sensor KIA Soul EV 2016 2.G Owner's Guide
[x] Cancel search | Manufacturer: KIA, Model Year: 2016, Model line: Soul EV, Model: KIA Soul EV 2016 2.GPages: 524, PDF Size: 25.82 MB
Page 166 of 524
Features of your vehicle
96
4
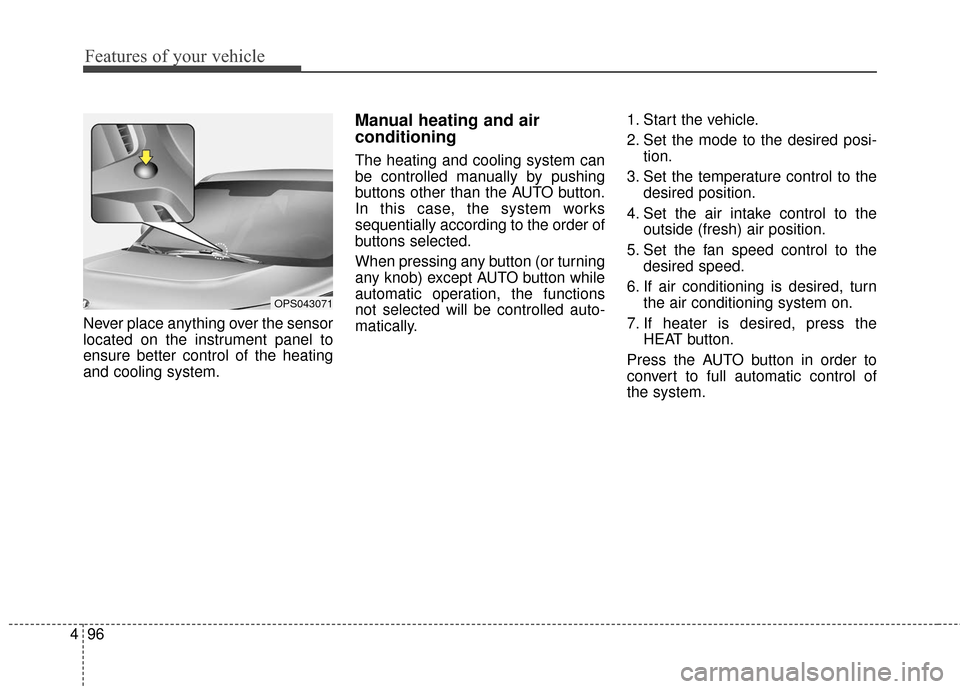
Never place anything over the sensor
located on the instrument panel to
ensure better control of the heating
and cooling system.
Manual heating and air
conditioning
The heating and cooling system can
be controlled manually by pushing
buttons other than the AUTO button.
In this case, the system works
sequentially according to the order of
buttons selected.
When pressing any button (or turning
any knob) except AUTO button while
automatic operation, the functions
not selected will be controlled auto-
matically. 1. Start the vehicle.
2. Set the mode to the desired posi-
tion.
3. Set the temperature control to the desired position.
4. Set the air intake control to the outside (fresh) air position.
5. Set the fan speed control to the desired speed.
6. If air conditioning is desired, turn the air conditioning system on.
7. If heater is desired, press the HEAT button.
Press the AUTO button in order to
convert to full automatic control of
the system.
OPS043071
Page 363 of 524
What to do in an emergency
12
6
Changing a tire with TPMS
If you have a flat tire, the Low Tire
Pressure telltale will come on. Have
the flat tire repaired by an authorized
Kia dealer as soon as possible or
replace the flat tire with the spare tire.
Each wheel is equipped with a tire
pressure sensor mounted inside the
tire behind the valve stem. You must
use TPMS specific wheels. It is rec-
ommended that you always have
your tires serviced by an authorized
Kia dealer. Even if you replace the low pressure
tire with the spare tire, the Low Tire
Pressure telltale will remain on until
the low pressure tire is repaired and
placed on the vehicle.
After you replace the low pressure
tire with the spare tire, the TPMS
malfunction indicator may illuminate
after a few minutes because the
TPMS sensor mounted on the spare
wheel is not initiated.
Once the low pressure tire is reinflat-
ed to the recommended pressure
and installed on the vehicle or the
TPMS sensor mounted on the
replaced spare wheel is initiated by
an authorized Kia dealer, the TPMS
malfunction indicator and the low tire
pressure telltale will extinguish within
a few minutes of driving.
If the indicator is not extinguished
after a few minutes of driving, please
visit an authorized Kia dealer.
If an original mounted tire is replaced
with the spare tire, the TPMS sensor
on the replaced spare wheel should
be initiated and the TPMS sensor on
the original mounted wheel should be
deactivated. If the TPMS sensor on
the original mounted wheel located in
the spare tire carrier still activates,
the tire pressure monitoring system
may not operate properly. Have the
tire with TPMS serviced or replaced
by an authorized Kia dealer.
CAUTION- Repair
Agents
Never use a puncture-repairing
agent not approved by Kia torepair and/or inflate a low pres-sure tire. The tire sealant notapproved by Kia may damagethe tire pressure sensor.
Page 364 of 524
613
What to do in an emergency
You may not be able to identify a low
tire by simply looking at it. Always
use a good quality tire pressure
gauge to measure the tire's inflation
pressure. Please note that a tire that
is hot (from being driven) will have a
higher pressure measurement than a
tire that is cold (from sitting station-
ary for at least 3 hours and driven
less than 1.6 km (1 mile) during that
3 hour period).
Allow the tire to cool before measur-
ing the inflation pressure. Always be
sure the tire is cold before inflating to
the recommended pressure.
Do not use any tire sealant if your
vehicle is equipped with a Tire
Pressure Monitoring System. The liq-
uid sealant can damage the tire
pressure sensors. The TPMS cannot alert you to
severe and sudden tire damage
caused by external factors such as
nails or road debris.
If you feel any vehicle instability, immediately take your foot off the
accelerator, apply the brakes gradu-
ally and with light force, and slowly
move to a safe position off the road.
✽ ✽ NOTICE - Protecting TPMS
Tampering with, modifying, or dis-
abling the Tire Pressure Monitoring
System (TPMS) components may
interfere with the system's ability to
warn the driver of low tire pressure
conditions and/or TPMS malfunc-
tions. Tampering with, modifying,
or disabling the Tire Pressure
Monitoring System (TPMS) compo-
nents may void the warranty for
that portion of the vehicle.
This device complies with
Industry Canada licence-exempt
RSS standard (s).
Operation is subject to the following
two conditions:
(1) This device may not cause inter-
ference, and
(2) This device must accept any interference, including interfer-
ence that may cause undesired
operation of the device.
Page 369 of 524
What to do in an emergency
18
6
8. With the vehicle start/stop button
position on or ignition switch posi-
tion on, switch on the compressor
and let it run for approximately
5~7 minutes to fill the sealant up
to proper pressure. (refer to the
Tire and Wheels, chapter 8). The
inflation pressure of the tire after
filling is unimportant and will be
checked/corrected later.
Be careful not to overinflate the
tire and stay away from the tire
when filling it. 9. Switch off the compressor.
10. Detach the hoses from the
sealant bottle connector and
from the tire valve.
Return the Tire Mobility Kit to its stor-
age location in the vehicle.Distributing the sealant
11. Immediately drive approximately 7~10km (4~6miles or, about
10min) to evenly distribute the
sealant in the tire.
Do not exceed a speed of 80 km/h
(50 mph). If possible, do not fall
below a speed of 20 km/h (12 mph).
While driving, if you experience any
unusual vibration, ride disturbance or
noise, reduce your speed and drive
with caution until you can safely pull
off of the side of the road.
Call for road side service or towing.
When you use the Tire Mobility Kit,
the tire pressure sensors and wheel
may be stained by sealant.
Therefore, remove the tire pressure
sensors and wheel stained by
sealant and we recommend that
inspect at an authorized Kia dealer.
WARNING - Carbon monoxide
Do not leave your vehicle run-
ning in a poorly ventilated area
for extended periods of time.
Carbon monoxide poisoning
and suffocation can occur.
WARNING- Tire pressure
Do not attempt to drive your
vehicle if the tire pressure is
below 200 kPa (29 psi).
This could result in an accident
due to sudden tire failure.
Page 370 of 524
619
What to do in an emergency
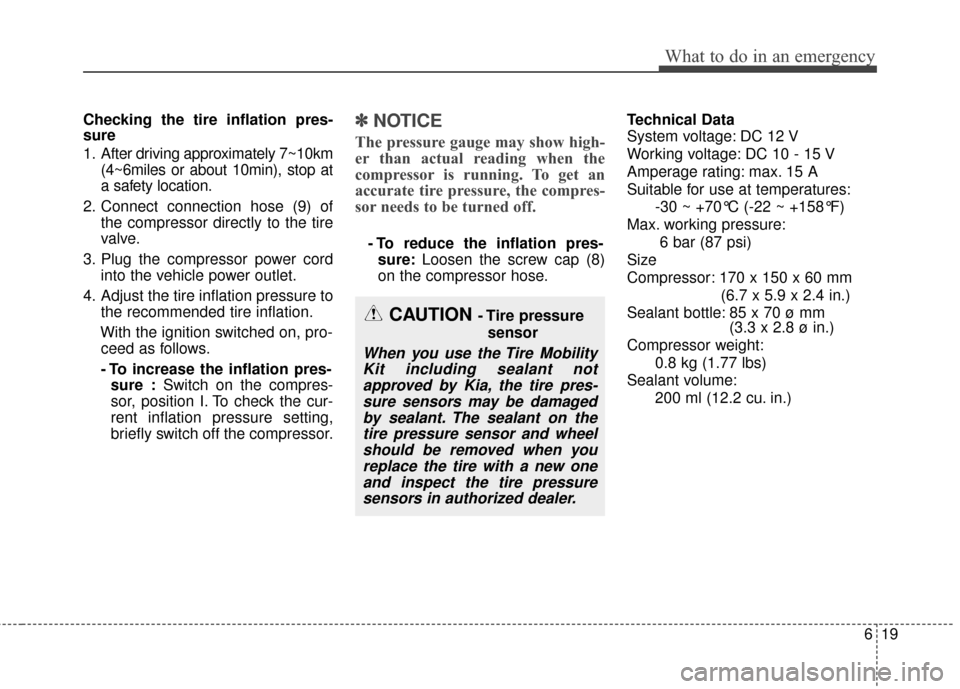
Checking the tire inflation pres-
sure
1. After driving approximately 7~10km(4~6miles or about 10min), stop at
a safety location.
2. Connect connection hose (9) of the compressor directly to the tire
valve.
3. Plug the compressor power cord into the vehicle power outlet.
4. Adjust the tire inflation pressure to the recommended tire inflation.
With the ignition switched on, pro- ceed as follows.
- To increase the inflation pres- sure : Switch on the compres-
sor, position I. To check the cur-
rent inflation pressure setting,
briefly switch off the compressor.✽ ✽ NOTICE
The pressure gauge may show high-
er than actual reading when the
compressor is running. To get an
accurate tire pressure, the compres-
sor needs to be turned off.
- To reduce the inflation pres-
sure: Loosen the screw cap (8)
on the compressor hose. Technical Data
System voltage: DC 12 V
Working voltage: DC 10 - 15 V
Amperage rating: max. 15 A
Suitable for use at temperatures:
-30 ~ +70°C (-22 ~ +158°F)
Max. working pressure: 6 bar (87 psi)
Size
Compressor: 170 x 150 x 60 mm (6.7 x 5.9 x 2.4 in.)
Sealant bottle: 85 x 70 ø mm (3.3 x 2.8 ø in.)
Compressor weight: 0.8 kg (1.77 lbs)
Sealant volume: 200 ml (12.2 cu. in.)
CAUTION - Tire pressuresensor
When you use the Tire MobilityKit including sealant notapproved by Kia, the tire pres-sure sensors may be damagedby sealant. The sealant on thetire pressure sensor and wheelshould be removed when youreplace the tire with a new oneand inspect the tire pressuresensors in authorized dealer.
Page 371 of 524
What to do in an emergency
20
6
TOWING
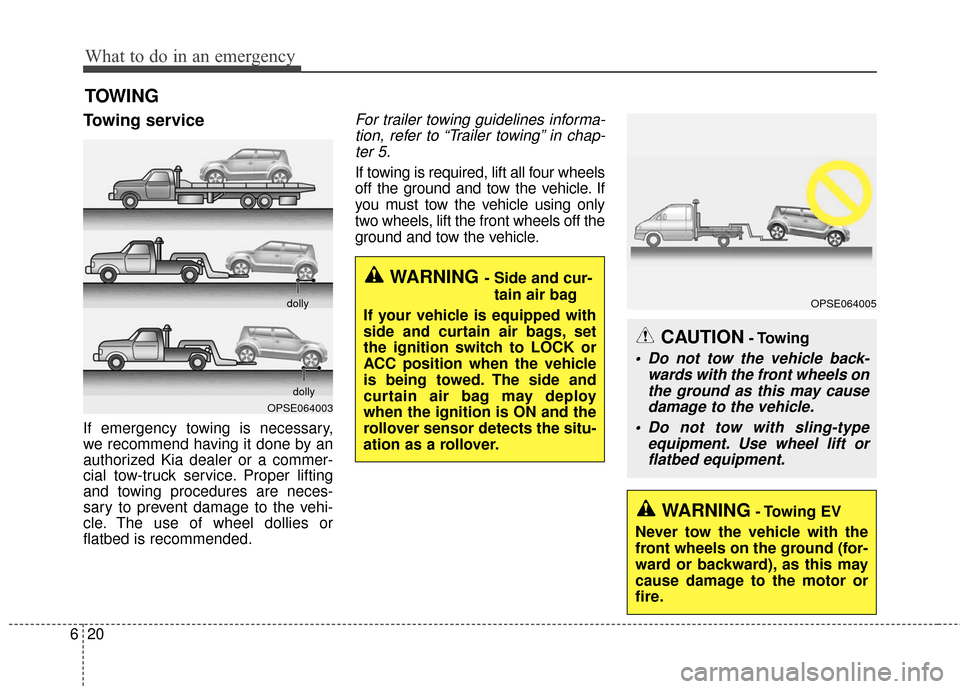
Towing service
If emergency towing is necessary,
we recommend having it done by an
authorized Kia dealer or a commer-
cial tow-truck service. Proper lifting
and towing procedures are neces-
sary to prevent damage to the vehi-
cle. The use of wheel dollies or
flatbed is recommended.
For trailer towing guidelines informa-
tion, refer to “Trailer towing” in chap-ter 5.
If towing is required, lift all four wheels
off the ground and tow the vehicle. If
you must tow the vehicle using only
two wheels, lift the front wheels off the
ground and tow the vehicle.
OPSE064003 dolly
dolly
WARNING- Towing EV
Never tow the vehicle with the
front wheels on the ground (for-
ward or backward), as this may
cause damage to the motor or
fire.
OPSE064005
CAUTION- Towing
Do not tow the vehicle back- wards with the front wheels onthe ground as this may causedamage to the vehicle.
Do not tow with sling-type equipment. Use wheel lift orflatbed equipment.
WARNING - Side and cur-
tain air bag
If your vehicle is equipped with
side and curtain air bags, set
the ignition switch to LOCK or
ACC position when the vehicle
is being towed. The side and
curtain air bag may deploy
when the ignition is ON and the
rollover sensor detects the situ-
ation as a rollover.
Page 428 of 524
Maintenance
54
7
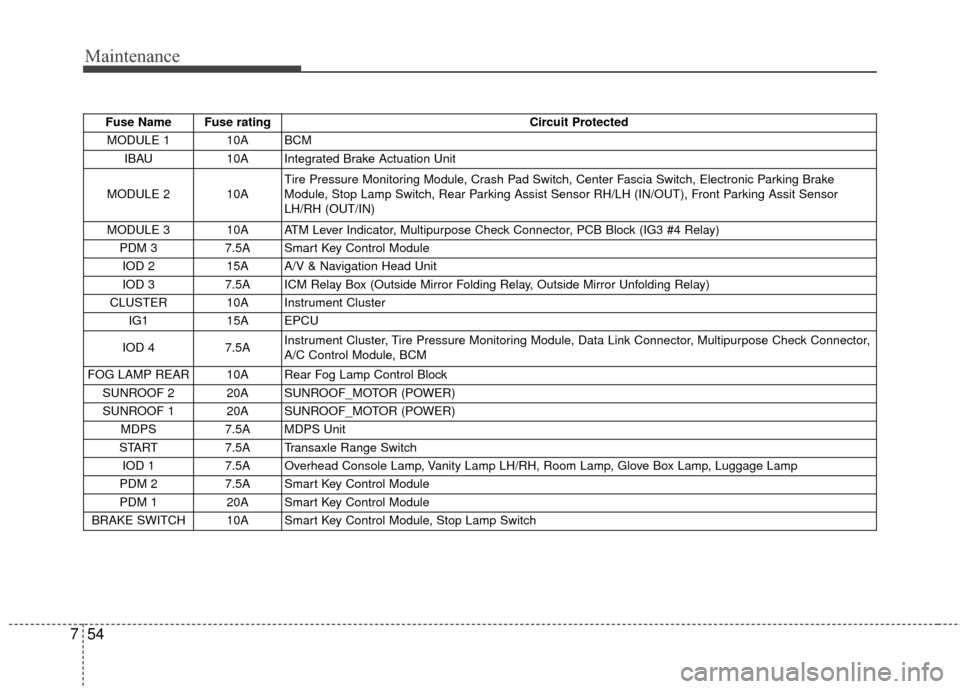
Fuse Name Fuse rating Circuit Protected
MODULE 1 10A BCM IBAU 10A Integrated Brake Actuation Unit
MODULE 2 10A Tire Pressure Monitoring Module, Crash Pad Switch, Center Fascia Switch, Electronic Parking Brake
Module, Stop Lamp Switch, Rear Parking Assist Sensor RH/LH (IN/OUT), Front Parking Assit Sensor
LH/RH (OUT/IN)
MODULE 3 10A ATM Lever Indicator, Multipurpose Check Connector, PCB Block (IG3 #4 Relay) PDM 3 7.5A Smart Key Control Module
IOD 2 15A A/V & Navigation Head Unit
IOD 3 7.5A ICM Relay Box (Outside Mirror Folding Relay, Outside Mirror Unfolding Relay)
CLUSTER 10A Instrument Cluster IG1 15A EPCU
IOD 4 7.5A Instrument Cluster, Tire Pressure Monitoring Module, Data Link Connector, Multipurpose Check Connector,
A/C Control Module, BCM
FOG LAMP REAR 10A Rear Fog Lamp Control Block SUNROOF 2 20A SUNROOF_MOTOR (POWER)
SUNROOF 1 20A SUNROOF_MOTOR (POWER) MDPS 7.5A MDPS Unit
START 7.5A Transaxle Range Switch
IOD 1 7.5A Overhead Console Lamp, Vanity Lamp LH/RH, Room Lamp, Glove Box Lamp, Luggage Lamp
PDM 2 7.5A Smart Key Control Module
PDM 1 20A Smart Key Control Module
BRAKE SWITCH 10A Smart Key Control Module, Stop Lamp Switch
Page 444 of 524
Maintenance
70
7
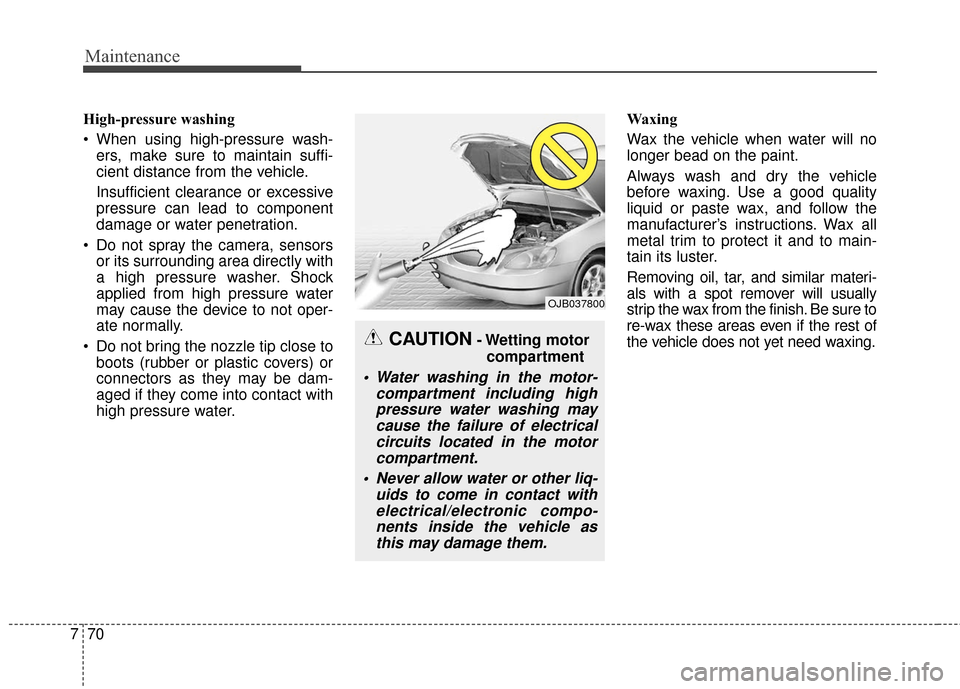
High-pressure washing
When using high-pressure wash-
ers, make sure to maintain suffi-
cient distance from the vehicle.
Insufficient clearance or excessive
pressure can lead to component
damage or water penetration.
Do not spray the camera, sensors or its surrounding area directly with
a high pressure washer. Shock
applied from high pressure water
may cause the device to not oper-
ate normally.
Do not bring the nozzle tip close to boots (rubber or plastic covers) or
connectors as they may be dam-
aged if they come into contact with
high pressure water. Waxing
Wax the vehicle when water will no
longer bead on the paint.
Always wash and dry the vehicle
before waxing. Use a good quality
liquid or paste wax, and follow the
manufacturer’s instructions. Wax all
metal trim to protect it and to main-
tain its luster.
Removing oil, tar, and similar materi-
als with a spot remover will usually
strip the wax from the finish. Be sure to
re-wax these areas even if the rest of
the vehicle does not yet need waxing.
CAUTION- Wetting motor
compartment
Water washing in the motor- compartment including highpressure water washing maycause the failure of electricalcircuits located in the motorcompartment.
Never allow water or other liq- uids to come in contact withelectrical/electronic compo-nents inside the vehicle asthis may damage them.
OJB037800
Page 517 of 524
52
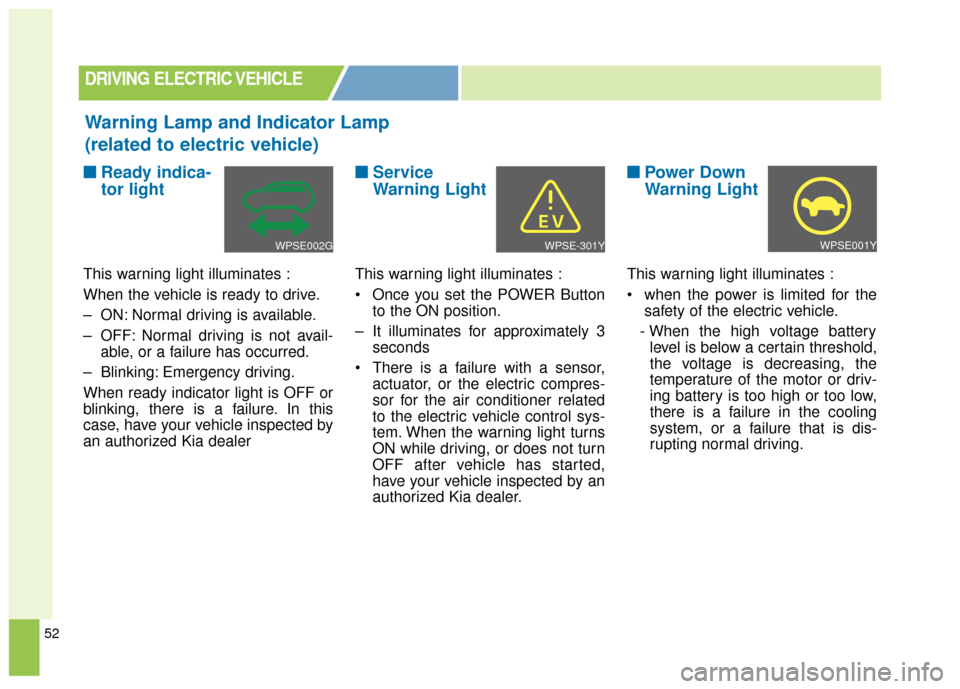
■ ■Ready indica-
tor light
This warning light illuminates :
When the vehicle is ready to drive.
– ON: Normal driving is available.
– OFF: Normal driving is not avail-
able, or a failure has occurred.
– Blinking: Emergency driving.
When ready indicator light is OFF or
blinking, there is a failure. In this
case, have your vehicle inspected by
an authorized Kia dealer
■ ■ Service
Warning Light
This warning light illuminates :
Once you set the POWER Button
to the ON position.
– It illuminates for approximately 3 seconds
There is a failure with a sensor, actuator, or the electric compres-
sor for the air conditioner related
to the electric vehicle control sys-
tem. When the warning light turns
ON while driving, or does not turn
OFF after vehicle has started,
have your vehicle inspected by an
authorized Kia dealer.
■ ■Power Down
Warning Light
This warning light illuminates :
when the power is limited for the
safety of the electric vehicle.
- When the high voltage battery level is below a certain threshold,
the voltage is decreasing, the
temperature of the motor or driv-
ing battery is too high or too low,
there is a failure in the cooling
system, or a failure that is dis-
rupting normal driving.
DRIVING ELECTRIC VEHICLE
Warning Lamp and Indicator Lamp
(related to electric vehicle)
WPSE002GWPSE-301YWPSE001Y