light Lancia Delta 2011 Owner handbook (in English)
[x] Cancel search | Manufacturer: LANCIA, Model Year: 2011, Model line: Delta, Model: Lancia Delta 2011Pages: 290, PDF Size: 8.36 MB
Page 82 of 290
1
KNOWING YOUR CAR81
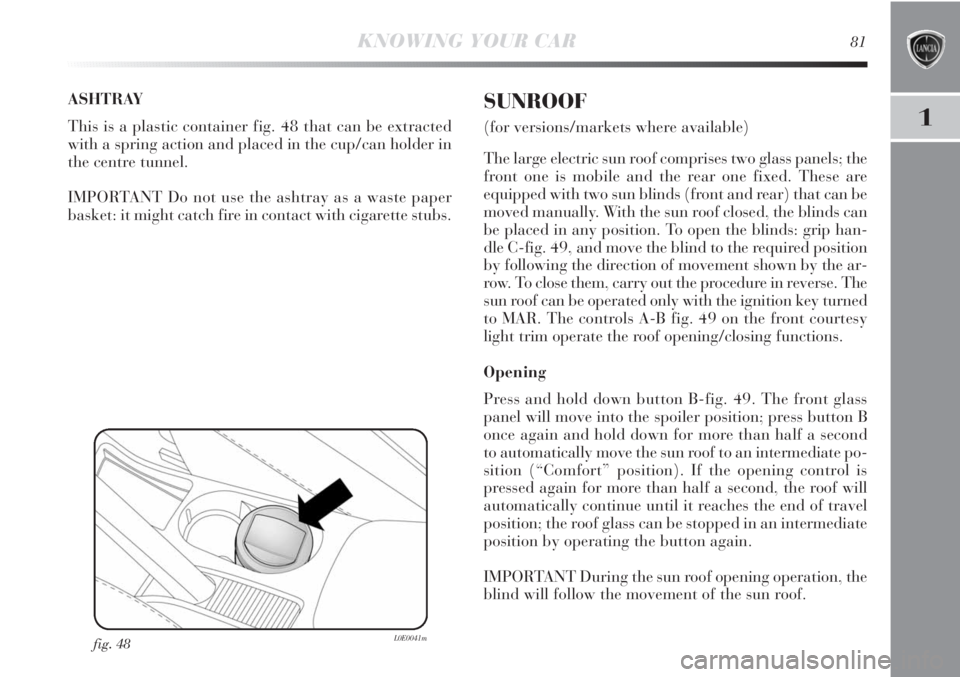
ASHTRAY
This is a plastic container fig. 48 that can be extracted
with a spring action and placed in the cup/can holder in
the centre tunnel.
IMPORTANT Do not use the ashtray as a waste paper
basket: it might catch fire in contact with cigarette stubs.
fig. 48L0E0041m
SUNROOF
(for versions/markets where available)
The large electric sun roof comprises two glass panels; the
front one is mobile and the rear one fixed. These are
equipped with two sun blinds (front and rear) that can be
moved manually. With the sun roof closed, the blinds can
be placed in any position. To open the blinds: grip han-
dle C-fig. 49, and move the blind to the required position
by following the direction of movement shown by the ar-
row. To close them, carry out the procedure in reverse. The
sun roof can be operated only with the ignition key turned
to MAR. The controls A-B fig. 49 on the front courtesy
light trim operate the roof opening/closing functions.
Opening
Press and hold down button B-fig. 49. The front glass
panel will move into the spoiler position; press button B
once again and hold down for more than half a second
to automatically move the sun roof to an intermediate po-
sition (“Comfort” position). If the opening control is
pressed again for more than half a second, the roof will
automatically continue until it reaches the end of travel
position; the roof glass can be stopped in an intermediate
position by operating the button again.
IMPORTANT During the sun roof opening operation, the
blind will follow the movement of the sun roof.
Page 92 of 290

1
KNOWING YOUR CAR91
BOOT
OPENING THE TAILGATE
When unlocked, the luggage compartment can be opened
from the outside using the handle fig. 55.
The tailgate can be opened at any time, if the doors are
unlocked.
The key with remote control should be used to open the
tailgate.
fig. 55L0E0046m
If the luggage compartment is not closed correctly, this
is indicated by the warning light
´coming on in the in-
strument panel or the icon
Rappearing in the display
together with a dedicated message (see “Instrument panel
warning lights” paragraph in this chapter).
Opening the tailgate will switch the boot light on: the
light will go off automatically when closing the tailgate.
The light will stay on for about 15 minutes after turning
the key to STOP: if during this time, a door or the tailgate
is opened, the light will switch on again for 15 minutes.
Opening the tailgate using the key
with remote control
To release the tailgate lock press R. Luggage com-
partment opening is indicated by the double flashing of
the direction indicators; tailgate closing is indicated by
single flashing (only with the alarm switched on, where
provided).
Page 95 of 290
94KNOWING YOUR CAR
fig. 59L0E0110m
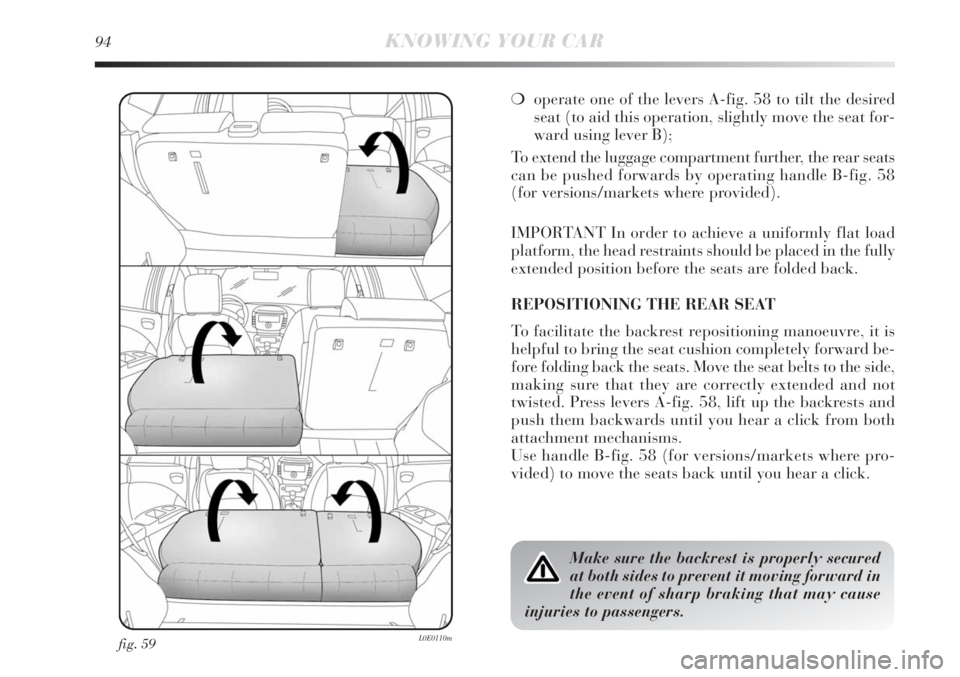
❍operate one of the levers A-fig. 58 to tilt the desired
seat (to aid this operation, slightly move the seat for-
ward using lever B);
To extend the luggage compartment further, the rear seats
can be pushed forwards by operating handle B-fig. 58
(for versions/markets where provided).
IMPORTANT In order to achieve a uniformly flat load
platform, the head restraints should be placed in the fully
extended position before the seats are folded back.
REPOSITIONING THE REAR SEAT
To facilitate the backrest repositioning manoeuvre, it is
helpful to bring the seat cushion completely forward be-
fore folding back the seats. Move the seat belts to the side,
making sure that they are correctly extended and not
twisted. Press levers A-fig. 58, lift up the backrests and
push them backwards until you hear a click from both
attachment mechanisms.
Use handle B-fig. 58 (for versions/markets where pro-
vided) to move the seats back until you hear a click.
Make sure the backrest is properly secured
at both sides to prevent it moving forward in
the event of sharp braking that may cause
injuries to passengers.
Page 103 of 290
102KNOWING YOUR CAR
HEADLIGHTS
HEADLIGHT BEAM AIMING
The correct aiming of the headlights is important for the
comfort and safety of not only the driver but all other
road users. This is also covered by a specific rule of the
highway code.
The headlights must be correctly aimed to guarantee the
best visibility conditions for all drivers while travelling
with headlights on.
Contact a Lancia Dealership to have the headlights prop-
erly adjusted.
Check beam alignment every time the load or its distri-
bution changes.
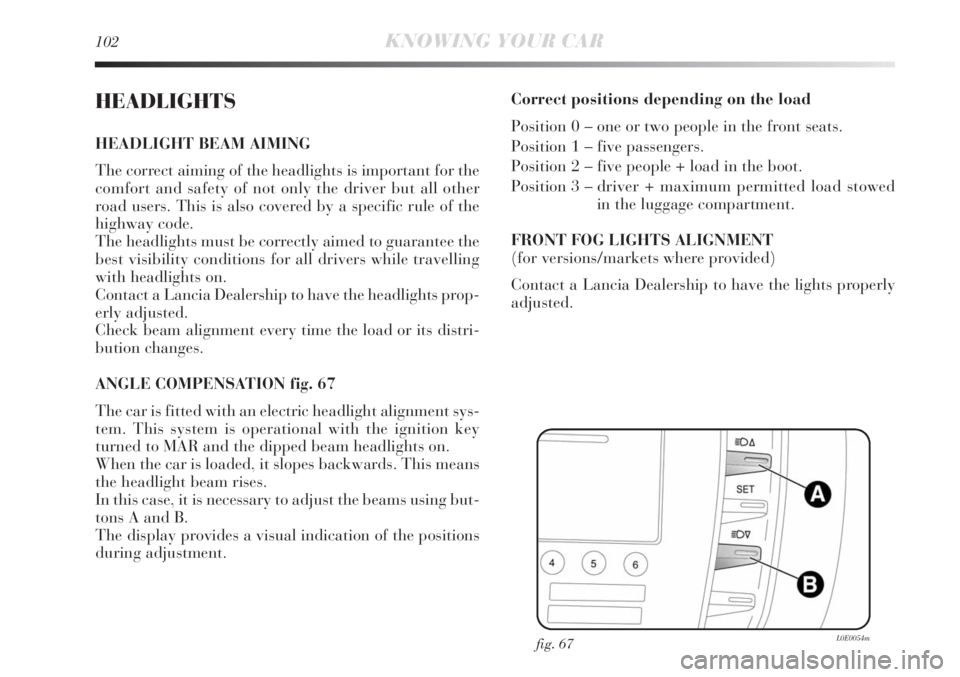
ANGLE COMPENSATION fig. 67
The car is fitted with an electric headlight alignment sys-
tem. This system is operational with the ignition key
turned to MAR and the dipped beam headlights on.
When the car is loaded, it slopes backwards. This means
the headlight beam rises.
In this case, it is necessary to adjust the beams using but-
tons A and B.
The display provides a visual indication of the positions
during adjustment.Correct positions depending on the load
Position 0 – one or two people in the front seats.
Position 1 – five passengers.
Position 2 – five people + load in the boot.
Position 3 – driver + maximum permitted load stowed
in the luggage compartment.
FRONT FOG LIGHTS ALIGNMENT
(for versions/markets where provided)
Contact a Lancia Dealership to have the lights properly
adjusted.
fig. 67L0E0054m
Page 104 of 290

1
KNOWING YOUR CAR103
ADJUSTING THE HEADLIGHTS WHEN ABROAD
Dipped headlights are adjusted to drive in the country
where the vehicle was originally purchased. When trav-
elling in countries with opposite driving direction, to
avoid blinding the drivers on the other side of the road,
you need to cover the headlight areas depending on the
Highway code of the country you are travelling in.
ADAPTIVE LIGHTS (AFS – Adaptive Xenon Light)
This is a system combined with Xenon headlamps which
directs the main light beam and continuously and auto-
matically adapts it to the driving conditions round
bends/when cornering. The system directs the light beam
to light up the road in the best way, taking into account
the speed of the vehicle, the bend/corner angle and the
speed of steering.Activating/deactivating the system fig. 68
The adaptive lights are automatically activated when the
vehicle is started. In this situation the LED (amber) on
button A will remain off.
Press button A to deactivate the adaptive lights (if acti-
vated); they will be deactivated and the LED on button
A will come on constantly. Press AFS button again to turn
the adaptive lights on (LED off on the button).
In the event of a system failure, an indication is provided
on the instrument panel by the flashing of warning light
f
or the symbol
fappearing on the display along with a ded-
icated message (for versions/markets where provided).
fig. 68L0E0055m
Page 105 of 290

104KNOWING YOUR CAR
DST SYSTEM
(Dynamic Steering Torque)
This system is incorporated with the ESP control unit
and suggests steering corrections whilst driving via the
electric power steering. The system applies a torque to
the steering wheel which increases the safety perception
of the vehicle, maintaining control of the steering and
making the intervention of the Advanced ESP system
less intrusive.
Fault signalling
In the event of any operating fault, the system switches
off automatically and the èwarning light is lit up on the
display together with a dedicated message. In this case,
go to a Lancia Dealership
SPORT FUNCTION
(for versions/markets where provided)
The vehicle may be equipped with a system that allows
a choice between two styles of driving, normal and sports.
Pressing the SPORT button fig. 69 produces sporty dri-
ving featuring higher acceleration response and more ef-
fort required on the steering wheel to produce this effect.
When the function is active, “S” is lit up in the instru-
ment panel. Press the button again to turn the function
off and restore the normal driving setting.
fig. 69L0E0058m
Page 109 of 290
108KNOWING YOUR CAR
OPERATION
The system is not active when the vehicle is started. It is
only activated when button A-fig. 71 in the dashboard
is pressed. The LED in the button lights up to confirm
that the system has been switched on plus a dedicated
warning message in the instrument panel display. Once
it is turned on the system will recognise the operating
conditions and this is signalled to the driver by the LED
located in the button flashing and the symbol
ein the
amber coloured panel in the instrument panel display
flashing too. Once the system has recognised the operat-
ing conditions, it becomes active. Therefore: the
eicon
in the display switches off and the LED on the button
remains on constantly.
IMPORTANT If the operating conditions are no longer
present then the system will deactivate. This is signalled
to the driver by the LED on the button flashing and the
amber
eicon on the display flashing.
OPERATING CONDITIONS FOR ACTIVATION
Once switched on, the system becomes active only if the
following conditions are present:
❍always keep at least one hand on the steering wheel;
❍vehicle speed between 65 km/h and 180 km/h;
❍presence of lane demarcation lines not deteriorated
and visible on both sides;
❍suitable visibility conditions;
❍straight line or wide radius bends;
❍visual field condition sufficient (safe distance from ve-
hicle in front). ACTIVATING/DEACTIVATING THE SYSTEM
With the system on, if the vehicle approaches one of the
lines defining the side of the lane, a torque is applied to
the steering wheel to let the driver know which direction
to steer in order to stay within the lane. If the driver turns
on the direction indicator in order to change lanes or for
overtaking, then the system will switch off momentarily.
If the driver wishes to change lanes without turning the
direction indicator on, then there will be a warning from
the steering wheel that they are about to cross the line.
If the driver continues with the manoeuvre to change
lanes, the system will be temporarily deactivated and
then switch back on again once it has recognised the new
driving lane. This temporary deactivation will be sig-
nalled to the driver by the LED in the button flashing and
by the
esymbol in the amber coloured panel in the in-
strument panel display also flashing.
IMPORTANT The force applied to the steering wheel by
the system is sufficient for the driver to notice it but they
can easily override it and maintain control of the vehicle.
Page 110 of 290
1
KNOWING YOUR CAR109
DEACTIVATING THE SYSTEM
Manual mode
The system can be deactivated by pressing button A-fig.
71 in the dashboard. Confirmation that the system has
been switched off is given by the LED in the button
and the message 1-fig.72 in the instrument panel display
going out.
Automatic mode
The system can be switched off in automatic mode (there-
fore it must be activated again to use it). The driver is ad-
vised that the system has been turned off automatically
by three consecutive acoustic signals and the message
1 – fig. 72 in the instrument panel display after the fol-
lowing situations:
❍the driver does not keep their hands on the steering
wheel (indication 2-fig. 72 is shown on the instrument
panel and a buzzer sounds until the driver places their
hands back on the wheel. This is considered a dan-
gerous condition and the system is automatically de-
activated);
❍intervention of the vehicle safety systems (ABS, ESP,
ASR, DST and TTC);
❍the driver activates the sports driving setting pressing
the SPORT button (for versions/markets where pro-
vided).
IMPORTANT The system cannot be activated if the dri-
ver has previously selected the sports driving mode. The
impossibility of using the system will be communicated
to the driver by three consecutive beeps and by the dis-
played message 1 in fig. 72.SYSTEM FAILURE
In the case of a malfunction, the system notifies the dri-
ver of the fault with message 3-fig. 72 in the instrument
panel display plus a buzzer.
IMPORTANT NOTES
The driving advisor is not capable of operation follow-
ing a malfunction of the following safety systems – ABS,
ESP, ASR, DST and TTC.
When the lane demarcation lines are not suf-
ficiently visible, covered or non-existent, the
driving advisor cannot help the driver and
the system will not be activated.
The driving advisor is not an automatic dri-
ving system and does not replace the driver
in controlling the trajectory of the vehicle.
The driver is personally responsible for maintain-
ing a suitable level of attention to the traffic and
road conditions and for controlling the trajectory
of the vehicle safely.
The operation of the driving advisor can be adversely af-
fected by poor visibility conditions (fog, rain, snow), ex-
treme light conditions (glare of the sun, darkness), lack
of cleanliness or damage, even partial, to the windscreen
in the area behind the TV camera.
The area of the windscreen by the TV camera must not
be partly or totally obscured by objects (e.g. stickers, pro-
tective film, etc.).
Page 113 of 290
112KNOWING YOUR CAR
ADVANCED ESP SYSTEM
(ELECTRONIC STABILITY PROGRAM)
This is an electronic car stability control system in the
event of tyre grip loss, helping to maintain directional
control.
The Advanced ESP system is therefore particularly use-
ful when road surface grip conditions change.
With the Advanced ESP system as well as the ASR (trac-
tion control with intervention on the brakes and the en-
gine) plus the HILL HOLDER (device for hill starts with-
out using the brakes) and also MSR (adjustment of engine
braking force with gear downshift), HBA (automatic in-
crease in braking pressure during emergency braking),
ABS (preventing the wheels from locking and slipping on
all road surfaces during sharp braking and DST (appli-
cation of force on the steering wheel for steering correc-
tion) functions are all available. SYSTEM INTERVENTION
It is signalled by the blinking of the warning light á
on the instrument panel, to inform the driver that the car
is in critical stability and grip conditions.
Switching the system on
The Advanced ESP system comes on automatically when
the vehicle is started and cannot be turned off.
Failure indications
In the event of a failure, the Advanced ESP system will
be automatically switched off and warning light áwill
appear constantly in the instrument panel along with
a message on the reconfigurable multifunction display.
The LED on the ASR OFF button will also light up (see
“Instrument panel warning lights” chapter). In this case,
go to a Lancia Dealership.
The performance of the Advanced ESP sys-
tem should not encourage the driver to take
unnecessary risks. Your driving style must
always be suited to the road conditions, visibility
and traffic. The driver is ultimately responsible for
road safety.
Page 114 of 290
1
KNOWING YOUR CAR113
Failure indications
System failure is indicated by warning light
álighting
up in the instrument panel together with a dedicated mes-
sage appearing in the reconfigurable multifunction dis-
play; see “Instrument panel warning lights” chapter.
IMPORTANT The Hill Holder system is not a parking
brake; therefore, never leave the car without having en-
gaged the handbrake, turned the engine off and engaged
first gear.
The Advanced ESP system continues to oper-
ate if the space-saver wheel is fitted. Always
remember that the space-saver wheel, being
smaller than the original wheel provides less grip.
For the correct operation of the Advanced ESP and
ASR systems, the tyres must absolutely be the same
make and type on all wheels, in perfect conditions
and, above all, of the type, make and size specified.
HILL HOLDER SYSTEM
This is an integral part of the Advanced ESP system and
automatically cuts in in the following conditions:
❍uphill: car at a standstill on a road with a gradient
higher than 5%, engine running, clutch and brake
pedal pressed, gearbox in neutral or engaged gear
other than reverse.
❍downhill: car at a standstill on a road with a gradi-
ent higher than 5%, engine running, clutch and brake
pedal pressed and reverse gear engaged.
When setting off, the Advanced ESP system control unit
will keep braking pressure on the wheels until reaching
the required power for starting or, in any case, for a max-
imum of 2 seconds in order to move the right foot from
the brake pedal to the accelerator pedal easily.
When two seconds have elapsed, without starting, the
system is automatically deactivated, gradually releasing
the braking pressure. During this release stage, the typi-
cal mechanical brake release noise can be heard, indi-
cating that the car is about to move.