tow Lancia Thema 2012 Owner handbook (in English)
[x] Cancel search | Manufacturer: LANCIA, Model Year: 2012, Model line: Thema, Model: Lancia Thema 2012Pages: 316, PDF Size: 3.85 MB
Page 86 of 316
UCONNECT™ PHONE
FEATURES
Emergency Assistance
If you are in an emergency and the
mobile phone is reachable:
Pick up the phone and manuallydial the emergency number for
your area.
If the phone is not reachable and the
Uconnect™ Phone is operational, you
may reach the emergency number as
follows:
Press the
button to begin.
After the “Listening” prompt and the following beep, say “Call Emer-
gency or Dial Emergency” and the
Uconnect™ Phone will instruct the
paired mobile phone to call the
emergency number. This feature is
supported in the U.S., Canada, and
Mexico.
NOTE:
The Emergency call may also be initiated by using the touch-
screen.
The emergency number dialed is based on the country where the vehicle is purchased. The num-
ber dialed may not be appli-
cable with the available mobile
service and area.
The Uconnect™ Phone does slightly lower your chances of
successfully making a phone
call as to that for the mobile
phone directly.
WARNING!
Your phone must be turned on and
connected to the Uconnect™ Phone
to allow use of this vehicle feature in
emergency situations, when the mo-
bile phone has network coverage
and stays connected to the
Uconnect™ Phone.
Towing Assistance
If you need towing assistance:
Press the
button to begin.
After the “Listening” prompt and the following beep, say “Towing
Assistance”.
NOTE:
The towing assistance call may also be initiated by touch. The towing assistance number
dialed is based on the country
where the vehicle is purchased.
Please refer to the LANCIA 24-
Hour “Towing Assistance” cov-
erage details in the Warranty In-
formation Booklet and on the
24–Hour Towing Assistance
Card.
Voice Mail Calling
To learn how to access your voice
mail, refer to “Working with Auto-
mated Systems”.
Working With Automated Systems
This method is used in instances
where one generally has to press num-
bers on the mobile phone keypad
while navigating through an auto-
mated telephone system.
You can use your Uconnect™ Phone
to access a voice mail system or an
automated service, such as a paging
service or automated customer service
line. Some services require immediate
response selection. In some instances,
that may be too quick for use of the
Uconnect™ Phone.
80
Page 113 of 316
LIGHTS-ON REMINDER
If the headlights or parking lights are
on after the ignition is placed in the
OFF position, a chime will sound to
alert the driver when the driver's door
is opened.
FOG LIGHTSThe fog light switch is built
into the headlight switch.
To activate the fog lights,
turn the headlamp switch to
the park lamp or headlamp position.
Press the headlight switch once for
front fog lights, press the switch a
second time for front and rear fog
lights. Pressing the switch a third time
will deactivate the rear fog lights, and
a fourth time will deactivate the front
fog lights. Turning the headlight
switch off will also deactivate the fog
lights.
An indicator light in the instrument
cluster illuminates when the fog lights
are turned on.
NOTE:
The front fog lights will activate
automatically when turning on the
position lights or the low beam headlights if previously deacti-
vated by turning the headlight
switch off. The rear fog lights will
only turn on by operating the
switch as previously described.
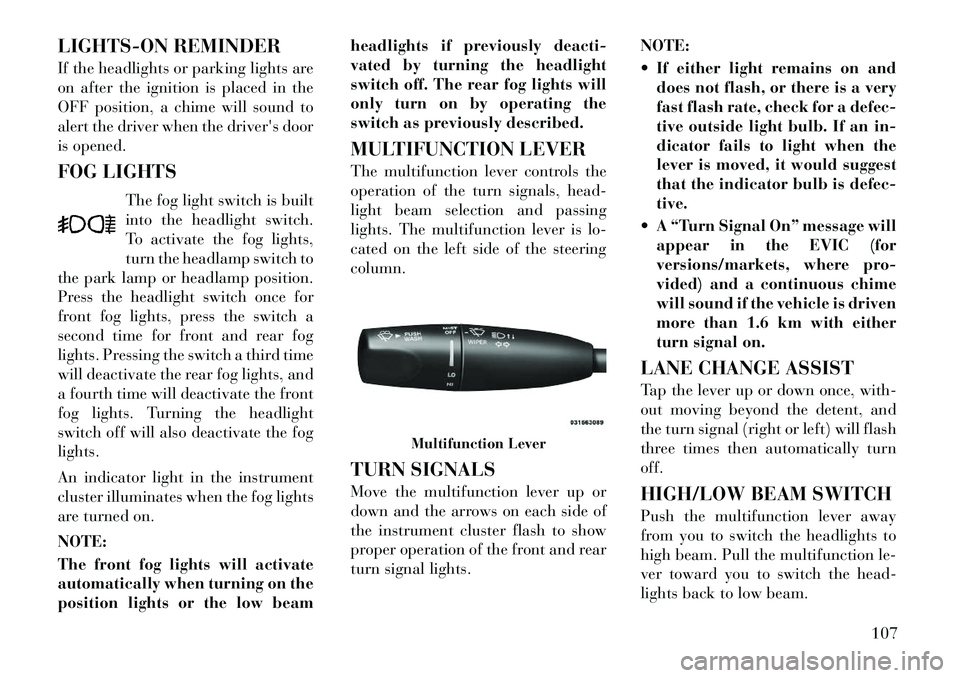
MULTIFUNCTION LEVER
The multifunction lever controls the
operation of the turn signals, head-
light beam selection and passing
lights. The multifunction lever is lo-
cated on the left side of the steering
column.
TURN SIGNALS
Move the multifunction lever up or
down and the arrows on each side of
the instrument cluster flash to show
proper operation of the front and rear
turn signal lights.
NOTE:
If either light remains on and
does not flash, or there is a very
fast flash rate, check for a defec-
tive outside light bulb. If an in-
dicator fails to light when the
lever is moved, it would suggest
that the indicator bulb is defec-
tive.
A “Turn Signal On” message will appear in the EVIC (for
versions/markets, where pro-
vided) and a continuous chime
will sound if the vehicle is driven
more than 1.6 km with either
turn signal on.
LANE CHANGE ASSIST
Tap the lever up or down once, with-
out moving beyond the detent, and
the turn signal (right or left) will flash
three times then automatically turn
off.
HIGH/LOW BEAM SWITCH
Push the multifunction lever away
from you to switch the headlights to
high beam. Pull the multifunction le-
ver toward you to switch the head-
lights back to low beam.
Multifunction Lever
107
Page 114 of 316

FLASH-TO-PASS
You can signal another vehicle with
your headlights by lightly pulling the
multifunction lever toward you. This
will turn on the high beams headlights
until the lever is released.
COURTESY LIGHTS
The courtesy lights can be turned on
by pressing the top corner of the lens.
To turn the lights off, press the lens a
second time.FRONT MAP/READING
LIGHTS
The front map/reading lights can be
turned on by pressing a switch on
either side of the console. These
switches are backlit for night time
visibility. To turn the lights off, press
the switch a second time. The lightswill also turn on when the UNLOCK
button on the Remote Keyless Entry
(RKE) is pressed.
AMBIENT LIGHT
The overhead console is equipped
with an ambient light feature. This
light casts illumination for improved
visibility of the floor center console
and PRNDL area.
INTERIOR LIGHTS
The interior lights come on when a
door is opened.
To protect the battery, the interior
lights will turn off automatically
10 minutes after the ignition switch is
moved to the LOCK position. This
will occur if the interior lights were
switched on manually or are on be-
cause a door is open. This includes the
Courtesy Lights
Front Map/Reading Lights
Front Map/Reading Light Switches
Ambient Light
108
Page 117 of 316

WINDSHIELD WASHERS
To use the washer, push the multi-
function lever inward (toward the
steering column) and hold it for as
long as washer spray is desired.
If you activate the washer while the
windshield wiper control is in the de-
lay range, the wipers will operate for
two wipe cycles after releasing the
lever and then resume the intermit-
tent interval previously selected.
If you activate the washer while the
windshield wiper is turned off, the
wipers will operate for three wipe
cycles and then turn off.WARNING!
Sudden loss of visibility through the
windshield could lead to a collision.
You might not see other vehicles or
other obstacles. To avoid sudden ic-
ing of the windshield during freezing
weather, warm the windshield with
the defroster before and during
windshield washer use.HEADLIGHTS ON WITH
WIPERS (Available With
Automatic Headlights Only)
When this feature is active, the head-
lights will turn on approximately
10 seconds after the wipers are turned
on if the headlight switch is placed in
the AUTO position. In addition, the
headlights will turn off when the wip-
ers are turned off if they were turned
on by this feature.
The Headlights On with Wipers fea-
ture can be turned on and off using
the Uconnect Touch™ System, refer
to “Uconnect Touch™ Settings” in
“Understanding Your Instrument
Panel” for further information.
RAIN SENSING WIPERS
(for versions/markets,
where provided)
This feature senses moisture on the
windshield and automatically acti-
vates the wipers for the driver. The
feature is especially useful for road
splash or over spray from the wind-
shield washers of the vehicle ahead. Rotate the end of the multifunction
lever to one of four settings to activate
this feature.
The sensitivity of the system can be
adjusted with the multifunction lever.
Wiper delay position 1 is the least
sensitive, and wiper delay position 4 is
the most sensitive. Setting 3 should be
used for normal rain conditions. Set-
tings 1 and 2 can be used if the driver
desires less wiper sensitivity. Settings
4 can be used if the driver desires
more sensitivity. The rain sense wip-
ers will automatically change between
an intermittent wipe, slow wipe and a
fast wipe depending on the amount of
moisture that is sensed on the wind-
shield. Place the wiper switch in the
OFF position when not using the sys-
tem.
The Rain Sensing feature can be
turned on and off using the Uconnect
Touch™ System, refer to “Uconnect
Touch™ Settings” in “Understanding
Your Instrument Panel” for further
information.
111
Page 119 of 316
To unlock the steering column, pull
the control handle outward. To tilt the
steering column, move the steering
wheel upward or downward as de-
sired. To lengthen or shorten the
steering column, pull the steering
wheel outward or push it inward as
desired. To lock the steering column
in position, push the control handle
inward until fully engaged.WARNING!
Do not adjust the steering column
while driving. Adjusting the steering
column while driving or driving with
the steering column unlocked, could
cause the driver to lose control of the
vehicle. Be sure the steering column
is locked before driving your vehicle.
Failure to follow this warning may
result in serious injury or death.POWER TILT/
TELESCOPING
STEERING COLUMN (for
versions/markets, where
provided)
This feature allows you to tilt the
steering column upward or down-
ward. It also allows you to lengthen or
shorten the steering column. The
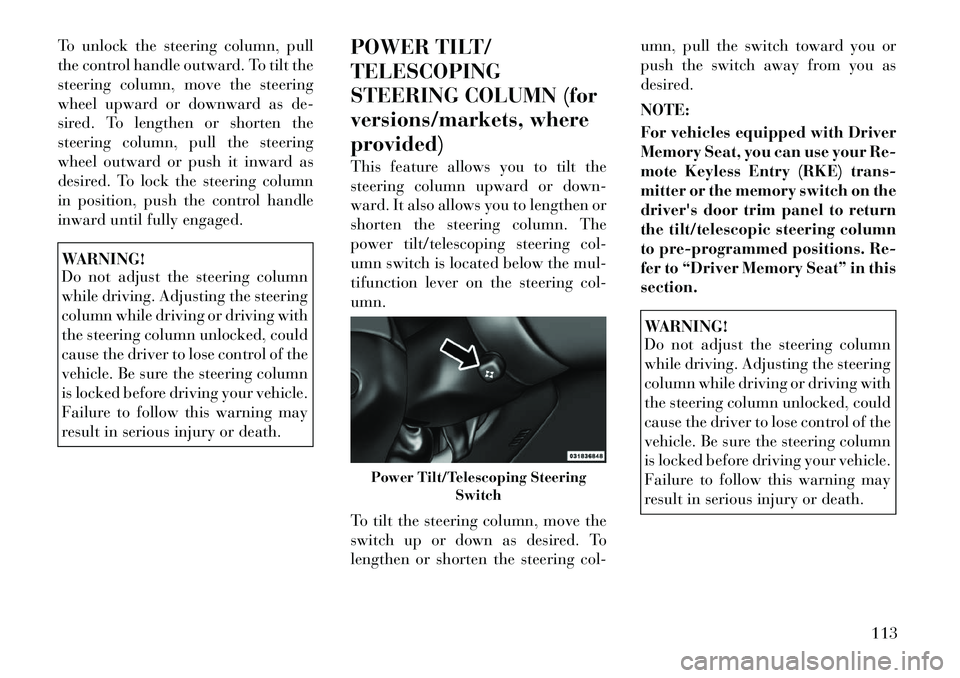
power tilt/telescoping steering col-
umn switch is located below the mul-
tifunction lever on the steering col-
umn.
To tilt the steering column, move the
switch up or down as desired. To
lengthen or shorten the steering col- umn, pull the switch toward you or
push the switch away from you as
desired.
NOTE:
For vehicles equipped with Driver
Memory Seat, you can use your Re-
mote Keyless Entry (RKE) trans-
mitter or the memory switch on the
driver's door trim panel to return
the tilt/telescopic steering column
to pre-programmed positions. Re-
fer to “Driver Memory Seat” in this
section.
WARNING!
Do not adjust the steering column
while driving. Adjusting the steering
column while driving or driving with
the steering column unlocked, could
cause the driver to lose control of the
vehicle. Be sure the steering column
is locked before driving your vehicle.
Failure to follow this warning may
result in serious injury or death.
Power Tilt/Telescoping Steering
Switch
113
Page 120 of 316
HEATED STEERING
WHEEL (for
versions/markets, where
provided)
The steering wheel contains a heating
element that helps warm your hands
in cold weather. The heated steering
wheel has only one temperature set-
ting. Once the heated steering wheel
has been turned on it will operate for
approximately 58 to 70 minutes be-
fore automatically shutting off. The
heated steering wheel can shut off
early or may not turn on when the
steering wheel is already warm.
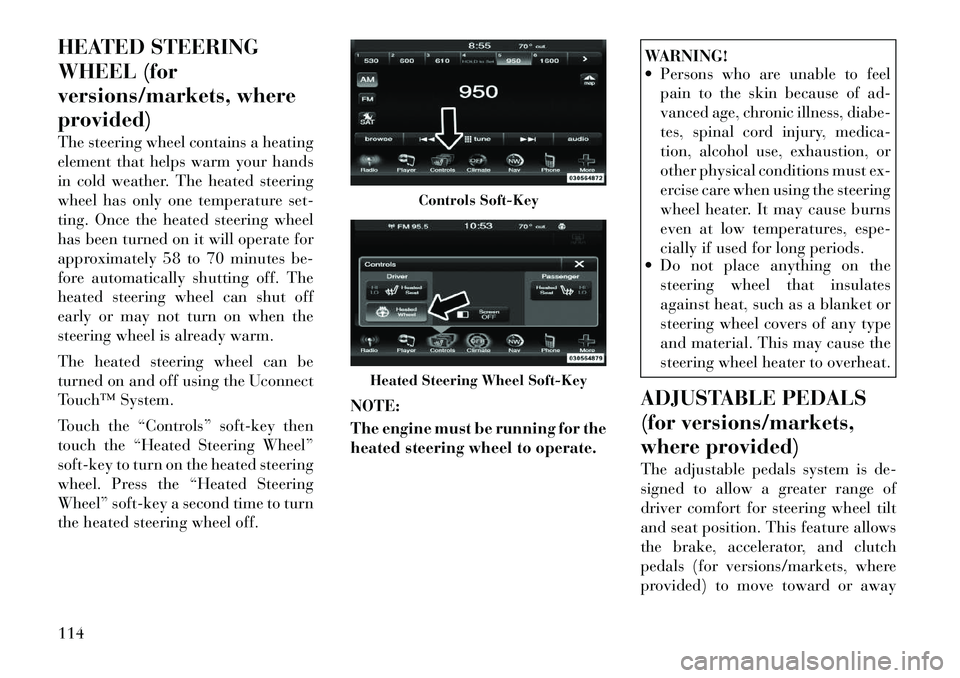
The heated steering wheel can be
turned on and off using the Uconnect
Touch™ System.
Touch the “Controls” soft-key then
touch the “Heated Steering Wheel”
soft-key to turn on the heated steering
wheel. Press the “Heated Steering
Wheel” soft-key a second time to turn
the heated steering wheel off.NOTE:
The engine must be running for the
heated steering wheel to operate.
WARNING!
Persons who are unable to feel
pain to the skin because of ad-
vanced age, chronic illness, diabe-
tes, spinal cord injury, medica-
tion, alcohol use, exhaustion, or
other physical conditions must ex-
ercise care when using the steering
wheel heater. It may cause burns
even at low temperatures, espe-
cially if used for long periods.
Do not place anything on the
steering wheel that insulates
against heat, such as a blanket or
steering wheel covers of any type
and material. This may cause the
steering wheel heater to overheat.
ADJUSTABLE PEDALS
(for versions/markets,
where provided)
The adjustable pedals system is de-
signed to allow a greater range of
driver comfort for steering wheel tilt
and seat position. This feature allows
the brake, accelerator, and clutch
pedals (for versions/markets, where
provided) to move toward or away
Controls Soft-Key
Heated Steering Wheel Soft-Key
114
Page 121 of 316

from the driver to provide improved
position with the steering wheel.
The switch is located on the front side
of the driver's seat cushion side shield.
Press the switch forward to move the
pedals forward (toward the front of
the vehicle).
Press the switch rearward to move the
pedals rearward (toward the driver).
The pedals can be adjusted with theignition OFF.
The pedals cannotbe adjusted
when the vehicle is in REVERSE or
when the Electronic Speed Control
System is on. The following mes-
sages will be displayed on vehicles
equipped with the Electronic Ve-
hicle Information System (EVIC) if
the pedals are attempted to be ad- justed when the system is locked
out (“Adjustable Pedal Disabled —
Cruise Control Engaged” or “Ad-
justable Pedal Disabled — Vehicle
In Reverse”.
NOTE:
For vehicles equipped with Driver
Memory Seat, you can use your Re-
mote Keyless Entry (RKE) trans-
mitter or the memory switch on the
driver's door trim panel to return
the adjustable pedals to pre-
programmed positions. Refer to
“Driver Memory Seat” in “Under-
standing The Features Of Your Ve-
hicle” for further information.
CAUTION!
Do not place any article under the
adjustable pedals or impede its abil-
ity to move as it may cause damage
to the pedal controls. Pedal travel
may become limited if movement is
stopped by an obstruction in the ad-
justable pedal's path.
WARNING!
Do not adjust the pedals while the
vehicle is moving. You could lose
control and have an accident. Al-
ways adjust the pedals while the ve-
hicle is parked.
ELECTRONIC SPEED
CONTROL (for
versions/markets, where
provided)
When engaged, the Electronic Speed
Control takes over accelerator opera-
tions at speeds greater than 40 km/h.
The Electronic Speed Control buttons
are located on the right side of the
steering wheel.
Adjustable Pedals Switch
1 — ON/OFF 2 — RES +
4 — CANCEL 3 — SET -
115
Page 124 of 316

WARNING!
Adaptive Cruise Control (ACC) isa convenience system. It is not a
substitute for active driving in-
volvement. It is always the driv-
er’s responsibility to be attentive
of road, traffic, and weather con-
ditions, vehicle speed, distance to
the vehicle ahead; and, most im-
portantly, brake operation to en-
sure safe operation of the vehicle
under all road conditions. Your
complete attention is always re-
quired while driving to maintain
safe control of your vehicle. Fail-
ure to follow these warnings can
result in a collision and death or
serious personal injury.
The ACC system: � Does not react to pedestrians,
oncoming vehicles, and sta-
tionary objects (i.e., a stopped
vehicle in a traffic jam or a
disabled vehicle).
�
Cannot take street, traffic, and
weather conditions into account,
and may be limited upon ad-
verse sight distance conditions.
(Continued)
WARNING! (Continued)
� Does not predict the lane cur -
vature or the movement of pre-
ceding vehicles and will not
compensate for such changes.
� Does not always fully recognize
complex driving conditions,
which can result in wrong or
missing distance warnings.
� Can only apply a maximum of
25% of the vehicle’s braking
capability, and will not bring
the vehicle to a complete stop.WARNING!
You should switch off the ACC sys-
tem:
When driving in fog, heavy rain, heavy snow, sleet, heavy traffic,
and complex driving situations
(e.g., in highway construction
zones).
When entering a turn lane or
highway off ramp; when driving
on roads that are winding, icy,
snow-covered, slippery, or have
steep uphill or downhill slopes.
(Continued)
WARNING!(Continued)
When towing a trailer up or down
steep slopes.
When circumstances do not allow
safe driving at a constant speed.
Failure to follow these warnings can
result in a collision and death or
serious personal injury.
The Cruise Control system has two
control modes:
Adaptive Cruise Control mode for maintaining an appropriate dis-
tance between vehicles.
Normal (fixed speed) cruise control mode is for cruising at a constant
preset speed. For additional infor-
mation, refer to “Normal (Fixed
Speed) Cruise Control Mode” in
this section.
NOTE:
The system will not react to pre-
ceding vehicles. Always be aware
of the mode selected.
You can change the mode by using the
Cruise Control buttons. The two con-
trol modes function differently. Al-
ways confirm which mode is selected.
118
Page 139 of 316

Objects such as bicycle carriers,trailer hitches, etc., must not be
placed within 30 cm from the
rear fascia/bumper while driv-
ing the vehicle. Failure to do so
can result in the system misin-
terpreting a close object as a
sensor problem, causing the
“SERVICE PARK ASSIST” mes-
sage to be displayed in the EVIC.CAUTION!
ParkSense® is only a parking aidand it is unable to recognize every
obstacle, including small ob-
stacles. Parking curbs might be
temporarily detected or not de-
tected at all. Obstacles located
above or below the sensors will
not be detected when they are in
close proximity.
(Continued)
CAUTION!(Continued)
The vehicle must be driven slowly
when using ParkSense® in order
to be able to stop in time when an
obstacle is detected. When back-
ing up, it is recommended that the
driver looks over his/her shoulder
when using ParkSense®.WARNING!
Drivers must be careful whenbacking up even when using the
ParkSense® Park Assist System.
Always check carefully behind
your vehicle, look behind you,
and be sure to check for pedestri-
ans, animals, other vehicles, ob-
structions, and blind spots before
backing up. You are responsible
for safety and must continue to
pay attention to your surround-
ings. Failure to do so can result in
serious injury or death.
(Continued)
WARNING!(Continued)
Before using the ParkSense®
Park Assist System, it is strongly
recommended that the ball mount
and hitch ball assembly is discon-
nected from the vehicle when the
vehicle is not used for towing.
Failure to do so can result in in-
jury or damage to vehicles or ob-
stacles because the hitch ball will
be much closer to the obstacle
than the rear fascia when the
warning display turns on the
single flashing arc and sounds the
continuous tone. Also, the sensors
could detect the ball mount and
hitch ball assembly, depending on
its size and shape, giving a false
indication that an obstacle is be-
hind the vehicle.
133
Page 150 of 316
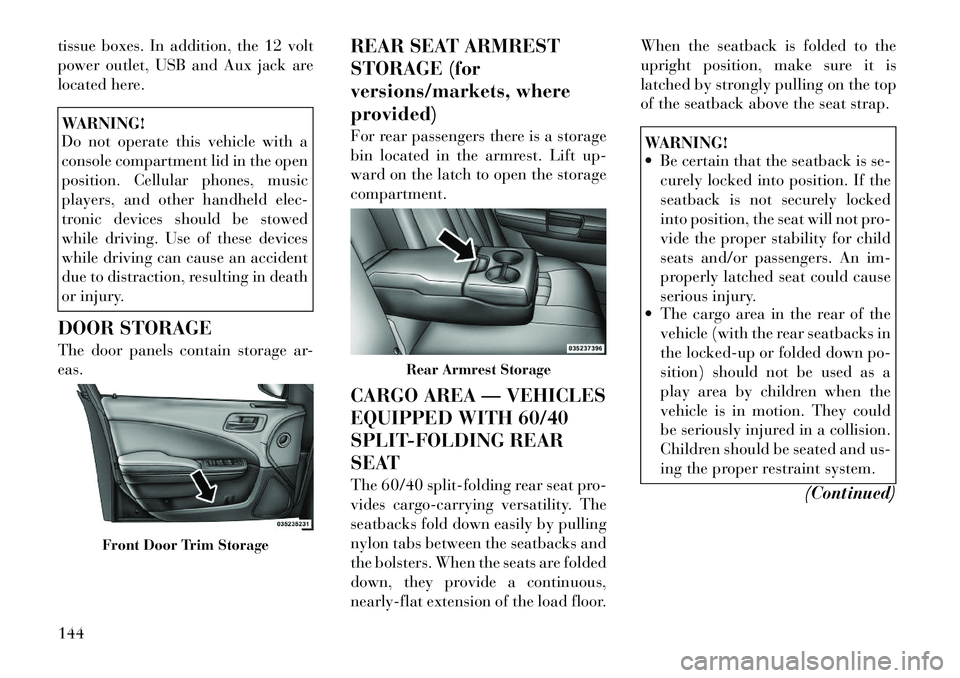
tissue boxes. In addition, the 12 volt
power outlet, USB and Aux jack are
located here.WARNING!
Do not operate this vehicle with a
console compartment lid in the open
position. Cellular phones, music
players, and other handheld elec-
tronic devices should be stowed
while driving. Use of these devices
while driving can cause an accident
due to distraction, resulting in death
or injury.
DOOR STORAGE
The door panels contain storage ar-
eas. REAR SEAT ARMREST
STORAGE (for
versions/markets, where
provided)
For rear passengers there is a storage
bin located in the armrest. Lift up-
ward on the latch to open the storage
compartment.
CARGO AREA — VEHICLES
EQUIPPED WITH 60/40
SPLIT-FOLDING REAR
SEAT
The 60/40 split-folding rear seat pro-
vides cargo-carrying versatility. The
seatbacks fold down easily by pulling
nylon tabs between the seatbacks and
the bolsters. When the seats are folded
down, they provide a continuous,
nearly-flat extension of the load floor.When the seatback is folded to the
upright position, make sure it is
latched by strongly pulling on the top
of the seatback above the seat strap.
WARNING!
Be certain that the seatback is se-
curely locked into position. If the
seatback is not securely locked
into position, the seat will not pro-
vide the proper stability for child
seats and/or passengers. An im-
properly latched seat could cause
serious injury.
The cargo area in the rear of the
vehicle (with the rear seatbacks in
the locked-up or folded down po-
sition) should not be used as a
play area by children when the
vehicle is in motion. They could
be seriously injured in a collision.
Children should be seated and us-
ing the proper restraint system.
(Continued)
Front Door Trim Storage
Rear Armrest Storage
144