seat memory Lancia Thema 2014 Owner handbook (in English)
[x] Cancel search | Manufacturer: LANCIA, Model Year: 2014, Model line: Thema, Model: Lancia Thema 2014Pages: 332, PDF Size: 3.46 MB
Page 70 of 332

Uconnect® PHONE (8.4/8.4N).................77
Uconnect® 8.4/8.4 NAV ...................77
OPERATION ............................79
PHONE CALL FEATURES .................84
UCONNECT® PHONE FEATURES ...........86
ADVANCED PHONE CONNECTIVITY .........89
THINGS YOU SHOULD KNOW ABOUT YOUR Uconnect® PHONE .......................90
GENERAL INFORMATION .................95
VOICE COMMAND .........................95
Uconnect® 8.4/8.4 Nav ....................95
UCONNECT® VOICE COMMANDS ...........96
VOICE TREE ...........................97
SEATS .................................103
POWER SEATS ........................103
POWER LUMBAR (for versions/markets, where provided) ........................104
HEATED SEATS (for versions/markets, where provided) ........................105
VENTILATED SEATS (for versions/markets, where provided) ........................106
HEAD RESTRAINTS ....................107
FOLDING REAR SEAT ...................108
DRIVER MEMORY SEAT (for versions/markets, where provided) .........................109
PROGRAMMING THE MEMORY FEATURE . . .109
64
Page 71 of 332

LINKING AND UNLINKING THE REMOTEKEYLESS ENTRY TRANSMITTER TO
MEMORY .............................110
MEMORY POSITION RECALL .............110
EASY ENTRY/EXIT SEAT (Available With Memory Seat Only) .....................111
TO OPEN AND CLOSE THE HOOD ............111
LIGHTS ................................112
HEADLIGHT SWITCH ...................112
AUTOMATIC HEADLIGHTS ..............112
HEADLIGHTS ON WITH WIPERS (Available With Automatic Headlights Only) ...........113
HEADLIGHT TIME DELAY ...............113
AUTOMATIC HIGH BEAM (for versions/ markets, where provided) ................113
DAYTIME RUNNING LIGHTS (for versions/ markets, where provided) .................114
ADAPTIVE BI-XENON HIGH INTENSITY DISCHARGE HEADLIGHTS ...............114
LIGHTS-ON REMINDER .................114
FOG LIGHTS ..........................115
MULTIFUNCTION LEVER ................115
TURN SIGNALS ........................115
LANE CHANGE ASSIST ..................115
HIGH/LOW BEAM SWITCH ..............116
FLASH-TO-PASS.......................116
COURTESY LIGHTS ....................116
FRONT MAP/READING LIGHTS ...........116
65
Page 78 of 332

Using the mirror control switch, press
on any of the four arrows for the di-
rection that you want the mirror to
move.
Power mirror preselected positions
can be controlled by the optional
Memory Seat Feature. Refer to
“Driver Memory Seat” in “Under-
standing The Features Of Your Ve-
hicle” for further information.
POWER FOLDING
OUTSIDE MIRRORS
The switch for the power folding mir-
rors is located between the power mir-
ror switches L (left) and R (right).
Press the switch once and the mirrors
will fold in, pressing the switch a sec-
ond time will return the mirrors to the
normal driving position.
NOTE: If the vehicle speed is
greater than 16 km/h the folding
feature will be disabled.
If the mirrors are in the folded posi-
tion, and vehicle speed is equal or
greater than 16 km/h, they will auto-
matically unfold.
HEATED MIRRORS
These mirrors are heated to
melt frost or ice. This feature is
activated whenever you turn on the
rear window defroster. Refer to “Rear
Window Features” in “Understanding
The Features Of Your Vehicle” for
further information.
ILLUMINATED VANITY
MIRRORS
An illuminated vanity mirror is lo-
cated on the sun visor. To use the
mirror, rotate the sun visor downward
and swing the mirror cover upward.
The light turns on automatically.
Closing the mirror cover turns off the
light.
“SLIDE-ON-ROD” AND
EXTENDER FEATURES OF
SUN VISOR
To use the “Slide-On-Rod” feature of
the sun visor, rotate the sun visor
downward and swing the sun visor so
it is parallel to the side window, grab-
bing the sun visor with your left hand
pull rearwards until the sun visor is in
the desired position. To use the ex-
tender feature of the sun visor, grab
the extender which is located at the
rear of the visor and pull rearward.
Illuminated Vanity Mirror
Slide-On-Rod Feature
72
Page 115 of 332

WARNING!
Be certain that the seatback issecurely locked into position. If
the seatback is not securely
locked into position, the seat will
not provide the proper stability
for child seats and/or passengers.
An improperly latched seat could
cause serious injury.
The cargo area in the rear of the vehicle (with the rear seatbacks
in the locked-up or folded down
position) should not be used as a
play area by children when the
vehicle is in motion. They could
be seriously injured in a collision.
Children should be seated and us-
ing the proper restraint system.
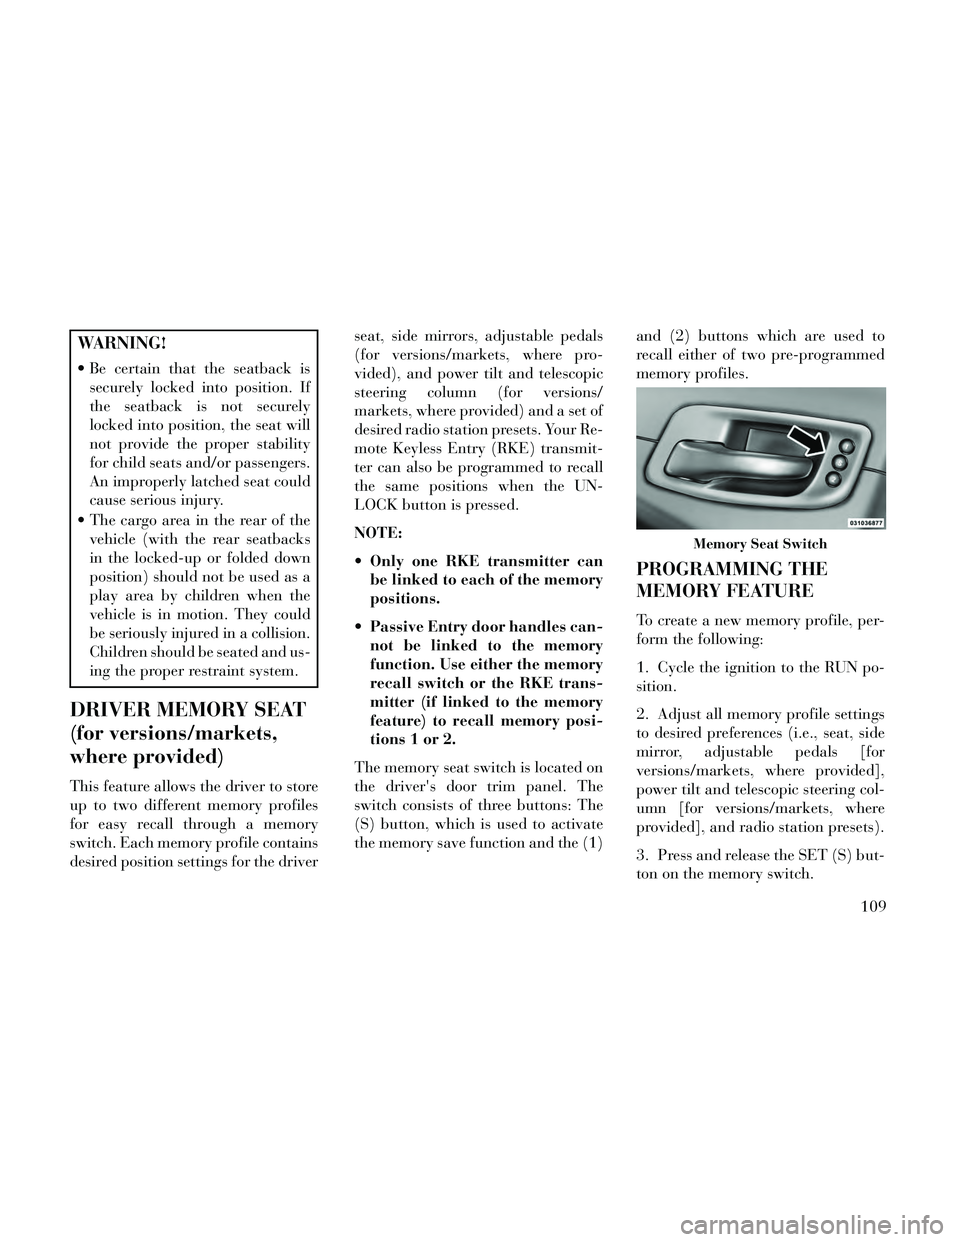
DRIVER MEMORY SEAT
(for versions/markets,
where provided)
This feature allows the driver to store
up to two different memory profiles
for easy recall through a memory
switch. Each memory profile contains
desired position settings for the driver seat, side mirrors, adjustable pedals
(for versions/markets, where pro-
vided), and power tilt and telescopic
steering column (for versions/
markets, where provided) and a set of
desired radio station presets. Your Re-
mote Keyless Entry (RKE) transmit-
ter can also be programmed to recall
the same positions when the UN-
LOCK button is pressed.
NOTE:
Only one RKE transmitter can
be linked to each of the memory
positions.
Passive Entry door handles can- not be linked to the memory
function. Use either the memory
recall switch or the RKE trans-
mitter (if linked to the memory
feature) to recall memory posi-
tions 1 or 2.
The memory seat switch is located on
the driver's door trim panel. The
switch consists of three buttons: The
(S) button, which is used to activate
the memory save function and the (1) and (2) buttons which are used to
recall either of two pre-programmed
memory profiles.
PROGRAMMING THE
MEMORY FEATURE
To create a new memory profile, per-
form the following:
1. Cycle the ignition to the RUN po-
sition.
2. Adjust all memory profile settings
to desired preferences (i.e., seat, side
mirror, adjustable pedals [for
versions/markets, where provided],
power tilt and telescopic steering col-
umn [for versions/markets, where
provided], and radio station presets).
3. Press and release the SET (S) but-
ton on the memory switch.
Memory Seat Switch
109
Page 117 of 332

seat, side mirror, adjustable pedals
(for versions/markets, where pro-
vided), and power tilt and telescopic
steering column (for versions/
markets, where provided) stop mov-
ing. A delay of one second will occur
before another recall can be selected.
EASY ENTRY/EXIT SEAT
(Available With Memory
Seat Only)
This feature provides automatic
driver seat positioning to enhance
driver mobility when entering and ex-
iting the vehicle.
The distance the driver seat moves
depends on where you have the driver
seat positioned when you place the
ignition to the OFF position.
When you cycle the ignition to theOFF position, the driver seat will
move about 60 mm rearward if the
driver seat position is greater than
or equal to 68 mm forward of the
rear stop. The seat will return to its
previously set position when you
place the ignition into the ACC or
RUN position. When you cycle the ignition to the
OFF position, the driver seat will
move to a position 8 mm forward of
the rear stop if the driver seat posi-
tion is between 23 mm and 68 mm
forward of the rear stop. The seat
will return to its previously set po-
sition when you place the ignition
to the ACC or RUN position.
The Easy Entry/Easy Exit feature is disabled when the driver seat po-
sition is less than 23 mm forward of
the rear stop. At this position, there
is no benefit to the driver by moving
the seat for Easy Exit or Easy En-
try.
Each stored memory setting will have
an associated Easy Entry and Easy
Exit position.
NOTE: The Easy Entry/Easy Exit
feature can be enabled or disabled
using the Uconnect® System, refer
to “Uconnect® Settings” in “Un-
derstanding Your Instrument
Panel” for further information.
TO OPEN AND CLOSE
THE HOOD
Two latches must be released to open
the hood.
1. Pull the hood release lever located
under the left side of the instrument
panel.
2. Move to the outside of the vehicle
and push the safety catch to the left.
The safety catch is located under the
center front edge of the hood.
Hood Release Lever
Hood Safety Latch
111
Page 127 of 332

power tilt/telescoping steering col-
umn switch is located below the mul-
tifunction lever on the steering col-
umn.
To tilt the steering column, move the
switch up or down as desired. To
lengthen or shorten the steering col-
umn, pull the switch toward you or
push the switch away from you as
desired.
NOTE:
For vehicles equipped with
Driver Memory Seat, you can use
your Remote Keyless Entry (RKE)
transmitter or the memory switch
on the driver's door trim panel to
return the tilt/telescopic steering
column to pre-programmed posi-
tions. Refer to “Driver Memory
Seat” in this section.
WARNING!
Do not adjust the steering column
while driving. Adjusting the steer-
ing column while driving or driving
with the steering column unlocked,
could cause the driver to lose con-
trol of the vehicle. Failure to follow
this warning may result in serious
injury or death.
HEATED STEERING
WHEEL (for
versions/markets, where
provided)
The steering wheel contains a heating
element that helps warm your hands
in cold weather. The heated steering
wheel has only one temperature set-
ting. Once the heated steering wheel
has been turned on it will operate for
approximately 80 minutes before au-
tomatically shutting off. The heated
steering wheel can shut off early or
may not turn on when the steering
wheel is already warm. The heated steering wheel can be
turned on and off using the
Uconnect® System.
Touch the “Controls” soft-key then
touch the “Heated Steering Wheel”
soft-key to turn on the heated steering
wheel. Press the “Heated Steering
Wheel” soft-key a second time to turn
the heated steering wheel off.
Power Tilt/Telescoping Steering
Switch
Controls Soft-Key
Heated Steering Wheel Soft-Key
121
Page 129 of 332

NOTE: For vehicles equipped
with Driver Memory Seat, you can
use your Remote Keyless Entry
(RKE) transmitter or the memory
switch on the driver's door trim
panel to return the adjustable ped-
als to pre-programmed positions.
Refer to “Driver Memory Seat” in
“Understanding The Features Of
Your Vehicle” for further informa-
tion.
CAUTION!
Do not place any article under the
adjustable pedals or impede its
ability to move as it may cause
damage to the pedal controls. Pedal
travel may become limited if move-
ment is stopped by an obstruction
in the adjustable pedal's path.
WARNING!
Do not adjust the pedals while the
vehicle is moving. You could lose
control and have an accident. Al-
ways adjust the pedals while the
vehicle is parked.
ELECTRONIC SPEED
CONTROL
When engaged, the Electronic Speed
Control takes over accelerator opera-
tions at speeds greater than 40 km/h.
NOTE: In order to ensure proper
operation, the Electronic Speed
Control System has been designed
to shut down if multiple Speed
Control functions are operated at
the same time. If this occurs, the
Electronic Speed Control System
can be reactivated by pushing the
Electronic Speed Control ON/OFF
button and resetting the desired
vehicle set speed.
TO ACTIVATE
Push the ON/OFF button. The Cruise
Indicator Light in the Electronic Ve-
hicle Information Center (EVIC) will
illuminate. To turn the system off,
push the ON/OFF button a second
time. The Cruise Indicator Light will
turn off. The system should be turned
off when not in use.
WARNING!
Leaving the Electronic Speed Con-
trol system on when not in use is
dangerous. You could accidentally
set the system or cause it to go
faster than you want. You could
lose control and have an accident.
Always leave the system OFF when
you are not using it.
TO SET A DESIRED SPEED
Turn the Electronic Speed Control
ON. When the vehicle has reached the
desired speed, press the SET (-) but-
ton and release. Release the accelera-
tor and the vehicle will operate at the
selected speed.
Electronic Speed Control Buttons
1 — ON/OFF 2 — RES +
4 — CANCEL 3 — SET -123
Page 187 of 332

is programmed touching the
handle more than once will only
result in the driver’s door opening.
If driver door first is selected, once
the driver door is opened, the inte-
rior door lock/unlock switch can
be used to unlock all doors (or use
RKE transmitter).
Passive Entry
This feature allows you to lock and
unlock the vehicle’s door(s) without
having to press the Remote Keyless
Entry (RKE) transmitter lock or un-
lock buttons. To make your selection,
touch the Passive Entry soft-key, until
a check-mark appears next to setting,
showing that setting has been selected.
Touch the back arrow soft-key to re-
turn to the previous menu. Refer to
“Keyless Enter-N-Go” in “Things To
Know Before Starting Your Vehicle”.
Personal Settings Linked To FOB
(for versions/markets, where pro-
vided)
This feature provides automatic
driver seat positioning to enhance
driver mobility when entering and ex-
iting the vehicle. To make your selec-
tion, touch the Personal SettingsLinked To FOB soft-key, until a
check-mark appears next to setting,
showing that setting has been se-
lected. Touch the back arrow soft-key
to return to the previous menu.
NOTE: The seat will return to the
memorized seat location (if Recall
Memory with Remote Key Unlock
is set to ON) when the Remote Key-
less Entry (RKE) transmitter is
used to unlock the door. Refer to
“Driver Memory Seat” in “Under-
standing The Features Of Your Ve-
hicle” for further information.
Engine Off Options
After pressing the Engine Off Options
soft-key the following settings will be
available.
Easy Exit Seat (for versions/
markets, where provided)
This feature provides automatic
driver seat positioning to enhance
driver mobility when entering and ex-
iting the vehicle. To make your selec-
tion, touch the Easy Exit Seats soft-
key, until a check-mark appears next
to setting, showing that setting has
been selected. Touch the back arrow
soft-key to return to the previous
menu.
Engine Off Power Delay (for
versions/markets, where provided)
When this feature is selected, the
power window switches, radio,
Uconnect® phone system (for
versions/markets, where provided),
DVD video system (for versions/
markets, where provided), power
sunroof (for versions/markets, where
provided), and power outlets will re-
main active for up to 10 minutes after
the ignition is cycled to OFF. Opening
either front door will cancel this fea-
ture. To change the Engine Off Power
Delay status touch the 0 seconds, 45
seconds, 5 minutes or 10 minutes
soft-key. Then touch the arrow back
soft-key.
Headlight Off Delay
When this feature is selected, the
driver can choose to have the head-
lights remain on for 0, 30, 60, or 90
seconds when exiting the vehicle. To
change the Headlight Off Delay status
touch the + or - soft-key to select your
181
Page 324 of 332

Airbag........42, 45, 60, 162
Alarm.................164
Anti-Lock..............164
Automatic Headlights......112
Brake Assist Warning.......223
Brake Warning...........163
Bulb Replacement.....296, 297
Dimmer Switch,
Headlight
...........115, 116
Electronic Stability Program (ESP)
Indicator
...............223
Exterior.................61
Fog...................160
Hazard Warning Flasher.....252
Headlights..........112, 297
Headlights On Reminder. . . .114
Headlights On With Wipers. . .113
Headlight Switch..........112
High Beam..............116
High Beam Indicator.......160
High Beam/Low Beam Select. .116
Illuminated Entry..........18
Instrument Cluster........112
Intensity Control..........117
Interior................116
License................298
Lights On Reminder.......114
Low Fuel...............168
Malfunction Indicator
(Check Engine)
...........162
Map Reading............116
Parade Mode
(Daytime Brightness)
.......117
Passing................116
Reading................116
Seat Belt Reminder........165
Security Alarm (Theft Alarm). .164
Service.............296, 297
Service Engine Soon
(Malfunction Indicator)
.....162
SmartBeams.............113
Theft Alarm (Security Alarm). .164
Tire Pressure Monitoring
(TPMS)
............161, 232
Traction Control..........223
Turn Signal..........61, 115
Vanity Mirror.............72
Wait to Start.............168
Warning (Instrument Cluster
Description)
.............160
Load Leveling System.........154
Locks.....................20
Automatic Door...........22
Auto Unlock..............22
Child Protection...........22
Door...................20
Power Door..............21
Low Tire Pressure System......232
Lubrication, Body...........276
Lug Nuts.................253
Maintenance Free Battery......274
Maintenance, General.........271
Maintenance Procedures.......271
Maintenance Schedule.....306, 309
Malfunction Indicator Light(Check Engine)
...........162
Master Cylinder (Brakes).......283
Memory Feature (Memory Seat). .109
Memory Seat...............109
Memory Seats and Radio.......109
Methanol.................237
Methanol Fuel..............237
Mini-Trip Computer..........173
Mirrors....................70
Automatic Dimming........70
Electric Powered...........71
Electric Remote...........71
Exterior Folding...........70
Heated.................72
Outside.................70
Vanity..................72
ModeFuel Saver
..............172
Modifications/Alterations, Vehicle...7
Monitor, Tire Pressure System. . .232
318
Page 326 of 332

Replacement Bulbs...........296
Replacement Keys............14
Replacement Parts...........271
Replacement Tires...........230
Resetting Oil ChangeIndicator
............160, 171
Restraint, Head.............107
Restraints, Child.............47
Restraints, Occupant...........28
Rocking Vehicle When Stuck. . . .261
Rotation, Tires..............232
Safety Checks Inside Vehicle.....60
Safety Checks Outside Vehicle....61
Safety, Exhaust Gas...........59
Safety Tips.................59
Schedule, Maintenance. . . .306, 309
Seat Belt Maintenance.........289
Seat Belt Reminder............37
Seat Belts.............28, 31, 60
Adjustable Upper Shoulder
Anchorage
...............33
And Pregnant Women.......38
Child Restraint............47
Front Seat...............31
Inspection...............60
Operating Instructions.......31
Pretensioners.............35
Rear Seat................31
Untwisting Procedure.......33
Seats....................103
Adjustment.............103
Easy Entry..............111
Head Restraints..........107
Height Adjustment........103
Memory................109
Power.................103
Rear Folding............108
Seatback Release..........108
Tilting.................103
Selection of Coolant(Antifreeze)
..........280, 300
Selection of Oil.............273
Sentry Key (Immobilizer).......14
Sentry Key Programming.......14
Sentry Key Replacement........14
Service Engine Soon Light(Malfunction Indicator)
......162
Setting the Clock............184
Shifting..................201
Automatic Transmission.....201
Shift Lever Override..........263
Shoulder Belts...............31
Shoulder Belt Upper Anchorage. . .33
Side Airbag.................43
Side View Mirror Adjustment.....70
Signals, Turn........61, 115, 160
SmartBeams...............113
Snow Chains (Tire Chains).....231
Snow Tires................227
Sound SystemKicker
.................184
Sound Systems..............183
Sound Systems (Radio)........183
Spare Tire.............228, 229
Spark Plugs................300
SpecificationsFuel (Gasoline)
.......236, 300
Oil...............273, 300
Speed Control(Cruise Control)
.......123, 125
Speedometer...............162
Starting..................197
Cold Weather............198
Engine Fails to Start.......198
Starting and Operating........197
Starting Procedures..........197
SteeringColumn Controls
..........115
Column Lock............120
Power.................215
Tilt Column.............120
Wheel, Heated...........121
Wheel, Tilt..............120
Steering Wheel Audio Controls. . .185
Steering Wheel Mounted SoundSystem Controls
...........185
320