tow bar Lancia Voyager 2013 Owner handbook (in English)
[x] Cancel search | Manufacturer: LANCIA, Model Year: 2013, Model line: Voyager, Model: Lancia Voyager 2013Pages: 360, PDF Size: 4.21 MB
Page 66 of 360

turn the buckle around, and insert
the latch plate into the buckle
again. If you still can't make the
child restraint secure, try a differ-
ent seating position.
Buckle the child into the seat ac- cording to the child restraint manu-
facturer's directions.WARNING!
When your child restraint is not in
use, secure it in the vehicle with the
seat belt or remove it from the ve-
hicle. Do not leave it loose in the
vehicle. In a sudden stop or colli-
sion, it could strike the occupants
or seatbacks and cause serious per-
sonal injury.
ISOFIX — Child Seat Anchorage
System
Each vehicle, except com-
mercial cargo vehicles, is
equipped with the child re-
straint anchorage system
called ISOFIX. Two ISOFIX child re-
straint anchorage systems are in-
stalled on all second-row seats and in the center position on all third row
fold-in-floor seats. Second-row seats
also feature tether strap anchorages,
located in the rear surface of the seat-
back. In addition, all third row fold-
in-floor seats are equipped with a
child restraint tether anchor at the
center seating position.
NOTE:
When using the ISOFIX attach-
ing system to install a child re-
straint, please ensure that all
seat belts not being used for oc-
cupant restraints are stowed and
out of reach of children. It is
recommended that before in-
stalling the child restraint,
buckle the seat belt so the seat
belt is tucked behind the child
restraint and out of reach. If the
buckled seat belt interferes with
the child restraint installation,
instead of tucking the seat belt
behind the child restraint, route
the seat belt through the child
restraint belt path and then
buckle it. This should stow the
seat belt out of the reach of an inquisitive child. Remind all
children in the vehicle that the
seat belts are not toys and
should not be played with, and
never leave your child unat-
tended in the vehicle.
If your child restraint seat is not ISOFIX-compatible, install the
restraint using the vehicle seat
belts.
Installing the Lower Attachments:
1. The vehicle lower anchorages are
round bars located at the rear of the
seat cushion where it meets the seat-
back.
2. Loosen the adjusters on the lower
child restraint attachment straps (ref-
erence the child restraint seat instruc-
tions) to ease the installation.
NOTE: It is recommended to
loosen the top tether strap and
route it loosely prior to securing
the lower anchors so the top tether
strap is not trapped between the
vehicle seat and child restraint.60
Page 161 of 360

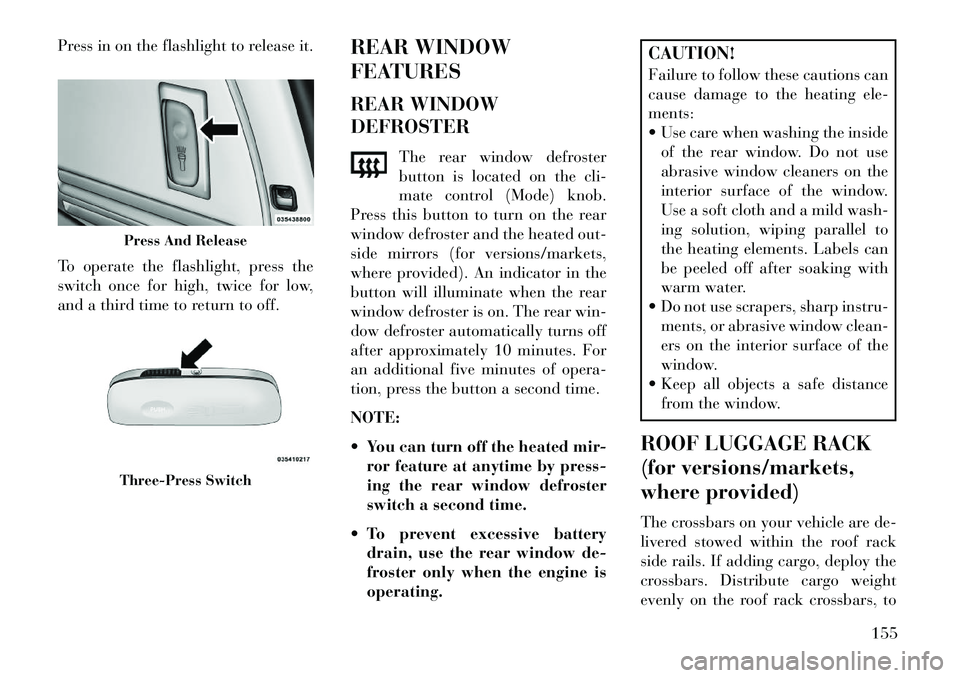
Press in on the flashlight to release it.
To operate the flashlight, press the
switch once for high, twice for low,
and a third time to return to off.REAR WINDOW
FEATURES
REAR WINDOW
DEFROSTER
The rear window defroster
button is located on the cli-
mate control (Mode) knob.
Press this button to turn on the rear
window defroster and the heated out-
side mirrors (for versions/markets,
where provided). An indicator in the
button will illuminate when the rear
window defroster is on. The rear win-
dow defroster automatically turns off
after approximately 10 minutes. For
an additional five minutes of opera-
tion, press the button a second time.
NOTE:
You can turn off the heated mir- ror feature at anytime by press-
ing the rear window defroster
switch a second time.
To prevent excessive battery drain, use the rear window de-
froster only when the engine is
operating.
CAUTION!
Failure to follow these cautions can
cause damage to the heating ele-
ments:
Use care when washing the insideof the rear window. Do not use
abrasive window cleaners on the
interior surface of the window.
Use a soft cloth and a mild wash-
ing solution, wiping parallel to
the heating elements. Labels can
be peeled off after soaking with
warm water.
Do not use scrapers, sharp instru- ments, or abrasive window clean-
ers on the interior surface of the
window.
Keep all objects a safe distance
from the window.
ROOF LUGGAGE RACK
(for versions/markets,
where provided)
The crossbars on your vehicle are de-
livered stowed within the roof rack
side rails. If adding cargo, deploy the
crossbars. Distribute cargo weight
evenly on the roof rack crossbars, to
Press And ReleaseThree-Press Switch
155
Page 162 of 360

maximum of 68 kg. The roof rack
does not increase the total load carry-
ing capacity of the vehicle. Be sure the
total load of cargo inside the vehicle
plus that on the external rack does not
exceed the maximum vehicle load ca-
pacity.
The crossbars and side rails are de-
signed to carry weight on vehicles
equipped with a luggage rack. The
load must not exceed 68 kg, and
should be uniformly distributed over
the luggage rack crossbars.
NOTE:
Crossbars are error-proofed andcannot be deployed or stowed in
the incorrect positions. To help control wind noise, stow
the crossbars in the side rails
when they are not in use.
DEPLOYING THE
CROSSBARS
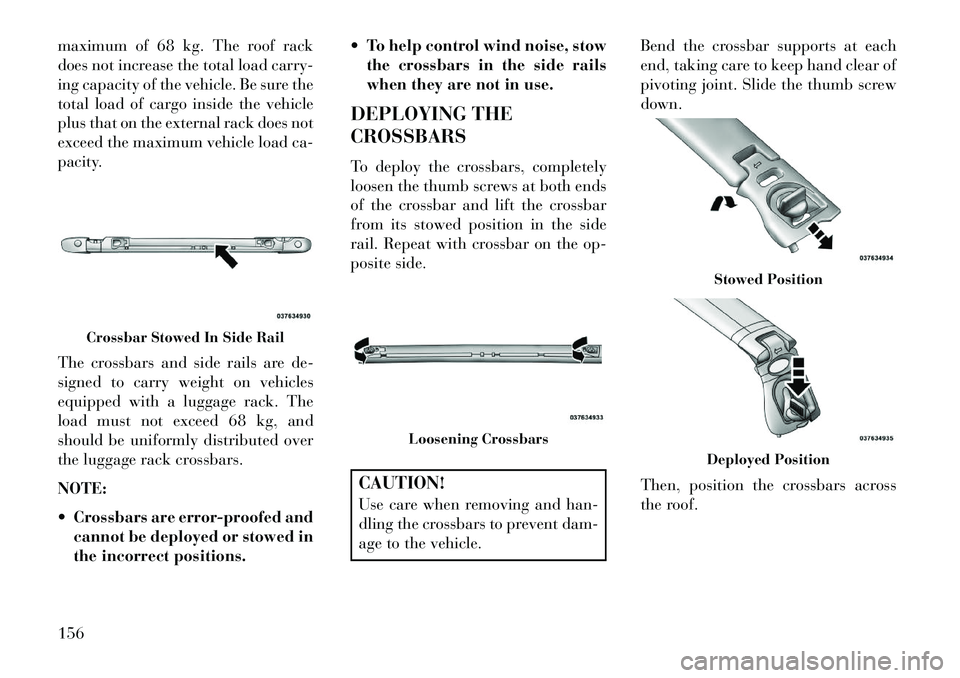
To deploy the crossbars, completely
loosen the thumb screws at both ends
of the crossbar and lift the crossbar
from its stowed position in the side
rail. Repeat with crossbar on the op-
posite side.
CAUTION!
Use care when removing and han-
dling the crossbars to prevent dam-
age to the vehicle. Bend the crossbar supports at each
end, taking care to keep hand clear of
pivoting joint. Slide the thumb screw
down.
Then, position the crossbars across
the roof.
Crossbar Stowed In Side Rail
Loosening Crossbars
Stowed PositionDeployed Position
156
Page 163 of 360

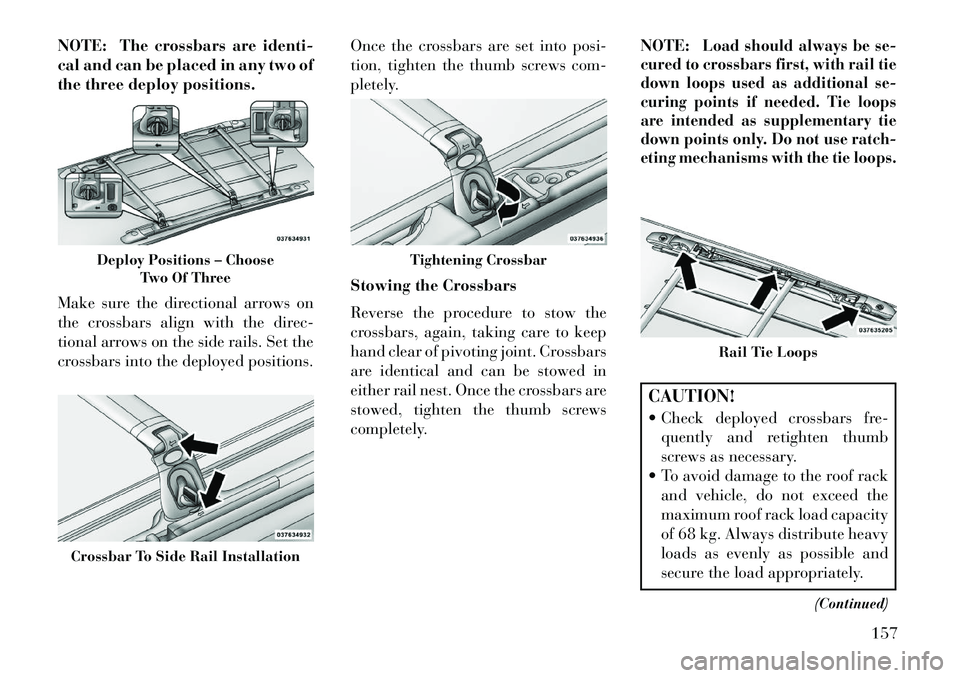
NOTE: The crossbars are identi-
cal and can be placed in any two of
the three deploy positions.
Make sure the directional arrows on
the crossbars align with the direc-
tional arrows on the side rails. Set the
crossbars into the deployed positions.Once the crossbars are set into posi-
tion, tighten the thumb screws com-
pletely.
Stowing the Crossbars
Reverse the procedure to stow the
crossbars, again, taking care to keep
hand clear of pivoting joint. Crossbars
are identical and can be stowed in
either rail nest. Once the crossbars are
stowed, tighten the thumb screws
completely.NOTE:
Load should always be se-
cured to crossbars first, with rail tie
down loops used as additional se-
curing points if needed. Tie loops
are intended as supplementary tie
down points only. Do not use ratch-
eting mechanisms with the tie loops.
CAUTION!
Check deployed crossbars fre-
quently and retighten thumb
screws as necessary.
To avoid damage to the roof rack and vehicle, do not exceed the
maximum roof rack load capacity
of 68 kg. Always distribute heavy
loads as evenly as possible and
secure the load appropriately.
(Continued)
Deploy Positions – ChooseTwo Of Three
Crossbar To Side Rail Installation
Tightening Crossbar
Rail Tie Loops
157
Page 278 of 360

WARNING!
An improperly adjusted hitch sys-
tem may reduce handling, stability
and braking performance and
could result in an accident. Consult
with your hitch and trailer manu-
facturer or a reputable trailer/
caravan dealer for additional infor-
mation.
Frontal Area
The frontal area is the maximum
height multiplied by the maximum
width of the front of a trailer.
BREAKAWAY CABLE
ATTACHMENT
European braking regulations for
braked trailers up to 3 500 kg, require
trailers to be fitted with either a sec-
ondary coupling or breakaway cable.
The recommended location for at-
taching the normal trailer's break-
away cable is in the stamped slot lo-
cated on the sidewall of the hitch
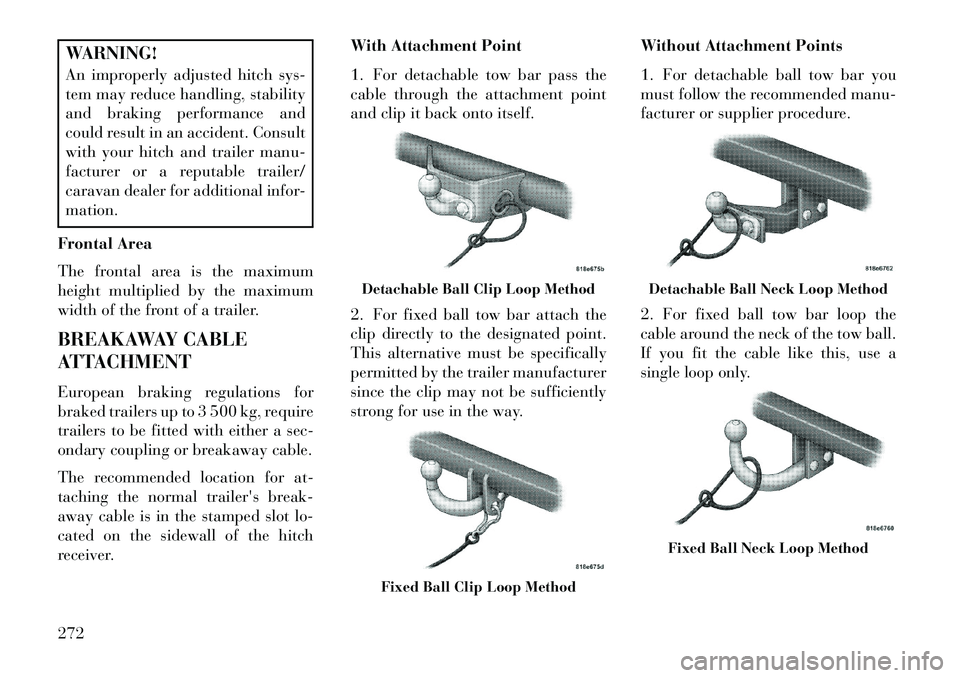
receiver. With Attachment Point
1. For detachable tow bar pass the
cable through the attachment point
and clip it back onto itself.
2. For fixed ball tow bar attach the
clip directly to the designated point.
This alternative must be specifically
permitted by the trailer manufacturer
since the clip may not be sufficiently
strong for use in the way.
Without Attachment Points
1. For detachable ball tow bar you
must follow the recommended manu-
facturer or supplier procedure.
2. For fixed ball tow bar loop the
cable around the neck of the tow ball.
If you fit the cable like this, use a
single loop only.
Detachable Ball Clip Loop Method
Fixed Ball Clip Loop Method
Detachable Ball Neck Loop Method
Fixed Ball Neck Loop Method
272
Page 301 of 360

TOWING A DISABLED VEHICLE
NOTE: This section describes procedures for towing a disabled vehicle using a commercial wrecker service.Towing ConditionWheels OFF the GroundALL MODELS
Flat Tow NONEIf transmission is operable:
Transmission inNEUTRAL
40 km/h maxspeed
24 km maxdistance
Wheel lift or Dolly Tow
Rear
Front OK
Flatbed ALLBEST METHOD
Proper towing or lifting equipment is
required to prevent damage to your
vehicle. Use only tow bars and other
equipment designed for this purpose,
following equipment manufacturer’s
instructions. Use of safety chains is
mandatory. Attach a tow bar or other
towing device to main structural
members of the vehicle, not to bum-
pers or associated brackets. State and
local laws regarding vehicles under
tow must be observed.
If you must use the accessories (wip-
ers, defrosters, etc.) while being
towed, the ignition must be in the
ON/RUN position, not the ACC posi-
tion. If the key fob is unavailable, or the
battery is discharged, see "Shift Lever
Override" in "What To Do In Emer-
gencies" for instructions on shifting
the automatic transmission out of
PARK for towing.
CAUTION!
Do not use sling type equipment
when towing. Damage to the fas-
cia will occur.
When securing the vehicle to a flatbed truck, do not attach to
front or rear suspension compo-
nents. Damage to your vehicle
may result from improper towing.
(Continued)
CAUTION!(Continued)
Do not push or tow this vehicle with another vehicle as damage to
the bumper fascia and transmis-
sion may result.
The manufacturer recommends tow-
ing your vehicle with all four wheels
OFF the ground using a flatbed. If
flatbed equipment is not available,
and the transmission is operable, the
vehicle may be flat towed (with all
four wheels on the ground) under the
following conditions:
The transmission must be in NEU- TRAL.
295