ECU LAND ROVER DISCOVERY 2002 Workshop Manual
[x] Cancel search | Manufacturer: LAND ROVER, Model Year: 2002, Model line: DISCOVERY, Model: LAND ROVER DISCOVERY 2002Pages: 1672, PDF Size: 46.1 MB
Page 666 of 1672

CLUTCH - TD5
REPAIRS 33-1-15
Bearing and lever - clutch release
$% 33.25.12
Remove
1.Remove gearbox assembly.
+ MANUAL GEARBOX - R380,
REPAIRS, Gearbox - Diesel.
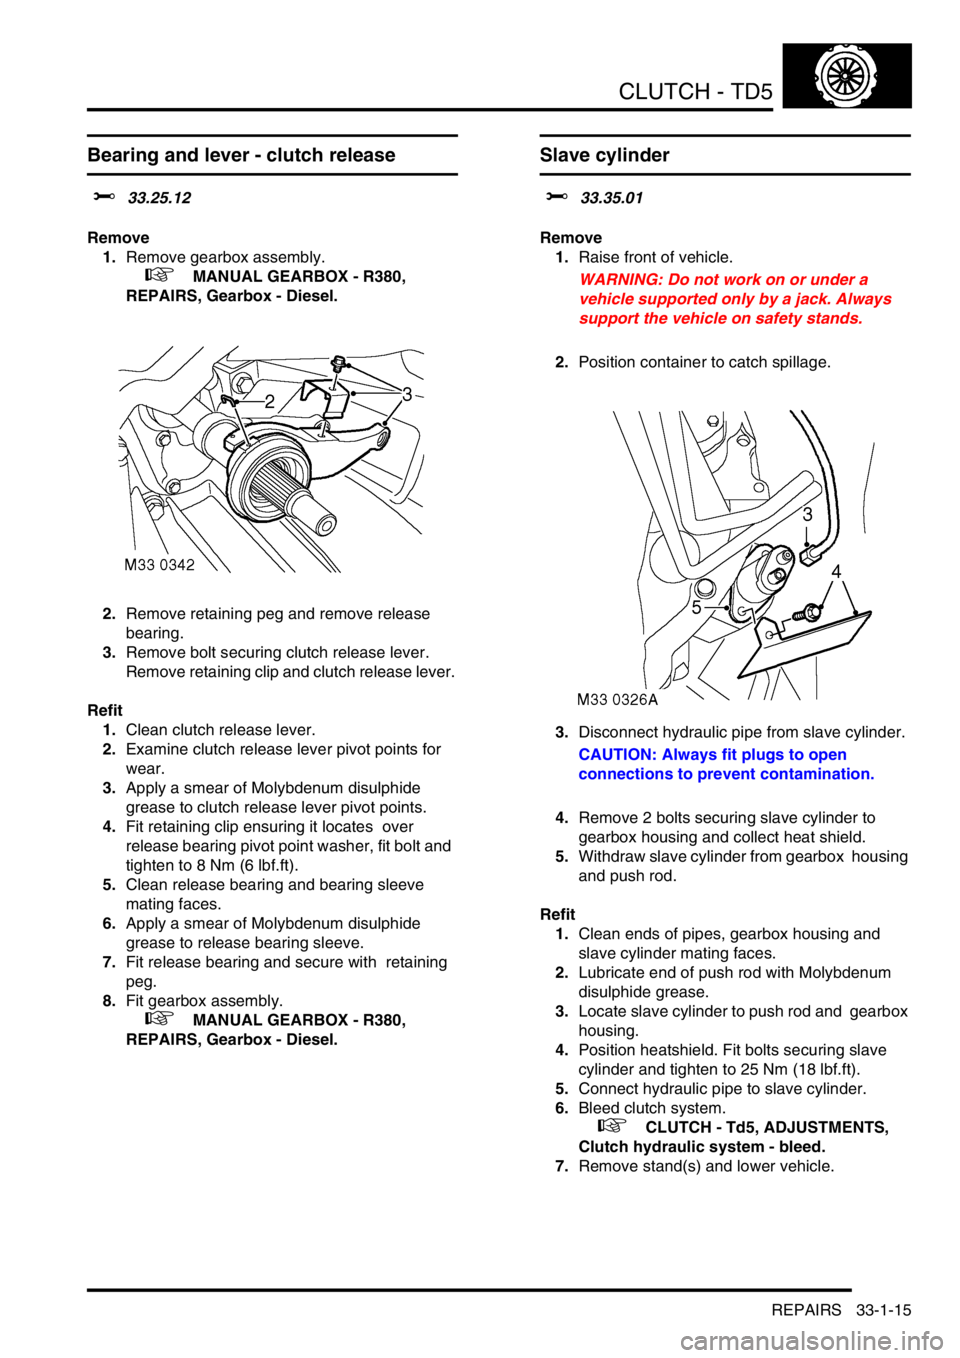
2.Remove retaining peg and remove release
bearing.
3.Remove bolt securing clutch release lever.
Remove retaining clip and clutch release lever.
Refit
1.Clean clutch release lever.
2.Examine clutch release lever pivot points for
wear.
3.Apply a smear of Molybdenum disulphide
grease to clutch release lever pivot points.
4.Fit retaining clip ensuring it locates over
release bearing pivot point washer, fit bolt and
tighten to 8 Nm (6 lbf.ft).
5.Clean release bearing and bearing sleeve
mating faces.
6.Apply a smear of Molybdenum disulphide
grease to release bearing sleeve.
7.Fit release bearing and secure with retaining
peg.
8.Fit gearbox assembly.
+ MANUAL GEARBOX - R380,
REPAIRS, Gearbox - Diesel.
Slave cylinder
$% 33.35.01
Remove
1.Raise front of vehicle.
WARNING: Do not work on or under a
vehicle supported only by a jack. Always
support the vehicle on safety stands.
2.Position container to catch spillage.
3.Disconnect hydraulic pipe from slave cylinder.
CAUTION: Always fit plugs to open
connections to prevent contamination.
4.Remove 2 bolts securing slave cylinder to
gearbox housing and collect heat shield.
5.Withdraw slave cylinder from gearbox housing
and push rod.
Refit
1.Clean ends of pipes, gearbox housing and
slave cylinder mating faces.
2.Lubricate end of push rod with Molybdenum
disulphide grease.
3.Locate slave cylinder to push rod and gearbox
housing.
4.Position heatshield. Fit bolts securing slave
cylinder and tighten to 25 Nm (18 lbf.ft).
5.Connect hydraulic pipe to slave cylinder.
6.Bleed clutch system.
+ CLUTCH - Td5, ADJUSTMENTS,
Clutch hydraulic system - bleed.
7.Remove stand(s) and lower vehicle.
Page 673 of 1672

CLUTCH - V8
33-2-6 DESCRIPTION AND OPERATION
Description
General
The clutch system is a conventional diaphragm type clutch operated by a hydraulic cylinder. The clutch requires no
adjustment to compensate for wear.
Hydraulic clutch
The hydraulic clutch comprises a master cylinder, slave cylinder and a hydraulic reservoir, which is also shared with
the braking system. The master and slave cylinders are connected to each other hydraulically by plastic and metal
pipes. The plastic section of the pipe allows ease of pipe routing and also absorbs engine movements and vibrations.
The master cylinder comprises a body with a central bore. Two ports in the body connect the bore to the hydraulic
feed pipe to the slave cylinder and the brake/clutch fluid reservoir. A piston is fitted in the bore and has an external
rod which is attached to the clutch pedal with a pin. Two coiled springs on the clutch pedal reduce the effort required
to depress the pedal.
The master cylinder is mounted on the bulkhead in the engine compartment and secured with two bolts. The cylinder
is connected to the shared brake/clutch reservoir on the brake servo by a braided connecting hose.
The slave cylinder is located on the left hand side of the gearbox housing and secured with two bolts. A heat shield
protects the underside of the cylinder from heat generated from the exhaust system. The slave cylinder comprises a
cylinder with a piston and a rod. A port in the cylinder body provides the attachment for the hydraulic feed pipe from
the master cylinder. A second port is fitted with a bleed nipple for removing air from the hydraulic system after
servicing. The piston rod locates on a clutch release lever located in the gearbox housing. The rod is positively
retained on the release lever with a clip.
Clutch mechanism
The clutch mechanism comprises a flywheel, drive plate, pressure plate, release lever and a release bearing. The
clutch mechanism is fully enclosed at the rear of the engine by the gearbox housing.
A clutch release bearing sleeve is attached in the gearbox housing with two bolts and located on two dowels. A spigot
with a ball end is formed on the release bearing sleeve and provides a mounting and pivot point for the clutch release
lever. A dished pivot washer is located on the ball of the spigot. When the release lever is located on the ball, the pivot
washer seats against the rear face of the release lever. A spring clip is located on the lever and the pivot washer and
secures the lever on the spigot. A small bolt retains the spring clip in position.
The release lever is forked at its inner end and locates on the clutch release bearing carrier. The outer end of the
release lever has a nylon seat which locates the slave cylinder piston rod. A second nylon seat, positioned centrally
on the release lever, locates on the ball spigot of the release bearing sleeve and allows the release lever to pivot freely
around the ball.
The clutch release bearing locates on the clutch release lever and the release bearing sleeve. The bearing is retained
on a carrier which has two flats to prevent the carrier rotating on the release lever. A clip retains the release lever on
the carrier. The bearing and carrier are not serviceable individually.
Page 675 of 1672

CLUTCH - V8
33-2-8 DESCRIPTION AND OPERATION
The pressure plate is forged from cast iron and machined to provide a smooth surface for the drive plate to engage
on. Three lugs on the outer diameter of the pressure plate connect it via three leaf springs to the cover. The leaf
springs have two tempered steel leaves which assist in pulling the pressure plate away from the drive plate when the
clutch pedal is depressed.
The cover is made from pressed steel and houses and locates all pressure plate components. Shouldered rivets
support the diaphragm and fulcrum rings inside the cover. The cover also provides attachment for balance weights
when the pressure plate assembly is balanced. Three holes in the cover locate on the dowels on the flywheel and six
further holes provide for the attachment of the cover to the flywheel with six bolts and spring washers. Larger holes
in the cover provide ventilation for the drive plate and pressure plate and flywheel contact surfaces.
The diaphragm comprises a cast ring with eighteen fingers. The diaphragm is attached to the cover with nine
shouldered rivets. Two circular steel fulcrum rings are also secured by the shouldered rivets on each side of the
diaphragm. The fulcrum rings allow the diaphragm to pivot between them when the clutch is depressed or released.
When pressure is applied to the diaphragm fingers by the release bearing, the diaphragm pivots between the fulcrum
rings and moves away from the pressure plate. Retractor clips are secured to the pressure plate and are located on
the outer diameter of the diaphragm. The retractor clips ensure that the diaphragm remains in contact with the
pressure plate.
Drive plate
1Friction material
2Hub
3Damper spring
4Retainer plate
5Disc adaptor
6Stop pin
Page 676 of 1672

CLUTCH - V8
DESCRIPTION AND OPERATION 33-2-9
The drive plate is of the spring centred type and is sandwiched between the pressure plate and the flywheel. The drive
plate has a splined hub which engages with the splines on the primary drive shaft from the gearbox. The hub is located
in an inner plate which contains six compression damper springs. A spring retainer plate and a disc adaptor are
secured together with stop pins which limit the angular deflection of the disc adaptor. Engine power is transmitted from
the disc adaptor to the damper springs. The damper springs then transfer the power to the retainer plate and the hub.
Friction washers are located between the hub, retainer plate and disc adaptor and provide further damping.
A spring steel plate is riveted to the disc adaptor and provides the attachment surface for the drive plate friction
material. The friction material comprises discs which are secured with rivets to each side of the plate. The rivets are
installed through recessed holes in the disc and emerge in recessed holes in the opposite disc. The drive plate is 267
mm (10.5 in) diameter and has a friction material manufactured from APTEC T385.
Page 680 of 1672

CLUTCH - V8
REPAIRS 33-2-13
REPAIRS
Clutch assembly
$% 33.10.01
Remove
1.Remove gearbox assembly.
+ MANUAL GEARBOX - R380,
REPAIRS, Gearbox - V8.
2.Restrain flywheel.
3.Working in diagonal sequence, progressively
loosen 6 bolts securing clutch cover to flywheel.
Remove bolts.
4.Remove clutch cover.
5.Remove clutch plate.
6.Renew all worn or damaged components.Refit
1.Clean clutch cover and flywheel mating faces
and spigot bush in end of crankshaft.
2.Fit LRT-12-001 to spigot bearing in crankshaft.
3.Fit clutch plate onto LRT-12-001, ensure side
marked 'flywheel side' is against flywheel.
4.Fit clutch cover and locate on dowels.
5.Fit clutch cover bolts and progressively tighten,
in diagonal sequence shown, to 40 Nm. (30
lbf.ft).
6.Fit gearbox assembly.
+ MANUAL GEARBOX - R380,
REPAIRS, Gearbox - V8.
Page 681 of 1672

CLUTCH - V8
33-2-14 REPAIRS
Master cylinder
$% 33.20.01
CAUTION: Brake fluid will damage paint finished
surfaces. If spilled, immediately remove fluid and
clean area with water.
Remove
1.Raise front of vehicle.
WARNING: Do not work on or under a
vehicle supported only by a jack. Always
support the vehicle on safety stands.
2.Release spring clip securing clutch pedal
clevis pin and remove pin from push rod and
clutch pedal.
3.Position container to catch spillage. Disconnect
hydraulic pipe from clutch master cylinder.
CAUTION: Always fit plugs to open
connections to prevent contamination.4.Release clip and remove connecting hose from
clutch master cylinder.
5.Remove 2 bolts securing clutch master
cylinder to pedal box and remove clutch master
cylinder.
Refit
1.Clean master cylinder and pedal box mating
faces.
2.Position clutch master cylinder to pedal box, fit
bolts and tighten to 25 Nm (18 lbf.ft).
3.Position clevis pin to push-rod and clutch pedal
and secure with spring clip.
4.Fit connecting hose to brake master cylinder
and tighten clip.
5.Position hydraulic pipe and tighten union to 18
Nm (13 lbf.ft).
6.Bleed clutch.
+ CLUTCH - V8, ADJUSTMENTS,
Clutch hydraulic system - bleed.
7.Remove stand(s) and lower vehicle.
Page 682 of 1672

CLUTCH - V8
REPAIRS 33-2-15
Bearing and lever - clutch release
$% 33.25.12
Remove
1.Remove gearbox assembly.
+ MANUAL GEARBOX - R380,
REPAIRS, Gearbox - V8.
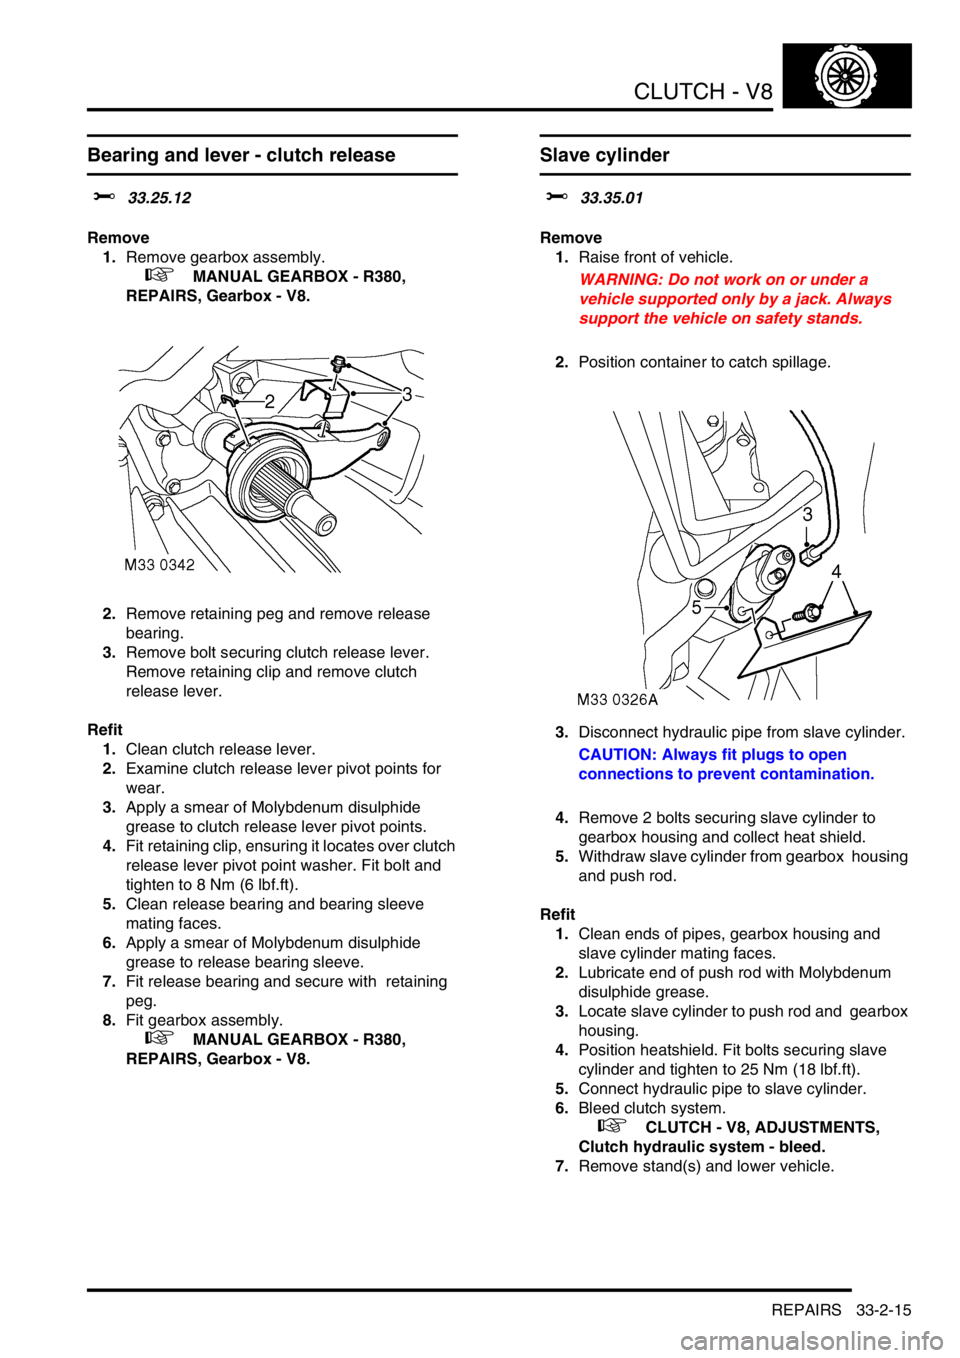
2.Remove retaining peg and remove release
bearing.
3.Remove bolt securing clutch release lever.
Remove retaining clip and remove clutch
release lever.
Refit
1.Clean clutch release lever.
2.Examine clutch release lever pivot points for
wear.
3.Apply a smear of Molybdenum disulphide
grease to clutch release lever pivot points.
4.Fit retaining clip, ensuring it locates over clutch
release lever pivot point washer. Fit bolt and
tighten to 8 Nm (6 lbf.ft).
5.Clean release bearing and bearing sleeve
mating faces.
6.Apply a smear of Molybdenum disulphide
grease to release bearing sleeve.
7.Fit release bearing and secure with retaining
peg.
8.Fit gearbox assembly.
+ MANUAL GEARBOX - R380,
REPAIRS, Gearbox - V8.
Slave cylinder
$% 33.35.01
Remove
1.Raise front of vehicle.
WARNING: Do not work on or under a
vehicle supported only by a jack. Always
support the vehicle on safety stands.
2.Position container to catch spillage.
3.Disconnect hydraulic pipe from slave cylinder.
CAUTION: Always fit plugs to open
connections to prevent contamination.
4.Remove 2 bolts securing slave cylinder to
gearbox housing and collect heat shield.
5.Withdraw slave cylinder from gearbox housing
and push rod.
Refit
1.Clean ends of pipes, gearbox housing and
slave cylinder mating faces.
2.Lubricate end of push rod with Molybdenum
disulphide grease.
3.Locate slave cylinder to push rod and gearbox
housing.
4.Position heatshield. Fit bolts securing slave
cylinder and tighten to 25 Nm (18 lbf.ft).
5.Connect hydraulic pipe to slave cylinder.
6.Bleed clutch system.
+ CLUTCH - V8, ADJUSTMENTS,
Clutch hydraulic system - bleed.
7.Remove stand(s) and lower vehicle.
Page 690 of 1672

MANUAL GEARBOX - R380
DESCRIPTION AND OPERATION 37-7
Description
General
The R380 all synchromesh gearbox has five forward speeds and reverse and is mounted in line with the engine. The
clutch bell housing is bolted to the front of the gearbox and the transfer box is mounted at the rear.
Gearbox casings
Gearbox casings consist of a front cover, gearcase, centre plate and extension housing. All casings with the exception
of the front cover are located to each other by dowels and sealed. Gearbox filler/level and drain plugs are located in
the gearcase.
Reverse lamp switch
A reverse lamp switch is inserted into the extension housing. Selection of reverse gear will close the switch allowing
current from fuse 25 to flow through the switch to illuminate the reverse lamps. The switch also provides a feed to the
BCU and the automatic interior mirror - if fitted; the mirror moving to the dimming position.
Gearchange assembly
The gearchange assembly is bolted to the top of the gearcase, the upper gear lever being attached to the lower gear
lever by means of a clamp bolt. The lower gear lever ball is housed in a Railko bush inserted in the gear change
housing, the end of the lever locating in the selector yoke which is attached to the end of the selector shaft. Bias
springs provide a positive return of the gear lever to the neutral position with selection of 1st/2nd and 5th/reverse gears
being against bias spring pressure. Spring loaded detent balls fitted in the centre plate locate in grooves in the selector
shaft to provide positive gear and neutral selection.
Lubrication
Lubrication is by an oil pump located in the extension housing and driven by the layshaft with additional lubrication
being provided by splash. The pump directs oil via a filter and internal drillings in the output shaft to lubricate the
components. On non UK and non European models, provision for oil cooling is by means of a thermostat housed in
a cover bolted to the side of the extension housing. The cover incorporates tappings for connections to an oil cooler.
On UK and European models, the thermostat and cover are replaced by an oil by-pass block.
Internal pressures produced within the gearbox are vented to atmosphere via a plastic breather pipe. The pipe is
attached to the extension housing and is routed across the top of the gearcase and secured at the open end by a clip
attached to the engine cylinder block.
Selector shaft and forks
Selector forks for 1st/2nd, 3rd/4th and 5th/reverse gears are located on a single selector shaft; the 1st/2nd and 3rd/
4th selector forks are inside the main gearcase whilst the 5th/reverse selector fork is inside the extension housing.
Each of the selector forks locates inside its corresponding synchromesh hub.
Synchromesh assemblies
Each synchromesh assembly is located on the output shaft adjacent to its corresponding gears and comprises a
synchromesh ring, hub, slippers and sleeve. The hubs and slippers are retained in the sleeves by means of spring
clips. 1st/2nd and 3rd synchromesh assemblies are fitted with double synchromesh rings whilst 4th, 5th and reverse
assemblies are fitted with single rings.
Page 692 of 1672

MANUAL GEARBOX - R380
ADJUSTMENTS 37-9
ADJUST ME NTS
Spring - gear lever bias
$% 37.16.26
Adjust
1.Remove centre console.
+ INTERIOR TRIM COMPONENTS,
REPAIRS, Console - centre - manual
models.
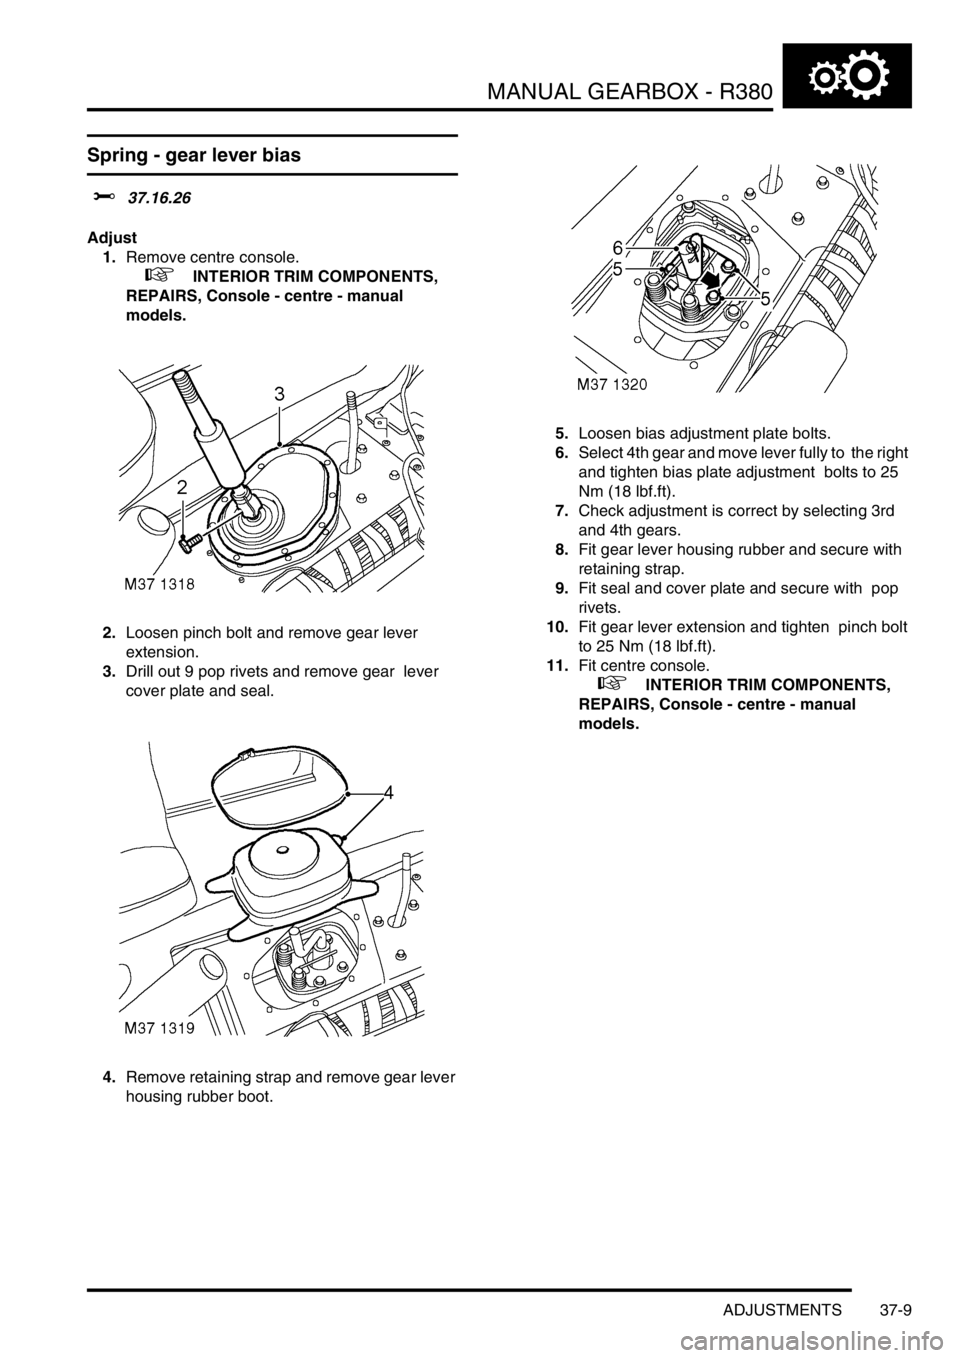
2.Loosen pinch bolt and remove gear lever
extension.
3.Drill out 9 pop rivets and remove gear lever
cover plate and seal.
4.Remove retaining strap and remove gear lever
housing rubber boot.5.Loosen bias adjustment plate bolts.
6.Select 4th gear and move lever fully to the right
and tighten bias plate adjustment bolts to 25
Nm (18 lbf.ft).
7.Check adjustment is correct by selecting 3rd
and 4th gears.
8.Fit gear lever housing rubber and secure with
retaining strap.
9.Fit seal and cover plate and secure with pop
rivets.
10.Fit gear lever extension and tighten pinch bolt
to 25 Nm (18 lbf.ft).
11.Fit centre console.
+ INTERIOR TRIM COMPONENTS,
REPAIRS, Console - centre - manual
models.
Page 694 of 1672

MANUAL GEARBOX - R380
REPAIRS 37-11
REPAIRS
Housing - gear selector
$% 37.16.37
Remove
1.Remove centre console.
+ INTERIOR TRIM COMPONENTS,
REPAIRS, Console - centre - manual
models.
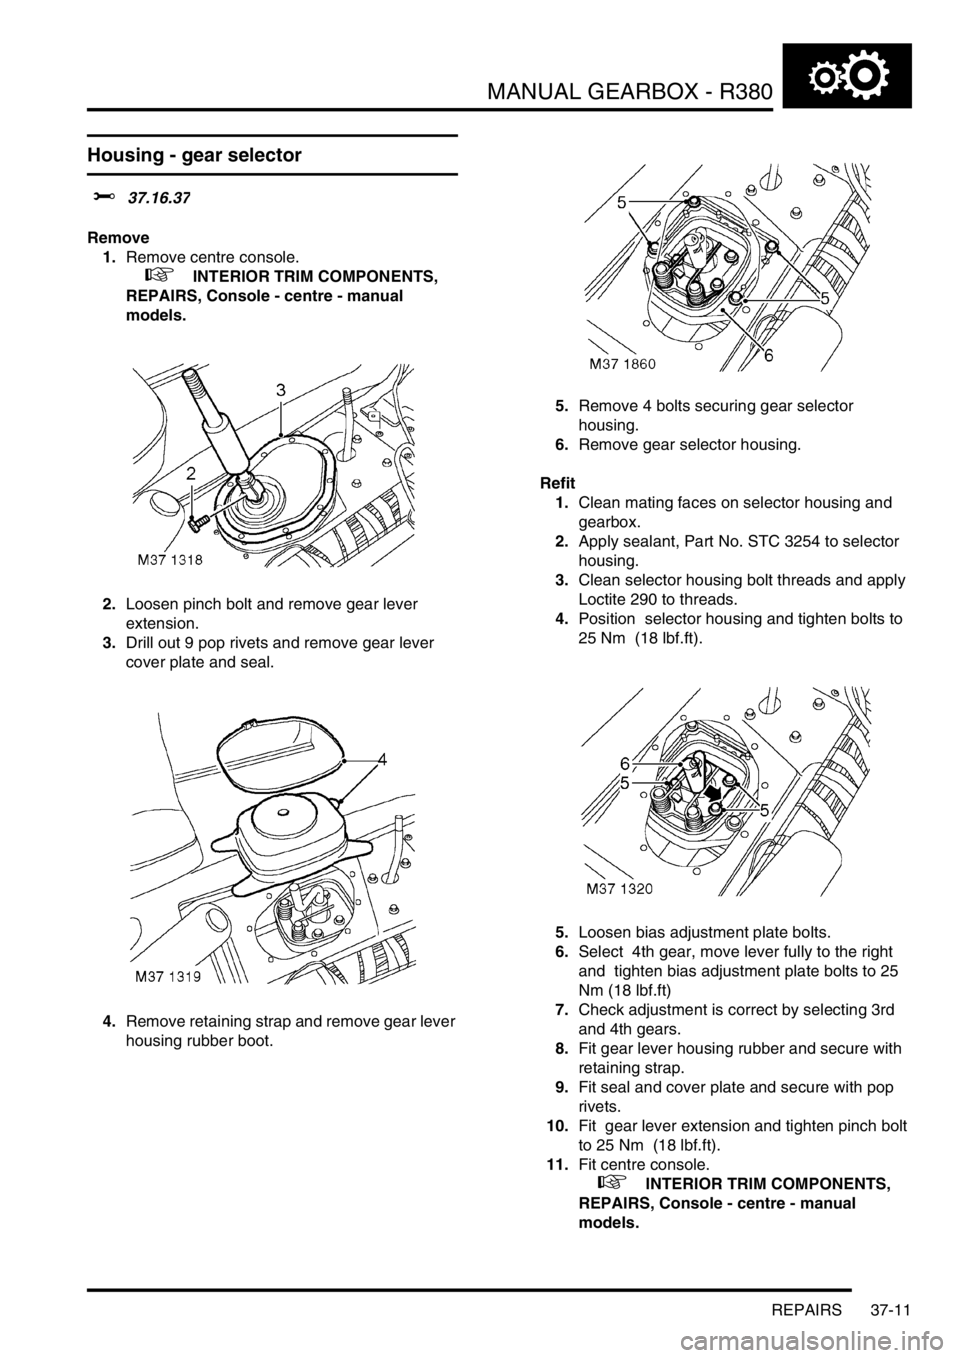
2.Loosen pinch bolt and remove gear lever
extension.
3.Drill out 9 pop rivets and remove gear lever
cover plate and seal.
4.Remove retaining strap and remove gear lever
housing rubber boot.5.Remove 4 bolts securing gear selector
housing.
6.Remove gear selector housing.
Refit
1.Clean mating faces on selector housing and
gearbox.
2.Apply sealant, Part No. STC 3254 to selector
housing.
3.Clean selector housing bolt threads and apply
Loctite 290 to threads.
4.Position selector housing and tighten bolts to
25 Nm (18 lbf.ft).
5.Loosen bias adjustment plate bolts.
6.Select 4th gear, move lever fully to the right
and tighten bias adjustment plate bolts to 25
Nm (18 lbf.ft)
7.Check adjustment is correct by selecting 3rd
and 4th gears.
8.Fit gear lever housing rubber and secure with
retaining strap.
9.Fit seal and cover plate and secure with pop
rivets.
10.Fit gear lever extension and tighten pinch bolt
to 25 Nm (18 lbf.ft).
11.Fit centre console.
+ INTERIOR TRIM COMPONENTS,
REPAIRS, Console - centre - manual
models.