navigation Lexus CT200h 2012 Navigation Manual (in English)
[x] Cancel search | Manufacturer: LEXUS, Model Year: 2012, Model line: CT200h, Model: Lexus CT200h 2012Pages: 436, PDF Size: 28.25 MB
Page 27 of 436
27
3. QUICK REFERENCE
1
QUICK GUIDE
CT200h_Navi_OM76078E_(EE)
14.02.06 12:29
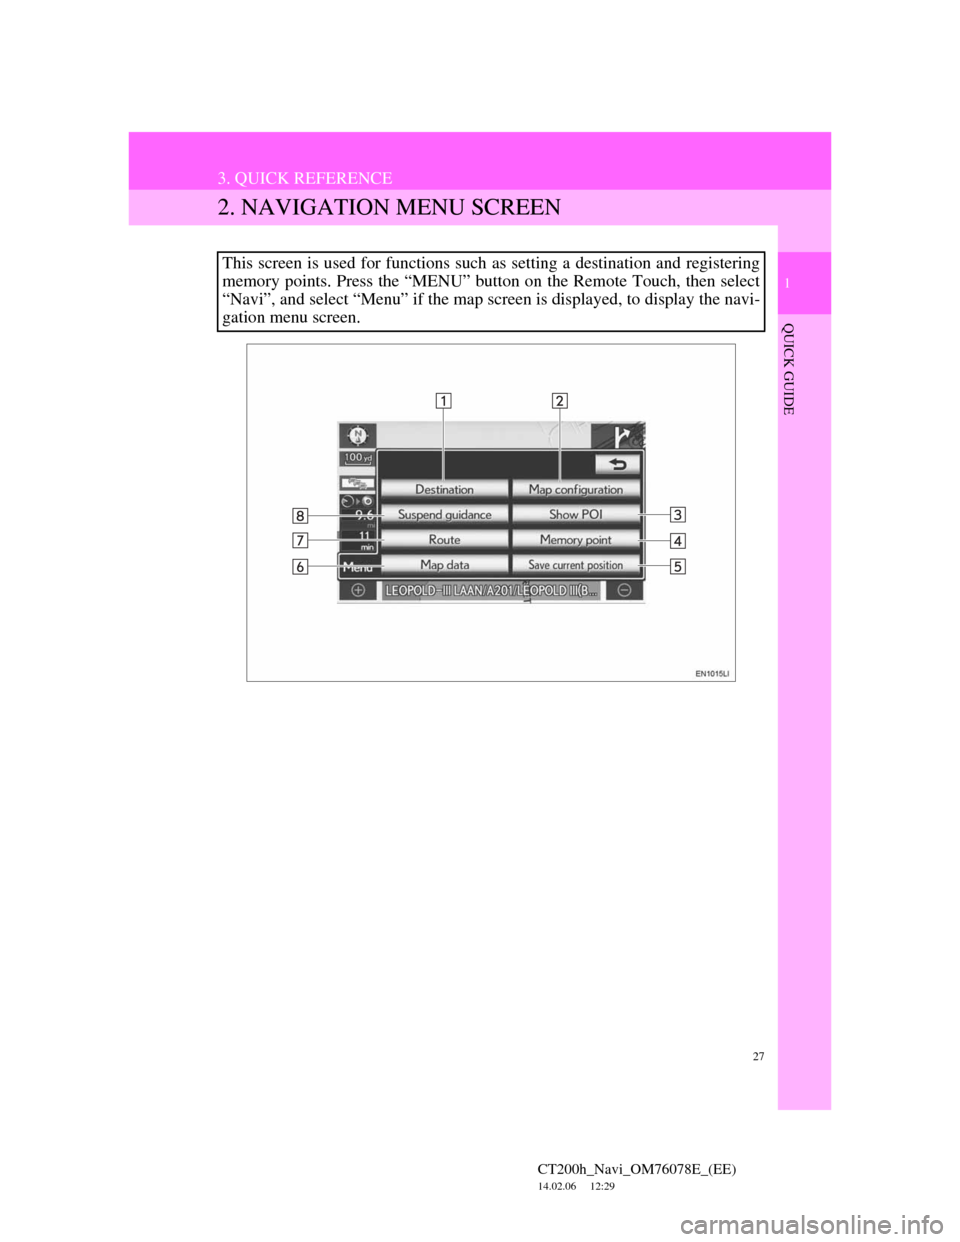
2. NAVIGATION MENU SCREEN
This screen is used for functions such as setting a destination and registering
memory points. Press the “MENU” button on the Remote Touch, then select
“Navi”, and select “Menu” if the map screen is displayed, to display the navi-
gation menu screen.
Page 30 of 436
30
3. QUICK REFERENCE
CT200h_Navi_OM76078E_(EE)
14.02.06 12:29
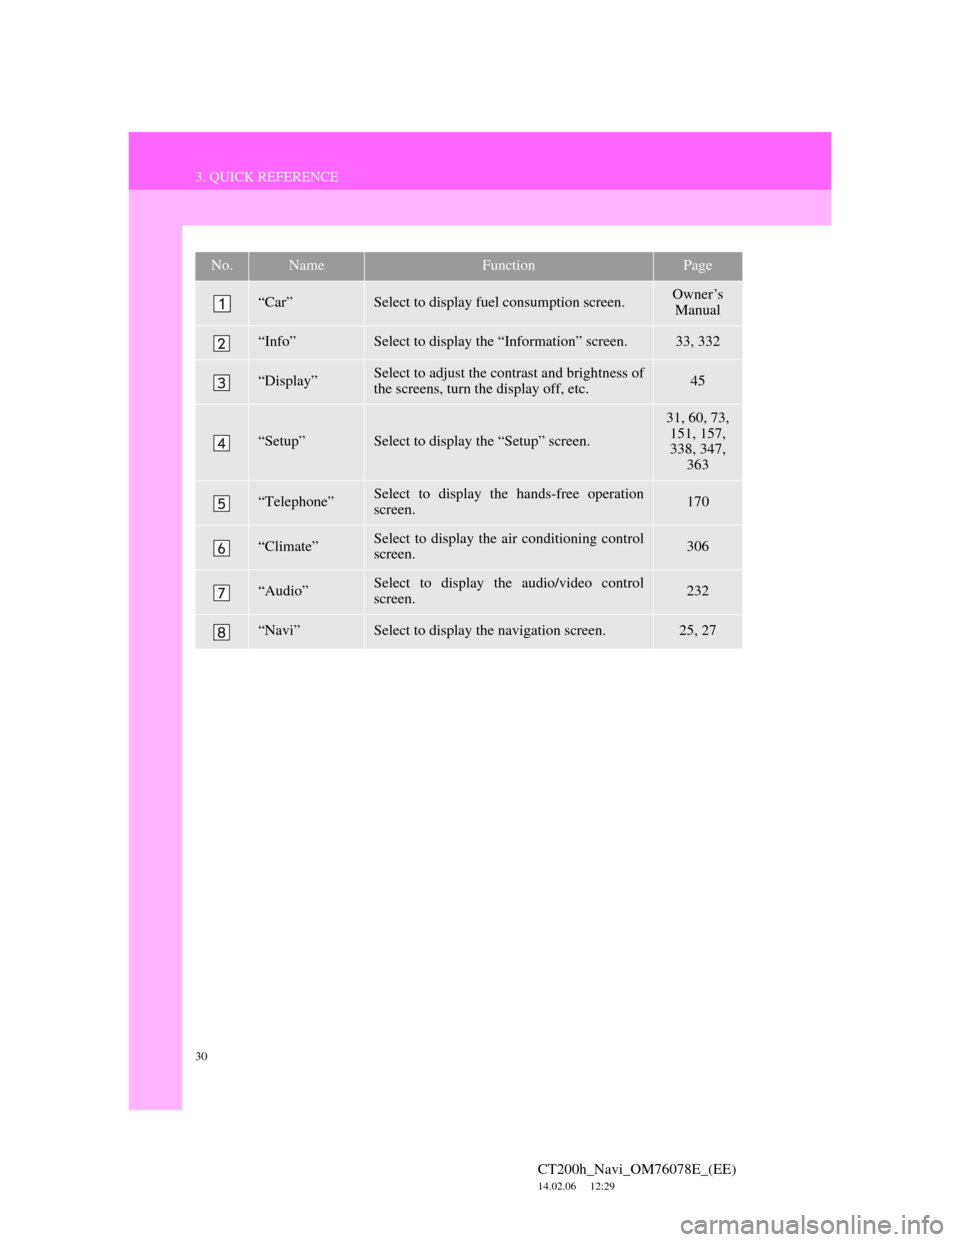
No.NameFunctionPage
“Car”Select to display fuel consumption screen.Owner’s
Manual
“Info”Select to display the “Information” screen.33, 332
“Display”Select to adjust the contrast and brightness of
the screens, turn the display off, etc.45
“Setup”Select to display the “Setup” screen.
31, 60, 73,
151, 157,
338, 347,
363
“Telephone”Select to display the hands-free operation
screen.170
“Climate”Select to display the air conditioning control
screen.306
“Audio”Select to display the audio/video control
screen.232
“Navi”Select to display the navigation screen.25, 27
Page 32 of 436
32
3. QUICK REFERENCE
CT200h_Navi_OM76078E_(EE)
14.02.06 12:29
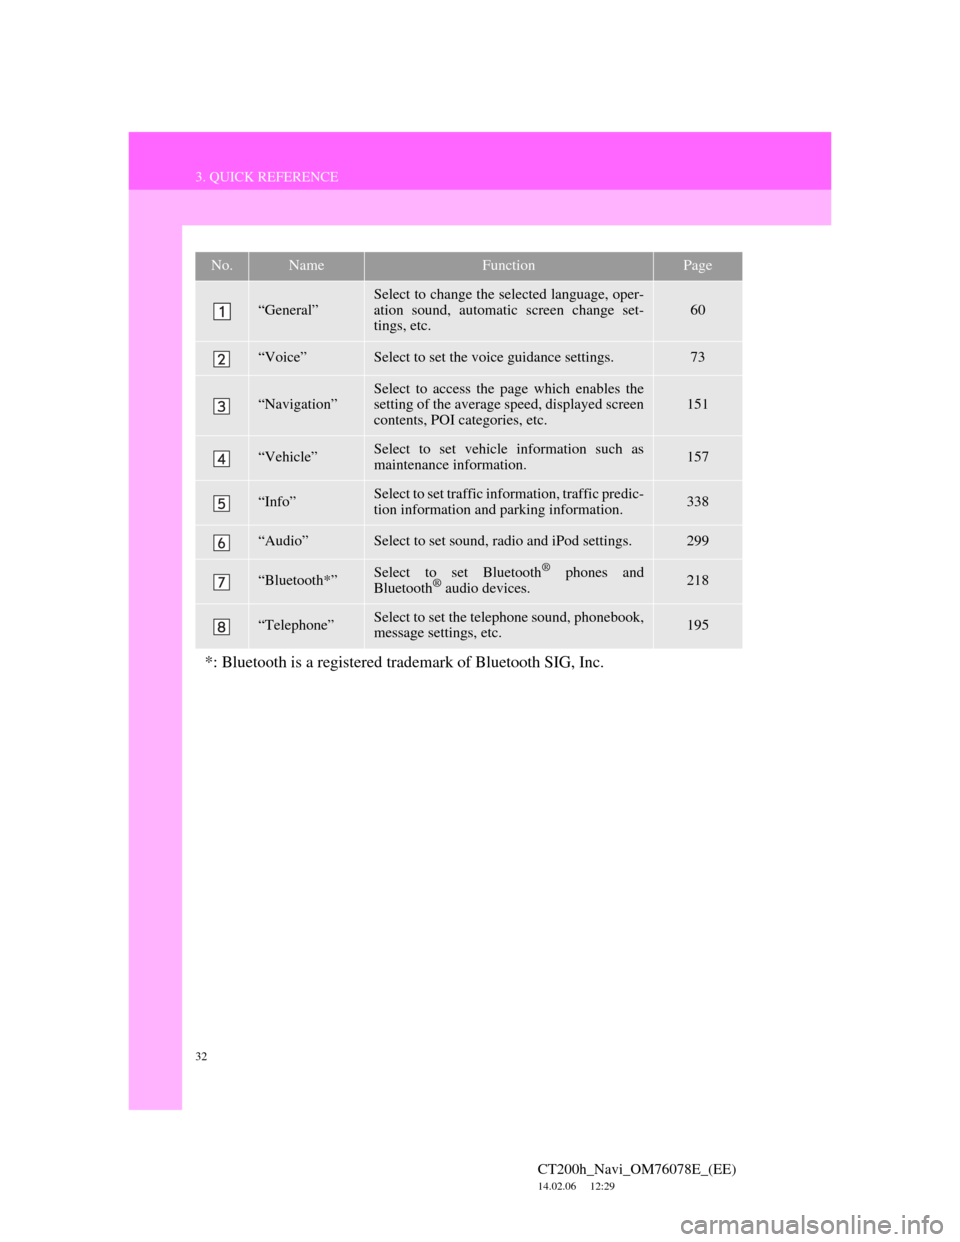
No.NameFunctionPage
“General”
Select to change the selected language, oper-
ation sound, automatic screen change set-
tings, etc.
60
“Voice”Select to set the voice guidance settings.73
“Navigation”Select to access the page which enables the
setting of the average speed, displayed screen
contents, POI categories, etc.151
“Vehicle”Select to set vehicle information such as
maintenance information.157
“Info”Select to set traffic information, traffic predic-
tion information and parking information.338
“Audio”Select to set sound, radio and iPod settings.299
“Bluetooth*”Select to set Bluetooth® phones and
Bluetooth® audio devices.218
“Telephone”Select to set the telephone sound, phonebook,
message settings, etc.195
*: Bluetooth is a registered trademark of Bluetooth SIG, Inc.
Page 36 of 436
36
CT200h_Navi_OM76078E_(EE)
14.02.06 12:29
1. BASIC INFORMATION BEFORE OPERATION
1. INITIAL SCREEN
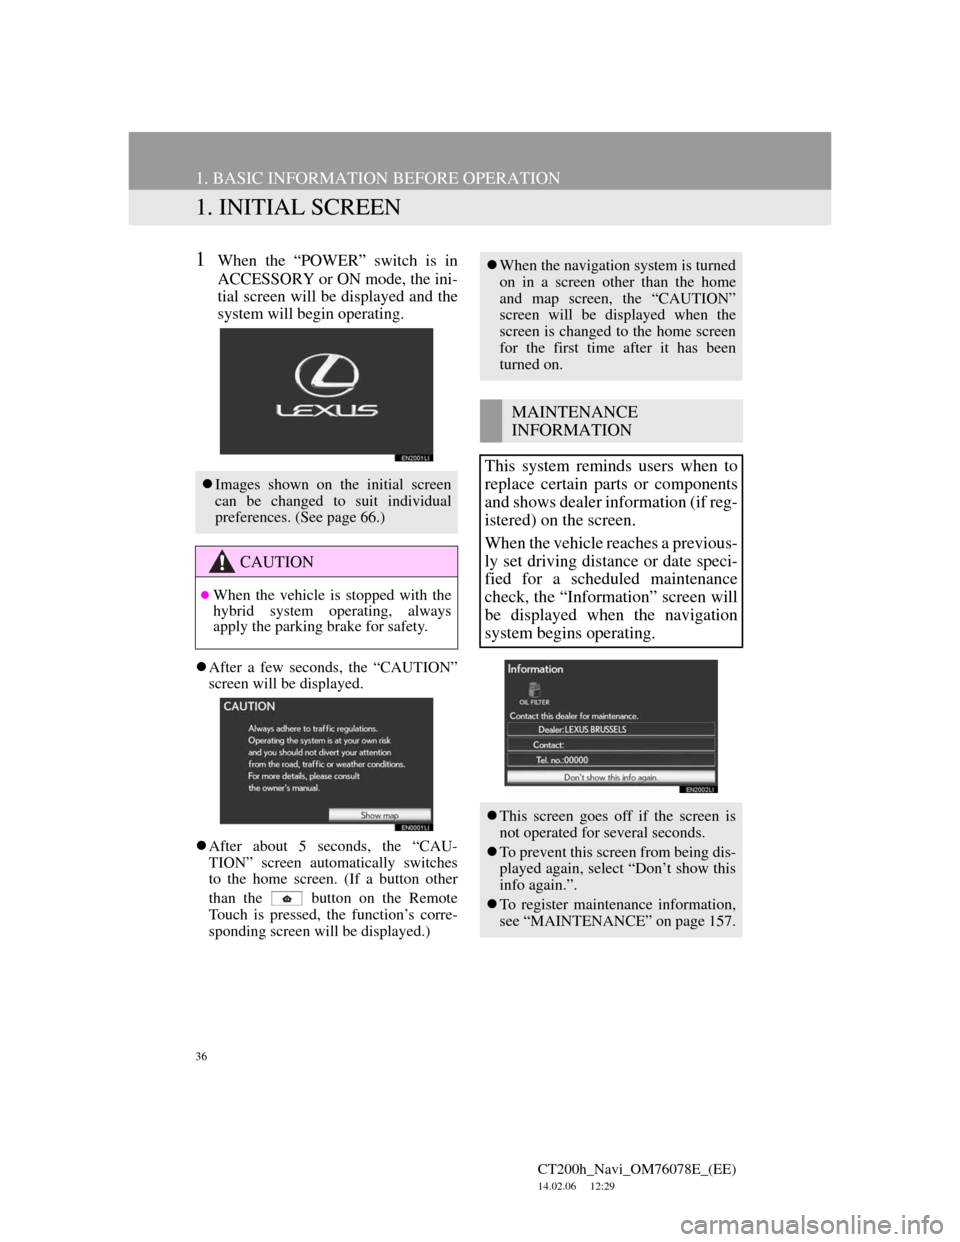
1When the “POWER” switch is in
ACCESSORY or ON mode, the ini-
tial screen will be displayed and the
system will begin operating.
After a few seconds, the “CAUTION”
screen will be displayed.
After about 5 seconds, the “CAU-
TION” screen automatically switches
to the home screen. (If a button other
than the
button on the Remote
Touch is pressed, the function’s corre-
sponding screen will be displayed.)
Images shown on the initial screen
can be changed to suit individual
preferences. (See page 66.)
CAUTION
When the vehicle is stopped with the
hybrid system operating, always
apply the parking brake for safety.
When the navigation system is turned
on in a screen other than the home
and map screen, the “CAUTION”
screen will be displayed when the
screen is changed to the home screen
for the first time after it has been
turned on.
MAINTENANCE
INFORMATION
This system reminds users when to
replace certain parts or components
and shows dealer information (if reg-
istered) on the screen.
When the vehicle reaches a previous-
ly set driving distance or date speci-
fied for a scheduled maintenance
check, the “Information” screen will
be displayed when the navigation
system begins operating.
This screen goes off if the screen is
not operated for several seconds.
To prevent this screen from being dis-
played again, select “Don’t show this
info again.”.
To register maintenance information,
see “MAINTENANCE” on page 157.
Page 37 of 436
37
1. BASIC INFORMATION BEFORE OPERATION
CT200h_Navi_OM76078E_(EE)
14.02.06 12:29
2
BASIC FUNCTION
2. DISPLAY OPERATION
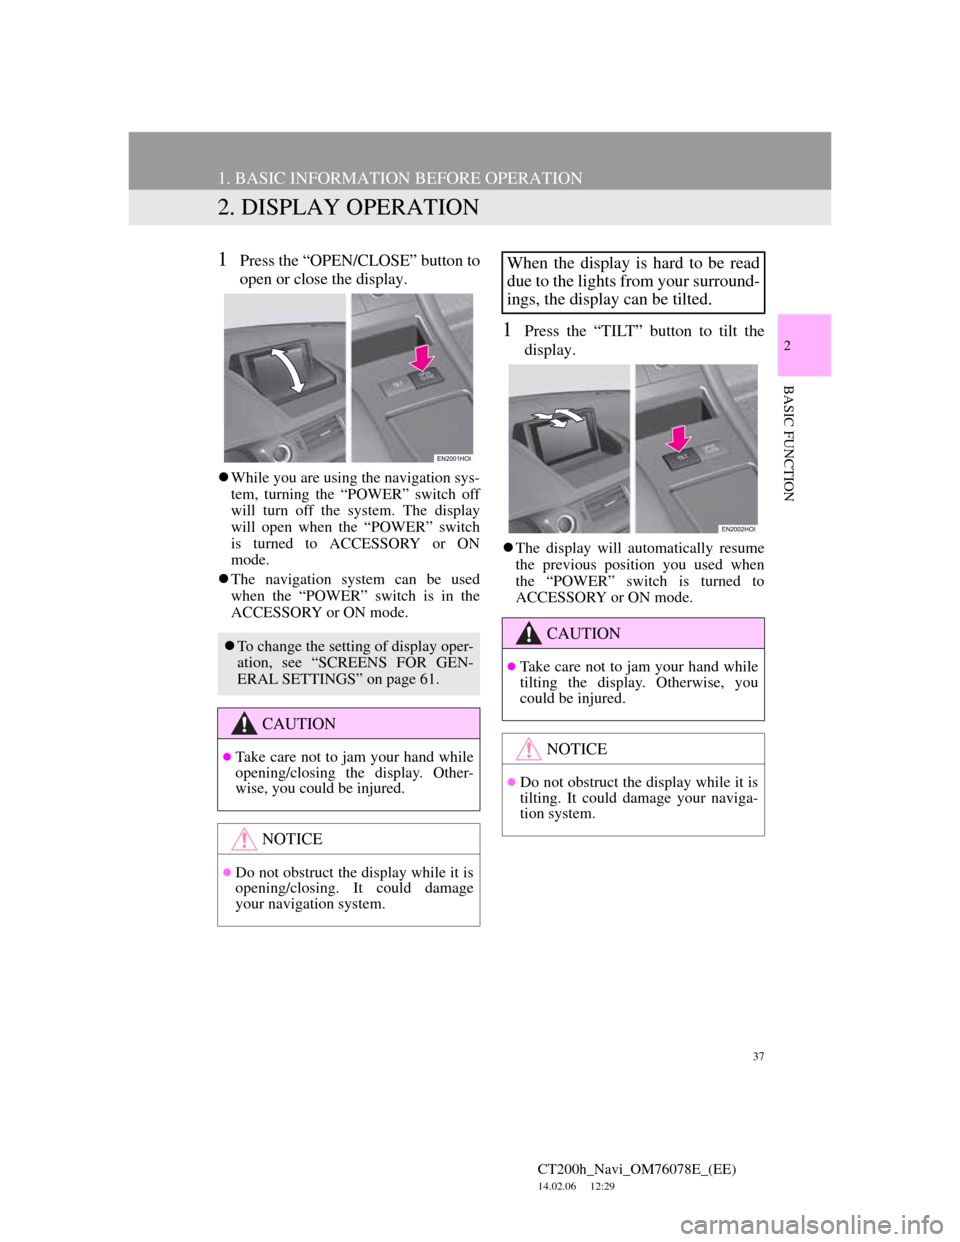
1Press the “OPEN/CLOSE” button to
open or close the display.
While you are using the navigation sys-
tem, turning the “POWER” switch off
will turn off the system. The display
will open when the “POWER” switch
is turned to ACCESSORY or ON
mode.
The navigation system can be used
when the “POWER” switch is in the
ACCESSORY or ON mode.
1Press the “TILT” button to tilt the
display.
The display will automatically resume
the previous position you used when
the “POWER” switch is turned to
ACCESSORY or ON mode.
To change the setting of display oper-
ation, see “SCREENS FOR GEN-
ERAL SETTINGS” on page 61.
CAUTION
Take care not to jam your hand while
opening/closing the display. Other-
wise, you could be injured.
NOTICE
Do not obstruct the display while it is
opening/closing. It could damage
your navigation system.
When the display is hard to be read
due to the lights from your surround-
ings, the display can be tilted.
CAUTION
Take care not to jam your hand while
tilting the display. Otherwise, you
could be injured.
NOTICE
Do not obstruct the display while it is
tilting. It could damage your naviga-
tion system.
Page 38 of 436
38
1. BASIC INFORMATION BEFORE OPERATION
CT200h_Navi_OM76078E_(EE)
14.02.06 12:29
3. HOW TO USE THE Remote Touch
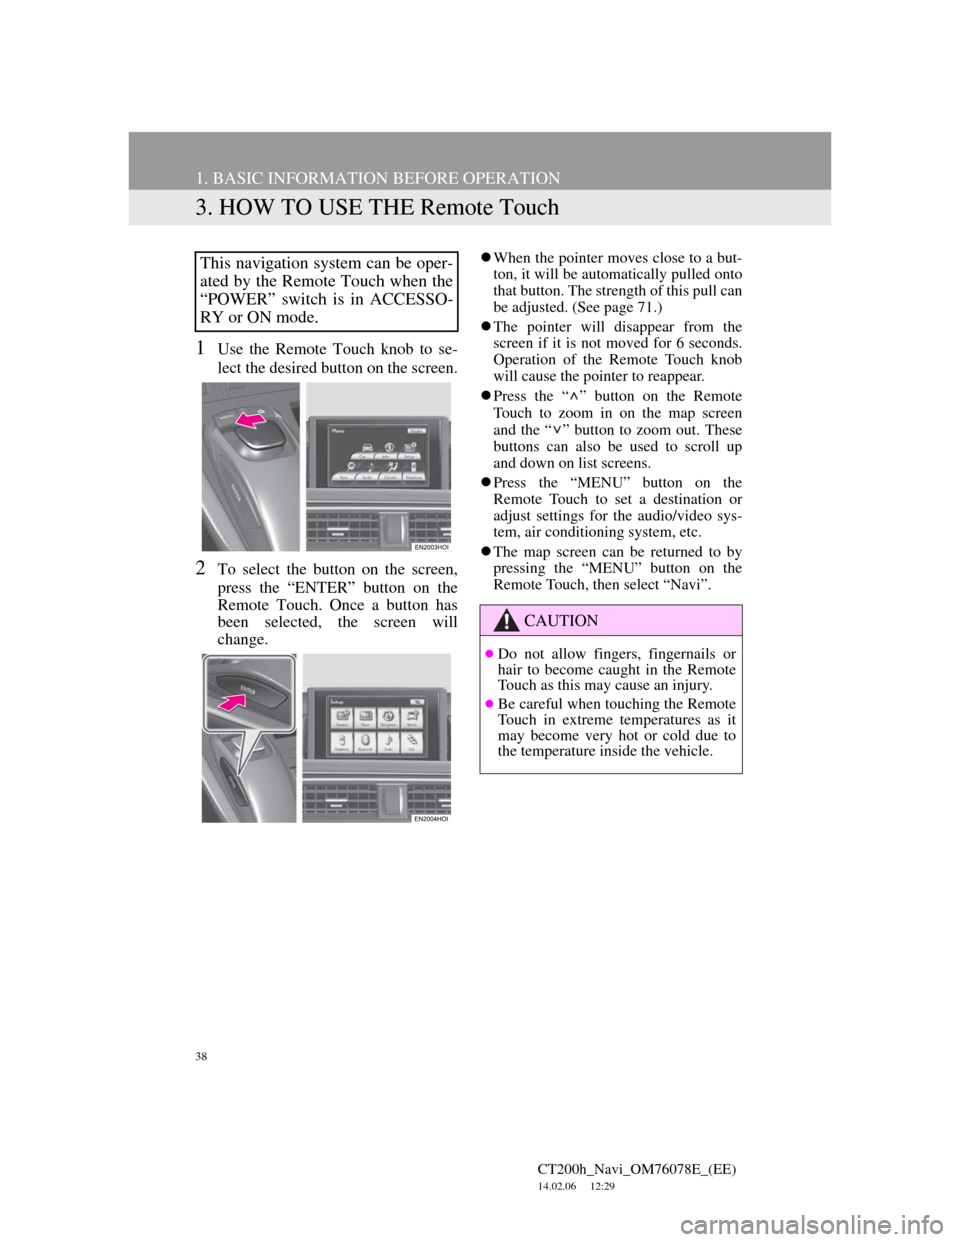
1Use the Remote Touch knob to se-
lect the desired button on the screen.
2To select the button on the screen,
press the “ENTER” button on the
Remote Touch. Once a button has
been selected, the screen will
change.
When the pointer moves close to a but-
ton, it will be automatically pulled onto
that button. The strength of this pull can
be adjusted. (See page 71.)
The pointer will disappear from the
screen if it is not moved for 6 seconds.
Operation of the Remote Touch knob
will cause the pointer to reappear.
Press the “ ” button on the Remote
Touch to zoom in on the map screen
and the “ ” button to zoom out. These
buttons can also be used to scroll up
and down on list screens.
Press the “MENU” button on the
Remote Touch to set a destination or
adjust settings for the audio/video sys-
tem, air conditioning system, etc.
The map screen can be returned to by
pressing the “MENU” button on the
Remote Touch, then select “Navi”.This navigation system can be oper-
ated by the Remote Touch when the
“POWER” switch is in ACCESSO-
RY or ON mode.
CAUTION
Do not allow fingers, fingernails or
hair to become caught in the Remote
Touch as this may cause an injury.
Be careful when touching the Remote
Touch in extreme temperatures as it
may become very hot or cold due to
the temperature inside the vehicle.
Page 47 of 436
47
1. BASIC INFORMATION BEFORE OPERATION
CT200h_Navi_OM76078E_(EE)
14.02.06 12:29
2
BASIC FUNCTION
6. MAP SCREEN OPERATION
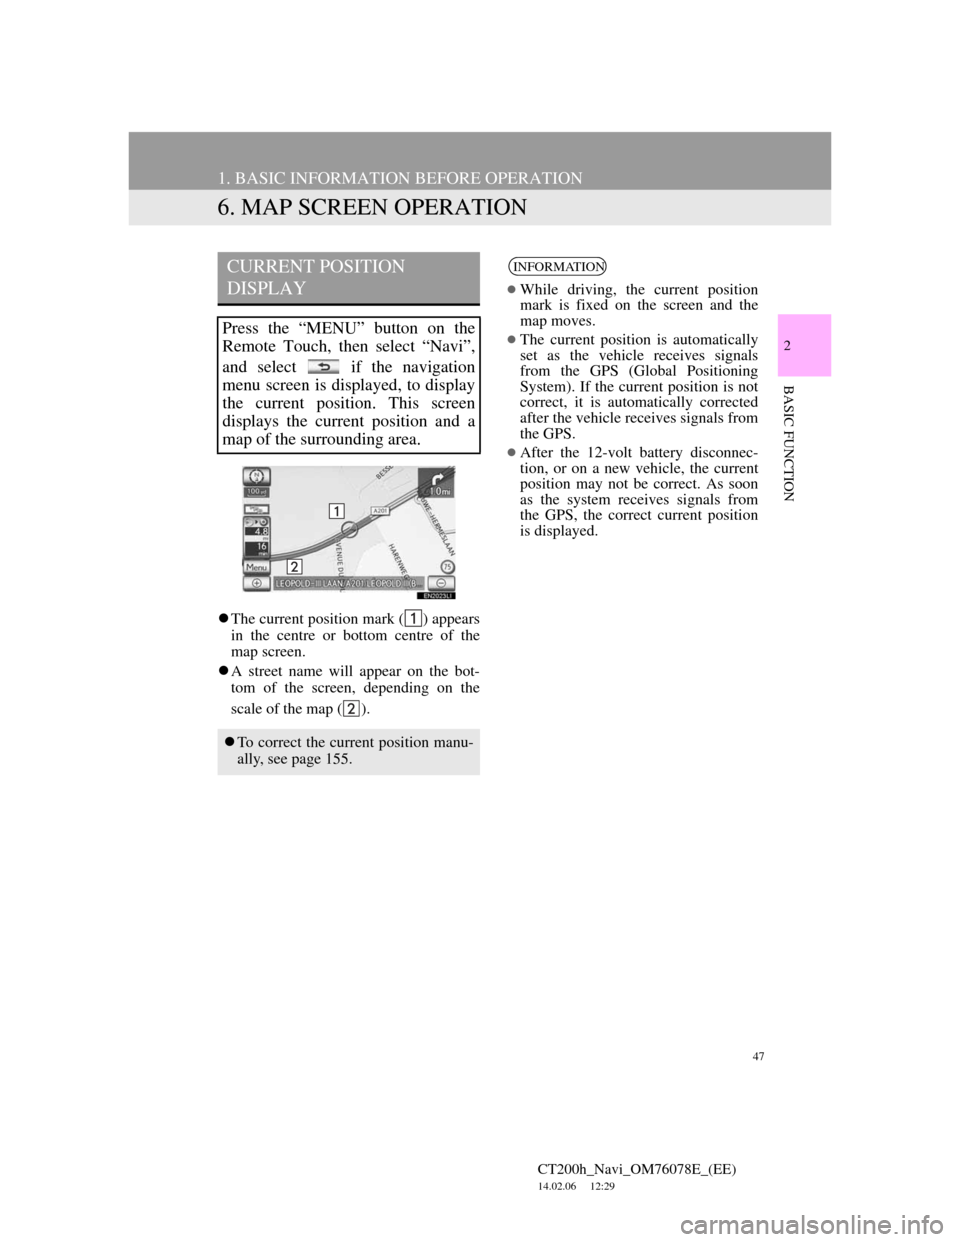
The current position mark ( ) appears
in the centre or bottom centre of the
map screen.
A street name will appear on the bot-
tom of the screen, depending on the
scale of the map ( ).
CURRENT POSITION
DISPLAY
Press the “MENU” button on the
Remote Touch, then select “Navi”,
and select if the navigation
menu screen is displayed, to display
the current position. This screen
displays the current position and a
map of the surrounding area.
To correct the current position manu-
ally, see page 155.
INFORMATION
While driving, the current position
mark is fixed on the screen and the
map moves.
The current position is automatically
set as the vehicle receives signals
from the GPS (Global Positioning
System). If the current position is not
correct, it is automatically corrected
after the vehicle receives signals from
the GPS.
After the 12-volt battery disconnec-
tion, or on a new vehicle, the current
position may not be correct. As soon
as the system receives signals from
the GPS, the correct current position
is displayed.
Page 66 of 436
66
2. SETUP
CT200h_Navi_OM76078E_(EE)
14.02.06 12:29
1Press the “MENU” button on the
Remote Touch, then select “Setup”.
2Select “General” on the “Setup”
screen.
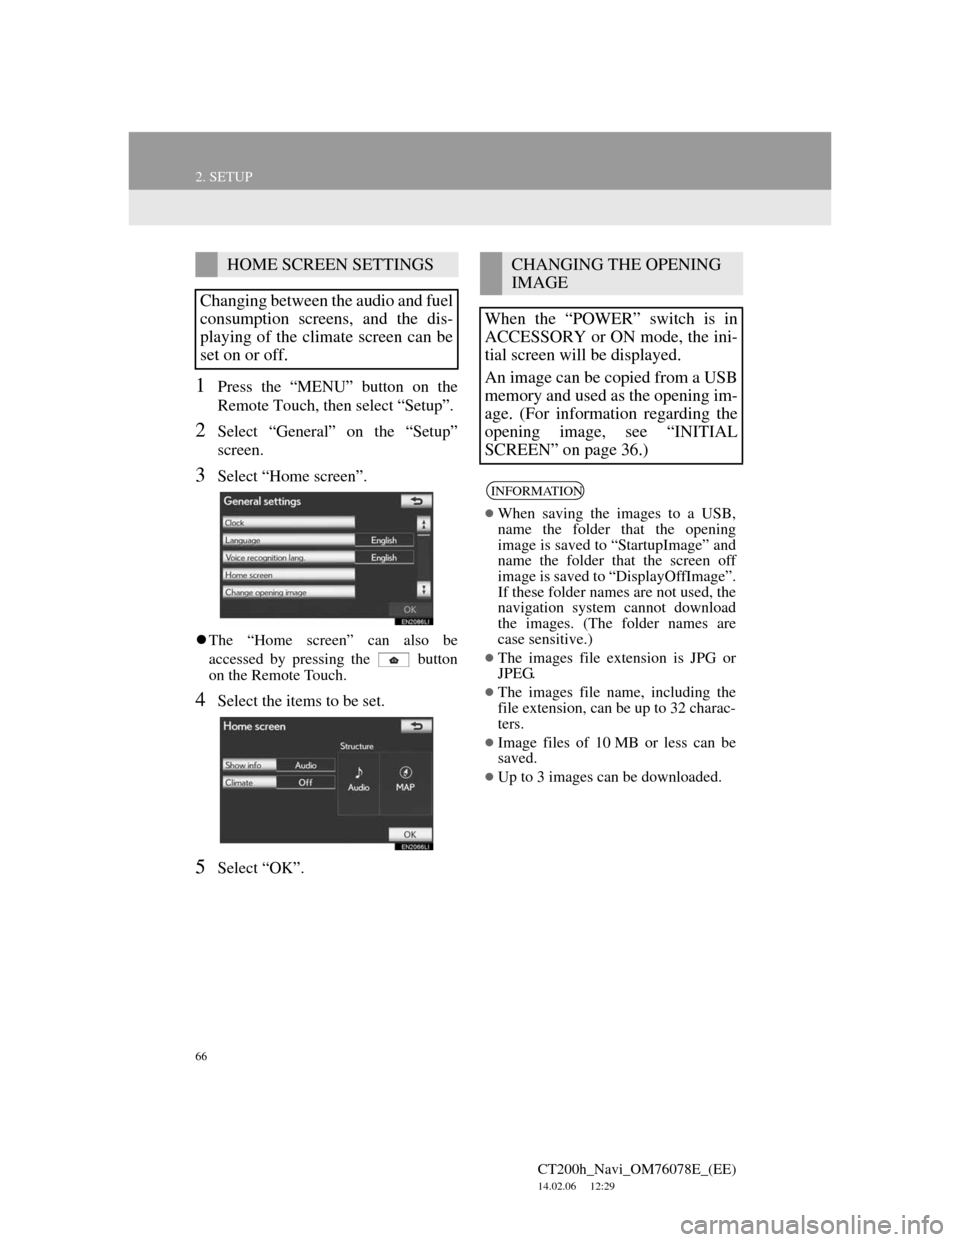
3Select “Home screen”.
The “Home screen” can also be
accessed by pressing the button
on the Remote Touch.
4Select the items to be set.
5Select “OK”.
HOME SCREEN SETTINGS
Changing between the audio and fuel
consumption screens, and the dis-
playing of the climate screen can be
set on or off.CHANGING THE OPENING
IMAGE
When the “POWER” switch is in
ACCESSORY or ON mode, the ini-
tial screen will be displayed.
An image can be copied from a USB
memory and used as the opening im-
age. (For information regarding the
opening image, see “INITIAL
SCREEN” on page 36.)
INFORMATION
When saving the images to a USB,
name the folder that the opening
image is saved to “StartupImage” and
name the folder that the screen off
image is saved to “DisplayOffImage”.
If these folder names are not used, the
navigation system cannot download
the images. (The folder names are
case sensitive.)
The images file extension is JPG or
JPEG.
The images file name, including the
file extension, can be up to 32 charac-
ters.
Image files of 10 MB or less can be
saved.
Up to 3 images can be downloaded.
Page 77 of 436
3
77
1
2
3
4
5
6
7
CT200h_Navi_OM76078E_(EE)
14.02.06 12:29
8
9
10
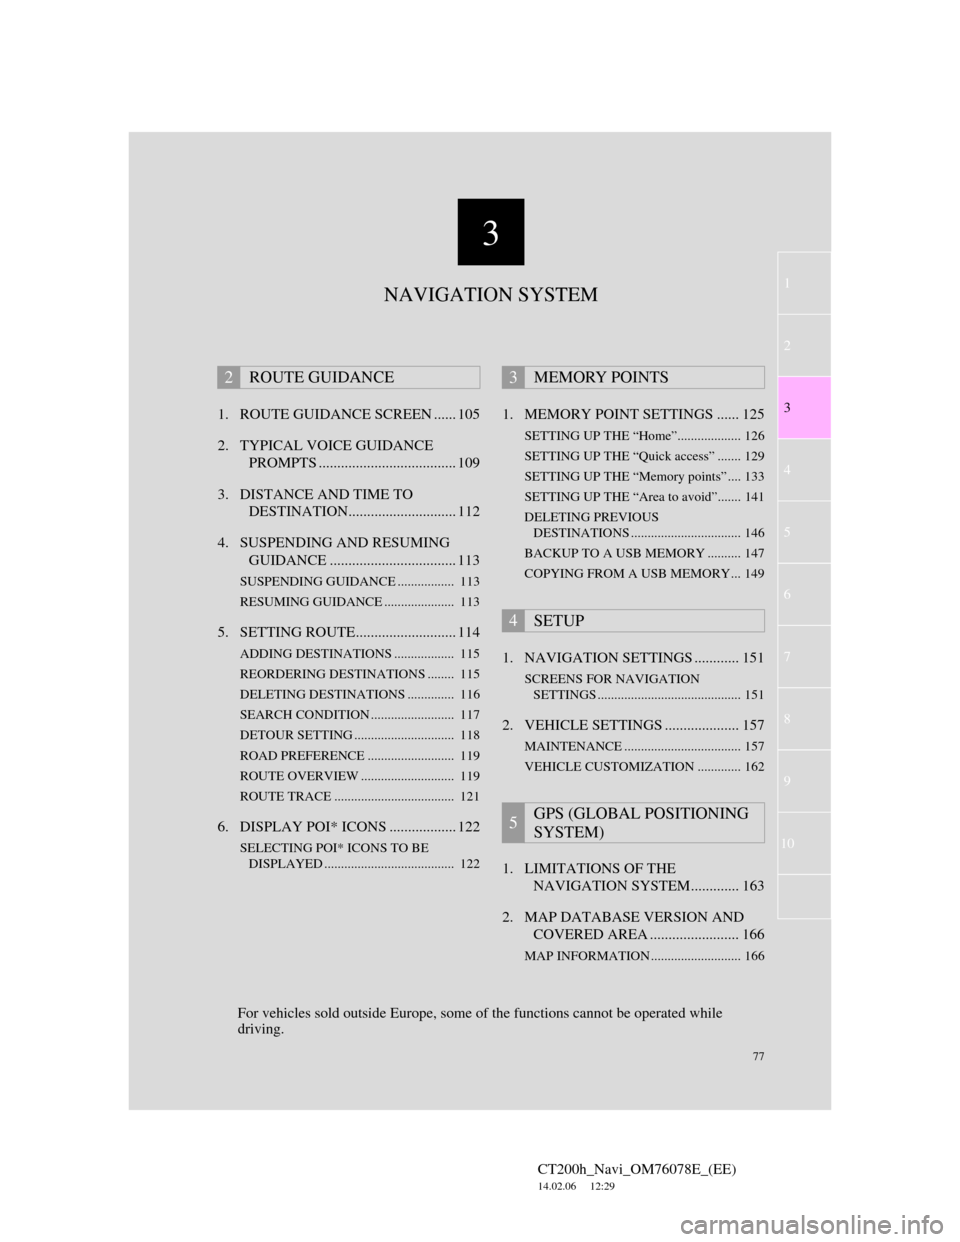
1. ROUTE GUIDANCE SCREEN ...... 105
2. TYPICAL VOICE GUIDANCE
PROMPTS ..................................... 109
3. DISTANCE AND TIME TO
DESTINATION............................. 112
4. SUSPENDING AND RESUMING
GUIDANCE .................................. 113
SUSPENDING GUIDANCE ................. 113
RESUMING GUIDANCE ..................... 113
5. SETTING ROUTE........................... 114
ADDING DESTINATIONS .................. 115
REORDERING DESTINATIONS ........ 115
DELETING DESTINATIONS .............. 116
SEARCH CONDITION ......................... 117
DETOUR SETTING .............................. 118
ROAD PREFERENCE .......................... 119
ROUTE OVERVIEW ............................ 119
ROUTE TRACE .................................... 121
6. DISPLAY POI* ICONS .................. 122
SELECTING POI* ICONS TO BE
DISPLAYED ....................................... 122
1. MEMORY POINT SETTINGS ...... 125
SETTING UP THE “Home”................... 126
SETTING UP THE “Quick access” ....... 129
SETTING UP THE “Memory points” .... 133
SETTING UP THE “Area to avoid”....... 141
DELETING PREVIOUS
DESTINATIONS ................................. 146
BACKUP TO A USB MEMORY .......... 147
COPYING FROM A USB MEMORY... 149
1. NAVIGATION SETTINGS ............ 151
SCREENS FOR NAVIGATION
SETTINGS ........................................... 151
2. VEHICLE SETTINGS .................... 157
MAINTENANCE ................................... 157
VEHICLE CUSTOMIZATION ............. 162
1. LIMITATIONS OF THE
NAVIGATION SYSTEM............. 163
2. MAP DATABASE VERSION AND
COVERED AREA ........................ 166
MAP INFORMATION ........................... 166
2ROUTE GUIDANCE3MEMORY POINTS
4SETUP
5GPS (GLOBAL POSITIONING
SYSTEM)
NAVIGATION SYSTEM
For vehicles sold outside Europe, some of the functions cannot be operated while
driving.
Page 78 of 436
78
CT200h_Navi_OM76078E_(EE)
14.02.06 12:29
1. DESTINATION SEARCH
1. QUICK REFERENCE
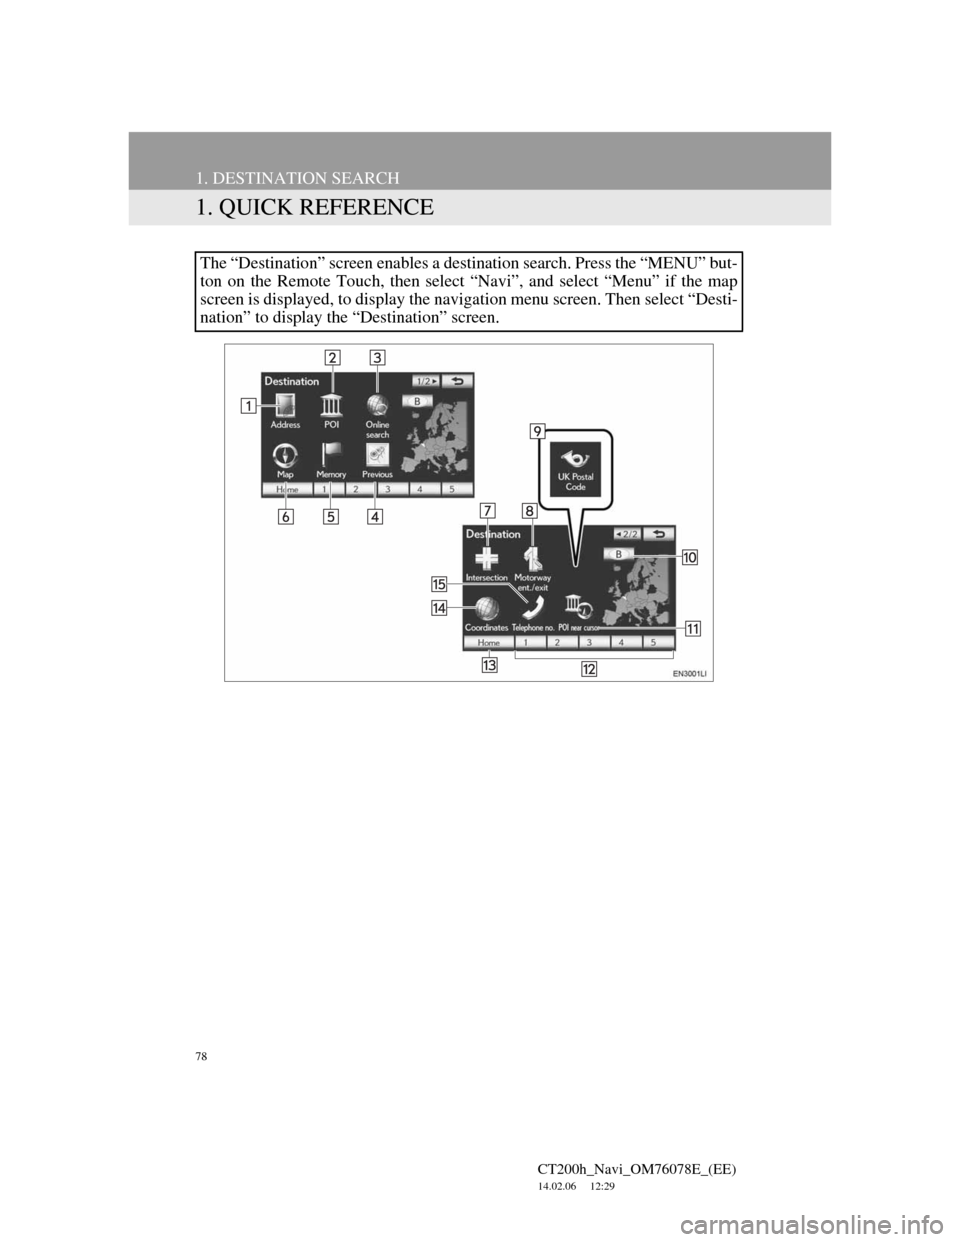
The “Destination” screen enables a destination search. Press the “MENU” but-
ton on the Remote Touch, then select “Navi”, and select “Menu” if the map
screen is displayed, to display the navigation menu screen. Then select “Desti-
nation” to display the “Destination” screen.