Lexus GS350 2007 Using the front audio system / LEXUS 2007 GS430/350 OWNER'S MANUAL (OM30A04U)
Manufacturer: LEXUS, Model Year: 2007,
Model line: GS350,
Model: Lexus GS350 2007
Pages: 562, PDF Size: 17.95 MB
Lexus GS350 2007 Using the front audio system / LEXUS 2007 GS430/350 OWNER'S MANUAL (OM30A04U)
GS350 2007
Lexus
Lexus
https://www.carmanualsonline.info/img/36/15301/w960_15301-0.png
Lexus GS350 2007 Using the front audio system / LEXUS 2007 GS430/350 OWNER'S MANUAL (OM30A04U)
Trending: tires, traction control, transmission oil, ESP, warning light, fuel pump, brake rotor
Page 121 of 562
101
2-1. Driving procedures
2
When driving
■Shift position uses
*1: To improve fuel consumption and reduce noises, set the shift lever in the
“D” position for normal driving.
*2: By selecting shift ranges using “S” mode, y
ou can control engine braking
forces.
■ Selecting a driving mode
The following patterns can be selec ted to suit curr
ent driving and
operating conditions.
Power mode
For powerful acceleration and
driving in mountainous regions.
Normal mode
Snow mode
For accelerating and driving on
slippery road surfaces, such as
on snow.
Press “SNOW” to return to nor-
mal mode.
Shift positionFunction
PParking the vehicle or starting the engine
RReversing
NNeutral
DNormal driving*1
S“S” mode driving*2 ( P. 1 0 2 )
Page 122 of 562
102
2-1. Driving procedures
Changing shift ranges in “S” mode
Shift the shift lever to the “S” position and operate the shift lever.Upshifting
Downshifting
The initial shift range in “S ” mode is automatically set to “5” or “4” accor
d-
ing to the vehicle's speed. However, th e initial shif
t range may be set to
“3” or “2” if the AI-SHIFT has opera ted while the shift lever was in the “D”
position. (
P. 1 0 3 )
■ Shift r
anges and their functions
●Y
ou can choose from 6 levels of engine braking force.
●A lo
wer shift range will provide gr eater engine braking force than a
higher shift range, and the engine revolutions will also increase.
● If y
ou accelerate while in ranges “1” to “5”, the shift range may auto -
matically range up in accordance with the vehicle's speed.
Page 123 of 562

103
2-1. Driving procedures
2
When driving
■Downshifting restrictions in “S” mode
The shift lever cannot be downshifted if the following speeds are exceeded. (The
w
arning buzzer will sound twice in this situation.)
The maximum speeds can get lower when the engine is not warm such as in cold
climates or before warm-up.
■When driving with the cruise control syst em (or dynamic radar cruise control sys-
tem)
The engine brake will not operate in the “S” mode, e
ven when downshifting to “5” or
“4”. ( P. 1 2 4 , 127 )
■Snow mode automatic deactivation
Snow mode is automatically deactivated if the e
ngine switch is turned to “ACC” or
“IG-ON” mode after driving in snow mode.
■If the shift lever cannot be shifted from “P”
P.
4 8 4
■If the indicator does not come on even after shifting the shift lever to “S”
This may indicate a malfunction in the automatic transmission system. Have the
v
ehicle inspected by your Lexus dealer immediately.
(In this situation, the vehicle will operate as if the shift lever is in “D”.)
■AI-SHIFT
The AI-SHIFT automatically shifts the gear to
the optimal position according to the
driver's input and driving conditions.
The AI-SHIFT automatically operates when th e
shift lever is in the D position. (Shift-
ing the shift lever to the S position cancels the function.)
Downshifting
Maximum speed
mph (km/h)
GS430GS350
5 4120 (194)124 (200)
4 388 (142)87 (141)
3 259 (95)56 (91)
2 124 (38)28 (45)
Page 124 of 562
104
2-1. Driving procedures
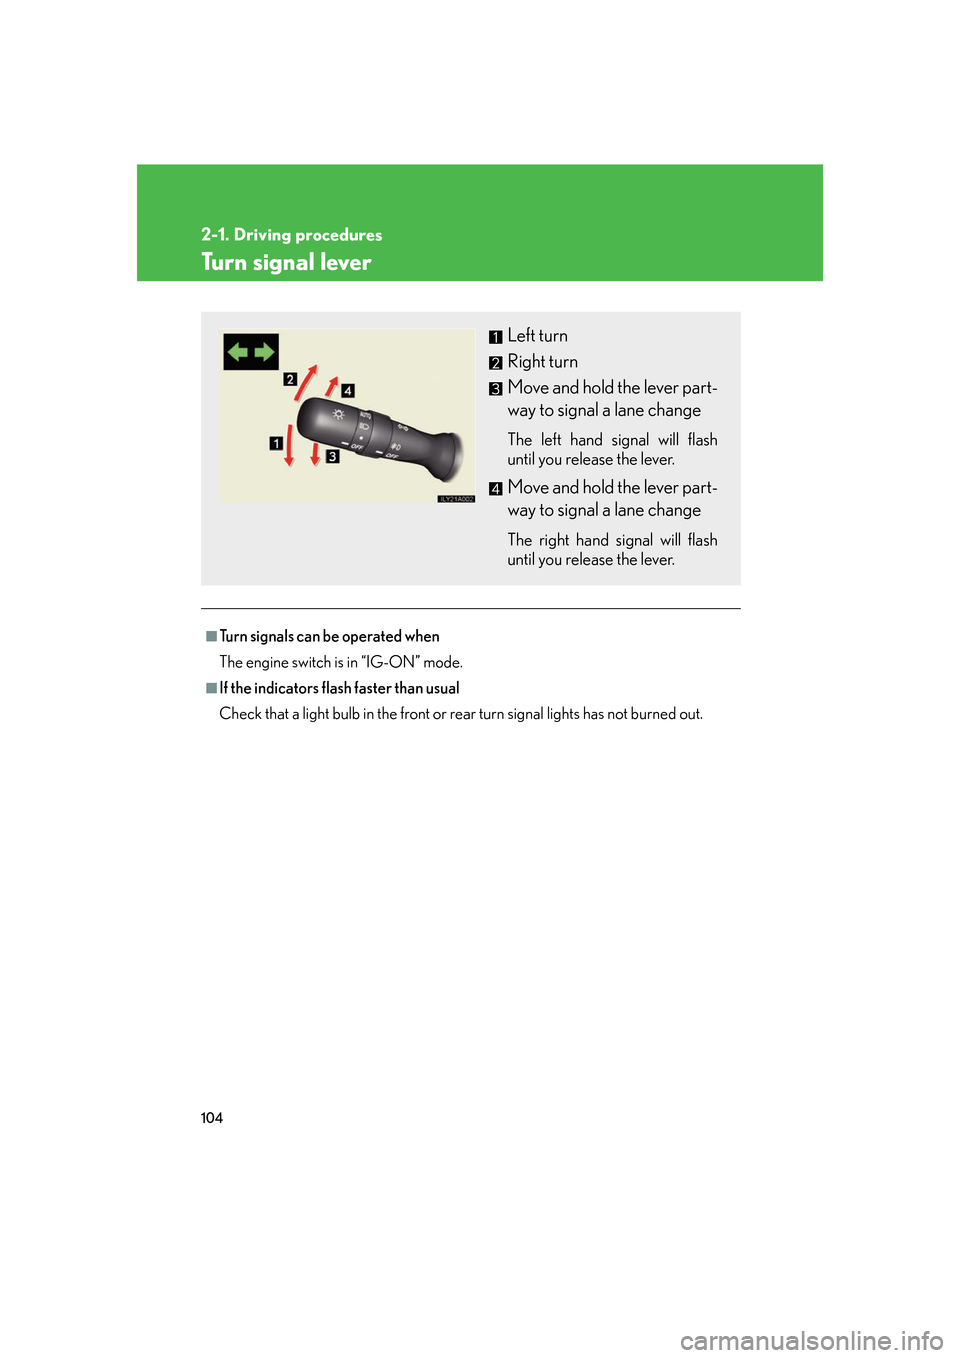
Turn signal lever
■Turn signals can be operated when
The engine switch is in “IG-ON” mode.
■If the indicators flash faster than usual
Check that a light bulb in the front or rear
turn signal lights has not burned out.
Left turn
Right turn
Move and hold the lever part-
way to signal a lane change
The left hand signal will flash
until you release the lever.
Move and hold the lever part -
way to signal a lane change
The right hand signal will flash
until you release the lever.
Page 125 of 562
105
2-1. Driving procedures
2
When driving
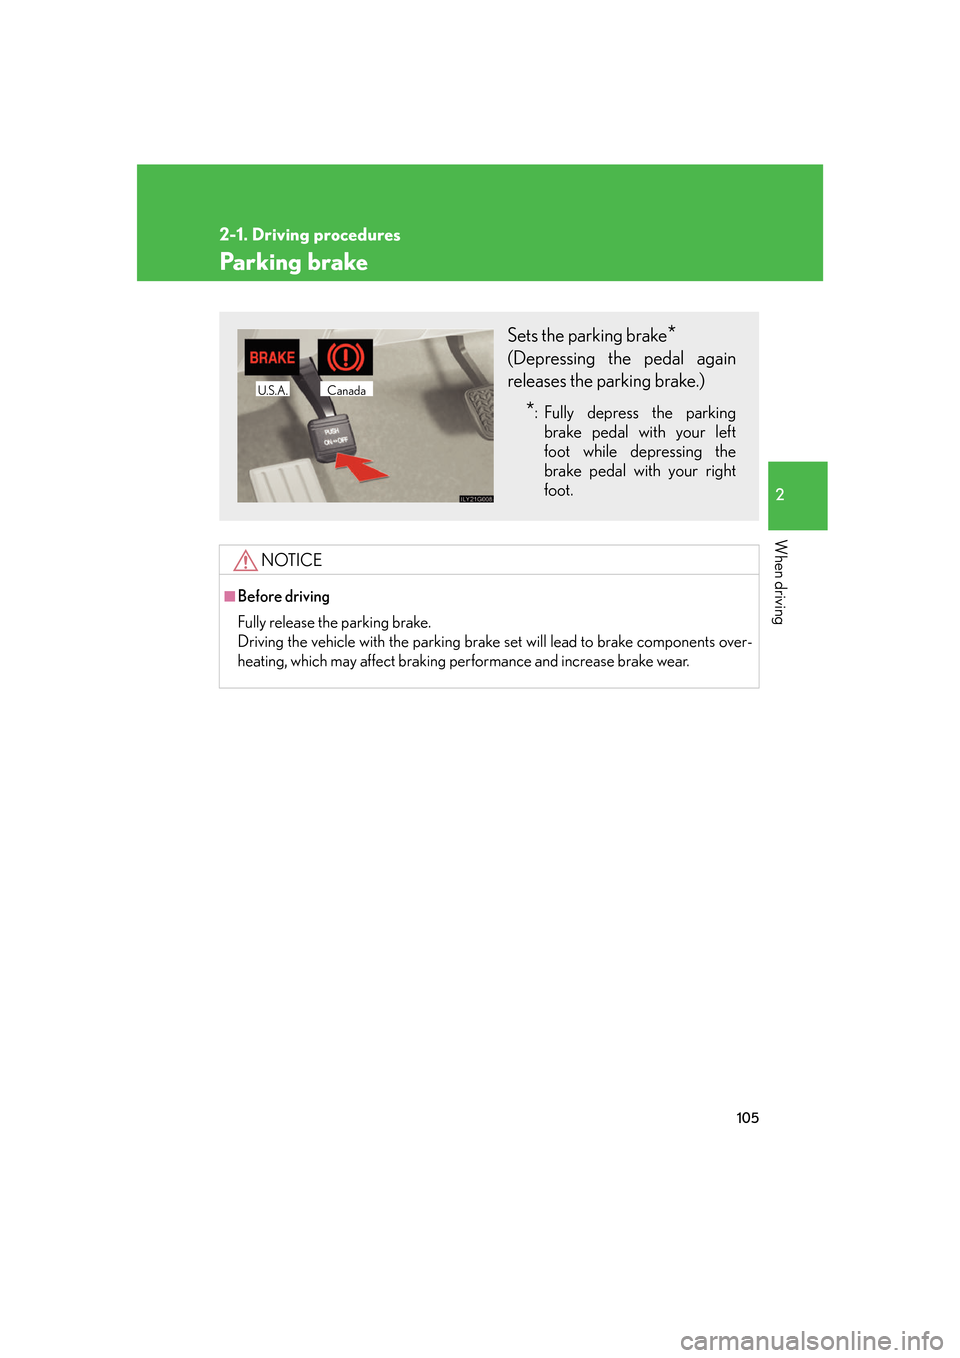
Parking brake
NOTICE
■Before driving
Fully release the parking brake.
Driving the vehicle with the parking brake set will lead to brake components over-
heating, which may affect braking performance and increase brake wear.
Sets the parking brake*
(Depressing the pedal again
releases the parking brake.)
*: Fully depress the parking
brake pedal with your left
foot while depressing the
brake pedal with your right
foot.
CanadaU.S.A.
Page 126 of 562
106
2-2. Instrument cluster
Gauges and meters
Tachometer
Displays the number of engine speed in revolutions per minute. (RPM)
Speedometer
Displays the vehicle speed.
Fuel gauge
Displays the quantity of fuel remaining in the tank.
Engine coolant temperature gauge
Displays the engine coolant temperature.
Multi-information display
P. 113
Odometer
Displays the total distance the vehicle has been driven.
Trip meter
Displays the distance the vehicle has been driven since the meter was last
reset. Trip meters A and B can be used to record and display different dis-
tances independently.
Page 127 of 562
107
2-2. Instrument cluster
2
When driving
Odometer/trip meter and trip meter reset button
Changes the display
Resets the trip meter driving
range to “0”.
Instrument panel light control
The brightness of the instrument panel lights excluding the clock and out-
side temperature display, can be adjusted.
Brighter
Darker
Maximum brightness
Page 128 of 562
108
2-2. Instrument cluster
Light sensitive optitron meter
To reduce glare or reflection of the instrument cluster, the cluster glass is
tinted automatically or manually. You can select a setting from 7 modes.
Display the present setting, then
change the mode.
To change the mode, press the but-
ton once and then again within 6
se
conds.
Each time you press the button, the
mode changes in the
following
order;
1. “AUTO - Norm”
2. “AUTO - Lo”
3. “AUTO - Hi”
4. “MANUAL - 1”
5. “MANUAL - 2”
6. “MANUAL - 3”
7. “ M A N U A L - 4 ”
Mode 1 to 3: The cluster glass tint
will be adjusted automatically
depending on t
he intensity of sun -
light in the surrounding.
Mode 4 to 7: The cluster glass tint
will be
fixed when a certain level of
sunlight is reached in the surround -
ing.
(“Norm” to “Hi”, “1” to “4” referring
to the le
vel of cluster glass tint.)
Page 129 of 562
109
2-2. Instrument cluster
2
When driving
NOTICE
■To prevent damage to the engine and its components
●Do not let the indicator needle of the tachometer enter the red zone, which indi-
cates the maximum engine speed.
●The engine may be overheating if the temperature gauge is in the red zone (“H”). In
this case, immediately stop the vehicle in a safe place. Check the engine after it has
cooled completely. ( P. 4 9 2 )
■To activate the light sensitivity function properly
Do not affix a sticker or window tint to the rear window glass, or put an object
behind the rear seat.
Page 130 of 562
110
2-2. Instrument cluster
Indicators and warning lights
The indicator and warning lights on the instrument cluster and center
panel inform the driver of the status of the vehicle’s various systems.
Instrument cluster
Center panel
Trending: clock setting, parking brake, spare tire, fuel fill door release, instrument panel, remote control, spare wheel


