Lexus GS350 2013 Navigation manual
Manufacturer: LEXUS, Model Year: 2013, Model line: GS350, Model: Lexus GS350 2013Pages: 256, PDF Size: 30.05 MB
Page 151 of 256
151
4. SETUP
GS450h_300h_350_250_NAVI_OM30D64E_(EE)
13.10.23 11:07
3
NAVIGATION SYSTEM
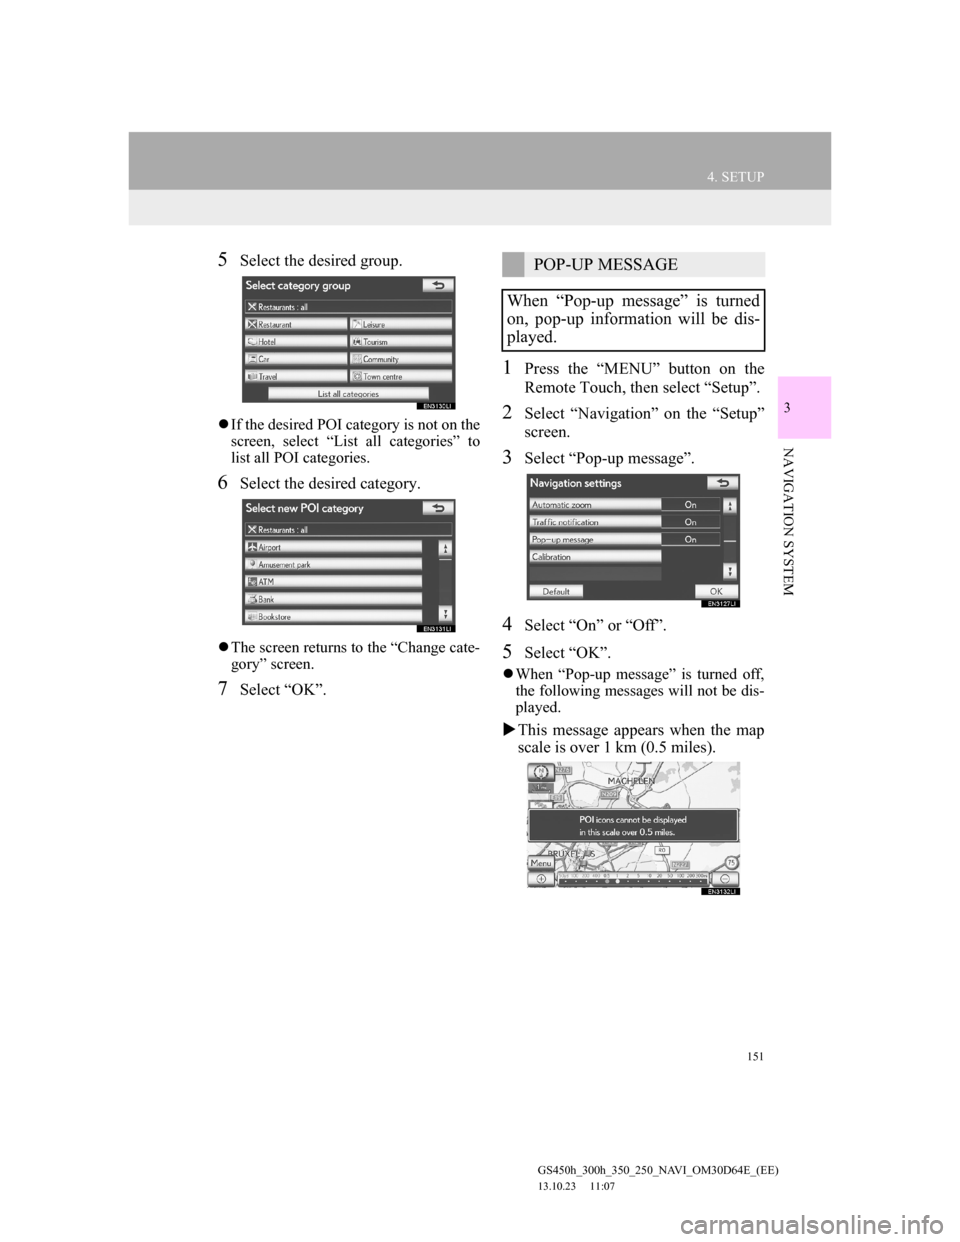
5Select the desired group.
If the desired POI category is not on the
screen, select “List all categories” to
list all POI categories.
6Select the desired category.
The screen returns to the “Change cate-
gory” screen.
7Select “OK”.
1Press the “MENU” button on the
Remote Touch, then select “Setup”.
2Select “Navigation” on the “Setup”
screen.
3Select “Pop-up message”.
4Select “On” or “Off”.
5Select “OK”.
When “Pop-up message” is turned off,
the following messages will not be dis-
played.
This message appears when the map
scale is over 1 km (0.5 miles).
POP-UP MESSAGE
When “Pop-up message” is turned
on, pop-up information will be dis-
played.
Page 152 of 256
152
4. SETUP
GS450h_300h_350_250_NAVI_OM30D64E_(EE)
13.10.23 11:07
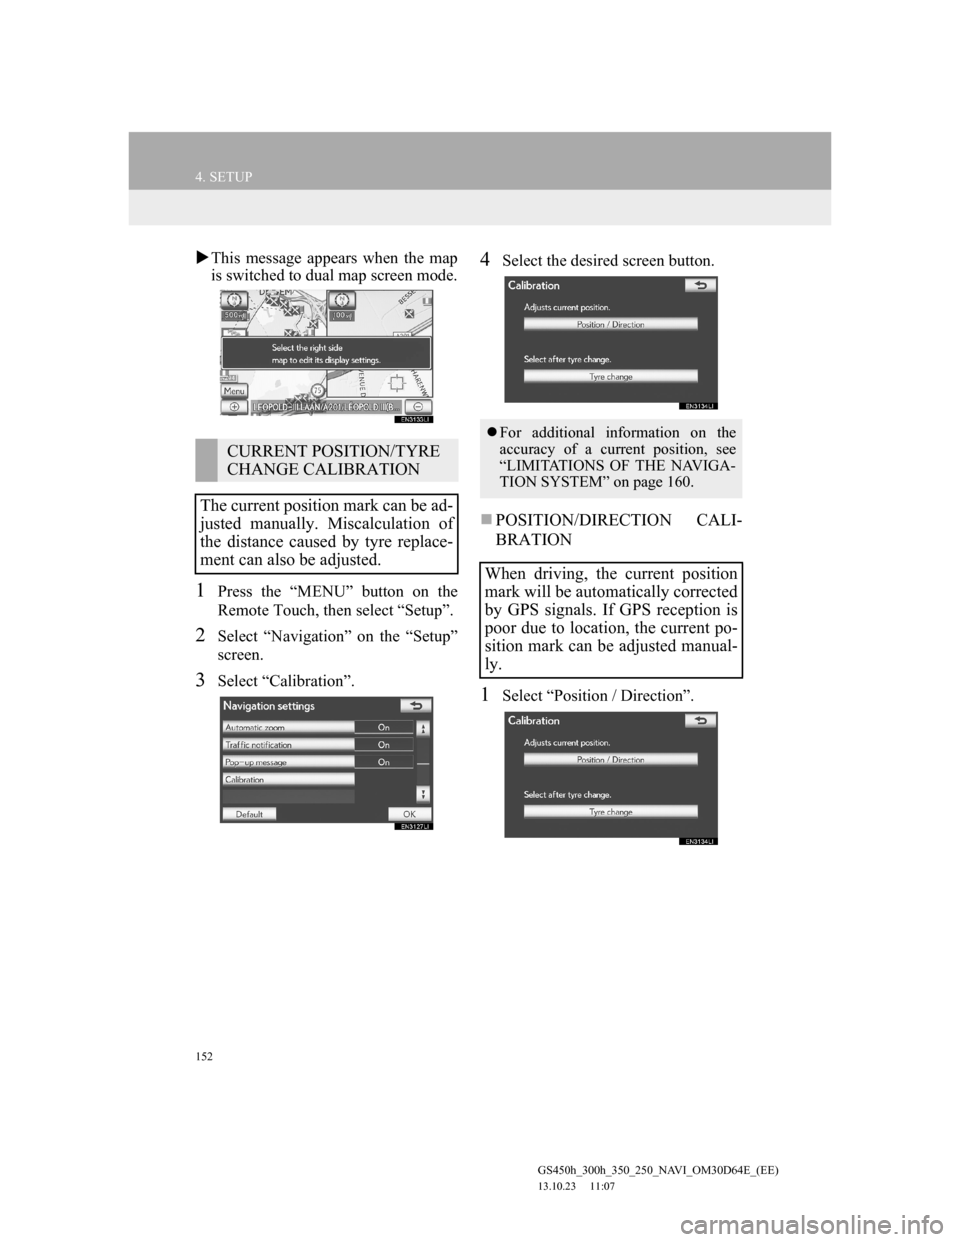
This message appears when the map
is switched to dual map screen mode.
1Press the “MENU” button on the
Remote Touch, then select “Setup”.
2Select “Navigation” on the “Setup”
screen.
3Select “Calibration”.
4Select the desired screen button.
POSITION/DIRECTION CALI-
BRATION
1Select “Position / Direction”.
CURRENT POSITION/TYRE
CHANGE CALIBRATION
The current position mark can be ad-
justed manually. Miscalculation of
the distance caused by tyre replace-
ment can also be adjusted.
For additional information on the
accuracy of a current position, see
“LIMITATIONS OF THE NAVIGA-
TION SYSTEM” on page 160.
When driving, the current position
mark will be automatically corrected
by GPS signals. If GPS reception is
poor due to location, the current po-
sition mark can be adjusted manual-
ly.
Page 153 of 256
153
4. SETUP
GS450h_300h_350_250_NAVI_OM30D64E_(EE)
13.10.23 11:07
3
NAVIGATION SYSTEM
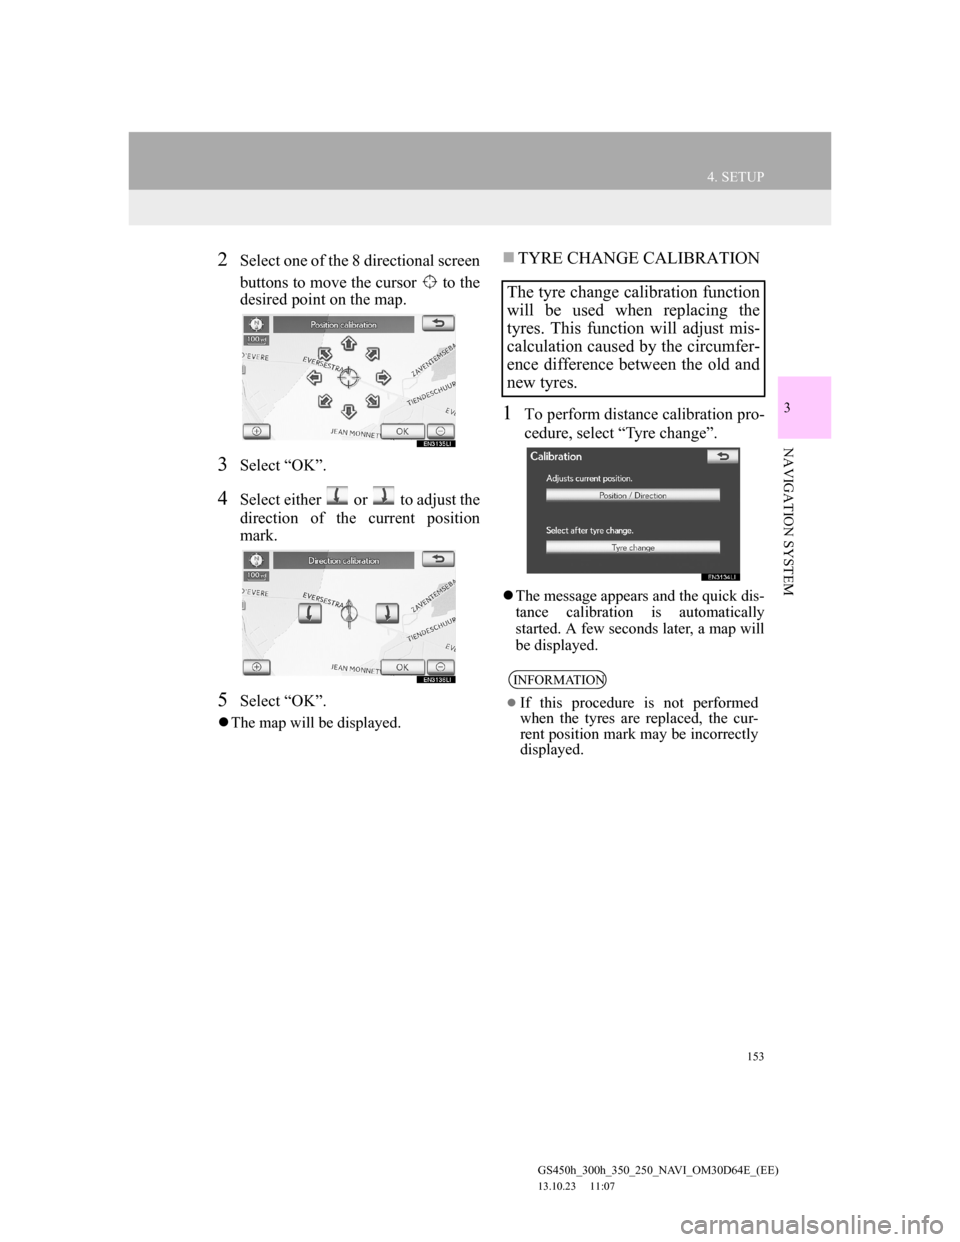
2Select one of the 8 directional screen
buttons to move the cursor to the
desired point on the map.
3Select “OK”.
4Select either or to adjust the
direction of the current position
mark.
5Select “OK”.
The map will be displayed.
TYRE CHANGE CALIBRATION
1To perform distance calibration pro-
cedure, select “Tyre change”.
The message appears and the quick dis-
tance calibration is automatically
started. A few seconds later, a map will
be displayed.
The tyre change calibration function
will be used when replacing the
tyres. This function will adjust mis-
calculation caused by the circumfer-
ence difference between the old and
new tyres.
INFORMATION
If this procedure is not performed
when the tyres are replaced, the cur-
rent position mark may be incorrectly
displayed.
Page 154 of 256
154
4. SETUP
GS450h_300h_350_250_NAVI_OM30D64E_(EE)
13.10.23 11:07
2. VEHICLE SETTINGS
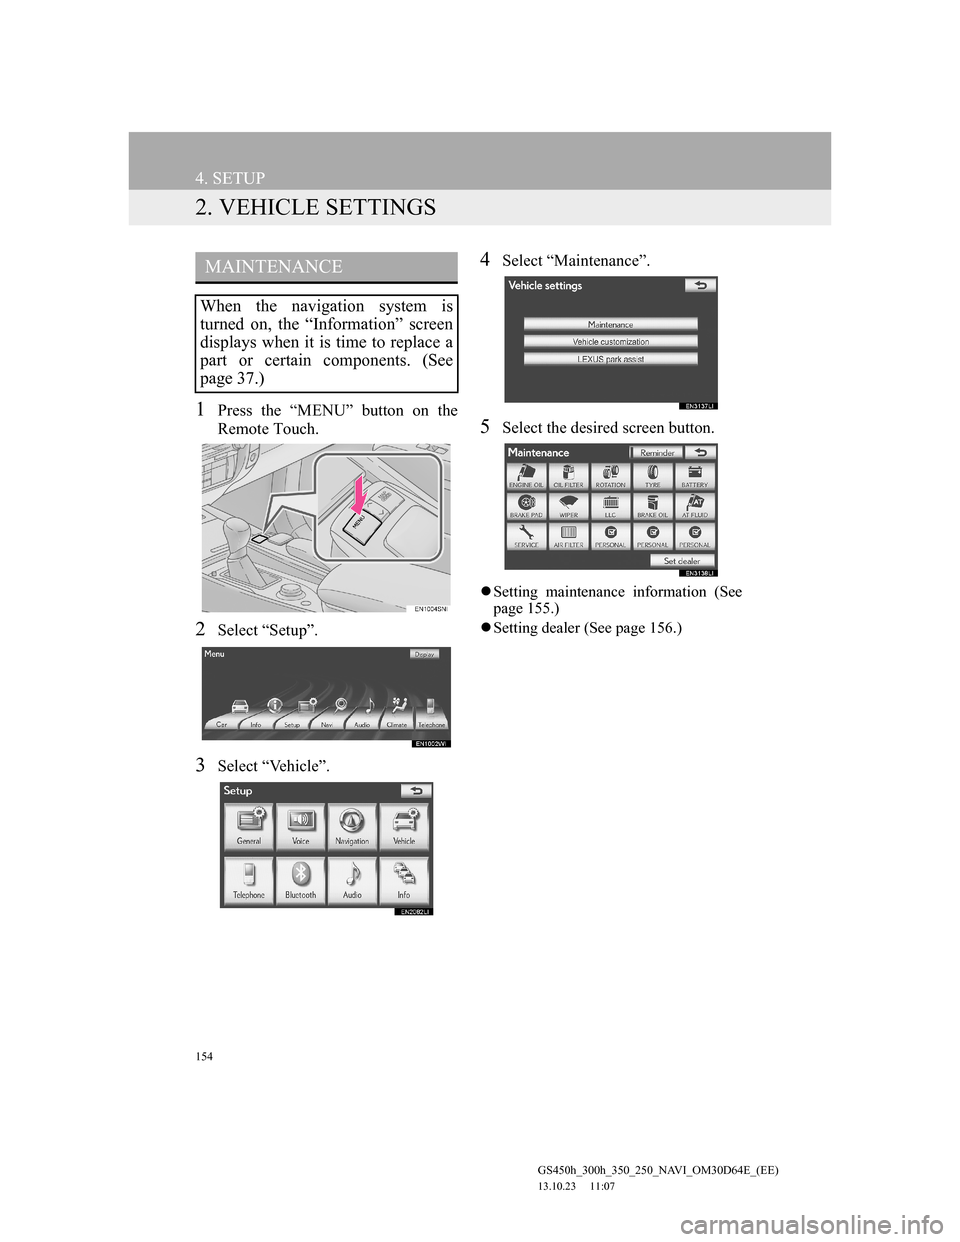
1Press the “MENU” button on the
Remote Touch.
2Select “Setup”.
3Select “Vehicle”.
4Select “Maintenance”.
5Select the desired screen button.
Setting maintenance information (See
page 155.)
Setting dealer (See page 156.)
MAINTENANCE
When the navigation system is
turned on, the “Information” screen
displays when it is time to replace a
part or certain components. (See
page 37.)
Page 155 of 256
155
4. SETUP
GS450h_300h_350_250_NAVI_OM30D64E_(EE)
13.10.23 11:07
3
NAVIGATION SYSTEM
1Press the “MENU” button on the
Remote Touch, then select “Setup”.
2Select “Vehicle” on the “Setup”
screen.
3Select “Maintenance” on the “Vehi-
cle settings” screen.
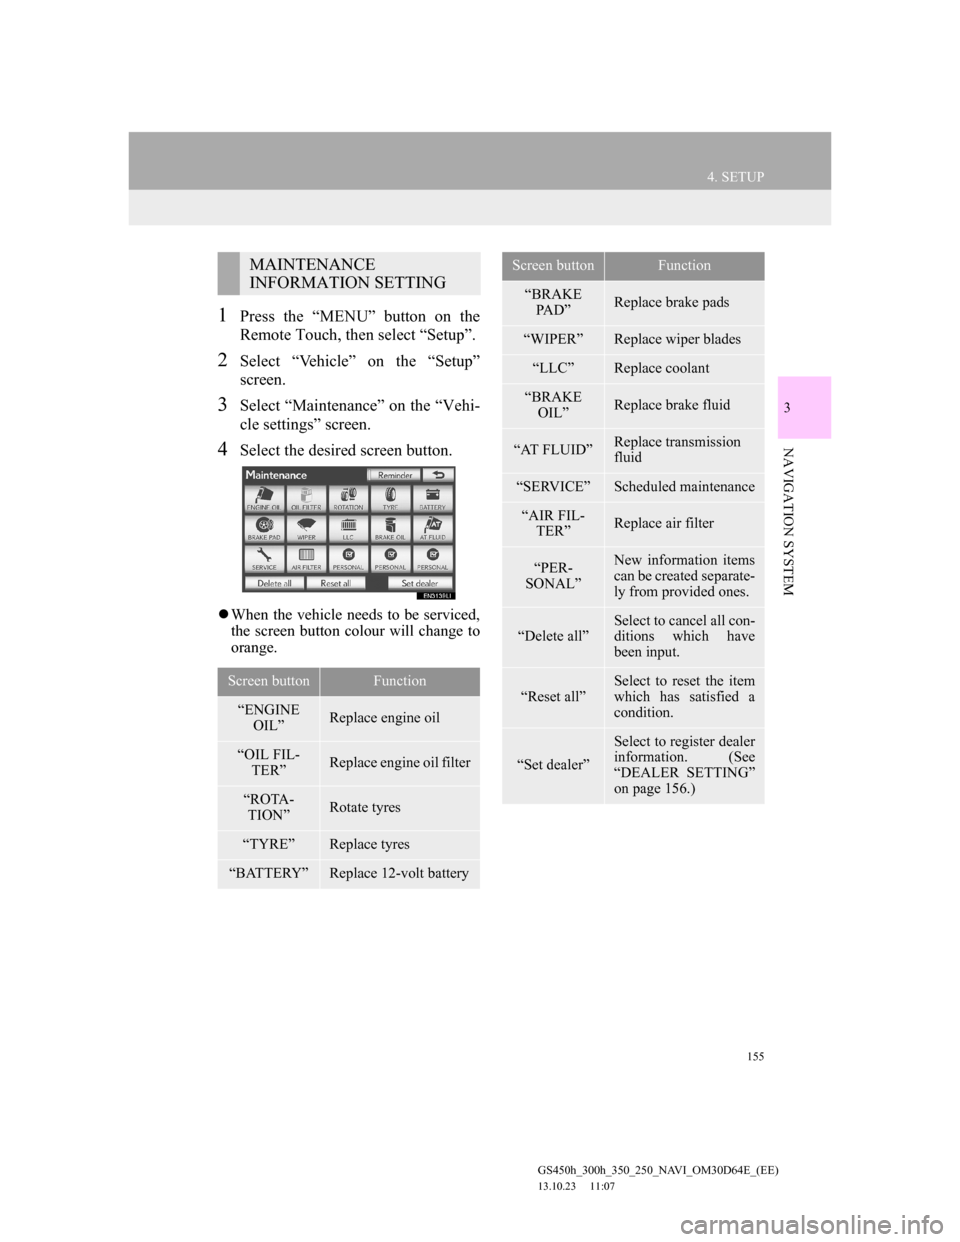
4Select the desired screen button.
When the vehicle needs to be serviced,
the screen button colour will change to
orange.
MAINTENANCE
INFORMATION SETTING
Screen buttonFunction
“ENGINE
OIL”Replace engine oil
“OIL FIL-
TER”Replace engine oil filter
“ROTA-
TION”Rotate tyres
“TYRE”Replace tyres
“BATTERY”Replace 12-volt battery
“BRAKE
PAD”Replace brake pads
“WIPER”Replace wiper blades
“LLC”Replace coolant
“BRAKE
OIL”Replace brake fluid
“AT FLUID”Replace transmission
fluid
“SERVICE”Scheduled maintenance
“AIR FIL-
TER”Replace air filter
“PER-
SONAL”New information items
can be created separate-
ly from provided ones.
“Delete all”Select to cancel all con-
ditions which have
been input.
“Reset all”
Select to reset the item
which has satisfied a
condition.
“Set dealer”
Select to register dealer
information. (See
“DEALER SETTING”
on page 156.)
Screen buttonFunction
Page 156 of 256
156
4. SETUP
GS450h_300h_350_250_NAVI_OM30D64E_(EE)
13.10.23 11:07
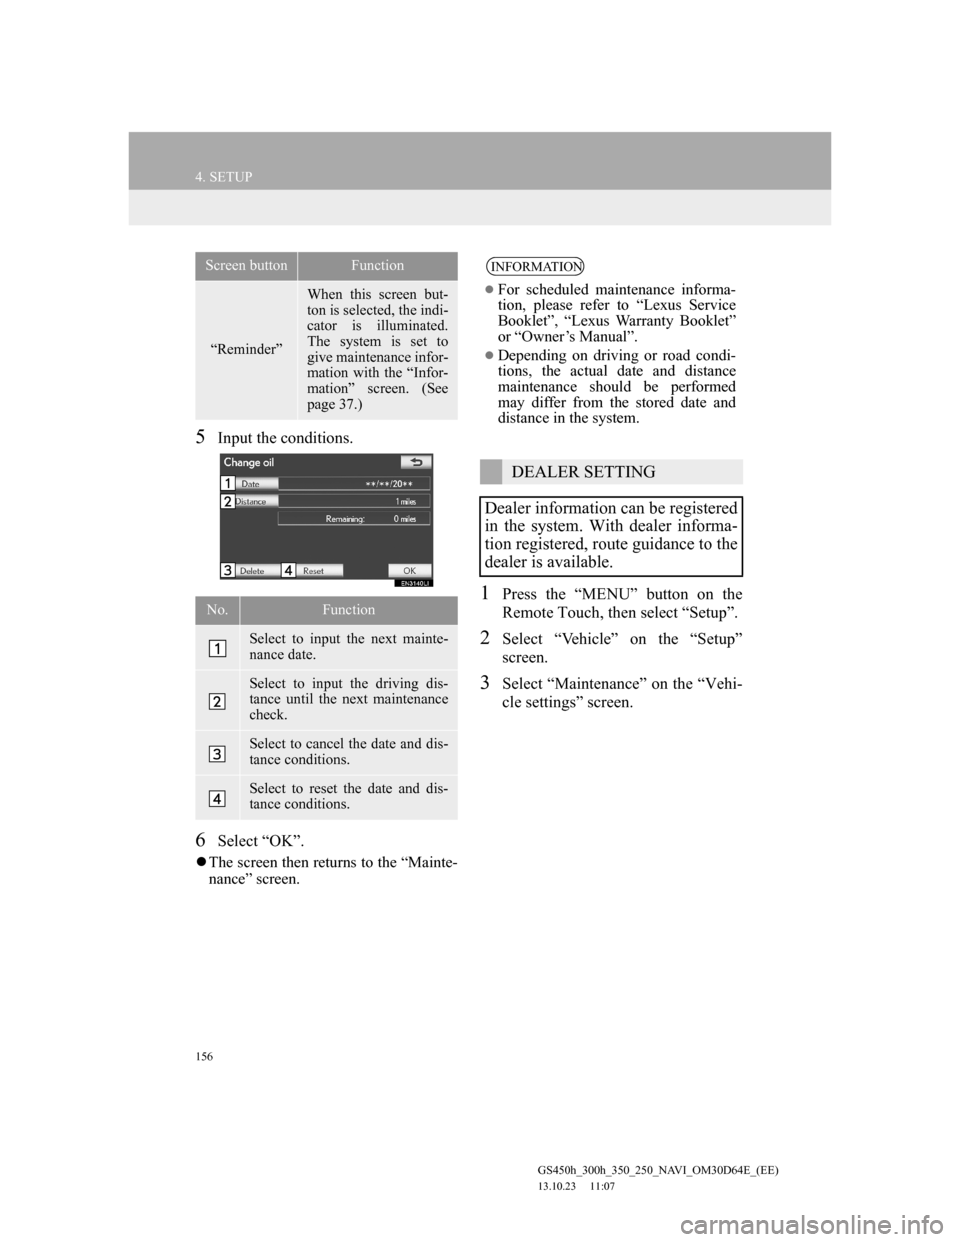
5Input the conditions.
6Select “OK”.
The screen then returns to the “Mainte-
nance” screen.
1Press the “MENU” button on the
Remote Touch, then select “Setup”.
2Select “Vehicle” on the “Setup”
screen.
3Select “Maintenance” on the “Vehi-
cle settings” screen.
“Reminder”
When this screen but-
ton is selected, the indi-
cator is illuminated.
The system is set to
give maintenance infor-
mation with the “Infor-
mation” screen. (See
page 37.)
No.Function
Select to input the next mainte-
nance date.
Select to input the driving dis-
tance until the next maintenance
check.
Select to cancel the date and dis-
tance conditions.
Select to reset the date and dis-
tance conditions.
Screen buttonFunctionINFORMATION
For scheduled maintenance informa-
tion, please refer to “Lexus Service
Booklet”, “Lexus Warranty Booklet”
or “Owner’s Manual”.
Depending on driving or road condi-
tions, the actual date and distance
maintenance should be performed
may differ from the stored date and
distance in the system.
DEALER SETTING
Dealer information can be registered
in the system. With dealer informa-
tion registered, route guidance to the
dealer is available.
Page 157 of 256
157
4. SETUP
GS450h_300h_350_250_NAVI_OM30D64E_(EE)
13.10.23 11:07
3
NAVIGATION SYSTEM
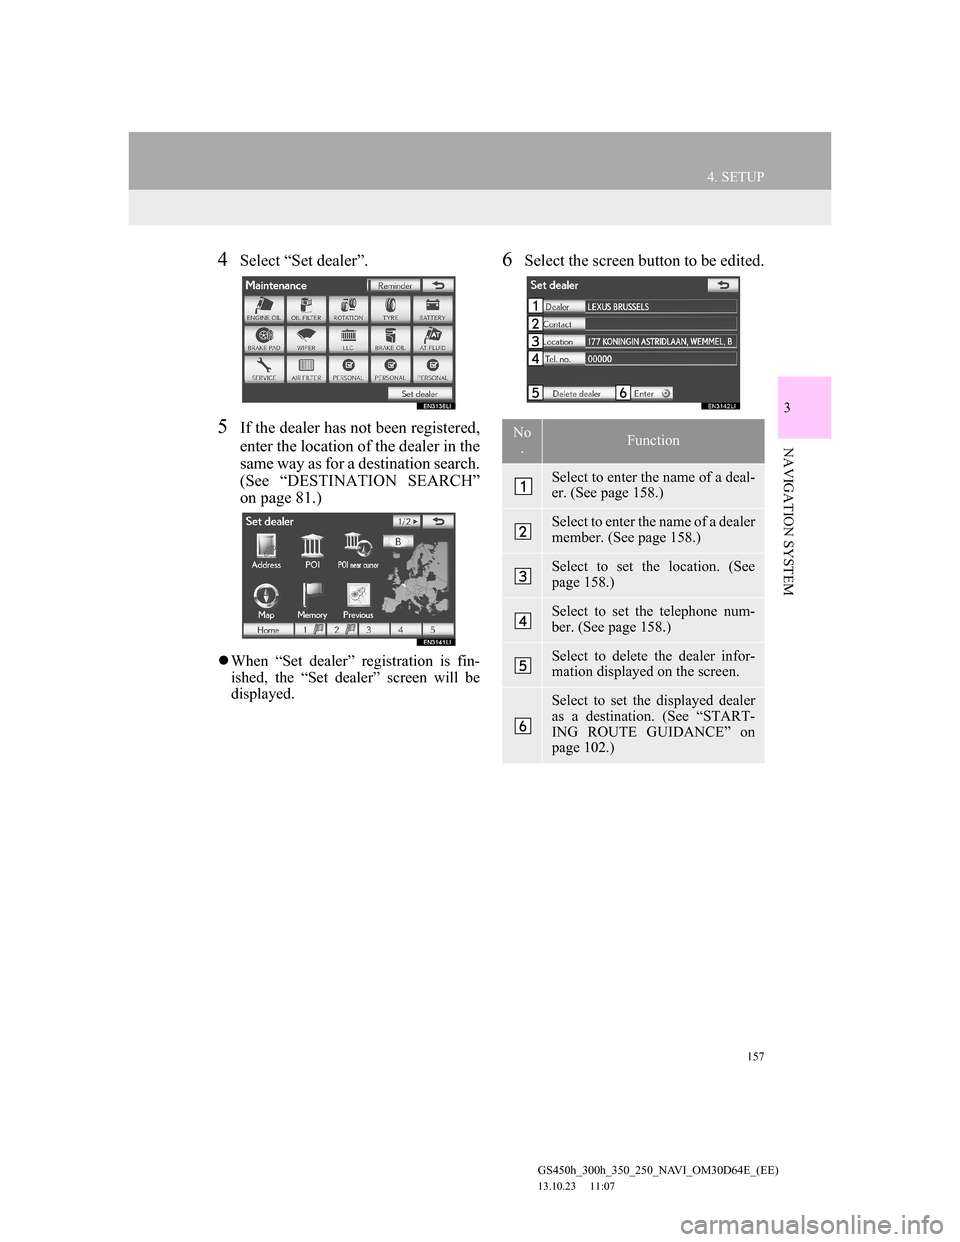
4Select “Set dealer”.
5If the dealer has not been registered,
enter the location of the dealer in the
same way as for a destination search.
(See “DESTINATION SEARCH”
on page 81.)
When “Set dealer” registration is fin-
ished, the “Set dealer” screen will be
displayed.
6Select the screen button to be edited.
No
.Function
Select to enter the name of a deal-
er. (See page 158.)
Select to enter the name of a dealer
member. (See page 158.)
Select to set the location. (See
page 158.)
Select to set the telephone num-
ber. (See page 158.)
Select to delete the dealer infor-
mation displayed on the screen.
Select to set the displayed dealer
as a destination. (See “START-
ING ROUTE GUIDANCE” on
page 102.)
Page 158 of 256
158
4. SETUP
GS450h_300h_350_250_NAVI_OM30D64E_(EE)
13.10.23 11:07
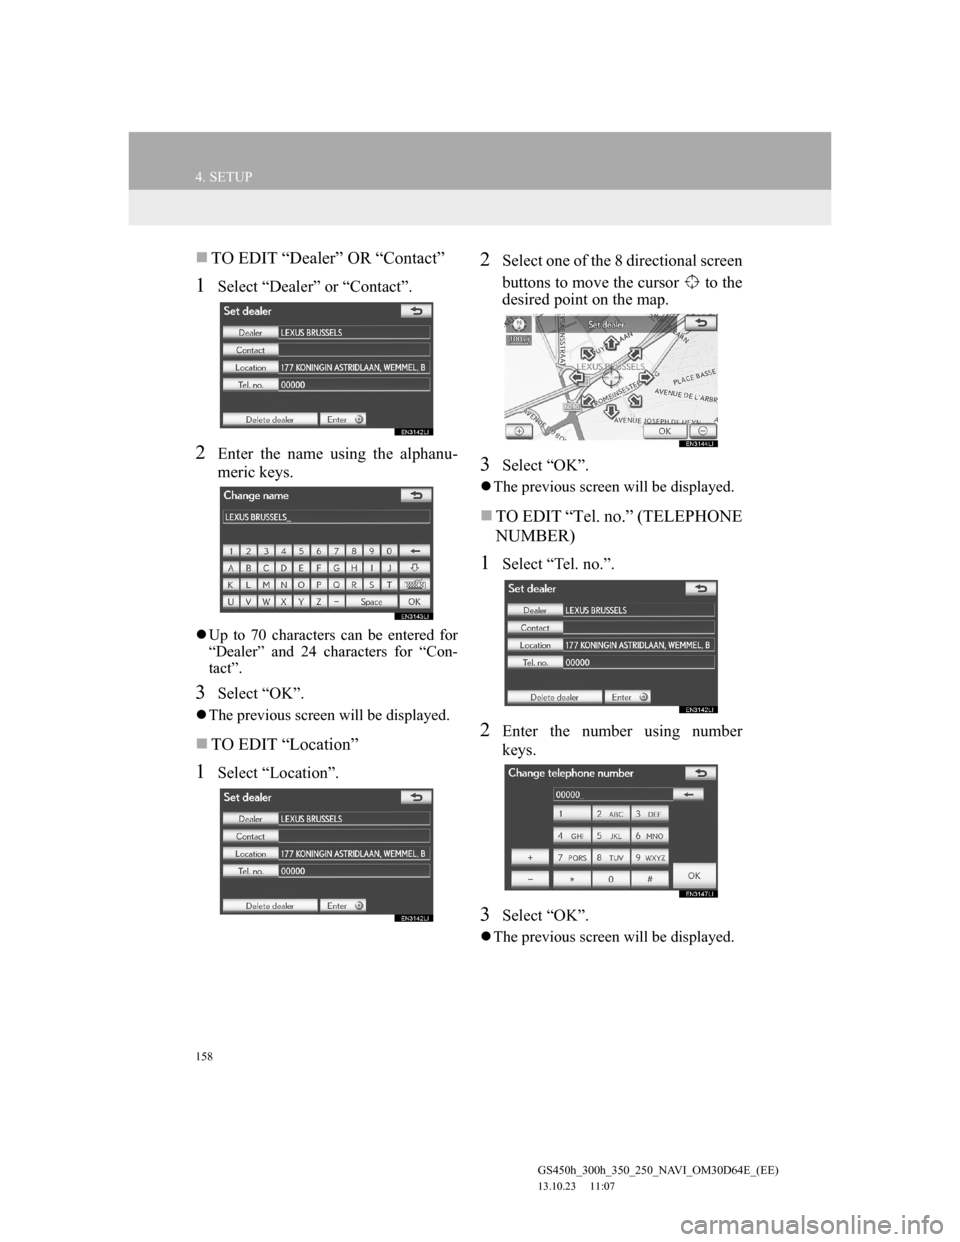
TO EDIT “Dealer” OR “Contact”
1Select “Dealer” or “Contact”.
2Enter the name using the alphanu-
meric keys.
Up to 70 characters can be entered for
“Dealer” and 24 characters for “Con-
tact”.
3Select “OK”.
The previous screen will be displayed.
TO EDIT “Location”
1Select “Location”.
2Select one of the 8 directional screen
buttons to move the cursor to the
desired point on the map.
3Select “OK”.
The previous screen will be displayed.
TO EDIT “Tel. no.” (TELEPHONE
NUMBER)
1Select “Tel. no.”.
2Enter the number using number
keys.
3Select “OK”.
The previous screen will be displayed.
Page 159 of 256
159
4. SETUP
GS450h_300h_350_250_NAVI_OM30D64E_(EE)
13.10.23 11:07
3
NAVIGATION SYSTEM
1Press the “MENU” button on the
Remote Touch. (See “Remote
Touch” on page 12.)
2Select “Setup” on the “Menu”
screen.
3Select “Vehicle” on the “Setup”
screen.
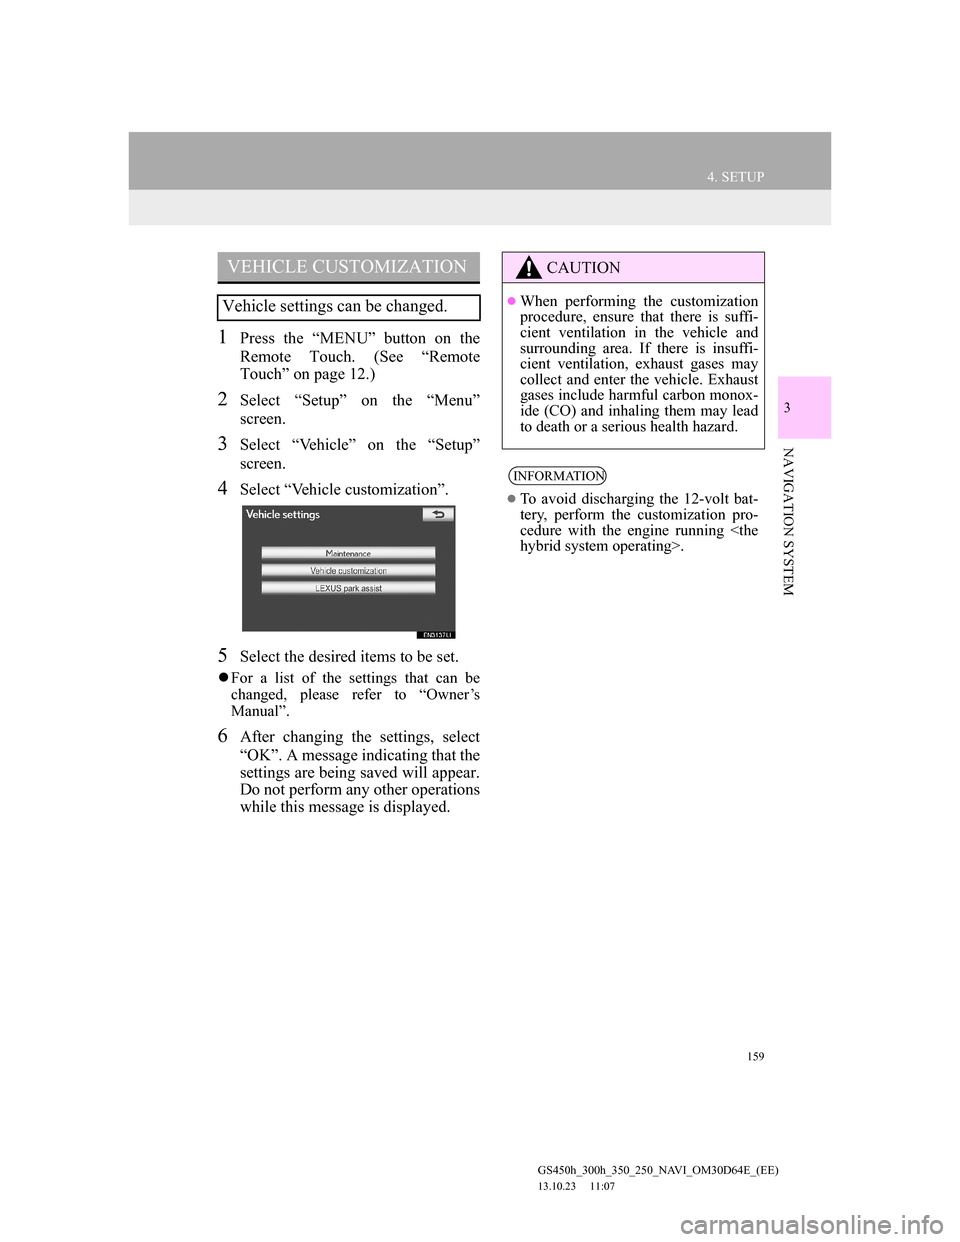
4Select “Vehicle customization”.
5Select the desired items to be set.
For a list of the settings that can be
changed, please refer to “Owner’s
Manual”.
6After changing the settings, select
“OK”. A message indicating that the
settings are being saved will appear.
Do not perform any other operations
while this message is displayed.
VEHICLE CUSTOMIZATION
Vehicle settings can be changed.
CAUTION
When performing the customization
procedure, ensure that there is suffi-
cient ventilation in the vehicle and
surrounding area. If there is insuffi-
cient ventilation, exhaust gases may
collect and enter the vehicle. Exhaust
gases include harmful carbon monox-
ide (CO) and inhaling them may lead
to death or a serious health hazard.
INFORMATION
To avoid discharging the 12-volt bat-
tery, perform the customization pro-
cedure with the engine running
Page 160 of 256
160
GS450h_300h_350_250_NAVI_OM30D64E_(EE)
13.10.23 11:07
5. GPS (GLOBAL POSITIONING SYSTEM)
1. LIMITATIONS OF THE NAVIGATION SYSTEM
The Global Positioning System (GPS)
developed and operated by the U.S. De-
partment of Defense provides an accu-
rate current position, normally using 4
or more satellites, and in some case 3
satellites. The GPS system has a certain
level of inaccuracy. While the naviga-
tion system will compensate for this
most of the time, occasional positioning
errors of up to 100 m (300 feet) can and
should be expected. Generally, position
errors will be corrected within a few
seconds.When the vehicle is receiving signals
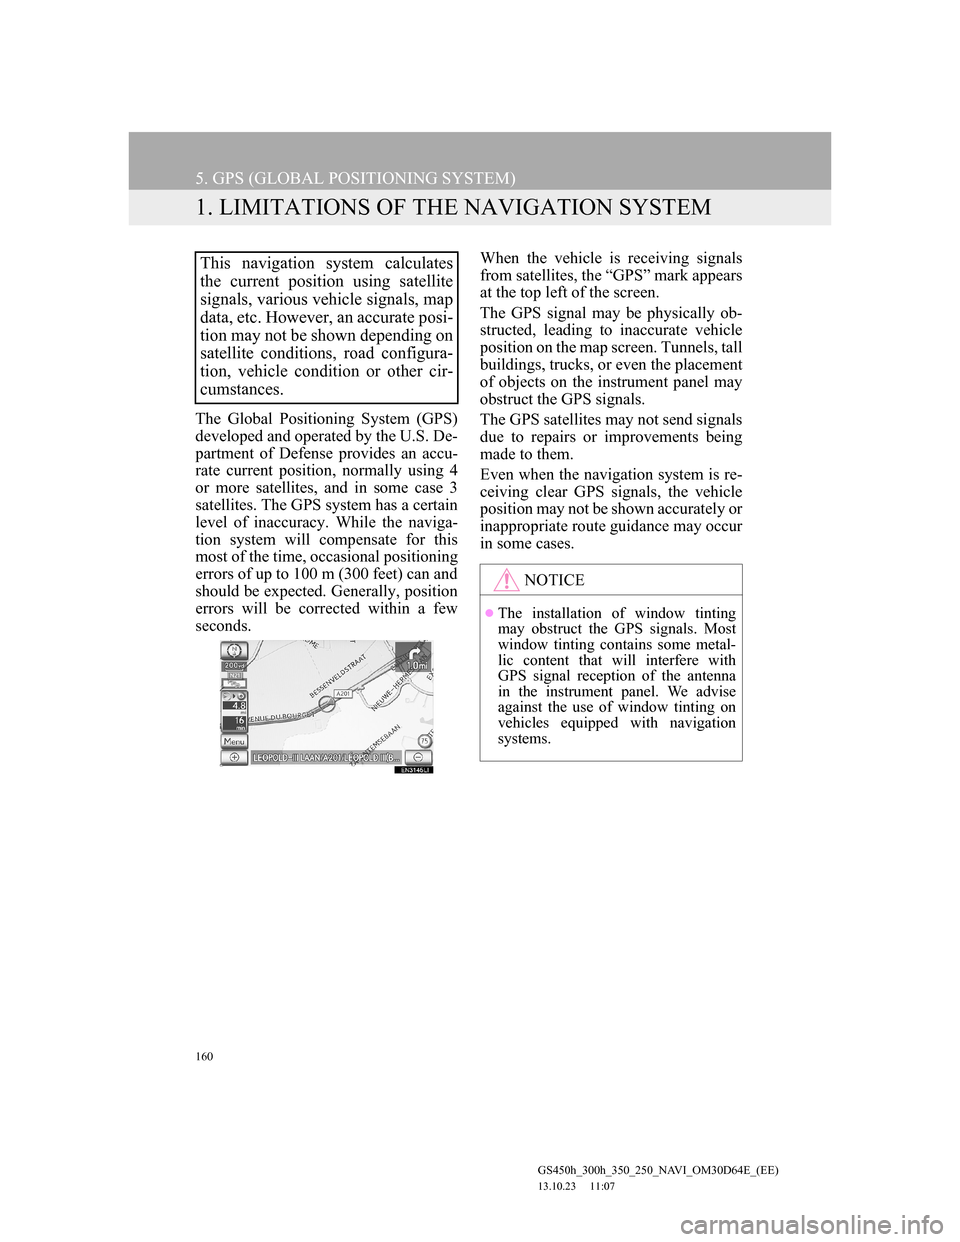
from satellites, the “GPS” mark appears
at the top left of the screen.
The GPS signal may be physically ob-
structed, leading to inaccurate vehicle
position on the map screen. Tunnels, tall
buildings, trucks, or even the placement
of objects on the instrument panel may
obstruct the GPS signals.
The GPS satellites may not send signals
due to repairs or improvements being
made to them.
Even when the navigation system is re-
ceiving clear GPS signals, the vehicle
position may not be shown accurately or
inappropriate route guidance may occur
in some cases.
This navigation system calculates
the current position using satellite
signals, various vehicle signals, map
data, etc. However, an accurate posi-
tion may not be shown depending on
satellite conditions, road configura-
tion, vehicle condition or other cir-
cumstances.
NOTICE
The installation of window tinting
may obstruct the GPS signals. Most
window tinting contains some metal-
lic content that will interfere with
GPS signal reception of the antenna
in the instrument panel. We advise
against the use of window tinting on
vehicles equipped with navigation
systems.