display Lexus GX460 2021 Owner's Manual /
[x] Cancel search | Manufacturer: LEXUS, Model Year: 2021, Model line: GX460, Model: Lexus GX460 2021Pages: 628, PDF Size: 12.51 MB
Page 420 of 628
420
GX460_OM_OM60T19U_(U)5-4. Using the other interior features
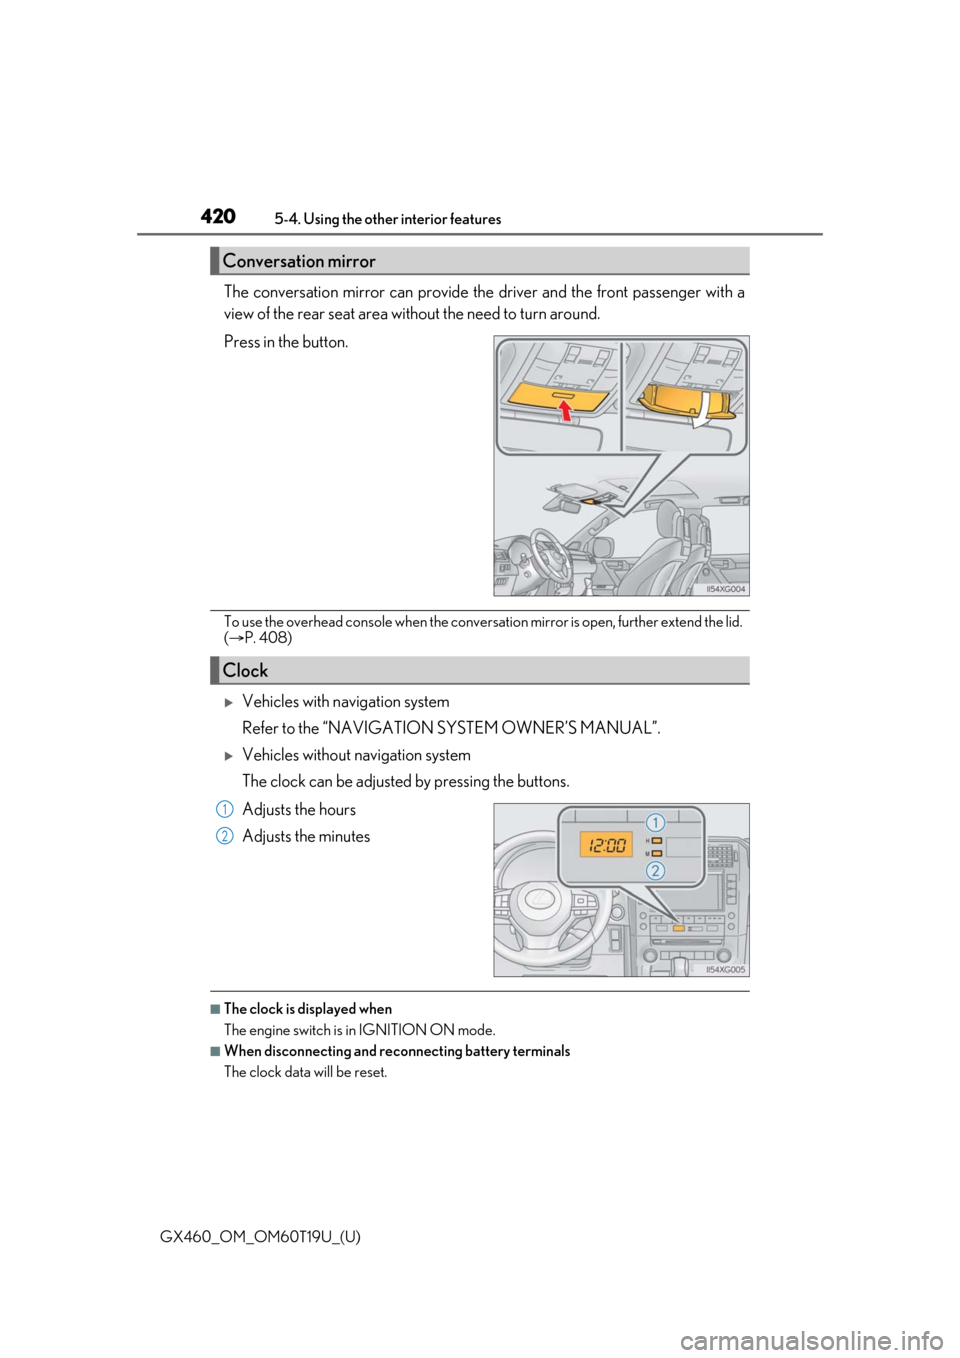
The conversation mirror can provide the
driver and the front passenger with a
view of the rear seat area without the need to turn around.
Press in the button.
To use the overhead console when the conversation mirror is open, further extend the lid.
( P. 408)
Vehicles with navigation system
Refer to the “NAVIGATION SYSTEM OWNER’S MANUAL”.
Vehicles without navigation system
The clock can be adjusted by pressing the buttons.
Adjusts the hours
Adjusts the minutes
■The clock is displayed when
The engine switch is in IGNITION ON mode.
■When disconnecting and reconnecting battery terminals
The clock data will be reset.
Conversation mirror
Clock
1
2
Page 429 of 628

429
GX460_OM_OM60T19U_(U)5-4. Using the other interior features
5
Interior features
Compass
To turn the compass on or off, push and
hold the button for longer than 3 sec-
onds.
: If equipped
The compass on the inside rear view
mirror indicates the direction in which
the vehicle is heading.
Operation
Displays and directions
DisplayDirection
“N”North
“NE”Northeast
“E”East
“SE”Southeast
“S”South
“SW”Southwest
“W”West
“NW”Northwest
Page 431 of 628

GX460_OM_OM60T19U_(U)
4315-4. Using the other interior features
5
Interior features
The direction display deviates from the true direction determined by the earth’s
magnetic field. The amount of deviation varies according to the geographic posi-
tion of the vehicle.
If you cross over a map boundary shown in illustration, the compass will deviate.
To obtain higher precision or perfec t calibration, refer to the following.
■Deviation calibration
Stop the vehicle where it is safe to drive in a circle.
Press and hold the button for 6
seconds.
A number (1 to 15) appears on the
compass display.
Referring to the map above, press the button to select the number of the
zone you are in.
If the direction is displayed several se conds after adjustment, the calibration is
complete.
■Circling calibration
Stop the vehicle in a place where it is safe to drive in a circle.
Press and hold the button for 9
seconds.
“C” appears on the compass display.
Drive the vehicle at 5 mph (8
km/h) or less in a circle until a
direction is displayed.
If there is not enough space to drive
in a circle, drive around the block
until a direction is displayed.
1
2
3
1
2
3
Page 432 of 628

432
GX460_OM_OM60T19U_(U)5-4. Using the other interior features
■Conditions unfavorable
to correct operation
The compass may not show the correct di rection in the following conditions:
●The vehicle is stopped immediately after turning.
●The vehicle is on an inclined surface.
●The vehicle is in a place where the earth’s magnetic field is subject to interference by
artificial magnetic fields (underground car park/parking lot, under a steel tower,
between buildings, roof car park/parking lot, near an intersection, near a large vehicle,
etc.).
●The vehicle has become magnetized.
(There is a magnet or metal object near the inside rear view mirror.)
●The battery has been disconnected.
●A door is open.
WARNING
■While driving the vehicle
Do not adjust the display. Adjust the di splay only when the vehicle is stopped.
■When doing the circling calibration
Secure a wide space, and watch out for people and vehicles in the vicinity. Do not vio-
late any local traffic rules while performing circling calibration.
NOTICE
■To avoid compass malfunctions
Do not place magnets or any metal objects near the inside rear view mirror.
Doing this may cause the compass sensor to malfunction.
■To ensure normal operation of the compass
●Do not perform circling calibration of the compass in a place where the earth’s mag-
netic field is subject to interferen ce by artificial magnetic fields.
●During calibration, do not operate electric systems (moon roof, power windows, etc.)
as they may interfere with the calibration.
Page 437 of 628
GX460_OM_OM60T19U_(U)
4375-4. Using the other interior features
5
Interior features
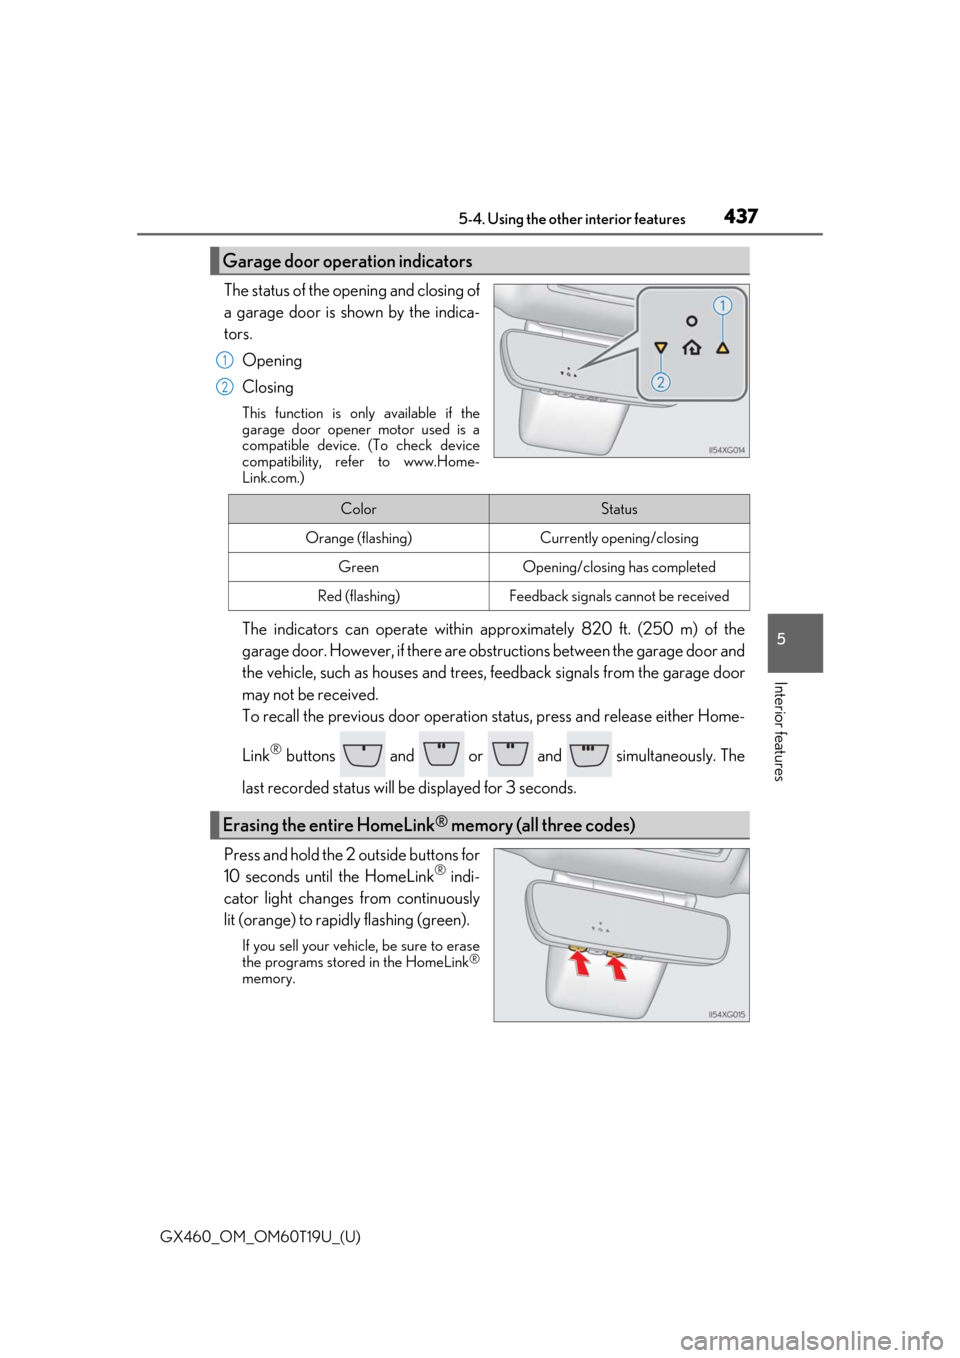
The status of the opening and closing of
a garage door is shown by the indica-
tors.Opening
Closing
This function is only available if the
garage door opener motor used is a
compatible device. (To check device
compatibility, refer to www.Home-
Link.com.)
The indicators can operate within ap proximately 820 ft. (250 m) of the
garage door. However, if there are obst ructions between the garage door and
the vehicle, such as houses and trees, feedback signals from the garage door
may not be received.
To recall the previous door operation status, press and release either Home-
Link
® buttons and or and simultaneously. The
last recorded status will be displayed for 3 seconds.
Press and hold the 2 outside buttons for
10 seconds until the HomeLink
® indi-
cator light changes from continuously
lit (orange) to rapidly flashing (green).
If you sell your vehicle, be sure to erase
the programs stored in the HomeLink®
memory.
Garage door operation indicators
1
2
ColorStatus
Orange (flashing)Currently opening/closing
GreenOpening/closing has completed
Red (flashing)Feedback signals cannot be received
Erasing the entire HomeLink® memory (all three codes)
Page 449 of 628

GX460_OM_OM60T19U_(U)
4496-2. Maintenance
6
Maintenance and care
■Repair and replacement
It is recommended that genuine Lexus parts be used for repairs to ensure performance
of each system. If non-Lexus parts are used in replacement or if a repair shop other than
a Lexus dealer performs repairs, confirm the warranty coverage.
■Resetting the message indicating main tenance is required (U.S.A. only)
After the required maintenanc e is performed according to the maintenance schedule,
please reset the message.
To reset the message, follow the procedures described below:
Press or of the meter control switch es and select on the multi-informa-
tion display.
Press or of the meter control switches and select “Vehicle Settings”, and then
press .
Press or of the meter control switch es and select “Scheduled Maintenance”,
and then press .
Select the “Yes” and press .
“The Data Has Been Reset” will be displayed when the re set procedure has been com-
pleted.
■Allow inspection and repairs to be performed by a Lexus dealer
●Lexus technicians are well-trained specialists and are kept up to date with the latest ser-
vice information. They are well informed about the operat ion of all systems on your
vehicle.
●Keep a copy of the repair order. It proves that the maintenance that has been per-
formed is under warranty co verage. If any problem should arise while your vehicle is
under warranty, your Lexus dealer will promptly take care of it.
1
2
3
4
Page 462 of 628
462
GX460_OM_OM60T19U_(U)6-3. Do-it-yourself maintenance
■Adding engine oil
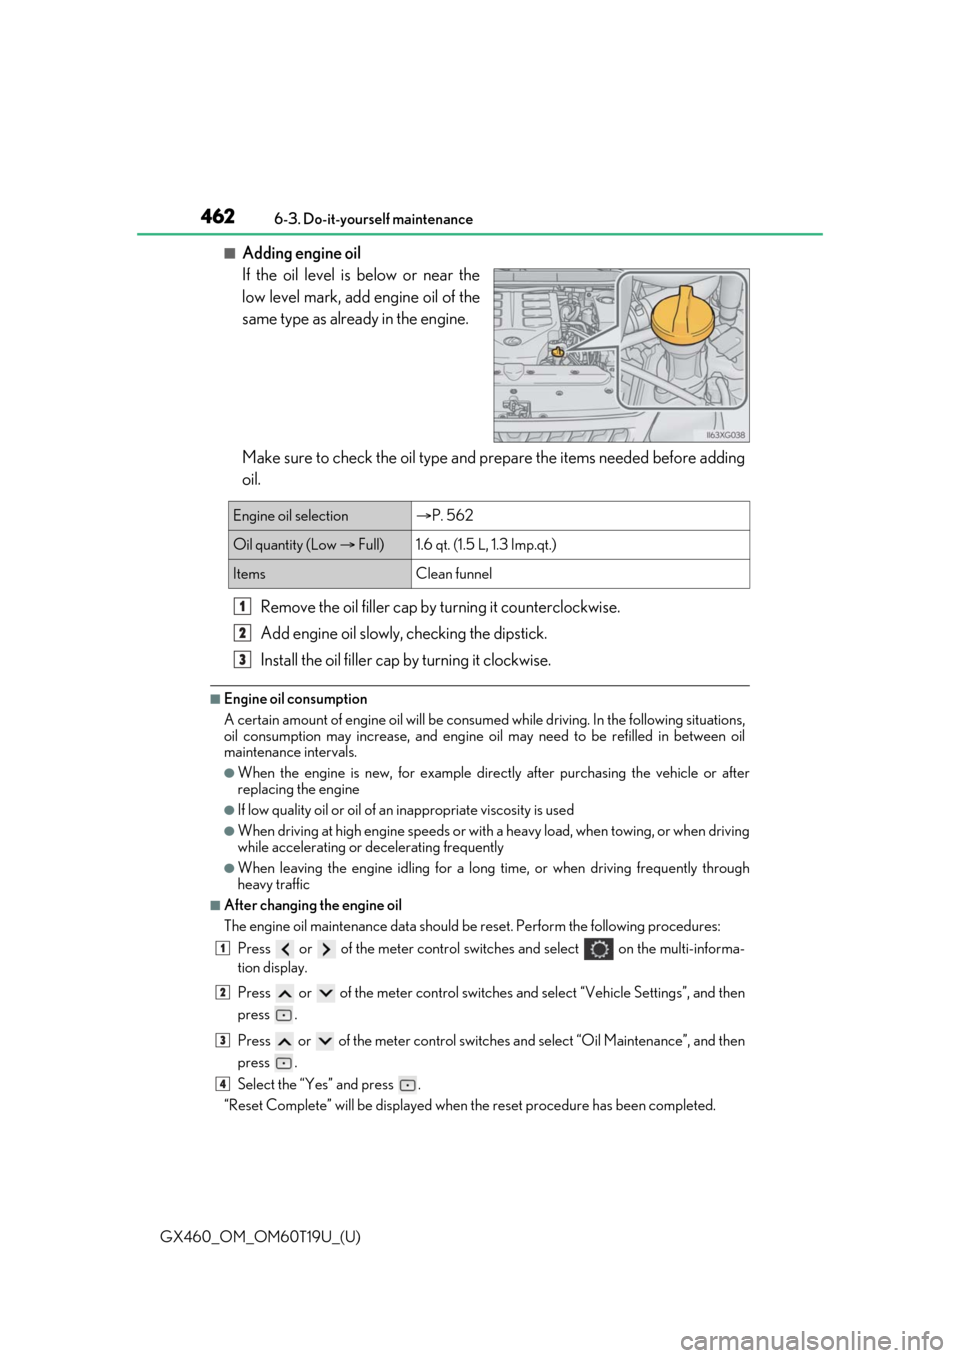
If the oil level is below or near the
low level mark, add engine oil of the
same type as already in the engine.
Make sure to check the oil type and
prepare the items needed before adding
oil.
Remove the oil filler cap by turning it counterclockwise.
Add engine oil slowly, checking the dipstick.
Install the oil filler cap by turning it clockwise.
■Engine oil consumption
A certain amount of engine oil will be consumed while driving. In the following situations,
oil consumption may increase, and engine oil may need to be refilled in between oil
maintenance intervals.
●When the engine is new, for example directly after purchasing the vehicle or after
replacing the engine
●If low quality oil or oil of an inappropriate viscosity is used
●When driving at high engine speeds or with a heavy load, when towing, or when driving
while accelerating or decelerating frequently
●When leaving the engine idling for a long time, or when driving frequently through
heavy traffic
■After changing the engine oil
The engine oil maintenance data should be reset. Perform the following procedures:
Press or of the meter control switch es and select on the multi-informa-
tion display.
Press or of the meter control switches and select “Vehicle Settings”, and then
press .
Press or of the meter control switch es and select “Oil Maintenance”, and then
press .
Select the “Yes” and press .
“Reset Complete” will be displayed when the reset procedure has been completed.
Engine oil selection P. 562
Oil quantity (Low Full)1.6 qt. (1.5 L, 1.3 Imp.qt.)
ItemsClean funnel
1
2
3
1
2
3
4
Page 471 of 628
GX460_OM_OM60T19U_(U)
4716-3. Do-it-yourself maintenance
6
Maintenance and care
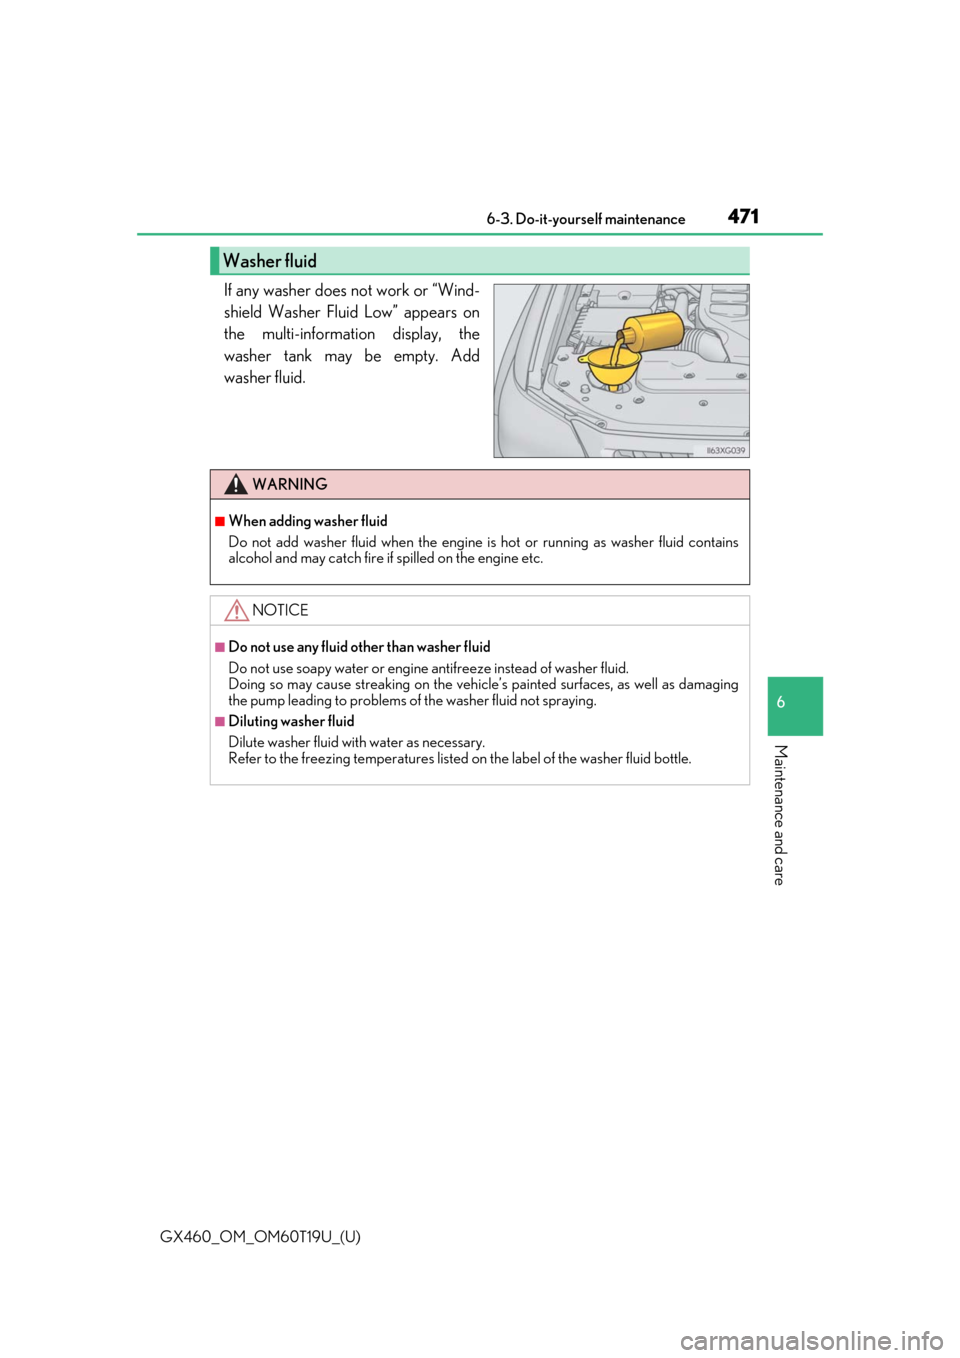
If any washer does not work or “Wind-
shield Washer Fluid Low” appears on
the multi-information display, the
washer tank may be empty. Add
washer fluid.
Washer fluid
WARNING
■When adding washer fluid
Do not add washer fluid when the engine is hot or running as washer fluid contains
alcohol and may catch fire if spilled on the engine etc.
NOTICE
■Do not use any fluid other than washer fluid
Do not use soapy water or engine antifreeze instead of washer fluid.
Doing so may cause streaking on the vehicle’s painted surfaces, as well as damaging
the pump leading to problems of the washer fluid not spraying.
■Diluting washer fluid
Dilute washer fluid with water as necessary.
Refer to the freezing temperatures listed on the label of the washer fluid bottle.
Page 473 of 628
GX460_OM_OM60T19U_(U)
4736-3. Do-it-yourself maintenance
6
Maintenance and care
Your vehicle is equipped with a tire pressure warning system that uses tire pres-
sure warning valves and transmitters to detect low tire inflation pressure before
serious problems arise.
●If the tire pressure drops below a predet ermined level, the driver is warned by
a screen display and a warning light. ( P. 520)
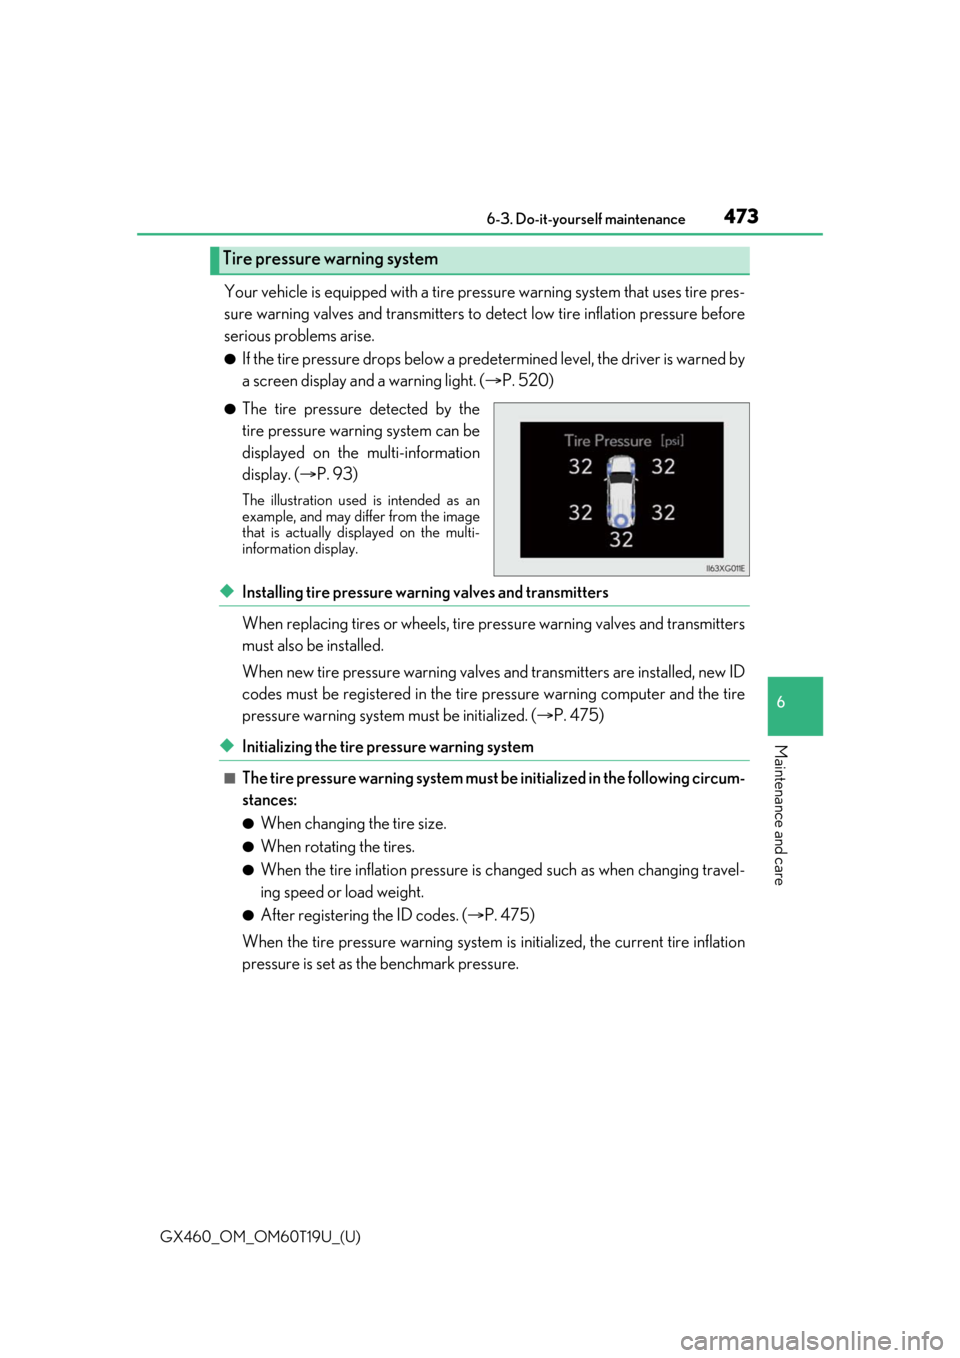
●The tire pressure detected by the
tire pressure warning system can be
displayed on the multi-information
display. ( P. 93)
The illustration used is intended as an
example, and may differ from the image
that is actually disp layed on the multi-
information display.
◆Installing tire pressure warning valves and transmitters
When replacing tires or wheels, tire pr essure warning valves and transmitters
must also be installed.
When new tire pressure wa rning valves and transmitters are installed, new ID
codes must be registered in the tire pressure warning computer and the tire
pressure warning system must be initialized. ( P. 475)
◆Initializing the tire pressure warning system
■The tire pressure warning system must be initialized in the following circum-
stances:
●When changing the tire size.
●When rotating the tires.
●When the tire inflation pressure is changed such as when changing travel-
ing speed or load weight.
●After registering the ID codes. ( P. 475)
When the tire pressure warning system is initialized, the current tire inflation
pressure is set as the benchmark pressure.
Tire pressure warning system
Page 474 of 628
474
GX460_OM_OM60T19U_(U)6-3. Do-it-yourself maintenance
■How to initialize the tire pressure warning system
Park the vehicle in a safe place and st op the engine for 20 minutes or more.
Initialization cannot be performed while the vehicle is moving.
Adjust the tire inflation pressure to th e specified cold tire inflation pressure
level. ( P. 568)
Make sure to adjust the tire pressure to the specified cold tire inflation pressure
level. The tire pressure warning system will operate based on this pressure level.
Start the engine. (P. 200)
Press or of the meter control switches and select .
Press or of the meter control switches and select “Vehicle
Settings”, and then press .
Press or of the meter control switches and select “TPWS”, and
then press .
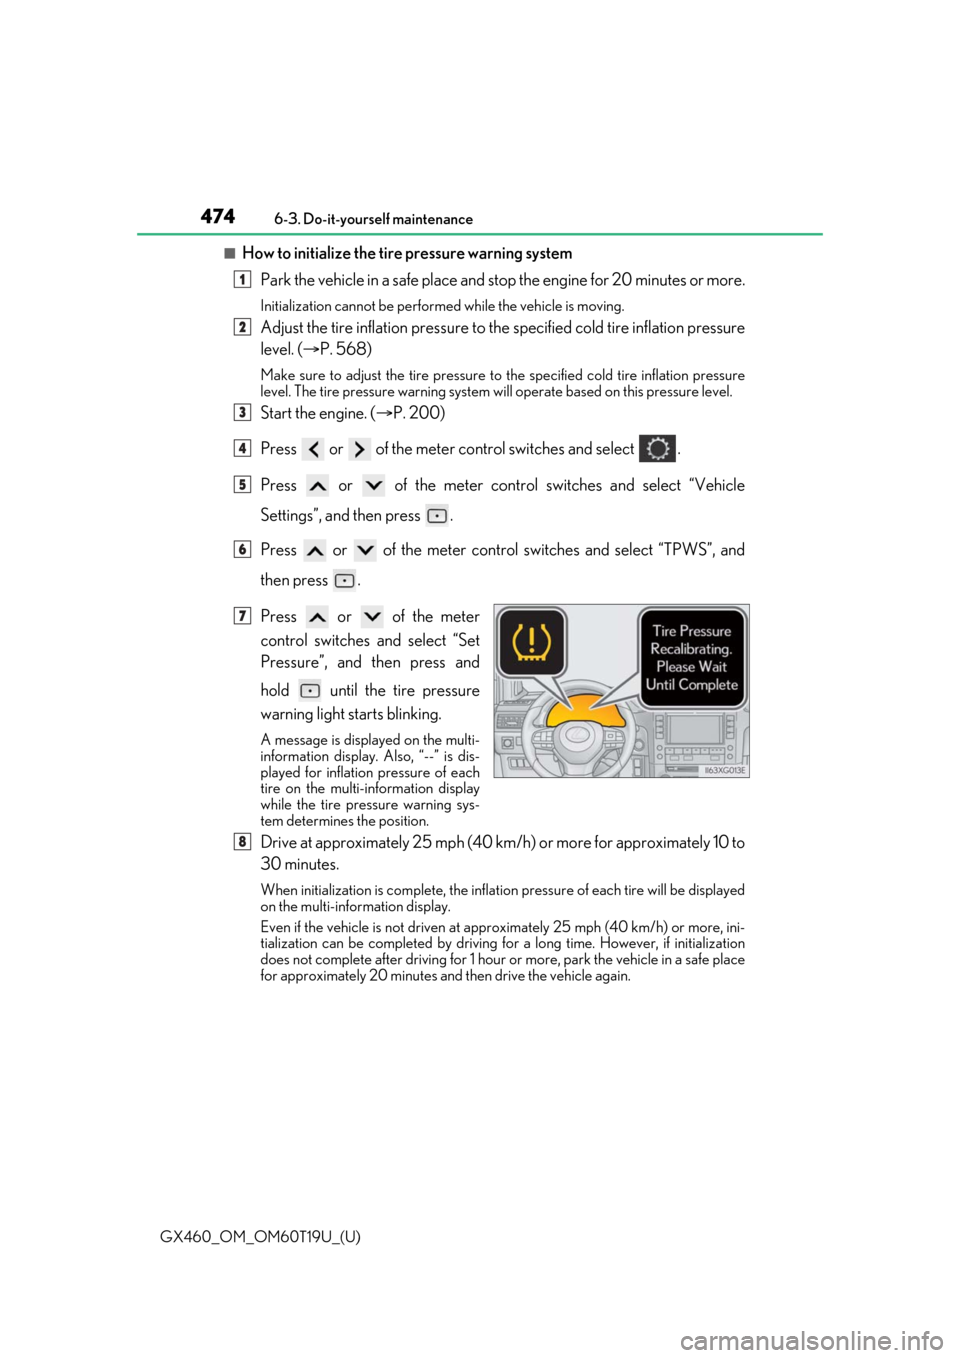
Press or of the meter
control switches and select “Set
Pressure”, and then press and
hold until the tire pressure
warning light starts blinking.
A message is displayed on the multi-
information display. Also, “--” is dis-
played for inflation pressure of each
tire on the multi-information display
while the tire pressure warning sys-
tem determines the position.
Drive at approximately 25 mph (40 km /h) or more for approximately 10 to
30 minutes.
When initialization is comple te, the inflation pressure of each tire will be displayed
on the multi-information display.
Even if the vehicle is not driven at ap proximately 25 mph (40 km/h) or more, ini-
tialization can be co mpleted by driving for a long ti me. However, if initialization
does not complete after driving for 1 hour or more, park the vehicle in a safe place
for approximately 20 minutes and then drive the vehicle again.
1
2
3
4
5
6
7
8