audio Lexus IS220d 2012 Navigation manual
[x] Cancel search | Manufacturer: LEXUS, Model Year: 2012, Model line: IS220d, Model: Lexus IS220d 2012Pages: 407, PDF Size: 23.8 MB
Page 209 of 407
202
1. AUDIO/VIDEO SYSTEM OPERATION
ISF_IS_ISC_Navi_EE
2. SOME BASICS
This section describes some of the
basic features of the audio/video sys-
tem. Some information may not per-
tain to your system.
Your audio/video system works
when the “ENGINE START STOP”
switch is turned to ACCESSORY or
IGNITION ON mode.
CAUTION
This product is a class 1 laser product
classified under the Safety of laser
products, IEC 60825-1:2007, and
contains a class 1M laser module. To
ensure continued safety, do not
remove any covers or attempt to gain
access to the inside of the product.
Refer all servicing to qualified
personnel.
NOTICE
To prevent the battery from being dis-
charged, do not leave the audio/video
system on longer than necessary
when the engine is not running.
CLASS 1 LASER PROD-
CAUTION - CLASS 1M VISIBLE AND
INVISIBLE LASER RADIATION
WHEN OPEN, DO NOT VIEW
DIRECTLY WITH OPTICAL
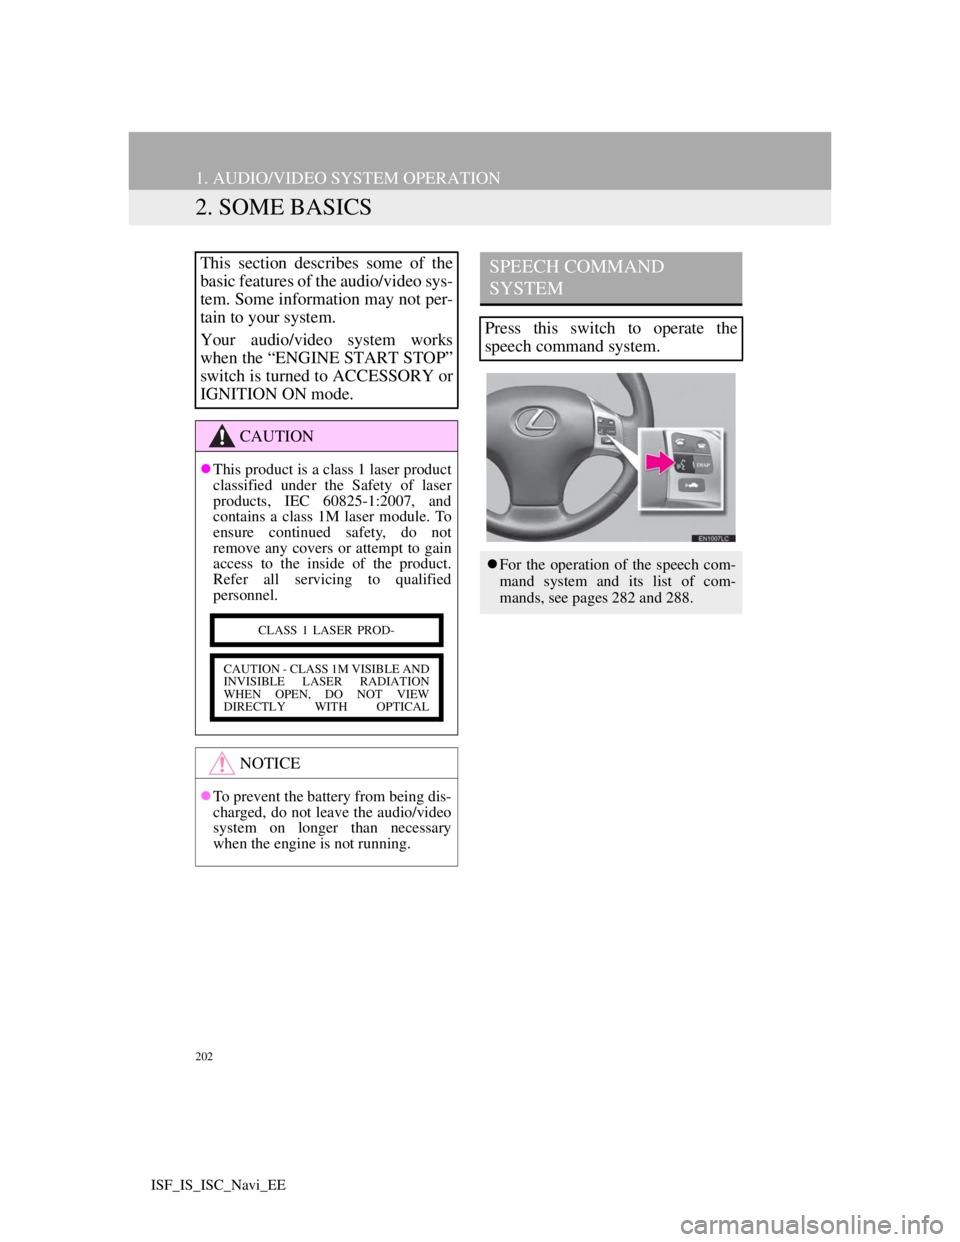
SPEECH COMMAND
SYSTEM
Press this switch to operate the
speech command system.
For the operation of the speech com-
mand system and its list of com-
mands, see pages 282 and 288.
Page 210 of 407
203
1. AUDIO/VIDEO SYSTEM OPERATION
5
AUDIO/VIDEO SYSTEM
ISF_IS_ISC_Navi_EE
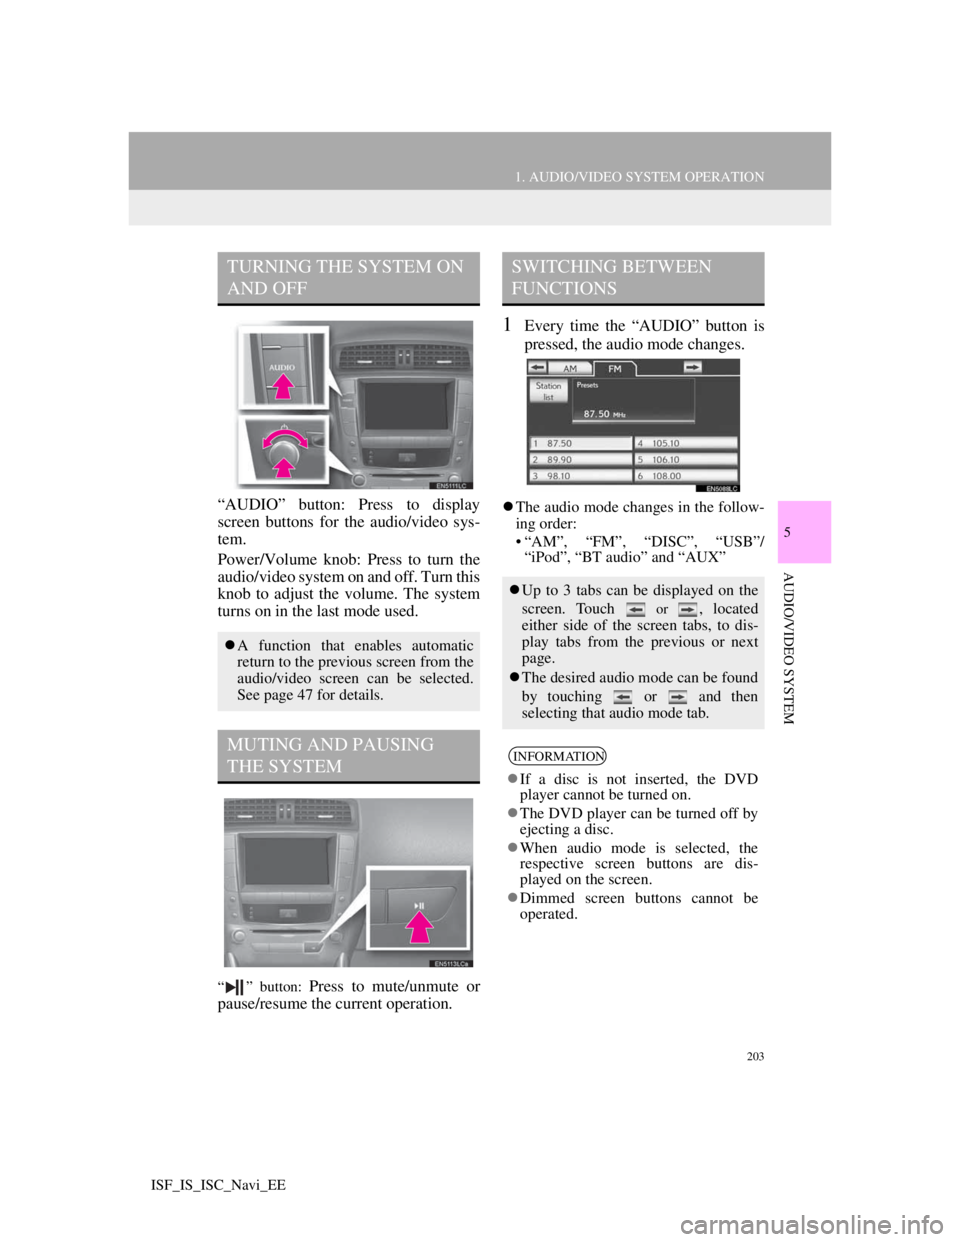
“AUDIO” button: Press to display
screen buttons for the audio/video sys-
tem.
Power/Volume knob: Press to turn the
audio/video system on and off. Turn this
knob to adjust the volume. The system
turns on in the last mode used.
“ ” button: Press to mute/unmute or
pause/resume the current operation.
1Every time the “AUDIO” button is
pressed, the audio mode changes.
The audio mode changes in the follow-
ing order:
• “AM”, “FM”, “DISC”, “USB”/
“iPod”, “BT audio” and “AUX”
TURNING THE SYSTEM ON
AND OFF
A function that enables automatic
return to the previous screen from the
audio/video screen can be selected.
See page 47 for details.
MUTING AND PAUSING
THE SYSTEM
SWITCHING BETWEEN
FUNCTIONS
Up to 3 tabs can be displayed on the
screen. Touch
or , located
either side of the screen tabs, to dis-
play tabs from the previous or next
page.
The desired audio mode can be found
by touching or and then
selecting that audio mode tab.
INFORMATION
If a disc is not inserted, the DVD
player cannot be turned on.
The DVD player can be turned off by
ejecting a disc.
When audio mode is selected, the
respective screen buttons are dis-
played on the screen.
Dimmed screen buttons cannot be
operated.
Page 211 of 407
204
1. AUDIO/VIDEO SYSTEM OPERATION
ISF_IS_ISC_Navi_EE
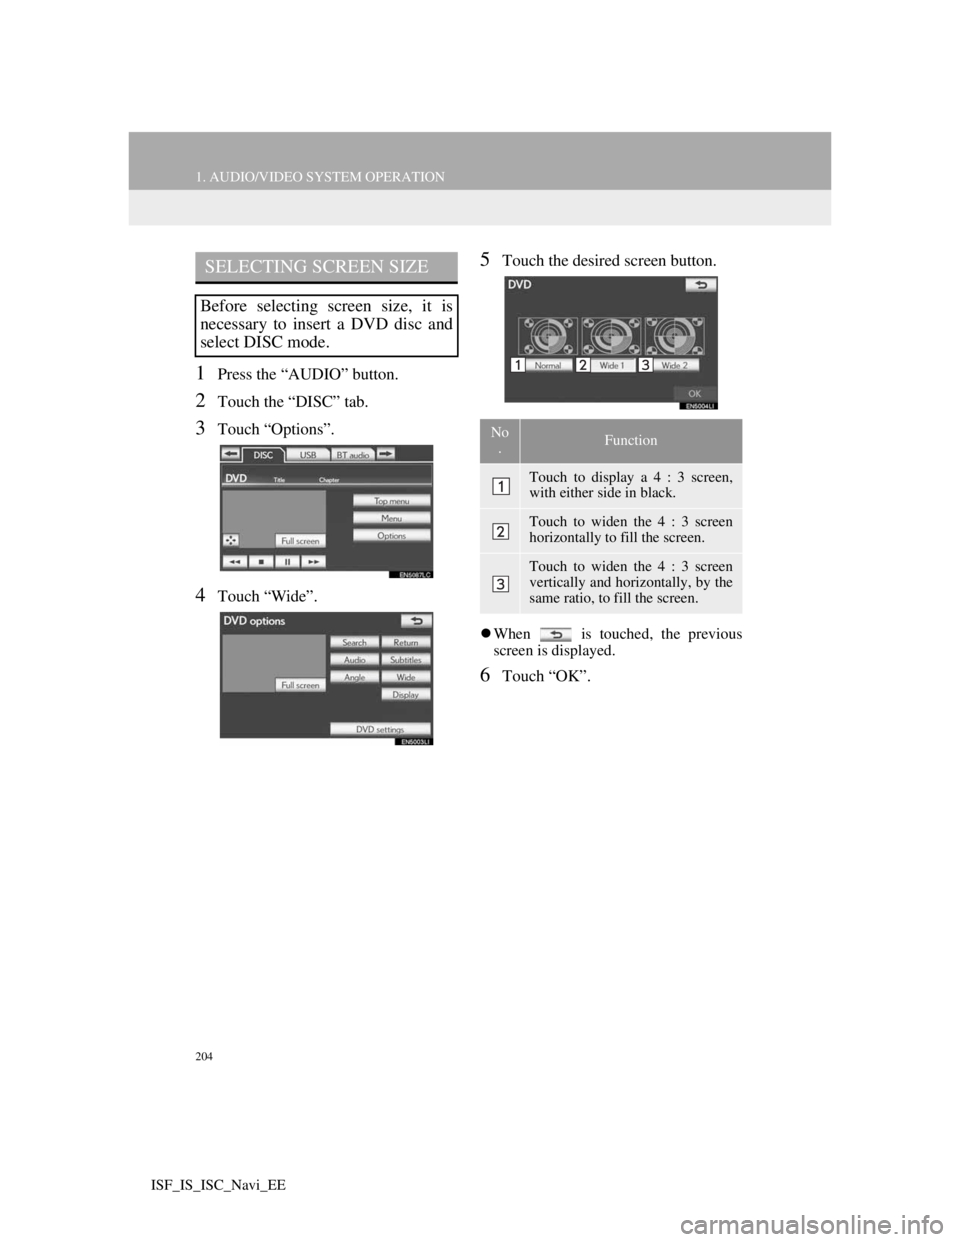
1Press the “AUDIO” button.
2Touch the “DISC” tab.
3Touch “Options”.
4Touch “Wide”.
5Touch the desired screen button.
When is touched, the previous
screen is displayed.
6Touch “OK”.
SELECTING SCREEN SIZE
Before selecting screen size, it is
necessary to insert a DVD disc and
select DISC mode.
No
.Function
Touch to display a 4 : 3 screen,
with either side in black.
Touch to widen the 4 : 3 screen
horizontally to fill the screen.
Touch to widen the 4 : 3 screen
vertically and horizontally, by the
same ratio, to fill the screen.
Page 212 of 407
205
1. AUDIO/VIDEO SYSTEM OPERATION
5
AUDIO/VIDEO SYSTEM
ISF_IS_ISC_Navi_EE
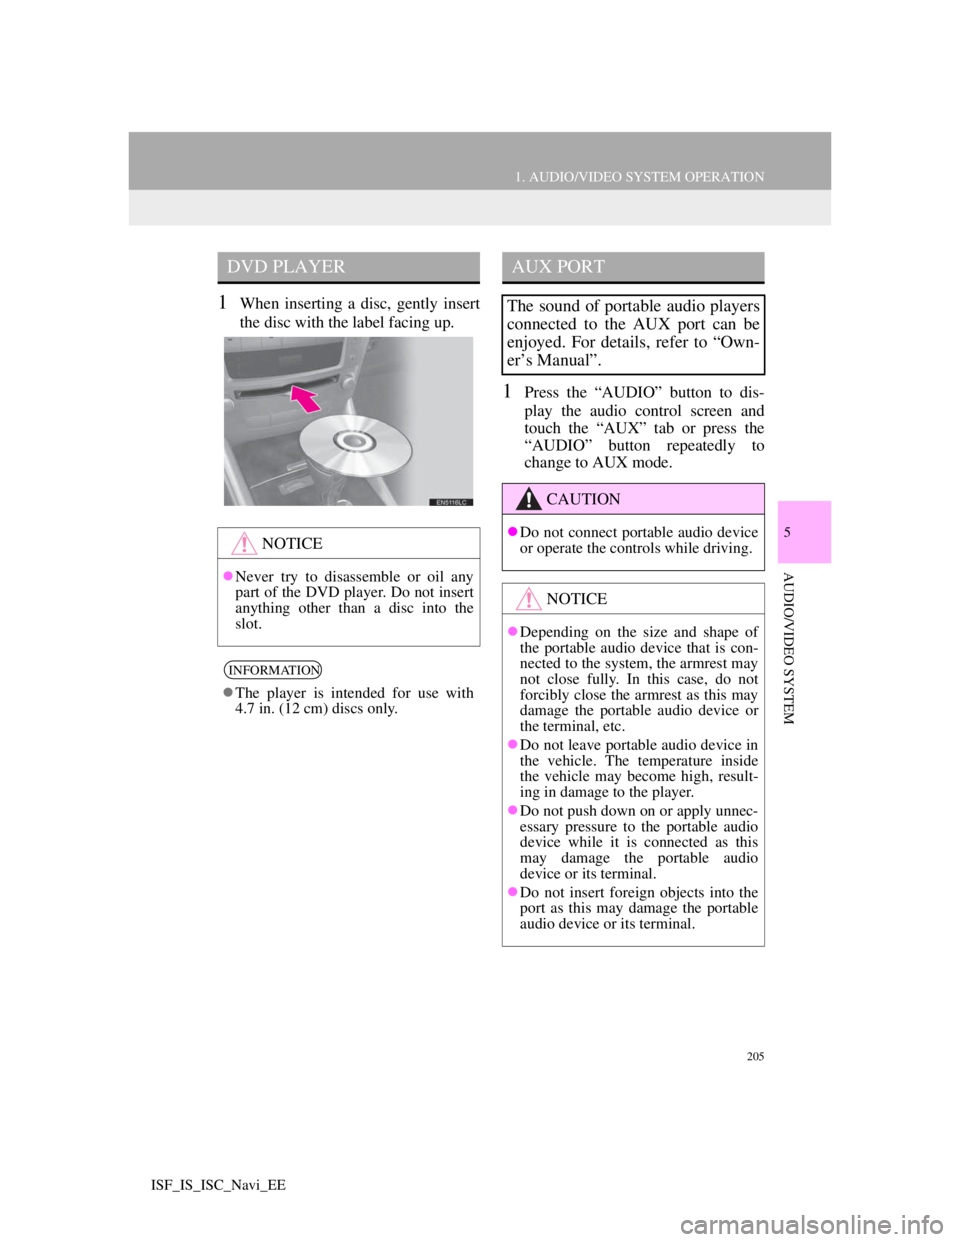
1When inserting a disc, gently insert
the disc with the label facing up.
1Press the “AUDIO” button to dis-
play the audio control screen and
touch the “AUX” tab or press the
“AUDIO” button repeatedly to
change to AUX mode.
DVD PLAYER
NOTICE
Never try to disassemble or oil any
part of the DVD player. Do not insert
anything other than a disc into the
slot.
INFORMATION
The player is intended for use with
4.7 in. (12 cm) discs only.
AUX PORT
The sound of portable audio players
connected to the AUX port can be
enjoyed. For details, refer to “Own-
er’s Manual”.
CAUTION
Do not connect portable audio device
or operate the controls while driving.
NOTICE
Depending on the size and shape of
the portable audio device that is con-
nected to the system, the armrest may
not close fully. In this case, do not
forcibly close the armrest as this may
damage the portable audio device or
the terminal, etc.
Do not leave portable audio device in
the vehicle. The temperature inside
the vehicle may become high, result-
ing in damage to the player.
Do not push down on or apply unnec-
essary pressure to the portable audio
device while it is connected as this
may damage the portable audio
device or its terminal.
Do not insert foreign objects into the
port as this may damage the portable
audio device or its terminal.
Page 213 of 407
206
1. AUDIO/VIDEO SYSTEM OPERATION
ISF_IS_ISC_Navi_EE
1Press the “AUDIO” button to
display the audio control screen and
touch the “USB” or “iPod” tab or
press the “AUDIO” button
repeatedly to change to USB
memory or iPod mode.
INFORMATION
When the portable audio player is not
connected to the AUX port, the tab
will be dimmed.
USB PORT
A USB memory/iPod can be con-
nected to the USB port. For details,
see “CONNECTING A USB MEM-
ORY” on page 231 and “CON-
NECTING iPod” on page 237.
INFORMATION
When a USB memory/iPod is not
connected with the USB port, the tab
will be dimmed.
Page 214 of 407
207
1. AUDIO/VIDEO SYSTEM OPERATION
5
AUDIO/VIDEO SYSTEM
ISF_IS_ISC_Navi_EE
3. RADIO OPERATION
1Press the “AUDIO” button.
2Touch the “AM” or “FM” tab or
press the “AUDIO” button repeated-
ly to select the desired tab.
1Turn the knob clockwise to step up
the station band or counterclockwise
to step down.
1Tune in the desired station.
2Touch one of the screen buttons (1-
6) and hold it until a beep is heard.
This sets the frequency to the screen
button. The station’s frequency will
be displayed in the screen button.
To change the preset station to a differ-
ent one, follow the same procedure.
LISTENING TO THE RADIO
SELECTING A RADIO
STATION
STEP UP AND DOWN THE
STATION BAND
INFORMATION
The radio automatically changes to
stereo reception when a stereo broad-
cast is received.
If the signal becomes weak, the radio
reduces the amount of channel sepa-
ration to prevent the weak signal from
creating noise. If the signal becomes
extremely weak, the radio switches
from stereo to mono reception.
PRESETTING A STATION
Up to 6 preset stations can be regis-
tered in each radio mode.
Page 215 of 407
208
1. AUDIO/VIDEO SYSTEM OPERATION
ISF_IS_ISC_Navi_EE
Preset tuning: Touch one of the preset
channels on the screen or press the “ ”
or “ ” button of Channel/Track to select
the desired station. The screen button is
highlighted and the station frequency
appears on the screen.
Seek tuning: Press and hold the “ ” or
“ ” button of Channel/Track. The radio
will begin seeking up or down for a sta-
tion of the nearest frequency and will
stop when a station is found. Each time
the button is pressed, the stations will be
searched automatically one after anoth-
er.
WHEN RECEIVING FM
SELECTING A STATION
Tune in the desired station using one
of the following methods.
RDS (RADIO DATA
SYSTEM)
Depending on the availability of
RDS infrastructure, the service may
not function properly.
AF (ALTERNATIVE
FREQUENCY) FUNCTION
A station providing good reception is
automatically selected if current re-
ception worsens.
TA (TRAFFIC
ANNOUNCEMENT)
FUNCTION
The tuner will automatically seek a
station that regularly broadcasts traf-
fic information and the station broad-
casts when the traffic information
program starts.
“TP” will appear on the screen.
Page 216 of 407
209
1. AUDIO/VIDEO SYSTEM OPERATION
5
AUDIO/VIDEO SYSTEM
ISF_IS_ISC_Navi_EE
WHEN LISTENING TO OR
WATCHING A DISC
TRAFFIC ANNOUNCEMENT
VOLUME FUNCTIONINFORMATION
When TA is set to “On”, the radio will
begin seeking a TP station. If the
radio seeks out a TP station, the pro-
gram name will appear on the screen.
If a TA (Traffic Announcement) sta-
tion is received, the radio will be
switched to the traffic information
program automatically. When the pro-
gram ends, the initial operation
resumes. Also, when in AF mode, the
radio will seek a TP station by using
the AF list.
EON (Enhanced Other Network) sys-
tem: If the RDS station (with EON
data) currently being listened to is not
broadcasting a traffic information
program in the TA (Traffic
Announcement) mode, the radio will
be switched to the traffic information
program automatically by using the
EON AF list. After the traffic infor-
mation ends, the radio will return to
the initial program automatically.
A station broadcasting traffic infor-
mation is sought and “TP” appears
on the screen.
INFORMATION
When the traffic information program
starts, the disc playback mode is
interrupted and the traffic information
is automatically broadcasted. When
the program ends, the initial operation
resumes.
The volume level when receiving the
traffic announcement is memorized.
Page 217 of 407
210
1. AUDIO/VIDEO SYSTEM OPERATION
ISF_IS_ISC_Navi_EE
4. DVD PLAYER OPERATION
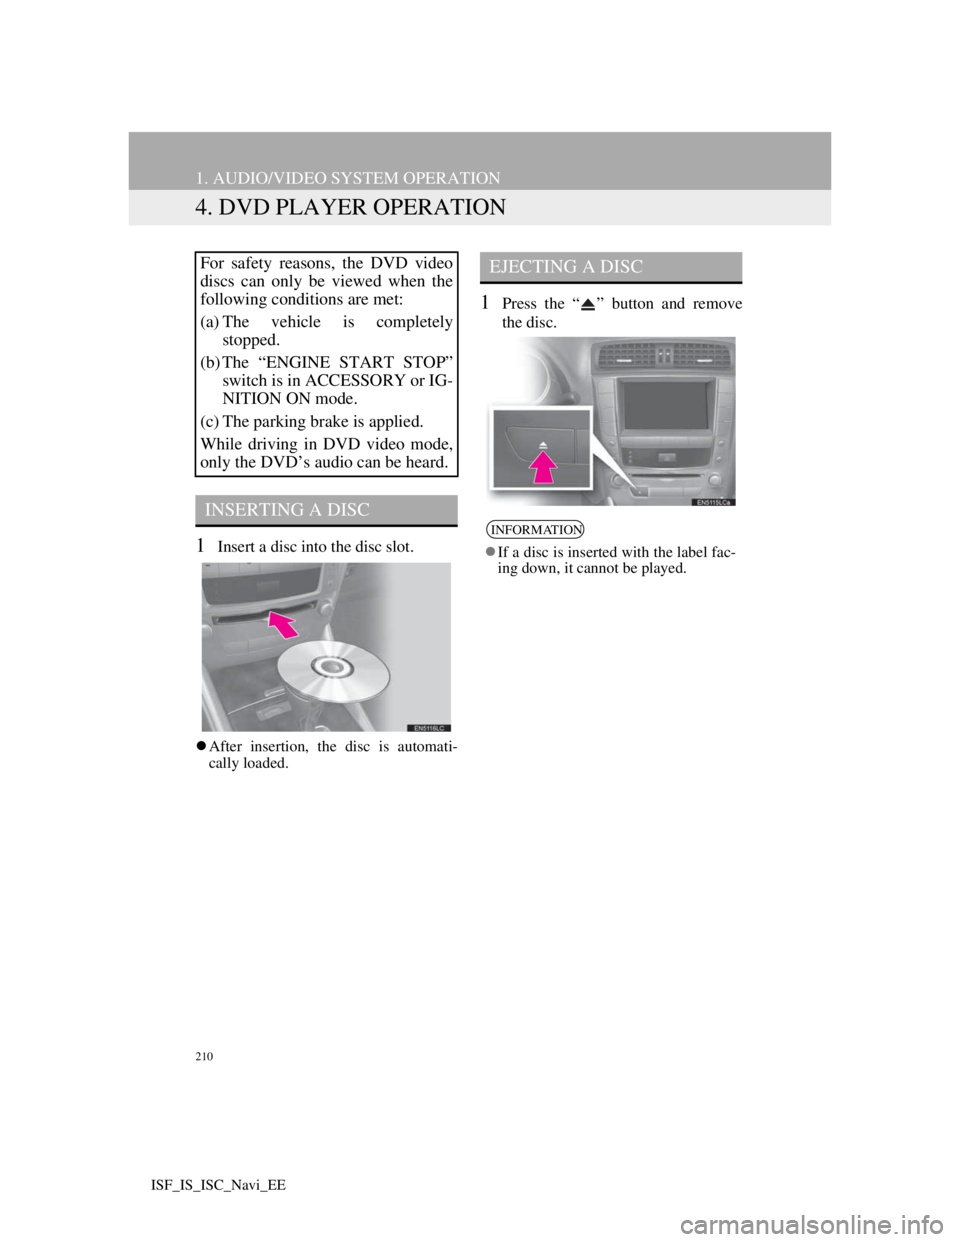
1Insert a disc into the disc slot.
After insertion, the disc is automati-
cally loaded.
1Press the “ ” button and remove
the disc.
For safety reasons, the DVD video
discs can only be viewed when the
following conditions are met:
(a) The vehicle is completely
stopped.
(b) The “ENGINE START STOP”
switch is in ACCESSORY or IG-
NITION ON mode.
(c) The parking brake is applied.
While driving in DVD video mode,
only the DVD’s audio can be heard.
INSERTING A DISC
EJECTING A DISC
INFORMATION
If a disc is inserted with the label fac-
ing down, it cannot be played.
Page 218 of 407
211
1. AUDIO/VIDEO SYSTEM OPERATION
5
AUDIO/VIDEO SYSTEM
ISF_IS_ISC_Navi_EE
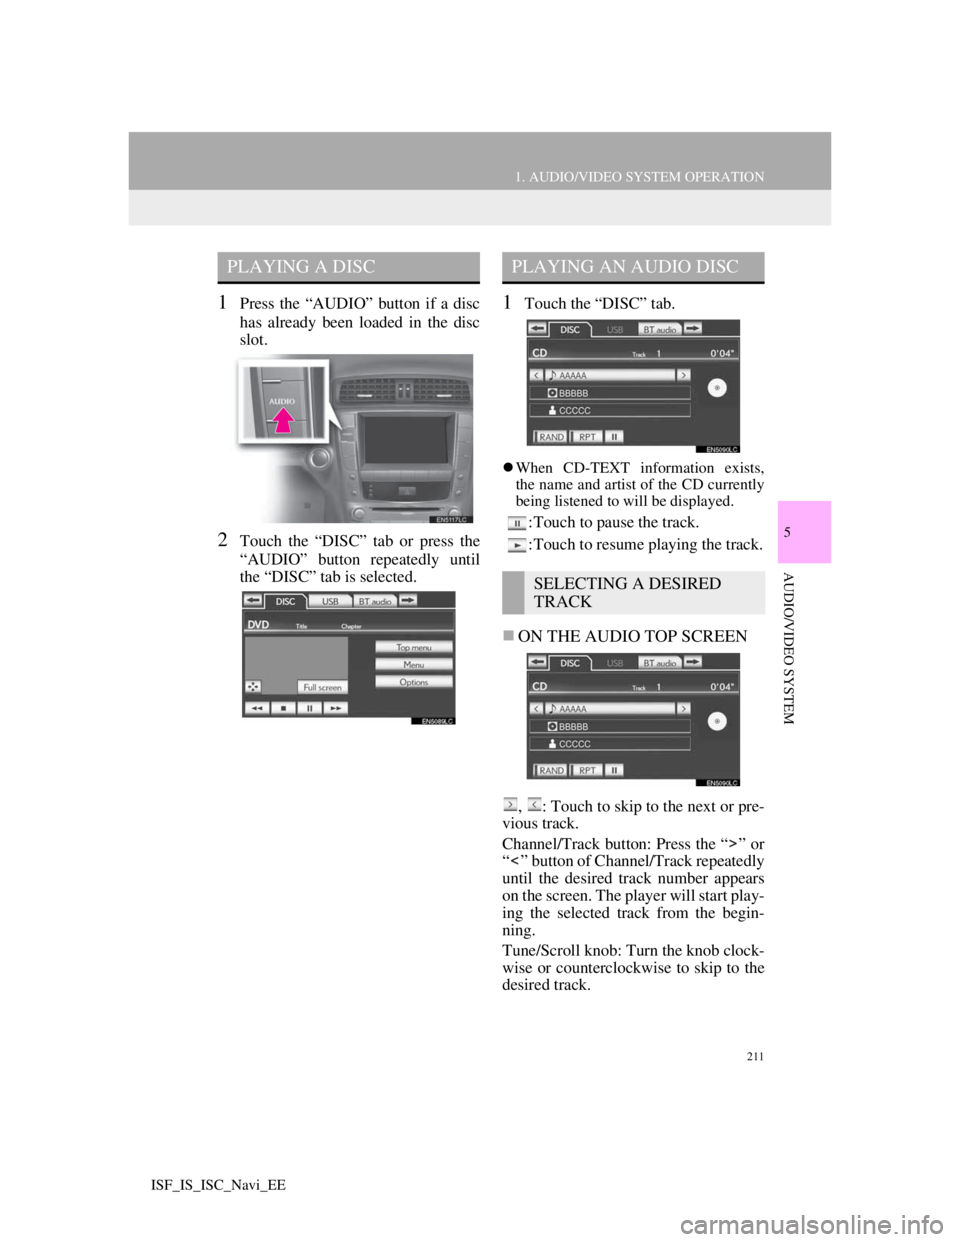
1Press the “AUDIO” button if a disc
has already been loaded in the disc
slot.
2Touch the “DISC” tab or press the
“AUDIO” button repeatedly until
the “DISC” tab is selected.
1Touch the “DISC” tab.
When CD-TEXT information exists,
the name and artist of the CD currently
being listened to will be displayed.
:Touch to pause the track.
:Touch to resume playing the track.
ON THE AUDIO TOP SCREEN
, : Touch to skip to the next or pre-
vious track.
Channel/Track button: Press the “ ” or
“ ” button of Channel/Track repeatedly
until the desired track number appears
on the screen. The player will start play-
ing the selected track from the begin-
ning.
Tune/Scroll knob: Turn the knob clock-
wise or counterclockwise to skip to the
desired track.
PLAYING A DISCPLAYING AN AUDIO DISC
SELECTING A DESIRED
TRACK