LEXUS LS430 2003 Factory User Guide
LS430 2003
LEXUS
LEXUS
https://www.carmanualsonline.info/img/36/57050/w960_57050-0.png
LEXUS LS430 2003 Factory User Guide
Page 1865 of 4500
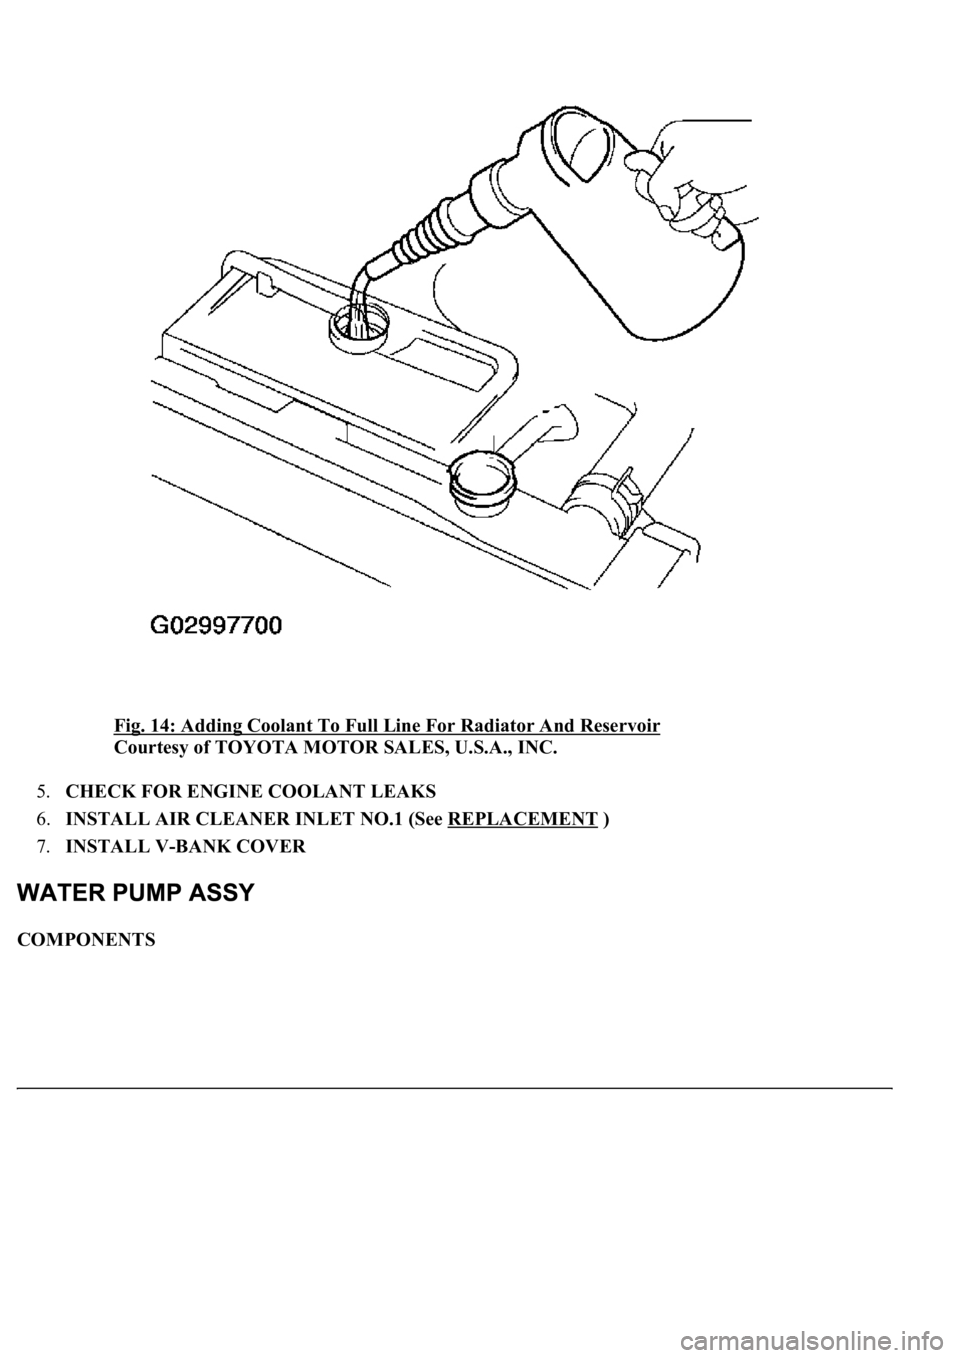
Fig. 14: Adding Coolant To Full Line For Radiator And Reservoir
Courtesy of TOYOTA MOTOR SALES, U.S.A., INC.
5.CHECK FOR ENGINE COOLANT LEAKS
6.INSTALL AIR CLEANER INLET NO.1 (See REPLACEMENT
)
7.INSTALL V-BANK COVER
COMPONENTS
Page 1869 of 4500
1.DISCONNECT BATTERY NEGATIVE TERMINAL
2.DRAIN ENGINE COOLANT (See REPLACEMENT
)
3.REMOVE ENGINE UNDER COVER NO.1
4.REMOVE RADIATOR ASSY
5.REMOVE TIMING BELT (See REPLACEMENT
)
6.REMOVE WATER INLET HOUSING
a. Disconnect the water hose and remove the 2 bolts, inlet housing and O-ring.
Fig. 18: Disconnecting Water Hose
Courtesy of TOYOTA MOTOR SALES, U.S.A., INC.
7.REMOVE TIMING BELT IDLER SUB-ASSY NO.2 (See OVERHAUL
)
8.REMOVE WATER PUMP ASSY
a. Remove the 5 bolts, water pump and
gasket.
Page 1872 of 4500
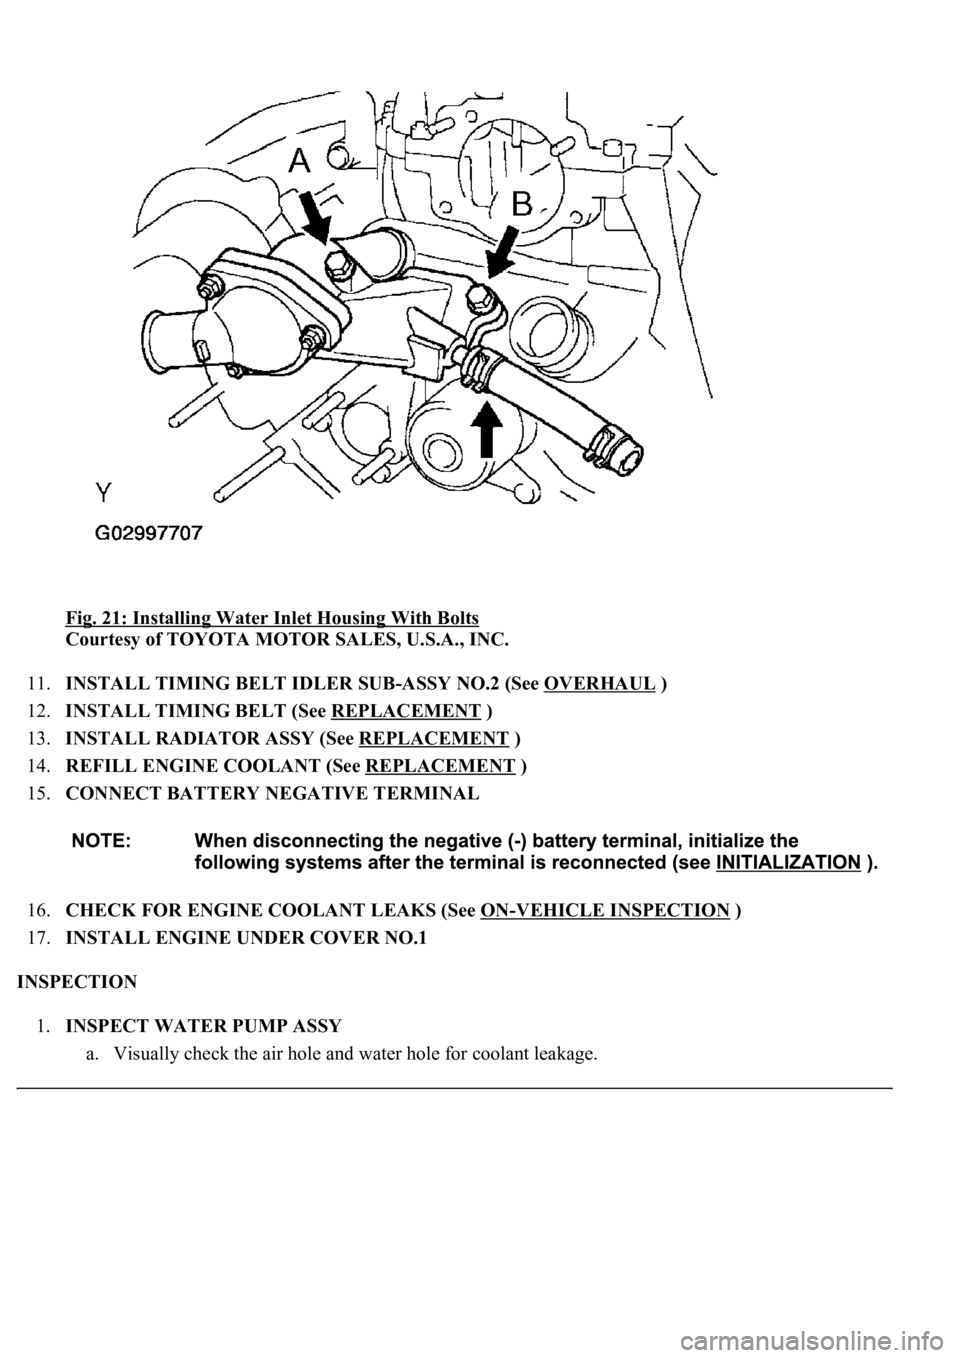
Fig. 21: Installing Water Inlet Housing With Bolts
Courtesy of TOYOTA MOTOR SALES, U.S.A., INC.
11.INSTALL TIMING BELT IDLER SUB-ASSY NO.2 (See OVERHAUL
)
12.INSTALL TIMING BELT (See REPLACEMENT
)
13.INSTALL RADIATOR ASSY (See REPLACEMENT
)
14.REFILL ENGINE COOLANT (See REPLACEMENT
)
15.CONNECT BATTERY NEGATIVE TERMINAL
16.CHECK FOR ENGINE COOLANT LEAKS (See ON
-VEHICLE INSPECTION )
17.INSTALL ENGINE UNDER COVER NO.1
INSPECTION
1.INSPECT WATER PUMP ASSY
a. Visuall
y<00030046004b00480046004e00030057004b004800030044004c00550003004b0052004f004800030044005100470003005a00440057004800550003004b0052004f004800030049005200550003004600520052004f0044005100570003004f0048004400
4e0044[ge.
Page 1876 of 4500
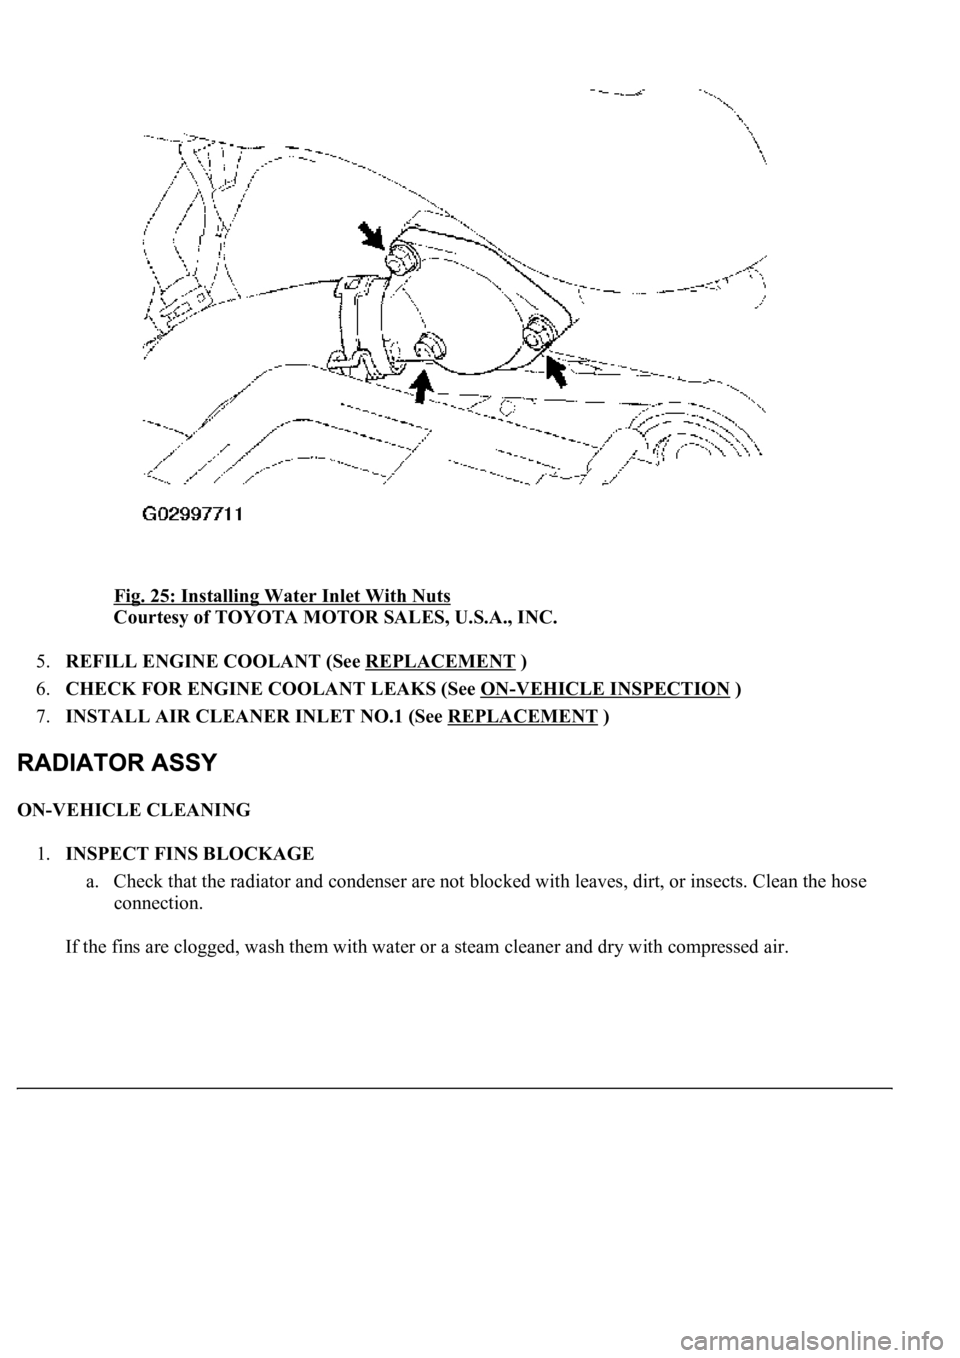
Fig. 25: Installing Water Inlet With Nuts
Courtesy of TOYOTA MOTOR SALES, U.S.A., INC.
5.REFILL ENGINE COOLANT (See REPLACEMENT
)
6.CHECK FOR ENGINE COOLANT LEAKS (See ON
-VEHICLE INSPECTION )
7.INSTALL AIR CLEANER INLET NO.1 (See REPLACEMENT
)
ON-VEHICLE CLEANING
1.INSPECT FINS BLOCKAGE
a. Check that the radiator and condenser are not blocked with leaves, dirt, or insects. Clean the hose
connection.
If the fins are clo
gged, wash them with water or a steam cleaner and dry with compressed air.
Page 1878 of 4500
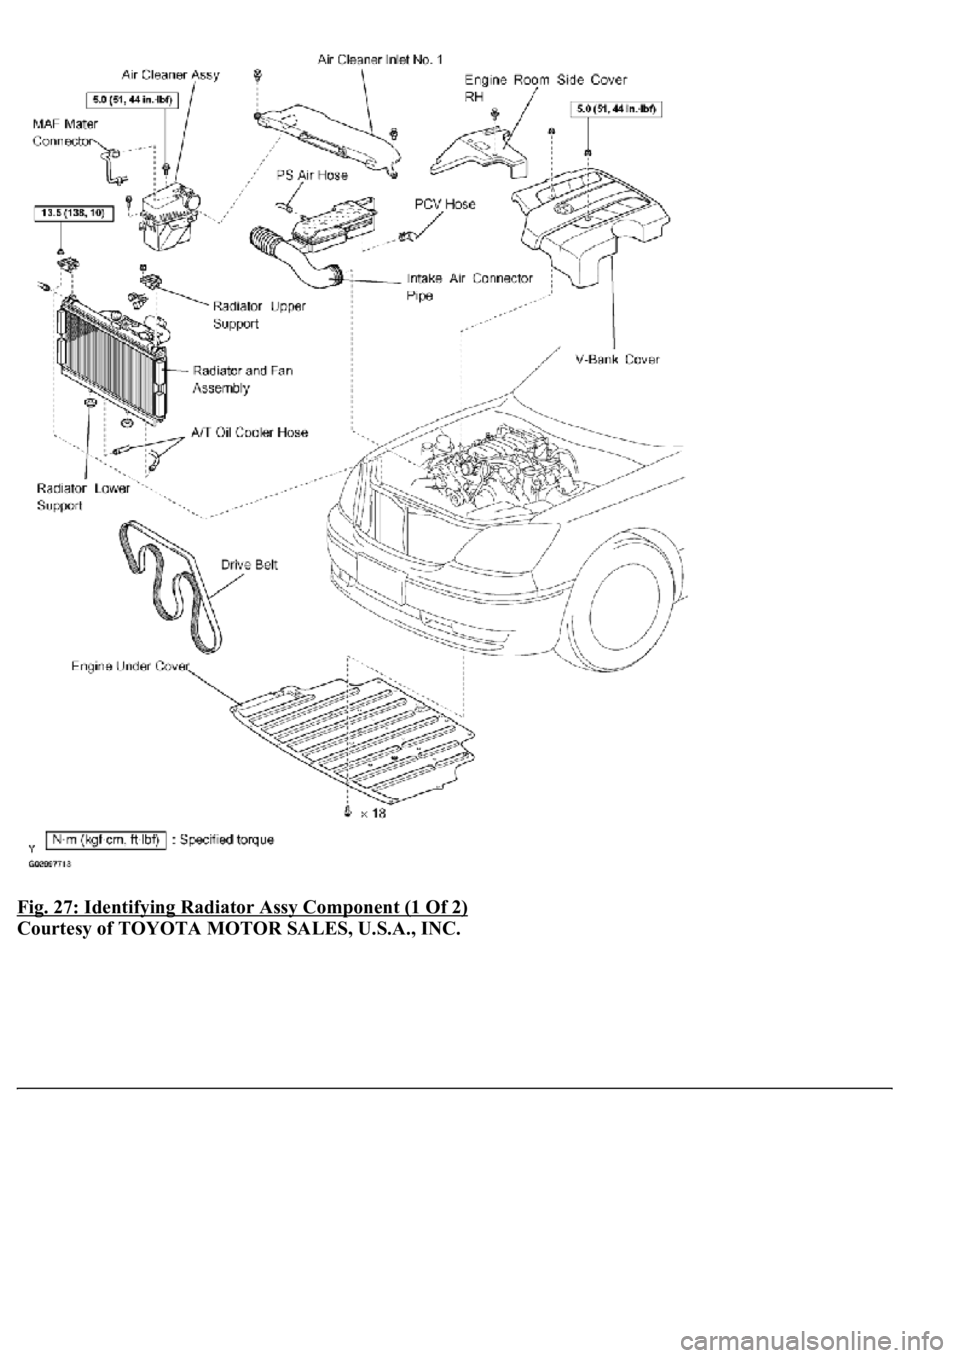
Fig. 27: Identifying Radiator Assy Component (1 Of 2)
Courtesy of TOYOTA MOTOR SALES, U.S.A., INC.
Page 1879 of 4500
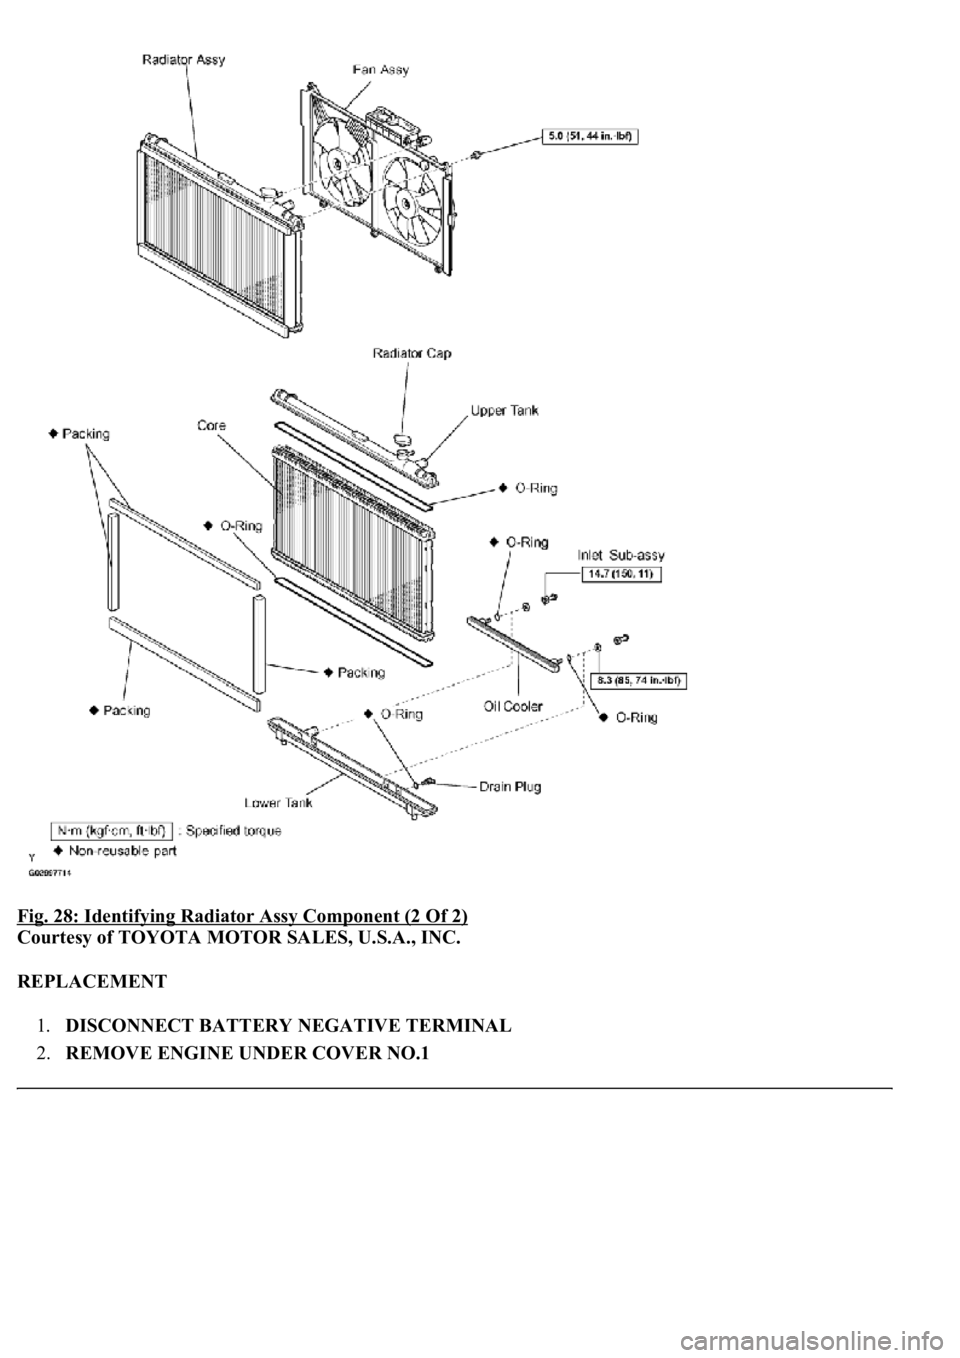
Fig. 28: Identifying Radiator Assy Component (2 Of 2)
Courtesy of TOYOTA MOTOR SALES, U.S.A., INC.
REPLACEMENT
1.DISCONNECT BATTERY NEGATIVE TERMINAL
2.REMOVE ENGINE UNDER COVER NO.1
Page 1880 of 4500
3.REMOVE AIR CLEANER INLET NO.1
4.DRAIN ENGINE COOLANT (See REPLACEMENT
)
5.REMOVE V-BANK COVER
6.REMOVE INTAKE AIR CONNECTOR PIPE
7.DISCONNECT RADIATOR HOSE NO.1
8.DISCONNECT RADIATOR HOSE NO.2
9.DISCONNECT OIL COOLER INLET TUBE NO.1
10.DISCONNECT OIL COOLER OUTLET TUBE NO.1
11.REMOVE AIR CLEANER ASSY
12.REMOVE RADIATOR AND FAN ASSEMBLY
a. Disconnect the cooling fan ECU connector.
b. Remove the 2 nuts and 2 radiator upper supports.
c. Remove the radiator and fan assembly.
d. Remove the 2 radiator lower supports.
Fig. 29: Removing Nuts And Radiator Upper Supports
Courtesy of TOYOTA MOTOR SALES, U.S.A., INC.
Page 1881 of 4500
13.REMOVE FAN ASSY
a. Disconnect the radiator reservoir hose from the radiator.
b. Remove the 6 bolts and fan.
14.INSTALL FAN ASSY
a. Install the fan with the 6 bolts.
Torque: 5.0 Nm (51 kgfcm, 44 in.lbf)
b. Connect the radiator reservoir hose to the radiator.
15.INSTALL RADIATOR AND FAN ASSEMBLY
a. Install the 2 radiator lower supports to the radiator.
b. Attach the 2 radiator lower supports on the radiator to the body bracket.
c. Install the radiator and fan assembly with the 2 radiator upper supports and 2 nuts.
Torque: 13.5 N m (138 kgf cm, 10 ft lbf)
d. Connect the cooling fan ECU connector.
16.INSTALL AIR CLEANER ASSY
17.INSTALL AIR CLEANER INLET NO.1
18.REFILL ENGINE COOLANT (See REPLACEMENT
)
19.CHECK FOR ENGINE COOLANT LEAKS
20.INSTALL ENGINE UNDER COVER NO.1
21.CONNECT BATTERY NEGATIVE TERMINAL
OVERHAUL
1.REMOVE PACKING
2.REMOVE RADIATOR CAP SUB-ASSY
3.REMOVE DRAIN PLUG
a. Remove the drain plug.
b. Remove the O-ring.
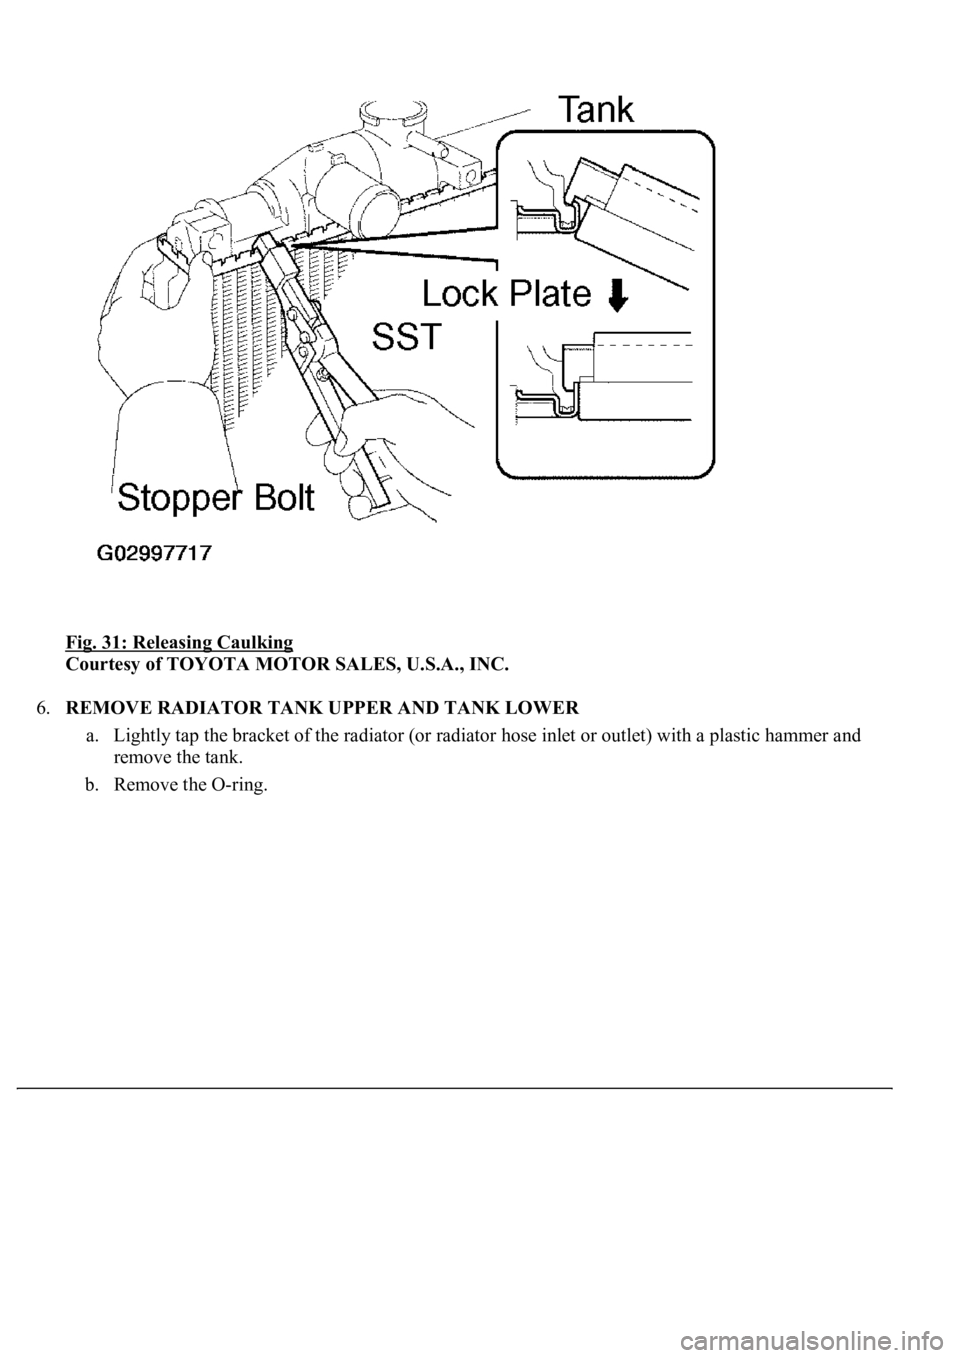
4.ASSEMBLE SST
SST 09230-01010
a. Install the claw to the overhaul handle, inserting it in the hole in part A as shown in the illustration
b. While gripping the handle, adjust the stopper bolt so that dimension B is as shown in the
illustration.
Page 1883 of 4500
Fig. 31: Releasing Caulking
Courtesy of TOYOTA MOTOR SALES, U.S.A., INC.
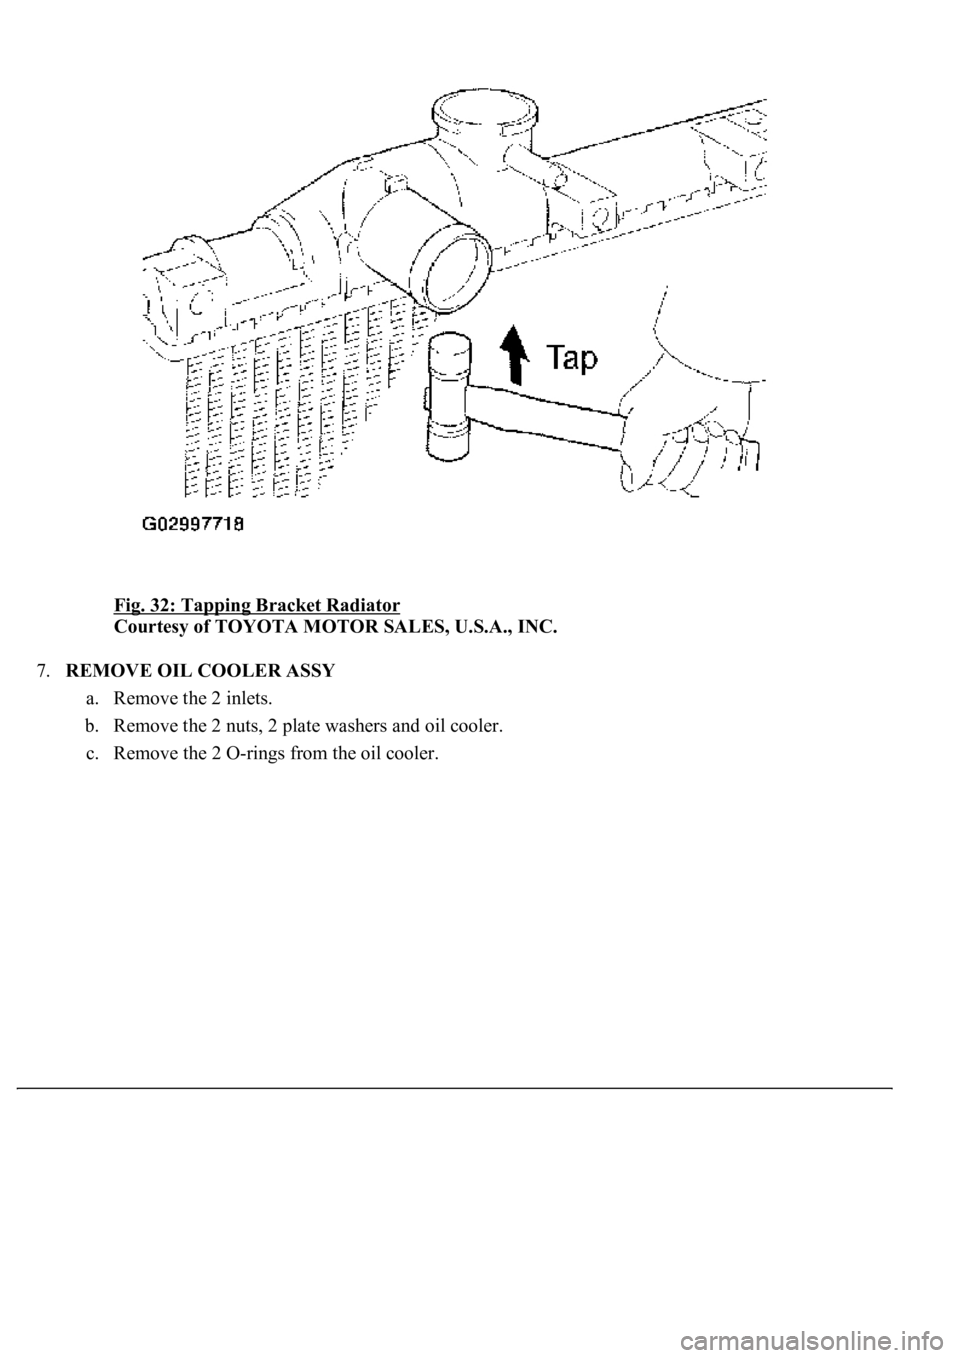
6.REMOVE RADIATOR TANK UPPER AND TANK LOWER
a. Lightly tap the bracket of the radiator (or radiator hose inlet or outlet) with a plastic hammer and
remove the tank.
b. Remove the O-ring.
Page 1884 of 4500
Fig. 32: Tapping Bracket Radiator
Courtesy of TOYOTA MOTOR SALES, U.S.A., INC.
7.REMOVE OIL COOLER ASSY
a. Remove the 2 inlets.
b. Remove the 2 nuts, 2 plate washers and oil cooler.
c. Remove the 2 O-rin
gs from the oil cooler.