ECO LEXUS RX200T 2017 Owners Manual
[x] Cancel search | Manufacturer: LEXUS, Model Year: 2017, Model line: RX200T, Model: LEXUS RX200T 2017Pages: 776, PDF Size: 44.51 MB
Page 702 of 776

7028-2. Steps to take in an emergency
RX350/RX200t_EE_OM48F32E
Attach the air release cap to the end
of the hose.
If the air release cap is not attached, the sealant may leak and the vehicle mayget dirty.
Temporarily store the bottle in the luggage compartment while it is connected
to the compressor.
To spread the liquid sealant evenly within the tire, immediately drive safety for
about 5 km (3 miles) below 80 km/h (50 mph).
After driving, stop your vehicle in a
safe place on a hard, flat surface and
reconnect the compressor.
Turn the compressor switch on and
wait for several seconds, then turn it
off. Check the tire inflation pressure.
If the tire inflation pressure is
below 130 kPa (1.3 kgf/cm2 or
bar, 19 psi): The puncture cannot
be repaired. Contact any autho-
rized Lexus dealer or repairer, or
another duly qualified and
equipped professional.
If the tire inflation pressure is between 130 kPa (1.3 kgf/cm2 or bar, 19 psi)
and a point below the recommended level: The tire can be repaired. Pro-
ceed to step .
If the tire inflation pressure is at the recommended level: Proceed to step
.
16
17
18
19
20
1
2
21
3
22
Page 703 of 776

7038-2. Steps to take in an emergency
8
When trouble arises
RX350/RX200t_EE_OM48F32E
Turn the compressor switch on to inflate the tire until the recommended tire
inflation pressure is reached. Drive for about 5 km (3 miles) and then perform
step .
Attach the air release cap to the end
of the hose.
If the air release cap is not attached, the
sealant may leak and the vehicle may
get dirty.
Store the bottle in the luggage compartment while it is connected to the com-
pressor.
Taking precautions to avoid sudden br aking, sudden acceleration and sharp
turns, drive carefully at under 80 km/h (50 mph) to any authorized Lexus
dealer or repairer, or another duly qualified and equipped professional that is
less than 100 km (62 miles) away for tire repair or replacement.
Make sure to tell any authorized Lexus deal er or repairer, or another duly qualified
and equipped professional when you have them repair or replace the tire that sealant
is injected.
21
19
22
23
24
Page 704 of 776

7048-2. Steps to take in an emergency
RX350/RX200t_EE_OM48F32E
■Emergency tire puncture repair kit
●The sealant has a limited life span. The expiry date is marked on the bottle. The sealant should be replaced before the expiry da te. Contact any authorized Lexus dealer or repairer, or another duly qualified an d equipped professional for replacement.
●The sealant stored in the emergency tire puncture repair kit can be used only once to temporarily repair a single tire. If the seal ant has been used and needs to be purchased, contact any authorized Lexus dealer or repairer, or another duly qualified and
equipped professional. The compressor is reusable.
●The compressor can be used repeatedly.
●The sealant can be used when the outside temperature is from -40 C (-40F) to 60C
(140 F).
●The kit is exclusively designed for size and type of tires originally installed on your vehi- cle. Do not use it for tires that a different size than the original ones, or for any other
purposes.
●If the sealant gets on your clothes, it may stain.
●If the sealant adheres to a wheel or the surface of the vehicle body, the stain may not be
removable if it is not cleaned at once. Immediately wipe away the sealant with a wet cloth.
●During operation of the kit, a loud operatio n noise is produced. This does not indicate a
malfunction.
●Do not use to check or to adjust the tire pressure.
■If the tire is inflated to mo re than the recommended level
Disconnect the hose from the valve.
Disconnect the hose from the valve, remove the air release cap from the hose and then reconnect the hose.
Turn the compressor switch on and wait for several seconds, then turn it off. Check that
the air pressure indicator sh ows the recommended level. (P. 737) If the air pressure is lower than the reco mmended level, turn the compressor switch on again and repeat the inflation procedure un til the recommended pressure is reached.
■After a tire repaired with the emergency tire puncture repair kit
●The tire pressure warning valve and transmitter should be replaced.
●Even if the tire inflation pressure is at the recommended level, the tire pressure warning
light may come on/flash.
Install the air release cap to the end of the
hose and push the protrusion on the air release cap into the valve to let some air out.
1
2
3
4
Page 706 of 776
7068-2. Steps to take in an emergency
RX350/RX200t_EE_OM48F32E
WARNING
■When fixing the flat tire
●Stop your vehicle in a safe and flat area.
●Do not touch the wheels or the area around the brakes immediately after the vehicle
has been driven. After the vehicle has been driven, the wheels and the area around the brakes may beextremely hot. Touching these areas with hands, feet or other body parts may result in
burns.
●Connect the valve and hose securely with the tire installed on the vehicle.
●If the hose is not properly connected to the valve, air leakage may occur or sealant
may be sprayed out.
●If the hose comes off the valve while inflating the tire, there is a risk that the hose will move abruptly due to air pressure.
●After inflation of the tire has completed, the sealant may splatter when the hose is dis-connected or some air is let out of the tire.
●Follow the operation procedure to repair the tire. If the procedure is not followed, the
sealant may spray out.
●Keep back from the tire while it is being repaired, as there is a chance of it bursting while the repair operation is being performe d. If you notice any cracks or deforma-
tion of the tire, turn off the compressor sw itch and stop the repair operation immedi- ately.
●The kit may overheat if operated for a long period of time. Do not operate the com-
pressor continuously for more than 40 minutes.
●Parts of the kit become hot during operatio n. Be careful handling the kit during and after operation. Do not touch the metal part around the connecting area between the
bottle and compressor. It will be extremely hot.
●Do not attach the vehicle speed warning sticker to an area other than the one indi- cated. If the sticker is attached to an area where an SRS airbag is located, such as the
pad of the steering wheel, it may prevent the SRS air bag from operating properly.
■Driving to spread the liquid sealant evenly
●Drive the vehicle carefully at a low speed. Be especially careful when turning and cor-
nering.
●If the vehicle does not drive straight or you feel a pull through the steering wheel, stop the vehicle and check the following:
• Tire condition. The tire may have separated from the wheel. • Tire inflation pressure. If tire inflation pressure is 130 kPa (1.3 kgf/cm2 or b ar, 1 9 p si)or below, this may indica te severe tire damage.
Page 709 of 776

7098-2. Steps to take in an emergency
8
When trouble arises
RX350/RX200t_EE_OM48F32E
One of the following may be the cause of the problem:
●One or both of the battery terminals may be disconnected.
●The battery may be discharged. (P. 714)
●There may be a malfunction in the steering lock system.
Contact any authorized Lexus dealer or repairer, or another duly qualified and equipped professional if the problem cannot be repaired, or if repair procedures are unknown.
When the engine does not start, the foll owing steps can be used as an interim
measure to start the engine if the engine switch is functioning normally.
Turn the engine switch to IGNITION ON mode and check that the parking
brake is set. ( P. 247, 259)
Shift the shift lever to P.
Turn the engine switch to ACCESSORY mode.
Press and hold the engine switch for about 15 seconds while depressing the
brake pedal firmly.
Even if the engine can be started using the above steps, the system may be mal-
functioning. Have the vehicle inspected by any authorized Lexus dealer or
repairer, or another duly qualified and equipped professional.
The starter motor does not turn over , the interior lights and headlights
do not turn on, or the horn does not sound.
Emergency start function
1
2
3
4
Page 713 of 776
7138-2. Steps to take in an emergency
8
When trouble arises
RX350/RX200t_EE_OM48F32E
■Stopping the engine
Shift the shift lever to P, set the parking brake, and press the engine switch as you nor- mally do when stopping the engine.
■Replacing the key battery
As the above procedure is a temporary measur e, it is recommended that the electronic key battery be replaced immediately when the battery is depleted. ( P. 638)
■Alarm (if equipped)
Using the mechanical key to lock the doors will not set the alarm system.
If a door is unlocked using the mechanical key when the alarm system is set, the alarm may be triggered. ( P. 83)
■Changing engine switch modes
Release the brake pedal and press the engine switch in step above.
The engine does not start an d modes will be changed each time the switch is pressed.
( P. 247)
■When the electronic key does not work properly
●Make sure that the smart entry & start system has not been deactivated in the
customization setting. If it is off, turn the function on. (Customizable features P. 743)
●Check if battery-saving mode is set. If it is set, cancel the function. (P. 170)
WARNING
■When using the mechanical key and operating the power windows or the moon roof
or panoramic moon roof
Operate the power window or the moon roof or panoramic moon roof after checking to make sure that there is no possibility of any passenger having any of their body parts
caught in the window or the moon roof or panoramic moon roof. Also, do not allow children to operate the me chanical key. It is possible for children and other passengers to get caught in the powe r window or the moon roof or panoramic
moon roof.
3
Page 714 of 776
7148-2. Steps to take in an emergency
RX350/RX200t_EE_OM48F32E
If you have a set of jumper (or booster) cables and a second vehicle with a 12-volt
battery, you can jump start your vehicle by following the steps below.
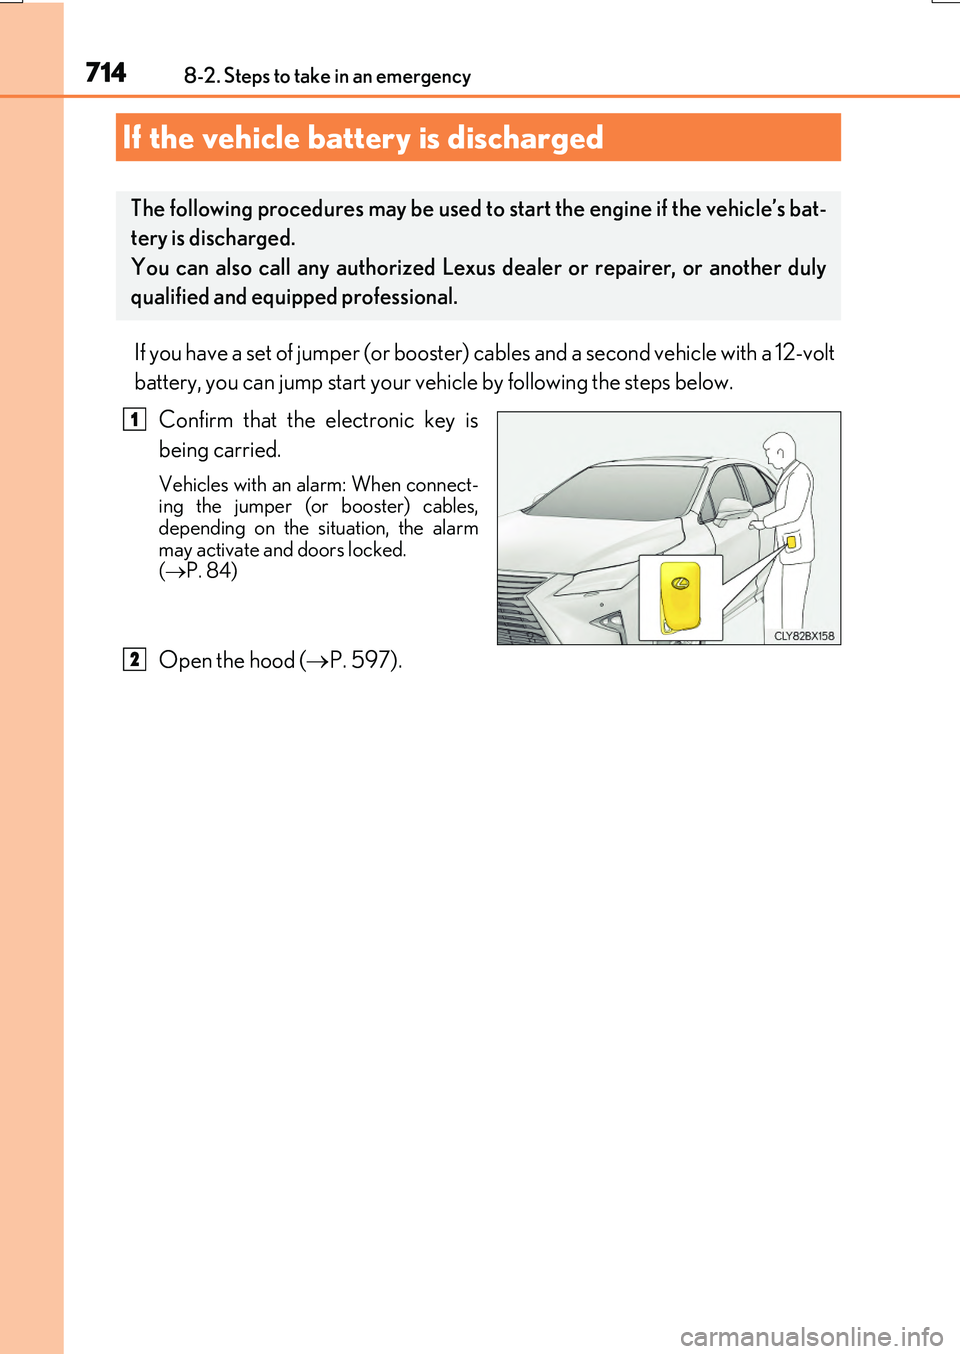
Confirm that the electronic key is
being carried.
Vehicles with an alarm: When connect- ing the jumper (or booster) cables,depending on the situation, the alarm
may activate and doors locked. ( P. 84)
Open the hood (P. 597).
If the vehicle battery is discharged
The following procedures may be used to start the engine if the vehicle’s bat-
tery is discharged.
You can also call any authorized Lexus dealer or repairer, or another duly
qualified and equipped professional.
1
2
Page 715 of 776

7158-2. Steps to take in an emergency
8
When trouble arises
RX350/RX200t_EE_OM48F32E
Connect the jumper cables according to the following procedure:
RX350
RX200t
Connect a positive jumper cable clamp to the positive (+) battery terminal on
your vehicle.
Connect the clamp on the other end of the positive cable to the positive (+)
battery terminal on the second vehicle.
Connect a negative cable clamp to the negative (-) battery terminal on the
second vehicle.
Connect the clamp at the other end of the negative cable to a solid, stationary,
unpainted metallic point away from the battery and any moving parts, as
shown in the illustration.
3
1
2
3
4
Page 716 of 776
7168-2. Steps to take in an emergency
RX350/RX200t_EE_OM48F32E
Start the engine of the second vehicle. Increase the engine speed slightly and
maintain at that level for approximately 5 minutes to recharge the battery of
your vehicle.
Open and close any of the doors of your vehicle with the engine switch off.
Maintain the engine speed of the second vehicle and start the engine of your
vehicle by turning the engine switch to IGNITION ON mode.
Once the vehicle’s engine has started, remove the jumper cables in the exact
reverse order from which they were connected.
Once the engine starts, have the vehicle inspected at any authorized Lexus
dealer or repairer, or another duly qualified and equipped professional as soon
as possible.
■Starting the engine when the battery is discharged
The engine cannot be started by push-starting.
■To prevent battery discharge
●Turn off the headlights and the audio system while the engine is stopped. (RX200t: Except when the engine is stopped by the Stop & Start system.)
●Turn off any unnecessary electrical components when the vehicle is running at a low
speed for an extended period, such as in heavy traffic.
■Charging the battery
The electricity stored in the battery will discharge gradually even when the vehicle is not
in use, due to natural discharge and the draining effects of certain electrical appliances. If the vehicle is left for a long time, the battery may discharge, and the engine may beunable to start. (The battery recharges automatically during driving.)
■When the battery is removed or discharged
●In some cases, it may not be possible to unlock the doors using the smart entry & startsystem when the battery is discharged. Us e the wireless remote control or the mechan-
ical key to lock or unlock the doors.
●The engine may not start on the first attempt after the battery has recharged but will start normally after the second attempt. This is not a malfunction.
●The engine switch mode is memorized by the vehicle. When the battery is recon-nected, the system will return to the mode it was in before the battery was discharged. Before disconnecting the battery, turn the engine switch off.
If you are unsure what mode the engine switch was in before the battery discharged, be especially careful when reconnecting the battery.
●Vehicles with power back door: The power back door must be initialized. (P. 159)
●RX200t: After the battery terminals have been disconnected then reconnected or the battery has been replaced, the Stop & Start system may not automatically stop theengine for approximately 5 to 60 minutes.
4
5
6
7
Page 717 of 776

7178-2. Steps to take in an emergency
8
When trouble arises
RX350/RX200t_EE_OM48F32E
■When exchanging the battery (RX200t)
Use a battery specified for use with the Stop & Start system and equivalent to a genuine battery. If an unsupported battery is used, Stop & Start system functions may be
restricted to protect the battery.
Also, battery performance may decrease and the engine may not be able to restart. Contact any authorized Lexus dealer or repairer, or another duly qualified and equipped
professional.
WARNING
■Avoiding battery fires or explosions
Observe the following precautions to preven t accidentally igniting the flammable gas that may be emitted from the battery:
●Make sure each jumper cable is connected to the correct terminal and that it is notunintentionally in contact with any other than the intended terminal.
●Do not allow the other end of the jumper cable connected to the “+” terminal to come
into contact with any other parts or metal surfaces in the area, such as brackets or unpainted metal.
●Do not allow the + and - clamps of the jumper cables to come into contact with each
other.
●Do not smoke, use matches, cigarette lighters or allow open flame near the battery.
■Battery precautions
The battery contains poisonous and corrosive acidic electrolyte, while related parts contain lead and lead compounds. Observ e the following precautions when handling the battery:
●When working with the battery, always wear safety glasses and take care not to allowany battery fluids (acid) to come into contact with skin, clothing or the vehicle body.
●Do not lean over the battery.
●In the event that battery fluid comes into contact with the skin or eyes, immediatelywash the affected area with water and seek medical attention.Place a wet sponge or cloth over the affected area until medical attention can be
received.
●Always wash your hands after handling the battery support, terminals, and other bat- tery-related parts.
●Do not allow children near the battery.
NOTICE
■When handling jumper cables
When connecting the jumper cables, ensure that they do not become entangled in the cooling fans or engine drive belt.