LINCOLN AVIATOR 2004 Owners Manual
Manufacturer: LINCOLN, Model Year: 2004, Model line: AVIATOR, Model: LINCOLN AVIATOR 2004Pages: 336, PDF Size: 3.69 MB
Page 241 of 336
Fuse/Relay
LocationFuse Amp
RatingPower Distribution Box
Description
56 Ð Starter motor relay
57 Ð PTEC relay
58 Ð Ignition relay
59 Ð Driver brake applied relay
60 Ð PCM diode
61 Ð A/C clutch diode
62 30A*** Power windows
* Mini Fuses ** Maxi Cartridge Fuses *** Circuit breaker
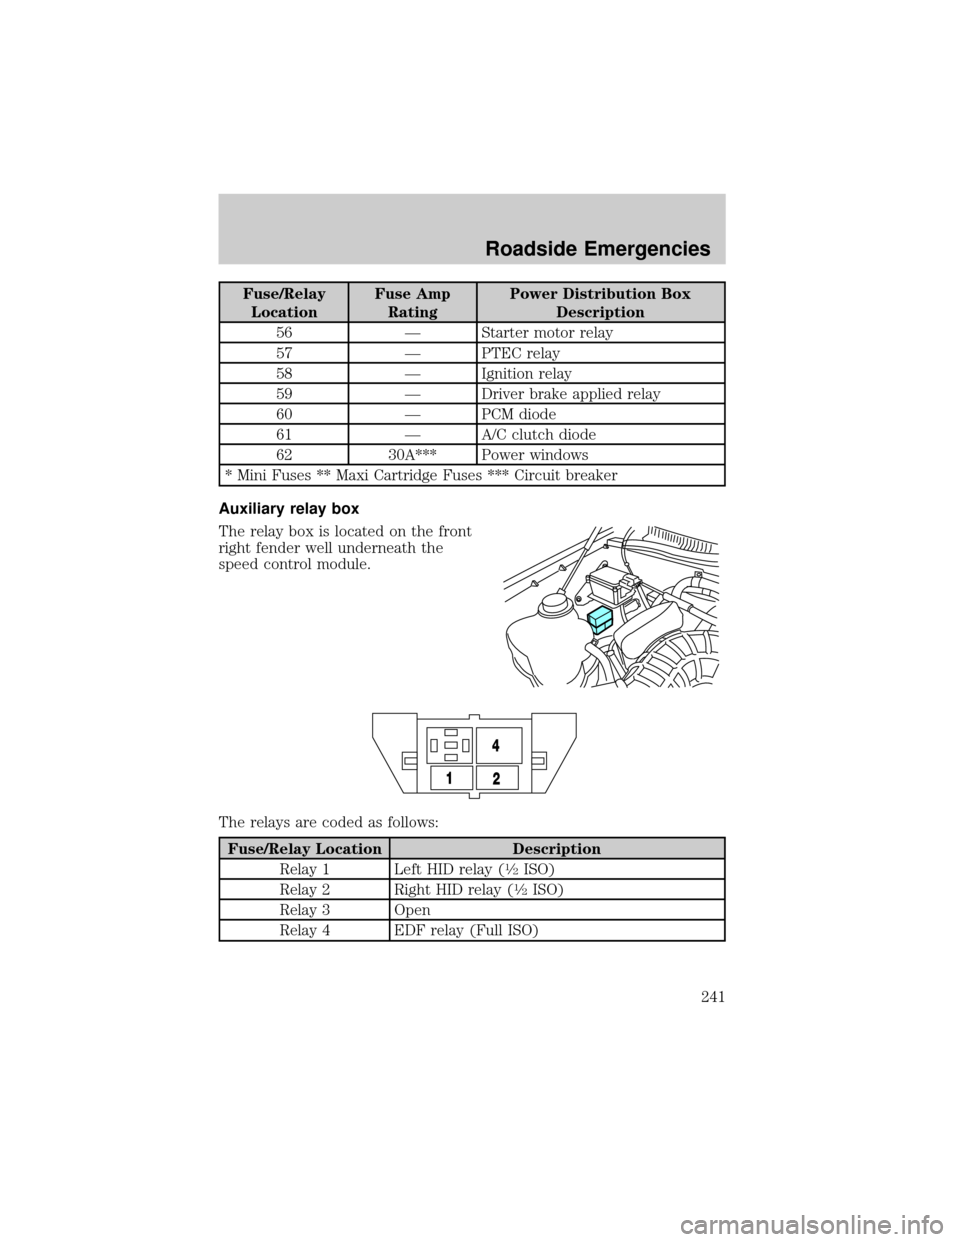
Auxiliary relay box
The relay box is located on the front
right fender well underneath the
speed control module.
The relays are coded as follows:
Fuse/Relay Location Description
Relay 1 Left HID relay (
1¤2ISO)
Relay 2 Right HID relay (
1¤2ISO)
Relay 3 Open
Relay 4 EDF relay (Full ISO)
Roadside Emergencies
241
Page 242 of 336
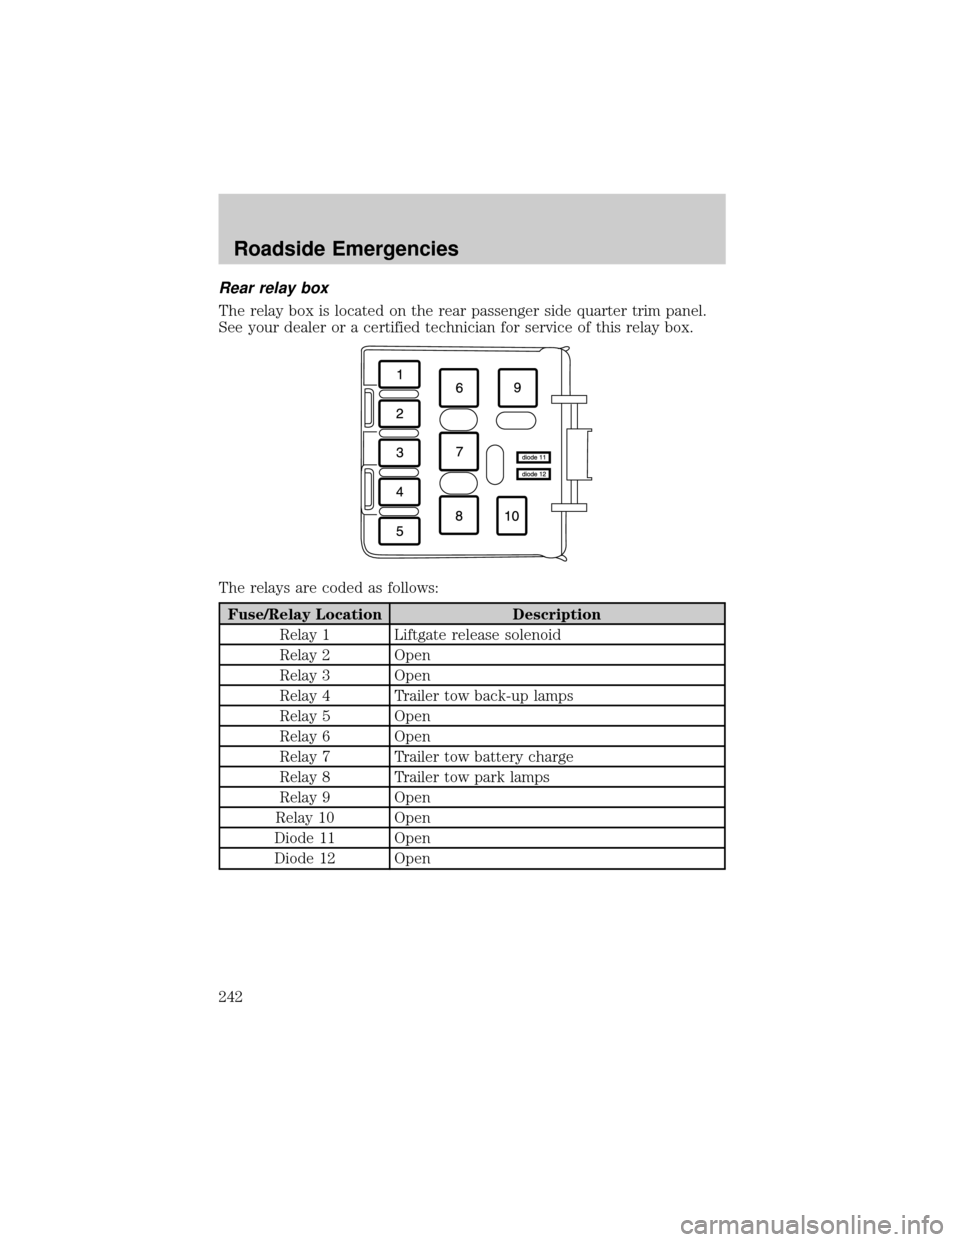
Rear relay box
The relay box is located on the rear passenger side quarter trim panel.
See your dealer or a certified technician for service of this relay box.
The relays are coded as follows:
Fuse/Relay Location Description
Relay 1 Liftgate release solenoid
Relay 2 Open
Relay 3 Open
Relay 4 Trailer tow back-up lamps
Relay 5 Open
Relay 6 Open
Relay 7 Trailer tow battery charge
Relay 8 Trailer tow park lamps
Relay 9 Open
Relay 10 Open
Diode 11 Open
Diode 12 Open
Roadside Emergencies
242
Page 243 of 336
CHANGING THE TIRES
If you get a flat tire while driving:
²do not brake heavily.
²gradually decrease the vehicle's speed.
²hold the steering wheel firmly.
²slowly move to a safe place on the side of the road.
The use of tire sealants may damage your tires. The use of tire
sealants may also damage your tire pressure monitoring system
(if equipped).
If your vehicle is equipped with a tire pressure monitoring
system, refer toTire Pressure Monitoring System (if
equipped)in theMaintenance and specificationssection for
important information. If the tire pressure monitor sensor becomes
damaged, it will no longer function.
Spare tire information
Your spare tire is not equipped with a tire pressure monitoring system
(TPMS) sensor. The tire pressure monitoring system indicator light will
illuminate when the spare is in use. To restore full functionality of the
monitoring system, all road wheels equipped with tire pressure
monitoring sensors must be mounted on the vehicle.
Have flat tires serviced by a dealer or qualified technician in order to
prevent damage to the TPMS sensor. Replace the spare tire with a road
tire as soon as possible.
If your vehicle is equipped with AWD, a spare tire of a different
diameter than the road tires should not be used. Such a tire
could make the vehicle difficult to control as well as result in damage
to driveline components.
Roadside Emergencies
243
Page 244 of 336
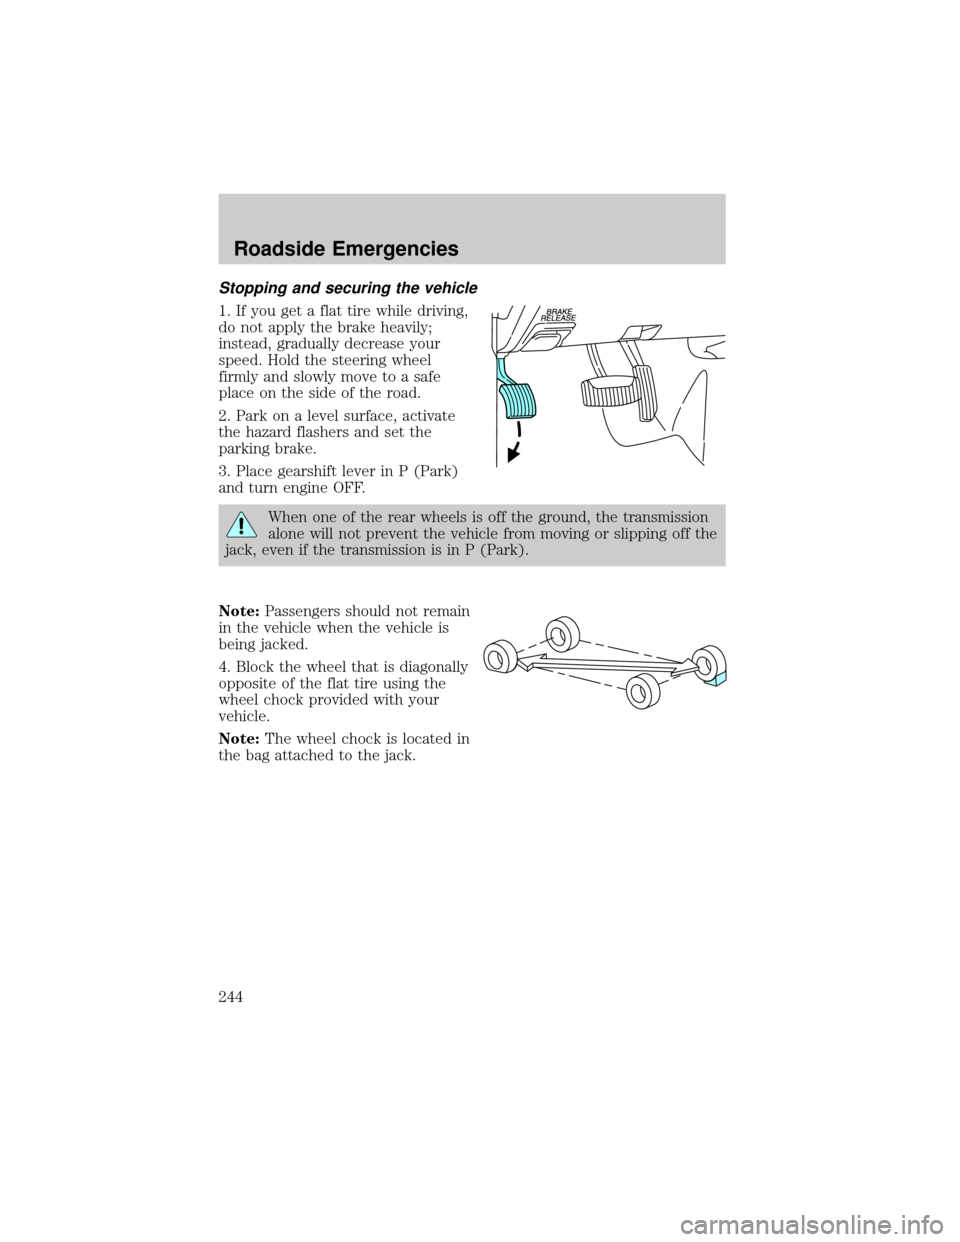
Stopping and securing the vehicle
1. If you get a flat tire while driving,
do not apply the brake heavily;
instead, gradually decrease your
speed. Hold the steering wheel
firmly and slowly move to a safe
place on the side of the road.
2. Park on a level surface, activate
the hazard flashers and set the
parking brake.
3. Place gearshift lever in P (Park)
and turn engine OFF.
When one of the rear wheels is off the ground, the transmission
alone will not prevent the vehicle from moving or slipping off the
jack, even if the transmission is in P (Park).
Note:Passengers should not remain
in the vehicle when the vehicle is
being jacked.
4. Block the wheel that is diagonally
opposite of the flat tire using the
wheel chock provided with your
vehicle.
Note:The wheel chock is located in
the bag attached to the jack.
Roadside Emergencies
244
Page 245 of 336
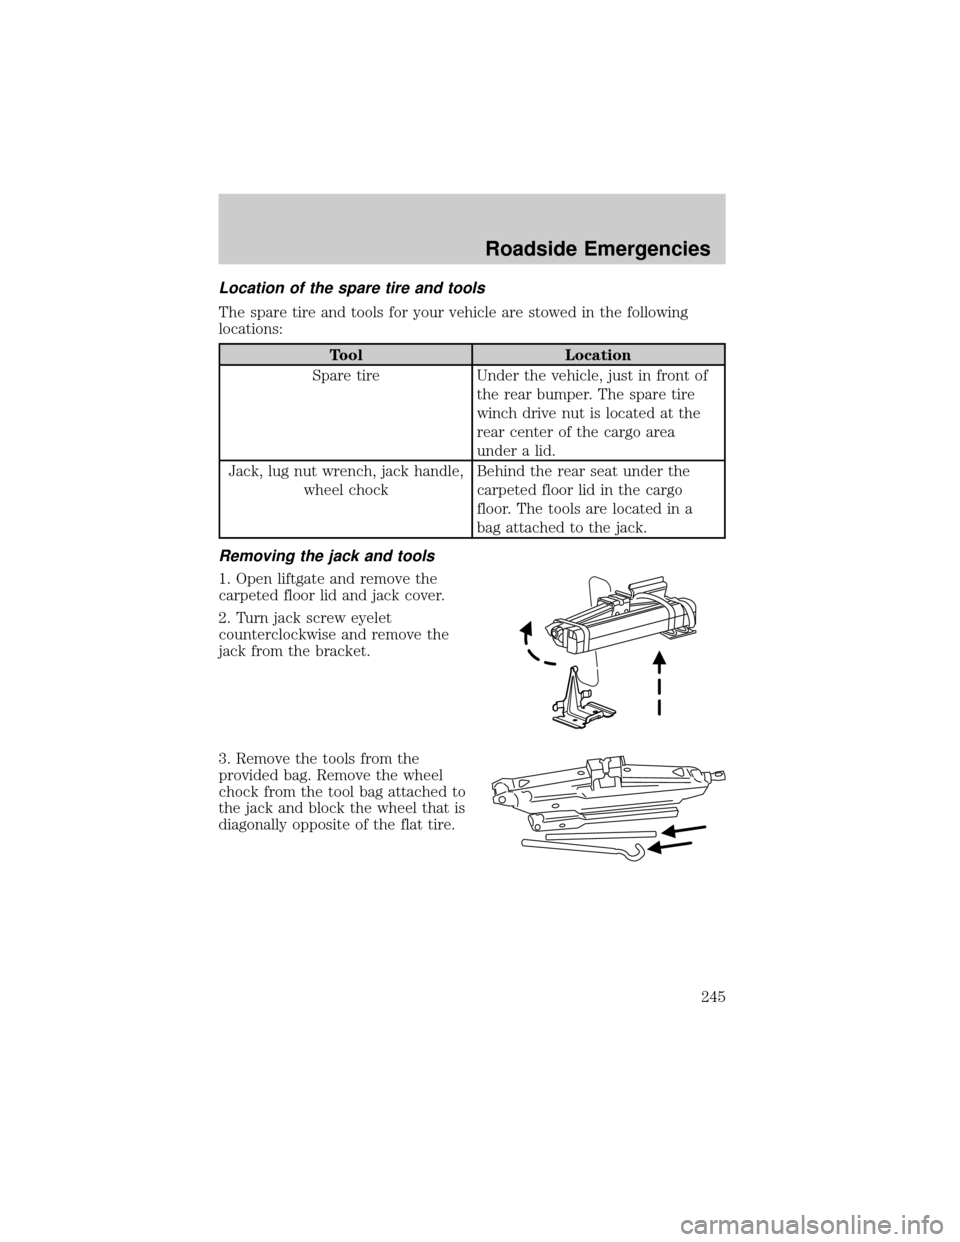
Location of the spare tire and tools
The spare tire and tools for your vehicle are stowed in the following
locations:
Tool Location
Spare tire Under the vehicle, just in front of
the rear bumper. The spare tire
winch drive nut is located at the
rear center of the cargo area
under a lid.
Jack, lug nut wrench, jack handle,
wheel chockBehind the rear seat under the
carpeted floor lid in the cargo
floor. The tools are located in a
bag attached to the jack.
Removing the jack and tools
1. Open liftgate and remove the
carpeted floor lid and jack cover.
2. Turn jack screw eyelet
counterclockwise and remove the
jack from the bracket.
3. Remove the tools from the
provided bag. Remove the wheel
chock from the tool bag attached to
the jack and block the wheel that is
diagonally opposite of the flat tire.
Roadside Emergencies
245
Page 246 of 336
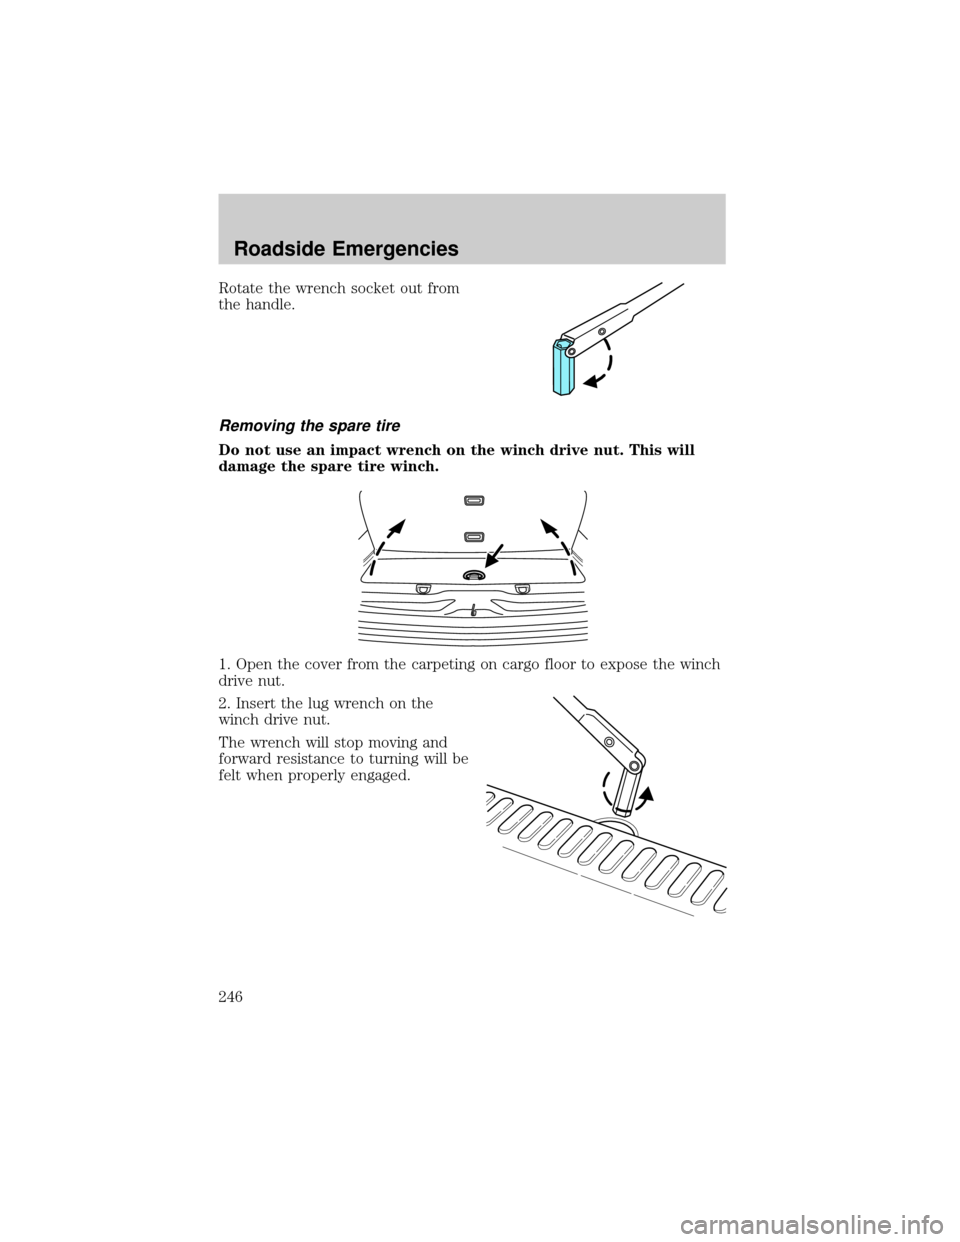
Rotate the wrench socket out from
the handle.
Removing the spare tire
Do not use an impact wrench on the winch drive nut. This will
damage the spare tire winch.
1. Open the cover from the carpeting on cargo floor to expose the winch
drive nut.
2. Insert the lug wrench on the
winch drive nut.
The wrench will stop moving and
forward resistance to turning will be
felt when properly engaged.
Roadside Emergencies
246
Page 247 of 336
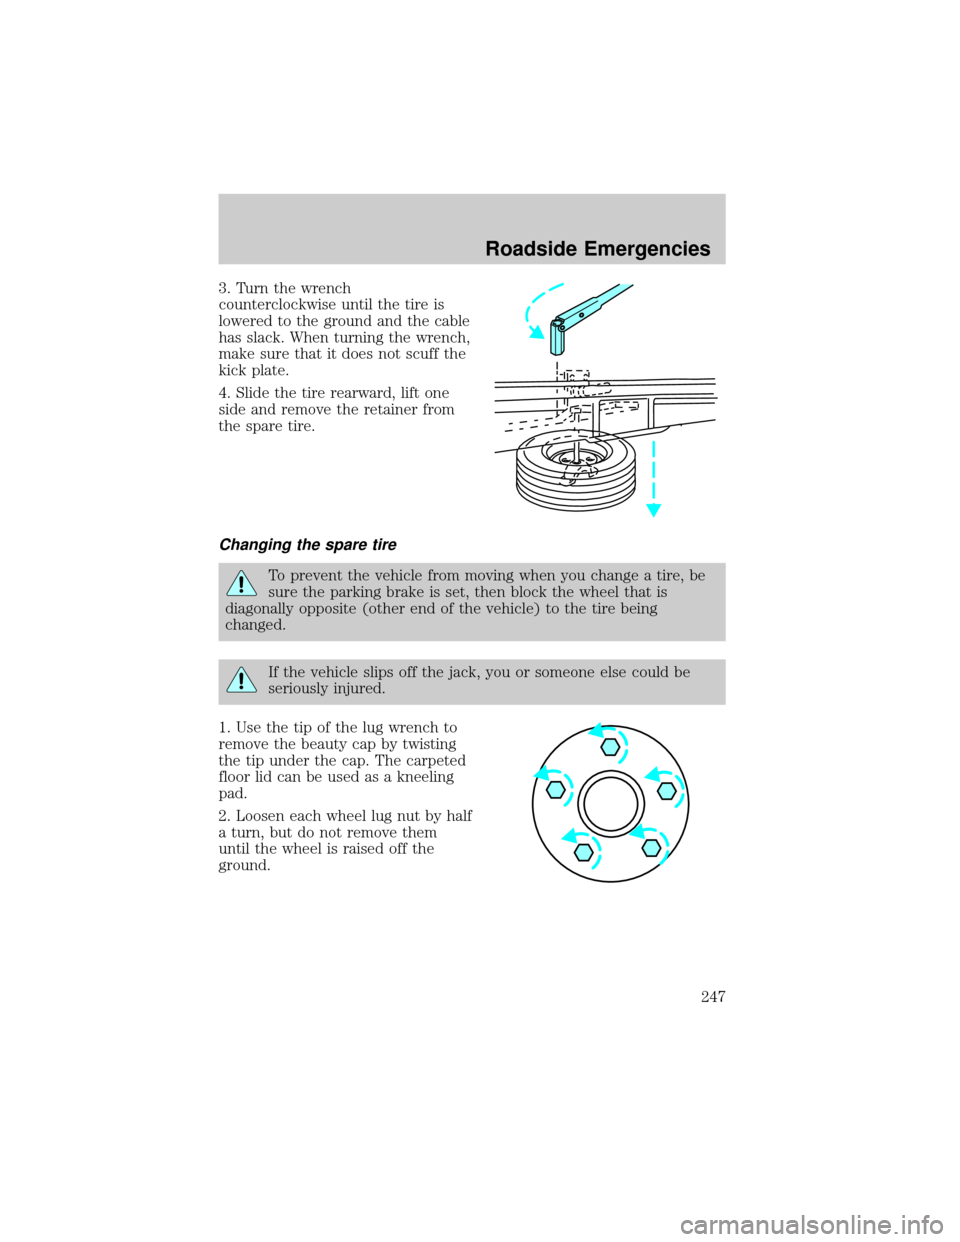
3. Turn the wrench
counterclockwise until the tire is
lowered to the ground and the cable
has slack. When turning the wrench,
make sure that it does not scuff the
kick plate.
4. Slide the tire rearward, lift one
side and remove the retainer from
the spare tire.
Changing the spare tire
To prevent the vehicle from moving when you change a tire, be
sure the parking brake is set, then block the wheel that is
diagonally opposite (other end of the vehicle) to the tire being
changed.
If the vehicle slips off the jack, you or someone else could be
seriously injured.
1. Use the tip of the lug wrench to
remove the beauty cap by twisting
the tip under the cap. The carpeted
floor lid can be used as a kneeling
pad.
2. Loosen each wheel lug nut by half
a turn, but do not remove them
until the wheel is raised off the
ground.
Roadside Emergencies
247
Page 248 of 336
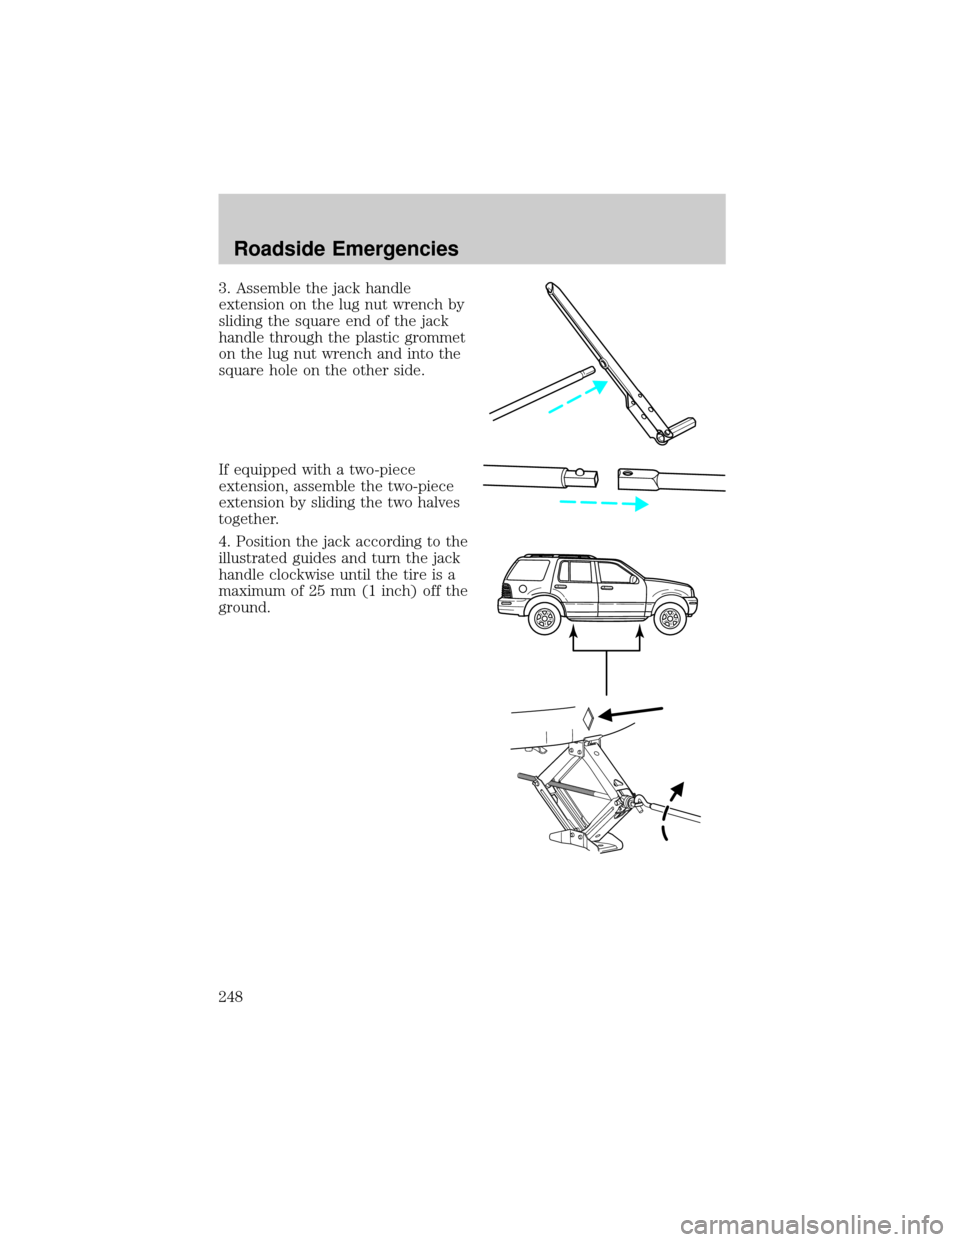
3. Assemble the jack handle
extension on the lug nut wrench by
sliding the square end of the jack
handle through the plastic grommet
on the lug nut wrench and into the
square hole on the other side.
If equipped with a two-piece
extension, assemble the two-piece
extension by sliding the two halves
together.
4. Position the jack according to the
illustrated guides and turn the jack
handle clockwise until the tire is a
maximum of 25 mm (1 inch) off the
ground.
Roadside Emergencies
248
Page 249 of 336
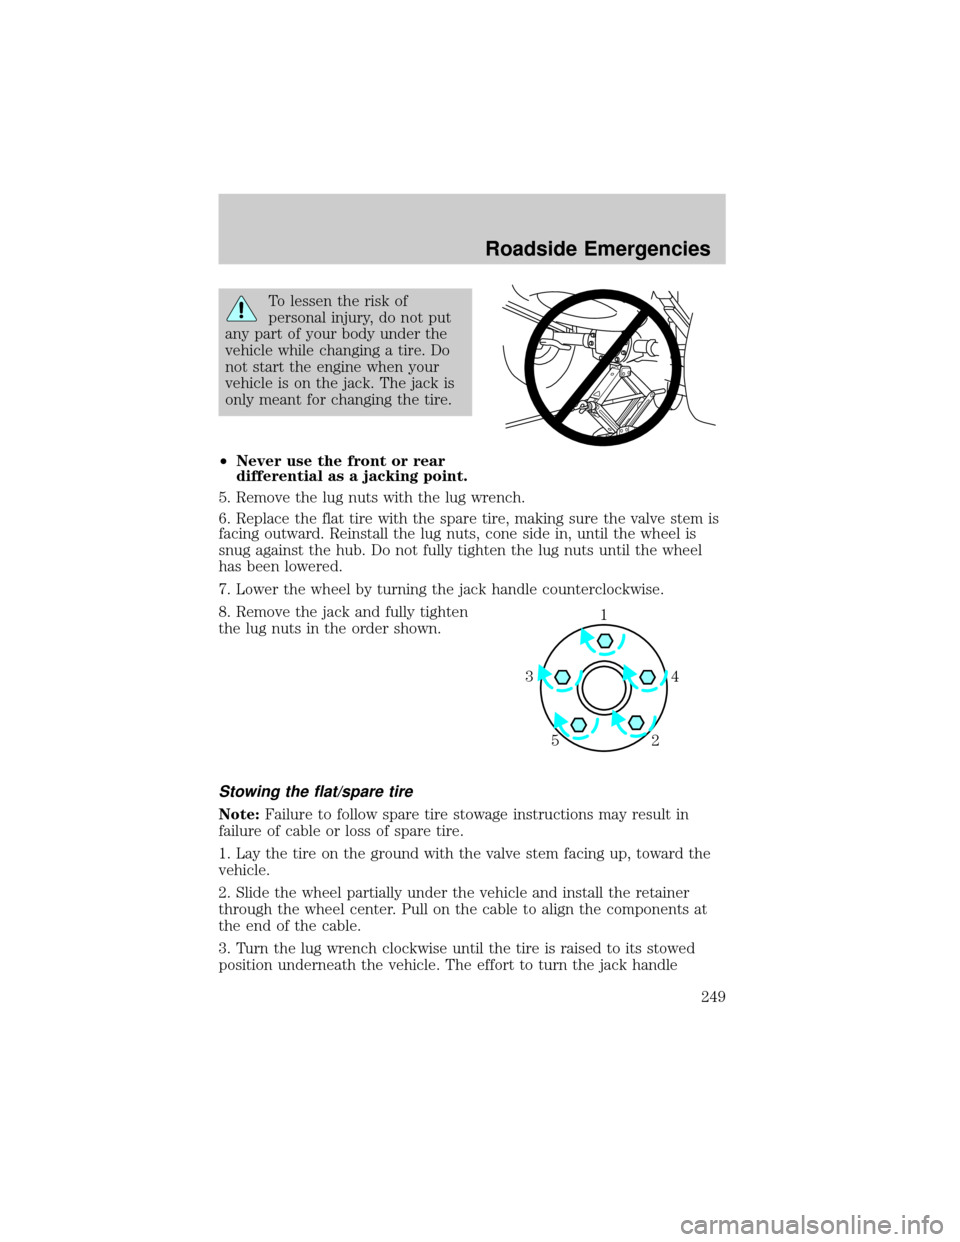
To lessen the risk of
personal injury, do not put
any part of your body under the
vehicle while changing a tire. Do
not start the engine when your
vehicle is on the jack. The jack is
only meant for changing the tire.
²Never use the front or rear
differential as a jacking point.
5. Remove the lug nuts with the lug wrench.
6. Replace the flat tire with the spare tire, making sure the valve stem is
facing outward. Reinstall the lug nuts, cone side in, until the wheel is
snug against the hub. Do not fully tighten the lug nuts until the wheel
has been lowered.
7. Lower the wheel by turning the jack handle counterclockwise.
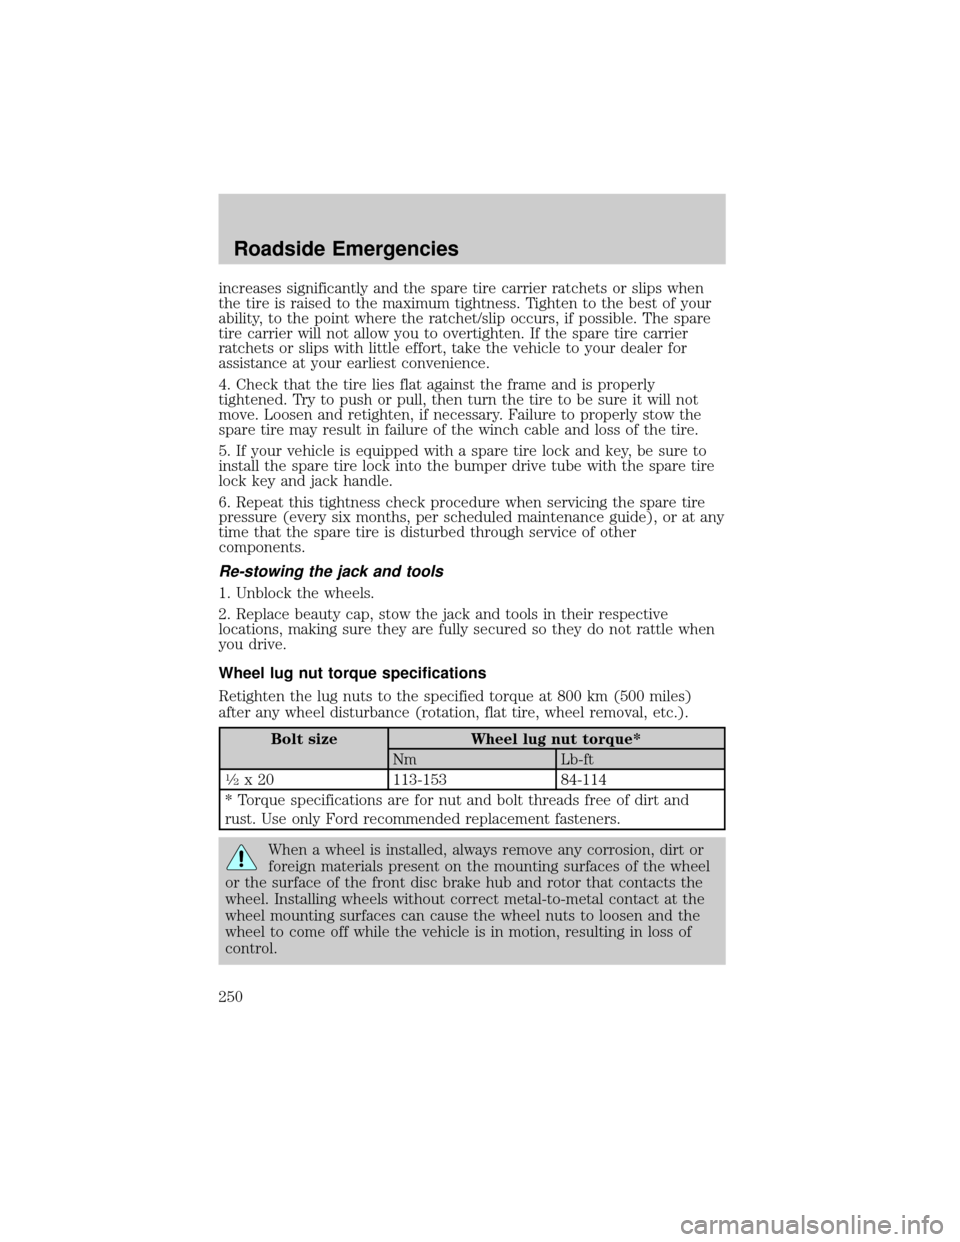
8. Remove the jack and fully tighten
the lug nuts in the order shown.
Stowing the flat/spare tire
Note:Failure to follow spare tire stowage instructions may result in
failure of cable or loss of spare tire.
1. Lay the tire on the ground with the valve stem facing up, toward the
vehicle.
2. Slide the wheel partially under the vehicle and install the retainer
through the wheel center. Pull on the cable to align the components at
the end of the cable.
3. Turn the lug wrench clockwise until the tire is raised to its stowed
position underneath the vehicle. The effort to turn the jack handle
1
4 3
2 5
Roadside Emergencies
249
Page 250 of 336
increases significantly and the spare tire carrier ratchets or slips when
the tire is raised to the maximum tightness. Tighten to the best of your
ability, to the point where the ratchet/slip occurs, if possible. The spare
tire carrier will not allow you to overtighten. If the spare tire carrier
ratchets or slips with little effort, take the vehicle to your dealer for
assistance at your earliest convenience.
4. Check that the tire lies flat against the frame and is properly
tightened. Try to push or pull, then turn the tire to be sure it will not
move. Loosen and retighten, if necessary. Failure to properly stow the
spare tire may result in failure of the winch cable and loss of the tire.
5. If your vehicle is equipped with a spare tire lock and key, be sure to
install the spare tire lock into the bumper drive tube with the spare tire
lock key and jack handle.
6. Repeat this tightness check procedure when servicing the spare tire
pressure (every six months, per scheduled maintenance guide), or at any
time that the spare tire is disturbed through service of other
components.
Re-stowing the jack and tools
1. Unblock the wheels.
2. Replace beauty cap, stow the jack and tools in their respective
locations, making sure they are fully secured so they do not rattle when
you drive.
Wheel lug nut torque specifications
Retighten the lug nuts to the specified torque at 800 km (500 miles)
after any wheel disturbance (rotation, flat tire, wheel removal, etc.).
Bolt size Wheel lug nut torque*
Nm Lb-ft
1¤2x 20 113-153 84-114
* Torque specifications are for nut and bolt threads free of dirt and
rust. Use only Ford recommended replacement fasteners.
When a wheel is installed, always remove any corrosion, dirt or
foreign materials present on the mounting surfaces of the wheel
or the surface of the front disc brake hub and rotor that contacts the
wheel. Installing wheels without correct metal-to-metal contact at the
wheel mounting surfaces can cause the wheel nuts to loosen and the
wheel to come off while the vehicle is in motion, resulting in loss of
control.
Roadside Emergencies
250