Passenger window LINCOLN AVIATOR 2004 Owners Manual
[x] Cancel search | Manufacturer: LINCOLN, Model Year: 2004, Model line: AVIATOR, Model: LINCOLN AVIATOR 2004Pages: 336, PDF Size: 3.69 MB
Page 1 of 336
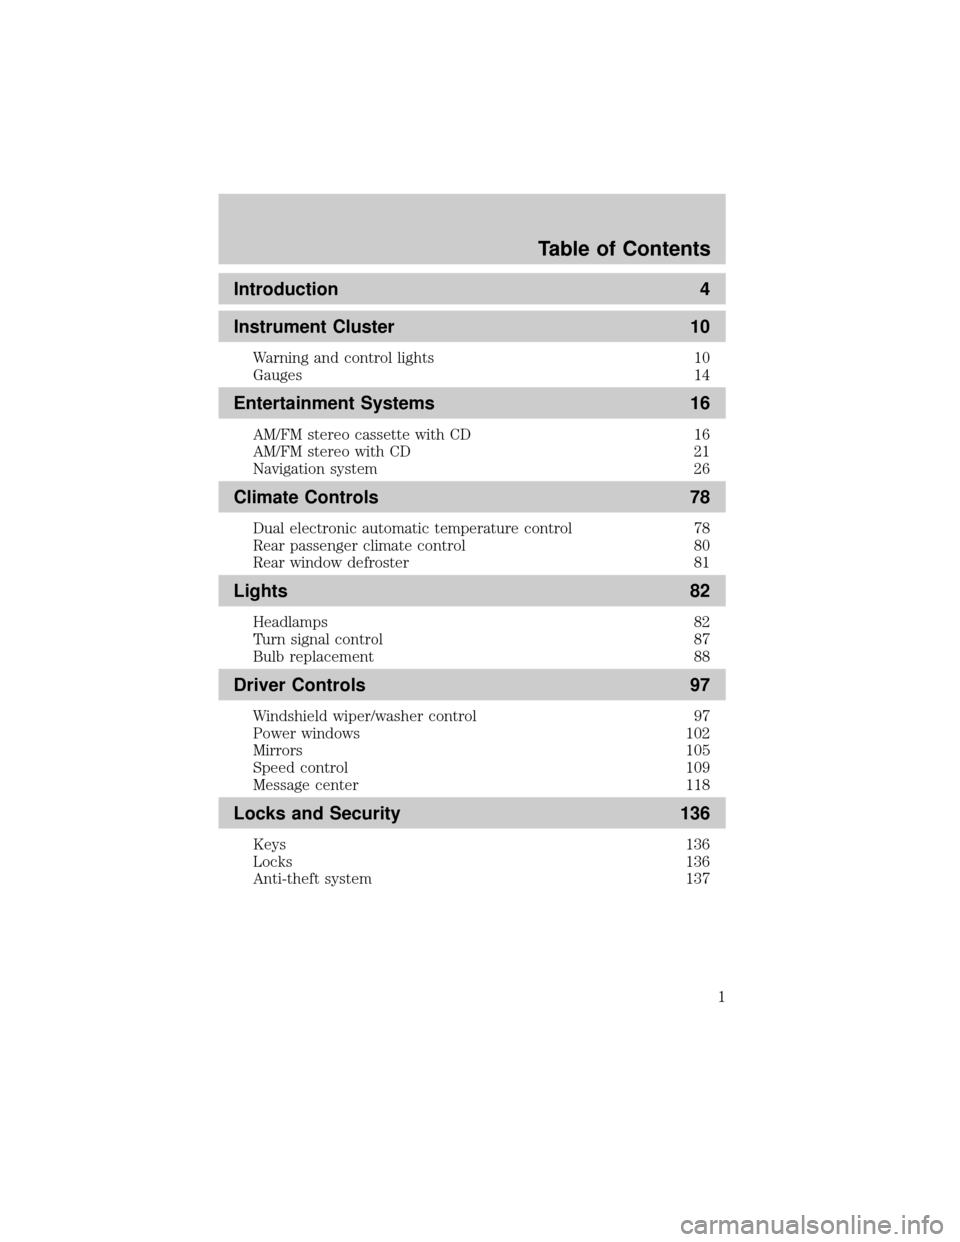
Introduction 4
Instrument Cluster 10
Warning and control lights 10
Gauges 14
Entertainment Systems 16
AM/FM stereo cassette with CD 16
AM/FM stereo with CD 21
Navigation system 26
Climate Controls 78
Dual electronic automatic temperature control 78
Rear passenger climate control 80
Rear window defroster 81
Lights 82
Headlamps 82
Turn signal control 87
Bulb replacement 88
Driver Controls 97
Windshield wiper/washer control 97
Power windows 102
Mirrors 105
Speed control 109
Message center 118
Locks and Security 136
Keys 136
Locks 136
Anti-theft system 137
Table of Contents
Table of Contents
1
Page 9 of 336
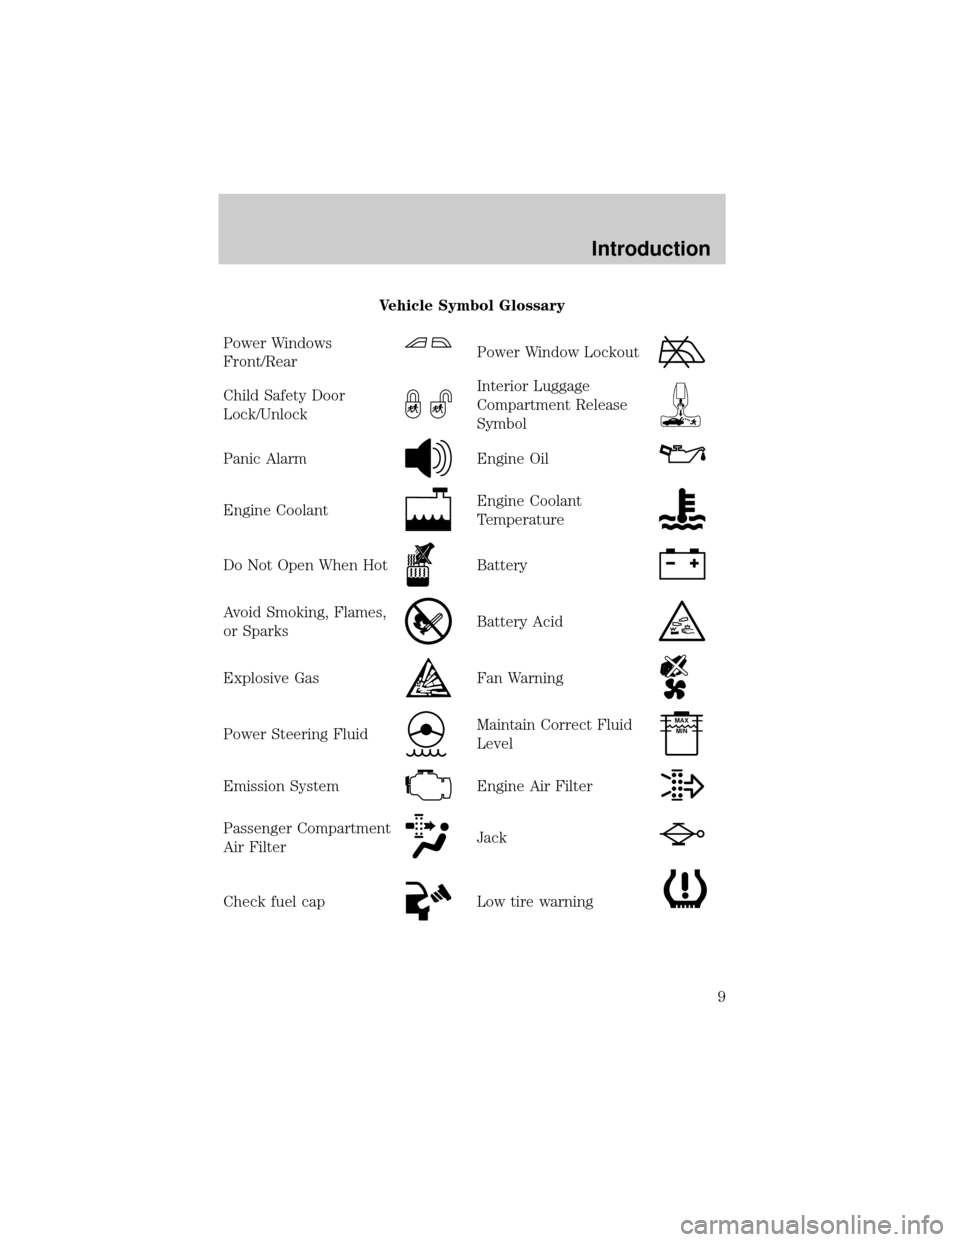
Vehicle Symbol Glossary
Power Windows
Front/Rear
Power Window Lockout
Child Safety Door
Lock/UnlockInterior Luggage
Compartment Release
Symbol
Panic AlarmEngine Oil
Engine CoolantEngine Coolant
Temperature
Do Not Open When HotBattery
Avoid Smoking, Flames,
or SparksBattery Acid
Explosive GasFan Warning
Power Steering FluidMaintain Correct Fluid
LevelMAX
MIN
Emission SystemEngine Air Filter
Passenger Compartment
Air FilterJack
Check fuel capLow tire warning
Introduction
9
Page 81 of 336
Floor console climate controls:
The floor console climate control system allows the rear passengers to
manually enable or disable airflow through the floor console.
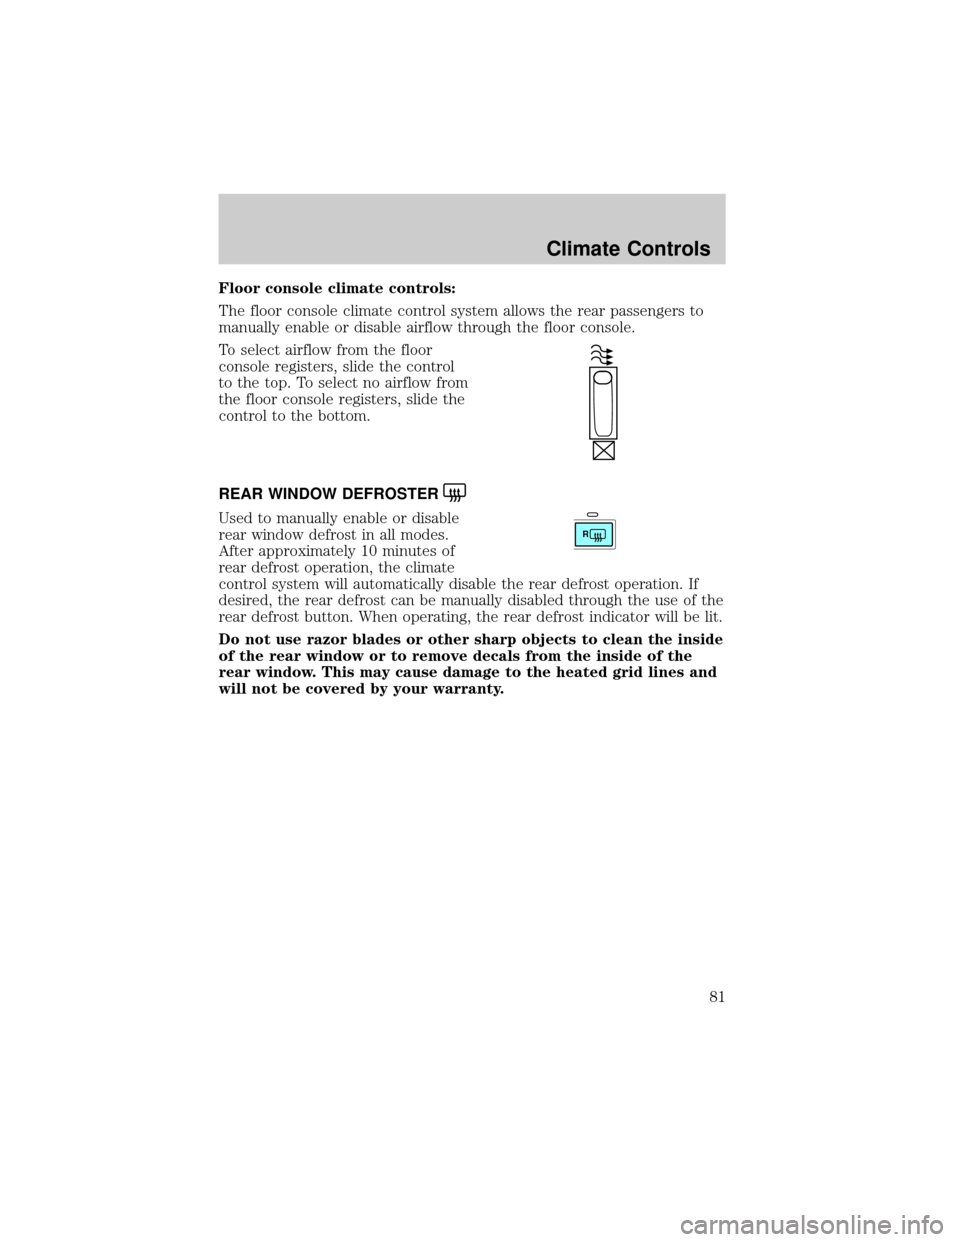
To select airflow from the floor
console registers, slide the control
to the top. To select no airflow from
the floor console registers, slide the
control to the bottom.
REAR WINDOW DEFROSTER
Used to manually enable or disable
rear window defrost in all modes.
After approximately 10 minutes of
rear defrost operation, the climate
control system will automatically disable the rear defrost operation. If
desired, the rear defrost can be manually disabled through the use of the
rear defrost button. When operating, the rear defrost indicator will be lit.
Do not use razor blades or other sharp objects to clean the inside
of the rear window or to remove decals from the inside of the
rear window. This may cause damage to the heated grid lines and
will not be covered by your warranty.R
Climate Controls
81
Page 103 of 336
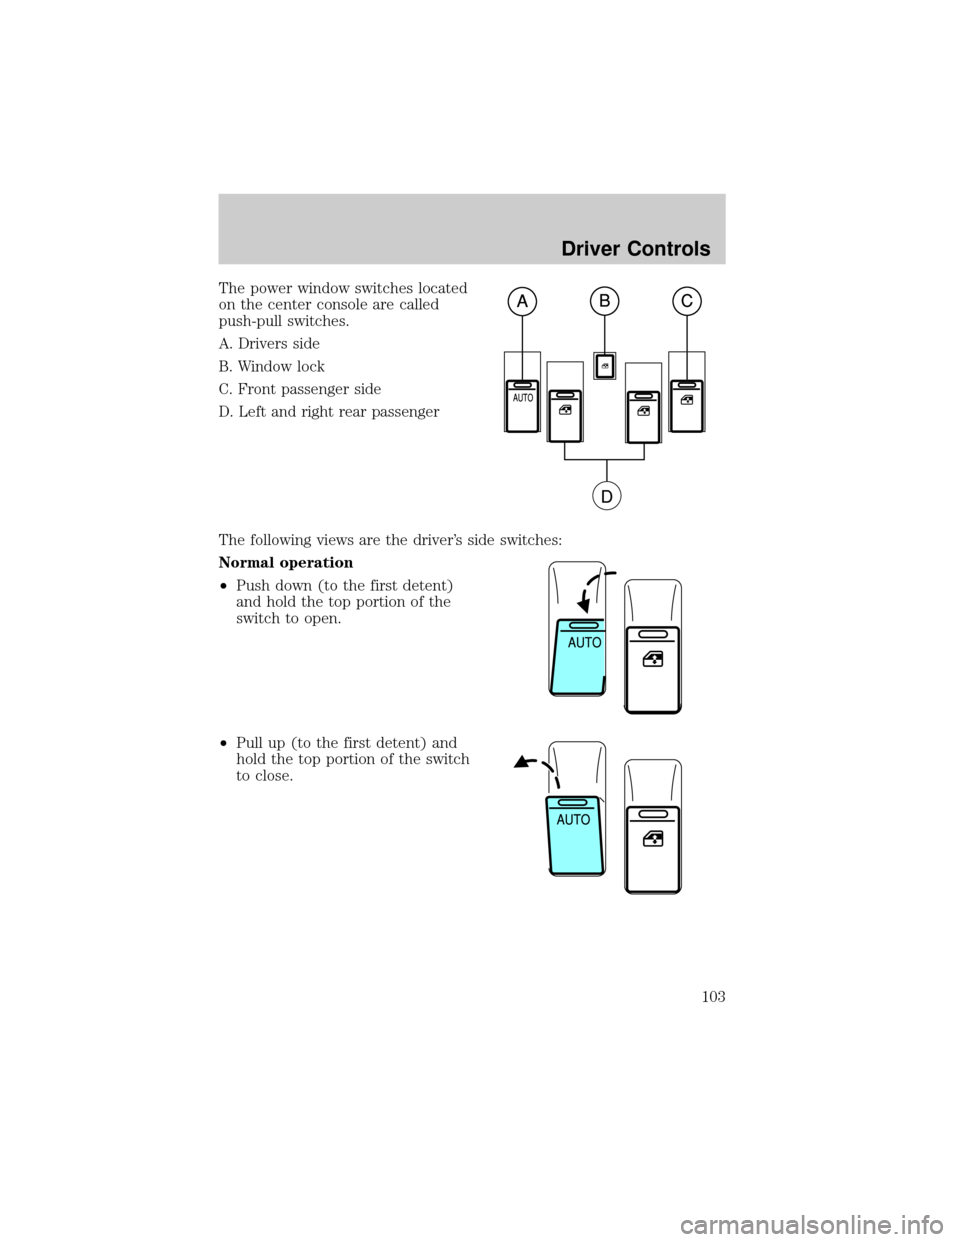
The power window switches located
on the center console are called
push-pull switches.
A. Drivers side
B. Window lock
C. Front passenger side
D. Left and right rear passenger
The following views are the driver's side switches:
Normal operation
²Push down (to the first detent)
and hold the top portion of the
switch to open.
²Pull up (to the first detent) and
hold the top portion of the switch
to close.
Driver Controls
103
Page 133 of 336
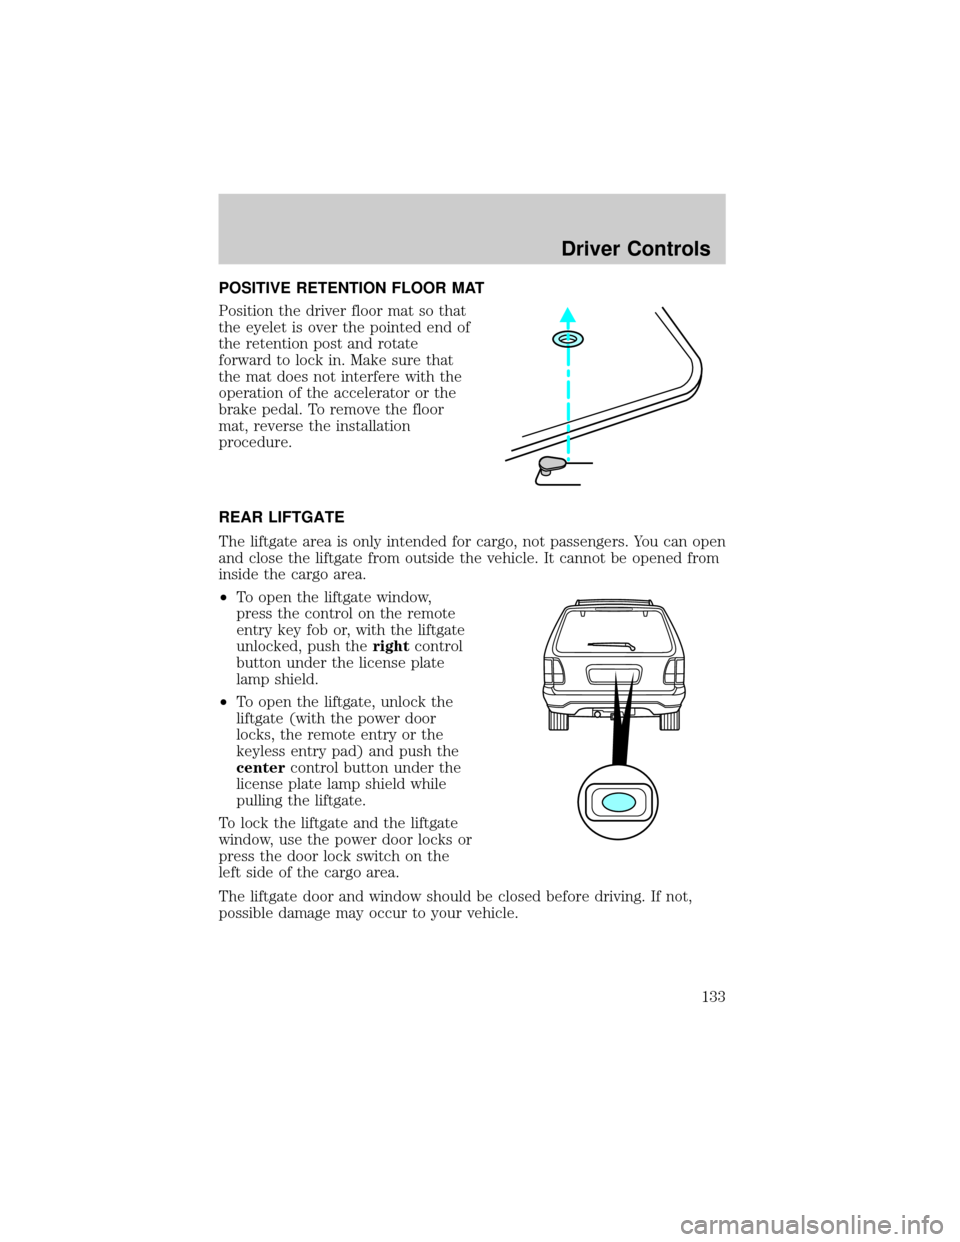
POSITIVE RETENTION FLOOR MAT
Position the driver floor mat so that
the eyelet is over the pointed end of
the retention post and rotate
forward to lock in. Make sure that
the mat does not interfere with the
operation of the accelerator or the
brake pedal. To remove the floor
mat, reverse the installation
procedure.
REAR LIFTGATE
The liftgate area is only intended for cargo, not passengers. You can open
and close the liftgate from outside the vehicle. It cannot be opened from
inside the cargo area.
²To open the liftgate window,
press the control on the remote
entry key fob or, with the liftgate
unlocked, push therightcontrol
button under the license plate
lamp shield.
²To open the liftgate, unlock the
liftgate (with the power door
locks, the remote entry or the
keyless entry pad) and push the
centercontrol button under the
license plate lamp shield while
pulling the liftgate.
To lock the liftgate and the liftgate
window, use the power door locks or
press the door lock switch on the
left side of the cargo area.
The liftgate door and window should be closed before driving. If not,
possible damage may occur to your vehicle.
Driver Controls
133
Page 134 of 336
Always close liftgate window before opening liftgate. Liftgate
glass and liftgate should never be open at the same time. Failure
to observe this warning may result in personal injury or damage to
your vehicle.
Make sure the liftgate door and/or window are closed to prevent
exhaust fumes from being drawn into the vehicle. This will also
prevent passengers and cargo from falling out.
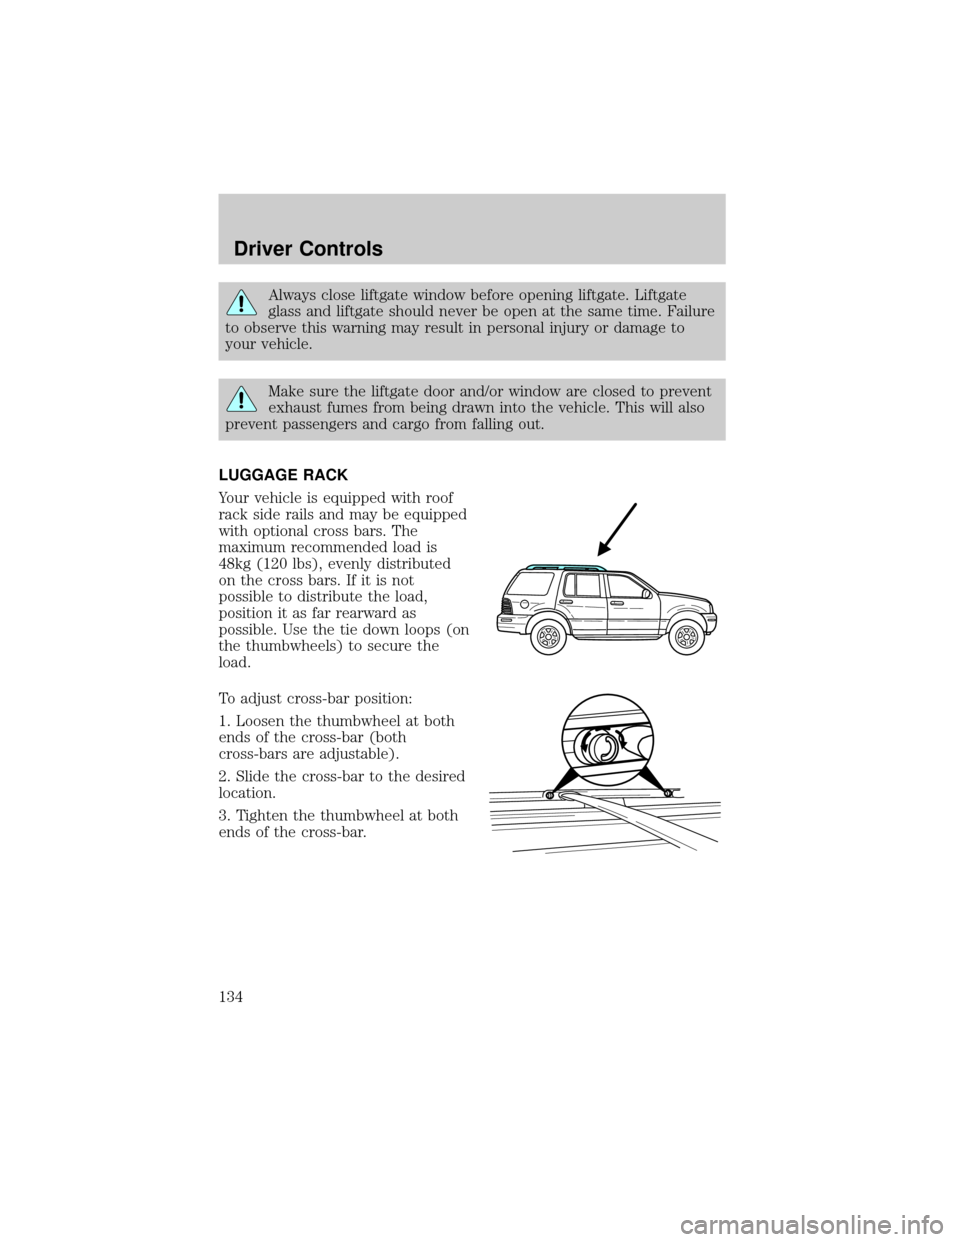
LUGGAGE RACK
Your vehicle is equipped with roof
rack side rails and may be equipped
with optional cross bars. The
maximum recommended load is
48kg (120 lbs), evenly distributed
on the cross bars. If it is not
possible to distribute the load,
position it as far rearward as
possible. Use the tie down loops (on
the thumbwheels) to secure the
load.
To adjust cross-bar position:
1. Loosen the thumbwheel at both
ends of the cross-bar (both
cross-bars are adjustable).
2. Slide the cross-bar to the desired
location.
3. Tighten the thumbwheel at both
ends of the cross-bar.
Driver Controls
134
Page 236 of 336
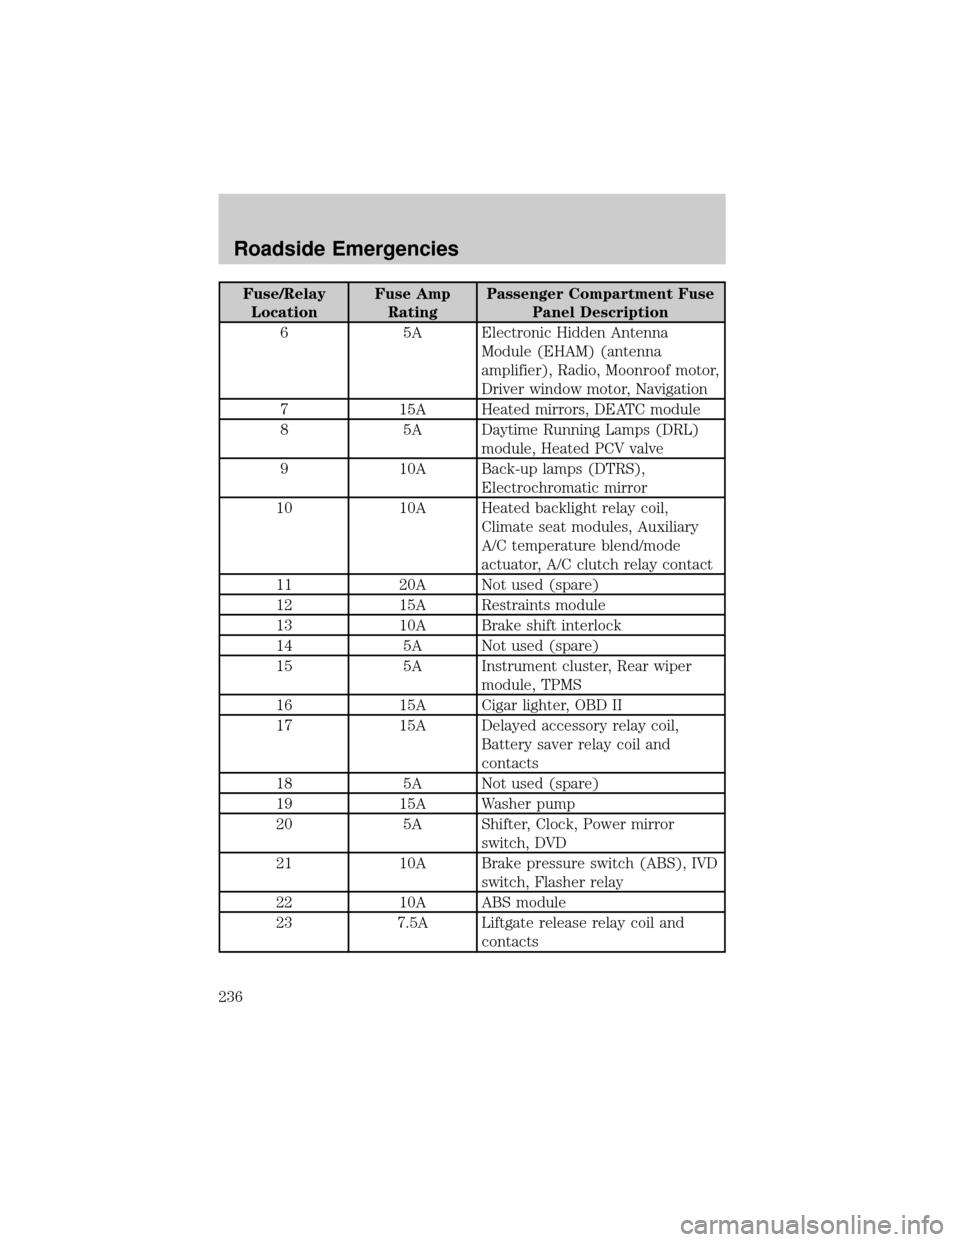
Fuse/Relay
LocationFuse Amp
RatingPassenger Compartment Fuse
Panel Description
6 5A Electronic Hidden Antenna
Module (EHAM) (antenna
amplifier), Radio, Moonroof motor,
Driver window motor, Navigation
7 15A Heated mirrors, DEATC module
8 5A Daytime Running Lamps (DRL)
module, Heated PCV valve
9 10A Back-up lamps (DTRS),
Electrochromatic mirror
10 10A Heated backlight relay coil,
Climate seat modules, Auxiliary
A/C temperature blend/mode
actuator, A/C clutch relay contact
11 20A Not used (spare)
12 15A Restraints module
13 10A Brake shift interlock
14 5A Not used (spare)
15 5A Instrument cluster, Rear wiper
module, TPMS
16 15A Cigar lighter, OBD II
17 15A Delayed accessory relay coil,
Battery saver relay coil and
contacts
18 5A Not used (spare)
19 15A Washer pump
20 5A Shifter, Clock, Power mirror
switch, DVD
21 10A Brake pressure switch (ABS), IVD
switch, Flasher relay
22 10A ABS module
23 7.5A Liftgate release relay coil and
contacts
Roadside Emergencies
236