remove seats LINCOLN AVIATOR 2004 Owners Manual
[x] Cancel search | Manufacturer: LINCOLN, Model Year: 2004, Model line: AVIATOR, Model: LINCOLN AVIATOR 2004Pages: 336, PDF Size: 3.69 MB
Page 156 of 336
Memory seats/rearview mirrors/adjustable pedals
This system allows automatic
positioning of the driver seat,
outside rearview mirrors, and
adjustable pedals to two
programmable positions.
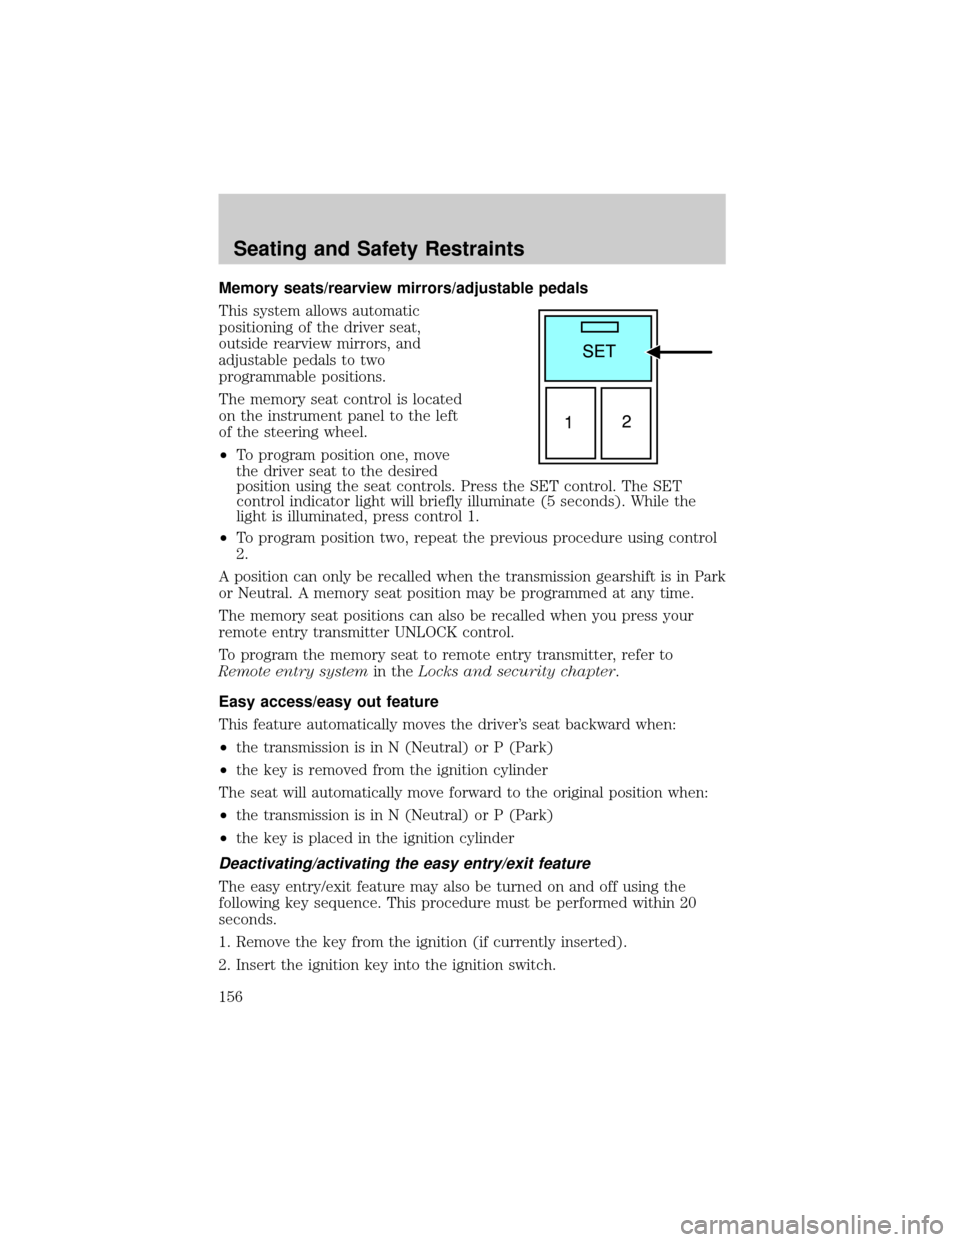
The memory seat control is located
on the instrument panel to the left
of the steering wheel.
²To program position one, move
the driver seat to the desired
position using the seat controls. Press the SET control. The SET
control indicator light will briefly illuminate (5 seconds). While the
light is illuminated, press control 1.
²To program position two, repeat the previous procedure using control
2.
A position can only be recalled when the transmission gearshift is in Park
or Neutral. A memory seat position may be programmed at any time.
The memory seat positions can also be recalled when you press your
remote entry transmitter UNLOCK control.
To program the memory seat to remote entry transmitter, refer to
Remote entry systemin theLocks and security chapter.
Easy access/easy out feature
This feature automatically moves the driver's seat backward when:
²the transmission is in N (Neutral) or P (Park)
²the key is removed from the ignition cylinder
The seat will automatically move forward to the original position when:
²the transmission is in N (Neutral) or P (Park)
²the key is placed in the ignition cylinder
Deactivating/activating the easy entry/exit feature
The easy entry/exit feature may also be turned on and off using the
following key sequence. This procedure must be performed within 20
seconds.
1. Remove the key from the ignition (if currently inserted).
2. Insert the ignition key into the ignition switch.
Seating and Safety Restraints
156
Page 157 of 336
3. Turn the ignition key to the on position.
4. Place the ignition key to the off position.
5. Turn the ignition key to the on position.
6. Place the ignition key to the off position.
7. Turn the ignition key to the on position.
8. Place the ignition key to the off position.
9. Momentarily activate the horizontal seat switch in either the forward
or rearward direction.
10. Remove the ignition key from the ignition switch.
CLIMATE CONTROL SEATS (if equipped)
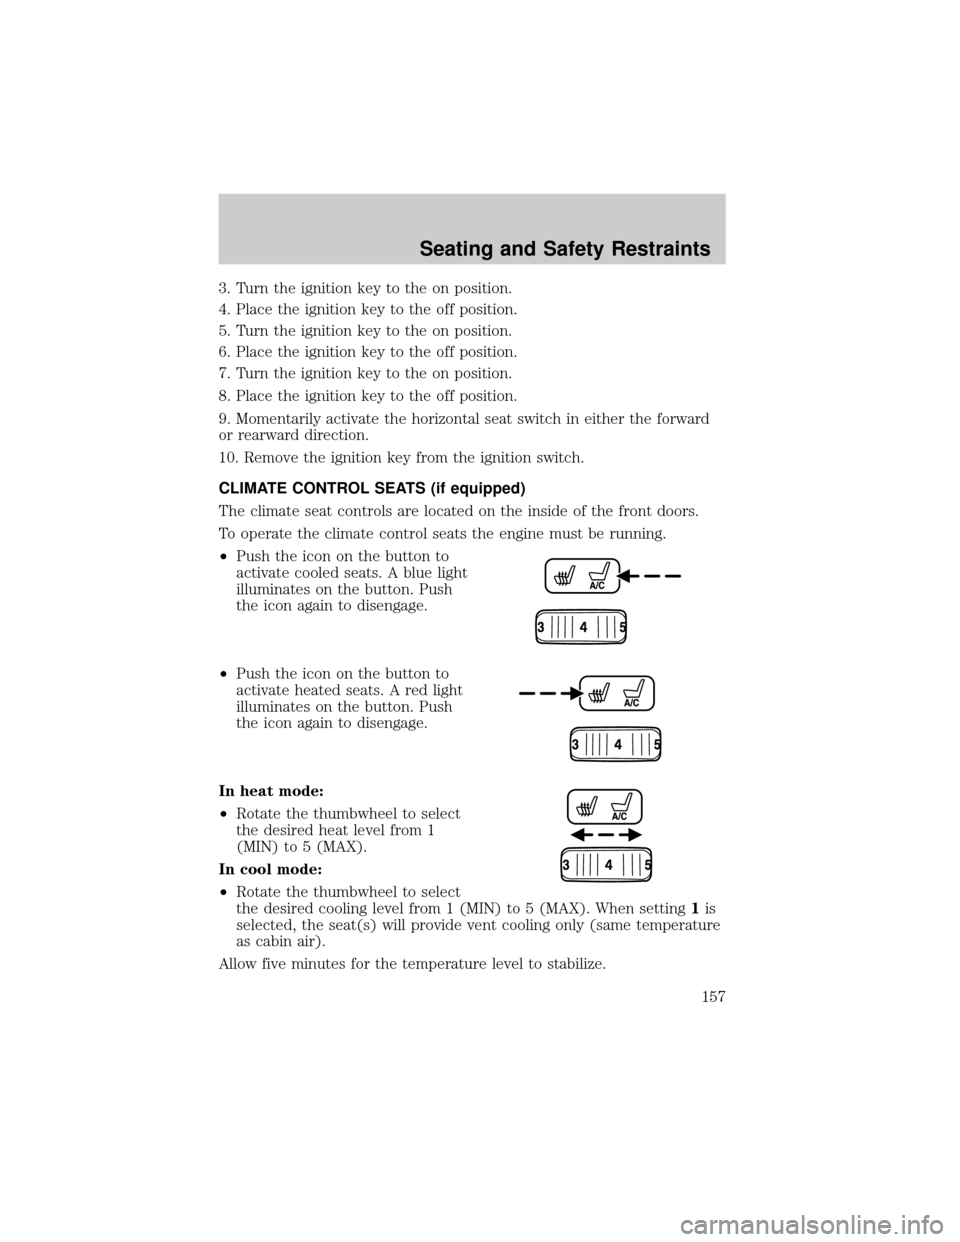
The climate seat controls are located on the inside of the front doors.
To operate the climate control seats the engine must be running.
²Push the icon on the button to
activate cooled seats. A blue light
illuminates on the button. Push
the icon again to disengage.
²Push the icon on the button to
activate heated seats. A red light
illuminates on the button. Push
the icon again to disengage.
In heat mode:
²Rotate the thumbwheel to select
the desired heat level from 1
(MIN) to 5 (MAX).
In cool mode:
²Rotate the thumbwheel to select
the desired cooling level from 1 (MIN) to 5 (MAX). When setting1is
selected, the seat(s) will provide vent cooling only (same temperature
as cabin air).
Allow five minutes for the temperature level to stabilize.
Seating and Safety Restraints
157
Page 158 of 336
Climate controlled seats air filter replacement (if equipped)
The climate controlled seat system includes an air filter that has to be
replaced periodically. Refer to theScheduled Maintenance Guidefor
more information.
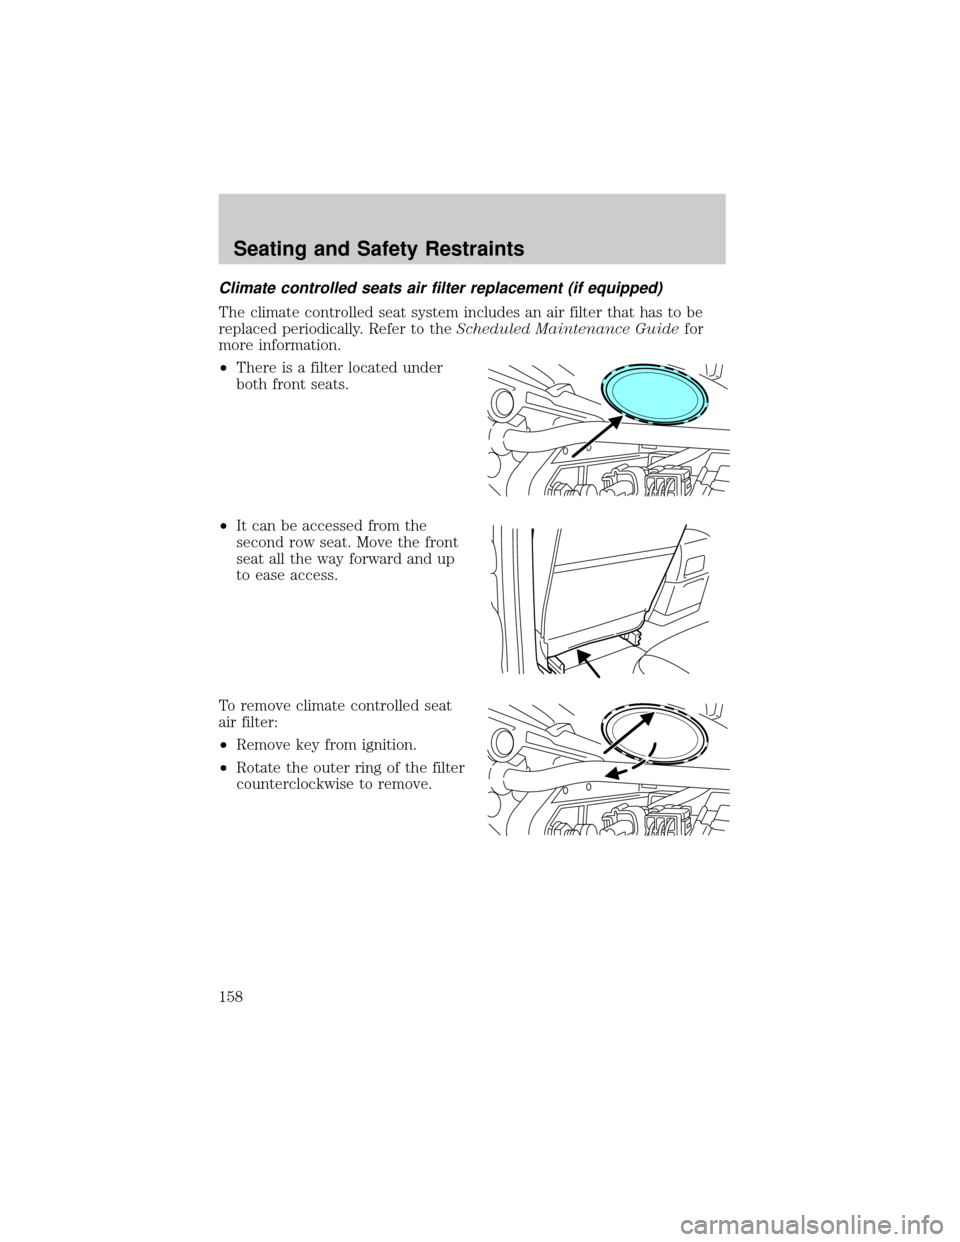
²There is a filter located under
both front seats.
²It can be accessed from the
second row seat. Move the front
seat all the way forward and up
to ease access.
To remove climate controlled seat
air filter:
²Remove key from ignition.
²Rotate the outer ring of the filter
counterclockwise to remove.
Seating and Safety Restraints
158
Page 159 of 336
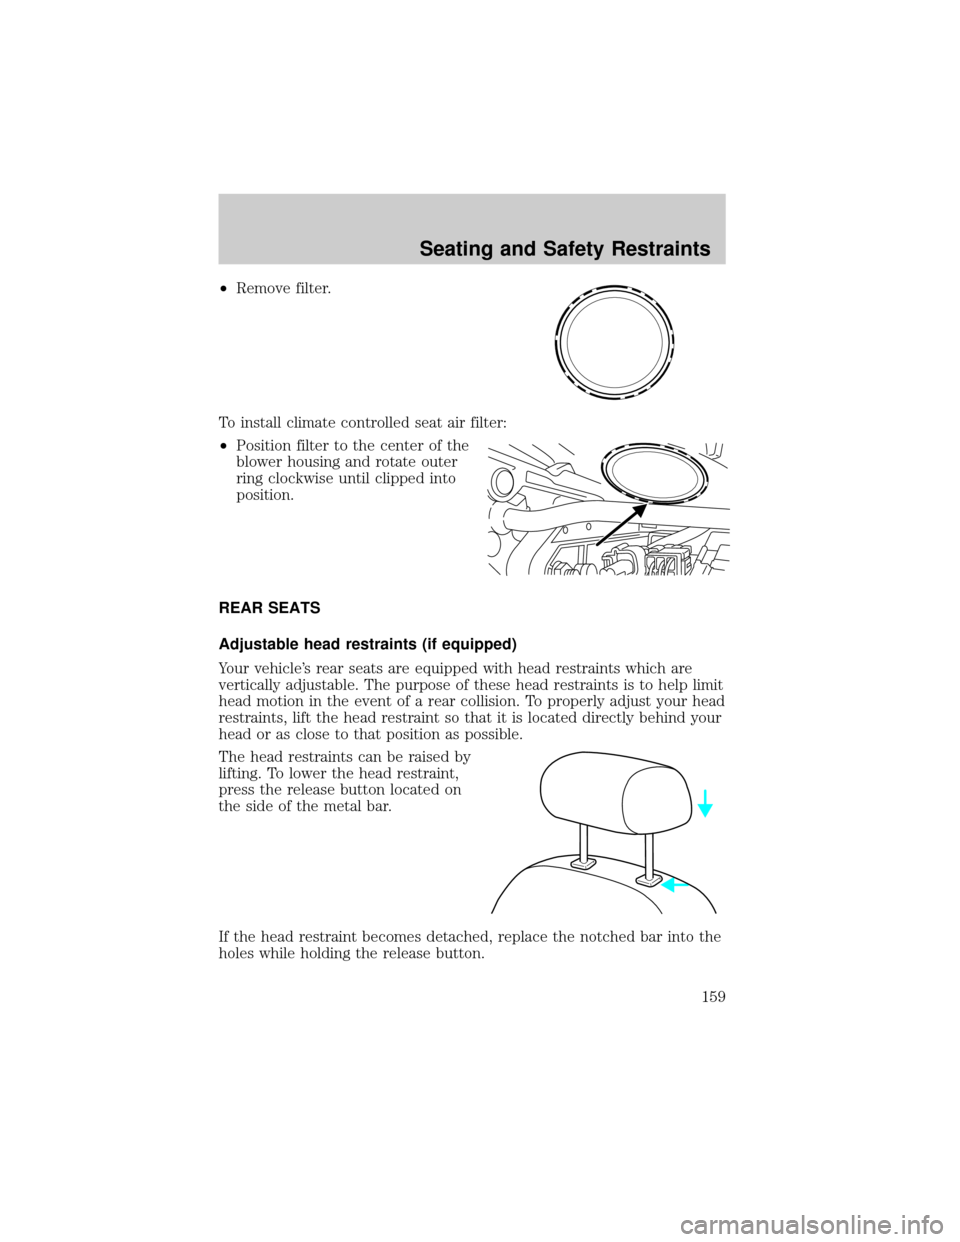
²Remove filter.
To install climate controlled seat air filter:
²Position filter to the center of the
blower housing and rotate outer
ring clockwise until clipped into
position.
REAR SEATS
Adjustable head restraints (if equipped)
Your vehicle's rear seats are equipped with head restraints which are
vertically adjustable. The purpose of these head restraints is to help limit
head motion in the event of a rear collision. To properly adjust your head
restraints, lift the head restraint so that it is located directly behind your
head or as close to that position as possible.
The head restraints can be raised by
lifting. To lower the head restraint,
press the release button located on
the side of the metal bar.
If the head restraint becomes detached, replace the notched bar into the
holes while holding the release button.
Seating and Safety Restraints
159
Page 166 of 336
Safety belts and seats can become hot in a vehicle that has been
closed up in sunny weather; they could burn a small child. Check
seat covers and buckles before you place a child anywhere near them.
Combination lap and shoulder belts
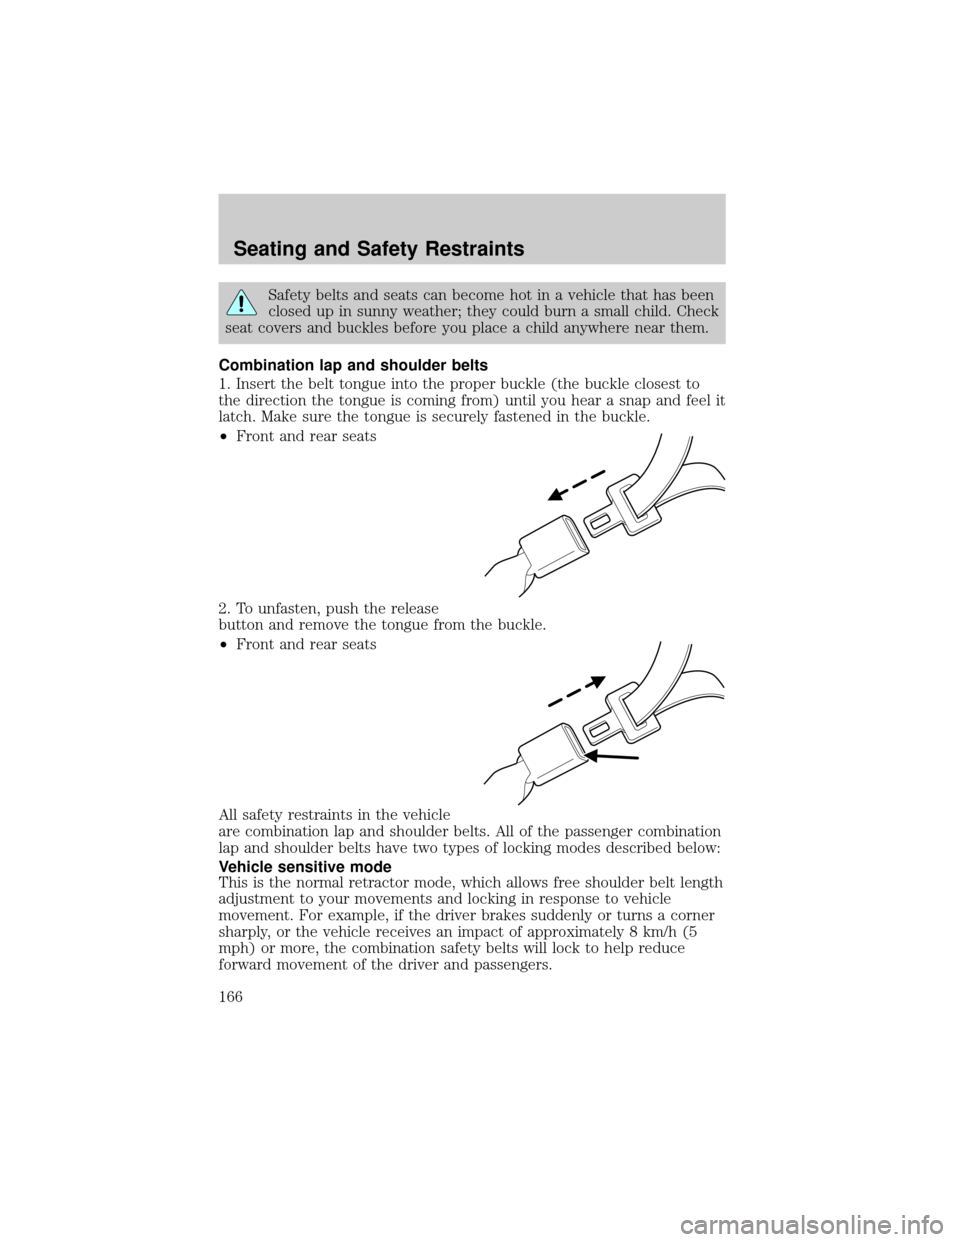
1. Insert the belt tongue into the proper buckle (the buckle closest to
the direction the tongue is coming from) until you hear a snap and feel it
latch. Make sure the tongue is securely fastened in the buckle.
²Front and rear seats
2. To unfasten, push the release
button and remove the tongue from the buckle.
²Front and rear seats
All safety restraints in the vehicle
are combination lap and shoulder belts. All of the passenger combination
lap and shoulder belts have two types of locking modes described below:
Vehicle sensitive mode
This is the normal retractor mode, which allows free shoulder belt length
adjustment to your movements and locking in response to vehicle
movement. For example, if the driver brakes suddenly or turns a corner
sharply, or the vehicle receives an impact of approximately 8 km/h (5
mph) or more, the combination safety belts will lock to help reduce
forward movement of the driver and passengers.
Seating and Safety Restraints
166
Page 167 of 336
Automatic locking mode
In this mode, the shoulder belt is pre-locked. The belt will still retract to
remove any slack in the shoulder belt.
The automatic locking mode is not available on the driver safety belt.
When to use the automatic locking mode
²Anytimea child safety seat (except a booster) is installed in the
vehicle. Children 12 years old and under should be properly restrained
in the rear seat whenever possible. Refer toSafety restraints for
childrenorSafety seats for childrenlater in this chapter.
How to use the automatic locking mode
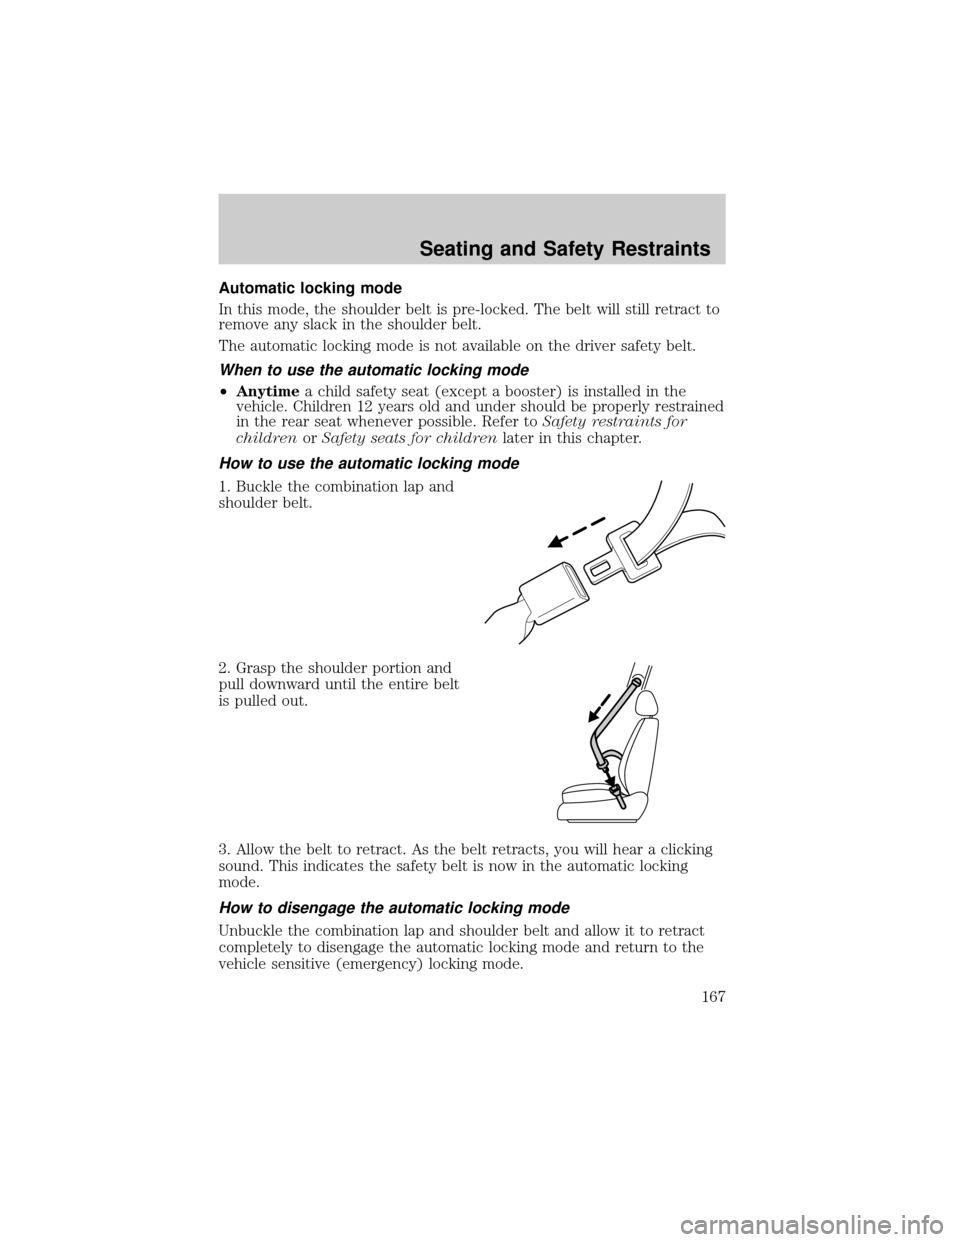
1. Buckle the combination lap and
shoulder belt.
2. Grasp the shoulder portion and
pull downward until the entire belt
is pulled out.
3. Allow the belt to retract. As the belt retracts, you will hear a clicking
sound. This indicates the safety belt is now in the automatic locking
mode.
How to disengage the automatic locking mode
Unbuckle the combination lap and shoulder belt and allow it to retract
completely to disengage the automatic locking mode and return to the
vehicle sensitive (emergency) locking mode.
Seating and Safety Restraints
167
Page 168 of 336
After any vehicle collision, the combination lap and shoulder belt
system at all passenger seating positions must be checked by a
qualified technician to verify that the ªautomatic locking retractorº
feature for child seats is still functioning properly, in addition to other
checks for proper seat belt system function.
BELT AND RETRACTOR ASSEMBLY MUST BE REPLACED if
the safety belt assembly ªautomatic locking retractorº feature or
any other safety belt function is not operating properly. In addition, all
safety belts should be checked for proper function. Failure to replace
the belt and retractor assembly could increase the risk of injury in
collisions.
Safety belt pretensioner
Your vehicle is equipped with safety belt pretensioners at the driver and
right front passenger seating positions.
The safety belt pretensioner removes some slack from the safety belt
system at the start of a crash. The safety belt pretensioner uses the
same crash sensor system as the front airbags and Safety Canopyy
system. When the safety belt pretensioner deploys, the lap and shoulder
belt are tightened.
When the Safety Canopyysystem and/or the front airbags are activated,
the safety belt pretensioners for the driver and right front passenger
seating positions will be activated when the respective seatbelt is
properly buckled.
The driver and the right front passenger seat belt system
(including retractors, buckles and height adjusters) must be
replaced if the vehicle is involved in a collision that results in
deployment of front air bags or Safety Canopyyand safety belt
pretensioners.
Refer to theSafety belt maintenancesection in this chapter.
Seating and Safety Restraints
168
Page 183 of 336
Booster seats should be used until you can answer YES to ALL of these
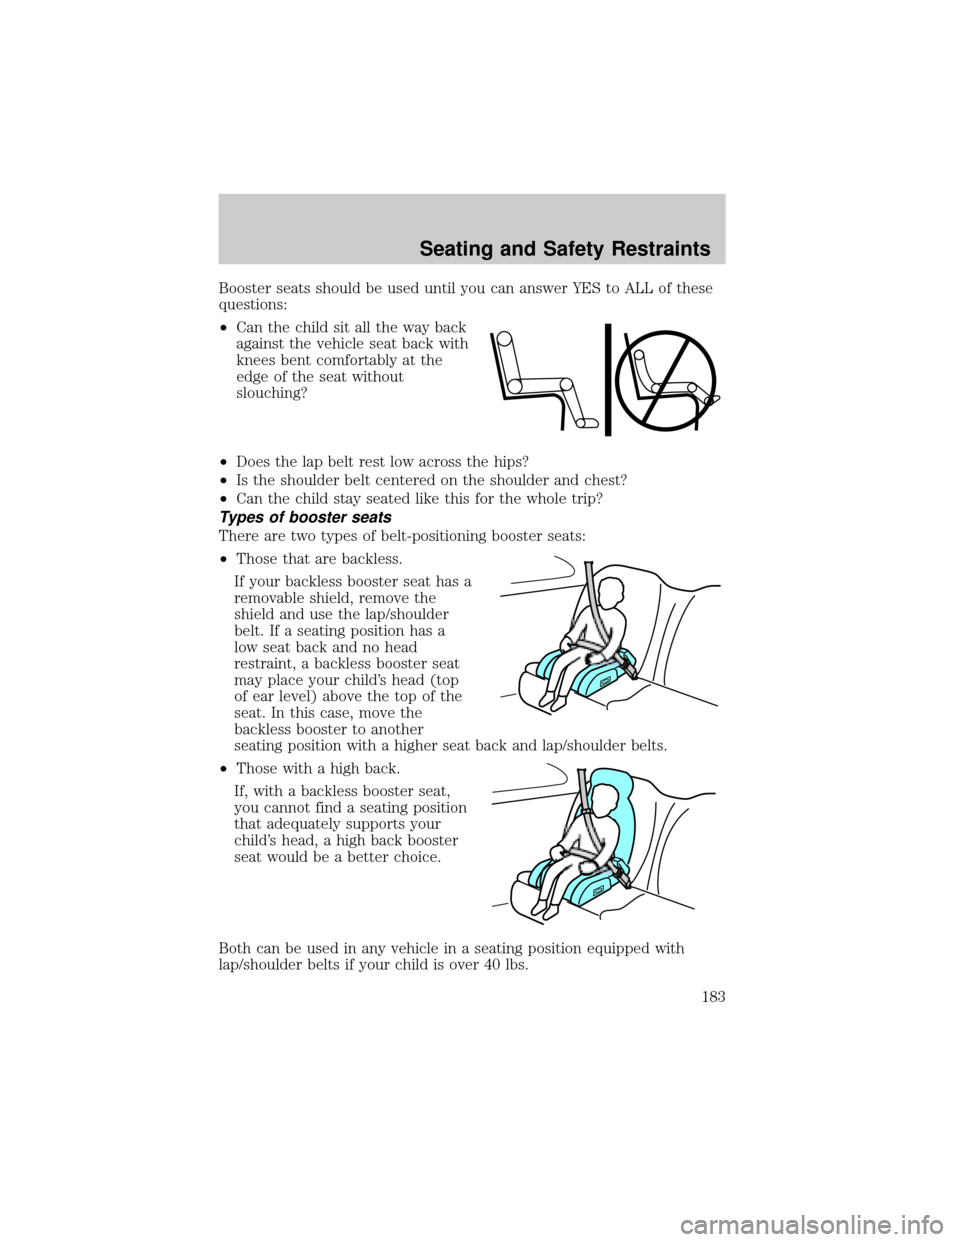
questions:
²Can the child sit all the way back
against the vehicle seat back with
knees bent comfortably at the
edge of the seat without
slouching?
²Does the lap belt rest low across the hips?
²Is the shoulder belt centered on the shoulder and chest?
²Can the child stay seated like this for the whole trip?
Types of booster seats
There are two types of belt-positioning booster seats:
²Those that are backless.
If your backless booster seat has a
removable shield, remove the
shield and use the lap/shoulder
belt. If a seating position has a
low seat back and no head
restraint, a backless booster seat
may place your child's head (top
of ear level) above the top of the
seat. In this case, move the
backless booster to another
seating position with a higher seat back and lap/shoulder belts.
²Those with a high back.
If, with a backless booster seat,
you cannot find a seating position
that adequately supports your
child's head, a high back booster
seat would be a better choice.
Both can be used in any vehicle in a seating position equipped with
lap/shoulder belts if your child is over 40 lbs.
Seating and Safety Restraints
183
Page 188 of 336
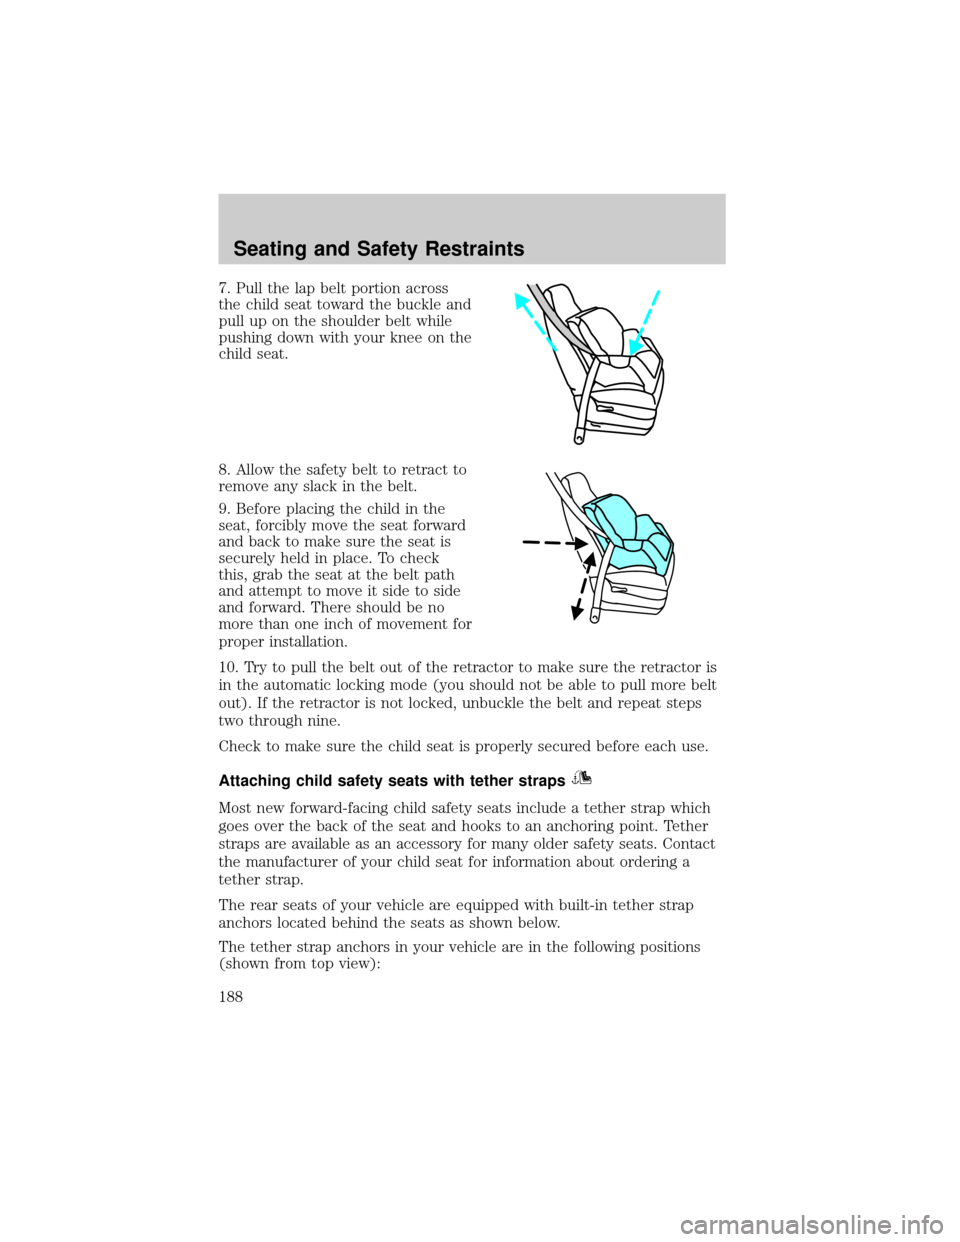
7. Pull the lap belt portion across
the child seat toward the buckle and
pull up on the shoulder belt while
pushing down with your knee on the
child seat.
8. Allow the safety belt to retract to
remove any slack in the belt.
9. Before placing the child in the
seat, forcibly move the seat forward
and back to make sure the seat is
securely held in place. To check
this, grab the seat at the belt path
and attempt to move it side to side
and forward. There should be no
more than one inch of movement for
proper installation.
10. Try to pull the belt out of the retractor to make sure the retractor is
in the automatic locking mode (you should not be able to pull more belt
out). If the retractor is not locked, unbuckle the belt and repeat steps
two through nine.
Check to make sure the child seat is properly secured before each use.
Attaching child safety seats with tether straps
Most new forward-facing child safety seats include a tether strap which
goes over the back of the seat and hooks to an anchoring point. Tether
straps are available as an accessory for many older safety seats. Contact
the manufacturer of your child seat for information about ordering a
tether strap.
The rear seats of your vehicle are equipped with built-in tether strap
anchors located behind the seats as shown below.
The tether strap anchors in your vehicle are in the following positions
(shown from top view):
Seating and Safety Restraints
188
Page 269 of 336
Do not use sharp objects, such as a razor blade, to clean the
inside of the rear window or to remove decals, as it may cause
damage to the rear window defroster's heated grid lines.
INSTRUMENT PANEL AND CLUSTER LENS
Clean the instrument panel with a damp cloth, then dry with a dry cloth.
²Avoid cleaners or polish that increase the gloss of the upper portion of
the instrument panel. The dull finish in this area helps protect the
driver from undesirable windshield reflection.
Do not use chemical solvents or strong detergents when cleaning
the steering wheel or instrument panel to avoid contamination of
the air bag system.
²Be certain to wash or wipe your hands clean if you have been in
contact with certain products such as insect repellent and suntan
lotion in order to avoid possible damage to the interior painted
surfaces.
INTERIOR
For fabric, carpets, cloth seats, safety belts and seats equipped with side
air bags:
²Remove dust and loose dirt with a vacuum cleaner.
²Remove light stains and soil with Motorcraft Extra Strength
Upholstery Cleaner (ZC-41).
²If grease or tar is present on the material, spot-clean the area first
with Motorcraft Spot and Stain Remover (ZC-14).
²Never saturate the seat covers with cleaning solution.
²Do not use household cleaning products or glass cleaners, which can
stain and discolor the fabric and affect the flame retardant abilities of
the seat materials.
Do not use cleaning solvents, bleach or dye on the vehicle's
safety belts, as these actions may weaken the belt webbing.
Do not use chemical solvents or strong detergents when cleaning
the seat-mounted side air bag. Such products could contaminate
the side air bag system and affect performance of the side air bag in a
collision.
Cleaning
269