close LINCOLN AVIATOR 2020 Service Manual
[x] Cancel search | Manufacturer: LINCOLN, Model Year: 2020, Model line: AVIATOR, Model: LINCOLN AVIATOR 2020Pages: 609, PDF Size: 5.4 MB
Page 205 of 609
GENERAL INFORMATION
WARNING: Extended idling at high
engine speeds can produce very high
temperatures in the engine and exhaust
system, creating the risk of fire or other
damage. WARNING:
Do not park, idle or drive
your vehicle on dry grass or other dry
ground cover. The emission system heats
up the engine compartment and exhaust
system, creating the risk of fire. WARNING:
Do not start the engine
in a closed garage or in other enclosed
areas. Exhaust fumes can be toxic. Always
open the garage door before you start the
engine. WARNING: Exhaust leaks may result
in entry of harmful and potentially lethal
fumes into the passenger compartment. If
you smell exhaust fumes inside your
vehicle, have your vehicle inspected
immediately. Do not drive if you smell
exhaust fumes.
If you disconnect the battery, your vehicle
may exhibit some unusual driving
characteristics for approximately 5 mi (8 km)
after you reconnect it. This is because the
engine management system must realign
itself with the engine. You can disregard any
unusual driving characteristics during this
period.
The powertrain control system meets all
Canadian interference-causing equipment
standard requirements regulating the
impulse electrical field or radio noise.
When you start the engine, avoid pressing
the accelerator pedal before and during
operation. Only use the accelerator pedal
when you have difficulty starting the engine. KEYLESS STARTING
Note:
The system may not function if the
intelligent access key is close to metal
objects or electronic devices, for example
keys or a cell phone.
Note: A valid intelligent access key must be
located inside your vehicle to switch the
ignition on and start your vehicle.
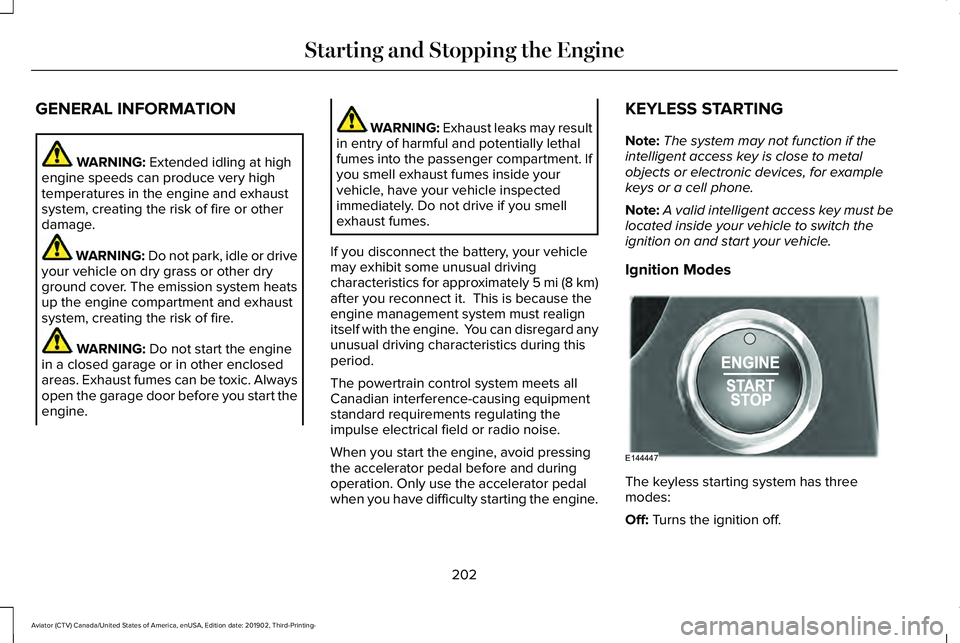
Ignition Modes The keyless starting system has three
modes:
Off:
Turns the ignition off.
202
Aviator (CTV) Canada/United States of America, enUSA, Edition date: 201902, Third-Printing- Starting and Stopping the EngineE144447
Page 210 of 609
WARNING: Do not fully close the
hood, or allow it to drop under its own
weight when using the engine block
heater. This could damage the power cable
and may cause an electrical short resulting
in fire, injury and property damage.
Note: The heater is most effective when
outdoor temperatures are below
0°F (-18°C).
The heater acts as a starting aid by warming
the engine coolant. This allows the climate
control system to respond quickly. The
equipment includes a heater element
(installed in the engine block) and a wire
harness. You can connect the system to a
grounded 120-volt AC electrical source. We recommend that you do the following for
a safe and correct operation:
•
Use a 16-gauge outdoor extension cord
that is product certified by Underwriter’ s
Laboratory (UL) or Canadian Standards
Association (CSA). This extension cord
must be suitable for use outdoors, in cold
temperatures, and be clearly marked
Suitable for Use with Outdoor
Appliances. Do not use an indoor
extension cord outdoors. This could
result in an electric shock or become a
fire hazard.
• Use as short an extension cord as
possible.
• Do not use multiple extension cords.
• Make sure that when in operation, the
extension cord plug and heater cord plug
connections are free and clear of water.
This could cause an electric shock or fire.
• Make sure your vehicle is parked in a
clean area, clear of combustibles.
• Make sure the heater, heater cord and
extension cord are firmly connected. •
Check for heat anywhere in the electrical
hookup once the system has been
operating for approximately 30 minutes.
• Make sure the system is unplugged and
properly stowed before starting and
driving your vehicle. Make sure the
protective cover seals the prongs of the
block heater cord plug when not in use.
• Make sure the heater system is checked
for proper operation before winter.
Using the Engine Block Heater
The engine block heater receptacle terminals
are located on the left lower portion of the
front fascia, behind the receptacle door.
Make sure the receptacle terminals are clean
and dry prior to use. Clean them with a dry
cloth if necessary.
The heater uses 0.4 to 1.0 kilowatt-hours of
energy per hour of use. The system does not
have a thermostat. It achieves maximum
temperature after approximately three hours
of operation. Using the heater longer than
three hours does not improve system
performance and unnecessarily uses
electricity.
207
Aviator (CTV) Canada/United States of America, enUSA, Edition date: 201902, Third-Printing- Starting and Stopping the Engine
Page 211 of 609
AUTO-START-STOP
The system helps reduce fuel consumption
by automatically stopping and restarting the
engine when your vehicle has stopped. The
engine restarts automatically when you
release the brake pedal.
In some situations, your vehicle may restart
automatically, for example:
•
To maintain interior comfort.
• To recharge the battery.
Note: Power assist steering turns off when
the engine is off.
Note: If your vehicle is flex fuel capable,
Auto-Start-Stop will be inhibited for a short
time after a refuel event while the system is
verifying the fuel type being used. WARNING: Apply the parking brake,
shift into park (P), switch the ignition off
and remove the key before you leave your
vehicle. Failure to follow this instruction
could result in personal injury or death. WARNING: Apply the parking brake,
shift into park (P), switch the ignition off
and remove the key before you open the
hood or have any service or repair work
completed. If you do not switch the ignition
off, the engine could restart at any time.
Failure to follow this instruction could result
in personal injury or death. WARNING: The system may require
the engine to automatically restart when
the auto-start-stop indicator illuminates
green or flashes amber. Failure to follow
this instruction could result in personal
injury.
The Auto-Start-Stop system status is
available at a glance within the information
display.
See Information Displays (page
130).
Enabling Auto-Start-Stop
The system automatically enables every time
you start your vehicle if: •
Your vehicle exceeds an initial speed of
3 mph (5 km/h)
after you have initially
started your vehicle.
• You have stopped your vehicle.
• Your foot is on the brake pedal.
• The driver door is closed.
• The interior compartment has cooled or
warmed to an acceptable level.
• The front windshield defroster is off.
• You have not turned the steering wheel
rapidly or you do not have it at a sharp
angle.
• The vehicle is not on a steep road grade.
• The battery is within optimal operating
conditions (battery state of charge and
temperature in range).
• The engine coolant is near operating
temperature.
• Elevation is below about
12,000 ft
(3,650 m).
• Ambient temperature is moderate.
• The trailer is not connected.
• If you select Normal, Conserve, or
Slippery.
208
Aviator (CTV) Canada/United States of America, enUSA, Edition date: 201902, Third-Printing- Unique Driving Characteristics
Page 217 of 609
3. Add fuel to your vehicle from the fuel
container.
4. Remove the fuel filler funnel.
5. Fully close the fuel filler door.
6. Clean the fuel filler funnel and place it back in your vehicle or correctly dispose
of it.
Note: Extra funnels can be purchased from
an authorized dealer if you choose to
dispose of the funnel. REFUELING
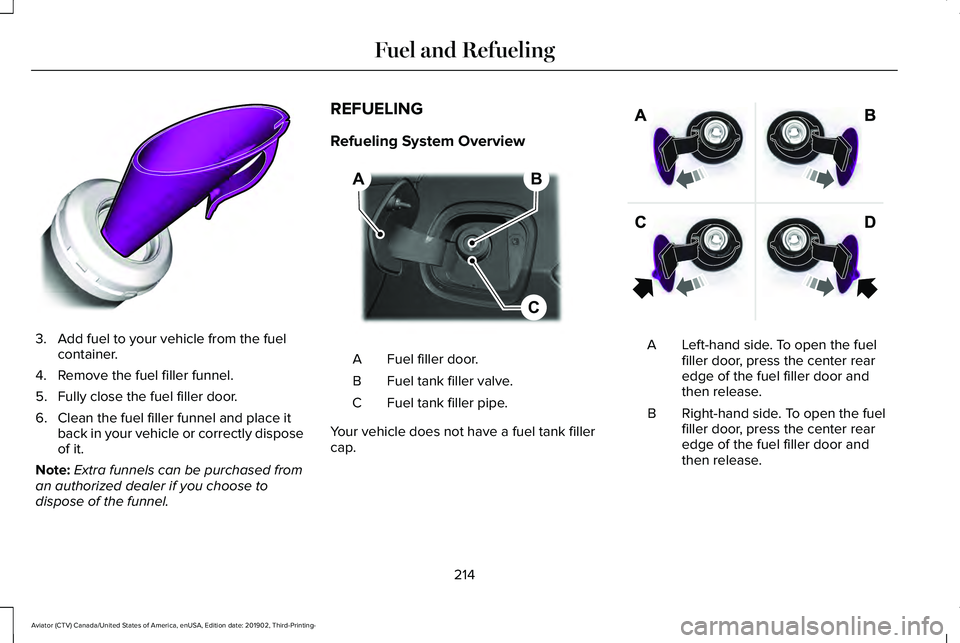
Refueling System Overview
Fuel filler door.
A
Fuel tank filler valve.
B
Fuel tank filler pipe.
C
Your vehicle does not have a fuel tank filler
cap. Left-hand side. To open the fuel
filler door, press the center rear
edge of the fuel filler door and
then release.
A
Right-hand side. To open the fuel
filler door, press the center rear
edge of the fuel filler door and
then release.
B
214
Aviator (CTV) Canada/United States of America, enUSA, Edition date: 201902, Third-Printing- Fuel and RefuelingE157452 B
C
A E267248 E206911
Page 219 of 609
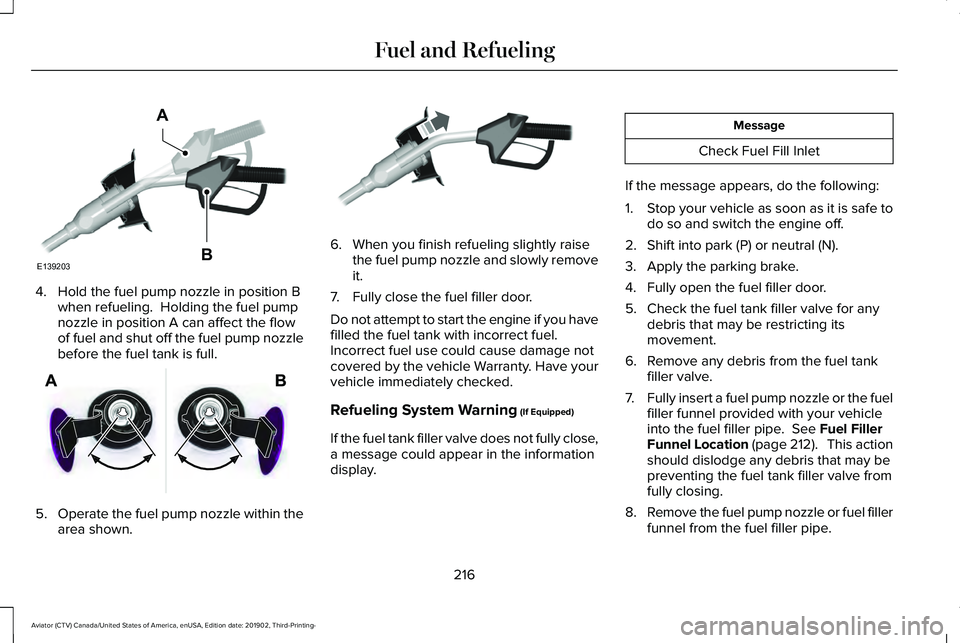
4. Hold the fuel pump nozzle in position B
when refueling. Holding the fuel pump
nozzle in position A can affect the flow
of fuel and shut off the fuel pump nozzle
before the fuel tank is full. 5.
Operate the fuel pump nozzle within the
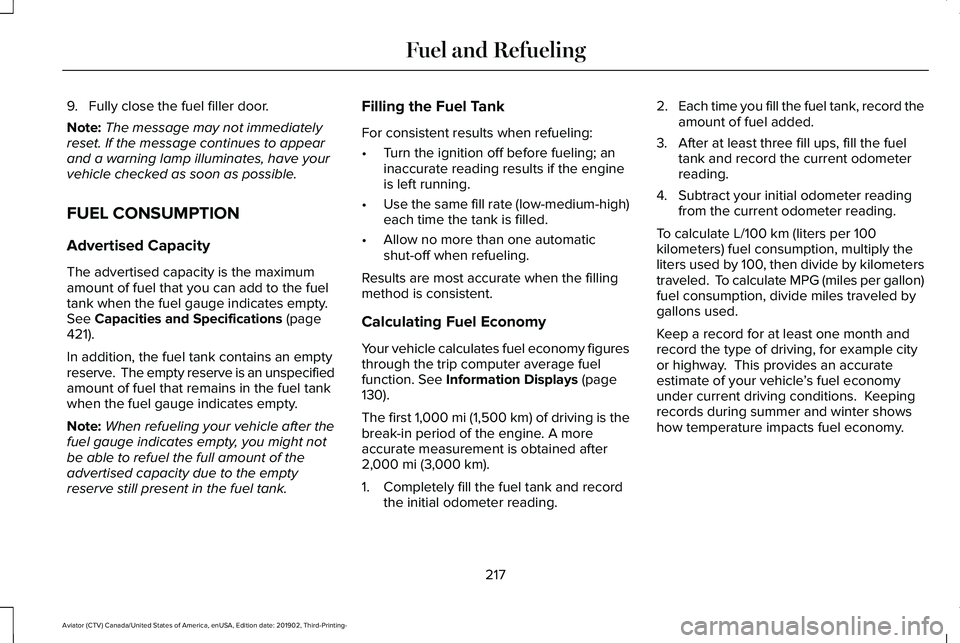
area shown. 6. When you finish refueling slightly raise
the fuel pump nozzle and slowly remove
it.
7. Fully close the fuel filler door.
Do not attempt to start the engine if you have
filled the fuel tank with incorrect fuel.
Incorrect fuel use could cause damage not
covered by the vehicle Warranty. Have your
vehicle immediately checked.
Refueling System Warning (If Equipped)
If the fuel tank filler valve does not fully close,
a message could appear in the information
display. Message
Check Fuel Fill Inlet
If the message appears, do the following:
1. Stop your vehicle as soon as it is safe to
do so and switch the engine off.
2. Shift into park (P) or neutral (N).
3. Apply the parking brake.
4. Fully open the fuel filler door.
5. Check the fuel tank filler valve for any debris that may be restricting its
movement.
6. Remove any debris from the fuel tank filler valve.
7. Fully insert a fuel pump nozzle or the fuel
filler funnel provided with your vehicle
into the fuel filler pipe.
See Fuel Filler
Funnel Location (page 212). This action
should dislodge any debris that may be
preventing the fuel tank filler valve from
fully closing.
8. Remove the fuel pump nozzle or fuel filler
funnel from the fuel filler pipe.
216
Aviator (CTV) Canada/United States of America, enUSA, Edition date: 201902, Third-Printing- Fuel and RefuelingE139203
A
B E206912 E119081
Page 220 of 609
9. Fully close the fuel filler door.
Note:
The message may not immediately
reset. If the message continues to appear
and a warning lamp illuminates, have your
vehicle checked as soon as possible.
FUEL CONSUMPTION
Advertised Capacity
The advertised capacity is the maximum
amount of fuel that you can add to the fuel
tank when the fuel gauge indicates empty.
See Capacities and Specifications (page
421).
In addition, the fuel tank contains an empty
reserve. The empty reserve is an unspecified
amount of fuel that remains in the fuel tank
when the fuel gauge indicates empty.
Note: When refueling your vehicle after the
fuel gauge indicates empty, you might not
be able to refuel the full amount of the
advertised capacity due to the empty
reserve still present in the fuel tank. Filling the Fuel Tank
For consistent results when refueling:
•
Turn the ignition off before fueling; an
inaccurate reading results if the engine
is left running.
• Use the same fill rate (low-medium-high)
each time the tank is filled.
• Allow no more than one automatic
shut-off when refueling.
Results are most accurate when the filling
method is consistent.
Calculating Fuel Economy
Your vehicle calculates fuel economy figures
through the trip computer average fuel
function.
See Information Displays (page
130).
The first 1,000 mi (1,500 km) of driving is the
break-in period of the engine. A more
accurate measurement is obtained after
2,000 mi (3,000 km)
.
1. Completely fill the fuel tank and record the initial odometer reading. 2.
Each time you fill the fuel tank, record the
amount of fuel added.
3. After at least three fill ups, fill the fuel tank and record the current odometer
reading.
4. Subtract your initial odometer reading from the current odometer reading.
To calculate L/100 km (liters per 100
kilometers) fuel consumption, multiply the
liters used by 100, then divide by kilometers
traveled. To calculate MPG (miles per gallon)
fuel consumption, divide miles traveled by
gallons used.
Keep a record for at least one month and
record the type of driving, for example city
or highway. This provides an accurate
estimate of your vehicle ’s fuel economy
under current driving conditions. Keeping
records during summer and winter shows
how temperature impacts fuel economy.
217
Aviator (CTV) Canada/United States of America, enUSA, Edition date: 201902, Third-Printing- Fuel and Refueling
Page 224 of 609
The scheduled maintenance items listed in
scheduled maintenance information are
essential to the life and performance of your
vehicle and to its emissions system.
If you use anything other than Ford,
Motorcraft or Ford-authorized parts for
maintenance replacements or for service of
components affecting emission control, such
non-Ford parts should be equivalent to
genuine Ford Motor Company parts in
performance and durability.
Illumination of the service engine soon
indicator, charging system warning light or
the temperature warning light, fluid leaks,
strange odors, smoke or loss of engine
power could indicate that the emission
control system is not working properly.
An improperly operating or damaged exhaust
system may allow exhaust to enter the
vehicle. Have a damaged or improperly
operating exhaust system inspected and
repaired immediately.
Do not make any unauthorized changes to
your vehicle or engine. By law, vehicle
owners and anyone who manufactures,
repairs, services, sells, leases, trades
vehicles, or supervises a fleet of vehicles are
not permitted to intentionally remove an
emission control device or prevent it from
working. Information about your vehicle
’s
emission system is on the Vehicle Emission
Control Information Decal located on or near
the engine. This decal also lists engine
displacement.
Please consult your warranty information for
complete details.
On-Board Diagnostics (OBD-II)
Your vehicle has a computer known as the
on-board diagnostics system (OBD-II) that
monitors the engine ’s emission control
system. The system protects the environment
by making sure that your vehicle continues
to meet government emission standards. The
OBD-II system also assists a service
technician in properly servicing your vehicle. When the service engine soon
indicator illuminates, the OBD-II
system has detected a malfunction.
Temporary malfunctions may cause the
service engine soon indicator to illuminate.
Examples are:
1. Your vehicle has run out of fuel—the engine may misfire or run poorly.
2. Poor fuel quality or water in the fuel—the
engine may misfire or run poorly.
3. The fuel fill inlet may not have closed properly. See Refueling (page 214).
4. Driving through deep water—the electrical system may be wet.
You can correct these temporary
malfunctions by filling the fuel tank with good
quality fuel, properly closing the fuel fill inlet
or letting the electrical system dry out. After
three driving cycles without these or any
other temporary malfunctions present, the
service engine soon indicator should stay off
the next time you start the engine. A driving
cycle consists of a cold engine startup
followed by mixed city and highway driving.
No additional vehicle service is required.
221
Aviator (CTV) Canada/United States of America, enUSA, Edition date: 201902, Third-Printing- Engine Emission Control
Page 227 of 609
Reverse (R)
With the transmission selector in reverse (R),
your vehicle moves backward. Always come
to a complete stop before shifting into and
out of reverse (R).
Neutral (N)
With the transmission selector in neutral (N),
you can start your vehicle and it is free to
roll. Hold the brake pedal down when in this
position.
Drive (D)
Drive (D) is the normal driving position for
the best fuel economy and smoothness. Shift
the transmission selector to drive (D) to allow
your vehicle to move forward and shift
through the forward gears.
The transmission shifts to the appropriate
gear for optimum performance based on
ambient temperature, road slope, vehicle
load and your input.
Automatic Return to Park
Note:
This feature does not operate when
your vehicle is in Stay in Neutral mode or
neutral tow.
The transmission returns to park (P) if any of
the following occur:
• You switch the ignition off.
• You do not have your seatbelt fastened
and you open the driver door.
• The driver door is open and you unfasten
your seatbelt.
If you switch the ignition off when your
vehicle is moving, your vehicle shifts into
neutral (N) until it slows down enough to shift
into park (P).
Note: This feature does not work properly if
the door ajar switch is malfunctioning. If your
door ajar indicator does not illuminate when
you open or close the driver door, or the
Transmission not in Park message still
displays in the information display when the
shifter has already selected (R), (N) or (D) and
the driver door remains closed, see your
authorized dealer. Stay in Neutral Mode
Note:
Stay in Neutral mode is a temporary
vehicle state that works with the engine in
a running or OFF state. Once in this mode,
maintain sufficient battery voltage, or your
vehicle returns to park (P) if left active for an
extended period of time when the engine is
off.
Failure to follow this instruction could result
in vehicle damage not covered by the vehicle
warranty.
Note: When entering an automatic car wash,
always enter the Stay in Neutral mode. Stay
in Neutral mode must be enabled if you are
exiting the vehicle before the car wash.
Extended usage of Stay in Neutral mode
could result in a battery voltage reduction to
a level where the vehicle no longer starts.
Do not tow your vehicle in this mode.
With the transmission selector in Stay in
Neutral mode, you can start your vehicle and
it is free to roll.
To enter Stay in Neutral mode, do the
following:
224
Aviator (CTV) Canada/United States of America, enUSA, Edition date: 201902, Third-Printing- Transmission
Page 239 of 609
This lamp also illuminates
momentarily when you switch the
ignition on to confirm the lamp is
functional. If it does not illuminate
when you switch the ignition on,
or begins to flash at any time, have
the system checked by an authorized dealer.
If the brake warning lamp illuminates with
the parking brake released, have the system
checked immediately.
HINTS ON DRIVING WITH ANTI-
LOCK BRAKES
The anti-lock braking system does not
eliminate the risks when:
• You drive too closely to the vehicle in
front of you.
• Your vehicle is hydroplaning.
• You take corners too fast.
• The road surface is poor. Note:
If the system activates, the brake
pedal may pulse and may travel further.
Maintain pressure on the brake pedal. You
may also hear a noise from the system. This
is normal.
ELECTRIC PARKING BRAKE WARNING: Always fully apply the
parking brake and make sure you shift into
park (P). Failure to follow this instruction
could result in personal injury or death. WARNING:
If you drive extended
distances with the parking brake applied,
you could cause damage to the brake
system. WARNING:
The electric parking
brake does not operate if the vehicle
battery is running out of charge. Your vehicle has an electric parking brake.
You operate it with a switch instead of a
lever. The switch is on the center console or
to the left-hand side of the steering wheel,
on the lower part of the instrument panel.
Note:
The electric parking brake makes
noises during operation. This is normal.
Applying the Electric Parking Brake Pull the switch upward.
The red warning lamp flashes
during operation and illuminates
when the parking brake is applied.
Note:
It remains illuminated for a short
period of time after you switch the ignition
off.
If it continues to flash or does not illuminate,
the system has malfunctioned. Have your
vehicle checked as soon as possible.
Note: You can apply the electric parking
brake when the ignition is off.
236
Aviator (CTV) Canada/United States of America, enUSA, Edition date: 201902, Third-Printing- BrakesE270480 E267156 E270480
Page 240 of 609
Note:
The electric parking brake could
automatically apply when you shift into park
(P). See Transmission (page 223).
Applying the Electric Parking Brake in an
Emergency
Note: Do not apply the electric parking brake
when your vehicle is moving, except in an
emergency. If you repeatedly use the electric
parking brake to slow or stop your vehicle,
you could cause damage to the brake
system.
You can use the electric parking brake to
slow or stop your vehicle in an emergency. Pull the switch upward and hold it.
The red warning lamp illuminates,
a tone sounds and the stoplamps
turn on.
The electric parking brake continues to slow
your vehicle down unless you release the
switch. Manually Releasing the Electric Parking
Brake
Switch the ignition on.
Press and hold the brake pedal.
Push the switch downward.
The red warning lamp turns off.
If it remains illuminated or flashes, the system
has malfunctioned. Have your vehicle
checked as soon as possible.
Pulling Away on a Hill When Towing a
Trailer
Press and hold the brake pedal.
Pull the switch upward and hold it.
Shift into gear. Press the accelerator pedal until engine has
developed sufficient torque to prevent your
vehicle from rolling down the hill. Release the switch and pull away
in a normal manner.
Automatically Releasing the Electric
Parking Brake
Close the driver door.
Shift into gear.
Press the accelerator pedal and pull away in
a normal manner. The red warning lamp turns off.
If it remains illuminated or flashes, the electric
parking brake has not released. Manually
release the parking brake.
237
Aviator (CTV) Canada/United States of America, enUSA, Edition date: 201902, Third-Printing- BrakesE267156 E270480 E267156 E270480 E267156 E267156 E270480