tow LINCOLN AVIATOR 2023 Owners Manual
[x] Cancel search | Manufacturer: LINCOLN, Model Year: 2023, Model line: AVIATOR, Model: LINCOLN AVIATOR 2023Pages: 681, PDF Size: 9.33 MB
Page 5 of 681
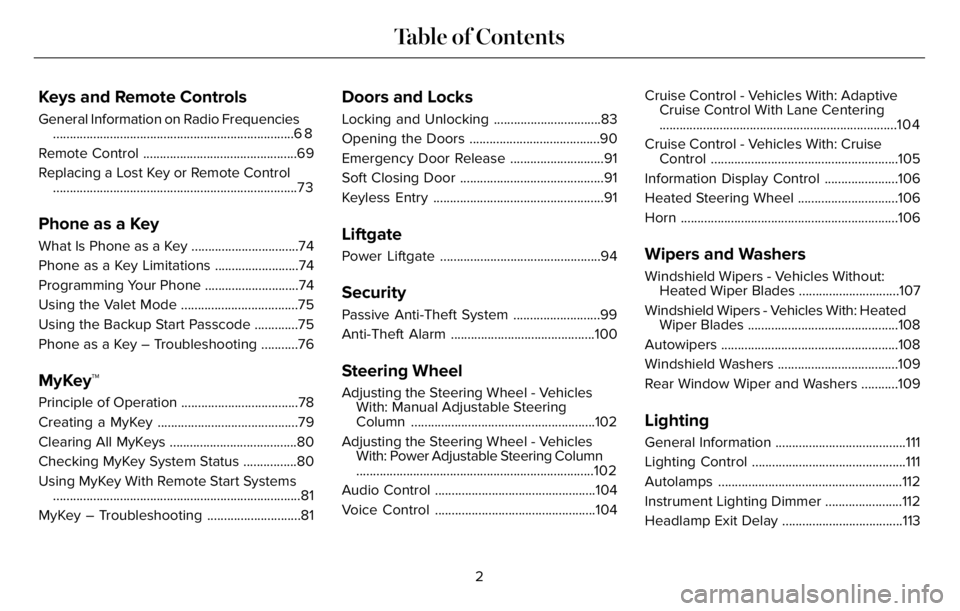
Keys and Remote Controls
General Information on Radio Frequencies
........................................................................6 8
Remote Control ..............................................69
Replacing a Lost Key or Remote Control
.........................................................................73
Phone as a Key
What Is Phone as a Key ................................74
Phone as a Key Limitations .........................74
Programming Your Phone ............................74
Using the Valet Mode ...................................75
Using the Backup Start Passcode .............75
Phone as a Key – Troubleshooting ...........76
MyKey™
Principle of Operation ...................................78
Creating a MyKey ..........................................79
Clearing All MyKeys ......................................80
Checking MyKey System Status ................80
Using MyKey With Remote Start Systems
..........................................................................81
MyKey – Troubleshooting ............................81
Doors and Locks
Locking and Unlocking ................................83
Opening the Doors .......................................90
Emergency Door Release ............................91
Soft Closing Door ...........................................91
Keyless Entry ...................................................91
Liftgate
Power Liftgate ................................................94
Security
Passive Anti-Theft System ..........................99
Anti-Theft Alarm ...........................................100
Steering Wheel
Adjusting the Steering Wheel - Vehicles
With: Manual Adjustable Steering
Column .......................................................102
Adjusting the Steering Wheel - Vehicles
With: Power Adjustable Steering Column
.......................................................................102
Audio Control ................................................104
Voice Control ................................................104Cruise Control - Vehicles With: Adaptive
Cruise Control With Lane Centering
.......................................................................104
Cruise Control - Vehicles With: Cruise
Control ........................................................105
Information Display Control ......................106
Heated Steering Wheel ..............................106
Horn .................................................................106
Wipers and Washers
Windshield Wipers - Vehicles Without:
Heated Wiper Blades ..............................107
Windshield Wipers - Vehicles With: Heated
Wiper Blades .............................................108
Autowipers .....................................................108
Windshield Washers ....................................109
Rear Window Wiper and Washers ...........109
Lighting
General Information .......................................111
Lighting Control ..............................................111
Autolamps .......................................................112
Instrument Lighting Dimmer .......................112
Headlamp Exit Delay ....................................113
2
Table of Contents
Page 9 of 681
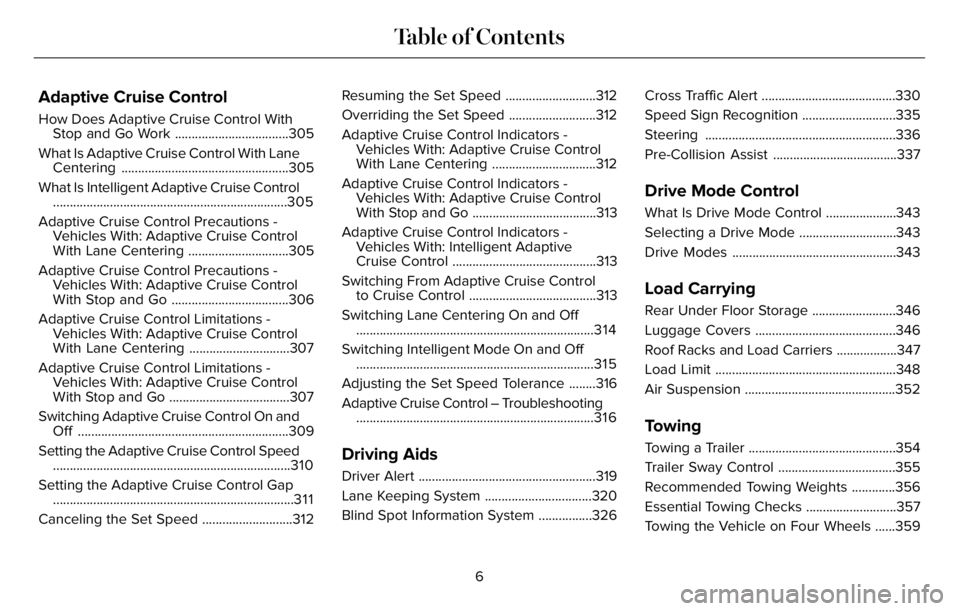
Adaptive Cruise Control
How Does Adaptive Cruise Control With
Stop and Go Work ..................................305
What Is Adaptive Cruise Control With Lane
Centering ..................................................305
What Is Intelligent Adaptive Cruise Control
......................................................................305
Adaptive Cruise Control Precautions -
Vehicles With: Adaptive Cruise Control
With Lane Centering ..............................305
Adaptive Cruise Control Precautions -
Vehicles With: Adaptive Cruise Control
With Stop and Go ...................................306
Adaptive Cruise Control Limitations -
Vehicles With: Adaptive Cruise Control
With Lane Centering ..............................307
Adaptive Cruise Control Limitations -
Vehicles With: Adaptive Cruise Control
With Stop and Go ....................................307
Switching Adaptive Cruise Control On and
Off ...............................................................309
Setting the Adaptive Cruise Control Speed
.......................................................................310
Setting the Adaptive Cruise Control Gap
........................................................................3 1 1
Canceling the Set Speed ...........................312Resuming the Set Speed ...........................312
Overriding the Set Speed ..........................312
Adaptive Cruise Control Indicators -
Vehicles With: Adaptive Cruise Control
With Lane Centering ...............................312
Adaptive Cruise Control Indicators -
Vehicles With: Adaptive Cruise Control
With Stop and Go .....................................313
Adaptive Cruise Control Indicators -
Vehicles With: Intelligent Adaptive
Cruise Control ...........................................313
Switching From Adaptive Cruise Control
to Cruise Control ......................................313
Switching Lane Centering On and Off
.......................................................................3 1 4
Switching Intelligent Mode On and Off
.......................................................................315
Adjusting the Set Speed Tolerance ........316
Adaptive Cruise Control – Troubleshooting
.......................................................................316
Driving Aids
Driver Alert .....................................................319
Lane Keeping System ................................320
Blind Spot Information System ................326Cross Traffic Alert ........................................330
Speed Sign Recognition ............................335
Steering .........................................................336
Pre-Collision Assist .....................................337
Drive Mode Control
What Is Drive Mode Control .....................343
Selecting a Drive Mode .............................343
Drive Modes .................................................343
Load Carrying
Rear Under Floor Storage .........................346
Luggage Covers ..........................................346
Roof Racks and Load Carriers ..................347
Load Limit ......................................................348
Air Suspension .............................................352
Towing
Towing a Trailer ............................................354
Trailer Sway Control ...................................355
Recommended Towing Weights .............356
Essential Towing Checks ...........................357
Towing the Vehicle on Four Wheels ......359
6
Table of Contents
Page 24 of 681
CONNECTED VEHICLE DATA
The modem has a SIM. The
modem was enabled when your
vehicle was built and periodically
sends messages to stay connected to the
cell phone network, receive automatic
software updates and send vehicle-related
information to us, for example diagnostic
information. These messages could include
information that identifies your vehicle, the
SIM and the electronic serial number of the
modem. Cell phone network service
providers could have access to additional
information, for example cell phone network
tower identification. For additional
information about our privacy policy, visit
www.ConnectedLincoln.com or refer to your
local Lincoln website.
Note:The modem continues to send this
information unless you disable the modem
or stop the modem from sharing vehicle data
by changing the modem settings.
Note:The service can be unavailable or
interrupted for a number of reasons, for
example environmental or topographical
conditions and data plan coverage.Note:To find out if your vehicle has a
modem, visit www
.ConnectedLincoln.com.
MOBILE DEVICE DATA
If you connect a mobile device to your
vehicle, you can display data from your
device on the touchscreen for example,
music and album art. You can share your
vehicle data with mobile apps on your device
through the system. See Apps.
The mobile apps function operates by your
connected device sending data to us in the
United States. The data is encrypted and
includes, for example, the vehicle
identification number of your vehicle, the
SYNC module serial number, odometer,
enabled apps, usage statistics and
debugging information. We retain it only as
long as necessary to provide the service, to
troubleshoot, for continuous improvement
and to offer you products and services that
may be of interest to you according to your
preferences and where allowed by law.If you connect a cell phone to the system,
the system creates a profile that links to that
cell phone. The cell phone profile enables
more mobile features and efficient operation.
The profile contains, for example data from
your phonebook, read and unread text
messages and call history, including history
of calls when your cell phone was not
connected to the system.
If you connect a media device, the system
creates and retains a media device index of
supported media content. The system also
records a short diagnostic log of
approximately 10 minutes of all recent system
activity.
The cell phone profile, media device index
and diagnostic log remain in your vehicle
unless you delete them and are generally
accessible only in your vehicle when you
connect your cell phone or media device. If
you no longer plan to use the system or your
vehicle, we recommend you use the master
reset function to erase the stored
information. See Settings.
21
Data Privacy
Page 26 of 681
PROTECTING THE ENVIRONMENT
You can take significant steps toward
protecting the environment with correct
vehicle usage and the authorized disposal
of waste, cleaning and lubrication materials.
For additional information about our
sustainability progress and initiatives, visit
www
.sustainability.ford.com.
23
Environment
Page 33 of 681
WARNING: Depending on where you
secure a child restraint, and depending on
the child restraint design, you may block
access to certain seatbelt buckle
assemblies and LATCH lower anchors,
rendering those features potentially
unusable. To avoid risk of injury, make sure
occupants only use seating positions
where they are able to be properly
restrained.
When installing a child restraint with
combination lap and shoulder belts:
• Use the correct seatbelt buckle for that
seating position.
• Insert the belt tongue into the proper
buckle until you hear a snap and feel it
latch. Make sure the tongue is securely
fastened in the buckle.
• Keep the buckle release button pointing
up and away from the child restraint, with
the tongue between the child restraint
and the release button, to prevent
accidental unbuckling.• Place the vehicle seat in the upright
position before you install the child
restraint.
• For second row seating positions, adjust
the recliner slightly to improve child
restraint fit. If needed, remove the head
restraints.
• For third row seating positions, stow the
head restraints to improve child restraint
fit. See Head Restraints (page 177).
• Put the seatbelt in the automatic locking
mode. See Step 5. This vehicle does not
require the use of a locking clip.
Perform the following steps when installing
the child restraint with combination lap and
shoulder belts:
Note:Although the child restraint illustrated
is a forward facing child restraint, the steps
are the same for installing a rear facing child
restraint.Note:Follow all instructions provided by the
manufacturer of the child restraint regarding
the necessary and proper use of the lock-off
device. In some instances these devices
have been provided only for use in vehicles
with seatbelt systems that would otherwise
require a locking clip.
E142528
1. Position the child restraint in a seat with
a combination lap and shoulder belt.
30
Child Safety
Page 35 of 681
5. To put the retractor in the automatic
locking mode, grasp the shoulder portion
of the belt and pull downward until you
pull all of the belt out.
Note:The automatic locking mode is
available on the front passenger and rear
seats.
6. Allow the belt to retract to remove slack.
The belt clicks as it retracts to indicate it
is in the automatic locking mode.7. Try to pull the belt out of the retractor to
make sure the retractor is in the
automatic locking mode. You should not
be able to pull more belt out. If the
retractor did not lock, unbuckle the belt
and repeat Steps 5 and 6.
E142533
8. Remove remaining slack from the belt.
Force the seat down with extra weight,
for example, by pressing down or
kneeling on the child restraint as you pull
up on the shoulder belt to force slack
from the belt. This is necessary to remove
the remaining slack that exists once youadd the extra weight of the child to the
child restraint. It also helps to achieve the
proper snugness of the child restraint to
your vehicle. Sometimes, a slight lean
toward the buckle provides extra help to
remove remaining slack from the belt.
9. If the child restraint has a tether strap,
attach it.E142534
32
Child Safety
Page 46 of 681
WARNING: Always carefully follow
the instructions and warnings provided by
the manufacturer of any child restraint to
determine if the restraint device is
appropriate for your child's size, height,
weight, or age. Follow the child restraint
manufacturer's instructions and warnings
provided for installation and use in
conjunction with the instructions and
warnings provided by your vehicle
manufacturer. A safety seat that is
improperly installed or utilized, is
inappropriate for your child's height, age,
or weight or does not properly fit the child
may increase the risk of serious injury or
death.WARNING: Do not allow a passenger
to hold a child on their lap when your
vehicle is moving. Failure to follow this
instruction could result in personal injury
or death in the event of a sudden stop or
crash.
WARNING: Do not use pillows, books
or towels to boost your child's height.
Failure to follow this instruction could result
in personal injury or death.
WARNING: Properly secure child
restraints or booster seats when they are
not in use. They could become projectiles
in a sudden stop or crash. Failure to follow
this instruction could result in personal
injury or death.
WARNING: Do not put the shoulder
section of the seatbelt or allow the child to
put the shoulder section of the seatbelt
under their arm or behind their back.
Failure to follow this instruction could
reduce the effectiveness of the seatbelt
and increase the risk of injury or death in
a crash.
WARNING: Do not leave children or
pets unattended in your vehicle. Failure to
follow this instruction could result in
personal injury or death.
43
Child Safety
Page 51 of 681
E1422590
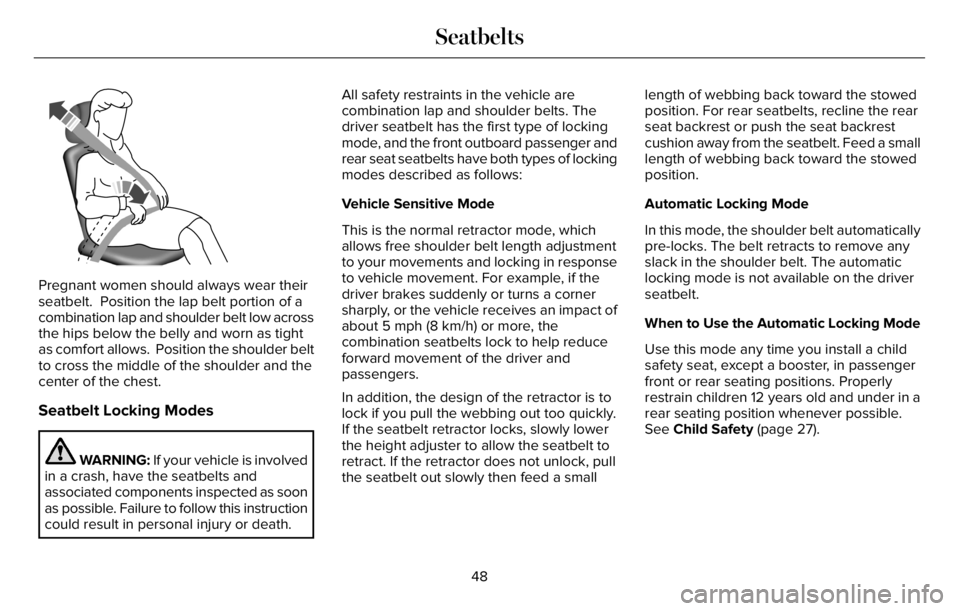
Pregnant women should always wear their
seatbelt. Position the lap belt portion of a
combination lap and shoulder belt low across
the hips below the belly and worn as tight
as comfort allows. Position the shoulder belt
to cross the middle of the shoulder and the
center of the chest.
Seatbelt Locking Modes
WARNING: If your vehicle is involved
in a crash, have the seatbelts and
associated components inspected as soon
as possible. Failure to follow this instruction
could result in personal injury or death.All safety restraints in the vehicle are
combination lap and shoulder belts. The
driver seatbelt has the first type of locking
mode, and the front outboard passenger and
rear seat seatbelts have both types of locking
modes described as follows:
Vehicle Sensitive Mode
This is the normal retractor mode, which
allows free shoulder belt length adjustment
to your movements and locking in response
to vehicle movement. For example, if the
driver brakes suddenly or turns a corner
sharply, or the vehicle receives an impact of
about 5 mph (8 km/h) or more, the
combination seatbelts lock to help reduce
forward movement of the driver and
passengers.
In addition, the design of the retractor is to
lock if you pull the webbing out too quickly.
If the seatbelt retractor locks, slowly lower
the height adjuster to allow the seatbelt to
retract. If the retractor does not unlock, pull
the seatbelt out slowly then feed a smalllength of webbing back toward the stowed
position. For rear seatbelts, recline the rear
seat backrest or push the seat backrest
cushion away from the seatbelt. Feed a small
length of webbing back toward the stowed
position.
Automatic Locking Mode
In this mode, the shoulder belt automatically
pre-locks. The belt retracts to remove any
slack in the shoulder belt. The automatic
locking mode is not available on the driver
seatbelt.
When to Use the Automatic Locking Mode
Use this mode any time you install a child
safety seat, except a booster, in passenger
front or rear seating positions. Properly
restrain children 12 years old and under in a
rear seating position whenever possible.
See Child Safety (page 27).
48
Seatbelts
Page 66 of 681
CRASH SENSORS AND AIRBAG
INDICATOR
WARNING: Modifying or adding
equipment to the front of your vehicle
could affect the performance of the airbag
system, increasing the risk of injury. This
includes the hood, bumper system, frame,
front body structure, tow hooks, hood pins,
push bar and snowplows.
Your vehicle has a collection of crash and
occupant sensors which provide information
to the restraints control module. The
restraints control module deploys (activates)
the seatbelt pretensioners, driver airbag,
passenger airbag, knee airbag(s), seat
mounted side airbags and the Safety
Canopy. Based on the type of crash, the
restraints control module deploys the
appropriate safety devices.The restraints control module also monitors
the readiness of the above safety devices
plus the crash and occupant sensors. The
readiness of the safety system is indicated
by a warning indicator light in the instrument
cluster or by a backup tone if the warning
light is not working. Routine maintenance of
the airbag is not required.
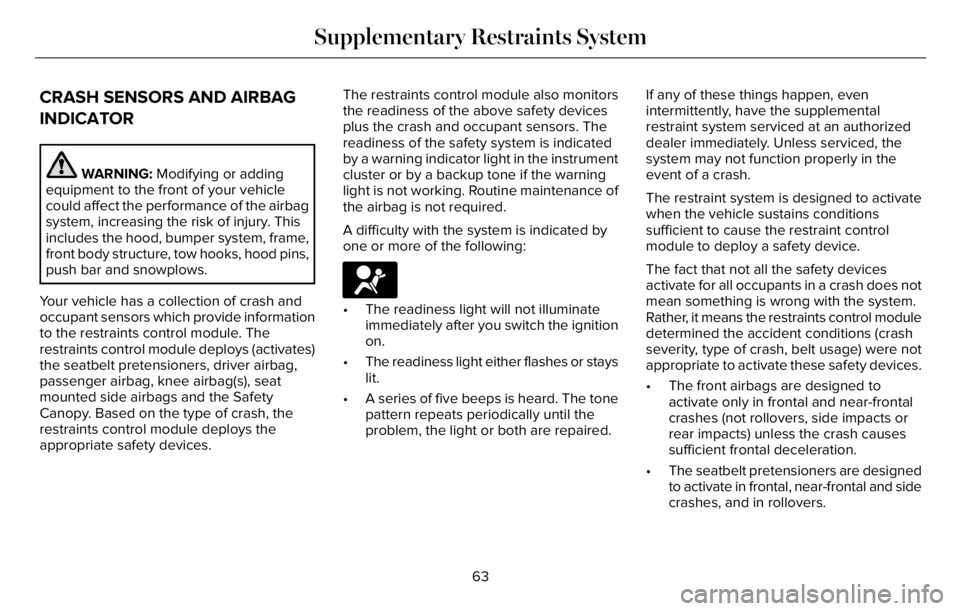
A difficulty with the system is indicated by
one or more of the following:
E67017€ The readiness light will not illuminate
immediately after you switch the ignition
on.
€ The readiness light either flashes or stays
lit.
€ A series of five beeps is heard. The tone
pattern repeats periodically until the
problem, the light or both are repaired.If any of these things happen, even
intermittently, have the supplemental
restraint system serviced at an authorized
dealer immediately. Unless serviced, the
system may not function properly in the
event of a crash.
The restraint system is designed to activate
when the vehicle sustains conditions
sufficient to cause the restraint control
module to deploy a safety device.
The fact that not all the safety devices
activate for all occupants in a crash does not
mean something is wrong with the system.
Rather, it means the restraints control module
determined the accident conditions (crash
severity, type of crash, belt usage) were not
appropriate to activate these safety devices.
€ The front airbags are designed to
activate only in frontal and near-frontal
crashes (not rollovers, side impacts or
rear impacts) unless the crash causes
sufficient frontal deceleration.
€ The seatbelt pretensioners are designed
to activate in frontal, near-frontal and side
crashes, and in rollovers.
63
Supplementary Restraints System
Page 71 of 681
GENERAL INFORMATION ON
RADIO FREQUENCIES
This device complies with Part 15 of the FCC
Rules and with Industry Canada
license-exempt RSS standard(s). Operation
is subject to the following two conditions: (1)
This device may not cause harmful
interference, and (2) This device must accept
any interference received, including
interference that may cause undesired
operation.
WARNING: Changes or modifications
not expressively approved by the party
responsible for compliance could void the
user's authority to operate the equipment.
The term "IC:" before the radio certification
number only signifies that Industry Canada
technical specifications were met.
The typical operating range for your
transmitter is approximately 33 ft (10 m).
Vehicles with the remote start feature will
have a greater range.One of the following could cause a decrease
in operating range:
• Weather conditions.
• Nearby radio towers.
• Structures around the vehicle.
• Other vehicles parked next to your
vehicle.
The radio frequency used by your remote
control can also be used by other radio
transmitters, for example amateur radios,
medical equipment, wireless headphones,
wireless remote controls, cell phones, battery
chargers and alarm systems. If the
frequencies are jammed, you will not be able
to use your remote control. You can lock and
unlock the doors with the key.
Note:Make sure to lock your vehicle before
leaving it unattended.
Note:If you are in range, the remote control
will operate if you press any button
unintentionally.
Note:The remote control contains sensitive
electrical components. Exposure to moisture
or impact may cause permanent damage.
Intelligent Access (If Equipped)
The system uses a radio frequency signal to
communicate with your vehicle and authorize
your vehicle to unlock when one of the
following conditions are met:
• You activate the front exterior door
handle switch.
• You press the luggage compartment
button.
• You press a button on the transmitter.
If excessive radio frequency interference is
present in the area or if the transmitter
battery is low, you may need to mechanically
unlock your door. You can use the
mechanical key blade in your intelligent
access key to open the driver door in this
situation. See Remote Control (page 69).
68
Keys and Remote Controls