display LINCOLN MKZ 2013 User Guide
[x] Cancel search | Manufacturer: LINCOLN, Model Year: 2013, Model line: MKZ, Model: LINCOLN MKZ 2013Pages: 474, PDF Size: 3.79 MB
Page 69 of 474
Accessory Mode Battery Saver for
Intelligent Access Keys
If you switch off the engine and leave
the ignition in the on or accessory
mode, the ignition will shut off after
30 minutes.
Luggage Compartment
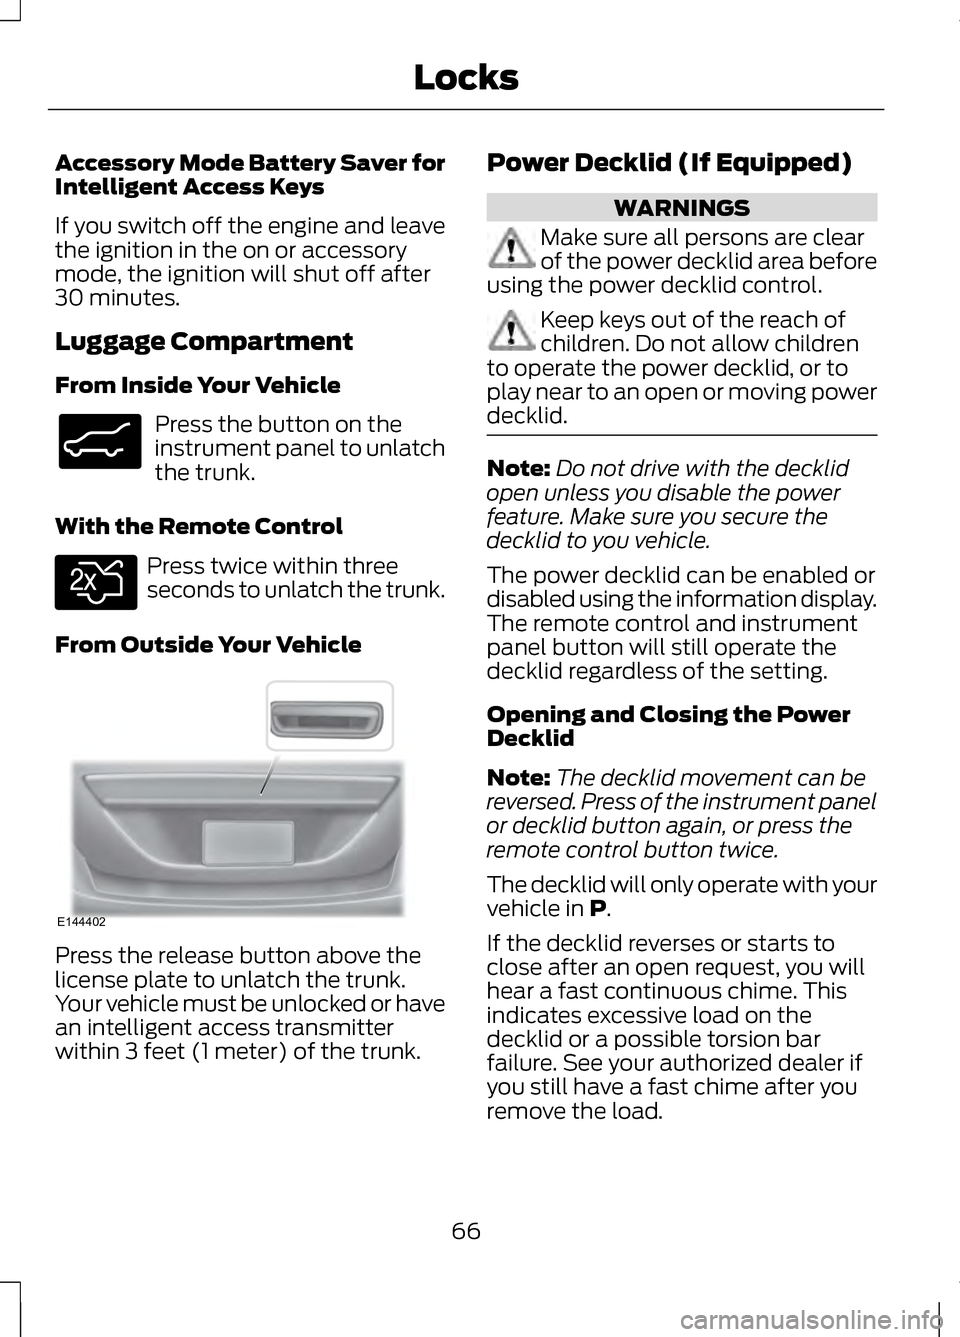
From Inside Your Vehicle
Press the button on the
instrument panel to unlatch
the trunk.
With the Remote Control Press twice within three
seconds to unlatch the trunk.
From Outside Your Vehicle Press the release button above the
license plate to unlatch the trunk.
Your vehicle must be unlocked or have
an intelligent access transmitter
within 3 feet (1 meter) of the trunk. Power Decklid (If Equipped) WARNINGS
Make sure all persons are clear
of the power decklid area before
using the power decklid control. Keep keys out of the reach of
children. Do not allow children
to operate the power decklid, or to
play near to an open or moving power
decklid. Note:
Do not drive with the decklid
open unless you disable the power
feature. Make sure you secure the
decklid to you vehicle.
The power decklid can be enabled or
disabled using the information display.
The remote control and instrument
panel button will still operate the
decklid regardless of the setting.
Opening and Closing the Power
Decklid
Note: The decklid movement can be
reversed. Press of the instrument panel
or decklid button again, or press the
remote control button twice.
The decklid will only operate with your
vehicle in P.
If the decklid reverses or starts to
close after an open request, you will
hear a fast continuous chime. This
indicates excessive load on the
decklid or a possible torsion bar
failure. See your authorized dealer if
you still have a fast chime after you
remove the load.
66
LocksE138633 E138630 E144402
Page 73 of 474
To Release the Trunk
Enter the factory set code or your
personal code, then press 5·6 within
five seconds.
Displaying the Factory Set Code
Note: You will need to have two
programmed intelligent access keys
for this procedure.
To display the factory set code in the
information display:
1. Place the first programmed key in the backup slot at the bottom of
the cupholder (after removing the
rubber cover).
2. Press the
START/STOP button
once and wait a few seconds.
3. Press the
START/STOP button
again and remove the key.
4. Insert the second programmed key
into the backup slot, then press the
START/STOP
button.
The factory set code will appear in the
information display for a few seconds.
Note: The code may not display until
after any other warning messages first
display. INTERIOR LUGGAGE
COMPARTMENT RELEASE WARNINGS
Keep vehicle doors and luggage
compartment locked and keep
keys and remote transmitters out of
a child ’s reach. Unsupervised children
could lock themselves in the trunk and
risk injury. Children should be taught
not to play in vehicles. Do not leave children, unreliable
adults, or animals unattended in
the vehicle. On hot days, the
temperature in the trunk or vehicle
interior can rise very quickly. Exposure
of people or animals to these high
temperatures for even a short time
can cause death or serious
heat-related injuries, including brain
damage. Small children are
particularly at risk. Your vehicle is equipped with a
release handle that provides a means
of escape for children and adults if
they become locked inside the
luggage compartment.
Adults should familiarize themselves
with the operation and location of the
release handle.
70
Locks
Page 75 of 474
PASSIVE ANTI-THEFT
SYSTEM
Note:
The system is not compatible
with non-Ford aftermarket remote start
systems. Use of these systems may
result in vehicle starting problems and
a loss of security protection.
Note: Metallic objects, electronic
devices or a second coded key on the
same key chain may cause vehicle
starting problems if they are too close
to the key when starting the engine.
Prevent these objects from touching
the coded key while starting the engine.
Switch the ignition off, move all objects
on the key chain away from the coded
key and restart the engine if a problem
occurs.
Note: Do not leave a duplicate coded
key in the vehicle. Always take your
keys and lock all doors when leaving
the vehicle.
SecuriLock®
The system is an engine
immobilization system. It is designed
to help prevent the engine from being
started unless a coded key
programmed to your vehicle is used.
Using the wrong key may prevent the
engine from starting. A message may
appear in the information display.
If you are unable to start the engine
with a correctly coded key, a
malfunction has happened and a
message may appear in the
information display. Automatic Arming
The vehicle is armed immediately
after switching the ignition off.
Automatic Disarming
Switching the ignition on with a coded
key disarms the vehicle.
Replacement Keys
Note:
Your vehicle comes equipped
with two intelligent access keys.
The intelligent access key functions
as a programmed key that operates
the driver door lock and activates the
intelligent access with push button
start system, as well as a remote
control.
If your programmed transmitters are
lost or stolen and you do not have an
extra coded key, you will need to have
your vehicle towed to an authorized
dealer. The key codes need to be
erased from your vehicle and new
coded keys will need to be
programmed.
Store an extra programmed key away
from the vehicle in a safe place to help
prevent any inconveniences. See your
authorized dealer to purchase
additional spare or replacement keys.
Programming a Spare Intelligent
Access Key
Note: You can program a maximum
for four intelligent access keys to your
vehicle.
72
Security
Page 78 of 474
ADJUSTING THE STEERING
WHEEL
WARNING
Do not adjust the steering wheel
when your vehicle is moving.
Note:
Make sure that you are sitting in
the correct position. See Sitting in the
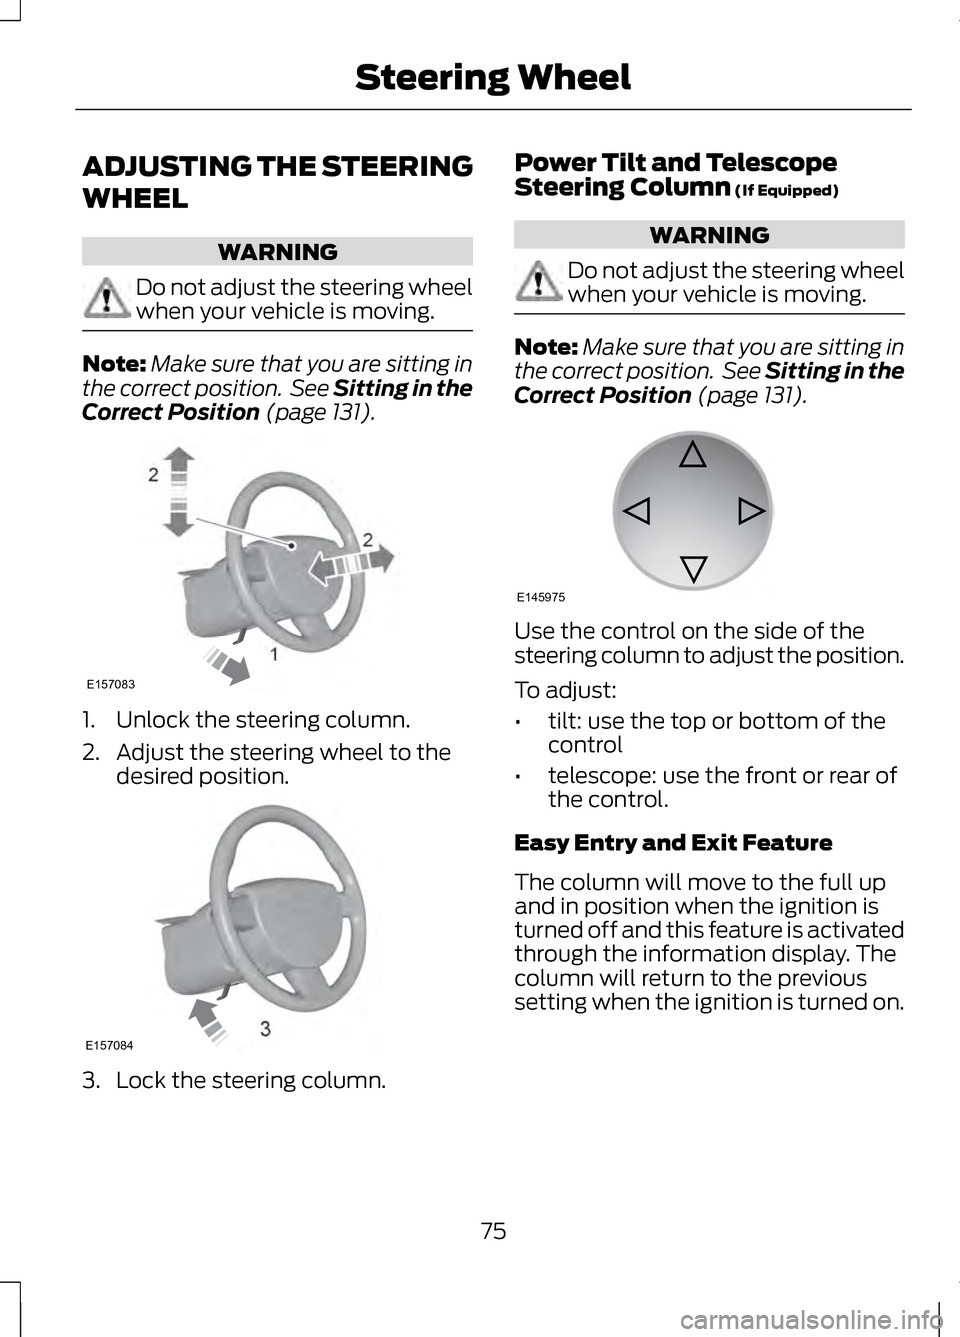
Correct Position (page 131). 1. Unlock the steering column.
2. Adjust the steering wheel to the
desired position. 3. Lock the steering column. Power Tilt and Telescope
Steering Column
(If Equipped) WARNING
Do not adjust the steering wheel
when your vehicle is moving.
Note:
Make sure that you are sitting in
the correct position. See Sitting in the
Correct Position
(page 131). Use the control on the side of the
steering column to adjust the position.
To adjust:
•
tilt: use the top or bottom of the
control
• telescope: use the front or rear of
the control.
Easy Entry and Exit Feature
The column will move to the full up
and in position when the ignition is
turned off and this feature is activated
through the information display. The
column will return to the previous
setting when the ignition is turned on.
75
Steering Wheel2
2
1E157083 E157084 E145975
Page 80 of 474
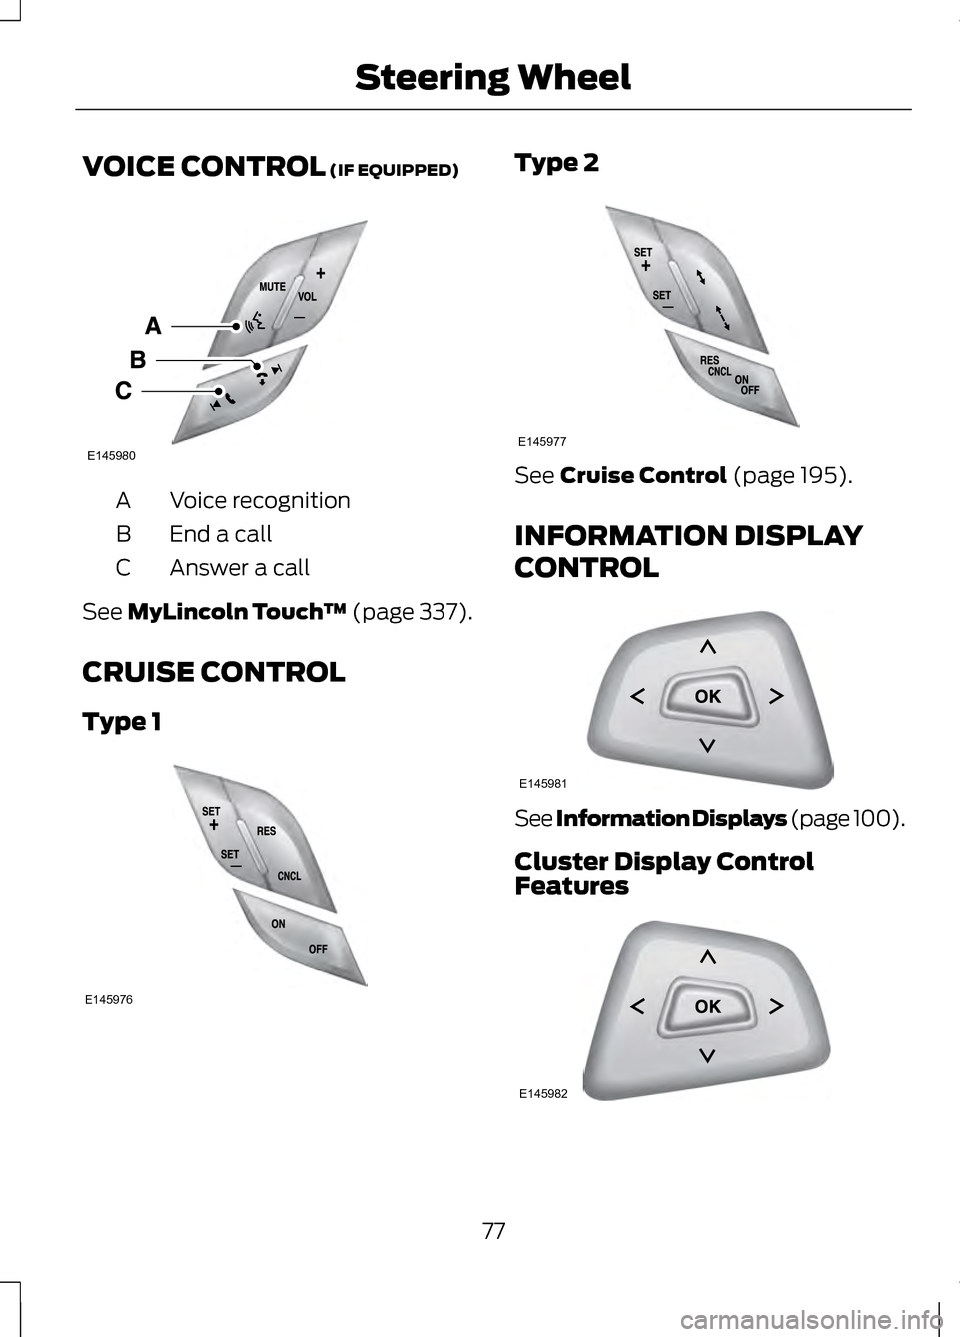
VOICE CONTROL (IF EQUIPPED)
Voice recognition
A
End a call
B
Answer a call
C
See
MyLincoln Touch ™ (page 337).
CRUISE CONTROL
Type 1 Type 2
See
Cruise Control (page 195).
INFORMATION DISPLAY
CONTROL See Information Displays (page 100).
Cluster Display Control
Features
77
Steering WheelE145980 E145976 E145977 E145981 E145982
Page 81 of 474
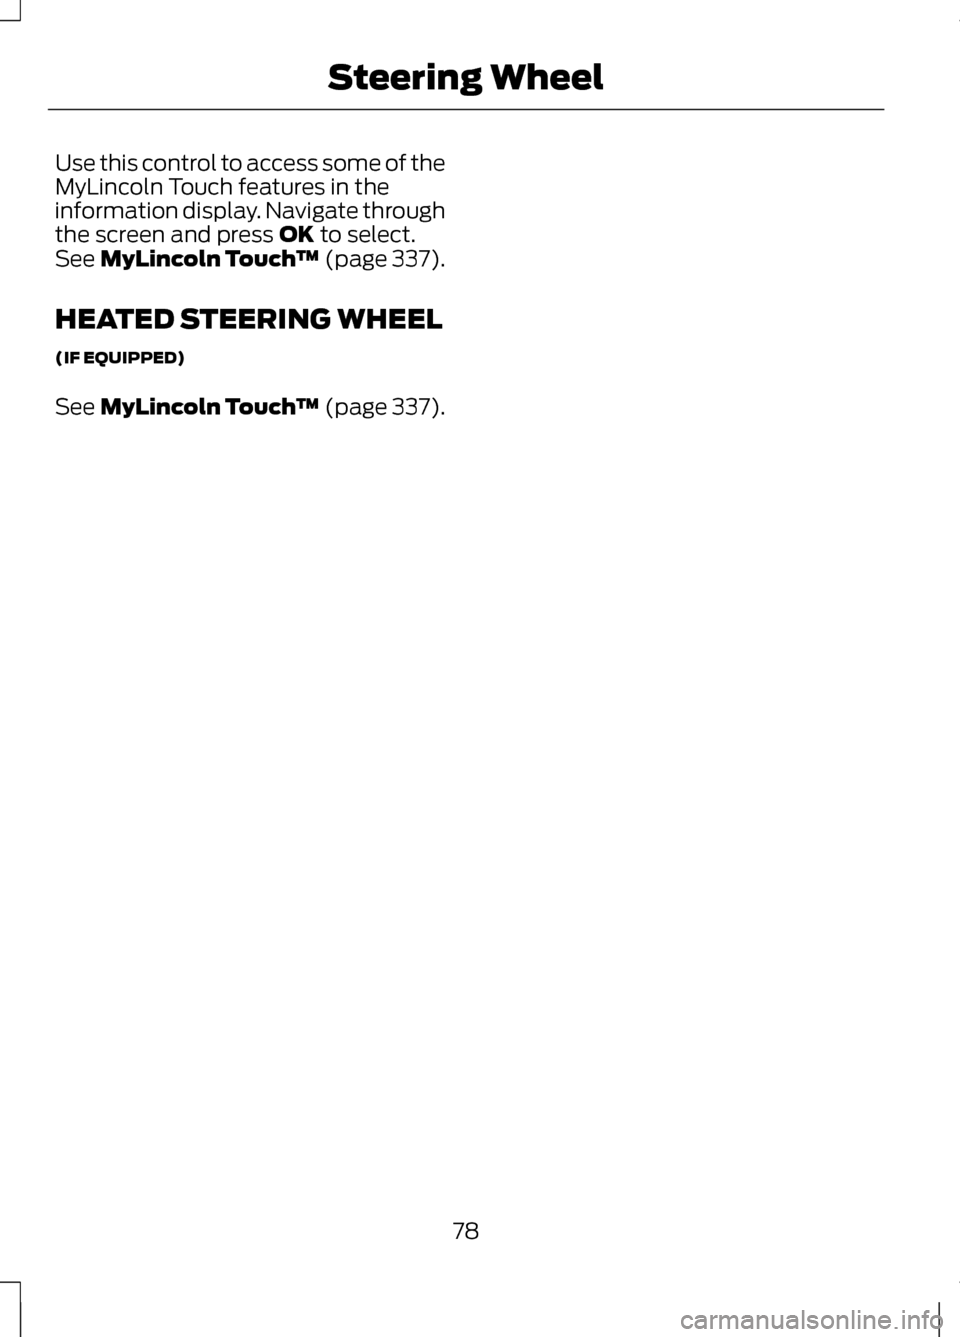
Use this control to access some of the
MyLincoln Touch features in the
information display. Navigate through
the screen and press OK to select.
See MyLincoln Touch ™ (page 337).
HEATED STEERING WHEEL
(IF EQUIPPED)
See
MyLincoln Touch ™ (page 337).
78
Steering Wheel
Page 83 of 474
Note:
If you switch autolamps on in
conjunction with autowipers, your low
beam headlamps will illuminate
automatically when the rain sensor
activates the windshield wipers
continuously.
Note: Wet road conditions can cause
unexpected wiping or smearing.
To reduce smearing we recommend
the following:
• Lower the sensitivity of the
autowipers.
• Switch to normal or high speed
wipe.
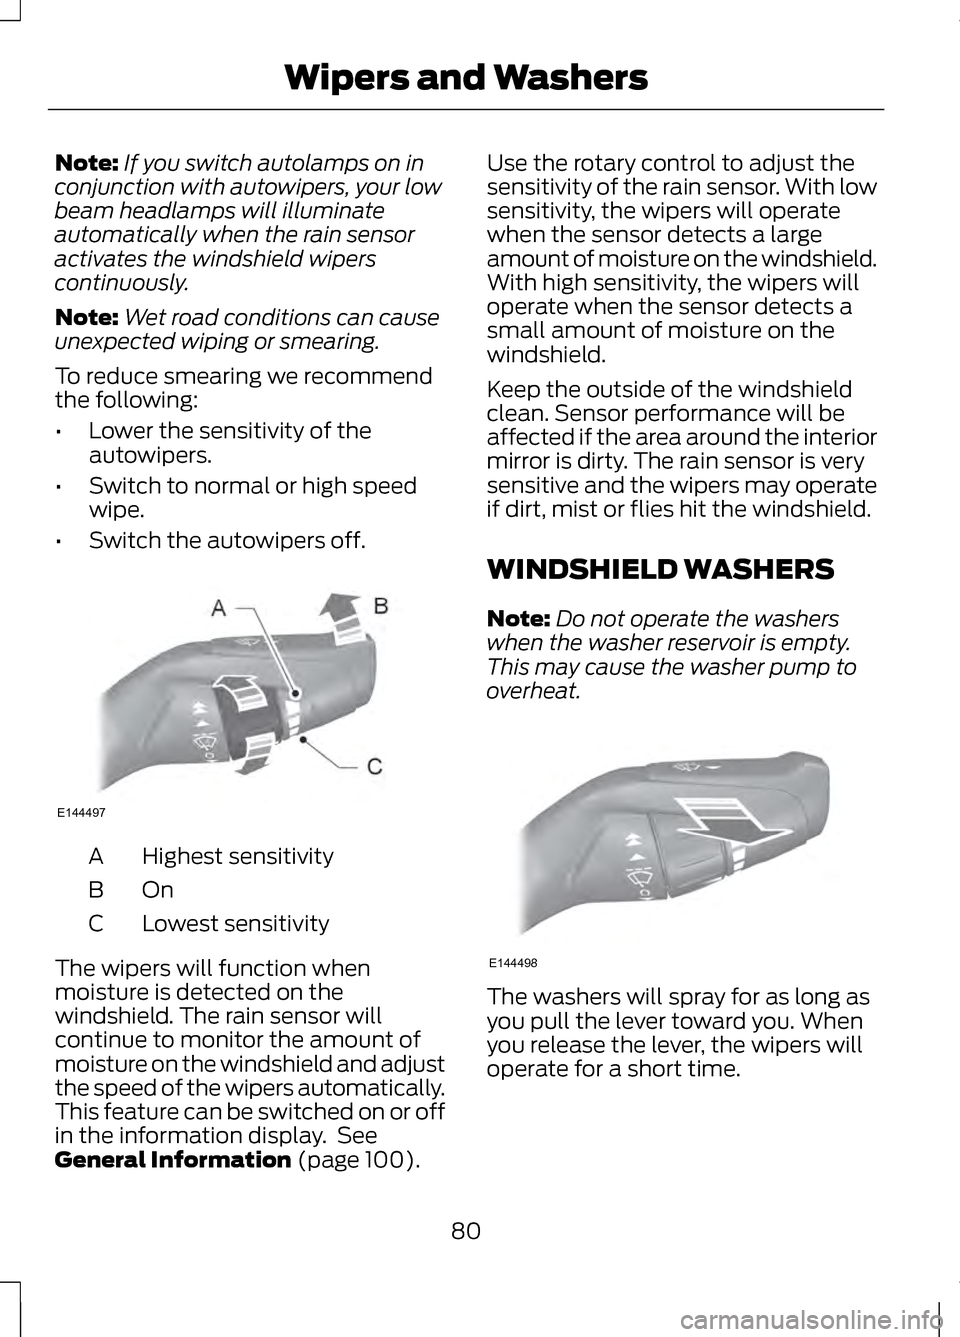
• Switch the autowipers off. Highest sensitivity
A
OnB
Lowest sensitivity
C
The wipers will function when
moisture is detected on the
windshield. The rain sensor will
continue to monitor the amount of
moisture on the windshield and adjust
the speed of the wipers automatically.
This feature can be switched on or off
in the information display. See
General Information (page 100). Use the rotary control to adjust the
sensitivity of the rain sensor. With low
sensitivity, the wipers will operate
when the sensor detects a large
amount of moisture on the windshield.
With high sensitivity, the wipers will
operate when the sensor detects a
small amount of moisture on the
windshield.
Keep the outside of the windshield
clean. Sensor performance will be
affected if the area around the interior
mirror is dirty. The rain sensor is very
sensitive and the wipers may operate
if dirt, mist or flies hit the windshield.
WINDSHIELD WASHERS
Note:
Do not operate the washers
when the washer reservoir is empty.
This may cause the washer pump to
overheat. The washers will spray for as long as
you pull the lever toward you. When
you release the lever, the wipers will
operate for a short time.
80
Wipers and WashersE144497 E144498
Page 84 of 474

A wipe will occur a few seconds after
washing to clear any remaining
washer fluid. This feature can be
switched on or off in the information
display. See General Information
(page 100).
81
Wipers and Washers
Page 86 of 474
The headlamps will remain on for a
period of time after you switch the
ignition off. You can adjust the time
delay using the information display
controls. See Information Displays
(page ?).
Note: If you switch autolamps on in
conjunction with autowipers, low beam
headlamps will illuminate
automatically when the rain sensor
activates the windshield wipers
continuously.
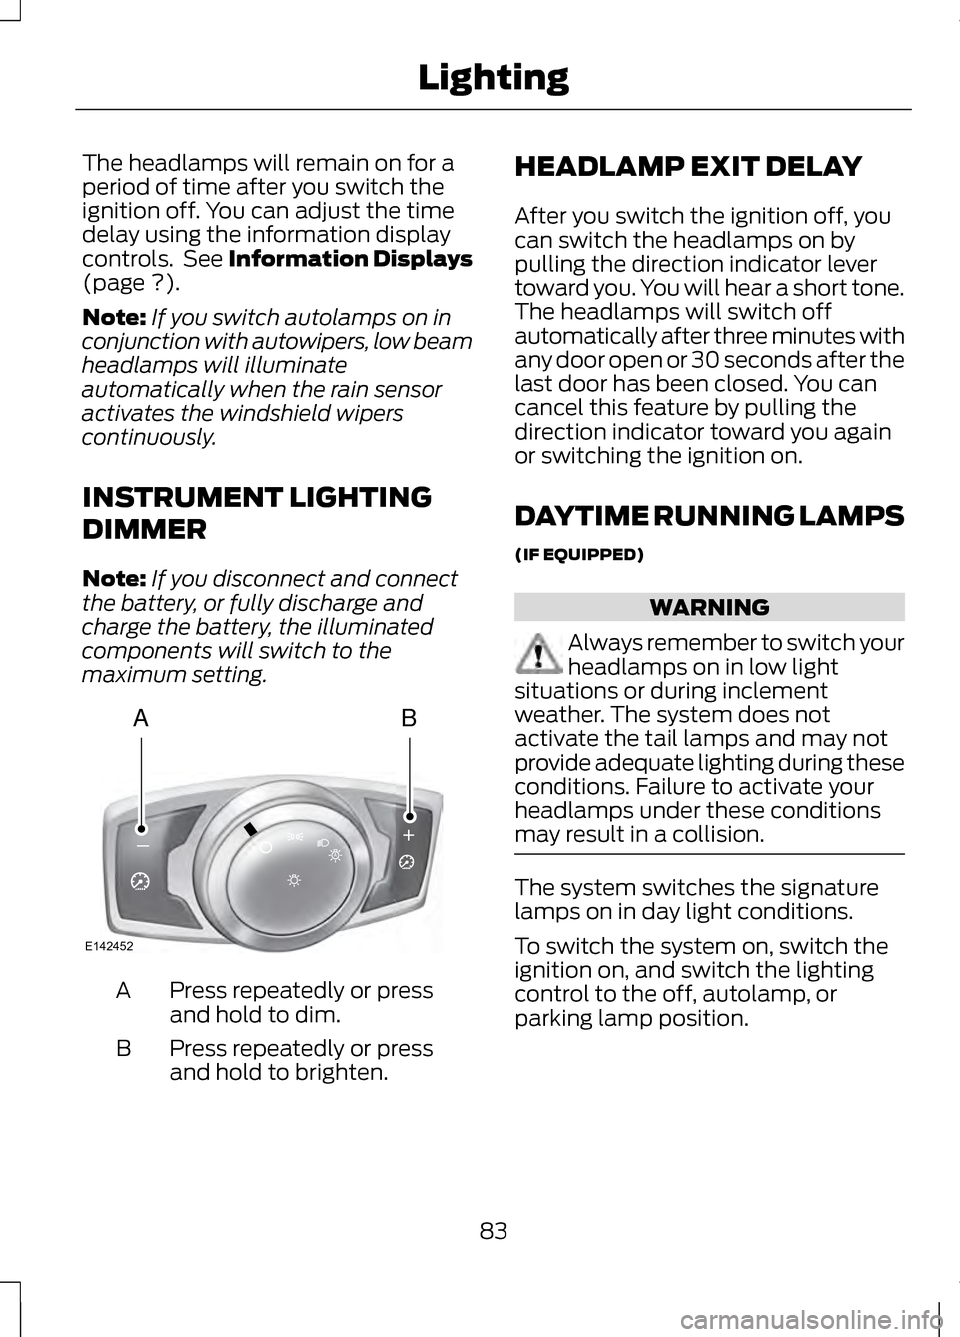
INSTRUMENT LIGHTING
DIMMER
Note: If you disconnect and connect
the battery, or fully discharge and
charge the battery, the illuminated
components will switch to the
maximum setting. Press repeatedly or press
and hold to dim.
A
Press repeatedly or press
and hold to brighten.
B HEADLAMP EXIT DELAY
After you switch the ignition off, you
can switch the headlamps on by
pulling the direction indicator lever
toward you. You will hear a short tone.
The headlamps will switch off
automatically after three minutes with
any door open or 30 seconds after the
last door has been closed. You can
cancel this feature by pulling the
direction indicator toward you again
or switching the ignition on.
DAYTIME RUNNING LAMPS
(IF EQUIPPED)
WARNING
Always remember to switch your
headlamps on in low light
situations or during inclement
weather. The system does not
activate the tail lamps and may not
provide adequate lighting during these
conditions. Failure to activate your
headlamps under these conditions
may result in a collision. The system switches the signature
lamps on in day light conditions.
To switch the system on, switch the
ignition on, and switch the lighting
control to the off, autolamp, or
parking lamp position.
83
LightingAB
A
E142452
Page 87 of 474
AUTOMATIC HIGH BEAM
CONTROL (IF EQUIPPED)
The system will automatically turn on
your high beams if it is dark enough
and no other traffic is present. When
it detects an approaching vehicle ’s
headlights, a preceding vehicle ’s tail
lamps or street lighting, the system
will turn off the high beams before
they distract other drivers. The low
beams remain on.
Note: If it appears that automatic
control of the high beams is not
functioning properly, check the
windshield in front of the camera for
blockage. A clear view of the road is
required for proper system operation.
Any windshield damage in the area of
the camera field-of-view should be
repaired.
Note: If a blockage is detected (e.g.
bird dropping, bug splatter, snow, or
ice) and no changes are observed, the
system will go into low beam mode
until the blockage is cleared. A
message may also appear in the
instrument cluster display noting the
front camera is blocked. Note:
Typical road dust, dirt and water
spots will not affect the automatic high
beam system ’s performance. However,
in cold or inclement weather
conditions, the automatic high beam
system's availability may be decreased.
If you want to change the beam state
independently of the system, you may
turn the high beams ON or OFF using
the multifunction switch lever.
Automatic control will resume when
conditions are correct.
Note: Modification of the vehicle ride
height (e.g. using much larger tires)
may degrade feature performance.
A camera sensor is centrally mounted
behind the windshield of the vehicle,
and monitors conditions continuously
to decide when to switch the high
beams off and on.
Once the system is active, the high
beams will switch on if:
• The ambient light level is low
enough that high beams are
needed.
• There is no traffic in front of the
vehicle.
• The vehicle speed is greater than
25 mph (40 km/h)
.
The high beams will switch off if:
• An approaching vehicle's
headlights or a preceding vehicle's
tail lamps are detected.
• Vehicle speed falls below
16 mph
(25 km/h).
• The ambient light level is high
enough that high beams are not
required.
84
Lighting