display LINCOLN MKZ 2013 Workshop Manual
[x] Cancel search | Manufacturer: LINCOLN, Model Year: 2013, Model line: MKZ, Model: LINCOLN MKZ 2013Pages: 474, PDF Size: 3.79 MB
Page 132 of 474
Both heated mirrors remove ice, mist
and fog when you switch on the
heated rear window.
CABIN AIR FILTER
Your vehicle is equipped with a cabin
air filter. It is located behind the glove
box.
The particulate filtration system
reduces the concentration of airborne
particles such as dust, spores and
pollen in the air supplied to the interior
of your vehicle.
Note:
To prevent foreign objects from
entering the system, make sure the
cabin air is in place at all times.
Running the system without a filter in
place could result in degradation or
damage to the system.
The particulate filtration system gives
you and your passengers the following
benefits:
• It improves your driving comfort by
reducing particle concentration.
• It improves the interior
compartment cleanliness.
• It protects the climate control
components from particle
deposits.
Replace the filter at regular intervals.
See Scheduled Maintenance (page
440).
For additional cabin air filter
information, or to replace the filter,
see an authorized dealer. REMOTE START
The climate control system adjusts
the cabin temperature during remote
start.
You cannot adjust the system during
remote start operation. Turn the
ignition on to return the system to its
previous settings. You can now make
adjustments. You need to turn certain
vehicle-dependent features back on,
such as:
•
heated seats
• cooled seats
• heated steering wheel
• heated mirrors
• heated rear window.
You can adjust the settings using the
information display controls.
See
Information Displays (page 100).
Automatic Settings
You can set the climate control to
operate in AUTO mode through the
information display setting: Remote
Start > Climate Control > Heater-A/C
> Auto. The climate control system
automatically sets the interior
temperature to 72°F (22°C).
In hot weather, the system is set to
72°F (22°C). Cooled seats are set to
high (if available, and selected to
AUTO in the information display).
In moderate weather, the system
either heats or cools (based on
previous settings). The rear defroster,
heated mirrors and heated/cooled
seats do not automatically turn on.
129
Climate Control
Page 133 of 474
In cold weather, the system is set to
72°F (22°C). The heated seats and
heated steering wheel are set to high
(if available, and selected to AUTO in
the information display). The rear
defroster and heated mirrors
automatically turn on.
Last Settings
You can set the climate control to
operate using the last climate control
settings through the information
display setting: Remote Start >
Climate Control > Heater
–A/C > Last
Settings. The climate control system
automatically uses the settings last
selected before turning off the vehicle.
Heated and Cooled Devices
The climate control system controls
other heated and cooled devices
inside the vehicle. These devices (if
available and selected to AUTO in the
information displays) may switch on
during remote start. Heated devices
typically switch on during cold
weather, and cooled devices during
hot weather.
130
Climate Control
Page 138 of 474
Lumbar and Bolster mode
Massage mode
Upper lumbar
Back massage intensity
adjustment
A
Lumbar decrease
Massage intensity
decrease and off *
B
Lower lumbar**
Cushion massage
intensity adjustment
C
Lumbar increase
Massage intensity
increase
D
-
On and off
E
* The massage feature will default to
an alternating massage mode with
back massage intensity adjustment.
The lumbar and bolster feature will
default to the middle lumbar mode.
** Press C a second time to adjust the
back bolster. Press C a third time to
adjust the cushion bolster.
This feature can also be adjusted
through the touch screen. When
switched on, the system displays
directions for you to adjust the lumbar
settings in your seat or to set the
massage function. To access and
make adjustments to the lumbar
setting:
1. Press the Menu Settings icon > Vehicle > Multi-contour Seat.
2. Choose the desired seat to adjust.
3. Press the + or - to adjust the lumbar intensity.
To access and make adjustments to
the massage setting: 1. Press the Menu Settings icon >
Vehicle >Multi-contour Seat.
2. Choose the desired seat to adjust.
3. Press Off, Lo or Hi.
MEMORY FUNCTION WARNINGS
Before activating the seat
memory, make sure that the area
immediately surrounding the seat is
clear of obstructions and that all
occupants are clear of moving parts. Do not use the memory function
when your vehicle is moving.
This feature will automatically recall
the position of the driver's seat and
power mirrors. The memory control is
located on the driver
’s door.
135
Seats
Page 140 of 474
Note:
If more than one linked remote
control or IA key is in range, the memory
function will move to the settings of
the first key stored.
Easy Entry and Exit Function
If the easy entry and exit feature is
enabled, this feature automatically
moves the driver seat position
rearward up to five centimeters when
the transmission selector lever is in
position P and the key is removed or
the keyless start ignition is turned off.
The driver seat will return to the
previous position when the key is put
in the ignition or the keyless start
ignition is activated.
The easy entry and exit feature can
be turned on or off using the driver
information display.
REAR SEATS
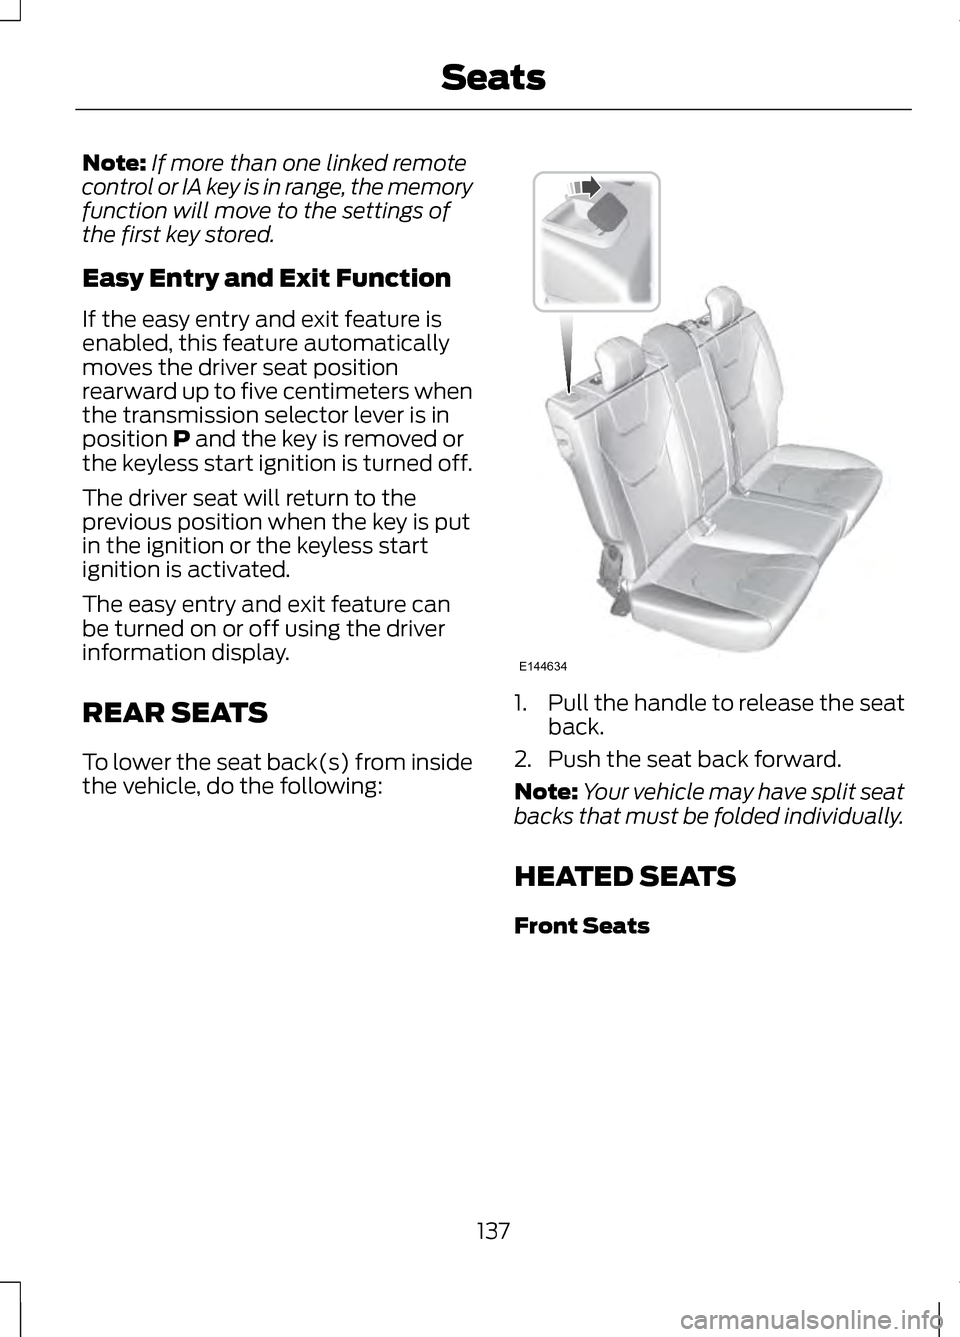
To lower the seat back(s) from inside
the vehicle, do the following: 1.
Pull the handle to release the seat
back.
2. Push the seat back forward.
Note: Your vehicle may have split seat
backs that must be folded individually.
HEATED SEATS
Front Seats
137
SeatsE144634
Page 148 of 474
3. Hold the transmitter within 1–
3
inches (2 –8 centimeter) of the
button on the visor you want to
program.
4. Press and hold both the programmed Genie button on the
hand-held transmitter and the
button you want to program. The
indicator light on the visor will flash
rapidly when the programming is
successful.
Note: The Genie transmitter will
transmit for up to 30 seconds. If
HomeLink does not program within 30
seconds the Genie transmitter will need
to be pressed again. If the Genie
transmitter indicator light displays
green and red, release the button until
the indicator light turns off before
pressing the button again.
Once HomeLink has been
programmed successfully, the Genie
transmitter must be changed out of
program mode. To do this:
1. Press and hold the previously programmed Genie button on the
hand-held transmitter for 10
seconds. The indicator light will
change from red to red and green.
2. Press the same button twice to confirm the change. If done
correctly the indicator light will
turn green.
Programming HomeLink to the
Genie Intellicode Garage Door
Opener Motor
Note: You may need a ladder to
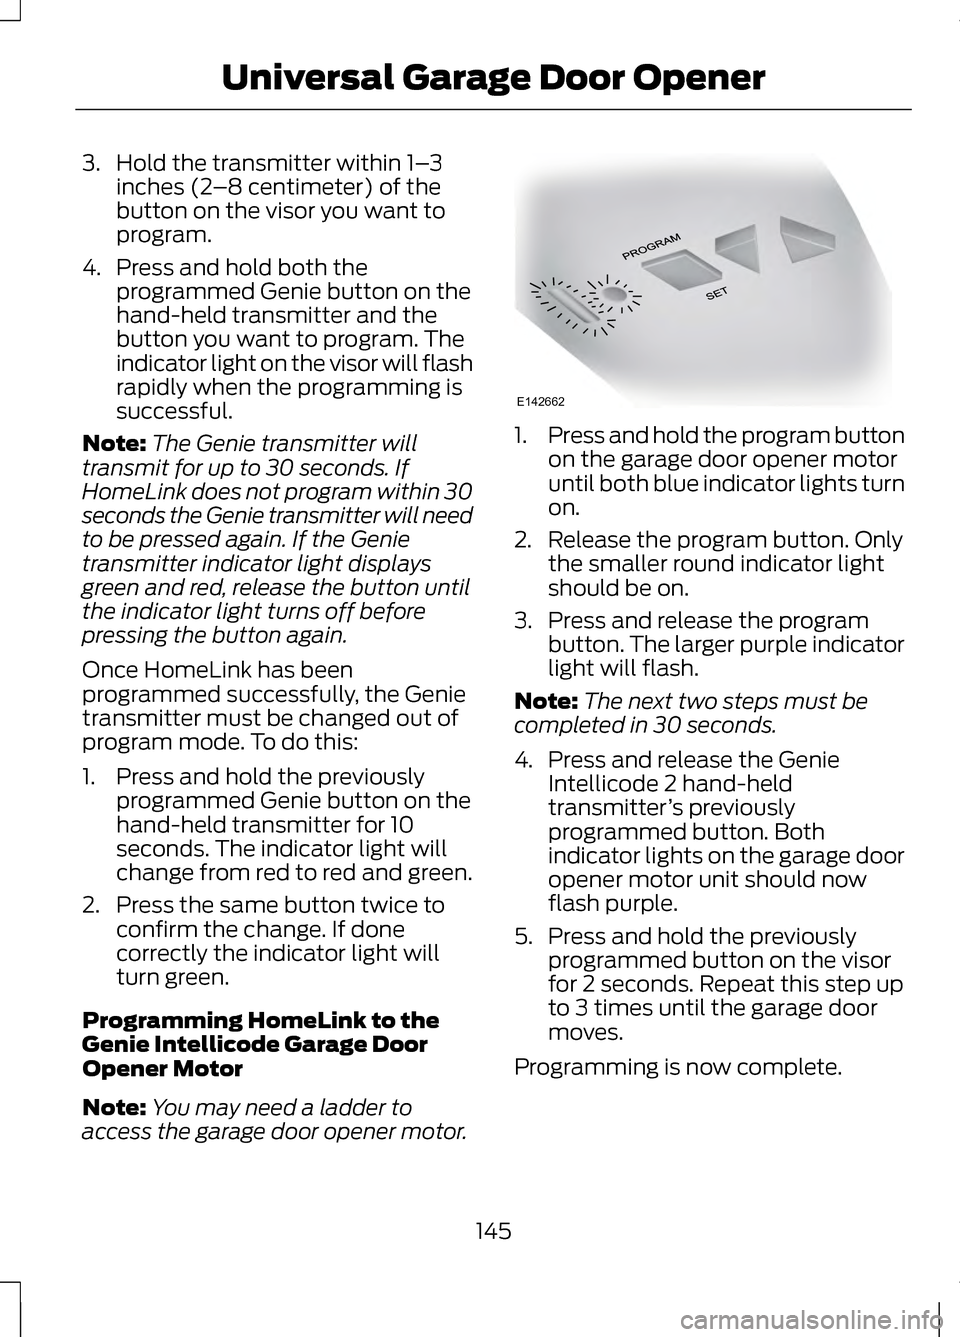
access the garage door opener motor. 1.
Press and hold the program button
on the garage door opener motor
until both blue indicator lights turn
on.
2. Release the program button. Only the smaller round indicator light
should be on.
3. Press and release the program button. The larger purple indicator
light will flash.
Note: The next two steps must be
completed in 30 seconds.
4. Press and release the Genie Intellicode 2 hand-held
transmitter ’s previously
programmed button. Both
indicator lights on the garage door
opener motor unit should now
flash purple.
5. Press and hold the previously programmed button on the visor
for 2 seconds. Repeat this step up
to 3 times until the garage door
moves.
Programming is now complete.
145
Universal Garage Door OpenerE142662
Page 155 of 474
Once your vehicle has started, it
remains running until you press the
start button, even if it does not detect
a valid key. If you open and close a
door while your vehicle is running, the
system searches for a valid key. You
cannot start your vehicle if it does not
detect a valid key within 20 seconds.
Automatic Engine Shutdown
Your vehicle is equipped with a
feature that automatically shuts down
the engine if it has been idling for an
extended period of time. The ignition
also turns off in order to save battery
power. Before the engine shuts down,
a message appears in the information
display showing a timer counting
down from 30 seconds. If you do not
intervene within 30 seconds, the
engine shuts down. Another message
appears in the information display to
inform you that the engine has shut
down in order to save fuel. Start your
vehicle as you normally do.
Automatic Engine Shutdown
Override
Note:
You cannot permanently switch
off the automatic engine shutdown
feature. When it is temporarily
switched off, it turns on at the next
ignition cycle.
The engine shutdown can be stopped,
or the timer reset, at any point before
the 30 second countdown has expired
by doing any of the following: • • You can reset the timer by
interacting with your vehicle (such
as pressing the brake pedal or
accelerator pedal).
• • You can temporarily switch off the shutdown feature any time the
ignition is on (for the current
ignition cycle only). Use the
information display to do so. See
Information Displays (page 100).
• • During the countdown before engine shutdown, you are
prompted to press OK or RESET
(depending on your type of
information display) to temporarily
switch the feature off (for the
current ignition cycle only).
STARTING A GASOLINE
ENGINE
After you start the engine, the idle
speed increases to warm up the
engine. If the engine idle speed does
not slow down automatically, have
your vehicle checked by your
authorized dealer.
Before starting the engine, check the
following:
• Make sure all occupants have
fastened their safety belts.
• Make sure the headlamps and
electrical accessories are off.
• Make sure the parking brake is on.
• Put the transmission in position P.
Note: Do not touch the accelerator
pedal.
1. Fully press the brake pedal.
152
Starting and Stopping the Engine
Page 168 of 474
AUTOMATIC
TRANSMISSION
WARNINGS
Always set the parking brake
fully and make sure the vehicle
is in P (Park). Turn the ignition off
whenever you leave your vehicle. Do not apply the brake pedal and
accelerator pedal
simultaneously. Applying both pedals
simultaneously for more than three
seconds will limit engine rpm, which
may result in difficulty maintaining
speed in traffic and could lead to
serious injury. Push Button Shift
Transmission
Your vehicle is equipped with an
electronic transmission. The shift
buttons are located on the center
stack next the MyLincoln Touch
™
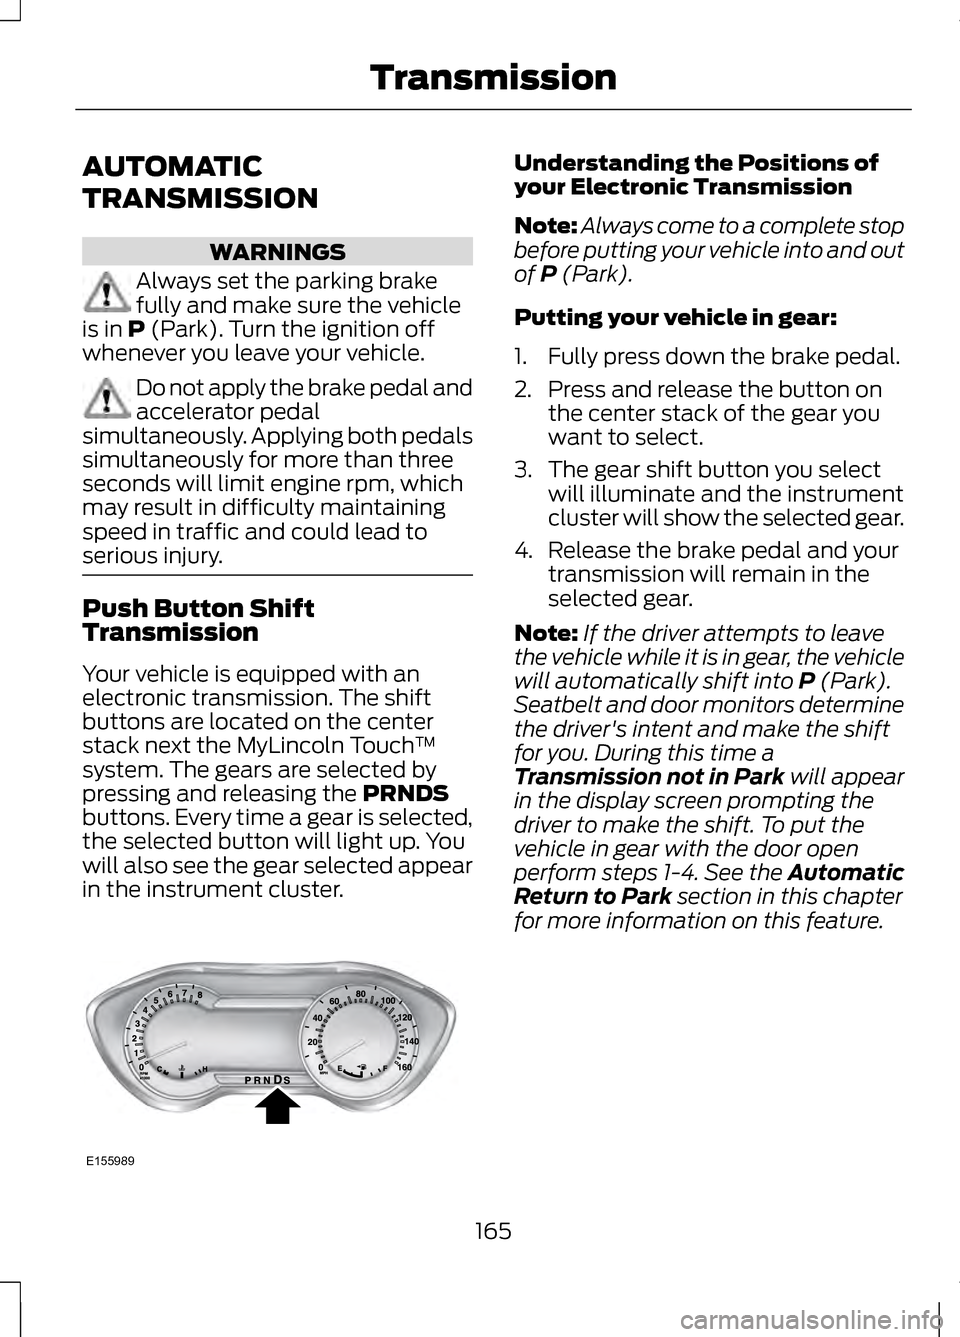
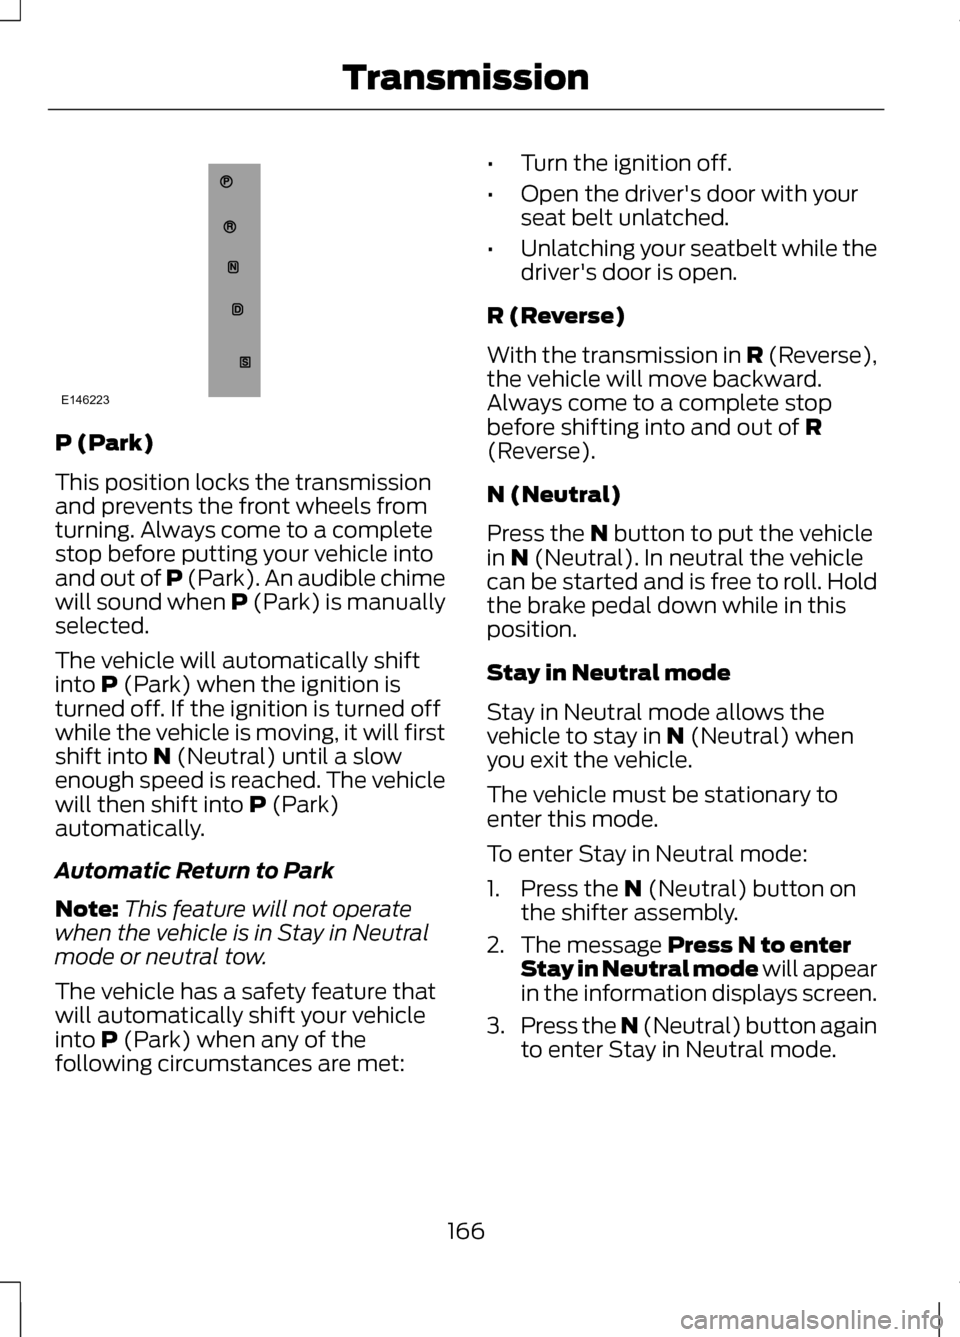
system. The gears are selected by
pressing and releasing the
PRNDS
buttons. Every time a gear is selected,
the selected button will light up. You
will also see the gear selected appear
in the instrument cluster. Understanding the Positions of
your Electronic Transmission
Note:
Always come to a complete stop
before putting your vehicle into and out
of
P (Park).
Putting your vehicle in gear:
1. Fully press down the brake pedal.
2. Press and release the button on the center stack of the gear you
want to select.
3. The gear shift button you select will illuminate and the instrument
cluster will show the selected gear.
4. Release the brake pedal and your transmission will remain in the
selected gear.
Note: If the driver attempts to leave
the vehicle while it is in gear, the vehicle
will automatically shift into
P (Park).
Seatbelt and door monitors determine
the driver's intent and make the shift
for you. During this time a
Transmission not in Park
will appear
in the display screen prompting the
driver to make the shift. To put the
vehicle in gear with the door open
perform steps 1-4. See the Automatic
Return to Park
section in this chapter
for more information on this feature.
165
TransmissionE155989
Page 169 of 474
P (Park)
This position locks the transmission
and prevents the front wheels from
turning. Always come to a complete
stop before putting your vehicle into
and out of P (Park). An audible chime
will sound when P (Park) is manually
selected.
The vehicle will automatically shift
into P (Park) when the ignition is
turned off. If the ignition is turned off
while the vehicle is moving, it will first
shift into
N (Neutral) until a slow
enough speed is reached. The vehicle
will then shift into
P (Park)
automatically.
Automatic Return to Park
Note: This feature will not operate
when the vehicle is in Stay in Neutral
mode or neutral tow.
The vehicle has a safety feature that
will automatically shift your vehicle
into
P (Park) when any of the
following circumstances are met: •
Turn the ignition off.
• Open the driver's door with your
seat belt unlatched.
• Unlatching your seatbelt while the
driver's door is open.
R (Reverse)
With the transmission in
R (Reverse),
the vehicle will move backward.
Always come to a complete stop
before shifting into and out of
R
(Reverse).
N (Neutral)
Press the
N button to put the vehicle
in N (Neutral). In neutral the vehicle
can be started and is free to roll. Hold
the brake pedal down while in this
position.
Stay in Neutral mode
Stay in Neutral mode allows the
vehicle to stay in
N (Neutral) when
you exit the vehicle.
The vehicle must be stationary to
enter this mode.
To enter Stay in Neutral mode:
1. Press the
N (Neutral) button on
the shifter assembly.
2. The message
Press N to enter
Stay in Neutral mode will appear
in the information displays screen.
3. Press the N (Neutral) button again
to enter Stay in Neutral mode.
166
TransmissionE146223
Page 170 of 474
The message Stay in Neutral mode
engaged will appear in the
information display screen when the
vehicle has entered Stay in Neutral
mode.
Note: During this mode the
N button
will flash continuously and the
instrument cluster will display N as the
selected gear.
Exiting Stay in Neutral mode
To disable Stay in Neutral mode put
the vehicle in another gear. See the
Putting the Vehicle in Gear
for
instructions on how to do this.
Entering a Carwash
Note: Always put the vehicle in Stay
in Neutral mode when entering an
automatic car wash. Failure to do this
could result in vehicle damage that
may not be covered by warranty.
D (Drive)
The normal driving position for the
best fuel economy.
S (Sport)
Putting the vehicle in
S (Sport): •
Provides additional engine braking
and extends lower gear operation
to enhance performance for uphill
climbs, hilly terrain or mountainous
areas. This will increase engine
RPM during engine braking.
• Provides additional lower gear
operation through the automatic
transmission shift strategy.
• Gears are selected more quickly
and at higher engine speeds.
SelectShift Automatic®
Transmission
Your SelectShift automatic
transmission gives you the ability to
manually change gears if you'd like.
Paddle Shifters
The paddle shifters allow you to shift
gears quickly, without taking your
hands off the steering wheel.
Temporary manual control is provided
when pulling the paddles with the
vehicle in the
D (Drive). The system
will determine when temporary
manual control is no longer desired
and reverts back to automatic control.
Extensive manual control can be
achieved by pressing the
S (Sport)
button. The system will stay in manual
control until the vehicle is put in
another gear.
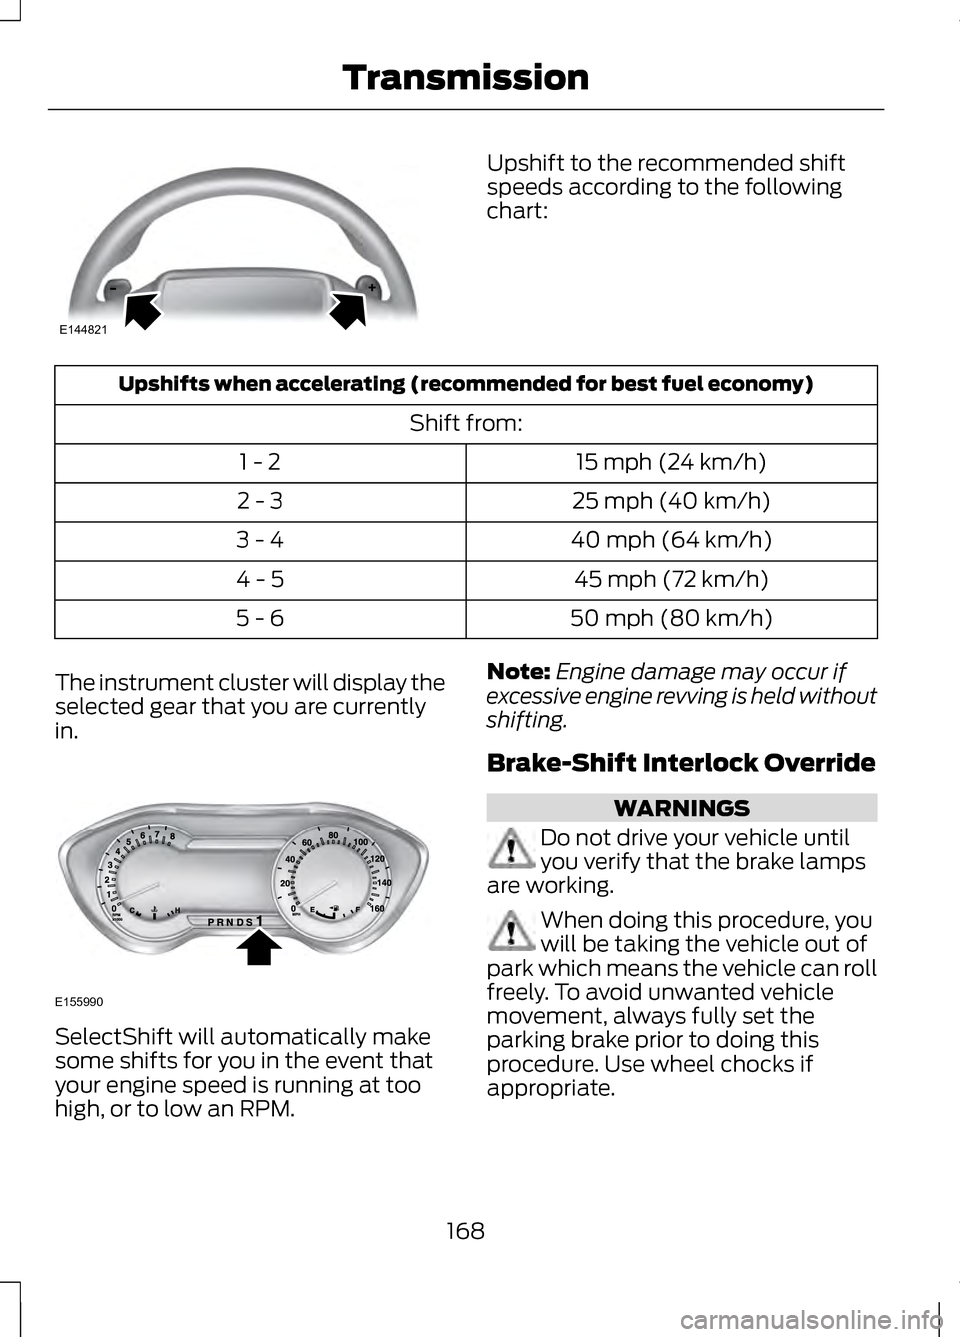
• Pull the right paddle (+) to upshift.
• Pull the left paddle (
–) to
downshift.
167
Transmission
Page 171 of 474
Upshift to the recommended shift
speeds according to the following
chart:
Upshifts when accelerating (recommended for best fuel economy)
Shift from:15 mph (24 km/h)
1 - 2
25 mph (40 km/h)
2 - 3
40 mph (64 km/h)
3 - 4
45 mph (72 km/h)
4 - 5
50 mph (80 km/h)
5 - 6
The instrument cluster will display the
selected gear that you are currently
in. SelectShift will automatically make
some shifts for you in the event that
your engine speed is running at too
high, or to low an RPM. Note:
Engine damage may occur if
excessive engine revving is held without
shifting.
Brake-Shift Interlock Override WARNINGS
Do not drive your vehicle until
you verify that the brake lamps
are working. When doing this procedure, you
will be taking the vehicle out of
park which means the vehicle can roll
freely. To avoid unwanted vehicle
movement, always fully set the
parking brake prior to doing this
procedure. Use wheel chocks if
appropriate.
168
TransmissionE144821 E155990