change time LINCOLN MKZ 2018 Owners Manual
[x] Cancel search | Manufacturer: LINCOLN, Model Year: 2018, Model line: MKZ, Model: LINCOLN MKZ 2018Pages: 595, PDF Size: 5.06 MB
Page 2 of 595
The information contained in this publication was correct at the time of going to print. In the interest of continuous development, we reserve the right to change specifications,design or equipment at any time without notice or obligation. No part of this publication may be reproduced, transmitted, stored in a retrieval system or translated into any languagein any form by any means without our written permission. Errors and omissions excepted.
© Ford Motor Company 2017
All rights reserved.
Part Number: 201706 20170915185718
Page 65 of 595
PRINCIPLE OF OPERATION
MyKey allows you to program keys withrestricted driving modes to promote gooddriving habits. You can program therestrictions to all keys but one. Any keys thatyou did not program are administrator keysor admin keys.
You can use admin keys to:
•Create a MyKey with certain vehiclerestrictions.
•Program certain MyKey settings.
•Clear all MyKey restrictions.
After you program a MyKey, you can viewthe following information through theinformation display:
•The total number of admin keys andMyKeys for your vehicle.
•The total distance a MyKey drivertraveled with your vehicle.
Note:Every MyKey receives the samerestrictions and settings. You cannotprogram them individually.
Note:For vehicles equipped with apush-button start switch: When both a MyKeyand an admin key are present when youstart your vehicle, the system recognizes theadmin key only.
Standard Settings
Not every vehicle includes the features listedbelow. If your vehicle has this equipment,then you cannot change the followingsettings when using a MyKey:
•Seatbelt reminder or Belt-Minder™. MyKeymutes the audio system until drivers, andin some instances, passengers, fastentheir seatbelts. Note: If your vehicleincludes an AM/FM radio or a very basicaudio system, then the radio may notmute.
•Earlier low-fuel warning. The low-fuelwarning activates earlier for MyKeydrivers, giving them more time to refuel.
•Certain driver alerts, stability systems orparking aids turn on automatically whenyou use the MyKey system. For example,Blind Spot Information System (BLIS),cross traffic alert, lane departure warningor forward collision warning. Note: MyKeydrivers may be able to turn the lanedeparture warning feature off, but thisfeature turns back on automatically withevery new key cycle.
•Restricted touchscreen operation in somemarkets. For example, MyKey mayprevent manual navigation destinationinput while the vehicle is in any gearother than park (P) or when the vehiclereaches a certain rate of speed.
•Satellite radio adult content restrictions,if this feature is available in your market.
Optional Settings
You can configure certain vehicle featuresettings when you first create a MyKey. Youcan also change the settings afterward withan admin key.
62
MKZ (CC9) Canada/United States of America, enUSA, Edition date: 201706, First Printing
MyKey™
Page 68 of 595
Use the arrow keys to select the desiredMyKey setting and press the OK button.Note:You can clear or change your MyKeysettings at any time during the same keycycle as you created the MyKey. Once youhave switched the vehicle off, however, youwill need an admin key to change or clearyour MyKey settings.
CLEARING ALL MYKEYS
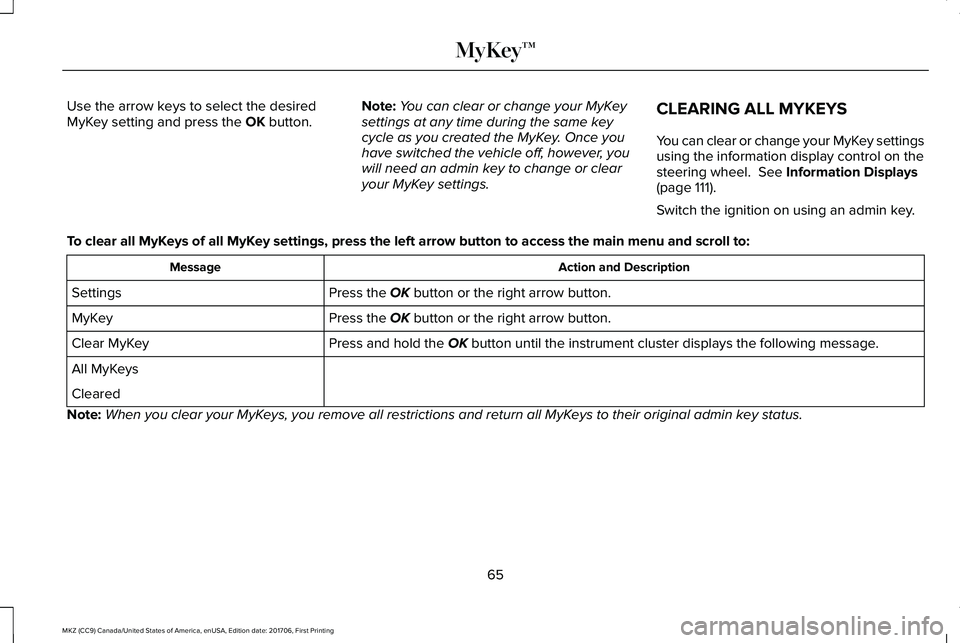
You can clear or change your MyKey settingsusing the information display control on thesteering wheel. See Information Displays(page 111).
Switch the ignition on using an admin key.
To clear all MyKeys of all MyKey settings, press the left arrow button to access the main menu and scroll to:
Action and DescriptionMessage
Press the OK button or the right arrow button.Settings
Press the OK button or the right arrow button.MyKey
Press and hold the OK button until the instrument cluster displays the following message.Clear MyKey
All MyKeys
Cleared
Note:When you clear your MyKeys, you remove all restrictions and return all MyKeys to their original admin key status.
65
MKZ (CC9) Canada/United States of America, enUSA, Edition date: 201706, First Printing
MyKey™
Page 71 of 595
LOCKING AND UNLOCKING
You can use the power door lock control orthe remote control to lock and unlock yourvehicle.
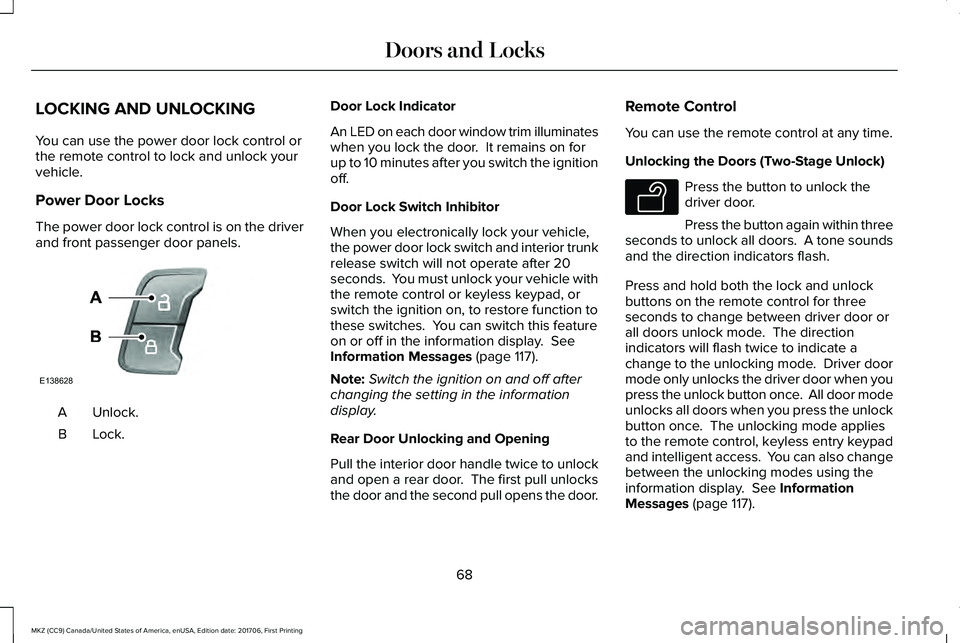
Power Door Locks
The power door lock control is on the driverand front passenger door panels.
Unlock.A
Lock.B
Door Lock Indicator
An LED on each door window trim illuminateswhen you lock the door. It remains on forup to 10 minutes after you switch the ignitionoff.
Door Lock Switch Inhibitor
When you electronically lock your vehicle,the power door lock switch and interior trunkrelease switch will not operate after 20seconds. You must unlock your vehicle withthe remote control or keyless keypad, orswitch the ignition on, to restore function tothese switches. You can switch this featureon or off in the information display. SeeInformation Messages (page 117).
Note:Switch the ignition on and off afterchanging the setting in the informationdisplay.
Rear Door Unlocking and Opening
Pull the interior door handle twice to unlockand open a rear door. The first pull unlocksthe door and the second pull opens the door.
Remote Control
You can use the remote control at any time.
Unlocking the Doors (Two-Stage Unlock)
Press the button to unlock thedriver door.
Press the button again within threeseconds to unlock all doors. A tone soundsand the direction indicators flash.
Press and hold both the lock and unlockbuttons on the remote control for threeseconds to change between driver door orall doors unlock mode. The directionindicators will flash twice to indicate achange to the unlocking mode. Driver doormode only unlocks the driver door when youpress the unlock button once. All door modeunlocks all doors when you press the unlockbutton once. The unlocking mode appliesto the remote control, keyless entry keypadand intelligent access. You can also changebetween the unlocking modes using theinformation display. See InformationMessages (page 117).
68
MKZ (CC9) Canada/United States of America, enUSA, Edition date: 201706, First Printing
Doors and LocksE138628 E138629
Page 91 of 595
GENERAL INFORMATION
Condensation in the Exterior FrontLamps and Rear Lamps
Exterior front lamps and rear lamps havevents to accommodate normal changes inair pressure.
Condensation can be a natural by-productof this design. When moist air enters thelamp assembly through the vents, there is apossibility that condensation can occur whenthe temperature is cold. When normalcondensation occurs, a fine mist can form onthe interior of the lens. The fine misteventually clears and exits through the ventsduring normal operation.
Clearing time may take as long as 48 hoursunder dry weather conditions.
Examples of acceptable condensation are:
•The presence of a fine mist (no streaks,drip marks or large droplets).
•A fine mist covers less than 50% of thelens.
Examples of unacceptable condensation are:
•A water puddle inside the lamp.
•Streaks, drip marks or large dropletspresent on the interior of the lens.
If you see any unacceptable condensation,have your vehicle checked by an authorizeddealer.
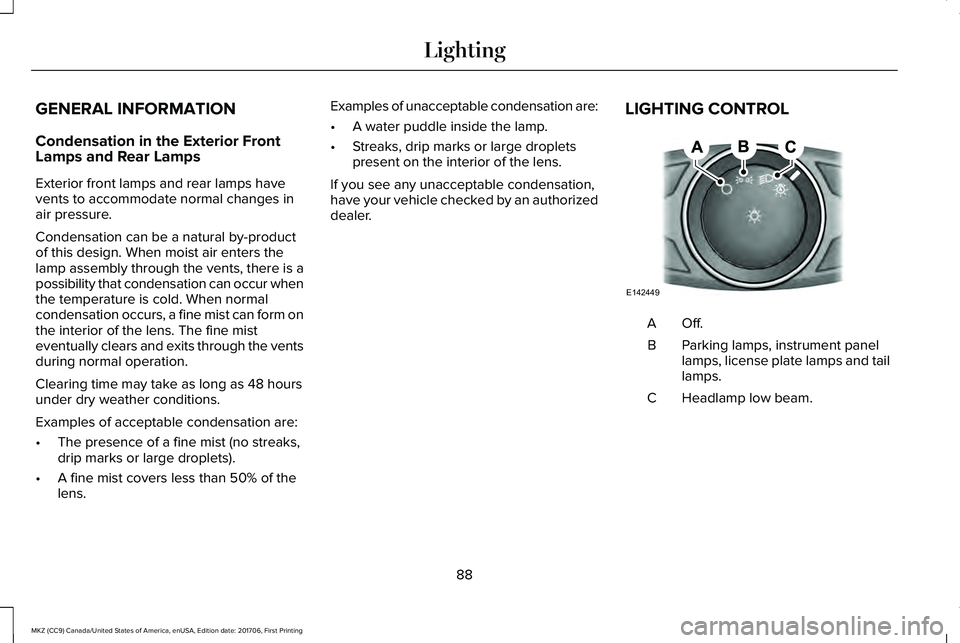
LIGHTING CONTROL
Off.A
Parking lamps, instrument panellamps, license plate lamps and taillamps.
B
Headlamp low beam.C
88
MKZ (CC9) Canada/United States of America, enUSA, Edition date: 201706, First Printing
LightingE142449
Page 96 of 595
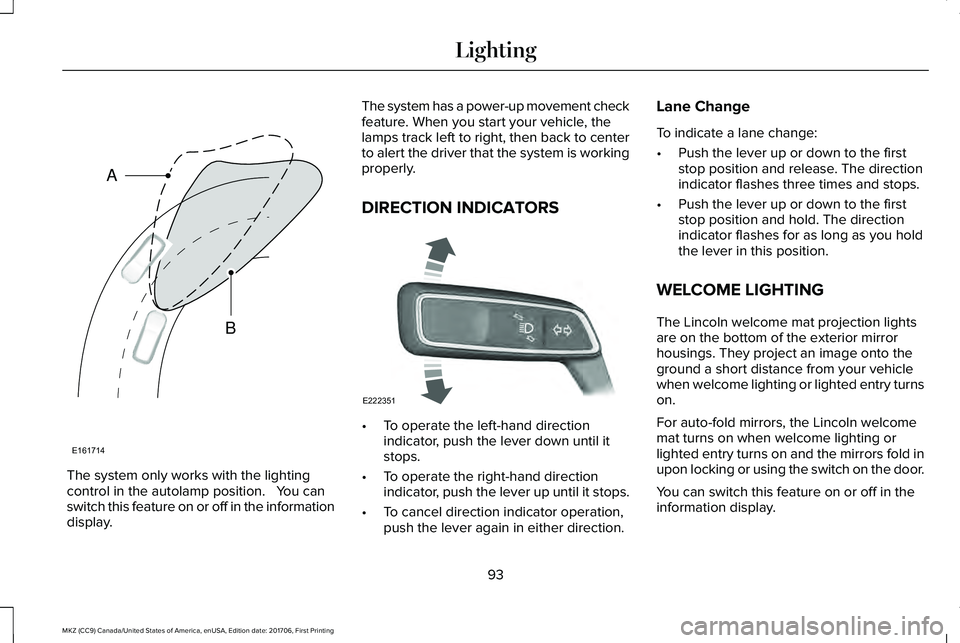
The system only works with the lightingcontrol in the autolamp position. You canswitch this feature on or off in the informationdisplay.
The system has a power-up movement checkfeature. When you start your vehicle, thelamps track left to right, then back to centerto alert the driver that the system is workingproperly.
DIRECTION INDICATORS
•To operate the left-hand directionindicator, push the lever down until itstops.
•To operate the right-hand directionindicator, push the lever up until it stops.
•To cancel direction indicator operation,push the lever again in either direction.
Lane Change
To indicate a lane change:
•Push the lever up or down to the firststop position and release. The directionindicator flashes three times and stops.
•Push the lever up or down to the firststop position and hold. The directionindicator flashes for as long as you holdthe lever in this position.
WELCOME LIGHTING
The Lincoln welcome mat projection lightsare on the bottom of the exterior mirrorhousings. They project an image onto theground a short distance from your vehiclewhen welcome lighting or lighted entry turnson.
For auto-fold mirrors, the Lincoln welcomemat turns on when welcome lighting orlighted entry turns on and the mirrors fold inupon locking or using the switch on the door.
You can switch this feature on or off in theinformation display.
93
MKZ (CC9) Canada/United States of America, enUSA, Edition date: 201706, First Printing
LightingE161714
B
A E222351
Page 102 of 595
Loose Mirror
If your power-folding mirrors are manuallyfolded, they may not work properly evenafter you re-position them. You need to resetthem if:
•The mirrors vibrate when you drive.
•The mirrors feel loose.
•The mirrors do not stay in the folded orunfolded position.
•One of the mirrors is not in its normaldriving position.
To reset the power-fold feature, use thepower-folding mirror control to fold andunfold the mirrors. You may hear a loud noiseas you reset the power-folding mirrors. Thissound is normal. Repeat this process asneeded each time the mirrors are manuallyfolded.
Heated Exterior Mirrors
See Heated Windows and Mirrors (page140).
Memory Mirrors
You can save and recall the mirror positionsthrough the memory function. See MemoryFunction (page 149).
Auto-Dimming Feature (If Equipped)
The driver exterior mirror automatically dimswhen the interior auto-dimming mirror turnson.
Signal Indicator Mirrors
The outer portion of the appropriate mirrorhousing blinks when you switch on thedirection indicator.
Lincoln Welcome Mat
Projection lights, on the bottom of the mirrorhousings, project an image onto the grounda short distance from the vehicle. SeeLighting (page 88).
Integrated Blind Spot Mirrors (If Equipped)
WARNING
Objects in the blind spot mirror arecloser than they appear.
Blind spot mirrors have an integrated convexmirror built into the upper outboard cornerof the exterior mirrors. Their design canincrease your visibility along the side of yourvehicle.
Check the main mirror first before a lanechange, then check the blind spot mirror. Ifno vehicles are present in the blind spotmirror and the traffic in the adjacent lane isat a safe distance, signal that you intend tochange lanes. Glance over your shoulder toverify traffic is clear and carefully changelanes.
99
MKZ (CC9) Canada/United States of America, enUSA, Edition date: 201706, First Printing
Windows and Mirrors
Page 160 of 595
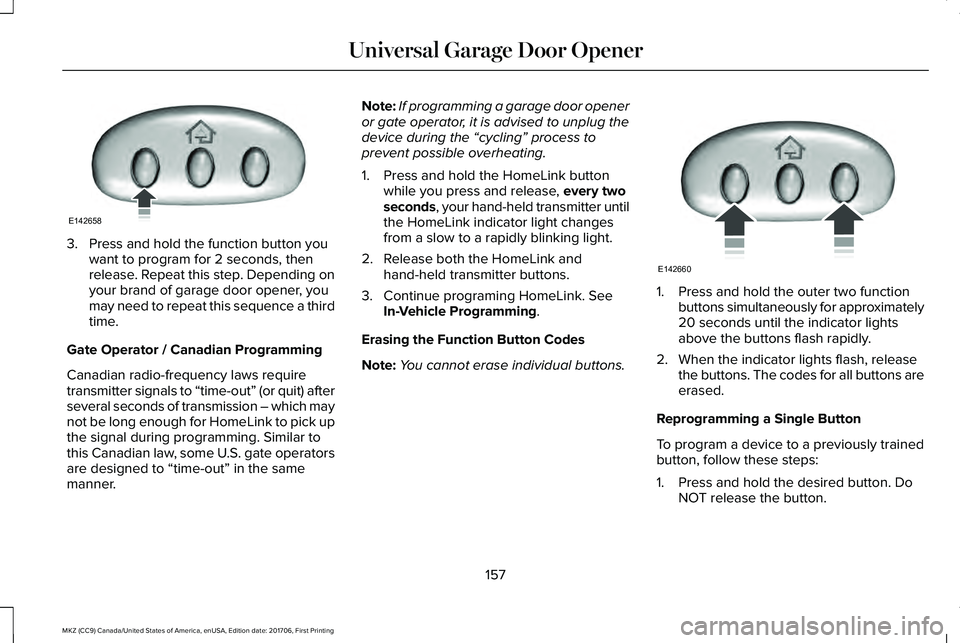
3. Press and hold the function button youwant to program for 2 seconds, thenrelease. Repeat this step. Depending onyour brand of garage door opener, youmay need to repeat this sequence a thirdtime.
Gate Operator / Canadian Programming
Canadian radio-frequency laws requiretransmitter signals to “time-out” (or quit) afterseveral seconds of transmission – which maynot be long enough for HomeLink to pick upthe signal during programming. Similar tothis Canadian law, some U.S. gate operatorsare designed to “time-out” in the samemanner.
Note:If programming a garage door openeror gate operator, it is advised to unplug thedevice during the “cycling” process toprevent possible overheating.
1. Press and hold the HomeLink buttonwhile you press and release, every twoseconds, your hand-held transmitter untilthe HomeLink indicator light changesfrom a slow to a rapidly blinking light.
2. Release both the HomeLink andhand-held transmitter buttons.
3. Continue programing HomeLink. SeeIn-Vehicle Programming.
Erasing the Function Button Codes
Note:You cannot erase individual buttons.
1. Press and hold the outer two functionbuttons simultaneously for approximately20 seconds until the indicator lightsabove the buttons flash rapidly.
2. When the indicator lights flash, releasethe buttons. The codes for all buttons areerased.
Reprogramming a Single Button
To program a device to a previously trainedbutton, follow these steps:
1. Press and hold the desired button. DoNOT release the button.
157
MKZ (CC9) Canada/United States of America, enUSA, Edition date: 201706, First Printing
Universal Garage Door OpenerE142658 E142660
Page 161 of 595
2.The indicator light will begin to flash after20 seconds. Without releasing thebutton, follow Step 1 in the Programmingsection.
For questions or comments, contactHomeLink at www.homelink.com,www.youtube.com/HomeLinkGentex or1-800-355-3515.
Programming to a Genie Intellicode 2Garage Door Opener
Note:The Genie Intellicode 2 transmittermust already be programmed to operatewith the garage door opener.
Note:To program HomeLink to thetransmitter you must first put the transmitterinto programming mode.
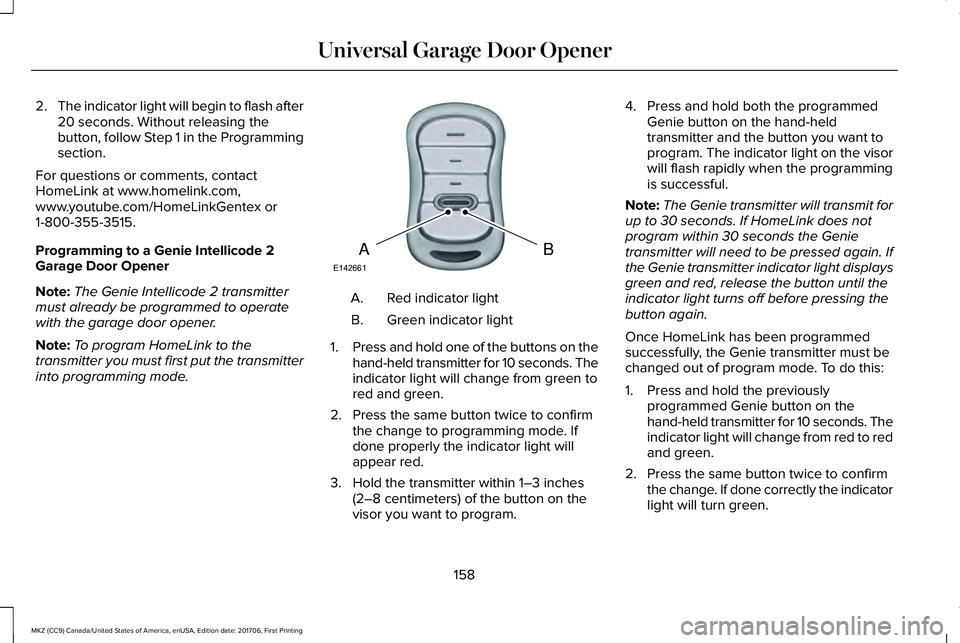
Red indicator lightA.
Green indicator lightB.
1.Press and hold one of the buttons on thehand-held transmitter for 10 seconds. Theindicator light will change from green tored and green.
2. Press the same button twice to confirmthe change to programming mode. Ifdone properly the indicator light willappear red.
3. Hold the transmitter within 1–3 inches(2–8 centimeters) of the button on thevisor you want to program.
4. Press and hold both the programmedGenie button on the hand-heldtransmitter and the button you want toprogram. The indicator light on the visorwill flash rapidly when the programmingis successful.
Note:The Genie transmitter will transmit forup to 30 seconds. If HomeLink does notprogram within 30 seconds the Genietransmitter will need to be pressed again. Ifthe Genie transmitter indicator light displaysgreen and red, release the button until theindicator light turns off before pressing thebutton again.
Once HomeLink has been programmedsuccessfully, the Genie transmitter must bechanged out of program mode. To do this:
1. Press and hold the previouslyprogrammed Genie button on thehand-held transmitter for 10 seconds. Theindicator light will change from red to redand green.
2. Press the same button twice to confirmthe change. If done correctly the indicatorlight will turn green.
158
MKZ (CC9) Canada/United States of America, enUSA, Edition date: 201706, First Printing
Universal Garage Door OpenerBAE142661
Page 162 of 595
Programming HomeLink to the GenieIntellicode Garage Door Opener Motor
Note:You may need a ladder to access thegarage door opener motor.
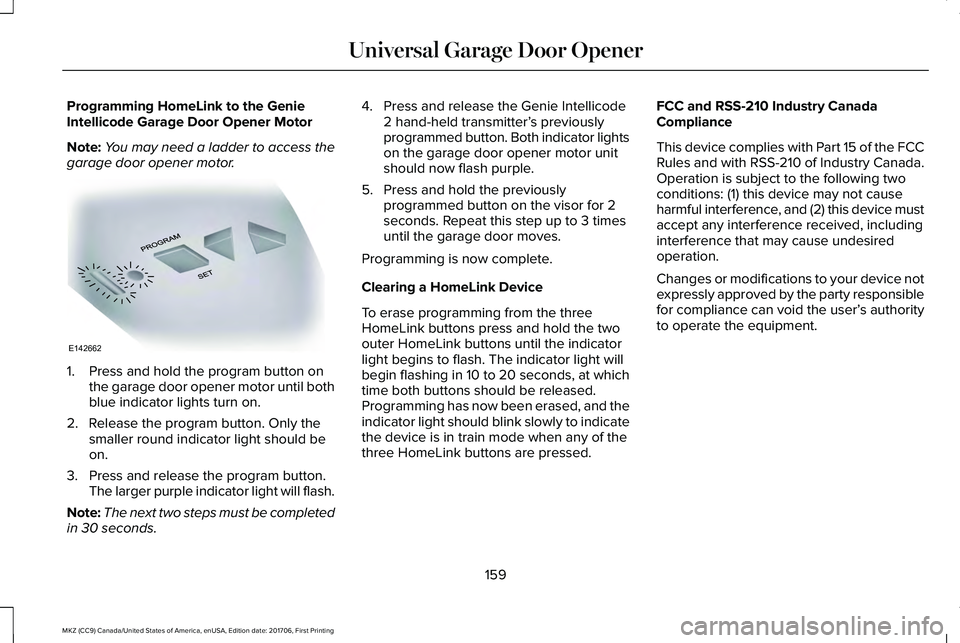
1. Press and hold the program button onthe garage door opener motor until bothblue indicator lights turn on.
2. Release the program button. Only thesmaller round indicator light should beon.
3. Press and release the program button.The larger purple indicator light will flash.
Note:The next two steps must be completedin 30 seconds.
4. Press and release the Genie Intellicode2 hand-held transmitter’s previouslyprogrammed button. Both indicator lightson the garage door opener motor unitshould now flash purple.
5. Press and hold the previouslyprogrammed button on the visor for 2seconds. Repeat this step up to 3 timesuntil the garage door moves.
Programming is now complete.
Clearing a HomeLink Device
To erase programming from the threeHomeLink buttons press and hold the twoouter HomeLink buttons until the indicatorlight begins to flash. The indicator light willbegin flashing in 10 to 20 seconds, at whichtime both buttons should be released.Programming has now been erased, and theindicator light should blink slowly to indicatethe device is in train mode when any of thethree HomeLink buttons are pressed.
FCC and RSS-210 Industry CanadaCompliance
This device complies with Part 15 of the FCCRules and with RSS-210 of Industry Canada.Operation is subject to the following twoconditions: (1) this device may not causeharmful interference, and (2) this device mustaccept any interference received, includinginterference that may cause undesiredoperation.
Changes or modifications to your device notexpressly approved by the party responsiblefor compliance can void the user’s authorityto operate the equipment.
159
MKZ (CC9) Canada/United States of America, enUSA, Edition date: 201706, First Printing
Universal Garage Door OpenerE142662