transmission LINCOLN NAUTILUS 2021 Owners Manual
[x] Cancel search | Manufacturer: LINCOLN, Model Year: 2021, Model line: NAUTILUS, Model: LINCOLN NAUTILUS 2021Pages: 579, PDF Size: 6.9 MB
Page 8 of 579
Exterior Mirrors
Adjusting the Exterior Mirrors
...................133
Folding the Exterior Mirrors - Vehicles With: Manual Folding Mirrors ................
133
Folding the Exterior Mirrors - Vehicles With: Power Folding Mirrors ..................
133
Auto-Dimming Exterior Mirror ...................
134
Moonroof
Opening and Closing the Sun Shade ......
135
Opening and Closing the Moonroof .......
135
Venting the Moonroof .................................
136
Moonroof Bounce-Back .............................
136
Instrument Cluster
Instrument Cluster Overview .....................
137
What Is the Tachometer .............................
138
What Is the Speedometer ..........................
138
Fuel Gauge ....................................................
138
What Is the Engine Coolant Temperature Gauge .........................................................
139
What Is the Engine Oil Pressure Gauge .......................................................................
139 What Is the Transmission Fluid
Temperature Gauge ................................
139
What Is the 12V Battery Gauge .................
139
What Are the Instrument Cluster Warning Lamps ..........................................................
139
Instrument Cluster Warning Lamps .........
139
What Are the Instrument Cluster Indicators ........................................................................\
141
Instrument Cluster Indicators .....................
141
Instrument Cluster Display
Using the Instrument Cluster Display Controls ......................................................
143
Instrument Cluster Display Main Menu .......................................................................
144
Trip Computer ...............................................
145
Customizing the Instrument Cluster Display .......................................................................
147
Personalized Settings .................................
148
Remote Start
What Is Remote Start ....................................
151
Remote Start Precautions ...........................
151
Remote Start Limitations .............................
151Enabling Remote Start
.................................
151
Remotely Starting and Stopping the Vehicle .........................................................
151
Extending the Remote Start Duration .......................................................................
152
Remote Start Remote Control Indicators .......................................................................
152
Remote Start Settings .................................
152
Climate Control
Identifying the Climate Control Unit ........
154
Switching Climate Control On and Off .......................................................................
154
Switching Recirculated Air On and Off .......................................................................
154
Switching Air Conditioning On and Off .......................................................................
154
Switching Maximum Defrost On and Off .......................................................................
154
Switching Maximum Cooling On and Off .......................................................................
154
Switching the Heated Rear Window On and Off ........................................................
155
Switching the Heated Mirrors On and Off .......................................................................
155
4
2021 Nautilus (CD9) Canada/United States of America, enUSA, Edition date: 202011, First-Printing Table of Contents
Page 10 of 579
Power Outlet - Vehicles With:
110V Power Outlet
What Is the Power Outlet ...........................180
Power Outlet Precautions ..........................
180
Locating the Power Outlet .........................
180
Power Outlet Indicators ..............................
180
Power Outlet - Vehicles With: 12V Power Outlet
What Is the Power Outlet ............................
181
Power Outlet Precautions ...........................
181
Locating the Power Outlet ..........................
181
Wireless Accessory Charger
What Is the Wireless Accessory Charger .......................................................................
182
Wireless Accessory Charger Precautions .......................................................................
182
Locating the Wireless Accessory Charger .......................................................................
183
Charging a Wireless Device ......................
183
Storage
Cup Holders ..................................................
184Under Floor Storage
....................................
184
Glasses Holder .............................................
185
Starting and Stopping the Engine
Starting and Stopping the Engine – Precautions ...............................................
186
Push Button Ignition Switch ......................
186
Starting the Engine ......................................
187
Engine Block Heater ...................................
188
Stopping the Engine ....................................
189
Automatic Engine Stop ...............................
189
Accessing the Passive Key Backup Position .......................................................
190
Starting and Stopping the Engine – Troubleshooting ........................................
191
Auto-Start-Stop
What Is Auto-Start-Stop ..............................
194
Auto-Start-Stop Precautions ......................
194
Switching Auto-Start-Stop On and Off .......................................................................
194
Stopping the Engine ....................................
194
Restarting the Engine ..................................
194Auto-Start-Stop Indicators
..........................
194
Auto-Start-Stop – Troubleshooting .........
195
Fuel and Refueling
Fuel and Refueling Precautions ...............
197
Fuel Quality ....................................................
198
Locating the Fuel Filler Funnel .................
198
Running Out of Fuel ....................................
199
Refueling .......................................................
200
Fuel Tank Capacity .....................................
202
Fuel and Refueling – Troubleshooting ......................................................................
203
Catalytic Converter
What Is the Catalytic Converter ..............
204
Catalytic Converter Precautions .............
204
Catalytic Converter – Troubleshooting ......................................................................
204
Automatic Transmission
Automatic Transmission Precautions .....
206
Automatic Transmission Positions ..........
206
Shifting Your Vehicle Into Gear ................
207
6
2021 Nautilus (CD9) Canada/United States of America, enUSA, Edition date: 202011, First-Printing Table of Contents
Page 11 of 579
Automatic Transmission Position Indicators
......................................................................207
Manually Shifting Gears .............................
207
Temporary Neutral Mode ..........................
208
Automatic Return to Park (P) ....................
209
Manual Park Release ..................................
210
Automatic Transmission Audible Warnings .......................................................................
212
Automatic Transmission – Troubleshooting .......................................................................
212
All-Wheel Drive
How Does All-Wheel Drive Work .............
214
All-Wheel Drive Precautions ......................
214
All-Wheel Drive Limitations ........................
214
All-Wheel Drive Driving Hints ....................
214
All-Wheel Drive – Troubleshooting ..........
217
Brakes
Brake Precautions ........................................
218
Anti-Lock Braking System ..........................
218
Brake Over Accelerator ..............................
218
Locating the Brake Fluid Reservoir .........
218
Checking the Brake Fluid ..........................
218Brake Fluid Specification
...........................
219
Brakes – Troubleshooting .........................
219
Electric Parking Brake
What Is the Electric Parking Brake ..........
221
Applying the Electric Parking Brake .......
221
Applying the Electric Parking Brake in an Emergency ................................................
221
Manually Releasing the Electric Parking Brake ...........................................................
221
Automatically Releasing the Electric Parking Brake ..........................................
222
Electric Parking Brake Audible Warning ......................................................................
222
Releasing the Electric Parking Brake if the Vehicle Battery Has Run Out of Charge
......................................................................
222
Electric Parking Brake – Troubleshooting ......................................................................
222
Hill Start Assist
What Is Hill Start Assist ..............................
225
How Does Hill Start Assist Work .............
225
Hill Start Assist Precautions .....................
225
Hill Start Assist – Troubleshooting .........
225Auto Hold
How Does Auto Hold Work
......................
226
Switching Auto Hold On and Off ............
226
Using Auto Hold ..........................................
226
Auto Hold Indicators ...................................
227
Traction Control
How Does Traction Control Work ...........
228
Switching Traction Control On and Off ......................................................................
228
Traction Control Indicator .........................
228
Traction Control – Troubleshooting .......
228
Stability Control
How Does Stability Control Work ...........
229
Switching Stability Control On and Off ......................................................................
230
Stability Control Indicator .........................
230
Stability Control – Troubleshooting .........
231
Steering
Electric Power Steering .............................
232
Steering – Troubleshooting ......................
233
7
2021 Nautilus (CD9) Canada/United States of America, enUSA, Edition date: 202011, First-Printing Table of Contents
Page 63 of 579
Seatbelt Reminder Indicators
A warning lamp illuminates if the ignition is
on, a front seat is occupied and the seatbelt
has not been fastened.
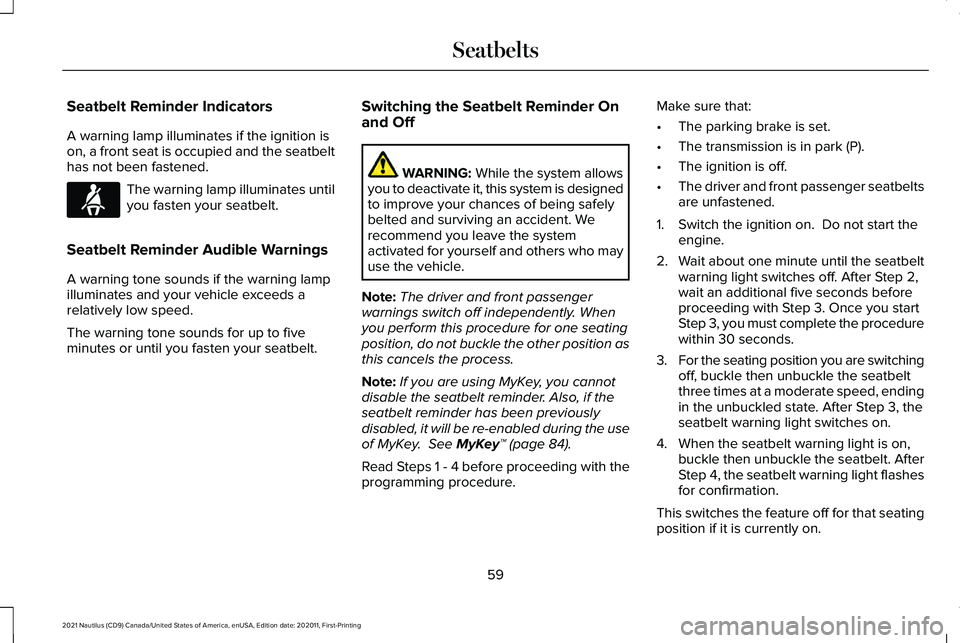
The warning lamp illuminates until
you fasten your seatbelt.
Seatbelt Reminder Audible Warnings
A warning tone sounds if the warning lamp
illuminates and your vehicle exceeds a
relatively low speed.
The warning tone sounds for up to five
minutes or until you fasten your seatbelt. Switching the Seatbelt Reminder On
and Off WARNING: While the system allows
you to deactivate it, this system is designed
to improve your chances of being safely
belted and surviving an accident. We
recommend you leave the system
activated for yourself and others who may
use the vehicle.
Note: The driver and front passenger
warnings switch off independently. When
you perform this procedure for one seating
position, do not buckle the other position as
this cancels the process.
Note: If you are using MyKey, you cannot
disable the seatbelt reminder. Also, if the
seatbelt reminder has been previously
disabled, it will be re-enabled during the use
of MyKey.
See MyKey™ (page 84).
Read Steps 1 - 4 before proceeding with the
programming procedure. Make sure that:
•
The parking brake is set.
• The transmission is in park (P).
• The ignition is off.
• The driver and front passenger seatbelts
are unfastened.
1. Switch the ignition on. Do not start the engine.
2. Wait about one minute until the seatbelt warning light switches off. After Step 2,
wait an additional five seconds before
proceeding with Step 3. Once you start
Step 3, you must complete the procedure
within 30 seconds.
3. For the seating position you are switching
off, buckle then unbuckle the seatbelt
three times at a moderate speed, ending
in the unbuckled state. After Step 3, the
seatbelt warning light switches on.
4. When the seatbelt warning light is on, buckle then unbuckle the seatbelt. After
Step 4, the seatbelt warning light flashes
for confirmation.
This switches the feature off for that seating
position if it is currently on.
59
2021 Nautilus (CD9) Canada/United States of America, enUSA, Edition date: 202011, First-Printing SeatbeltsE71880
Page 104 of 579
LIFTGATE PRECAUTIONS
WARNING: It is extremely dangerous
to ride in a cargo area, inside or outside of
a vehicle. In a crash, people riding in these
areas are more likely to be seriously
injured or killed. Do not allow people to
ride in any area of your vehicle that is not
equipped with seats and seatbelts. Make
sure everyone in your vehicle is in a seat
and properly using a seatbelt. Failure to
follow this warning could result in serious
personal injury or death. WARNING: Make sure that you fully
close the liftgate to prevent exhaust fumes
from entering your vehicle. If you are
unable to fully close the liftgate, open the
air vents or the windows to allow fresh air
to enter your vehicle. Failure to follow this
instruction could result in personal injury
or death. WARNING:
Keep keys out of reach
of children. Do not allow children to
operate or play near an open or moving
power liftgate. You should supervise the
operation of the power liftgate at all times.
OPENING THE LIFTGATE
Opening the Liftgate From Inside Your
Vehicle With the transmission in park (P),
press the button on the instrument
panel.
Note: Be careful when opening or closing
the liftgate in a garage or other enclosed
area to avoid damaging the liftgate.
Note: Do not hang anything, for example a
bike rack, from the glass or liftgate. This
could damage the liftgate and its
components.
Note: Do not leave the liftgate open while
driving. This could damage the liftgate and
its components. Opening the Liftgate From Outside
Your Vehicle
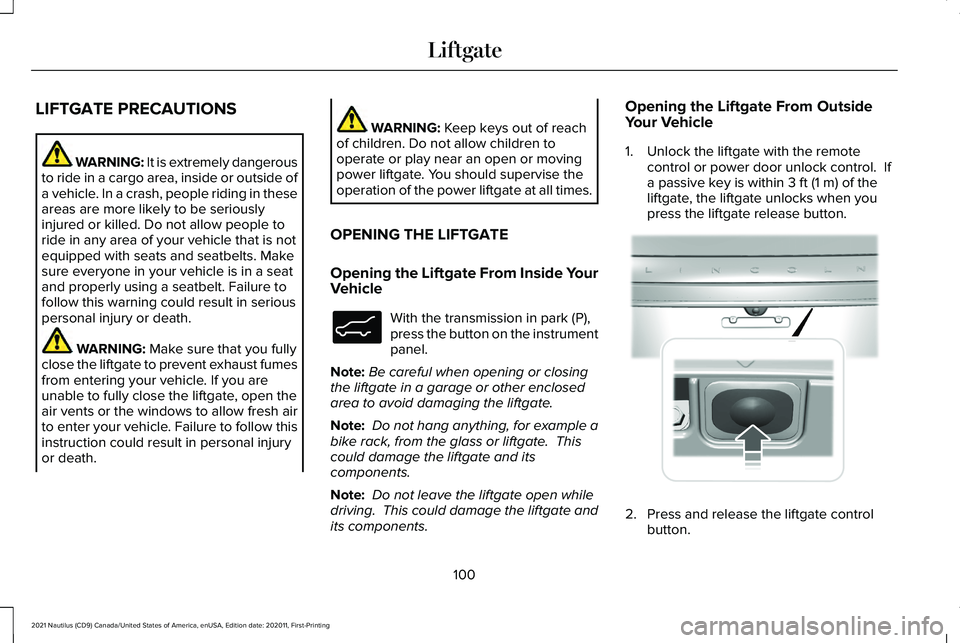
1. Unlock the liftgate with the remote
control or power door unlock control. If
a passive key is within
3 ft (1 m) of the
liftgate, the liftgate unlocks when you
press the liftgate release button. 2. Press and release the liftgate control
button.
100
2021 Nautilus (CD9) Canada/United States of America, enUSA, Edition date: 202011, First-Printing LiftgateE138633 E291416
Page 107 of 579
4. The power liftgate now opens at the
programmed height. To change the
programmed height, repeat the steps.
Note: You can fully open the liftgate by
manually pushing it upward to the maximum
open position if it opens in a lower position.
Note: The system recalls the new
programmed height until you reprogram it,
even if you disconnect the battery.
CLOSING THE LIFTGATE
Closing the Liftgate From Inside Your
Vehicle WARNING: Make sure all persons
are clear of the power liftgate area before
using the power liftgate control. With the transmission in park (P),
press the button on the instrument
panel. Note:
Make sure that you close the liftgate
before operating or moving your vehicle,
especially in an enclosure, like a garage or
a parking structure. This could damage the
liftgate and its components.
Note: Make sure the area behind your
vehicle is free from obstruction and that
there is enough room for you to operate the
liftgate. Objects too close to your vehicle,
for example a wall, garage door or another
vehicle may come into contact with the
moving liftgate. This could damage the
liftgate and its components.
Note: Make sure that you fully close the
liftgate to prevent cargo from falling out.
Closing the Liftgate From Outside Your
Vehicle WARNING:
Make sure all persons
are clear of the power liftgate area before
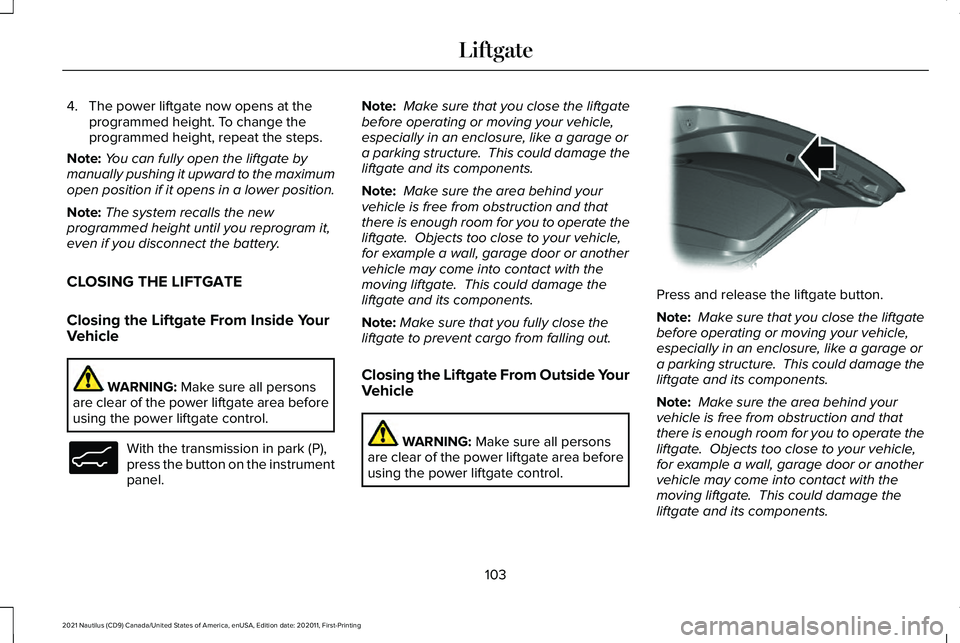
using the power liftgate control. Press and release the liftgate button.
Note:
Make sure that you close the liftgate
before operating or moving your vehicle,
especially in an enclosure, like a garage or
a parking structure. This could damage the
liftgate and its components.
Note: Make sure the area behind your
vehicle is free from obstruction and that
there is enough room for you to operate the
liftgate. Objects too close to your vehicle,
for example a wall, garage door or another
vehicle may come into contact with the
moving liftgate. This could damage the
liftgate and its components.
103
2021 Nautilus (CD9) Canada/United States of America, enUSA, Edition date: 202011, First-Printing LiftgateE138633 E138636
Page 111 of 579

Liftgate – Frequently Asked Questions
Why won't my power liftgate function?
Make sure the transmission is in park
(P), ensure nothing is obstructing the
liftgate path and there is not excessive
weight on the liftgate. If there are
continued issues, the battery voltage
may be low or other system issues. See
an authorized dealer.
107
2021 Nautilus (CD9) Canada/United States of America, enUSA, Edition date: 202011, First-Printing Liftgate
Page 125 of 579
EXTERIOR LAMPS
Switching the Turn Signal Lamps On
and Off
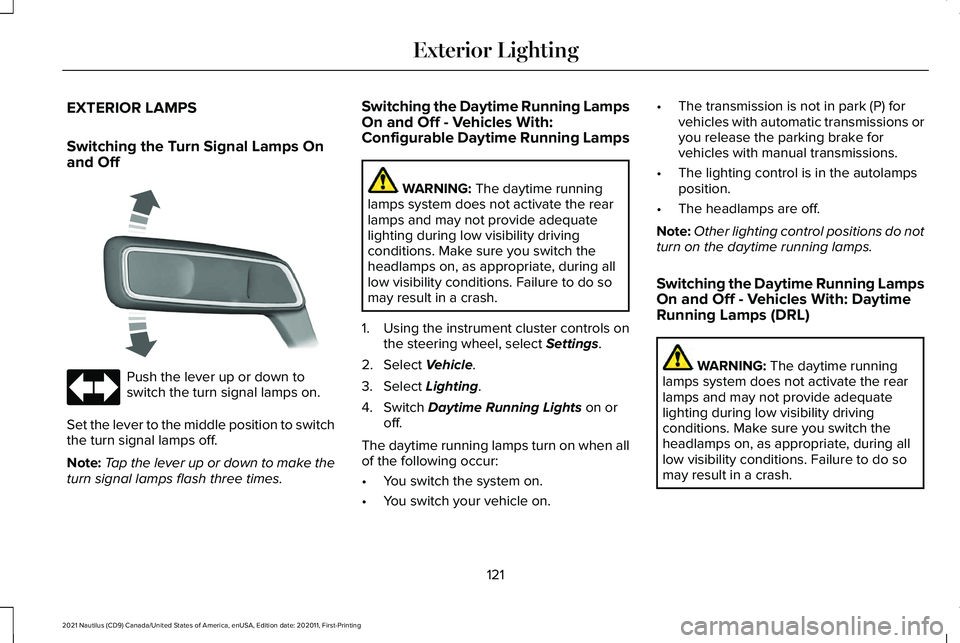
Push the lever up or down to
switch the turn signal lamps on.
Set the lever to the middle position to switch
the turn signal lamps off.
Note: Tap the lever up or down to make the
turn signal lamps flash three times. Switching the Daytime Running Lamps
On and Off - Vehicles With:
Configurable Daytime Running Lamps WARNING: The daytime running
lamps system does not activate the rear
lamps and may not provide adequate
lighting during low visibility driving
conditions. Make sure you switch the
headlamps on, as appropriate, during all
low visibility conditions. Failure to do so
may result in a crash.
1. Using the instrument cluster controls on the steering wheel, select
Settings.
2. Select
Vehicle.
3. Select
Lighting.
4. Switch
Daytime Running Lights on or
off.
The daytime running lamps turn on when all
of the following occur:
• You switch the system on.
• You switch your vehicle on. •
The transmission is not in park (P) for
vehicles with automatic transmissions or
you release the parking brake for
vehicles with manual transmissions.
• The lighting control is in the autolamps
position.
• The headlamps are off.
Note: Other lighting control positions do not
turn on the daytime running lamps.
Switching the Daytime Running Lamps
On and Off - Vehicles With: Daytime
Running Lamps (DRL) WARNING:
The daytime running
lamps system does not activate the rear
lamps and may not provide adequate
lighting during low visibility driving
conditions. Make sure you switch the
headlamps on, as appropriate, during all
low visibility conditions. Failure to do so
may result in a crash.
121
2021 Nautilus (CD9) Canada/United States of America, enUSA, Edition date: 202011, First-Printing Exterior Lighting E273180
Page 137 of 579
ADJUSTING THE EXTERIOR
MIRRORS
WARNING: Do not adjust the mirrors
when your vehicle is moving. This could
result in the loss of control of your vehicle,
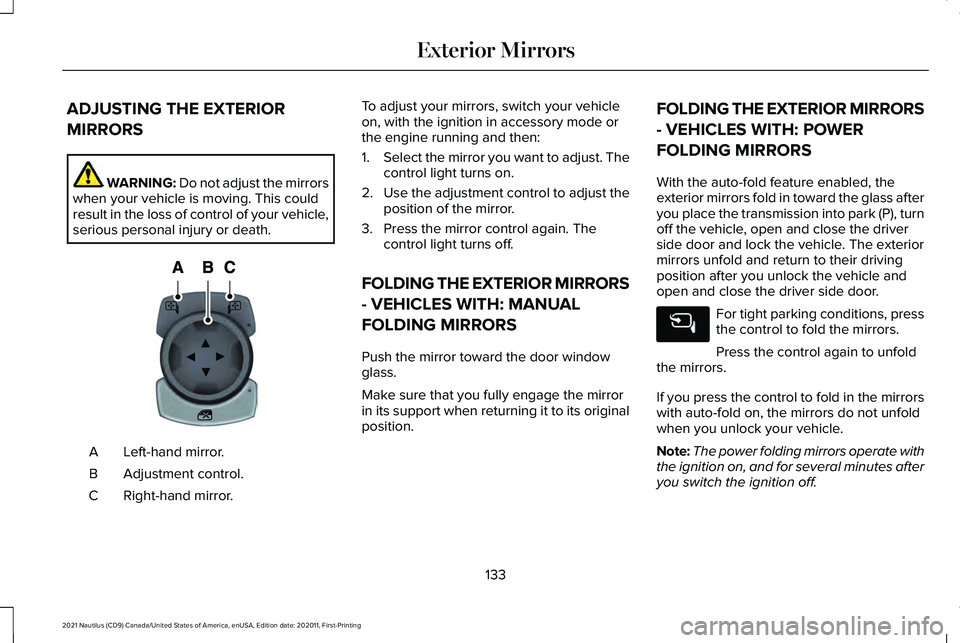
serious personal injury or death. Left-hand mirror.
A
Adjustment control.
B
Right-hand mirror.
C To adjust your mirrors, switch your vehicle
on, with the ignition in accessory mode or
the engine running and then:
1.
Select the mirror you want to adjust. The
control light turns on.
2. Use the adjustment control to adjust the
position of the mirror.
3. Press the mirror control again. The control light turns off.
FOLDING THE EXTERIOR MIRRORS
- VEHICLES WITH: MANUAL
FOLDING MIRRORS
Push the mirror toward the door window
glass.
Make sure that you fully engage the mirror
in its support when returning it to its original
position. FOLDING THE EXTERIOR MIRRORS
- VEHICLES WITH: POWER
FOLDING MIRRORS
With the auto-fold feature enabled, the
exterior mirrors fold in toward the glass after
you place the transmission into park (P), turn
off the vehicle, open and close the driver
side door and lock the vehicle. The exterior
mirrors unfold and return to their driving
position after you unlock the vehicle and
open and close the driver side door.
For tight parking conditions, press
the control to fold the mirrors.
Press the control again to unfold
the mirrors.
If you press the control to fold in the mirrors
with auto-fold on, the mirrors do not unfold
when you unlock your vehicle.
Note: The power folding mirrors operate with
the ignition on, and for several minutes after
you switch the ignition off.
133
2021 Nautilus (CD9) Canada/United States of America, enUSA, Edition date: 202011, First-Printing Exterior MirrorsE144073
Page 143 of 579
What Is Distance to Empty
Indicates the approximate distance your
vehicle can travel on the fuel remaining in
the tank. Changes in driving pattern can
cause the value to not only decrease but also
increase or stay constant for periods of time.
WHAT IS THE ENGINE COOLANT
TEMPERATURE GAUGE
Indicates the engine coolant temperature.
WHAT IS THE ENGINE OIL
PRESSURE GAUGE
Indicates the engine oil pressure.
Note:
This is a configurable gauge.
WHAT IS THE TRANSMISSION
FLUID TEMPERATURE GAUGE
Indicates the transmission fluid temperature. Special operating conditions can cause
higher than normal operating temperatures.
See Special Operating Conditions
Scheduled Maintenance (page 467).
Note: This is a configurable gauge.
WHAT IS THE 12V BATTERY
GAUGE
Indicates the power of the 12-volt battery.
WHAT ARE THE INSTRUMENT
CLUSTER WARNING LAMPS
Warning lamps alert you to a vehicle
condition that could become serious. Some
lamps illuminate when you start your vehicle
to make sure they work. If any lamps remain
on after starting your vehicle, refer to the
respective system warning lamp for further
information. INSTRUMENT CLUSTER WARNING
LAMPS
Anti-Lock Brake System If it illuminates when you are
driving, this indicates that the
system requires service. Your
vehicle continues to have normal braking
without the anti-lock brake system function.
Have your vehicle checked as soon as
possible.
Battery It illuminates when you switch the
ignition on.
If it illuminates when the engine is
running, this indicates your vehicle requires
service. Have your vehicle checked as soon
as possible.
139
2021 Nautilus (CD9) Canada/United States of America, enUSA, Edition date: 202011, First-Printing Instrument Cluster