light LINCOLN NAUTILUS 2022 Owner's Guide
[x] Cancel search | Manufacturer: LINCOLN, Model Year: 2022, Model line: NAUTILUS, Model: LINCOLN NAUTILUS 2022Pages: 586, PDF Size: 13.97 MB
Page 166 of 586
•Bend your legs slightly so that you canpress the pedals fully.
•Position the shoulder strap of the seatbeltover the center of your shoulder andposition the lap strap tightly across yourhips.
Make sure that your driving position iscomfortable and that you can maintain fullcontrol of your vehicle.
POWER SEATS
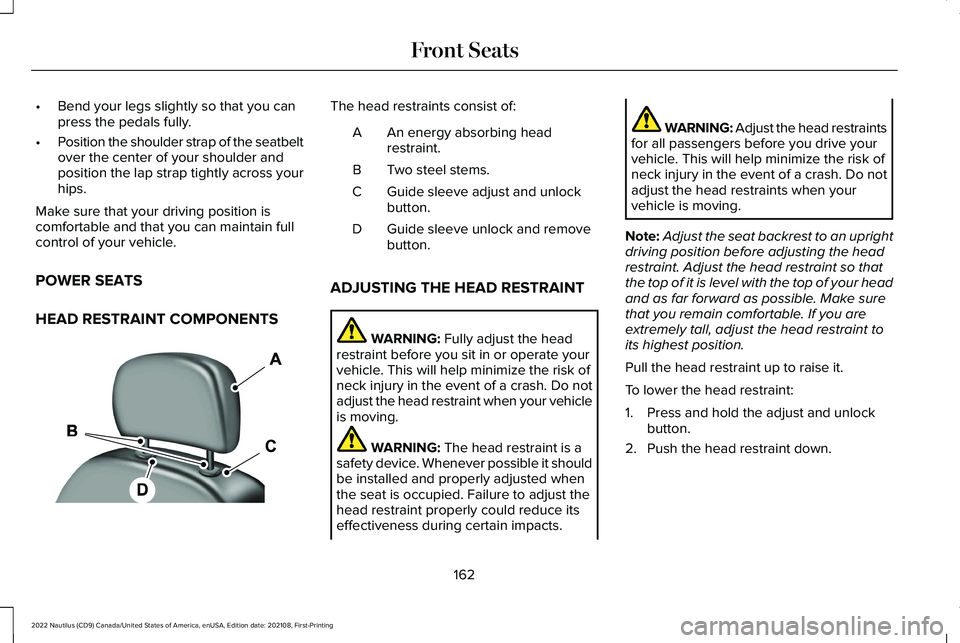
HEAD RESTRAINT COMPONENTS
The head restraints consist of:
An energy absorbing headrestraint.A
Two steel stems.B
Guide sleeve adjust and unlockbutton.C
Guide sleeve unlock and removebutton.D
ADJUSTING THE HEAD RESTRAINT
WARNING: Fully adjust the headrestraint before you sit in or operate yourvehicle. This will help minimize the risk ofneck injury in the event of a crash. Do notadjust the head restraint when your vehicleis moving.
WARNING: The head restraint is asafety device. Whenever possible it shouldbe installed and properly adjusted whenthe seat is occupied. Failure to adjust thehead restraint properly could reduce itseffectiveness during certain impacts.
WARNING: Adjust the head restraintsfor all passengers before you drive yourvehicle. This will help minimize the risk ofneck injury in the event of a crash. Do notadjust the head restraints when yourvehicle is moving.
Note:Adjust the seat backrest to an uprightdriving position before adjusting the headrestraint. Adjust the head restraint so thatthe top of it is level with the top of your headand as far forward as possible. Make surethat you remain comfortable. If you areextremely tall, adjust the head restraint toits highest position.
Pull the head restraint up to raise it.
To lower the head restraint:
1.Press and hold the adjust and unlockbutton.
2.Push the head restraint down.
162
2022 Nautilus (CD9) Canada/United States of America, enUSA, Edition date: 202108, First-PrintingFront SeatsE138642
Page 171 of 586
Press this symbol to cycle through thevarious ventilation settings and off. Moreindicator lights indicate higher fan speeds.
If the engine falls below 350 RPM while theventilated seats are on, the feature turnsitself off. You need to reactivate it.
Note:The ventilated seats may remain onafter you remote start your vehicle, basedon your remote start settings. The ventilatedseats may also turn on when you start yourvehicle if they were on when you switchedyour vehicle off.
Automatic Climate Controlled Seats (If
Equipped)
When you switch the auto setting on, theclimate controlled seats switch between theheated seats and ventilated seats to matchyour climate control setting.
167
2022 Nautilus (CD9) Canada/United States of America, enUSA, Edition date: 202108, First-PrintingFront Seats
Page 175 of 586
The rear seat heat controls are on the rearof the center console.
Press the heated seat symbol to cyclethrough the various heat settings and off.More indicator lights indicate warmersettings.
The heated seats turn off when you switchoff the vehicle.
171
2022 Nautilus (CD9) Canada/United States of America, enUSA, Edition date: 202108, First-PrintingRear SeatsE146322
Page 180 of 586
WHAT IS THE GARAGE DOOR
OPENER
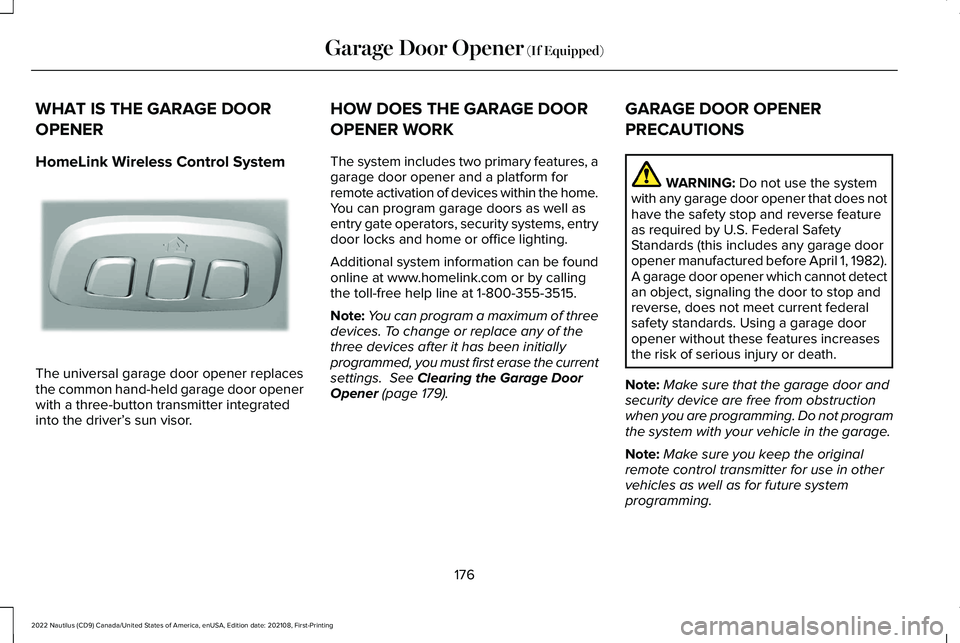
HomeLink Wireless Control System
The universal garage door opener replacesthe common hand-held garage door openerwith a three-button transmitter integratedinto the driver’s sun visor.
HOW DOES THE GARAGE DOOR
OPENER WORK
The system includes two primary features, agarage door opener and a platform forremote activation of devices within the home.You can program garage doors as well asentry gate operators, security systems, entrydoor locks and home or office lighting.
Additional system information can be foundonline at www.homelink.com or by callingthe toll-free help line at 1-800-355-3515.
Note:You can program a maximum of threedevices. To change or replace any of thethree devices after it has been initiallyprogrammed, you must first erase the currentsettings. See Clearing the Garage DoorOpener (page 179).
GARAGE DOOR OPENER
PRECAUTIONS
WARNING: Do not use the systemwith any garage door opener that does nothave the safety stop and reverse featureas required by U.S. Federal SafetyStandards (this includes any garage dooropener manufactured before April 1, 1982).A garage door opener which cannot detectan object, signaling the door to stop andreverse, does not meet current federalsafety standards. Using a garage dooropener without these features increasesthe risk of serious injury or death.
Note:Make sure that the garage door andsecurity device are free from obstructionwhen you are programming. Do not programthe system with your vehicle in the garage.
Note:Make sure you keep the originalremote control transmitter for use in othervehicles as well as for future systemprogramming.
176
2022 Nautilus (CD9) Canada/United States of America, enUSA, Edition date: 202108, First-PrintingGarage Door Opener (If Equipped)E188211
Page 181 of 586
Note:We recommend that upon the sale orlease termination of your vehicle, you erasethe programmed function buttons for securityreasons. See Clearing the Garage DoorOpener (page 179).
GARAGE DOOR OPENER
LIMITATIONS
Canadian radio-frequency laws requiretransmitter signals to time-out (or quit) afterseveral seconds – which may not be longenough for HomeLink to pick up the signal.
U.S. gate operators time-out in the samemanner.
Note:If programming a garage door openeror gate operator, it is advised to unplug thedevice during the “cycling” process toprevent possible overheating.
PROGRAMMING THE GARAGE
DOOR OPENER TO YOUR HAND-
HELD TRANSMITTER
This process is to program your in-vehicleHomeLink function button with yourhand-held transmitter.
Note:The programming steps below assumeyou will be programming HomeLink that wasnot previously programmed. If yourHomeLink was previously programmed, youmay need to erase your HomeLink buttons.See Clearing the Garage Door Opener(page 179).
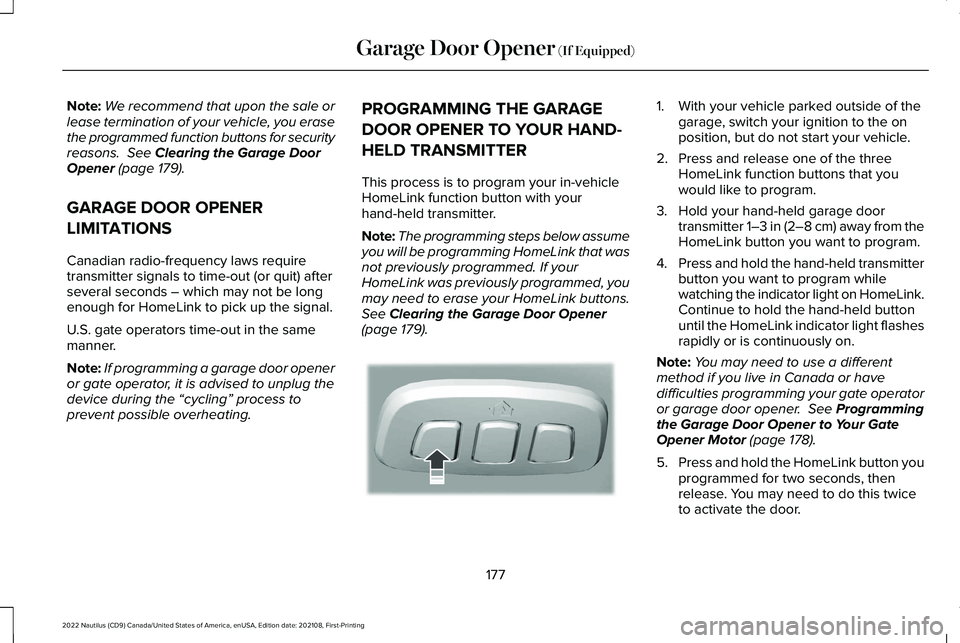
1.With your vehicle parked outside of thegarage, switch your ignition to the onposition, but do not start your vehicle.
2.Press and release one of the threeHomeLink function buttons that youwould like to program.
3.Hold your hand-held garage doortransmitter 1–3 in (2–8 cm) away from theHomeLink button you want to program.
4.Press and hold the hand-held transmitterbutton you want to program whilewatching the indicator light on HomeLink.Continue to hold the hand-held buttonuntil the HomeLink indicator light flashesrapidly or is continuously on.
Note:You may need to use a differentmethod if you live in Canada or havedifficulties programming your gate operatoror garage door opener. See Programmingthe Garage Door Opener to Your GateOpener Motor (page 178).
5.Press and hold the HomeLink button youprogrammed for two seconds, thenrelease. You may need to do this twiceto activate the door.
177
2022 Nautilus (CD9) Canada/United States of America, enUSA, Edition date: 202108, First-PrintingGarage Door Opener (If Equipped)E188212
Page 182 of 586
Note:If the indicator light stays on, theprogramming is complete.
Note:If the HomeLink indicator flashesrapidly, repeat step 5.
Note:If your device still does not operate,you must program your garage door. SeeProgramming the Garage Door Opener toYour Garage Door Opener Motor (page 178).
6.To program additional buttons, repeatSteps 1 – 4.
PROGRAMMING THE GARAGE
DOOR OPENER TO YOUR GARAGE
DOOR OPENER MOTOR
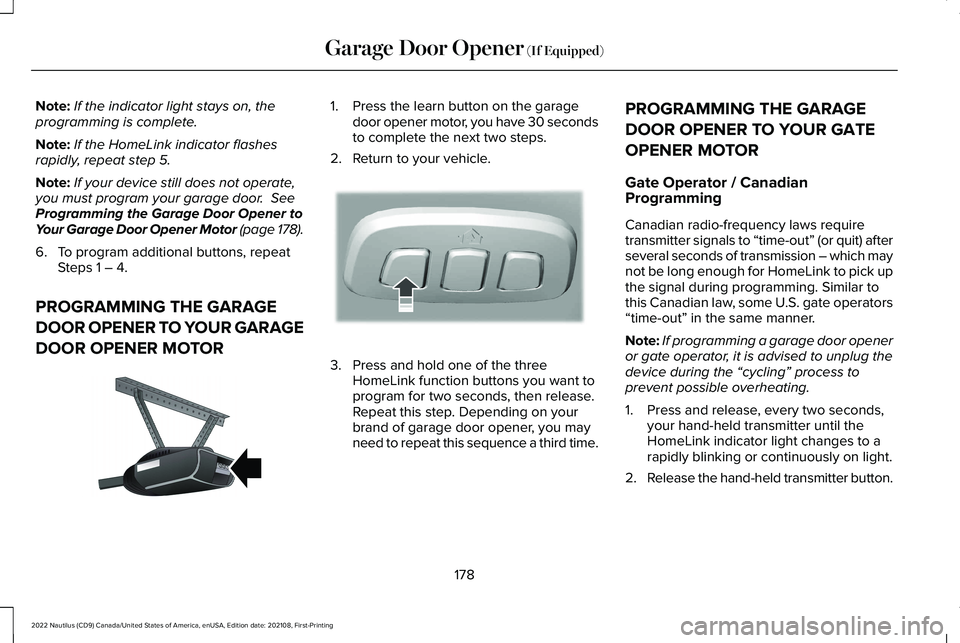
1.Press the learn button on the garagedoor opener motor, you have 30 secondsto complete the next two steps.
2.Return to your vehicle.
3.Press and hold one of the threeHomeLink function buttons you want toprogram for two seconds, then release.Repeat this step. Depending on yourbrand of garage door opener, you mayneed to repeat this sequence a third time.
PROGRAMMING THE GARAGE
DOOR OPENER TO YOUR GATE
OPENER MOTOR
Gate Operator / CanadianProgramming
Canadian radio-frequency laws requiretransmitter signals to “time-out” (or quit) afterseveral seconds of transmission – which maynot be long enough for HomeLink to pick upthe signal during programming. Similar tothis Canadian law, some U.S. gate operators“time-out” in the same manner.
Note:If programming a garage door openeror gate operator, it is advised to unplug thedevice during the “cycling” process toprevent possible overheating.
1.Press and release, every two seconds,your hand-held transmitter until theHomeLink indicator light changes to arapidly blinking or continuously on light.
2.Release the hand-held transmitter button.
178
2022 Nautilus (CD9) Canada/United States of America, enUSA, Edition date: 202108, First-PrintingGarage Door Opener (If Equipped)E142659 E188212
Page 183 of 586
3.Press and hold the HomeLink functionbutton you want to program for twoseconds, then release. You may need todo this twice to activate the door.
Note:If the indicator light stays on, theprogramming is complete.
Note:If the HomeLink indicator flashesrapidly, repeat Step 3.
Note:If your device still does not operate,you must program your garage door. SeeProgramming the Garage Door Opener toYour Garage Door Opener Motor (page 178).
4.To program additional buttons, repeatSteps 1 – 4.
CLEARING THE GARAGE DOOR
OPENER
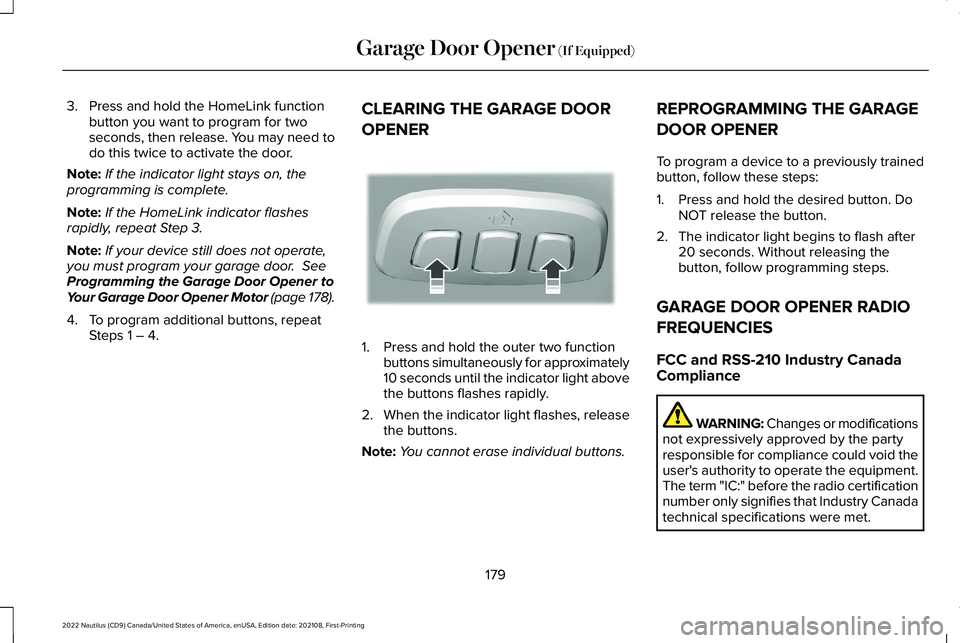
1.Press and hold the outer two functionbuttons simultaneously for approximately10 seconds until the indicator light abovethe buttons flashes rapidly.
2.When the indicator light flashes, releasethe buttons.
Note:You cannot erase individual buttons.
REPROGRAMMING THE GARAGE
DOOR OPENER
To program a device to a previously trainedbutton, follow these steps:
1.Press and hold the desired button. DoNOT release the button.
2.The indicator light begins to flash after20 seconds. Without releasing thebutton, follow programming steps.
GARAGE DOOR OPENER RADIO
FREQUENCIES
FCC and RSS-210 Industry CanadaCompliance
WARNING: Changes or modificationsnot expressively approved by the partyresponsible for compliance could void theuser's authority to operate the equipment.The term "IC:" before the radio certificationnumber only signifies that Industry Canadatechnical specifications were met.
179
2022 Nautilus (CD9) Canada/United States of America, enUSA, Edition date: 202108, First-PrintingGarage Door Opener (If Equipped)E188213
Page 187 of 586
WHAT IS THE POWER OUTLET
The power outlet is a socket that connectsan electrical device to your vehicle's powersupply.
POWER OUTLET PRECAUTIONS
WARNING: Do not keep electricaldevices plugged in the power pointwhenever the device is not in use. Do notuse any extension cord with the 110 voltAC power point, since it will defeat thesafety protection design. Doing so maycause the power point to overload due topowering multiple devices that can reachbeyond the 150 watt load limit and couldresult in fire or serious injury.
Note:The power point turns off when youswitch off the ignition, when the vehicle isnot in accessory mode, or when the batteryvoltage drops below 11 volts.
LOCATING THE POWER OUTLETS
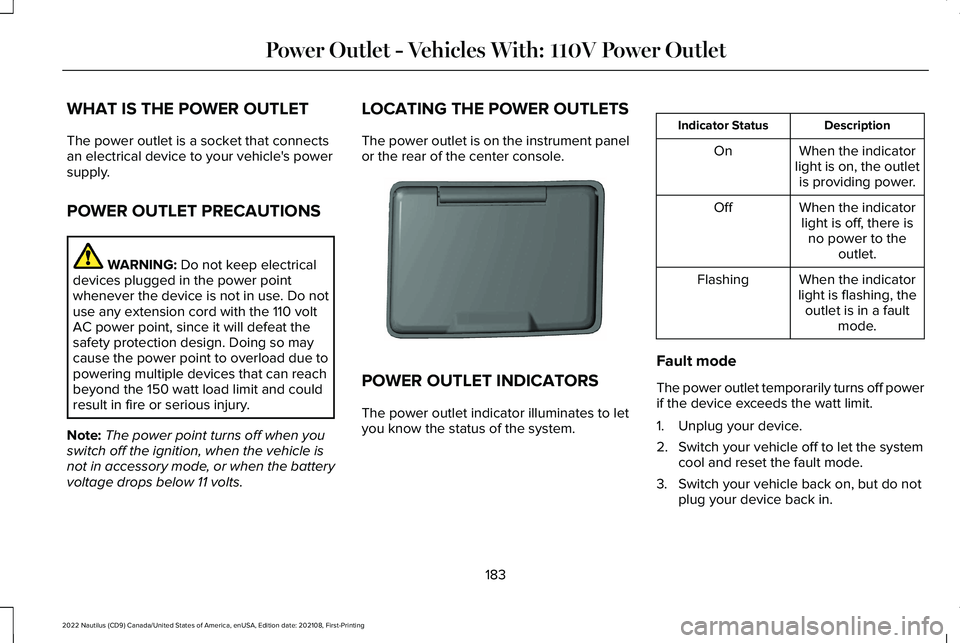
The power outlet is on the instrument panelor the rear of the center console.
POWER OUTLET INDICATORS
The power outlet indicator illuminates to letyou know the status of the system.
DescriptionIndicator Status
When the indicatorlight is on, the outletis providing power.
On
When the indicatorlight is off, there isno power to theoutlet.
Off
When the indicatorlight is flashing, theoutlet is in a faultmode.
Flashing
Fault mode
The power outlet temporarily turns off powerif the device exceeds the watt limit.
1.Unplug your device.
2.Switch your vehicle off to let the systemcool and reset the fault mode.
3.Switch your vehicle back on, but do notplug your device back in.
183
2022 Nautilus (CD9) Canada/United States of America, enUSA, Edition date: 202108, First-PrintingPower Outlet - Vehicles With: 110V Power OutletE353449
Page 188 of 586
4.With your vehicle on, make sure theindicator light remains on.
5.Make sure your device does not exceedthe power limits and then plug in yourdevice.
Note:If a fault occurs again, your devicemay exceed the capacity available from thepower outlet.
184
2022 Nautilus (CD9) Canada/United States of America, enUSA, Edition date: 202108, First-PrintingPower Outlet - Vehicles With: 110V Power Outlet
Page 189 of 586
WHAT IS THE POWER OUTLET
The power outlet can power devices usinga 12 V outlet adapter.
POWER OUTLET PRECAUTIONS
WARNING: Do not plug optionalelectrical accessories into the cigar lightersocket. Incorrect use of the cigar lightercan cause damage not covered by thevehicle warranty, and can result in fire orserious injury.
When you switch the vehicle on, you can usethe socket to power 12 V appliances with amaximum current rating of 20 A. Do not usethe power point over the vehicle capacity of12 V DC 240 W or a fuse could blow. Do notplug in any device that supplies power to thevehicle through the power points. This couldresult in damage to vehicle systems. Do nothang any accessory from the accessory plug.Always keep the power point caps closedwhen not in use. Do not insert objects otherthan an accessory plug into the power point.
To prevent the battery from running out ofcharge:
•Do not use the power point longer thannecessary when the vehicle is off.
•Do not leave devices plugged inovernight or when you park your vehiclefor extended periods.
LOCATING THE POWER OUTLETS
Power outlets may be in the followinglocations:
•On the lower instrument panel.
•Inside the center console.
•On the front of the center console.
•On the rear of the center console.
•In the cargo area.
•On the passenger side floor panel.
•3rd row on the quarter trim panels.
185
2022 Nautilus (CD9) Canada/United States of America, enUSA, Edition date: 202108, First-PrintingPower Outlet - Vehicles With: 12V Power Outlet