LINCOLN NAVIGATOR 2004 Owners Manual
Manufacturer: LINCOLN, Model Year: 2004, Model line: NAVIGATOR, Model: LINCOLN NAVIGATOR 2004Pages: 368, PDF Size: 8.21 MB
Page 101 of 368
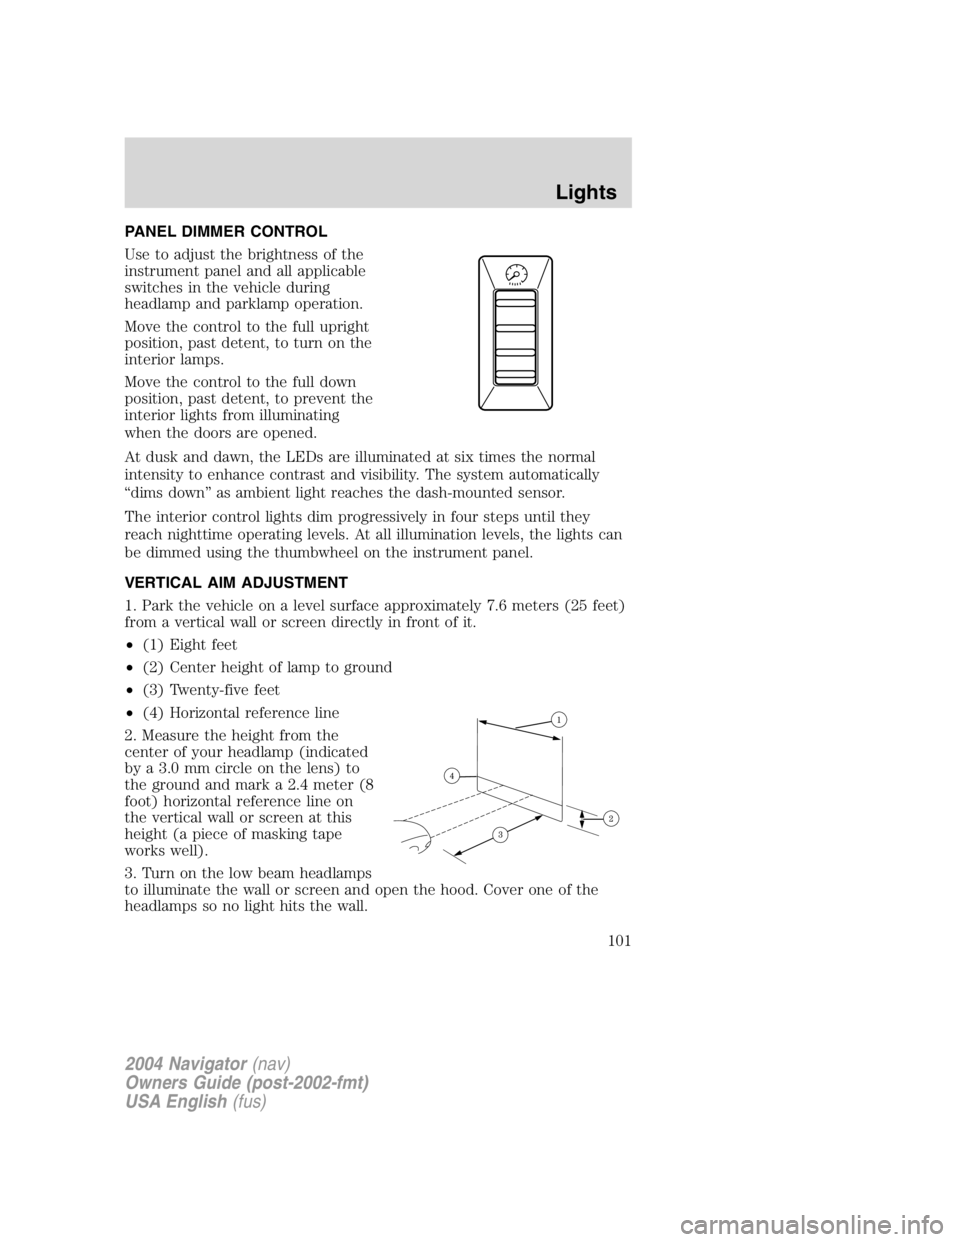
PANEL DIMMER CONTROL
Use to adjust the brightness of the
instrument panel and all applicable
switches in the vehicle during
headlamp and parklamp operation.
Move the control to the full upright
position, past detent, to turn on the
interior lamps.
Move the control to the full down
position, past detent, to prevent the
interior lights from illuminating
when the doors are opened.
At dusk and dawn, the LEDs are illuminated at six times the normal
intensity to enhance contrast and visibility. The system automatically
“ dims down ” as ambient light reaches the dash-mounted sensor.
The interior control lights dim progressively in four steps until they
reach nighttime operating levels. At all illumination levels, the lights can
be dimmed using the thumbwheel on the instrument panel.
VERTICAL AIM ADJUSTMENT
1. Park the vehicle on a level surface approximately 7.6 meters (25 feet)
from a vertical wall or screen directly in front of it.
• (1) Eight feet
• (2) Center height of lamp to ground
• (3) Twenty-five feet
• (4) Horizontal reference line
2. Measure the height from the
center of your headlamp (indicated
by a 3.0 mm circle on the lens) to
the ground and mark a 2.4 meter (8
foot) horizontal reference line on
the vertical wall or screen at this
height (a piece of masking tape
works well).
3. Turn on the low beam headlamps
to illuminate the wall or screen and open the hood. Cover one of the
headlamps so no light hits the wall.
2004 Navigator (nav)
Owners Guide (post-2002-fmt)
USA English (fus) Lights
101
Page 102 of 368
4. On the wall or screen you will
observe a light pattern with a
distinct horizontal edge towards the
right. If this edge is not at the
horizontal reference line, the beam will need to be adjusted so the edge
is at the same height as the horizontal reference line.
5. Locate the vertical adjuster on
each headlamp, then us ea4mm
socket/wrench to turn the adjuster
either counterclockwise (to adjust
down) or clockwise (to adjust up)
aligning the upper edge of the light
pattern up to the horizontal line.
6. HORIZONTAL AIM IS NOT
REQUIRED FOR THIS VEHICLE
AND IS NON-ADJUSTABLE.
7. Repeat step 3 – 5 for the other headlamp.
8. Close the hood and turn off the lamps.
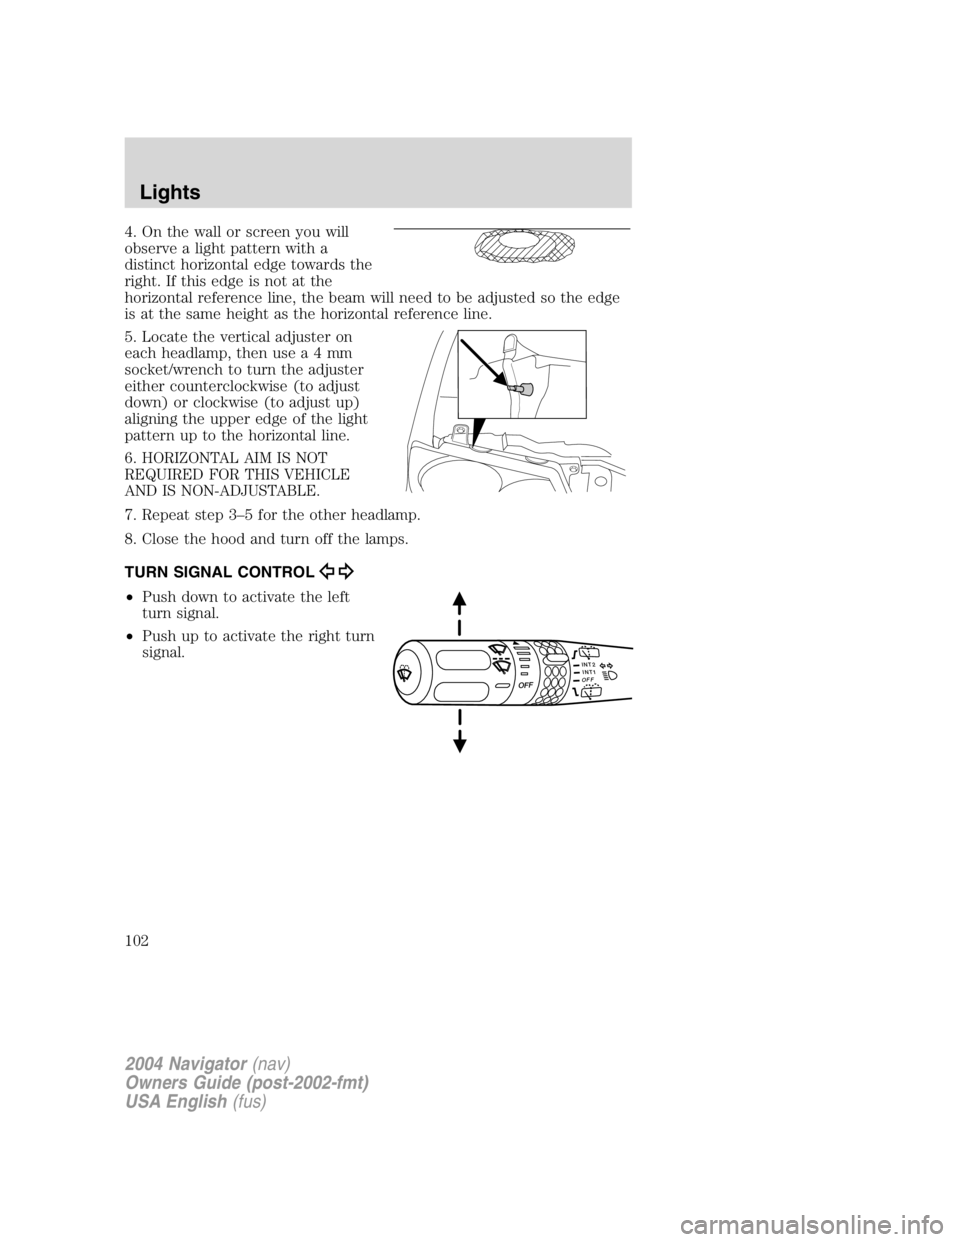
TURN SIGNAL CONTROL
• Push down to activate the left
turn signal.
• Push up to activate the right turn
signal. INT2
OFF
OFF INT1
2004 Navigator (nav)
Owners Guide (post-2002-fmt)
USA English (fus)Lights
102
Page 103 of 368
INTERIOR LAMPS
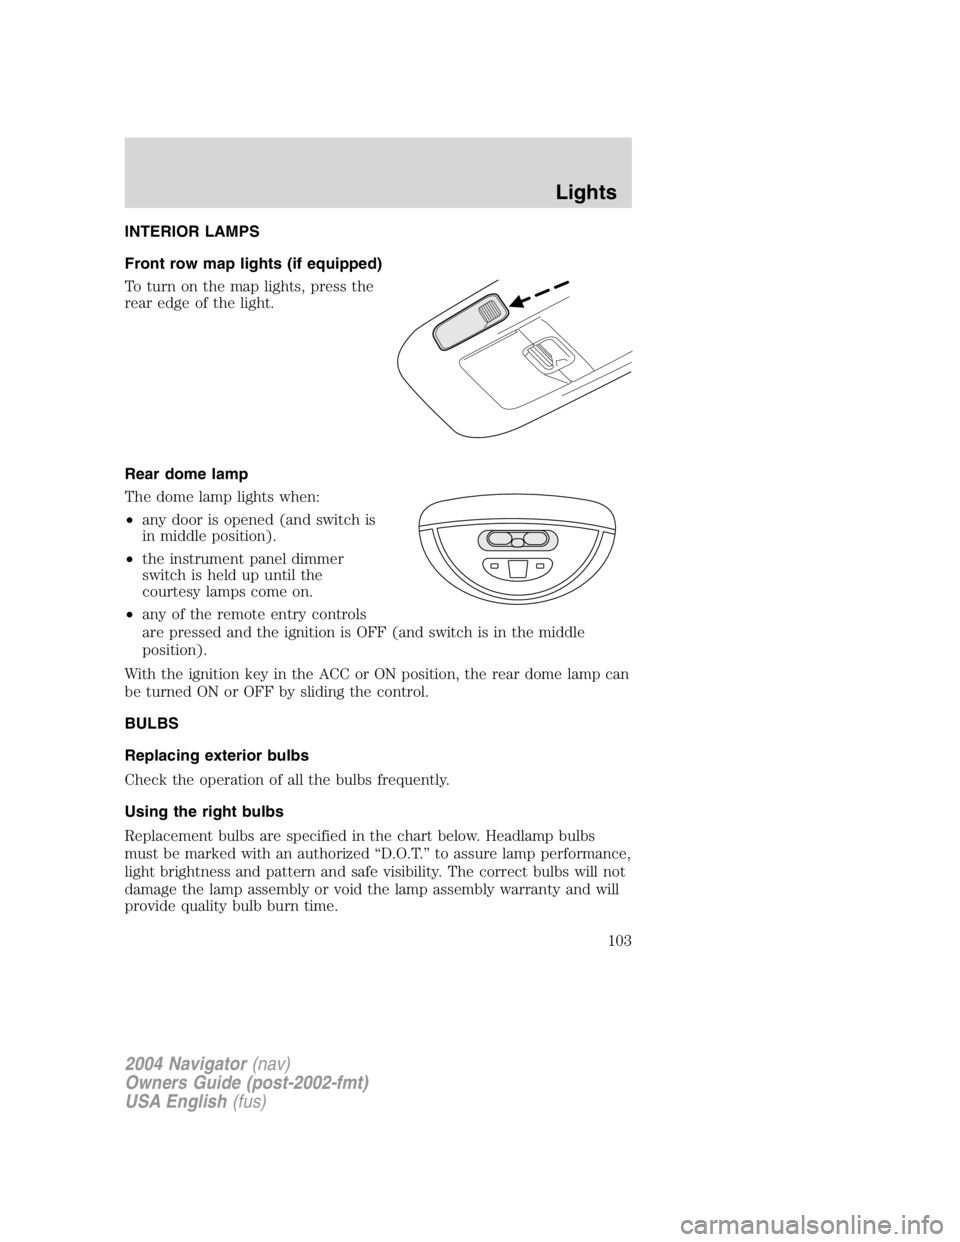
Front row map lights (if equipped)
To turn on the map lights, press the
rear edge of the light.
Rear dome lamp
The dome lamp lights when:
• any door is opened (and switch is
in middle position).
• the instrument panel dimmer
switch is held up until the
courtesy lamps come on.
• any of the remote entry controls
are pressed and the ignition is OFF (and switch is in the middle
position).
With the ignition key in the ACC or ON position, the rear dome lamp can
be turned ON or OFF by sliding the control.
BULBS
Replacing exterior bulbs
Check the operation of all the bulbs frequently.
Using the right bulbs
Replacement bulbs are specified in the chart below. Headlamp bulbs
must be marked with an authorized “ D.O.T. ” to assure lamp performance,
light brightness and pattern and safe visibility. The correct bulbs will not
damage the lamp assembly or void the lamp assembly warranty and will
provide quality bulb burn time.
2004 Navigator (nav)
Owners Guide (post-2002-fmt)
USA English (fus) Lights
103
Page 104 of 368
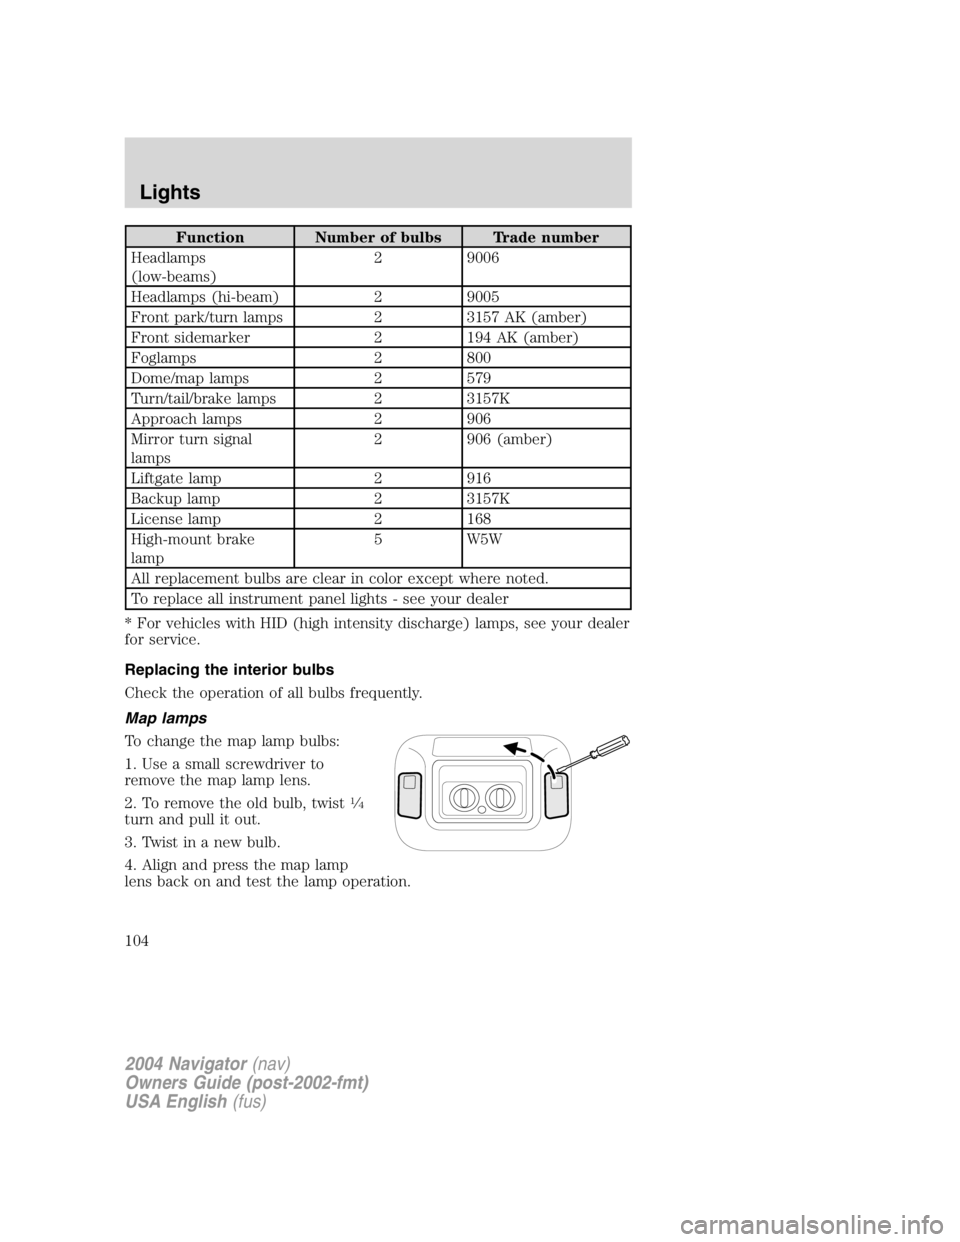
Function Number of bulbs Trade number
Headlamps
(low-beams) 2 9006
Headlamps (hi-beam) 2 9005
Front park/turn lamps 2 3157 AK (amber)
Front sidemarker 2 194 AK (amber)
Foglamps 2 800
Dome/map lamps 2 579
Turn/tail/brake lamps 2 3157K
Approach lamps 2 906
Mirror turn signal
lamps 2 906 (amber)
Liftgate lamp 2 916
Backup lamp 2 3157K
License lamp 2 168
High-mount brake
lamp 5 W5W
All replacement bulbs are clear in color except where noted.
To replace all instrument panel lights - see your dealer
* For vehicles with HID (high intensity discharge) lamps, see your dealer
for service.
Replacing the interior bulbs
Check the operation of all bulbs frequently.
Map lamps
To change the map lamp bulbs:
1. Use a small screwdriver to
remove the map lamp lens.
2. To remove the old bulb, twist 1
⁄ 4
turn and pull it out.
3. Twist in a new bulb.
4. Align and press the map lamp
lens back on and test the lamp operation.
2004 Navigator (nav)
Owners Guide (post-2002-fmt)
USA English (fus)Lights
104
Page 105 of 368

Replacing headlamp bulbs
1. Make sure the headlamp control is in the OFF position.
2. Open the hood.
3. At the back of the headlamp lens,
remove the three headlamp
assembly retainers bolts.
4. Pull the headlamp assembly
forward slightly to expose the
electrical connectors.
5. Rotate the bulb covers
counterclockwise and remove.
6. Once the bulb covers are
removed, the bulbs can be removed
by turning them counterclockwise
and then pulling the bulbs straight
out.
Handle a halogen headlamp bulb carefully and keep out of
children ’ s reach. Grasp the bulb only by its plastic base and do
not touch the glass. The oil from your hand could cause the bulb to
break the next time the headlamps are operated.
7. Insert the glass end of the new bulb into the headlamp assembly.
When the grooves in the plastic base are aligned, push the bulb into the
lamp assembly until the plastic base contacts the rear of the lamp
assembly. Turn the bulb counterclockwise to install.
8. Reinstall the bulb cover and secure it in place by turning
counterclockwise.
2004 Navigator (nav)
Owners Guide (post-2002-fmt)
USA English (fus) Lights
105
Page 106 of 368
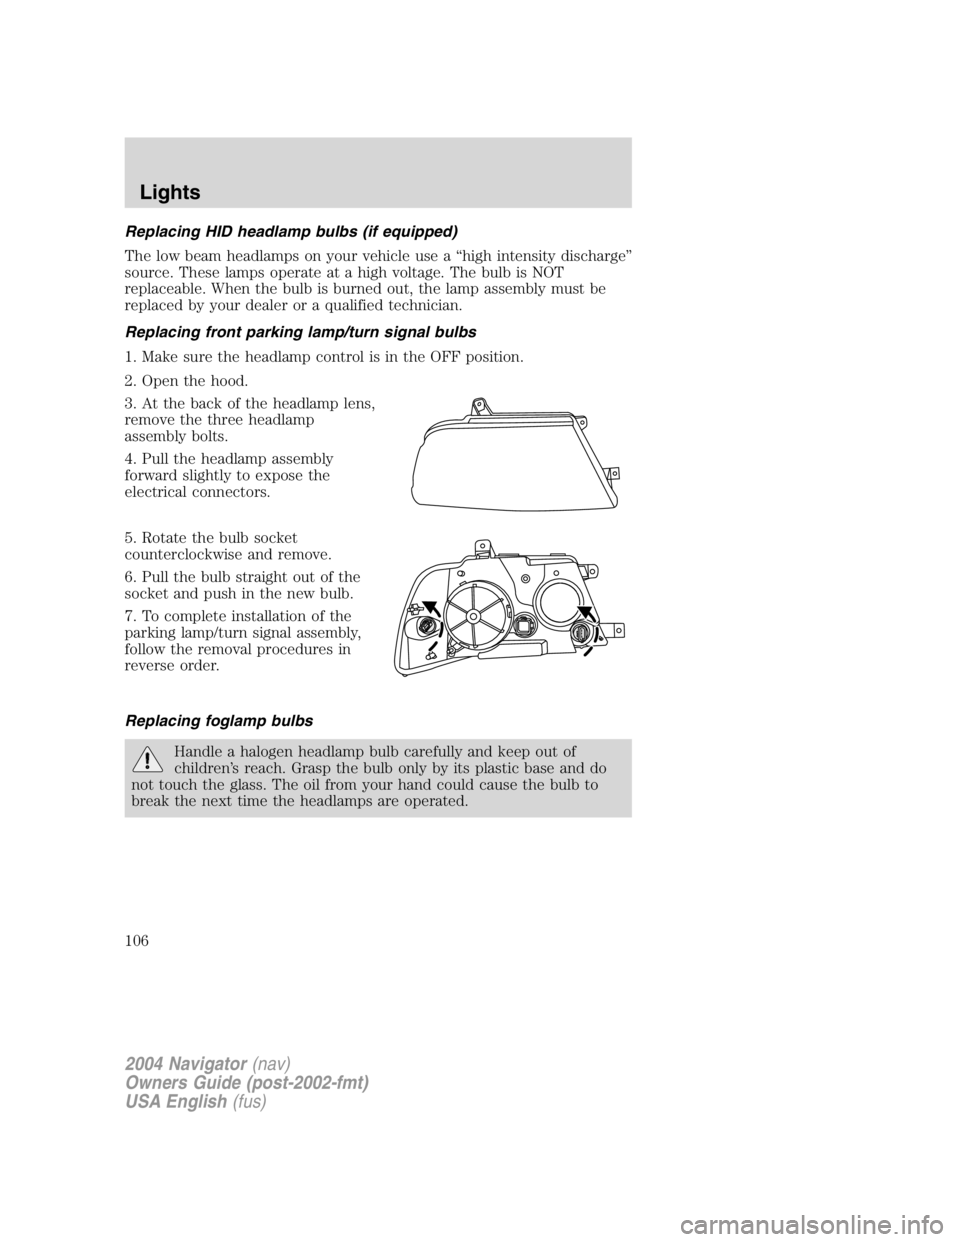
Replacing HID headlamp bulbs (if equipped)
The low beam headlamps on your vehicle use a “ high intensity discharge ”
source. These lamps operate at a high voltage. The bulb is NOT
replaceable. When the bulb is burned out, the lamp assembly must be
replaced by your dealer or a qualified technician.
Replacing front parking lamp/turn signal bulbs
1. Make sure the headlamp control is in the OFF position.
2. Open the hood.
3. At the back of the headlamp lens,
remove the three headlamp
assembly bolts.
4. Pull the headlamp assembly
forward slightly to expose the
electrical connectors.
5. Rotate the bulb socket
counterclockwise and remove.
6. Pull the bulb straight out of the
socket and push in the new bulb.
7. To complete installation of the
parking lamp/turn signal assembly,
follow the removal procedures in
reverse order.
Replacing foglamp bulbs
Handle a halogen headlamp bulb carefully and keep out of
children ’ s reach. Grasp the bulb only by its plastic base and do
not touch the glass. The oil from your hand could cause the bulb to
break the next time the headlamps are operated.
2004 Navigator (nav)
Owners Guide (post-2002-fmt)
USA English (fus)Lights
106
Page 107 of 368
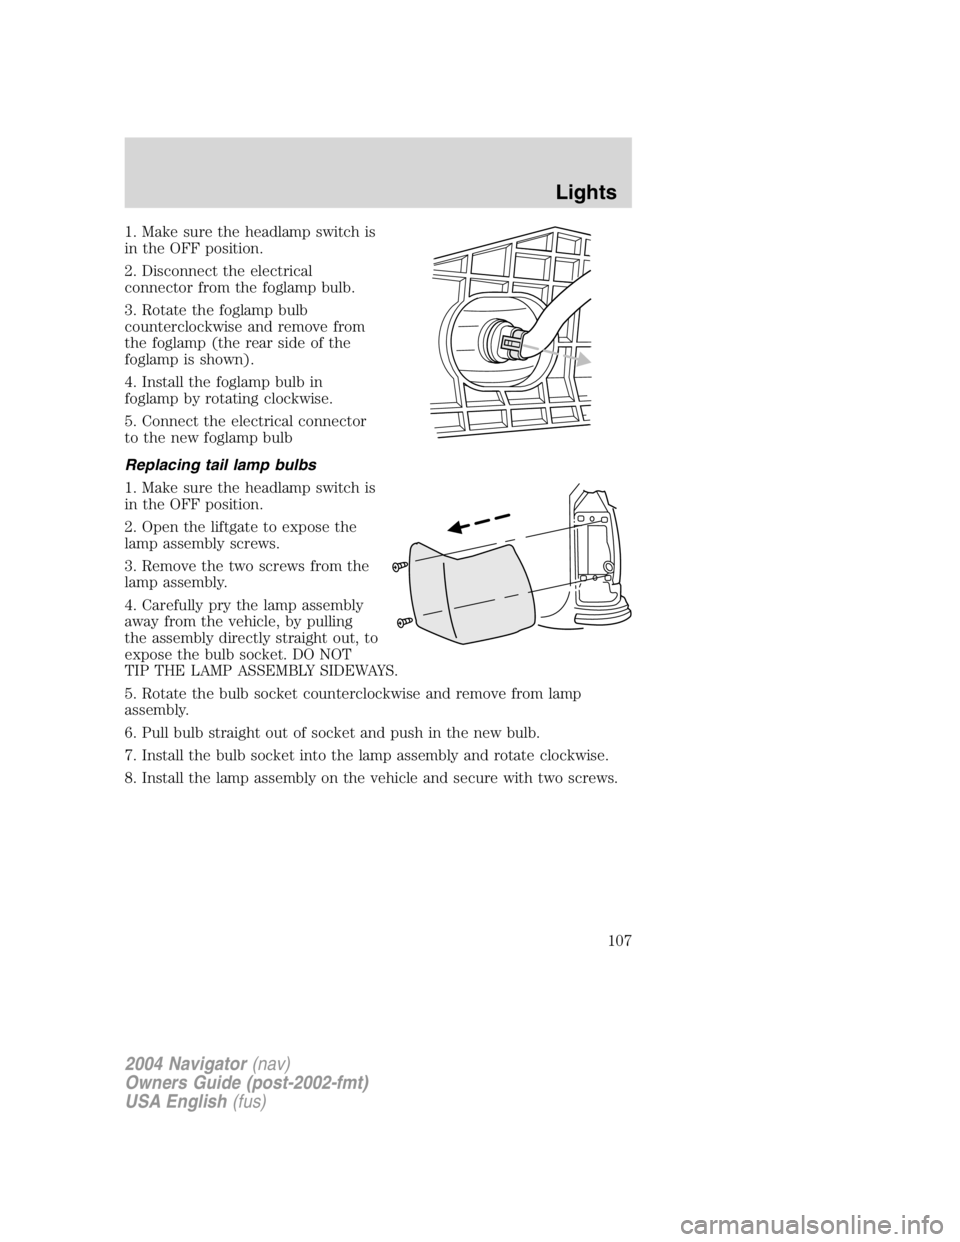
1. Make sure the headlamp switch is
in the OFF position.
2. Disconnect the electrical
connector from the foglamp bulb.
3. Rotate the foglamp bulb
counterclockwise and remove from
the foglamp (the rear side of the
foglamp is shown).
4. Install the foglamp bulb in
foglamp by rotating clockwise.
5. Connect the electrical connector
to the new foglamp bulb
Replacing tail lamp bulbs
1. Make sure the headlamp switch is
in the OFF position.
2. Open the liftgate to expose the
lamp assembly screws.
3. Remove the two screws from the
lamp assembly.
4. Carefully pry the lamp assembly
away from the vehicle, by pulling
the assembly directly straight out, to
expose the bulb socket. DO NOT
TIP THE LAMP ASSEMBLY SIDEWAYS.
5. Rotate the bulb socket counterclockwise and remove from lamp
assembly.
6. Pull bulb straight out of socket and push in the new bulb.
7. Install the bulb socket into the lamp assembly and rotate clockwise.
8. Install the lamp assembly on the vehicle and secure with two screws.
2004 Navigator (nav)
Owners Guide (post-2002-fmt)
USA English (fus) Lights
107
Page 108 of 368
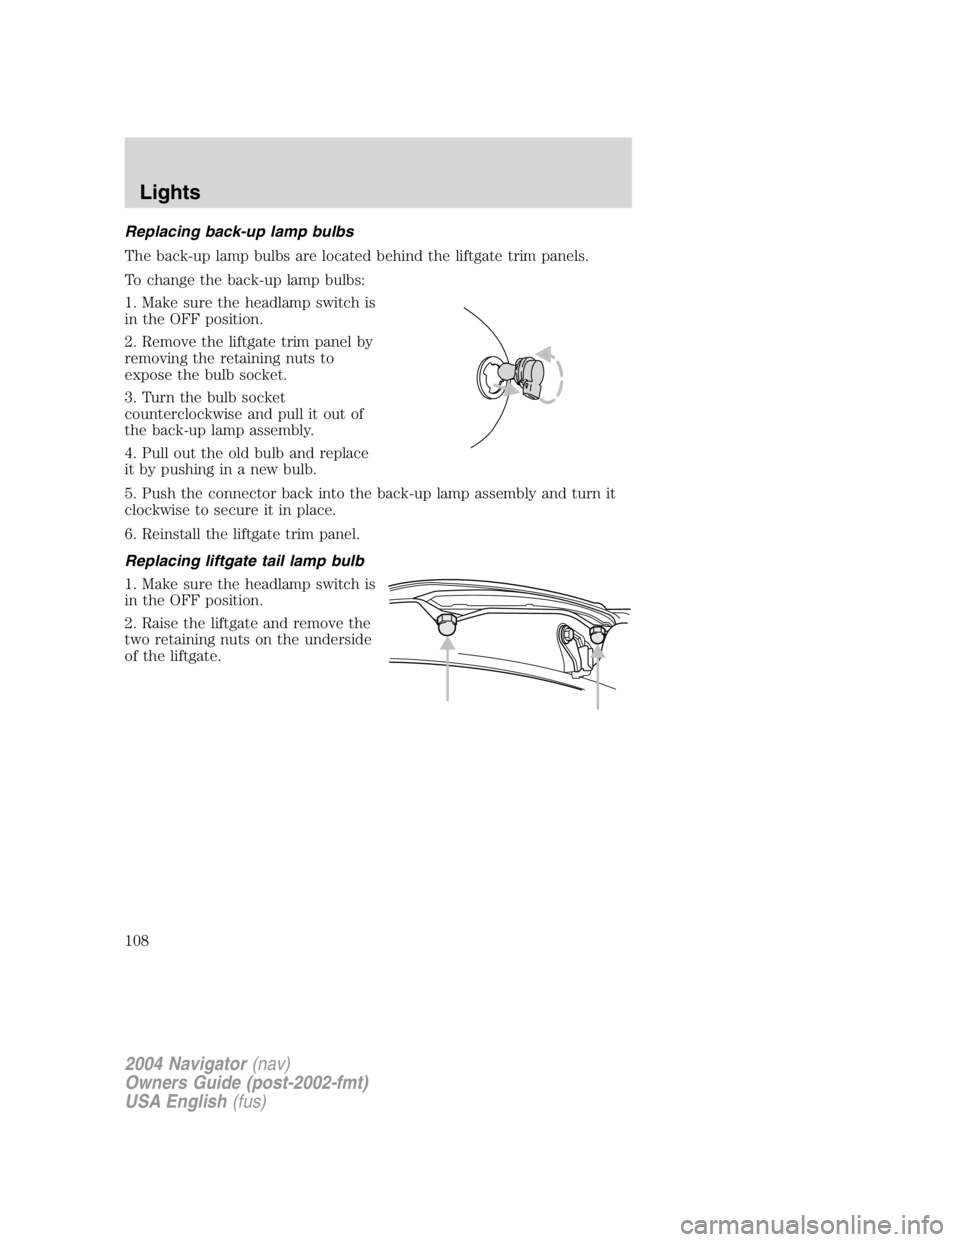
Replacing back-up lamp bulbs
The back-up lamp bulbs are located behind the liftgate trim panels.
To change the back-up lamp bulbs:
1. Make sure the headlamp switch is
in the OFF position.
2. Remove the liftgate trim panel by
removing the retaining nuts to
expose the bulb socket.
3. Turn the bulb socket
counterclockwise and pull it out of
the back-up lamp assembly.
4. Pull out the old bulb and replace
it by pushing in a new bulb.
5. Push the connector back into the back-up lamp assembly and turn it
clockwise to secure it in place.
6. Reinstall the liftgate trim panel.
Replacing liftgate tail lamp bulb
1. Make sure the headlamp switch is
in the OFF position.
2. Raise the liftgate and remove the
two retaining nuts on the underside
of the liftgate.
2004 Navigator (nav)
Owners Guide (post-2002-fmt)
USA English (fus)Lights
108
Page 109 of 368
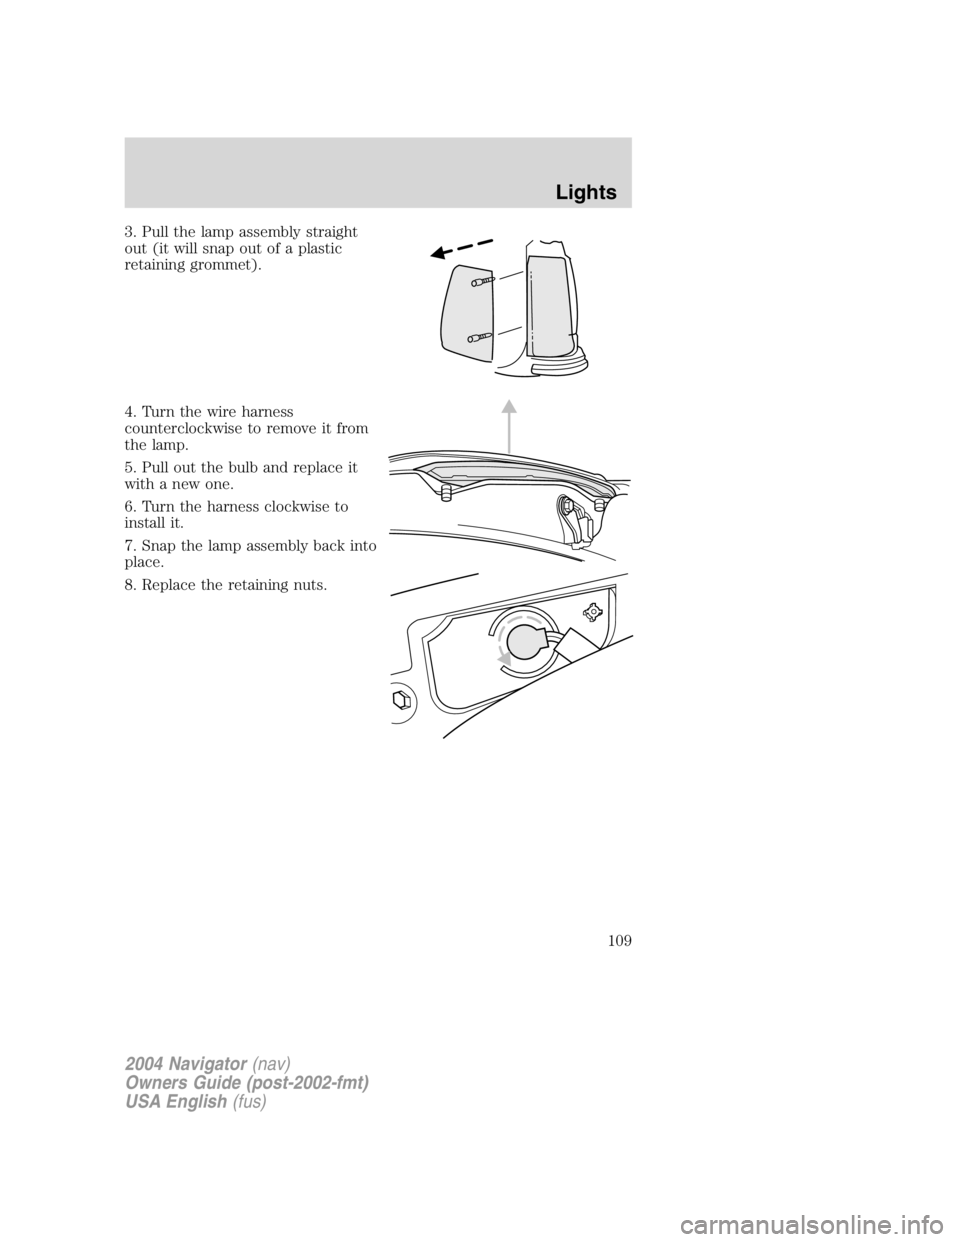
3. Pull the lamp assembly straight
out (it will snap out of a plastic
retaining grommet).
4. Turn the wire harness
counterclockwise to remove it from
the lamp.
5. Pull out the bulb and replace it
with a new one.
6. Turn the harness clockwise to
install it.
7. Snap the lamp assembly back into
place.
8. Replace the retaining nuts.
2004 Navigator (nav)
Owners Guide (post-2002-fmt)
USA English (fus) Lights
109
Page 110 of 368
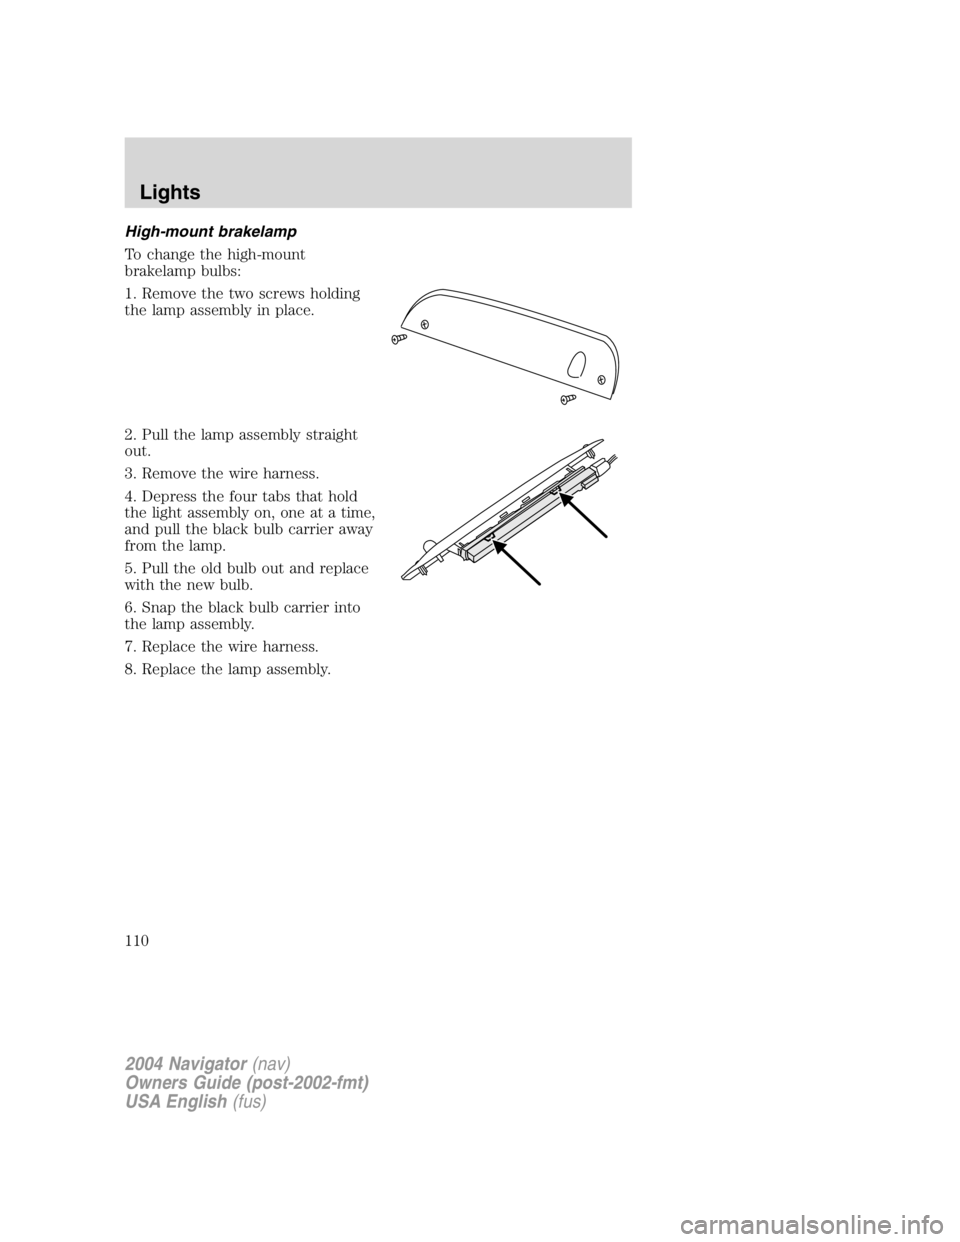
High-mount brakelamp
To change the high-mount
brakelamp bulbs:
1. Remove the two screws holding
the lamp assembly in place.
2. Pull the lamp assembly straight
out.
3. Remove the wire harness.
4. Depress the four tabs that hold
the light assembly on, one at a time,
and pull the black bulb carrier away
from the lamp.
5. Pull the old bulb out and replace
with the new bulb.
6. Snap the black bulb carrier into
the lamp assembly.
7. Replace the wire harness.
8. Replace the lamp assembly.
2004 Navigator (nav)
Owners Guide (post-2002-fmt)
USA English (fus)Lights
110