sat nav LINCOLN NAVIGATOR 2010 User Guide
[x] Cancel search | Manufacturer: LINCOLN, Model Year: 2010, Model line: NAVIGATOR, Model: LINCOLN NAVIGATOR 2010Pages: 385, PDF Size: 2.96 MB
Page 45 of 385
Note:SIRIUS reserves the unrestricted right to change, rearrange, add
or delete programming including canceling, moving or adding particular
channels, and its prices, at any time, with or without notice to you. Ford
Motor Company shall not be responsible for any such programming
changes.
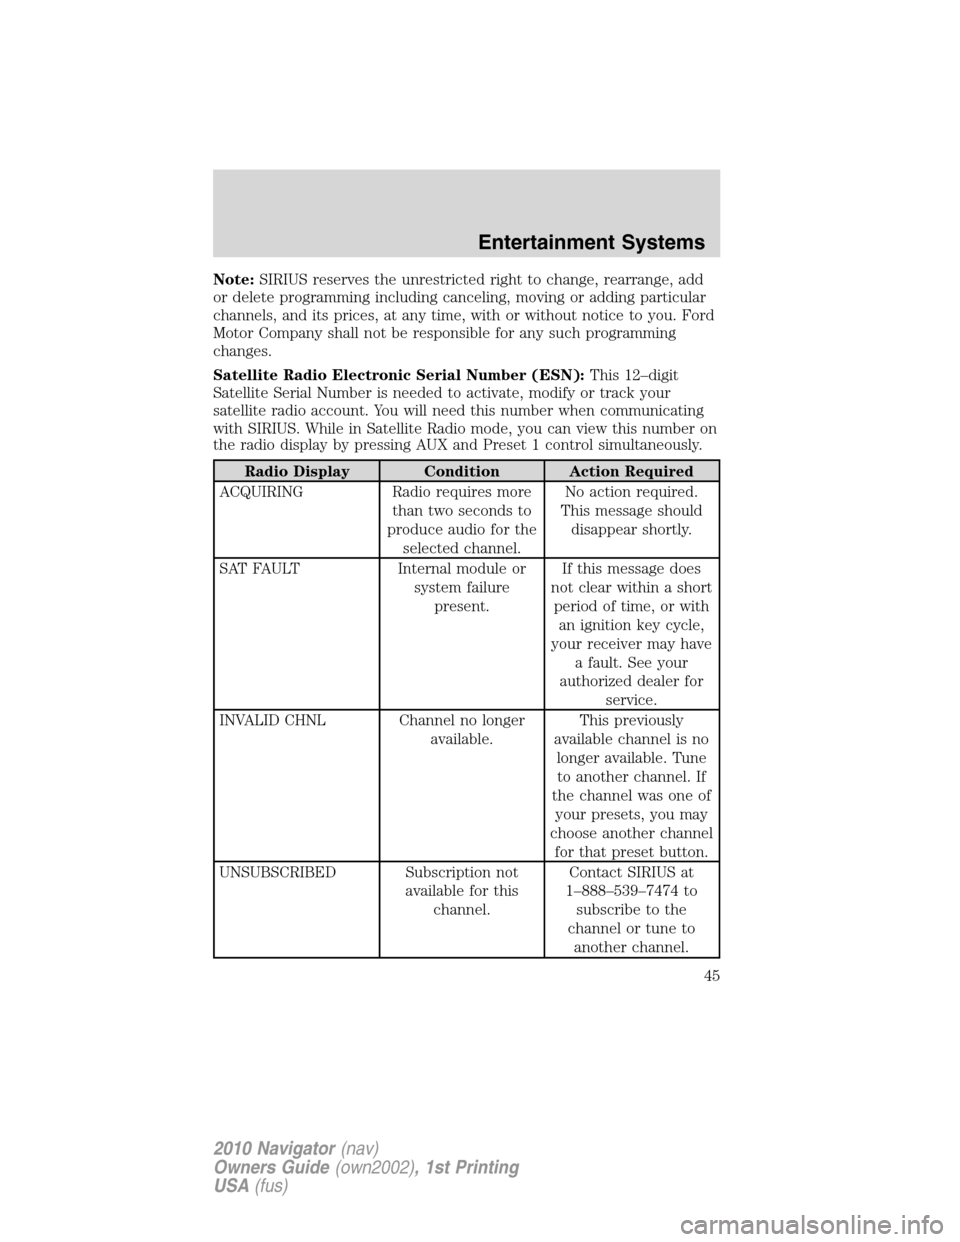
Satellite Radio Electronic Serial Number (ESN):This 12–digit
Satellite Serial Number is needed to activate, modify or track your
satellite radio account. You will need this number when communicating
with SIRIUS. While in Satellite Radio mode, you can view this number on
the radio display by pressing AUX and Preset 1 control simultaneously.
Radio Display Condition Action Required
ACQUIRING Radio requires more
than two seconds to
produce audio for the
selected channel.No action required.
This message should
disappear shortly.
SAT FAULT Internal module or
system failure
present.If this message does
not clear within a short
period of time, or with
an ignition key cycle,
your receiver may have
a fault. See your
authorized dealer for
service.
INVALID CHNL Channel no longer
available.This previously
available channel is no
longer available. Tune
to another channel. If
the channel was one of
your presets, you may
choose another channel
for that preset button.
UNSUBSCRIBED Subscription not
available for this
channel.Contact SIRIUS at
1–888–539–7474 to
subscribe to the
channel or tune to
another channel.
Entertainment Systems
45
2010 Navigator(nav)
Owners Guide(own2002), 1st Printing
USA(fus)
Page 46 of 385
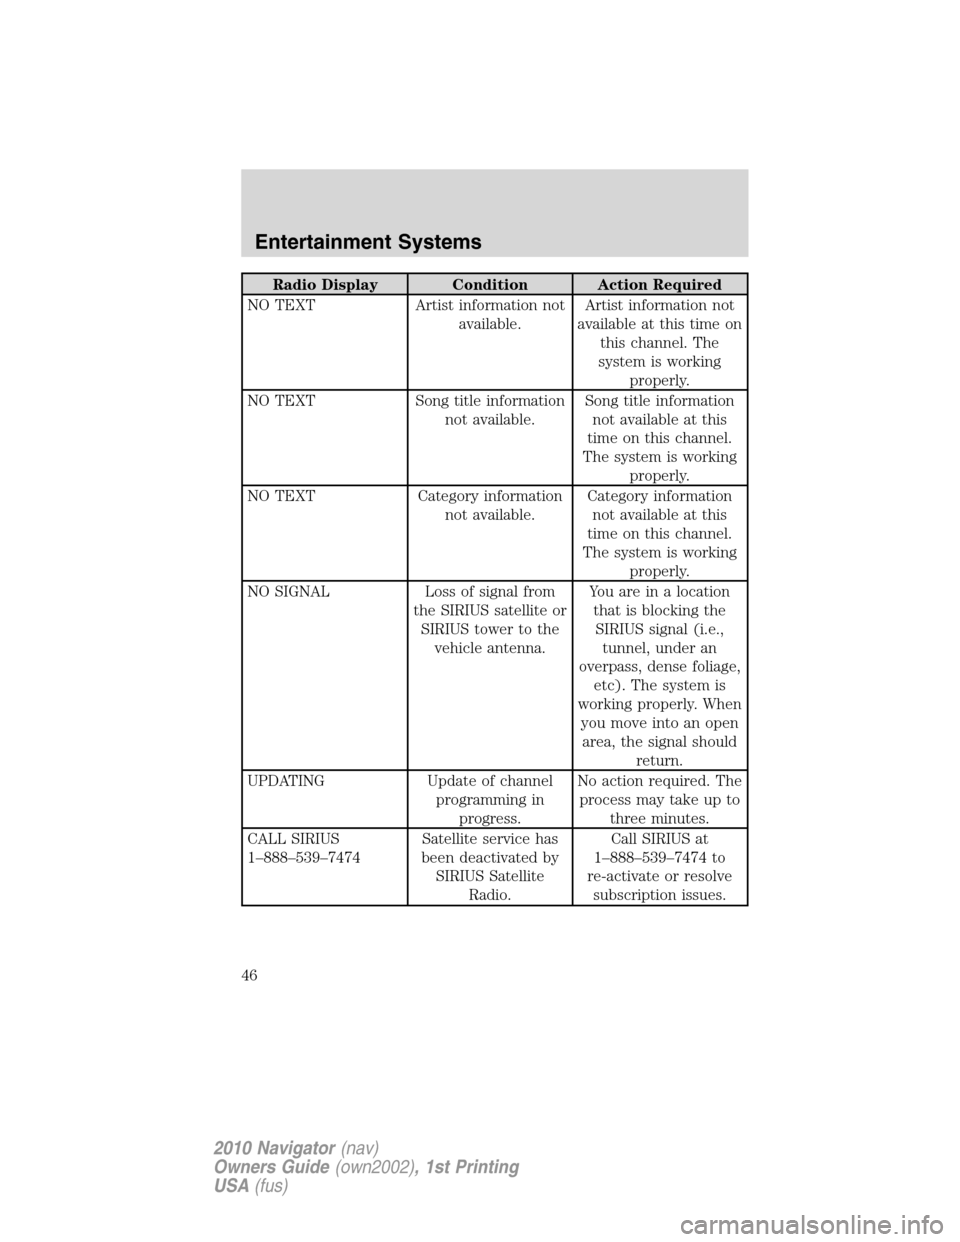
Radio Display Condition Action Required
NO TEXT Artist information not
available.Artist information not
available at this time on
this channel. The
system is working
properly.
NO TEXT Song title information
not available.Song title information
not available at this
time on this channel.
The system is working
properly.
NO TEXT Category information
not available.Category information
not available at this
time on this channel.
The system is working
properly.
NO SIGNAL Loss of signal from
the SIRIUS satellite or
SIRIUS tower to the
vehicle antenna.You are in a location
that is blocking the
SIRIUS signal (i.e.,
tunnel, under an
overpass, dense foliage,
etc). The system is
working properly. When
you move into an open
area, the signal should
return.
UPDATING Update of channel
programming in
progress.No action required. The
process may take up to
three minutes.
CALL SIRIUS
1–888–539–7474Satellite service has
been deactivated by
SIRIUS Satellite
Radio.Call SIRIUS at
1–888–539–7474 to
re-activate or resolve
subscription issues.
Entertainment Systems
46
2010 Navigator(nav)
Owners Guide(own2002), 1st Printing
USA(fus)
Page 51 of 385
Repeating each of these actions will switch back to single play mode, all
speakers playing and headphones off.
A green light will illuminate next to either the A or B Headphone Control
Button to indicate which channel is active (able to be controlled).
4. Press MEDIA to change the audio source of the active channel (A or
B). The audio source will be shown on the display. You may change the
active channel by pressing the A or B headphone control button.
Note:Channel A can access any possible media source (AM, FM1, FM2,
SAT (if equipped), CD, DVD, AUX). Channel B can only access DVD and
AUX sources.
Note:Refer toSingle play/Dual playfor more information.
To listen to audio over the headphones— Dual play mode
(Non-navigation based radio systems):
You may listen to channels A and B over wired or wireless headphones.
Refer toUsing the infrared wireless headphonesandUsing wired
headphonesfor further information.
•Black (4) — wired headphone output (wired headphones not
included)
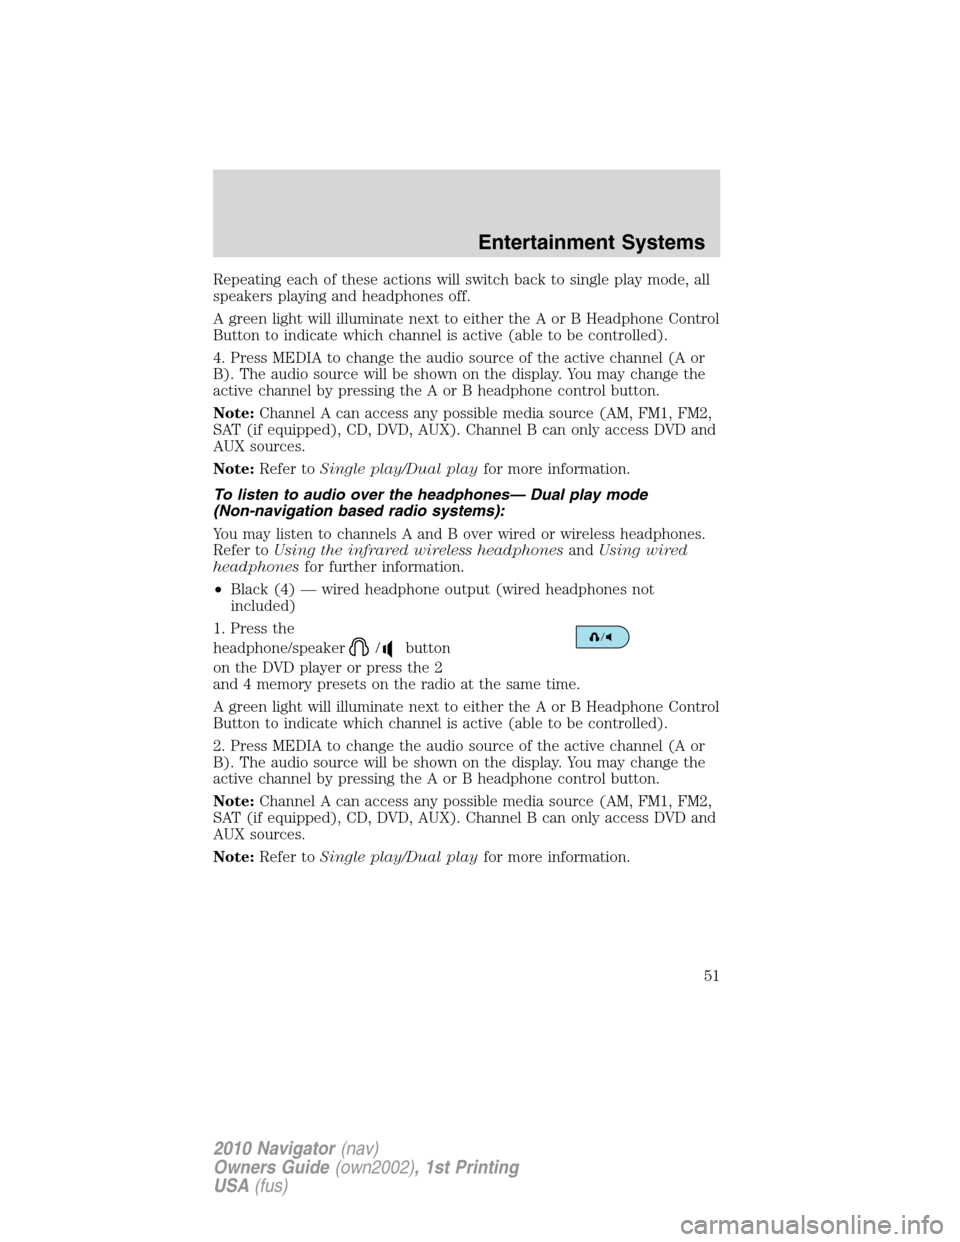
1. Press the
headphone/speaker
/button
on the DVD player or press the 2
and 4 memory presets on the radio at the same time.
A green light will illuminate next to either the A or B Headphone Control
Button to indicate which channel is active (able to be controlled).
2. Press MEDIA to change the audio source of the active channel (A or
B). The audio source will be shown on the display. You may change the
active channel by pressing the A or B headphone control button.
Note:Channel A can access any possible media source (AM, FM1, FM2,
SAT (if equipped), CD, DVD, AUX). Channel B can only access DVD and
AUX sources.
Note:Refer toSingle play/Dual playfor more information.
Entertainment Systems
51
2010 Navigator(nav)
Owners Guide(own2002), 1st Printing
USA(fus)
Page 53 of 385
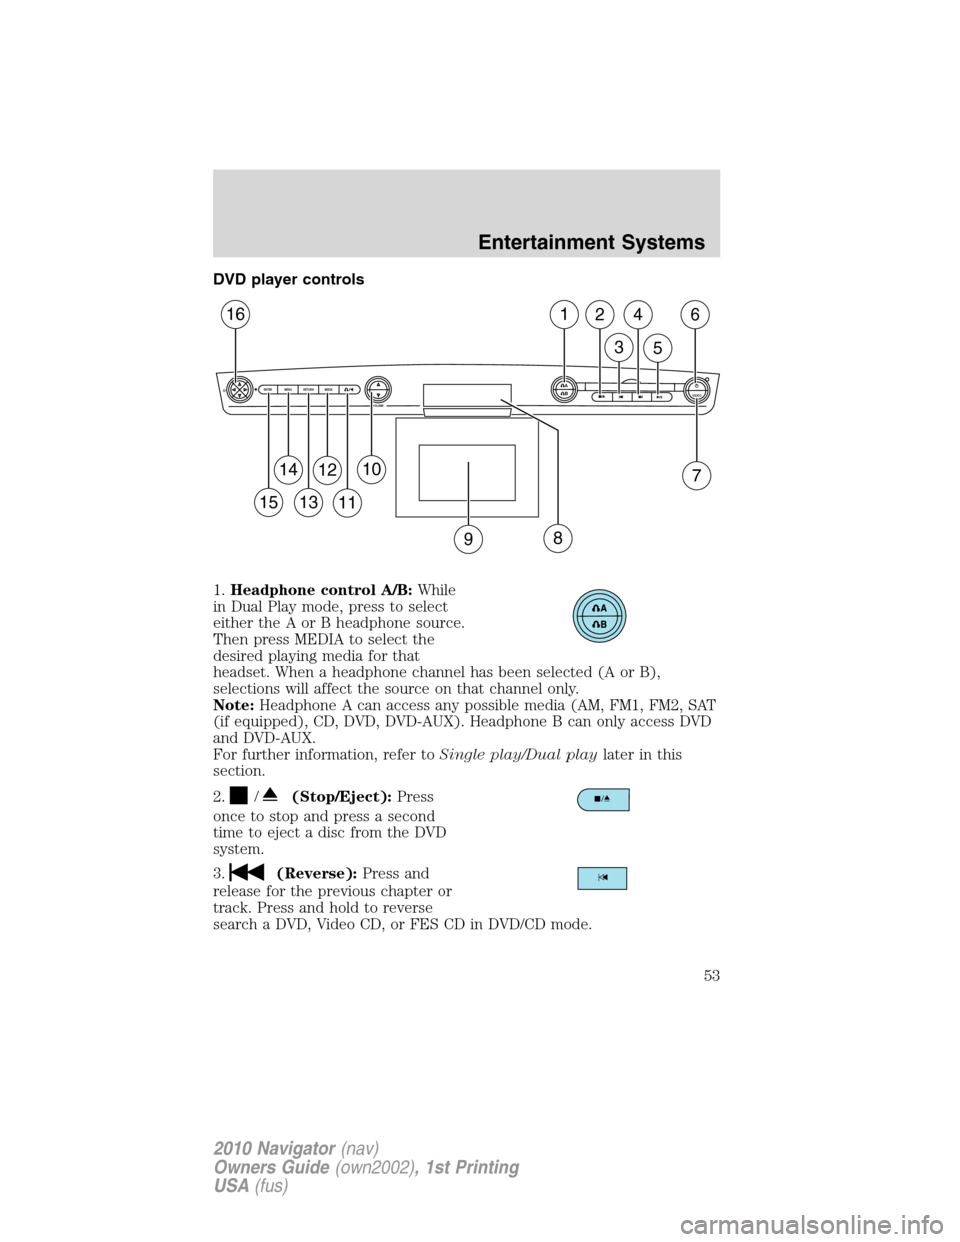
DVD player controls
1.Headphone control A/B:While
in Dual Play mode, press to select
either the A or B headphone source.
Then press MEDIA to select the
desired playing media for that
headset. When a headphone channel has been selected (A or B),
selections will affect the source on that channel only.
Note:Headphone A can access any possible media (AM, FM1, FM2, SAT
(if equipped), CD, DVD, DVD-AUX). Headphone B can only access DVD
and DVD-AUX.
For further information, refer toSingle play/Dual playlater in this
section.
2.
/(Stop/Eject):Press
once to stop and press a second
timetoejectadiscfromtheDVD
system.
3.
(Reverse):Press and
release for the previous chapter or
track. Press and hold to reverse
search a DVD, Video CD, or FES CD in DVD/CD mode.
A
BVIDEOVOLUME MEDIA RETURN MENU ENTER
1
7
2
3
4
5
6
9
10
11
12
13
14
15
16
8
Entertainment Systems
53
2010 Navigator(nav)
Owners Guide(own2002), 1st Printing
USA(fus)
Page 55 of 385
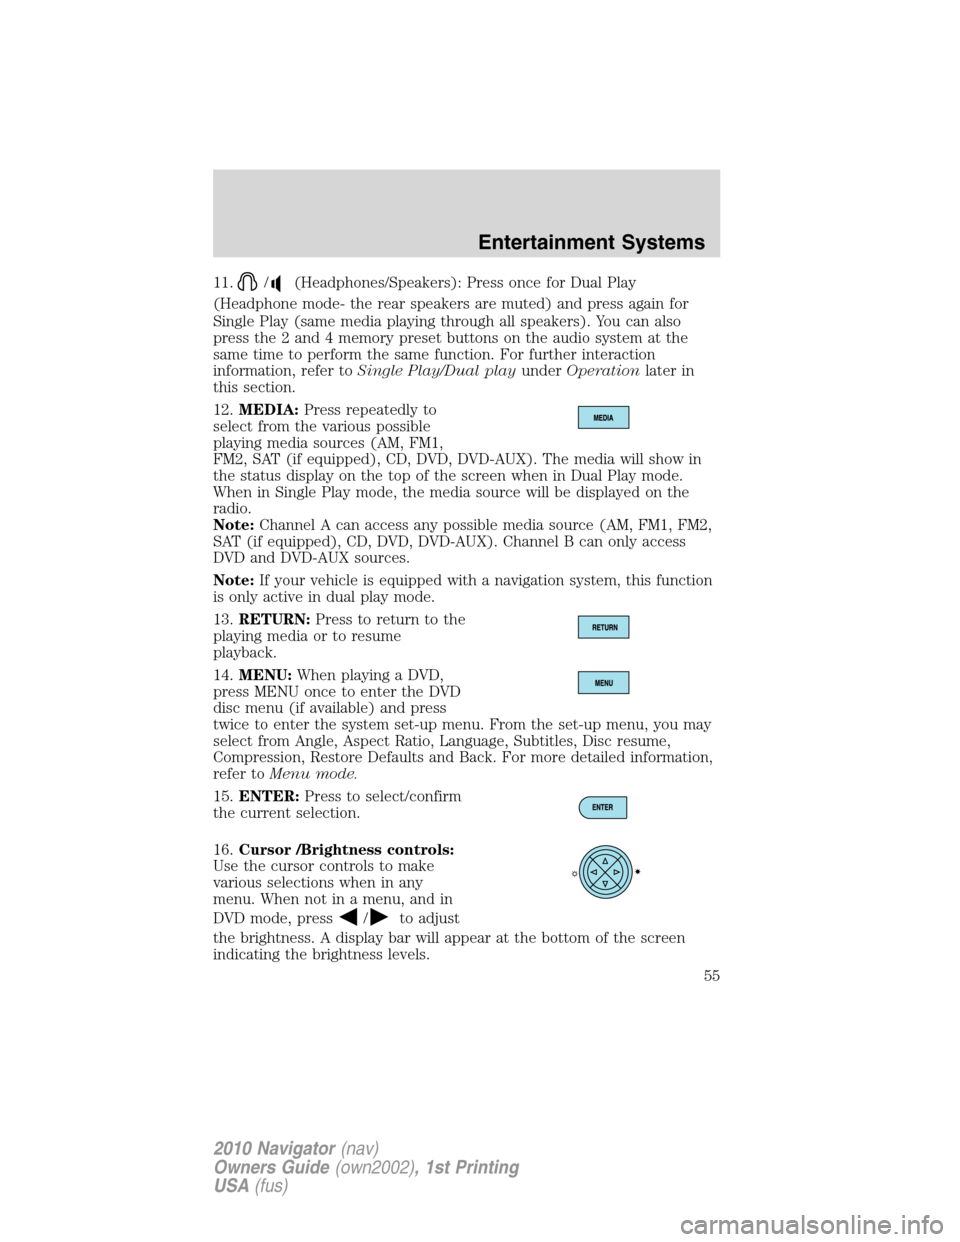
11./(Headphones/Speakers): Press once for Dual Play
(Headphone mode- the rear speakers are muted) and press again for
Single Play (same media playing through all speakers). You can also
press the 2 and 4 memory preset buttons on the audio system at the
same time to perform the same function. For further interaction
information, refer toSingle Play/Dual playunderOperationlater in
this section.
12.MEDIA:Press repeatedly to
select from the various possible
playing media sources (AM, FM1,
FM2, SAT (if equipped), CD, DVD, DVD-AUX). The media will show in
the status display on the top of the screen when in Dual Play mode.
When in Single Play mode, the media source will be displayed on the
radio.
Note:Channel A can access any possible media source (AM, FM1, FM2,
SAT (if equipped), CD, DVD, DVD-AUX). Channel B can only access
DVD and DVD-AUX sources.
Note:If your vehicle is equipped with a navigation system, this function
is only active in dual play mode.
13.RETURN:Press to return to the
playing media or to resume
playback.
14.MENU:When playing a DVD,
press MENU once to enter the DVD
disc menu (if available) and press
twice to enter the system set-up menu. From the set-up menu, you may
select from Angle, Aspect Ratio, Language, Subtitles, Disc resume,
Compression, Restore Defaults and Back. For more detailed information,
refer toMenu mode.
15.ENTER:Press to select/confirm
the current selection.
16.Cursor /Brightness controls:
Use the cursor controls to make
various selections when in any
menu. When not in a menu, and in
DVD mode, press
/to adjust
the brightness. A display bar will appear at the bottom of the screen
indicating the brightness levels.
Entertainment Systems
55
2010 Navigator(nav)
Owners Guide(own2002), 1st Printing
USA(fus)
Page 57 of 385
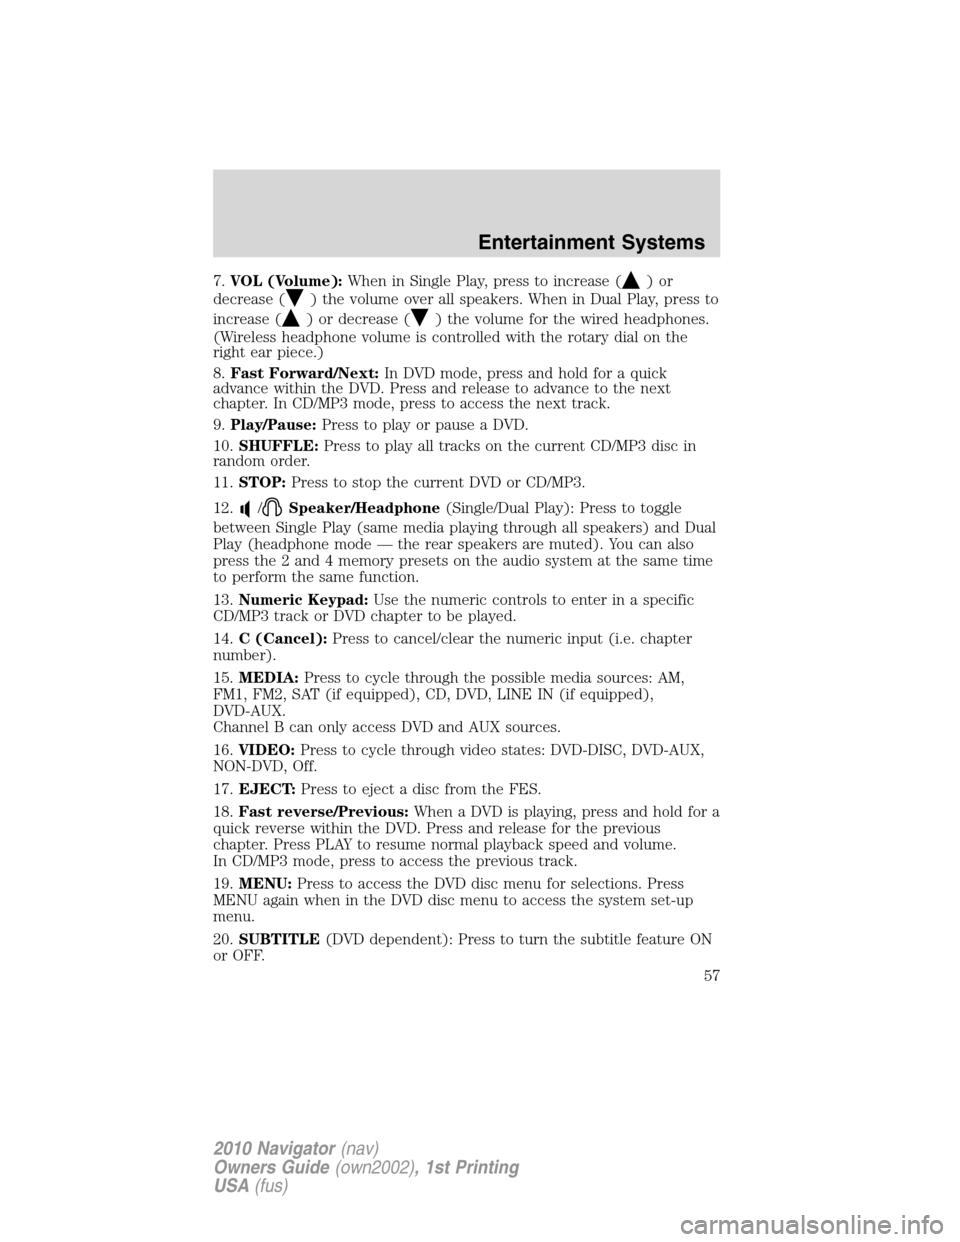
7.VOL (Volume):When in Single Play, press to increase ()or
decrease (
) the volume over all speakers. When in Dual Play, press to
increase (
) or decrease () the volume for the wired headphones.
(Wireless headphone volume is controlled with the rotary dial on the
right ear piece.)
8.Fast Forward/Next:In DVD mode, press and hold for a quick
advance within the DVD. Press and release to advance to the next
chapter. In CD/MP3 mode, press to access the next track.
9.Play/Pause:Press to play or pause a DVD.
10.SHUFFLE:Press to play all tracks on the current CD/MP3 disc in
random order.
11.STOP:Press to stop the current DVD or CD/MP3.
12.
/Speaker/Headphone(Single/Dual Play): Press to toggle
between Single Play (same media playing through all speakers) and Dual
Play (headphone mode — the rear speakers are muted). You can also
press the 2 and 4 memory presets on the audio system at the same time
to perform the same function.
13.Numeric Keypad:Use the numeric controls to enter in a specific
CD/MP3 track or DVD chapter to be played.
14.C (Cancel):Press to cancel/clear the numeric input (i.e. chapter
number).
15.MEDIA:Press to cycle through the possible media sources: AM,
FM1, FM2, SAT (if equipped), CD, DVD, LINE IN (if equipped),
DVD-AUX.
Channel B can only access DVD and AUX sources.
16.VIDEO:Press to cycle through video states: DVD-DISC, DVD-AUX,
NON-DVD, Off.
17.EJECT:Press to eject a disc from the FES.
18.Fast reverse/Previous:When a DVD is playing, press and hold for a
quick reverse within the DVD. Press and release for the previous
chapter. Press PLAY to resume normal playback speed and volume.
In CD/MP3 mode, press to access the previous track.
19.MENU:Press to access the DVD disc menu for selections. Press
MENU again when in the DVD disc menu to access the system set-up
menu.
20.SUBTITLE(DVD dependent): Press to turn the subtitle feature ON
or OFF.
Entertainment Systems
57
2010 Navigator(nav)
Owners Guide(own2002), 1st Printing
USA(fus)
Page 70 of 385
CD, MP3 and CD player care
•Handle discs by their edges only. Never touch the playing surface.
•Do not expose discs to direct sunlight or heat sources for extended
periods of time.
•Do not insert more than one disc into the slot of the CD player (if
equipped).
•Always store discs out of direct sunlight. Excessive heat may damage
or warp discs.
•Use care when handling and playing CD-R and CD-RW discs, which
are more susceptible to damage from heat, light and stress than are
regular CDs.
•Always insert and remove a disc by holding the disc flat, with the
playing surface facing down, in order to prevent damage to the disc or
the player.
•Never insert any object other than a compact disc (CD) or digital
versatile disc (DVD) into the player, as doing so may damage the
player and may cause injury to you.
•Do not disassemble the player. The laser used in disc playback is
extremely harmful to the eyes.
The FES DVD system is designed to play commercially pressed
12 cm (4.75 in) audio compact discs and digital versatile discs
(DVD), DVD-R and R/W discs only. Due to technical
incompatibility, certain recordable and re-recordable compact
discs may not function correctly when used in Ford CD and DVD
players. Irregular shaped CDs or DVDs, CDs or DVDs with a
scratch protection film attached, and CDs with homemade paper
(adhesive) labels should not be inserted into the FES DVD
system. The label may peel and cause the CD or DVD to become
jammed. It is recommended that homemade CDs or DVDs be
identified with permanent felt tip marker rather than adhesive
labels. Ball point pens may damage CDs or DVDs. Please contact
your authorized dealer for further information.
Entertainment Systems
70
2010 Navigator(nav)
Owners Guide(own2002), 1st Printing
USA(fus)
Page 75 of 385
rights owners. Use of this copyright protection technology must be
authorized by Macrovision Corporation, and is intended for home and
other limited viewing uses only unless otherwise authorized by
Macrovision Corporation. Reverse engineering or disassembly is
prohibited.
MP3:Supply of this product only conveys a license for private,
non-commercial use and does not convey a license nor imply any right to
use this product in any commercial (i.e. revenue generating) real time
broadcasting (terrestrial, satellite, cable and /or any other media)
broadcasting/streaming via internet, intranets and/or other networks or in
other electronic content distribution systems, such as pay-audio or
audio-on-demand applications. An independent license for such use is
required. For details, please visit http:// www.mp3licensing.com.
Safety information
WARNING:Driving while distracted can result in loss of vehicle
control, accident and injury. Ford strongly recommends that
drivers use extreme caution when using any device that may take their
focus off the road. The driver’s primary responsibility is the safe
operation of their vehicle. Only use cell phones and other devices not
essential to the driving task when it is safe to do so.
Read all of the safety and operating instructions before operating the
system and retain for future reference.
Do not attempt to service, repair or modify the Family Entertainment
System (FES). See your dealer.
Do not insert foreign objects into the DVD compartment.
WARNING:Do not leave children unattended in the vehicle and
do not let children operate the system while unsupervised. If
wired headphones or auxiliary systems are used, children may become
entangled in the cords and seriously injure themselves.
WARNING:The front glass on the liquid crystal display (LCD)
flip-down screen may break when hit with a hard surface. If the
glass breaks, do not touch the liquid crystalline material. In case of
contact with skin, wash immediately with soap and water.
Entertainment Systems
75
2010 Navigator(nav)
Owners Guide(own2002), 1st Printing
USA(fus)
Page 77 of 385
Care and service of the DVD player
Environmental extremes
DVD players which are subjected to harsh environmental conditions may
be damaged or perform at less than maximum capability. To avoid these
outcomes, whenever possible avoid exposing your DVD player to:
•extremely hot or cold temperatures.
•direct sunlight.
•high humidity.
•a dusty environment.
•locations where strong magnetic fields are generated.
Temperature extremes
When the vehicle is parked under direct sunlight or in an extremely cold
place for a long period of time, wait until the cabin temperature of the
vehicle is at normal temperature before operating the system.
Humidity and moisture condensation
Moisture in the air will condense in the DVD player under extremely
humid conditions or when moving from a cold place to a warm one.
Moisture condensation may cause damage to the DVD and/or player. If
moisture condensation occurs, do not insert a CD or DVD into the
player. If one is already in the player, remove it. Turn the DVD player ON
to dry the moisture before inserting a DVD. This could take an hour or
more.
Foreign substances
Exercise care to prevent dirt and foreign objects from entering the DVD
player compartment. Be especially careful not to spill liquids of any kind
onto the media controls or into the system. If liquid is accidentally
spilled onto the system, immediately turn the system OFF and consult a
qualified service technician.
Cleaning the liquid crystal display (LCD) flip-down screen
Clean the display screen by applying a small amount of water or any
ammonia-based household glass cleaner directly to a soft cloth. Rub the
screen gently until the dust, dirt or fingerprints are removed. Do not
spray the screen directly with water or glass cleaning solvents. Overspray
from these fluids could drip down into the internal electronics of the
screen and cause damage. Do not apply excessive pressure while
cleaning the screen.
Entertainment Systems
77
2010 Navigator(nav)
Owners Guide(own2002), 1st Printing
USA(fus)
Page 92 of 385
BULB REPLACEMENT
Lamp assembly condensation
Exterior lamps are vented to accommodate normal changes in pressure.
Condensation can be a natural by-product of this design. When moist air
enters the lamp assembly through the vents, there is a possibility that
condensation can occur when the temperature is cold. When normal
condensation occurs, a thin film of mist can form on the interior of the
lens. The thin mist eventually clears and exits through the vents during
normal operation. Clearing time may take as long as 48 hours under dry
weather conditions.
Examples of acceptable condensation are:
•Presence of thin mist (no streaks, drip marks or droplets)
•Fine mist covers less than 50% of the lens
Examples of unacceptable moisture (usually caused by a lamp water
leak) are:
•Water puddle inside the lamp
•Large water droplets, drip marks or streaks present on the interior of
the lens
Take your vehicle to dealer for service if any of the above conditions of
unacceptable moisture are present.
Using the right bulbs
Replacement bulbs are specified in the chart below. Headlamp bulbs
must be marked with an authorized “D.O.T.” for North America to ensure
lamp performance, light brightness and pattern and safe visibility. The
correct bulbs will not damage the lamp assembly or void the lamp
assembly warranty and will provide quality bulb burn time.
Function Number of bulbs Trade number
Headlamps (low and
high-beam)2 *See your dealer
Front park lamps 2 3157K or 4157K
Front turn lamps 2 3157A (amber)
Front sidemarker 2 168A (amber)
Fog lamps 2 H11
Front row map lamps 2 1600XB
Lights
92
2010 Navigator(nav)
Owners Guide(own2002), 1st Printing
USA(fus)