buttons LINCOLN NAVIGATOR 2014 User Guide
[x] Cancel search | Manufacturer: LINCOLN, Model Year: 2014, Model line: NAVIGATOR, Model: LINCOLN NAVIGATOR 2014Pages: 506, PDF Size: 5.72 MB
Page 150 of 506
8. The LED lamp will begin to flash rapidly until programming is
complete. If your garage door does not operate, repeat the previous
steps. Otherwise, call the toll-free help line at 1-866-572-2728.
The LED lamp above the selected button will illuminate to confirm that
the system is responding to the button command.
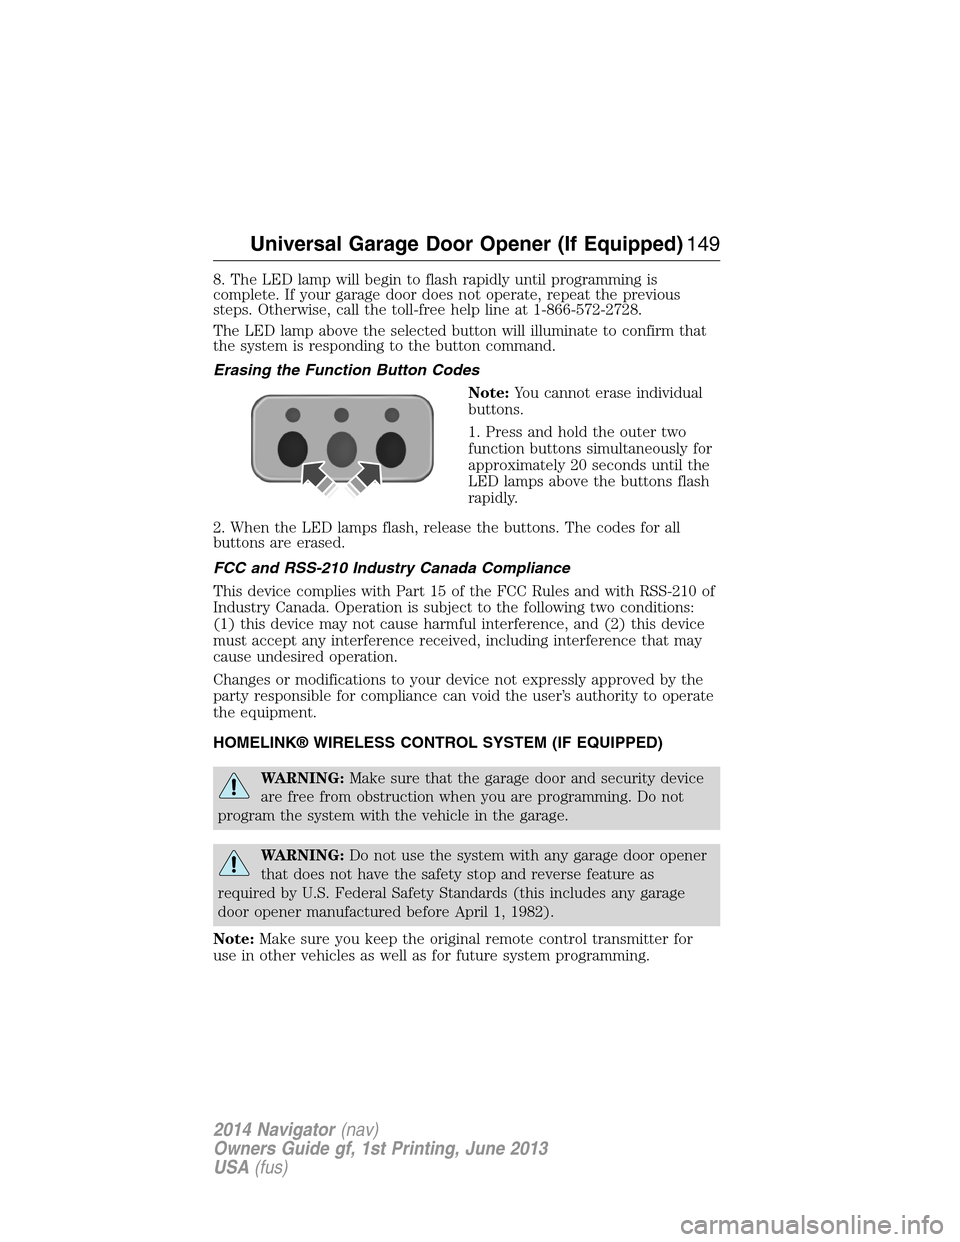
Erasing the Function Button Codes
Note:You cannot erase individual
buttons.
1. Press and hold the outer two
function buttons simultaneously for
approximately 20 seconds until the
LED lamps above the buttons flash
rapidly.
2. When the LED lamps flash, release the buttons. The codes for all
buttons are erased.
FCC and RSS-210 Industry Canada Compliance
This device complies with Part 15 of the FCC Rules and with RSS-210 of
Industry Canada. Operation is subject to the following two conditions:
(1) this device may not cause harmful interference, and (2) this device
must accept any interference received, including interference that may
cause undesired operation.
Changes or modifications to your device not expressly approved by the
party responsible for compliance can void the user’s authority to operate
the equipment.
HOMELINK® WIRELESS CONTROL SYSTEM (IF EQUIPPED)
WARNING:Make sure that the garage door and security device
are free from obstruction when you are programming. Do not
program the system with the vehicle in the garage.
WARNING:Do not use the system with any garage door opener
that does not have the safety stop and reverse feature as
required by U.S. Federal Safety Standards (this includes any garage
door opener manufactured before April 1, 1982).
Note:Make sure you keep the original remote control transmitter for
use in other vehicles as well as for future system programming.
Universal Garage Door Opener (If Equipped)149
2014 Navigator(nav)
Owners Guide gf, 1st Printing, June 2013
USA(fus)
Page 151 of 506
Note:We recommend that upon the sale or lease termination of your
vehicle, you erase the programmed function buttons for security reasons.
SeeErasing the function button codeslater in this section.
Note:You can program a maximum of three devices. To change or
replace any of the three devices after it has been initially programmed,
you must first erase the current settings. SeeErasing the function
button codeslater in this section.
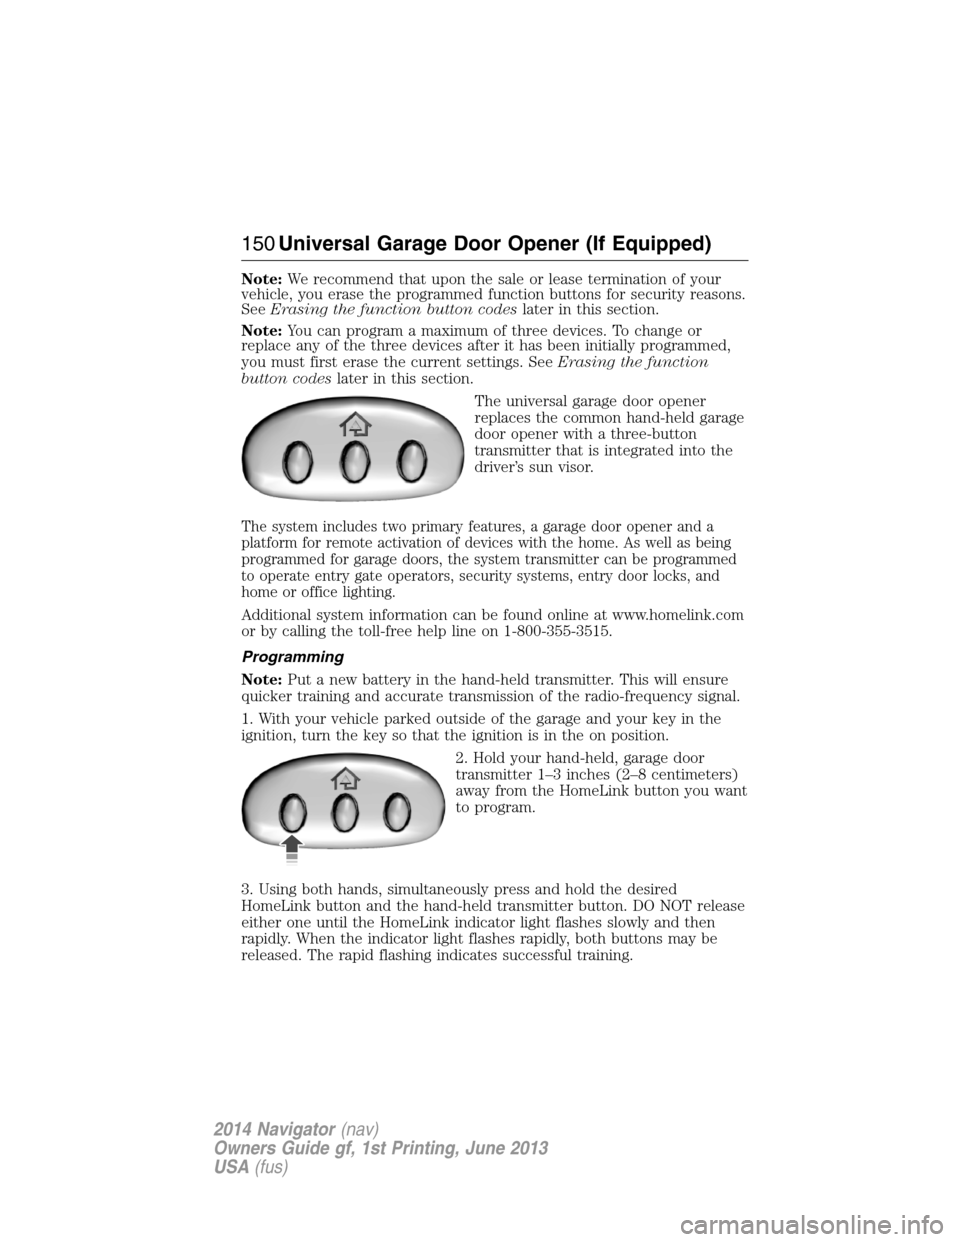
The universal garage door opener
replaces the common hand-held garage
door opener with a three-button
transmitter that is integrated into the
driver’s sun visor.
The system includes two primary features, a garage door opener and a
platform for remote activation of devices with the home. As well as being
programmed for garage doors, the system transmitter can be programmed
to operate entry gate operators, security systems, entry door locks, and
home or office lighting.
Additional system information can be found online at www.homelink.com
or by calling the toll-free help line on 1-800-355-3515.
Programming
Note:Put a new battery in the hand-held transmitter. This will ensure
quicker training and accurate transmission of the radio-frequency signal.
1. With your vehicle parked outside of the garage and your key in the
ignition, turn the key so that the ignition is in the on position.
2. Hold your hand-held, garage door
transmitter 1–3 inches (2–8 centimeters)
away from the HomeLink button you want
to program.
3. Using both hands, simultaneously press and hold the desired
HomeLink button and the hand-held transmitter button. DO NOT release
either one until the HomeLink indicator light flashes slowly and then
rapidly. When the indicator light flashes rapidly, both buttons may be
released. The rapid flashing indicates successful training.
150Universal Garage Door Opener (If Equipped)
2014 Navigator(nav)
Owners Guide gf, 1st Printing, June 2013
USA(fus)
Page 152 of 506
4. Press and hold the HomeLink button you programmed for five
seconds, then release. You may need to do this twice to activate the
door. If your garage door does not operate, watch the HomeLink
indicator light.
If the indicator light stays on, the programming is complete. Press and
release the programmed HomeLink button, and then begin programming
your garage door opener. See below for Steps5–7.
If the indicator light flashes rapidly for two seconds and then turns to a
constant light, the HomeLink button is not programmed yet. Do the
following:
Press and hold the HomeLink button while you press and release
the hand-held transmitter button every two seconds. The HomeLink
indicator light will flash slowly and then rapidly once the HomeLink
function button recognizes and accepts the hand-held transmitter’s radio
frequency signal.
After programming the HomeLink button, follow Steps5–7aslisted
below to program your garage door opener.
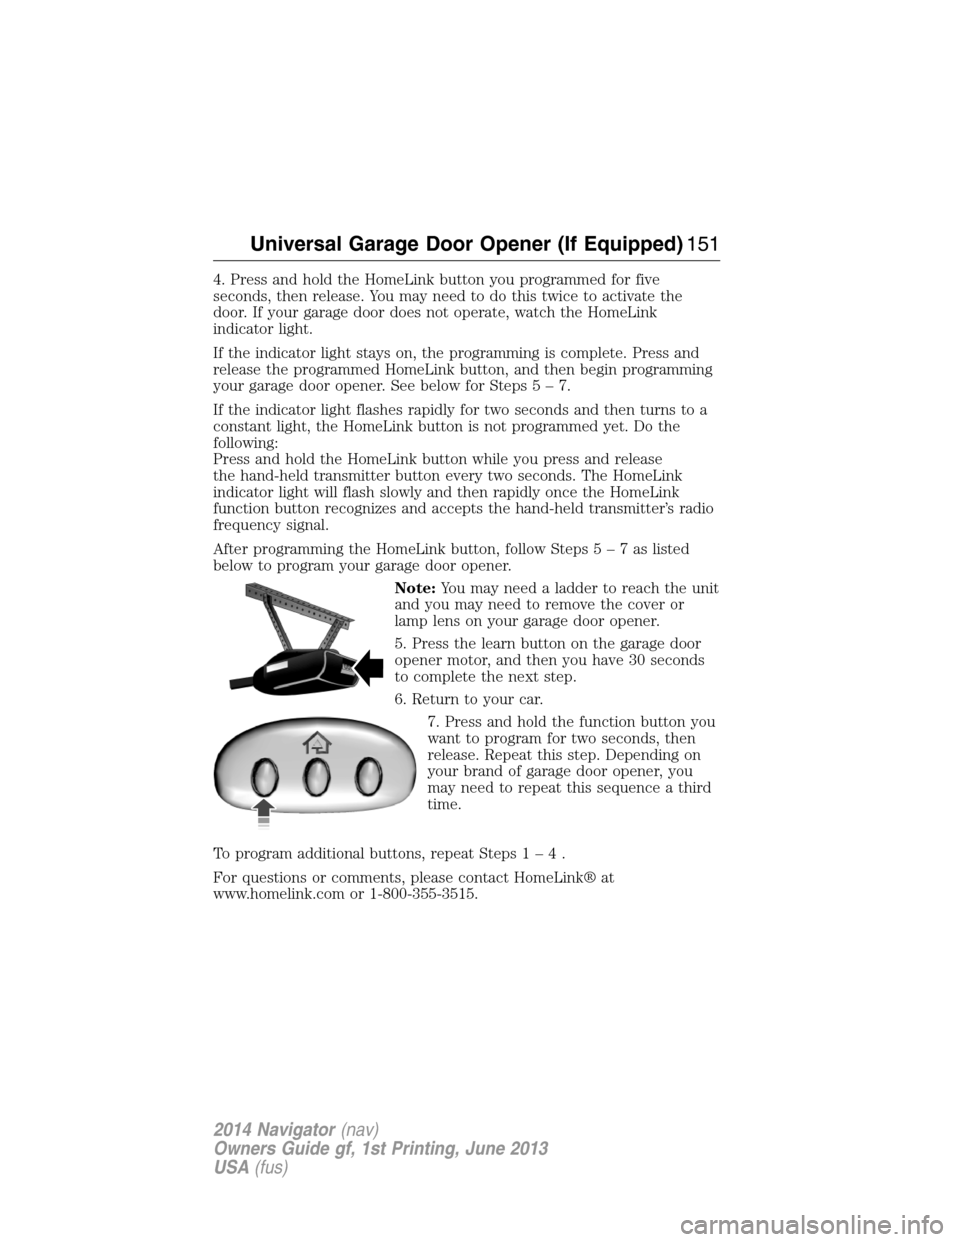
Note:You may need a ladder to reach the unit
and you may need to remove the cover or
lamp lens on your garage door opener.
5. Press the learn button on the garage door
opener motor, and then you have 30 seconds
to complete the next step.
6. Return to your car.
7. Press and hold the function button you
want to program for two seconds, then
release. Repeat this step. Depending on
your brand of garage door opener, you
may need to repeat this sequence a third
time.
To program additional buttons, repeat Steps1–4.
For questions or comments, please contact HomeLink® at
www.homelink.com or 1-800-355-3515.
Universal Garage Door Opener (If Equipped)151
2014 Navigator(nav)
Owners Guide gf, 1st Printing, June 2013
USA(fus)
Page 153 of 506
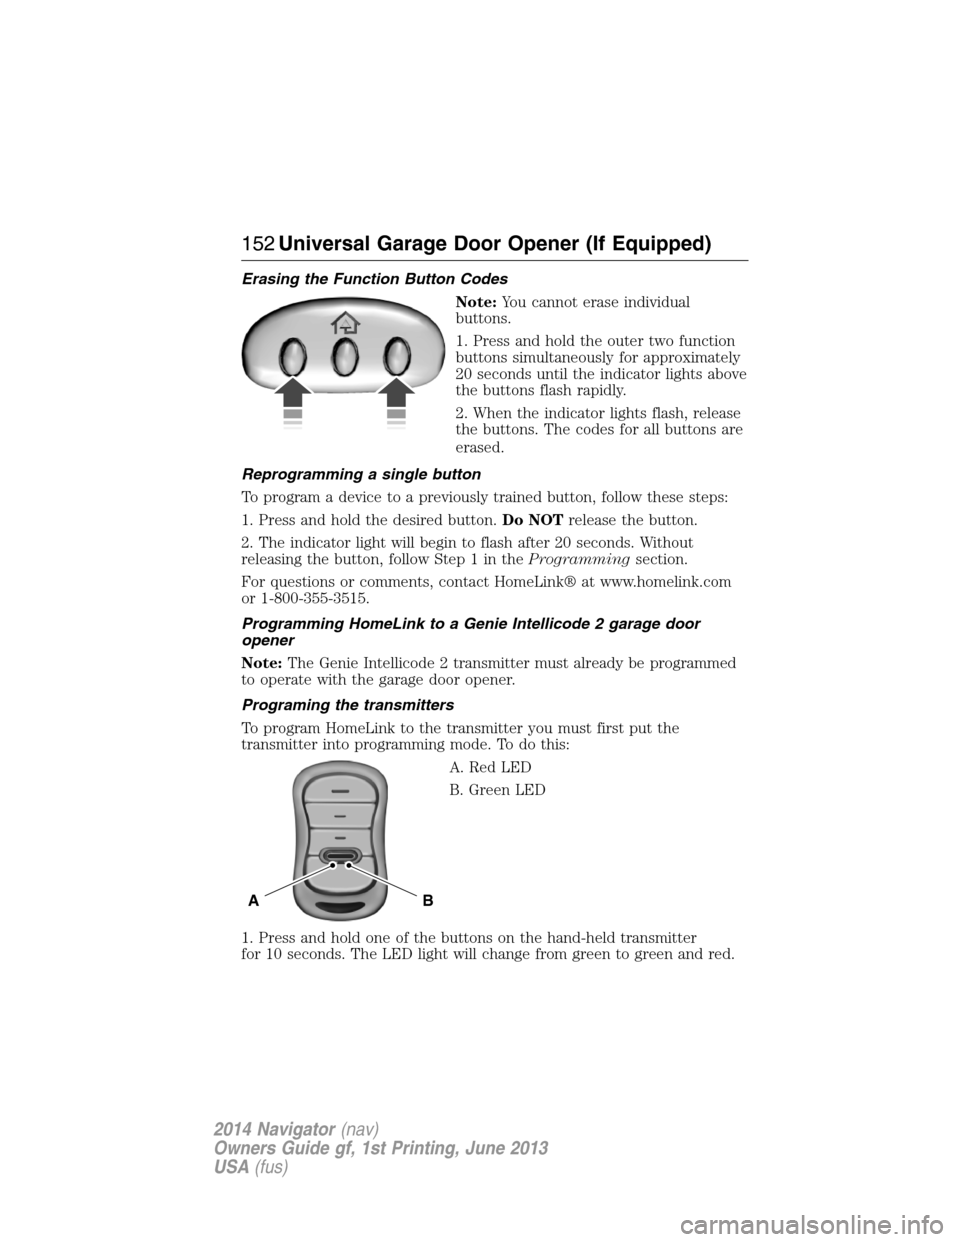
Erasing the Function Button Codes
Note:You cannot erase individual
buttons.
1. Press and hold the outer two function
buttons simultaneously for approximately
20 seconds until the indicator lights above
the buttons flash rapidly.
2. When the indicator lights flash, release
the buttons. The codes for all buttons are
erased.
Reprogramming a single button
To program a device to a previously trained button, follow these steps:
1. Press and hold the desired button.Do NOTrelease the button.
2. The indicator light will begin to flash after 20 seconds. Without
releasing the button, follow Step 1 in theProgrammingsection.
For questions or comments, contact HomeLink® at www.homelink.com
or 1-800-355-3515.
Programming HomeLink to a Genie Intellicode 2 garage door
opener
Note:The Genie Intellicode 2 transmitter must already be programmed
to operate with the garage door opener.
Programing the transmitters
To program HomeLink to the transmitter you must first put the
transmitter into programming mode. To do this:
A. Red LED
B. Green LED
1. Press and hold one of the buttons on the hand-held transmitter
for 10 seconds. The LED light will change from green to green and red.
BA
152Universal Garage Door Opener (If Equipped)
2014 Navigator(nav)
Owners Guide gf, 1st Printing, June 2013
USA(fus)
Page 155 of 506
Note:The next two steps must be completed in 30 seconds.
4. Press and release the Genie Intellicode 2 hand-held transmitter’s
previously programmed button. Both indicator lights on the garage door
opener motor unit should now flash purple.
5. Press and hold the previously programmed button on the sun visor for
two seconds. Repeat this step up to 3 times until the garage door moves.
Programming is now complete.
Clearing a HomeLink device
To erase programming from the three HomeLink buttons, press and hold
the two outer HomeLink buttons until the indicator light begins to flash.
The LED will begin flashing in 10 to 20 seconds, at which time both
buttons should be released. Programming has now been erased, and the
LED should blink slowly to indicate the device is in train mode when any
one of the three HomeLink buttons is pressed.
FCC and RSS-210 Industry Canada Compliance
This device complies with Part 15 of the FCC Rules and with RSS-210 of
Industry Canada. Operation is subject to the following two conditions:
(1) this device may not cause harmful interference, and (2) this device
must accept any interference received, including interference that may
cause undesired operation.
Changes or modifications to your device not expressly approved by the
party responsible for compliance can void the user’s authority to operate
the equipment.
154Universal Garage Door Opener (If Equipped)
2014 Navigator(nav)
Owners Guide gf, 1st Printing, June 2013
USA(fus)
Page 336 of 506
C.TUNE and Phone:
•In radio mode, turn the control to manually search the frequency
band.
•In MP3 mode, turn the control to go to the next or previous folder
(when folder mode is active).
•In satellite radio mode, press theSEEKbuttons to tune to the next
or previous channel.
•In category mode, turn the control to scroll through the list of
available satellite radio categories.
•In phone mode, press this button to access the phone features of the
SYNC system. See theSYNC®chapter for more information.
D.MENU:Press this button to access different audio system features.
You can also adjust settings for the family entertainment system if your
vehicle is equipped with this feature.
•If your vehicle is equipped with satellite radio, you can access
different menus by pressingOK.
•Set the time by pressingMENUuntilSET HOURSorSET
MINUTESappears and using the arrow buttons to adjust the time.
•Set the strongest stations on the radio frequency by pressingMENU
untilAUTOSETappears.AUTOSETdoes not override your original
presets.
•RBDSdisplays text transmitted by certain radio stations and
searches for music categories. To search for music categories, turn on
RBDS (by using theSEEKbuttons whenRBDS ON/OFFappears).
Press the up and down arrow buttons to scroll through categories,
then use theSEEKbuttons to begin the search.
•SPEEDVOL(speed compensated volume) allows you to adjust radio
volume to compensate for noise levels when vehicle speed increases.
•Track/Folderis only available on MP3 files when in CD mode. In
track mode, pressing theSEEKarrows allows you to scroll through
all the tracks on the disc. In folder mode, pressing theSEEKarrows
allows you to scroll through all the tracks within the selected folder.
Press theFOLDERbuttons to access other folders.
•COMPRESS(Compression) is only available in CD and MP3 modes.
Switching compression on brings the soft and loud passages together
for a more consistent listening level. Use theSEEKbuttons and up
and down arrow buttons to switch it on and off.
•Family entertainment options are also available, if your vehicle is
equipped with this feature.
E.Up and down arrow buttons:Press these buttons to make
selections inMENUmode.
Audio System335
2014 Navigator(nav)
Owners Guide gf, 1st Printing, June 2013
USA(fus)
Page 339 of 506
D.Wired headphone jack
E.Left arrow button
•In radio mode, press and release this button to scroll through
memory presets. Press and hold to go to the previous station
•In CD and SYNC modes, press and release this button to advance to
the previous track. Press and hold to rewind within that track.
F.Auxiliary audio input jacks:Plug in and play auxiliary audio
sources.
G.VOLUMEPress the up and down arrow buttons to increase or
decrease the headphone volume level. From the rear seat controls, the
volume cannot be higher than the current audio setting unless the
speakers are off.
H.Wired headphone jack
I.-Press the button to access the previous CD.
J.+Press to access the next CD.
Switching the Rear Audio Controls On
After you switch the ignition on, FULL rear controls are on and the
system is in Single Play mode.
Parental Control
The multimedia system allows for three varying levels of parental control.
By simultaneously pressing the 3 and 5 memory preset buttons, the rear
passengers may be allowed to access FULL or LOCAL control or be
LOCKED out of rear seat controls altogether.
1. Press the 3 and 5 memory preset buttons at the same time. LOCAL
illuminates in both front and rear audio displays, indicating that only
LOCAL rear control is available.Note:While in Single Play mode,
LOCAL is the same as LOCKED. In Dual Play mode, LOCAL allows
the driver to control the media selected at the radio, or over media
played through the rear auxiliary input jacks.
2. Pressing the 3 and 5 buttons a second time locks the rear control.
The rear passengers are restricted from control over media of any
kind (the rear controls are disabled).Note:If in Dual Play mode, the
headphone icon normally illuminated in the audio display when in
Dual Play turns off in the audio display.
3. Pressing the 3 and 5 buttons a third time restores full control to the
rear seat controls. Switching the ignition off and then on again has
the same effect.
338Audio System
2014 Navigator(nav)
Owners Guide gf, 1st Printing, June 2013
USA(fus)
Page 340 of 506
Switching Dual Play Mode On
You can switch Dual Play mode on by simultaneously pressing the 2 and
4 memory preset buttons on the audio or by doing the following:
1. Press the headphone/speaker control. The headphone icon
illuminates in both front and rear audio displays indicating the rear
seat speakers are off and the headphones are on.
2. Press MEDIA to change audio sources (as heard in the headphones
only).
3. Use the other controls to adjust the playing media.
Switching Off Dual Play Mode
Use any one of the following to switch off Dual Play mode:
•Press the 2 and 4 memory preset buttons simultaneously again.
•Press the 3 and 5 memory preset buttons simultaneously to LOCK
the rear seat controls.
•Press the headphone/speaker button again.
Using Dual Play Mode with Headphones
WARNING:Do not leave children unattended in your vehicle
and do not let children operate the system while unsupervised.
If wired headphones or auxiliary systems are used, children may
become entangled in the cords and seriously injure themselves.
Plug a 1/8–inch (3.5 millimeter) headphone (not included) into the
headphone jack. Press the speaker button, or the 2 and 4 memory preset
buttons simultaneously on the radio to switch on the headphones. DUAL
PLAY illuminates in the audio display, there is no sound from the rear
speakers and the fade control is inactive, signaling that Dual Play is on.
The front speakers remain on for the front passengers. Press the speaker
button, or the 2 and 4 memory preset buttons simultaneously on the
radio again to switch off the headphones and Dual Play mode. SINGLE
PLAY illuminates in the audio display; fade control is active and there is
sound from rear speakers, signaling that Single Play is on.
You need to switch the rear seat controls on to use any rear controls
(whether in Single Play or Dual Play mode). To use Dual Play, switch
on the rear seat controls; the headphone icon illuminates in the audio
display. SeeSwitching the rear audio controls onpreviously.
Audio System339
2014 Navigator(nav)
Owners Guide gf, 1st Printing, June 2013
USA(fus)
Page 346 of 506
The system consists of the following features:
•Seven-inch color TFT-LCD panel (480x234) with 16:9 aspect
•Built-in, top-loading slot load DVD player
•Infrared transmitters for infrared wireless headphones
•Audio/Video source input (three RCA jacks)
•USB 2.0 (optional)
•One-eighth inch stereo headphone jack
•Forward remote sensor on the front panel
•Full-function remote control
•Five control buttons on the front panel: POWER, SOURCE, STOP,
PLAY and EJECT
•On-screen display control
•12V DC power input
•FM transmitter (may be optional)
Note:Do not touch the inner pins of the jacks on the front panel.
Electrostatic discharge may cause permanent damage to the device.
Your system plays the following types of discs:
•DVD-Video:DVD contains video.
•DVD +/- R:DVD contains video.
•CD-DA:CD contains musical or sound content only.
•CD-Video:CD contains movie only.
•CD-R/RW:CD contains audio files (such as a CD-R with MP3 files),
MPEG or JPEG files.
Your system does not play the following types of discs:
•Optical disc CD-1
•CD-ROM
•DVD-ROM mini disc-CDG (audio only, not graphics)
Important Notice
It is unlawful in most jurisdictions for a person to drive a motor vehicle
which is equipped with a television viewer or screen that is located in
the motor vehicle at any point forward of the back of the driver’s seat, or
that is visible, directly or indirectly, to the driver while operating your
vehicle. In the interest of safety, do not install the unit where it is visible,
directly or indirectly, by the operator of the motor vehicle. If your vehicle
is equipped with a wireless rear seat audio system or any other wireless
infrared device, power the system off in order to operate the DVD
headrest system. If the system is on, the two systems may interfere with
each other canceling out or creating undesirable audio through the
wireless headphones.
Audio System345
2014 Navigator(nav)
Owners Guide gf, 1st Printing, June 2013
USA(fus)
Page 352 of 506
8.CH + and CH -:
•In DVD mode, press these buttons to move the select bar to items
among the menu or file list.
•In TV mode, press these buttons to go to the next channel or
previous channel.
•In on-screen display mode, press these buttons to change the setting
of a selected item.
9.VOL + and VOL -:
•In DVD mode, press these buttons to move the select bar to items to
one of the items in the menu or file list.
•When not in on-screen display mode, press these buttons to change
the volume of the playing media.
10.ENTER:Press this button to select from the on-screen display, or begin
disc playback.
11.TITLE:Press this button to go to a disc’s title menu.
12.SUBTITLE:If a disc has subtitle options, press this button to display
the subtitle menu. Keep pressing the button until you reach your
desired option.
13.Numbers:Decimal numbers: 0 to 9.
14.CLR:Press this button to clear any numeric input from the number
keypad.
15.P L AY:Press this button to play a disc in the DVD player.
16.STOP:Press this button to stop the playing media.
•Pressing STOP once, then PLAY, resumes disc playback from where
it left off.
•Pressing STOP twice, then PLAY, resumes disc playback from the
beginning.
17.PAUSE:Press this button to pause the disc.
18.FR (Fast Rewind):Press this button to search the disc backward
continuously. There are five speed options to choose: 2X, 4X, 8X, 16X,
and 32X.
19.FF (Fast Forward):Press this button to search the disc forward
continuously. There are five speed options to choose: 2X, 4X, 8X, 16X,
and 32X.
20.SETUP:Press this button to navigate the Setup Menu. SeeHow to use
the DVD on-screen display (OSD) menufor more information.
21.EJECT:Press this button to eject or load a disc.
22.TV-Monitor B
*:Press this button to control TV mode of Monitor B.
23.DVD-Monitor B:Press this button to control DVD mode of Monitor B.
24.SOUND AROUND SELECT
*:Press this button to select an FM
transmitter channel.
Audio System351
2014 Navigator(nav)
Owners Guide gf, 1st Printing, June 2013
USA(fus)