LINCOLN NAVIGATOR 2019 Owner's Manual
Manufacturer: LINCOLN, Model Year: 2019, Model line: NAVIGATOR, Model: LINCOLN NAVIGATOR 2019Pages: 645, PDF Size: 5.02 MB
Page 21 of 645
GENERAL INFORMATION
See the following sections for directions onhow to properly use safety restraints forchildren.
WARNING: Always make sure yourchild is secured properly in a device thatis appropriate for their height, age andweight. Child safety restraints must bebought separately from your vehicle.Failure to follow these instructions andguidelines may result in an increased riskof serious injury or death to your child.
WARNING: All children are shapeddifferently. The National Highway TrafficSafety Administration and other safetyorganizations, base their recommendationsfor child restraints on probable child height,age and weight thresholds, or on theminimum requirements of the law. Werecommend that you check with a NHTSACertified Child Passenger SafetyTechnician (CPST) to make sure that youproperly install the child restraint in yourvehicle and that you consult yourpediatrician to make sure you have a childrestraint appropriate for your child. Tolocate a child restraint fitting station andCPST, contact NHTSA toll free at
1-888-327-4236 or go towww.nhtsa.dot.gov. In Canada, contactTransport Canada toll free at1-800-333-0371 or go to www.tc.gc.ca tofind a Child Car Seat Clinic in your area.Failure to properly restrain children in childrestraints made especially for their height,age and weight, may result in an increasedrisk of serious injury or death to your child.
WARNING: On hot days, thetemperature inside the vehicle can risevery quickly. Exposure of people or animalsto these high temperatures for even a shorttime can cause death or serious heatrelated injuries, including brain damage.Small children are particularly at risk.
18
Navigator (TB9) Canada/United States of America, enUSA, Edition date: 201808, First-Printing
Child Safety
Page 22 of 645
Recommendations for Safety Restraints for Children
Recommended restraint typeChild size, height, weight, or ageChild
Use a child safety seat (sometimes called aninfant carrier, convertible seat, or toddlerseat).
Children weighing 40 lb (18 kg) or less (generally age four oryounger).Infants or toddlers
Use a belt-positioning booster seat.
Children who have outgrown or no longer properly fit in a childsafety seat (generally children who are less than 4 ft. 9 in. (1.45 m)tall, are greater than age four and less than age 12, and between40 lb (18 kg) and 80 lb (36 kg) and upward to 100 lb (45 kg) ifrecommended by your child restraint manufacturer).
Small children
Use a vehicle seatbelt having the lap beltsnug and low across the hips, shoulder beltcentered across the shoulder and chest, andseatback upright.
Children who have outgrown or no longer properly fit in a belt-positioning booster seat (generally children who are at least 4 ft.9 in. (1.45 m) tall or greater than 80 lb (36 kg) or 100 lb (45 kg) ifrecommended by child restraint manufacturer).
Larger children
19
Navigator (TB9) Canada/United States of America, enUSA, Edition date: 201808, First-Printing
Child Safety
Page 23 of 645
•You are required by law to properly usesafety seats for infants and toddlers inthe United States and Canada.
•Many states and provinces require thatsmall children use approved boosterseats until they reach age eight, a heightof 4 feet 9 inches (1.45 meters) tall, or80 lb (36 kg). Check your local and stateor provincial laws for specificrequirements about the safety of childrenin your vehicle.
•When possible, always properly restrainchildren 12 years of age and under in arear seating position of your vehicle.Accident statistics suggest that childrenare safer when properly restrained in therear seating positions than in a frontseating position.
INSTALLING CHILD RESTRAINTS
Child Seats
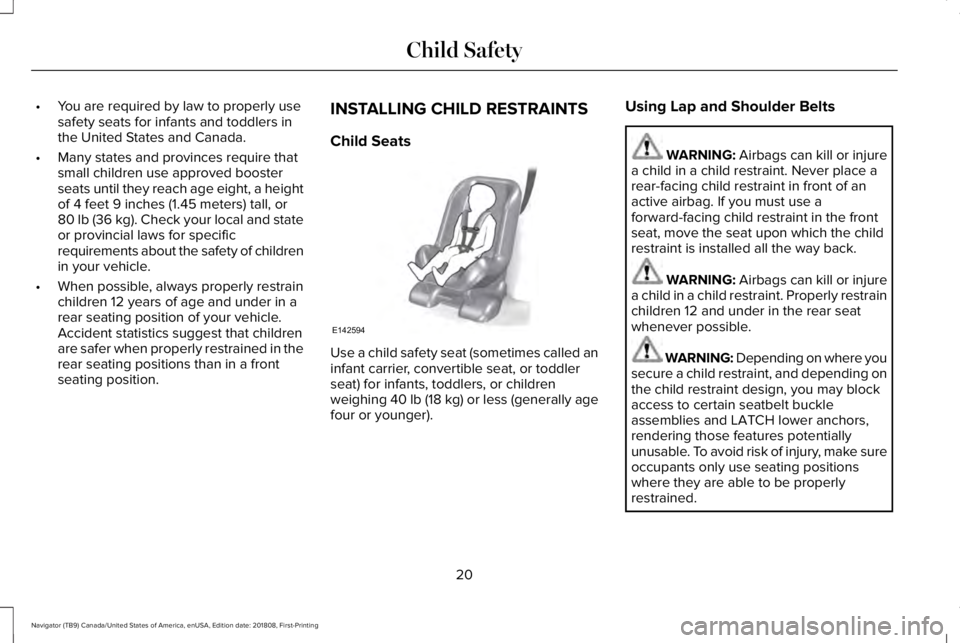
Use a child safety seat (sometimes called aninfant carrier, convertible seat, or toddlerseat) for infants, toddlers, or childrenweighing 40 lb (18 kg) or less (generally agefour or younger).
Using Lap and Shoulder Belts
WARNING: Airbags can kill or injurea child in a child restraint. Never place arear-facing child restraint in front of anactive airbag. If you must use aforward-facing child restraint in the frontseat, move the seat upon which the childrestraint is installed all the way back.
WARNING: Airbags can kill or injurea child in a child restraint. Properly restrainchildren 12 and under in the rear seatwhenever possible.
WARNING: Depending on where yousecure a child restraint, and depending onthe child restraint design, you may blockaccess to certain seatbelt buckleassemblies and LATCH lower anchors,rendering those features potentiallyunusable. To avoid risk of injury, make sureoccupants only use seating positionswhere they are able to be properlyrestrained.
20
Navigator (TB9) Canada/United States of America, enUSA, Edition date: 201808, First-Printing
Child SafetyE142594
Page 24 of 645
When installing a child safety seat withcombination lap and shoulder belts:
•Use the correct seatbelt buckle for thatseating position.
•Insert the belt tongue into the properbuckle until you hear a snap and feel itlatch. Make sure the tongue is securelyfastened in the buckle.
•Keep the buckle release button pointingup and away from the safety seat, withthe tongue between the child restraintand the release button, to preventaccidental unbuckling.
•Place the vehicle seat upon which thechild restraint will be installed in theupright position.
•For second-row seating positions, adjustthe recliner slightly to improve childrestraint fit. If needed, remove the headrestraints.
•For third-row seating positions, stow thehead restraints to improve child restraintfit. See Head Restraints (page 159).
•Put the seatbelt in the automatic lockingmode. See Step 5. This vehicle does notrequire the use of a locking clip.
Perform the following steps when installingthe child restraint with combination lap andshoulder belts:
Note:Although the child restraint illustratedis a forward facing child restraint, the stepsare the same for installing a rear facing childrestraint.
Note:The lock-off device on some childrestraints may not accommodate theshoulder portion of the inflatable seatbelt.Follow all instructions provided by themanufacturer of the child restraint regardingthe necessary and proper use of the lock-offdevice. In some instances these deviceshave been provided only for use in vehicleswith seatbelt systems that would otherwiserequire a locking clip.
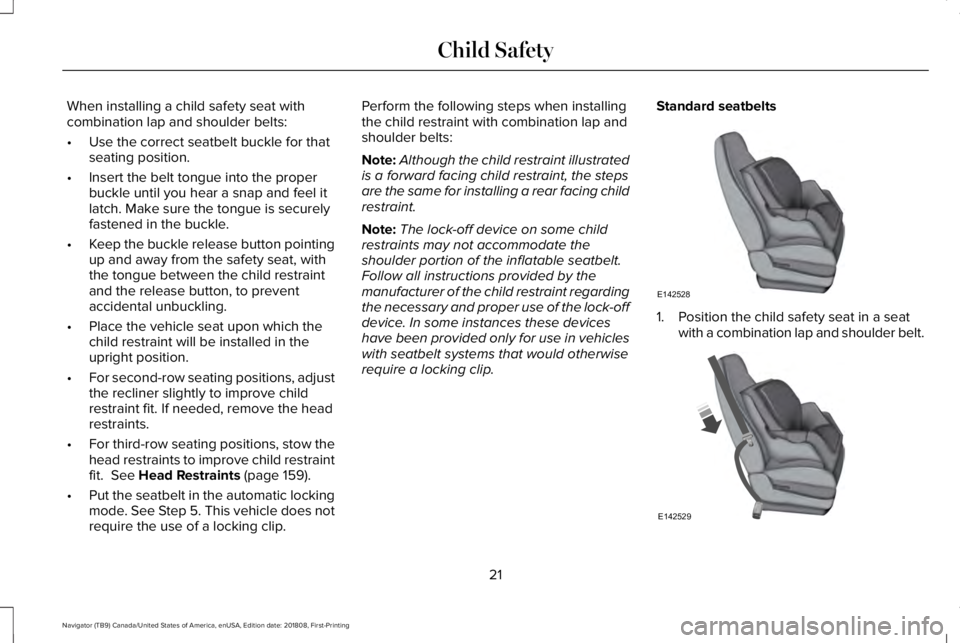
Standard seatbelts
1. Position the child safety seat in a seatwith a combination lap and shoulder belt.
21
Navigator (TB9) Canada/United States of America, enUSA, Edition date: 201808, First-Printing
Child SafetyE142528 E142529
Page 25 of 645
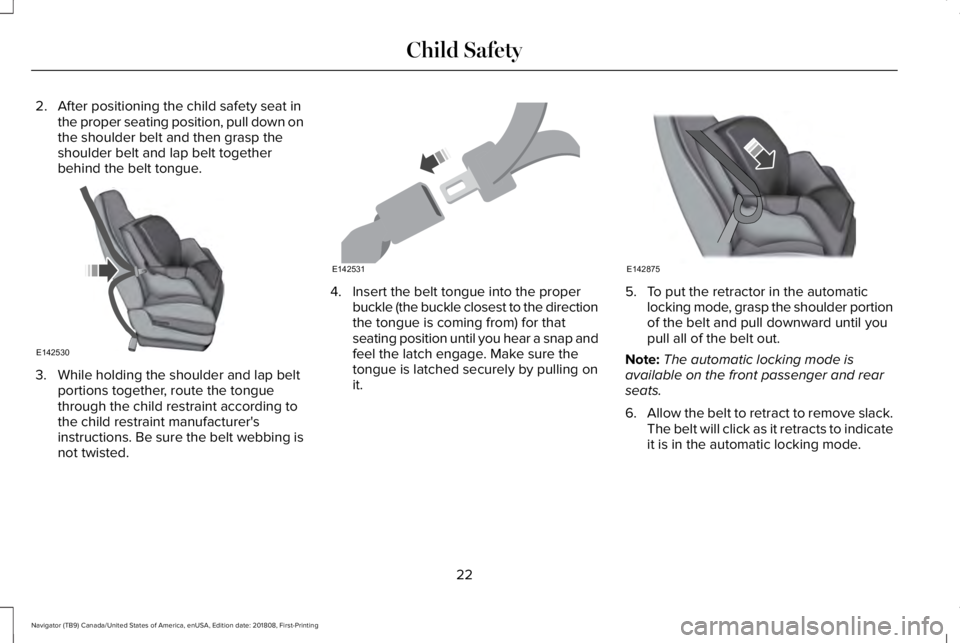
2. After positioning the child safety seat inthe proper seating position, pull down onthe shoulder belt and then grasp theshoulder belt and lap belt togetherbehind the belt tongue.
3. While holding the shoulder and lap beltportions together, route the tonguethrough the child restraint according tothe child restraint manufacturer'sinstructions. Be sure the belt webbing isnot twisted.
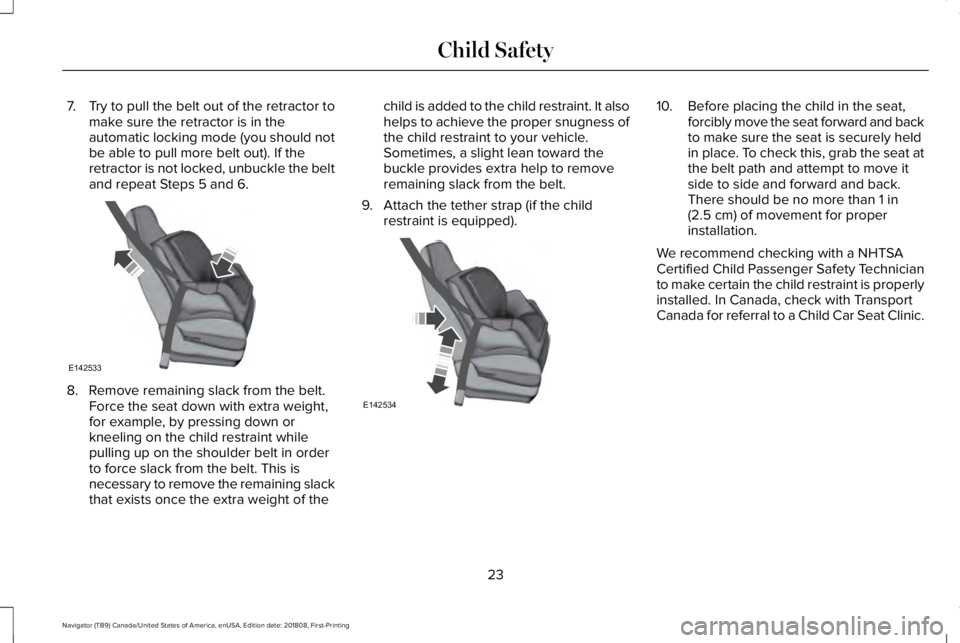
4. Insert the belt tongue into the properbuckle (the buckle closest to the directionthe tongue is coming from) for thatseating position until you hear a snap andfeel the latch engage. Make sure thetongue is latched securely by pulling onit.
5. To put the retractor in the automaticlocking mode, grasp the shoulder portionof the belt and pull downward until youpull all of the belt out.
Note:The automatic locking mode isavailable on the front passenger and rearseats.
6.Allow the belt to retract to remove slack.The belt will click as it retracts to indicateit is in the automatic locking mode.
22
Navigator (TB9) Canada/United States of America, enUSA, Edition date: 201808, First-Printing
Child SafetyE142530 E142531 E142875
Page 26 of 645
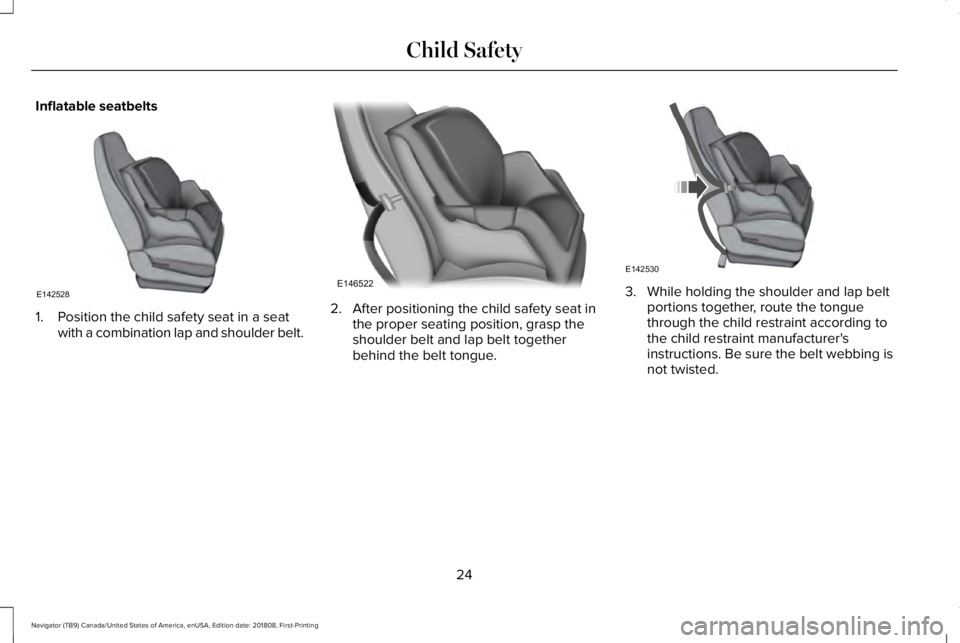
7.Try to pull the belt out of the retractor tomake sure the retractor is in theautomatic locking mode (you should notbe able to pull more belt out). If theretractor is not locked, unbuckle the beltand repeat Steps 5 and 6.
8. Remove remaining slack from the belt.Force the seat down with extra weight,for example, by pressing down orkneeling on the child restraint whilepulling up on the shoulder belt in orderto force slack from the belt. This isnecessary to remove the remaining slackthat exists once the extra weight of the
child is added to the child restraint. It alsohelps to achieve the proper snugness ofthe child restraint to your vehicle.Sometimes, a slight lean toward thebuckle provides extra help to removeremaining slack from the belt.
9. Attach the tether strap (if the childrestraint is equipped).
10. Before placing the child in the seat,forcibly move the seat forward and backto make sure the seat is securely heldin place. To check this, grab the seat atthe belt path and attempt to move itside to side and forward and back.There should be no more than 1 in(2.5 cm) of movement for properinstallation.
We recommend checking with a NHTSACertified Child Passenger Safety Technicianto make certain the child restraint is properlyinstalled. In Canada, check with TransportCanada for referral to a Child Car Seat Clinic.
23
Navigator (TB9) Canada/United States of America, enUSA, Edition date: 201808, First-Printing
Child SafetyE142533 E142534
Page 27 of 645
Inflatable seatbelts
1. Position the child safety seat in a seatwith a combination lap and shoulder belt.
2. After positioning the child safety seat inthe proper seating position, grasp theshoulder belt and lap belt togetherbehind the belt tongue.
3. While holding the shoulder and lap beltportions together, route the tonguethrough the child restraint according tothe child restraint manufacturer'sinstructions. Be sure the belt webbing isnot twisted.
24
Navigator (TB9) Canada/United States of America, enUSA, Edition date: 201808, First-Printing
Child SafetyE142528 E146522 E142530
Page 28 of 645
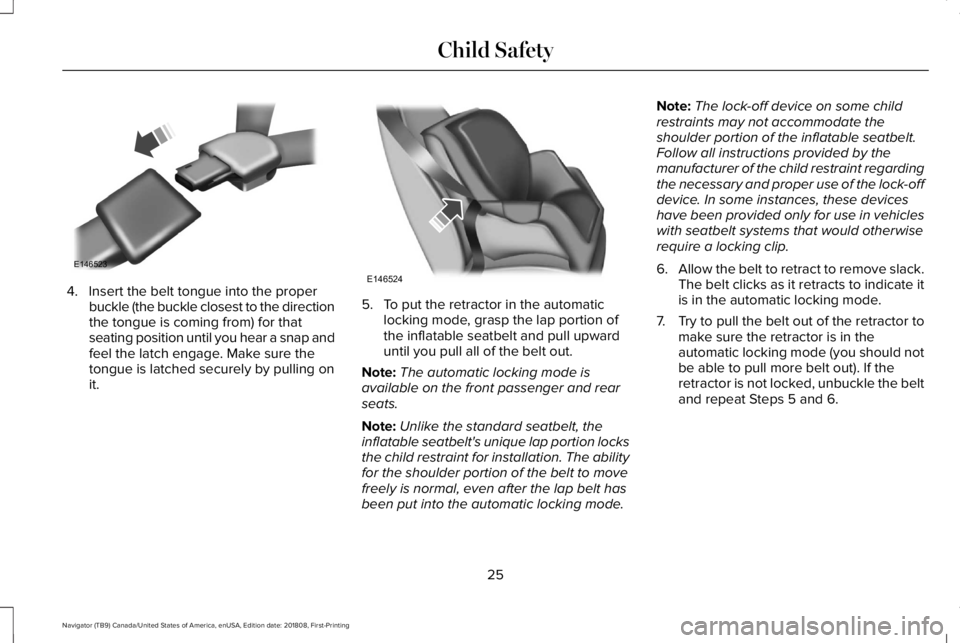
4. Insert the belt tongue into the properbuckle (the buckle closest to the directionthe tongue is coming from) for thatseating position until you hear a snap andfeel the latch engage. Make sure thetongue is latched securely by pulling onit.
5. To put the retractor in the automaticlocking mode, grasp the lap portion ofthe inflatable seatbelt and pull upwarduntil you pull all of the belt out.
Note:The automatic locking mode isavailable on the front passenger and rearseats.
Note:Unlike the standard seatbelt, theinflatable seatbelt's unique lap portion locksthe child restraint for installation. The abilityfor the shoulder portion of the belt to movefreely is normal, even after the lap belt hasbeen put into the automatic locking mode.
Note:The lock-off device on some childrestraints may not accommodate theshoulder portion of the inflatable seatbelt.Follow all instructions provided by themanufacturer of the child restraint regardingthe necessary and proper use of the lock-offdevice. In some instances, these deviceshave been provided only for use in vehicleswith seatbelt systems that would otherwiserequire a locking clip.
6.Allow the belt to retract to remove slack.The belt clicks as it retracts to indicate itis in the automatic locking mode.
7.Try to pull the belt out of the retractor tomake sure the retractor is in theautomatic locking mode (you should notbe able to pull more belt out). If theretractor is not locked, unbuckle the beltand repeat Steps 5 and 6.
25
Navigator (TB9) Canada/United States of America, enUSA, Edition date: 201808, First-Printing
Child SafetyE146523 E146524
Page 29 of 645
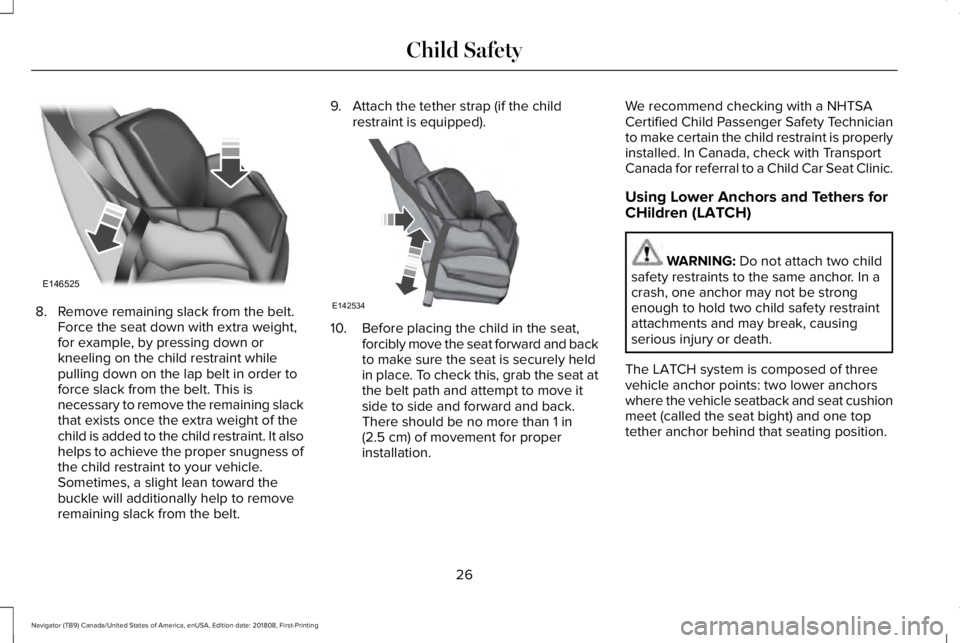
8. Remove remaining slack from the belt.Force the seat down with extra weight,for example, by pressing down orkneeling on the child restraint whilepulling down on the lap belt in order toforce slack from the belt. This isnecessary to remove the remaining slackthat exists once the extra weight of thechild is added to the child restraint. It alsohelps to achieve the proper snugness ofthe child restraint to your vehicle.Sometimes, a slight lean toward thebuckle will additionally help to removeremaining slack from the belt.
9. Attach the tether strap (if the childrestraint is equipped).
10. Before placing the child in the seat,forcibly move the seat forward and backto make sure the seat is securely heldin place. To check this, grab the seat atthe belt path and attempt to move itside to side and forward and back.There should be no more than 1 in(2.5 cm) of movement for properinstallation.
We recommend checking with a NHTSACertified Child Passenger Safety Technicianto make certain the child restraint is properlyinstalled. In Canada, check with TransportCanada for referral to a Child Car Seat Clinic.
Using Lower Anchors and Tethers for
CHildren (LATCH)
WARNING: Do not attach two childsafety restraints to the same anchor. In acrash, one anchor may not be strongenough to hold two child safety restraintattachments and may break, causingserious injury or death.
The LATCH system is composed of threevehicle anchor points: two lower anchorswhere the vehicle seatback and seat cushionmeet (called the seat bight) and one toptether anchor behind that seating position.
26
Navigator (TB9) Canada/United States of America, enUSA, Edition date: 201808, First-Printing
Child SafetyE146525 E142534
Page 30 of 645
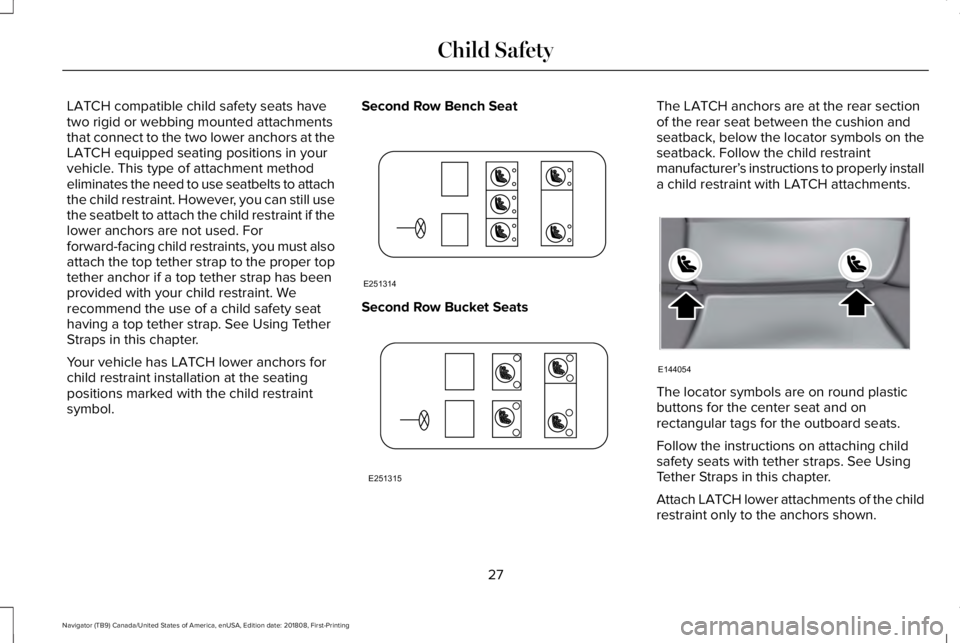
LATCH compatible child safety seats havetwo rigid or webbing mounted attachmentsthat connect to the two lower anchors at theLATCH equipped seating positions in yourvehicle. This type of attachment methodeliminates the need to use seatbelts to attachthe child restraint. However, you can still usethe seatbelt to attach the child restraint if thelower anchors are not used. Forforward-facing child restraints, you must alsoattach the top tether strap to the proper toptether anchor if a top tether strap has beenprovided with your child restraint. Werecommend the use of a child safety seathaving a top tether strap. See Using TetherStraps in this chapter.
Your vehicle has LATCH lower anchors forchild restraint installation at the seatingpositions marked with the child restraintsymbol.
Second Row Bench Seat
Second Row Bucket Seats
The LATCH anchors are at the rear sectionof the rear seat between the cushion andseatback, below the locator symbols on theseatback. Follow the child restraintmanufacturer’s instructions to properly installa child restraint with LATCH attachments.
The locator symbols are on round plasticbuttons for the center seat and onrectangular tags for the outboard seats.
Follow the instructions on attaching childsafety seats with tether straps. See UsingTether Straps in this chapter.
Attach LATCH lower attachments of the childrestraint only to the anchors shown.
27
Navigator (TB9) Canada/United States of America, enUSA, Edition date: 201808, First-Printing
Child SafetyE251314 E251315 E144054