display LINCOLN NAVIGATOR 2019 Manual Online
[x] Cancel search | Manufacturer: LINCOLN, Model Year: 2019, Model line: NAVIGATOR, Model: LINCOLN NAVIGATOR 2019Pages: 645, PDF Size: 5.02 MB
Page 221 of 645
Shifting To or From 4L - 4X4 LOW
Note:4L mode is not intended for use on drypavement.
1. Bring the vehicle to a rolling speed of3 mph (5 km/h) or less.
2. Place the gearshift in neutral (N).
3. Rotate the drive mode knob to desiredmode.
The information display shows a messageindicating a 4X4 shift is in progress. Theinformation display shows the system modeselected. If any of the previous shiftconditions are not present, the shift does notoccur and the information display shows theinformation guiding the driver through theproper shifting procedures. If the previousconditions are not satisfied in 30 seconds,the system reverts back to the previous 4WDmode or drive mode.
If Shift Delayed Pull Forward displays in theinformation display, transfer case gear toothblockage is present. To alleviate thiscondition, place the transmission in a forwardgear, move the vehicle forwardapproximately 5 ft (2 m), and shift thetransmission back to neutral (N) to allow thetransfer case to complete the range shift.
Operating 4WD Vehicles With Spareor Mismatched Tires
On four-wheel drive vehicles, the size of thespare tire can affect the 4X4 system. If thereis a significant difference between the sizeof the spare tire and the remaining tires, youmay have limited four-wheel drivefunctionality.
When driving with the full-size dissimilarspare wheel and tire assembly, it isrecommended that you do not:
•Exceed 50 mph (80 km/h) with a 4WDmode turned on.
•Turn on a 4WD mode unless the vehicleis stationary.
•Use a 4WD mode on dry pavement.
Use of a dissimilar spare wheel and tireassembly may lead to impairment of thefollowing:
•Comfort and noise.
•Winter weather driving capability.
•Wet driving capability.
•Four-wheel drive capability.
How Your Vehicle Differs From OtherVehicles
WARNING: Vehicles with a highercenter of gravity (utility and four-wheeldrive vehicles) handle differently thanvehicles with a lower center of gravity(passenger cars). Avoid sharp turns,excessive speed and abrupt steering inthese vehicles. Failure to drive cautiouslyincreases the risk of losing control of yourvehicle, vehicle rollover, personal injuryand death.
218
Navigator (TB9) Canada/United States of America, enUSA, Edition date: 201808, First-Printing
Four-Wheel Drive (If Equipped)
Page 227 of 645
LIMITED SLIP DIFFERENTIAL (IF
EQUIPPED)
The Electronic Limited Slip Differential (eLSD)system directs torque, enabling the vehicleto drive over terrain and road conditions thata conventional axle cannot. The system isactive at all times and requires no input fromthe driver.
Note:If your vehicle is not at optimaloperating conditions or a system fault ispresent, a warning may be displayed in theinstrument cluster. Depending on thewarning, your vehicle may need to beserviced. You can find more informationregarding the system information messagesin the Information Displays chapter. SeeInformation Messages (page 125).
Spare Tire
If your vehicle has an Electronic Limited SlipDifferential, do not use a spare tire of adifferent size than the tire provided. If a sparetire is installed, a message may appear,indicating the system has disabledautomatically or reduced function to prevent
system overheat and damage. It isrecommended to reinstall the repaired orreplaced road tire as soon as possible. Whenthe road tire is replaced, the system willresume normal operation on the next keycycle.
Trailer Towing
The Electronic Limited Slip Differentialenhances vehicle stability during trailer towoperation. During high demand traileringevents, such as steep slopes, high speedsor with a spare tire, the system may providea warning in the instrument cluster andreduce function or enter a temporarilydisabled state. To resume normal function,stop the vehicle in a safe location and allowthe unit to adequately cool. Once the systemhas reached normal operating temperatures,system function will be restored and theElectronic Limited Slip Differential Restoredmessage will be displayed.
224
Navigator (TB9) Canada/United States of America, enUSA, Edition date: 201808, First-Printing
Rear Axle
Page 231 of 645
HILL START ASSIST
WARNING: The system does notreplace the parking brake. When you leaveyour vehicle, always apply the parkingbrake and shift the transmission into park(P) for automatic transmission or first gearfor manual transmission.
WARNING: You must remain in yourvehicle when the system turns on. At alltimes, you are responsible for controllingyour vehicle, supervising the system andintervening, if required. Failure to take caremay result in the loss of control of yourvehicle, serious personal injury or death.
Note:If the engine is revved excessively, orif a malfunction is detected, the system willbe deactivated.
The system makes it easier to pull awaywhen your vehicle is on a slope without theneed to use the parking brake.
When the system is active, your vehicle willremain stationary on the slope for two tothree seconds after you release the brakepedal. This allows you time to move yourfoot from the brake to the accelerator pedal. The brakes release automatically when theengine has sufficient torque to prevent yourvehicle from rolling down the grade. This isan advantage when pulling away on a slope,for example from a car park ramp, trafficlights or when reversing uphill into a parkingspace.
The system will activate automatically on anyslope that will cause significant vehiclerollback. For vehicles with a manualtransmission, you can switch this feature offusing the information display. SeeInformation Displays (page 120). The systemwill remain on or off depending on how itwas last set.
Note:There is no warning lamp to indicatethe system is either on or off.
Note:If your vehicle is equipped with AutoHold, Hill Start Assist will not be availablewhile Auto Hold is active.
Using Hill Start Assist
1. Bring your vehicle to a completestandstill. Keep the brake pedal pressedand select an uphill gear (for example,drive (D) or first (1) when facing uphill orreverse (R) when facing downhill).
2. If the sensors detect that your vehicle ison a slope, the system will activateautomatically.
3. When you remove your foot from thebrake pedal, your vehicle will remain onthe slope without rolling away for abouttwo or three seconds. This hold time willautomatically be extended if you are inthe process of driving off.
4. Drive off in the normal manner. Thebrakes will release automatically.
Switching the System On and Off
You can switch this feature on or off if yourvehicle is equipped with a manualtransmission and an information display. SeeGeneral Information (page 120). The systemremembers the last setting when you startyour vehicle.
228
Navigator (TB9) Canada/United States of America, enUSA, Edition date: 201808, First-Printing
Brakes
Page 232 of 645
If your vehicle is not equipped with a manualtransmission and an information display, youcannot turn the system on or off. When youswitch the ignition on, the systemautomatically turns on.
AUTO HOLD
WARNING: The system does notreplace the parking brake. When you leaveyour vehicle, always apply the parkingbrake.
WARNING: You must remain in yourvehicle when the system turns on. At alltimes, you are responsible for controllingyour vehicle, supervising the system andintervening, if required. Failure to take caremay result in the loss of control of yourvehicle, serious personal injury or death.
WARNING: The system will turn offif a malfunction is apparent. Failure to takecare may result in the loss of control ofyour vehicle, serious personal injury ordeath.
The system uses your vehicle's brakes tohold your vehicle at a standstill after you stopyour vehicle and release the brake pedal.For example, Auto Hold can assist you whilestopping at traffic lights or while in trafficjams by holding the brake pressure for youonce you bring your vehicle to a stop.
Make sure you switch the system off beforetowing with your vehicle.
Note:In case of a malfunction in the systemwhile Auto Hold actively holds the vehicle(for example, low power supply), a messageappears in the information display askingyou to press the brake pedal. If you see thismessage, press the brake pedalimmediately.
Note:The system only activates if itrecognizes it is applying enough brakepressure. On a steep hill or slope, make sureyou press the brake pedal sufficiently toactivate the system.
Note:In some cases, Auto Hold might handover to the parking brake. When the parkingbrake applies, the red brake lamp appears.This is normal. When you press theaccelerator pedal, the drive away releasefeature releases the parking brake.
Note:Auto Hold works on all road grades.
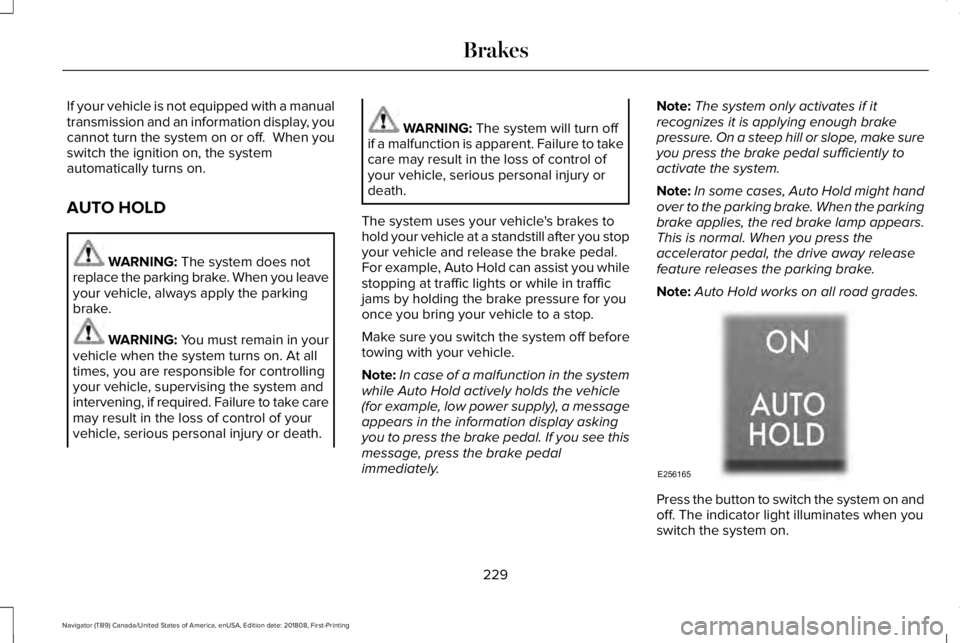
Press the button to switch the system on andoff. The indicator light illuminates when youswitch the system on.
229
Navigator (TB9) Canada/United States of America, enUSA, Edition date: 201808, First-Printing
BrakesE256165
Page 233 of 645
Note:You can only switch the system on ifyou close the door and fasten your seatbelt.
Note:The system turns off every time youpower down your vehicle.
Note:The system remembers the last settingwhen you start your vehicle.
Note:When in reverse (R), Auto Hold doesnot function.
When the system is off, your vehicle behavesthe same as a vehicle without Auto Hold.
There is an indicator lamp in the instrumentcluster that has two modes, active andunavailable:
The auto hold active indicatorilluminates in the informationdisplay when the system holdsyour vehicle stationary. When in active mode,press the brake pedal and the Auto Holdbutton to switch the system off.
The auto hold unavailable indicatorilluminates in the informationdisplay when the system is on butunavailable to hold your vehicle (for example,during Active Park Assist, Stay in NeutralMode, or when you do not fasten yourseatbelt or close the door).
Note:Make sure you switch off Auto Holdor use the Stay in Neutral mode before youenter a car wash. See AutomaticTransmission (page 210).
Using Auto Hold
1. Use the brakes to bring your vehicle toa complete stop. The auto hold activeindicator illuminates in the informationdisplay.
2. Release the brake pedal. The systemholds your vehicle at a standstill. Theauto hold active indicator remainsilluminated in the information display.
3. When you press the accelerator pedal,the system releases the brakes and youwill be able to drive off. Once you driveoff, the auto hold active indicator nolonger illuminates in the informationdisplay.
Note:The auto-start-stop system (ifequipped) may stop the engine when youpress the brake pedal. If this occurs, itrestarts once you press the acceleratorpedal. Auto Hold still holds your vehicle ata standstill with the engine off.
230
Navigator (TB9) Canada/United States of America, enUSA, Edition date: 201808, First-Printing
BrakesE197933 E197934
Page 234 of 645
PRINCIPLE OF OPERATION
The traction control system helps avoid drivewheel spin and loss of traction.
If your vehicle begins to slide, the systemapplies the brakes to individual wheels and,when needed, reduces engine power at thesame time. If the wheels spin whenaccelerating on slippery or loose surfaces,the system reduces engine power in orderto increase traction.
USING TRACTION CONTROL
WARNING: The stability and tractioncontrol light illuminates steadily if thesystem detects a failure. Make sure youdid not manually disable the tractioncontrol system using the informationdisplay controls or the switch. If the stabilitycontrol and traction control light is still
illuminating steadily, have the systemserviced by an authorized dealerimmediately. Operating your vehicle withthe traction control disabled could lead toan increased risk of loss of vehicle control,vehicle rollover, personal injury and death.
The system automatically turns on each timeyou switch the ignition on.
If your vehicle is stuck in mud or snow,switching traction control off may bebeneficial as this allows the wheels to spin.
Note:When you switch traction control off,stability control remains fully active.
Switching the System On and Off
You can switch traction control on and offthrough the information display controls. SeeGeneral Information (page 120).
When you switch the system off, a messageand an illuminated icon appear on theinstrument cluster.
Switch traction control on again to return thesystem to normal operations.
Note:Your vehicle may have MyKeyrestrictions regarding this feature. SeePrinciple of Operation (page 67).
System Indicator Lights and Messages
The stability and traction controllight temporarily illuminates onengine start-up and flashes:
•When a driving condition activates eitherof the systems.
•If a problem occurs in either of thesystems.
The stability and traction controloff light temporarily illuminates onengine start-up and stays on whenyou switch the traction control system off.
231
Navigator (TB9) Canada/United States of America, enUSA, Edition date: 201808, First-Printing
Traction ControlE138639 E130458
Page 238 of 645
PRINCIPLE OF OPERATION
WARNING: Hill descent controlcannot control descent in all surfaceconditions and circumstances, such as iceor extremely steep grades. Hill descentcontrol is a driver assist system and cannotsubstitute for good judgment by the driver.Failure to do so may result in loss ofvehicle control, crash or serious injury.
WARNING: Hill descent control doesnot provide hill hold at zero miles per hour(0 kilometers per hour). When stopped,you must apply the parking brake or placethe vehicle in P (Park), or it may roll away.
Hill descent control allows you to set andmaintain vehicle speed while descendingsteep grades in various surface conditions.
Hill descent control can maintain vehiclespeeds on downhill grades between 2 mph(3 km/h) and 12 mph (20 km/h). Above 20mph (32 km/h), the system remains armed,but you cannot use the system to set ormaintain the descent speed.
Hill descent control requires a cooling downinterval after a period of sustained use. Theamount of time that the feature can remainactive before cooling varies with conditions.The system provides a warning in themessage center and a tone sounds whenthe system is about to disengage for cooling.At this time, manually apply the brakes asneeded to maintain descent speed.
USING HILL DESCENT CONTROL
You can switch the hill descentcontrol on and off through theinformation display.
To increase descent speed, press theaccelerator pedal until you reach the desiredspeed. To decrease descent speed, pressthe brake pedal until you reach the desiredspeed.
Whether accelerating or decelerating, onceyou reach the desired descent speed,remove your feet from the pedals and hilldescent control maintains the chosen vehiclespeed.
Note:You may observe noise from the ABSpump motor during hill descent controloperation. This is a normal characteristic ofthe ABS and should be no reason forconcern.
Hill Descent Modes
•At speeds between 2 mph (3 km/h) and20 mph (32 km/h): Your vehicle maintainsthe speed you desire while in this mode.
•At speeds between 20 mph (32 km/h)and 40 mph (64 km/h): Your vehicle doesnot maintain the speed you desire andyou cannot set your descent speed.
•At speeds above 40 mph (64 km/h): Youneed to switch this feature back on touse.
Refer to the Information Display for additionalhill descent control messages. SeeInformation Messages (page 125).
235
Navigator (TB9) Canada/United States of America, enUSA, Edition date: 201808, First-Printing
Hill Descent Control (If Equipped)
Page 239 of 645
PRINCIPLE OF OPERATION
WARNING: To help avoid personalinjury, always use caution when in reverse(R) and when using the sensing system.
WARNING: The system may notdetect objects with surfaces that absorbreflection. Always drive with due care andattention. Failure to take care may resultin a crash.
WARNING: Traffic control systems,inclement weather, air brakes, externalmotors and fans may affect the correctoperation of the sensing system.This maycause reduced performance or false alerts.
WARNING: The system may notdetect small or moving objects, particularlythose close to the ground.
Note:Certain add-on devices installedaround the bumper or fascia may createfalse beeps. For example, large trailerhitches, bike or surfboard racks, license platebrackets, bumper covers or any other devicethat may block the normal detection zoneof the system.
Note:Keep the sensors, located on thebumper or fascia, free from snow, ice andlarge accumulations of dirt. If the sensorsare covered, the system’s accuracy can beaffected. Do not clean the sensors with sharpobjects.
Note:If your vehicle sustains damage to thebumper or fascia, leaving it misaligned orbent, the sensing zone may be alteredcausing inaccurate measurement ofobstacles or false alarms. See yourauthorized technician.
Note:When a trailer is connected to yourvehicle, the rear parking aid may detect thetrailer and therefore provide warnings.Disable the rear parking aid when a traileris connected to prevent these warnings.
Note:The sensing system cannot be turnedoff when a MyKey is present. See Principleof Operation (page 67).
We recommend that you take some time toget to know the system and its limitations byreading this section.
The sensing system warns the driver ofobstacles within a certain range of yourvehicle. The system automatically turns oneach time you switch the ignition on.
When receiving a detection warning, theradio volume reduces to a predeterminedlevel. After the warning goes away, the radiovolume returns to the previous level.
You can turn the system on or offby pressing the parking aid button.If your vehicle does not have aparking aid button, the system can beswitched off through the information displaymenu or from the pop-up message thatappears once you shift the transmission intoreverse (R). See General Information (page120).
236
Navigator (TB9) Canada/United States of America, enUSA, Edition date: 201808, First-Printing
Parking AidsE139213
Page 240 of 645
If a fault is present in the system, a warningmessage appears in the information displayand does not allow you to switch the systemon. See Information Messages (page 125).
If a sensor is blocked and cannot function,the system becomes disabled and a warningmessage appears in the information display.The system returns to a normal state oncethe blockage is cleared.
REAR PARKING AID
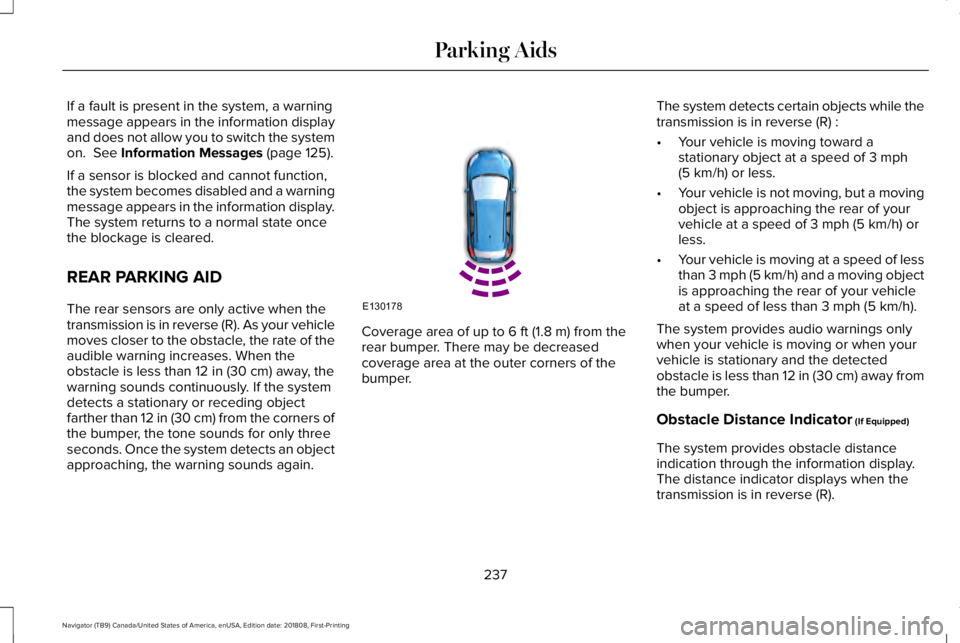
The rear sensors are only active when thetransmission is in reverse (R). As your vehiclemoves closer to the obstacle, the rate of theaudible warning increases. When theobstacle is less than 12 in (30 cm) away, thewarning sounds continuously. If the systemdetects a stationary or receding objectfarther than 12 in (30 cm) from the corners ofthe bumper, the tone sounds for only threeseconds. Once the system detects an objectapproaching, the warning sounds again.
Coverage area of up to 6 ft (1.8 m) from therear bumper. There may be decreasedcoverage area at the outer corners of thebumper.
The system detects certain objects while thetransmission is in reverse (R) :
•Your vehicle is moving toward astationary object at a speed of 3 mph(5 km/h) or less.
•Your vehicle is not moving, but a movingobject is approaching the rear of yourvehicle at a speed of 3 mph (5 km/h) orless.
•Your vehicle is moving at a speed of lessthan 3 mph (5 km/h) and a moving objectis approaching the rear of your vehicleat a speed of less than 3 mph (5 km/h).
The system provides audio warnings onlywhen your vehicle is moving or when yourvehicle is stationary and the detectedobstacle is less than 12 in (30 cm) away fromthe bumper.
Obstacle Distance Indicator (If Equipped)
The system provides obstacle distanceindication through the information display.The distance indicator displays when thetransmission is in reverse (R).
237
Navigator (TB9) Canada/United States of America, enUSA, Edition date: 201808, First-Printing
Parking AidsE130178
Page 241 of 645
The indicator displays:
•As the distance to the obstacledecreases the indicator blocks illuminateand move towards the vehicle icon.
•If there is no obstacle detected, thedistance indicator blocks are grayed out.
FRONT PARKING AID
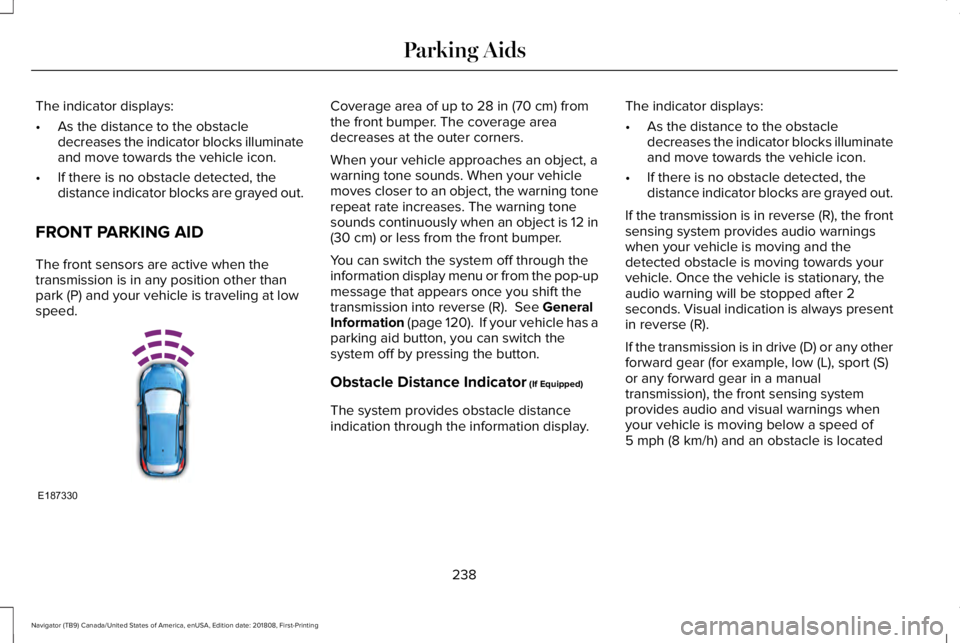
The front sensors are active when thetransmission is in any position other thanpark (P) and your vehicle is traveling at lowspeed.
Coverage area of up to 28 in (70 cm) fromthe front bumper. The coverage areadecreases at the outer corners.
When your vehicle approaches an object, awarning tone sounds. When your vehiclemoves closer to an object, the warning tonerepeat rate increases. The warning tonesounds continuously when an object is 12 in(30 cm) or less from the front bumper.
You can switch the system off through theinformation display menu or from the pop-upmessage that appears once you shift thetransmission into reverse (R). See GeneralInformation (page 120). If your vehicle has aparking aid button, you can switch thesystem off by pressing the button.
Obstacle Distance Indicator (If Equipped)
The system provides obstacle distanceindication through the information display.
The indicator displays:
•As the distance to the obstacledecreases the indicator blocks illuminateand move towards the vehicle icon.
•If there is no obstacle detected, thedistance indicator blocks are grayed out.
If the transmission is in reverse (R), the frontsensing system provides audio warningswhen your vehicle is moving and thedetected obstacle is moving towards yourvehicle. Once the vehicle is stationary, theaudio warning will be stopped after 2seconds. Visual indication is always presentin reverse (R).
If the transmission is in drive (D) or any otherforward gear (for example, low (L), sport (S)or any forward gear in a manualtransmission), the front sensing systemprovides audio and visual warnings whenyour vehicle is moving below a speed of5 mph (8 km/h) and an obstacle is located
238
Navigator (TB9) Canada/United States of America, enUSA, Edition date: 201808, First-Printing
Parking AidsE187330