MASERATI LEVANTE 2019 Owners Manual
Manufacturer: MASERATI, Model Year: 2019, Model line: LEVANTE, Model: MASERATI LEVANTE 2019Pages: 436, PDF Size: 15.24 MB
Page 321 of 436
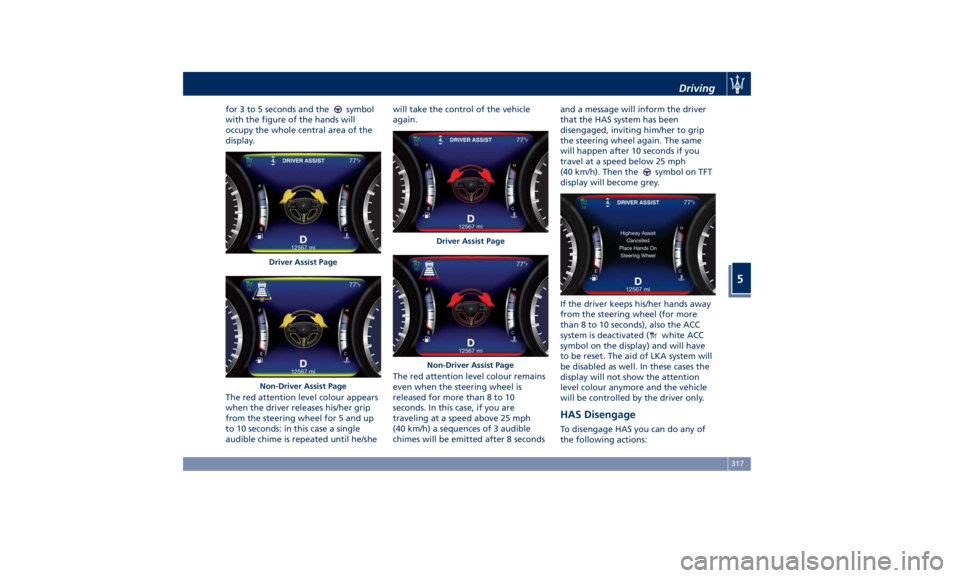
for 3 to 5 seconds and the symbol
with the figure of the hands will
occupy the whole central area of the
display.
The red attention level colour appears
when the driver releases his/her grip
from the steering wheel for 5 and up
to 10 seconds: in this case a single
audible chime is repeated until he/she will take the control of the vehicle
again.
The red attention level colour remains
even when the steering wheel is
released for more than 8 to 10
seconds. In this case, if you are
traveling at a speed above 25 mph
(40 km/h) a sequences of 3 audible
chimes will be emitted after 8 seconds and a message will inform the driver
that the HAS system has been
disengaged, inviting him/her to grip
the steering wheel again. The same
will happen after 10 seconds if you
travel at a speed below 25 mph
(40 km/h). Then the
symbol on TFT
display will become grey.
If the driver keeps his/her hands away
from the steering wheel (for more
than 8 to 10 seconds), also the ACC
system is deactivated (
white ACC
symbol on the display) and will have
to be reset. The aid of LKA system will
be disabled as well. In these cases the
display will not show the attention
level colour anymore and the vehicle
will be controlled by the driver only.
HAS Disengage To disengage HAS you can do any of
the following actions:Driver Assist Page
Non-Driver Assist Page Driver Assist Page
Non-Driver Assist Page Driving
5
317
Page 322 of 436
• Press the HAS enable button on
the steering wheel.
• Begin steering manually.
• Press brake pedal.
• Turn off ACC.
• Unbuckle the driver’s seat belt.
• Press ACC Gap button for two
seconds to enable CC system.
• Shift out of the (D) Drive gear.
• Enter an Autonomous Emergency
Braking (AEB) event (See chapter
"Forward Collision Warning - FCW"
in this section).
• Turn signal activated.
System Cancellation The HAS system will cancel (without
driver intervention) if either of the
following actions occur:
• Curve that is too tight.
• When leaving the grip of the hands
on the steering wheel.
• Vehicle exits the highway or limited
access freeway.
• Lane line markers aren’t detected by
the forward facing camera.
• Any ADAS system faults.
• ACC cancellation.
• Vehicle speed exceeds the maximum
limit. • Lateral accelerations exceeds the
limits.
NOTE:
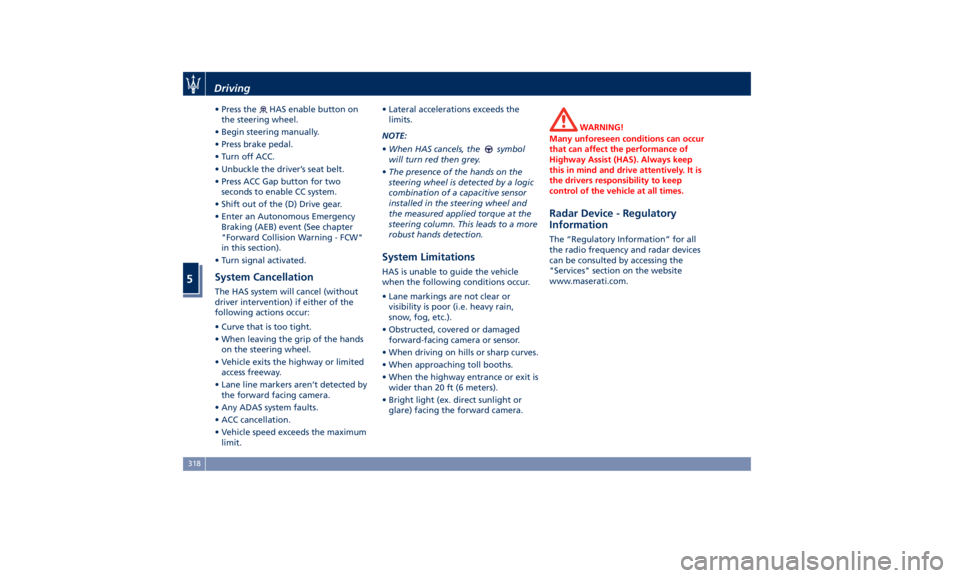
• When HAS cancels, the
symbol
will turn red then grey.
• The presence of the hands on the
steering wheel is detected by a logic
combination of a capacitive sensor
installed in the steering wheel and
the measured applied torque at the
steering column. This leads to a more
robust hands detection.
System Limitations HAS is unable to guide the vehicle
when the following conditions occur.
• Lane markings are not clear or
visibility is poor (i.e. heavy rain,
snow, fog, etc.).
• Obstructed, covered or damaged
forward-facing camera or sensor.
• When driving on hills or sharp curves.
• When approaching toll booths.
• When the highway entrance or exit is
wider than 20 ft (6 meters).
• Bright light (ex. direct sunlight or
glare) facing the forward camera. WARNING!
Many unforeseen conditions can occur
that can affect the performance of
Highway Assist (HAS). Always keep
this in mind and drive attentively. It is
the drivers responsibility to keep
control of the vehicle at all times.
Radar Device - Regulatory
Information The “Regulatory Information” for all
the radio frequency and radar devices
can be consulted by accessing the
"Services" section on the website
www.maserati.com.Driving
5
318
Page 323 of 436
Traffic Sign Assist – TSA
(optional) TSA detects traffic signs through the
use of a forward-facing digital camera
mounted on windshield, behind the
rear-view mirror. TSA assists the driver
by displaying on the instrument
cluster detected speed limits and
traffic signs with a restriction
indicated by an additional sign (e.g. in
snow conditions). TSA also uses the
data of the navigation system, in
order to provide information to the
driver in all cases in which the camera
is not able to detect the traffic signs
that are present on the road where
the car is travelling.
Some examples of these are: due to
low visibility, light reflection, damaged
traffic signs, traffic signs in wrong
position like rotated or fallen poles.
NOTE:
• Overtaking restriction signs are not
displayed by the TSA system.
• TSA provides a visual warning to the
driver when he/she unintentionally
reaches the maximum speed limit
allowed or when it exceeds the set
“Sensitivity” value. • The performance of TSA depends on
the update degree of navigation
system’s maps.
Customised Settings TSA is configurable by the customer
regarding the display mode on the
instrument cluster and the warning
sensitivity.
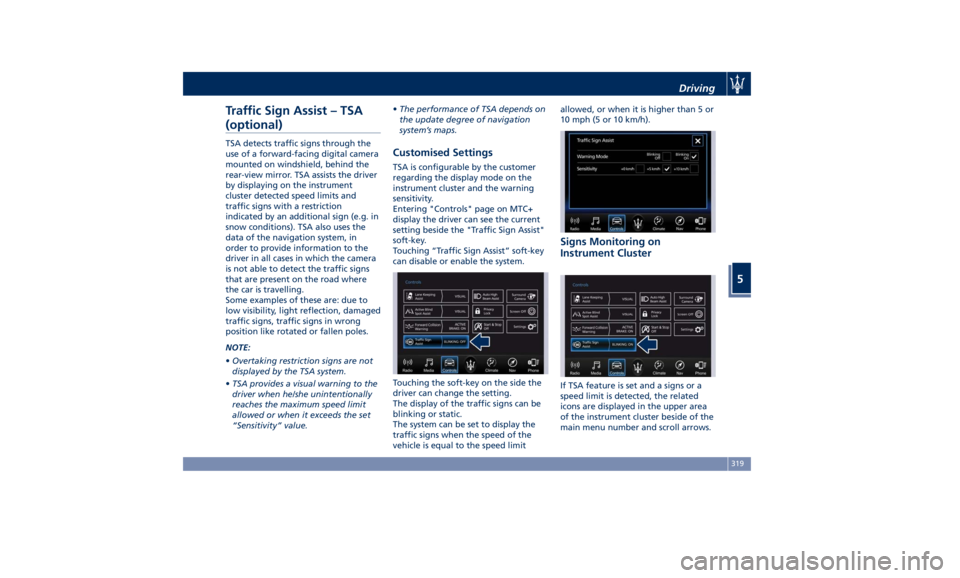
Entering "Controls" page on MTC+
display the driver can see the current
setting beside the "Traffic Sign Assist"
soft-key.
Touching “Traffic Sign Assist” soft-key
can disable or enable the system.
Touching the soft-key on the side the
driver can change the setting.
The display of the traffic signs can be
blinking or static.
The system can be set to display the
traffic signs when the speed of the
vehicle is equal to the speed limit allowed, or when it is higher than 5 or
10 mph (5 or 10 km/h).
Signs Monitoring on
Instrument Cluster
If TSA feature is set and a signs or a
speed limit is detected, the related
icons are displayed in the upper area
of the instrument cluster beside of the
main menu number and scroll arrows.Driving
5
319
Page 324 of 436
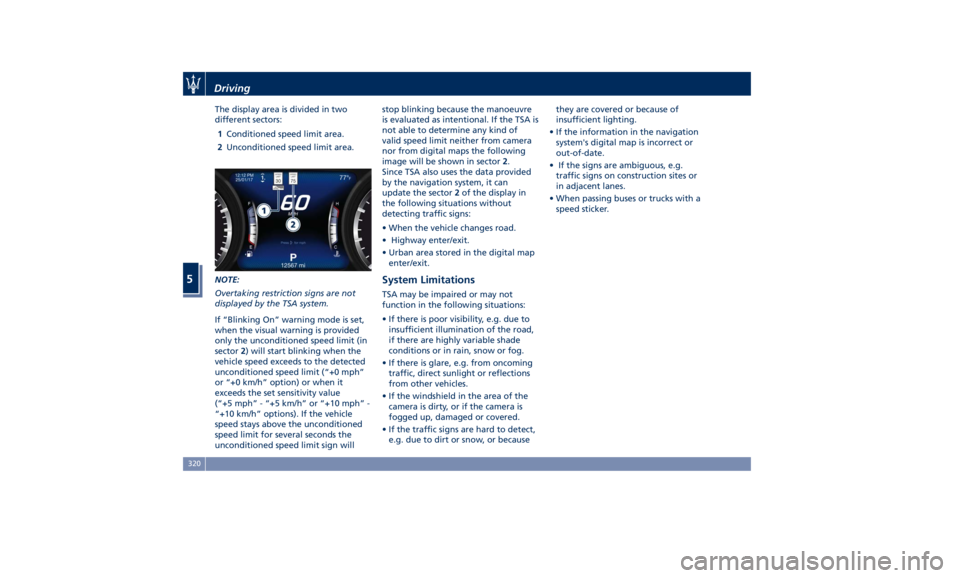
The display area is divided in two
different sectors:
1 Conditioned speed limit area.
2 Unconditioned speed limit area.
NOTE:
Overtaking restriction signs are not
displayed by the TSA system.
If “Blinking On” warning mode is set,
when the visual warning is provided
only the unconditioned speed limit (in
sector 2 ) will start blinking when the
vehicle speed exceeds to the detected
unconditioned speed limit (“+0 mph”
or “+0 km/h” option) or when it
exceeds the set sensitivity value
(“+5 mph” - “+5 km/h” or “+10 mph” -
“+10 km/h” options). If the vehicle
speed stays above the unconditioned
speed limit for several seconds the
unconditioned speed limit sign will stop blinking because the manoeuvre
is evaluated as intentional. If the TSA is
not able to determine any kind of
valid speed limit neither from camera
nor from digital maps the following
image will be shown in sector 2 .
Since TSA also uses the data provided
by the navigation system, it can
update the sector 2 of the display in
the following situations without
detecting traffic signs:
• When the vehicle changes road.
• Highway enter/exit.
• Urban area stored in the digital map
enter/exit.
System Limitations TSA may be impaired or may not
function in the following situations:
• If there is poor visibility, e.g. due to
insufficient illumination of the road,
if there are highly variable shade
conditions or in rain, snow or fog.
• If there is glare, e.g. from oncoming
traffic, direct sunlight or reflections
from other vehicles.
• If the windshield in the area of the
camera is dirty, or if the camera is
fogged up, damaged or covered.
• If the traffic signs are hard to detect,
e.g. due to dirt or snow, or because they are covered or because of
insufficient lighting.
• If the information in the navigation
system's digital map is incorrect or
out-of-date.
• If the signs are ambiguous, e.g.
traffic signs on construction sites or
in adjacent lanes.
• When passing buses or trucks with a
speed sticker.Driving
5
320
Page 325 of 436
Tires - General
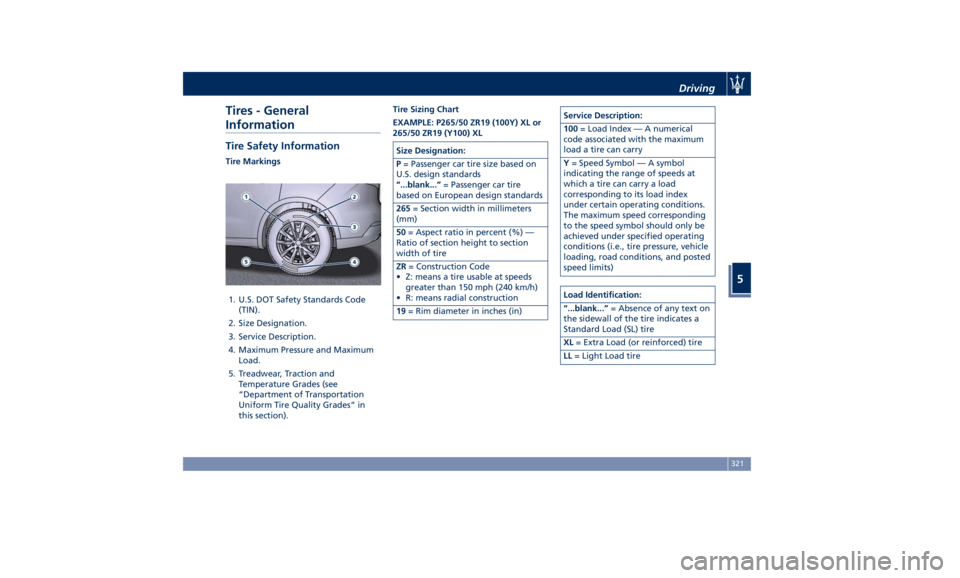
Information Tire Safety Information Tire Markings
1. U.S. DOT Safety Standards Code
(TIN).
2. Size Designation.
3. Service Description.
4. Maximum Pressure and Maximum
Load.
5. Treadwear, Traction and
Temperature Grades (see
“Department of Transportation
Uniform Tire Quality Grades” in
this section). Tire Sizing Chart
EXAMPLE: P265/50 ZR19 (100Y) XL or
265/50 ZR19 (Y100) XL
Size Designation:
P = Passenger car tire size based on
U.S. design standards
“...blank...” = Passenger car tire
based on European design standards
265 = Section width in millimeters
(mm)
50 = Aspect ratio in percent (%) —
Ratio of section height to section
width of tire
ZR = Construction Code
• Z: means a tire usable at speeds
greater than 150 mph (240 km/h)
• R: means radial construction
19 = Rim diameter in inches (in) Service Description:
100 = Load Index — A numerical
code associated with the maximum
load a tire can carry
Y = Speed Symbol — A symbol
indicating the range of speeds at
which a tire can carry a load
corresponding to its load index
under certain operating conditions.
The maximum speed corresponding
to the speed symbol should only be
achieved under specified operating
conditions (i.e., tire pressure, vehicle
loading, road conditions, and posted
speed limits)
Load Identification:
“...blank...” = Absence of any text on
the sidewall of the tire indicates a
Standard Load (SL) tire
XL = Extra Load (or reinforced) tire
LL = Light Load tireDriving
5
321
Page 326 of 436
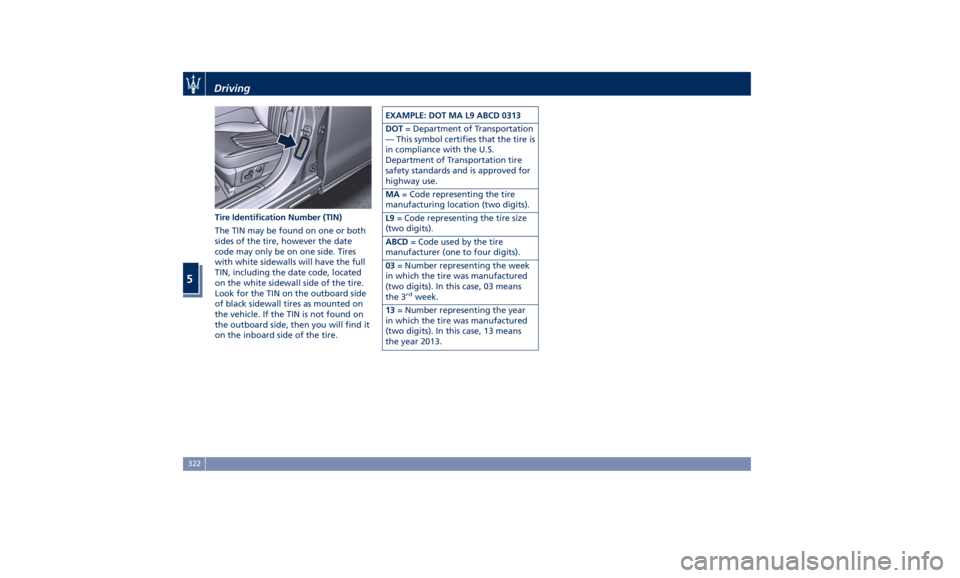
Tire Identification Number (TIN)
The TIN may be found on one or both
sides of the tire, however the date
code may only be on one side. Tires
with white sidewalls will have the full
TIN, including the date code, located
on the white sidewall side of the tire.
Look for the TIN on the outboard side
of black sidewall tires as mounted on
the vehicle. If the TIN is not found on
the outboard side, then you will find it
on the inboard side of the tire. EXAMPLE: DOT MA L9 ABCD 0313
DOT = Department of Transportation
— This symbol certifies that the tire is
in compliance with the U.S.
Department of Transportation tire
safety standards and is approved for
highway use.
MA = Code representing the tire
manufacturing location (two digits).
L9 = Code representing the tire size
(two digits).
ABCD = Code used by the tire
manufacturer (one to four digits).
03 = Number representing the week
in which the tire was manufactured
(two digits). In this case, 03 means
the 3 rd
week.
13 = Number representing the year
in which the tire was manufactured
(two digits). In this case, 13 means
the year 2013.Driving
5
322
Page 327 of 436
Tire Terminology and Definitions
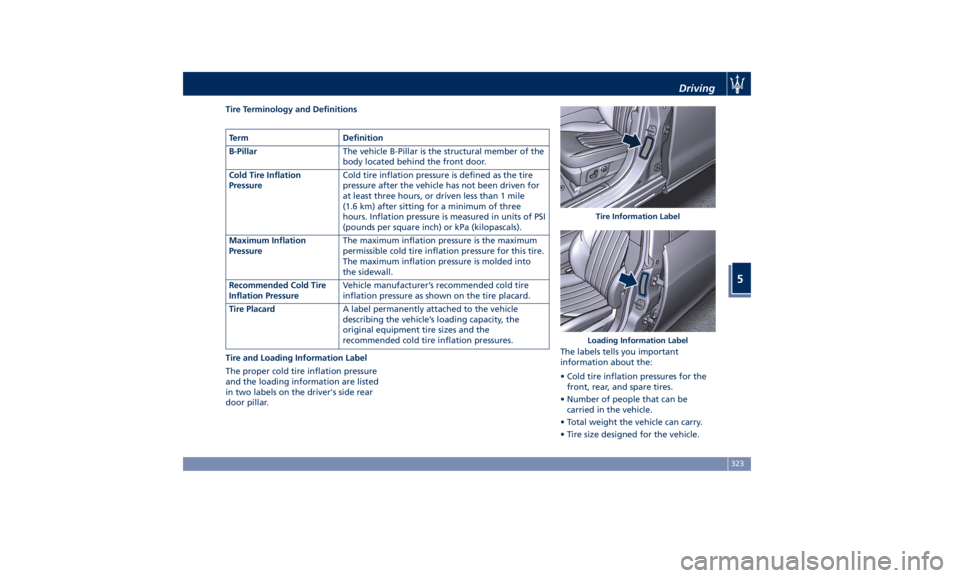
Tire and Loading Information Label
The proper cold tire inflation pressure
and the loading information are listed
in two labels on the driver's side rear
door pillar. The labels tells you important
information about the:
• Cold tire inflation pressures for the
front, rear, and spare tires.
• Number of people that can be
carried in the vehicle.
• Total weight the vehicle can carry.
• Tire size designed for the vehicle.Term Definition
B-Pillar The vehicle B-Pillar is the structural member of the
body located behind the front door.
Cold Tire Inflation
Pressure Cold tire inflation pressure is defined as the tire
pressure after the vehicle has not been driven for
at least three hours, or driven less than 1 mile
(1.6 km) after sitting for a minimum of three
hours. Inflation pressure is measured in units of PSI
(pounds per square inch) or kPa (kilopascals).
Maximum Inflation
Pressure The maximum inflation pressure is the maximum
permissible cold tire inflation pressure for this tire.
The maximum inflation pressure is molded into
the sidewall.
Recommended Cold Tire
Inflation Pressure Vehicle manufacturer’s recommended cold tire
inflation pressure as shown on the tire placard.
Tire Placard A label permanently attached to the vehicle
describing the vehicle’s loading capacity, the
original equipment tire sizes and the
recommended cold tire inflation pressures. Tire Information Label
Loading Information LabelDriving
5
323
Page 328 of 436
Loading
The vehicle maximum load on the tire
must not exceed the load carrying
capacity of the tire on your vehicle.
You will not exceed the tire's load
carrying capacity if you adhere to the
loading conditions, tire size, and cold
tire inflation pressures specified on the
“Tire and Loading Information Label”
and in the “Features and
Specifications” section.
NOTE:
Under a maximum loaded vehicle
condition, gross axle weight ratings
(GAWRs) for the front and rear axles
must not be exceeded.
To determine the maximum loading
conditions of your vehicle, locate the
statement “The combined weight of
occupants and cargo should never
exceed XXX lbs/XXX kg” on the tire
and loading information label. The
combined weight of occupants and
cargo/luggage should never exceed
the weight referenced here.
Steps For Determining Correct Load
Limit
• Locate the statement “The combined
weight of occupants and cargo
should never exceed XXX lbs/XXX kg” on the vehicle's
label.
• Determine the combined weight of
the driver and passengers that will
be riding in the vehicle.
• Subtract the combined weight of the
driver and passengers from
XXX lbs/XXX kg.
• The resulting figure equals the
available amount of cargo and
luggage load capacity. For example,
if “XXX amount equals 1,400 lbs/635
kg and there will be five
150 lbs/68 kg passengers in your
vehicle, the amount of available
cargo and luggage load capacity is
650 lbs/295 kg (since 5 x 150/68 =
750/340, and 1,400/635– 750/340 =
650 lbs/295 kg).
• Determine the combined weight of
luggage and cargo being loaded on
the vehicle. That weight may not
safely exceed the available cargo and
luggage load capacity calculated in
previous Step.
• If your vehicle will be towing a
trailer, load from your trailer will be
transferred to your vehicle. Consult
this manual to determine how this
reduces the available cargo and
luggage load capacity of your
vehicle. Tires
Driving over rough or damaged road
surfaces, as well as debris, curbs and
other obstacles can cause serious
damage to wheels, tires, and
suspension parts.
This is more likely to occur with
low-profile tires, which provide less
cushioning between the wheel and the
road.
Be careful to avoid road hazards and
reduce your speed, especially if your
vehicle is equipped with low profile
tires.
WARNING!
Overloading of your tires is
dangerous. Overloading can cause tire
failure, affect vehicle handling, and
increase the stopping distance. Use
tires of the recommended load
capacity for your vehicle. Never
overload them.Driving
5
324
Page 329 of 436
Department of Transportation
Uniform Tire Quality Grades The following tire grading categories
were established by the National
Highway Traffic Safety Administration.
The specific grade rating assigned by
the tire's manufacturer in each
category is shown on the sidewall of
the tires on your vehicle.
All passenger car tires must conform
to Federal safety requirements in
addition to these grades.
Treadwear
The Treadwear grade is a comparative
rating, based on the wear rate of the
tire when tested under controlled
conditions on a specified government
test course. For example, a tire graded
150 would wear one and one-half
times as well on the government
course as a tire graded 100. The
relative performance of tires depends
upon the actual conditions of their
use, however, and may depart
significantly from the norm due to
variations in driving habits, service
practices, and differences in road
characteristics and climate.
Traction Grades
The Traction grades, from highest to
lowest, are AAA, A, B, and C. These grades represent the tire's ability to
stop on wet pavement, as measured
under controlled conditions on
specified government test surfaces of
asphalt and concrete. A tire marked C
may have poor traction performance.
WARNING!
The traction grade assigned to this
tire is based on straight-ahead
braking traction tests, and does not
include acceleration, cornering,
hydroplaning, or peak traction
characteristics.
Temperature Grades
The
temperature grades are A (the
highest), B, and C, representing the
tire's resistance to the generation of
heat and its ability to dissipate heat,
when tested under controlled
conditions on a specified indoor
laboratory test wheel. Sustained high
temperature can cause the material of
the tire to degenerate and reduce tire
life, and excessive temperature can
lead to sudden tire failure. The grade
C corresponds to a level of
performance, which all passenger car
tires must meet under the Federal
Motor Vehicle Safety Standard No. 109. Grades B and A represent higher
levels of performance on the
laboratory test wheel, than the
minimum required by law.
WARNING!
The temperature grade for this tire is
established for a tire that is properly
inflated and not overloaded.
Excessive speed, under-inflation, or
excessive loading, either separately or
in combination, can cause heat
buildup and possible tire failure.
Tire Pressure Proper tire inflation pressure is
essential for safety and best
performance of your vehicle. The tire
pressure monitoring system “TPMS”
setup on the vehicle (see “Tire
Pressure Monitoring System” in this
section) may alert the driver about
insufficient tire pressure even though
the driver is responsible for regularly
checking the tire pressure.
Radial tires fitted on the vehicle may
look properly inflated even when they
actually are under inflated. Do not
make a visual judgment when
determining proper inflation.Driving
5
325
Page 330 of 436
Three primary driving aspects are
affected by improper tire pressure:
Safety
WARNING!
• Improperly inflated tires can be
dangerous.
• Under-inflation increases tire flexing
and can result in tire overheating.
• Over-inflation reduces a tire's ability
to cushion shock. Objects on the
road and potholes can cause damage
that results in tire failure.
• Over-inflated or under-inflated tires
can affect vehicle handling and can
fail suddenly, resulting in loss of
vehicle control.
• Unequal tire pressures can cause
steering problems.
• Unequal tire pressures from one side
of the vehicle to the other can cause
the vehicle to drift to the right or
left.
• Always drive with each tire inflated
to the recommended cold tire
inflation pressure.
Economy
Improper
inflation pressures may cause
uneven wear patterns to develop across the tire tread. These abnormal
wear patterns will reduce tread life
resulting in a need for earlier tire
replacement. Under-inflation also
increases tire rolling resistance
resulting in higher fuel consumption.
Ride comfort and vehicle stability
Proper tire inflation contributes to a
comfortable ride. Over-inflation
produces a jarring and uncomfortable
ride.
Tire Pressure Checkup The proper cold tire inflation pressure
is indicated on the driver's side rear
door pillar and on the table “Tire
Inflation Pressure” in section “Features
and Specifications”.
Inflation pressure specified on the
table always refers to “cold tire
inflation pressure”. Cold tire inflation
pressure is defined as the tire pressure
after the vehicle has not been driven
for at least three hours, or driven less
than 1 mi (1.6 km) after a three hour
period.
Check tire pressures more often in case
of significant outside temperature
changes, as tire pressure varies
according to temperature changes.
The pressure should be checked and if
necessary adjusted; tire wear and overall conditions should also be
checked monthly. Tire pressures
change by approximately 1 PSI (0.07
bar) per 12°F (7°C) of air temperature
change. Keep this in mind when
checking tire pressure inside a garage,
especially in winter.
Example: If garage temperature = 68°F
(20°C) and the outside temperature =
32°F (0°C) then the cold tire inflation
pressure should be increased by 3 PSI
(0.21 bar) for every 12°F (7°C) for this
outside temperature condition.
Tire pressure may increase from 2 to 6
PSI (0.13 to 0.4 bar) during operation.
DO NOT reduce this normal pressure
build-up or your tire pressure will be
too low. After inspecting or adjusting
the tire pressure, always reinstall the
valve stem cap. This will prevent
moisture and dirt from entering the
valve stem, which could damage the
valve stem and the TPMS sensor
connected to it.
Tread Wear Indicators Tread wear indicators are in the
original equipment tires to help you
determine when your tires should be
replaced.
These indicators are molded into the
bottom of the tread grooves.Driving
5
326