MERCEDES-BENZ B-CLASS SPORTS 2014 Owners Manual
Manufacturer: MERCEDES-BENZ, Model Year: 2014, Model line: B-CLASS SPORTS, Model: MERCEDES-BENZ B-CLASS SPORTS 2014Pages: 360, PDF Size: 39.45 MB
Page 131 of 360
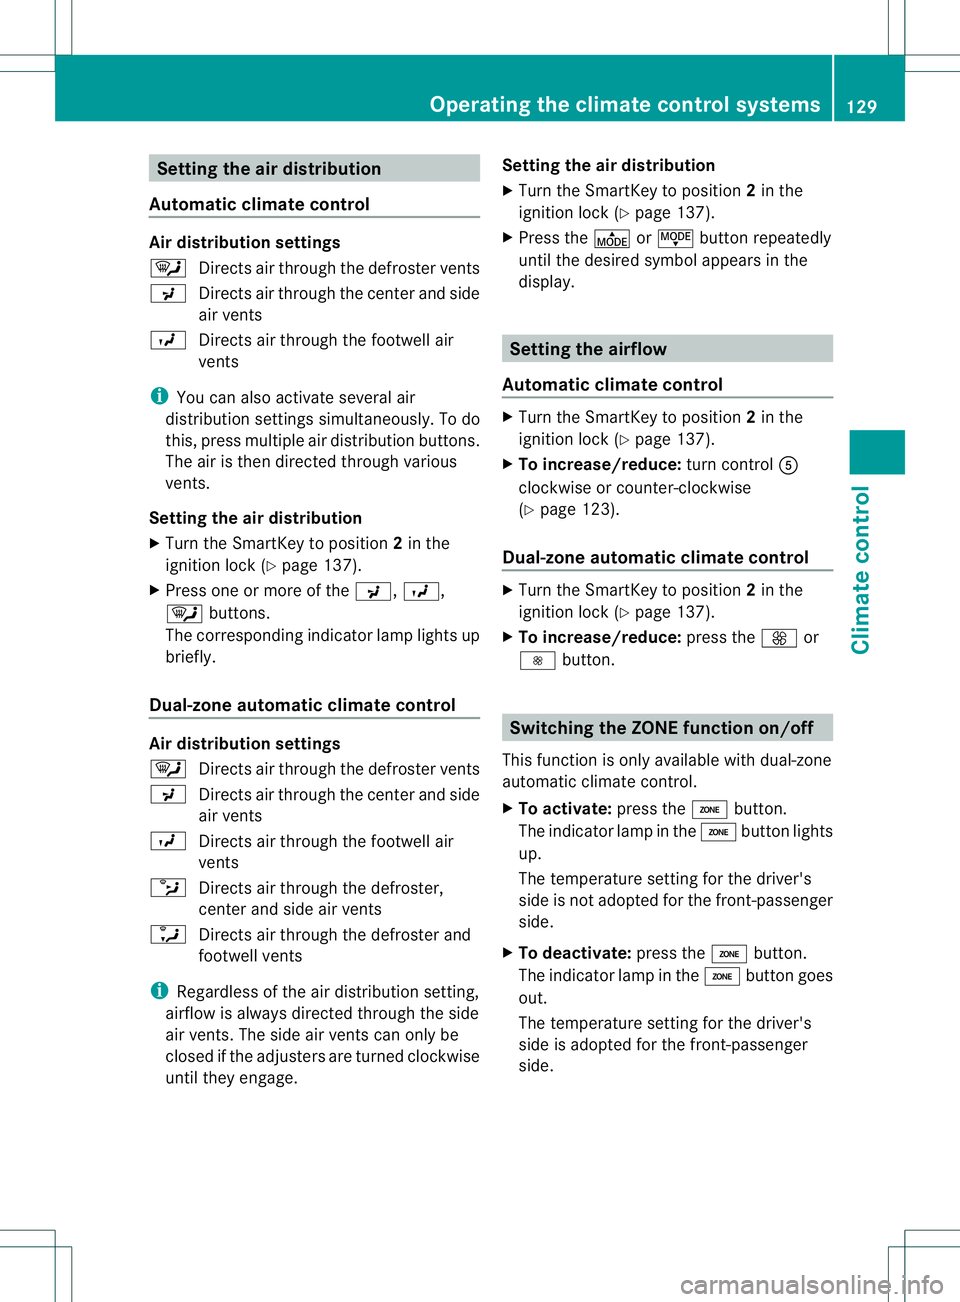
Setting the air distribution
Automatic climate control Air distribution settings
0002
Directsa ir through the defroster vents
0018 Directsa ir through the center and side
air vents
000B Directsa ir through the footwell air
vents
i You can also activate several air
distribution settings simultaneously. To do
this, press multiple air distribution buttons.
The air is then directed through various
vents.
Setting the air distribution
X Turn the SmartKey to position 2in the
ignition lock (Y page 137).
X Press one or more of the 0018,000B,
0002 buttons.
The corresponding indicator lamp lights up
briefly.
Dual-zone automatic climate control Air distribution settings
0002
Directsa ir through the defroster vents
0018 Directsair through the center and side
air vents
000B Directsair through the footwell air
vents
0013 Directsair through the defroster,
center and side air vents
0009 Directsair through the defroster and
footwell vents
i Regardless of the air distribution setting,
airflow is always directed through the side
air vents. The side air ventsc an only be
closed if the adjusters are turned clockwise
until they engage. Setting the air distribution
X
Turn the SmartKey to position 2in the
ignition lock (Y page 137).
X Press the 000For0017 button repeatedly
until the desired symbol appears in the
display. Setting the airflow
Automatic climate control X
Turn the SmartKey to position 2in the
ignition lock (Y page 137).
X To increase/reduce: turn control001E
clockwise or counter-clockwise
(Y page 123).
Dual-zone automatic climate control X
Turn the SmartKey to position 2in the
ignition lock (Y page 137).
X To increase/reduce: press the0004or
000E button. Switching the ZONE function on/off
This function is only available with dual-zone
automatic climate control.
X To activate: press the000Dbutton.
The indicator lamp in the 000Dbutton lights
up.
The temperature setting for the driver's
side is not adopted for the front-passenger
side.
X To deactivate: press the000Dbutton.
The indicator lamp in the 000Dbutton goes
out.
The temperature setting for the driver's
side is adopted for the front-passenger
side. Operating the climate control systems
129Climate control
Page 132 of 360
Defrosting th
ewindshield
You can use this function to defrost the
windshield or to defrost th einside of the
windshield and the side windows.
i Yous houl donlys elect the "Windshield
defrosting "fun ctio nuntil the windshield is
clear again.
X Turn the SmartKe ytoposition 2in the
ignition lock (Y page 137).
X To activate: press the0003button.
The indicator lamp in the 0003button lights
up.
The climate contro lsys tem switches to the
following functions:
R high airflow
R high temperature
R aird istribution to the windshield and
front side windows
R air-recirculation mode off
i The "Windshield defrosting" function
automatically set sthe blower output to the
optimum defrosting effect .Asaresult,the
airflow may increase or decrease
automatically after the button is pressed.
i You can adjust the blower output
manually while the "Windshield defrosting"
function is in operation:
R Automatic climate control: tur nairflow
control 001Eclockwise or counter-
clockwise (Y page 123).
R Dual-zon eautomatic climate control:
press the 0015or0005 button.
X To deactivate: press the0003button.
The indicator lamp in the 0003button goes
out. The previously selected settings are
restored. Air-recirculation mode remains
deactivated.
or
X Dual-zon eautomatic climate control: press
the 000C button.
The indicator lamp in the 0003button goes
out. Airflow and air distribution are set to
automatic mode. or
X
Automatic climate control: turn
temperature control 001Aclockwise or
counter-clockwise (Y page 123).
Dual-zon eautomatic climate control: turn
temperature control 001Aor0009 clockwise or
counter-clockwise (Y page 125). Defrosting th
ewindows
Windows fogged up on th einside Automatic climat
econtrol
X Activat ethe 0001 "Cooling with air
dehumidification "function.
X If the windows continue to fog up, activate
the 0003 "Windshield defrosting" function.
i You should only select this setting until
the windshield is clear again.
Dual-zone automatic climat econtrol
X Activat ethe 0001 "Cooling with air
dehumidification "function.
X Activat eautomatic mode 000C.
X If the windows continue to fog up, activate
the 0003 "Windshield defrosting" function.
i You should only select this setting until
the windshield is clear again.
Windows fogged up on the outside X
Activat ethe windshield wipers.
X Set the air distribution to 0018or000B.
i You should only select this setting until
the windshield is clear again. Rear window defroster
General notes The rear window defroster has
ahigh current
draw. You should therefore switch it off as
soon as the rear window is clear. Otherwise,
the rear window defroster switches off
automatically after several minutes. 130
Operating thec
limatecontrol systemsClimatecontrol
Page 133 of 360
If the battery voltage is too low, the rear
window defroster may switch off.
Activating/deactivating
X
Turn the SmartKey to position 2in the
ignition lock (Y page 137).
X Press the 001Abutton.
The indicator lamp in the 001Abutton lights
up or goes out. Operating the climatec
ontrol systems
131Climate control
Page 134 of 360
Problems with the rear window defroster
Problem Possible causes/consequences and
000B Solutions
The rear window
defroster has
deactivated
prematurely or cannot
be activated. The battery has not been sufficiently charged.
X
Switch off any consumers that are not required, e.g. reading
lamps, interior lighting or the seat heating.
When the battery is sufficiently charged, the rear window
defroster can be activated again. Activating/deactivating air-
recirculation mode
General notes You can deactivate the flow of fresh air if
unpleasant odors are enteringt
he vehicle
from outside. The air already inside the
vehicle will then be recirculated.
If you switch on air-recirculation mode, the
windows can fog up more quickly, in
particular at low temperatures. Only use air-
recirculation mode briefly to prevent the
windows from fogging up.
The operation of air-recirculation mode is the
same for all control panels.
Activating/deactivating X
Turn the SmartKey to position 2in the
ignition lock (Y page 137).
X To activate: press the0019button.
The indicator lamp in the 0019button lights
up.
i Air-recirculation mode is activated
automatically at high outside
temperatures. When air-recirculation mode
is activated automatically ,the indicator
lamp in the 0019button is not lit.
Outside air is added after about
30 minutes.
X To deactivate: press the0019button.
The indicator lamp in the 0019button goes
out. i
Air-recirculation mode deactivates
automatically:
R after approximately five minutes at
outside temperatures below about 5†
R after approximately fiv eminute sifthe
"Coolin gwitha ir dehumidification"
function is deactivated
R after approximately 30 minute sat
outside temperatures above
approximately 5†ifthe "Cooling with
air dehumidification" function is
activated Activating/deactivating the residual
heat function
General notes The residual heat function is only available in
vehicles for Canada with automatic climate
control.
It is possible to make use of the residual heat
of the engine to continue heating the vehicle
for approximately 30 minutes after the engine
has been switched off. The heating time
depends on the temperature that has been
set.
i
The blower will run at alow speed
regardless of the airflow setting.
i If you activate the residual heat function
at high temperatures, only the ventilation
will be activated. The blower runs at
medium speed. 132
Operating the climate control systemsClimatec
ontrol
Page 135 of 360
Activating/deactivating
X
Turn th eSmartKey to position 0in the
ignition loc korremove it (Y page 137).
X To activate: press the0016button.
The indicator lamp in the 0016buttonlights
up.
X To deactivate: press the0016button.
The indicator lamp in the 0016button goes
out.
i Residual heat is deactivated
automatically:
R after approximately 30 minutes
R when the ignition is switched on
R if the battery voltage drops Setting th
eair vents Important safety notes
G
WARNING
Very hot or very cold air can flow fro mthe air
vents. This could result in burns or frostbite in
the immediate vicinity of the air vents. There
is ar isk of injury.
Make sure that all vehicle occupants always
maintain asufficient distance to the air
outlets. If necessary, redirect the airflow to
another area of the vehicle interior.
In order to ensure the direct flow of fresh air
through the air ventsi nto the vehicle interior,
please observe the following notes:
R keep the air inlet between the windshield
and the hood free of blockages, such as ice,
snow or leaves.
R never cover the air ventsora ir intake grilles
in the vehicle interior.
i You can move the adjusters for the air
ventsv ertically or horizontally to set the
direction of the airflow.
i For optimal climate control in the vehicle,
open the air ventsc ompletely and set the
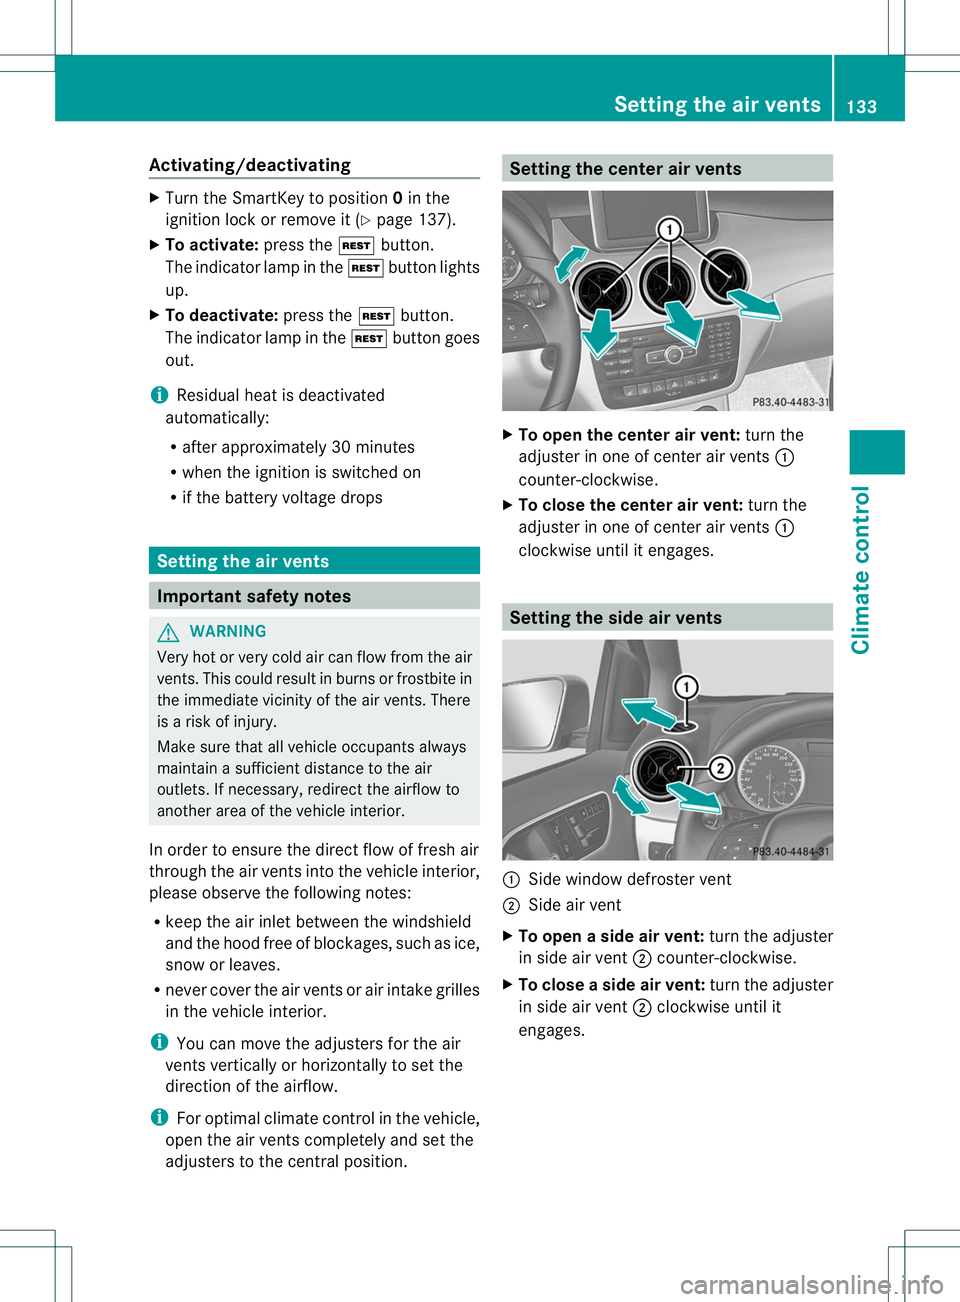
adjusters to the central position. Setting the center air vents
X
To open the center air vent: turn the
adjuster in one of center air vents 001A
counter-clockwise.
X To close the center air vent: turn the
adjuster in one of center air vents 001A
clockwise until it engages. Setting the side air vents
001A
Side window defroster vent
0010 Side air vent
X To open aside air vent: turn the adjuster
in side air vent 0010counter-clockwise.
X To close aside air vent: turn the adjuster
in side air vent 0010clockwise until it
engages. Setting thea
ir vents
133Climatecontrol Z
Page 136 of 360
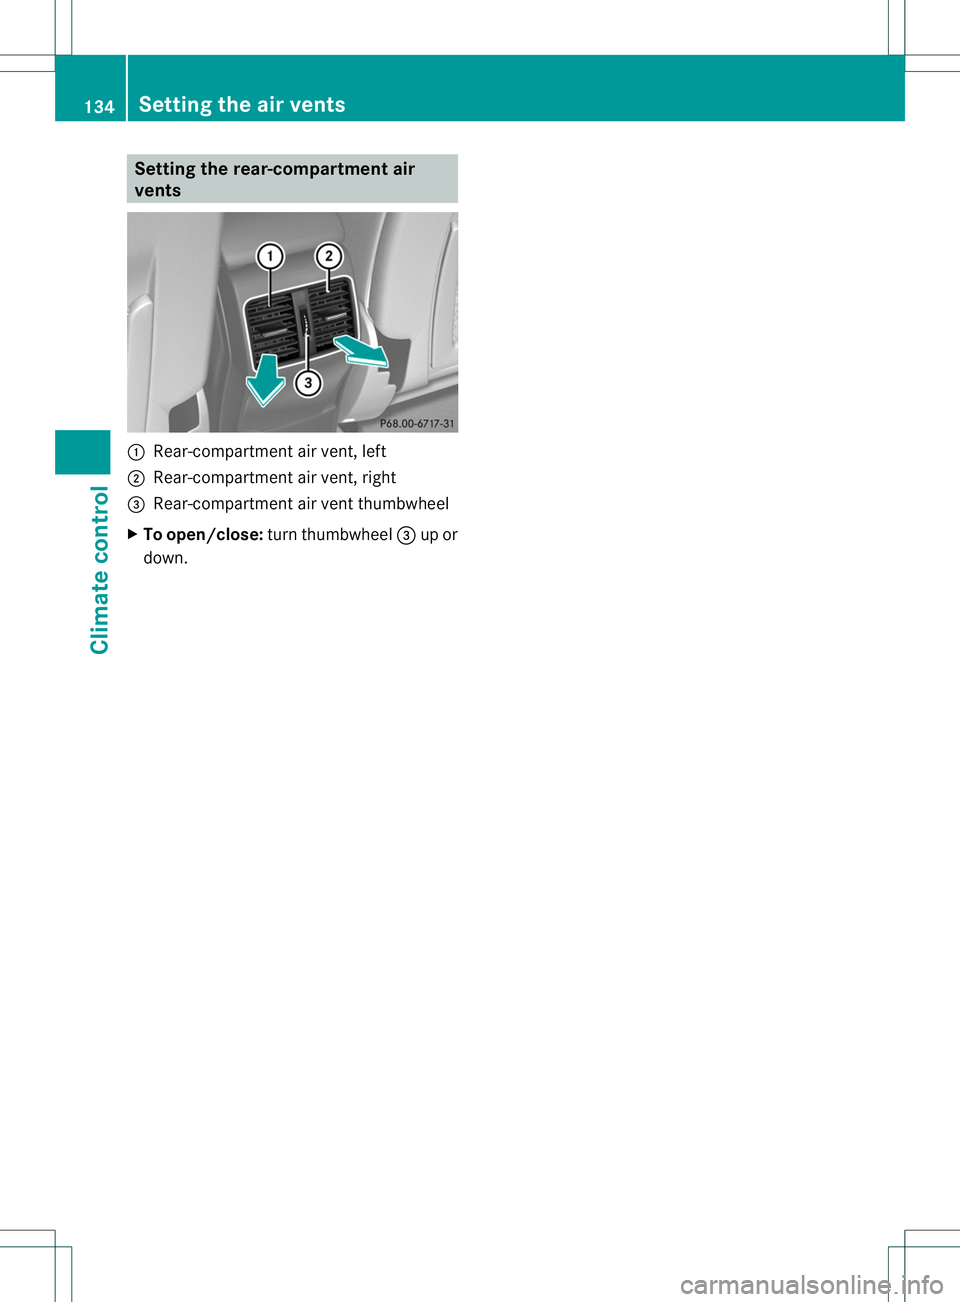
Setting the rear-compartment air
vents 001A
Rear-compartmen tair vent,l eft
0010 Rear-compartmen tair vent,r ight
0023 Rear-compartmen tair vent thumbwheel
X To open/close: turn thumbwheel 0023up or
down. 134
Setting the air ventsClimate control
Page 137 of 360
Useful information
............................136
Notes on breaking-in anew vehicle 136
Driving ............................................... 136
Automatic transmission ...................143
Refueling ............................................ 150
Parking ............................................... 152
Driving tips ........................................ 155
Driving systems ................................ 160 135Driving and parking
Page 138 of 360
Useful information
i This Operator's Manual describes all
models and all standard and optional
equipment of your vehicle available at the
time of publication of the Operator's
Manual. Country-specific differences are
possible. Please not ethat your vehicle may
not be equipped with all features
described. This also applies to safety-
related system sand functions.
i Read the information on qualified
specialist workshops: (Y page 25).Notes on breaking-in
anew vehicle Important safety notes
New and replaced brak epads and disc sonly
reac htheir optimum braking effect after
several hundred kilometers of driving.
Compensate for this by applyin ggreater force
to th ebrak epedal. Th
ef irst 1000 miles (1500 km)
The mor eyou look after th eengine when it is
new, th emores atisfied you will be with its
performanc einthefuture.
R You should therefore driv eatvarying
vehicle and engine speed sfor th efirst
1000 miles (1500 km).
R Avoid heavy loads, e.g .driving at full
throttle, during this period.
R Change gearing ood time, before the
tachometer needle is 001Bof the way to the
red area of the tachometer.
R Do not manually shift to alower gear to
brake the vehicle.
R If possible, do not depress the accelerator
pedal past the point of resistance
(kickdown).
R Ideally ,for the first 1000 miles (1500 km),
drive in program E. After 1,000 miles (1,500 km), you can
increase the engine spee
dgradually and bring
the vehicle to ful lspeed.
i You should also observe these notes on
breaking-in if the engine or parts of the
drive train on you rvehicle have been
replaced.
i Always observe the respective speed
limits. Driving
Important safet
ynotes G
WARNING
Objects in the driver's footwell can restrict the
pedal travel or obstruct adepressed pedal.
The operatin gand road safety of the vehicle
is jeopardized. There is arisk of an accident.
Make sure that all objects in the vehicle are
stowed correctly, and that they cannot enter
the driver's footwell. Install the floormats
securely and as specified in order to ensure
sufficien tclearanc efor the pedals. Do not use
loose floormats and do not place floormats on
top of one another. G
WARNING
Unsuitable footwear can hinde rcorrect usage
of the pedals, e.g.:
R shoes with thick soles
R shoes with high heels
R slippers
There is arisk of an accident.
Wear suitable footwear to ensure correct
usage of the pedals. G
WARNING
If you switch off the ignition while driving,
safety-relevant functions are only available
with limitations, or not at all. This could affect,
for example, the power steering and the brake
boosting effect .You will require considerably 136
DrivingDriving and parking
Page 139 of 360
more effort to steer and brake. There is
arisk
of an accident.
Do not switch off the ignitio nwhile driving. G
WARNING
If the parking brake has not been fully
released when driving, the parking brake can:
R overheat and cause afire
R lose its hold function.
There is arisk of fire and an accident. Release
the parking brake fully before driving off.
! Warm up the engine quickly. Do not use
the engine's full performance until it has
reached operating temperature.
Only shift the automatic transmission to
the desired drive position when the vehicle
is stationary.
Where possible, avoid spinning the drive
wheels when pulling away on slippery
roads. You could otherwise damage the
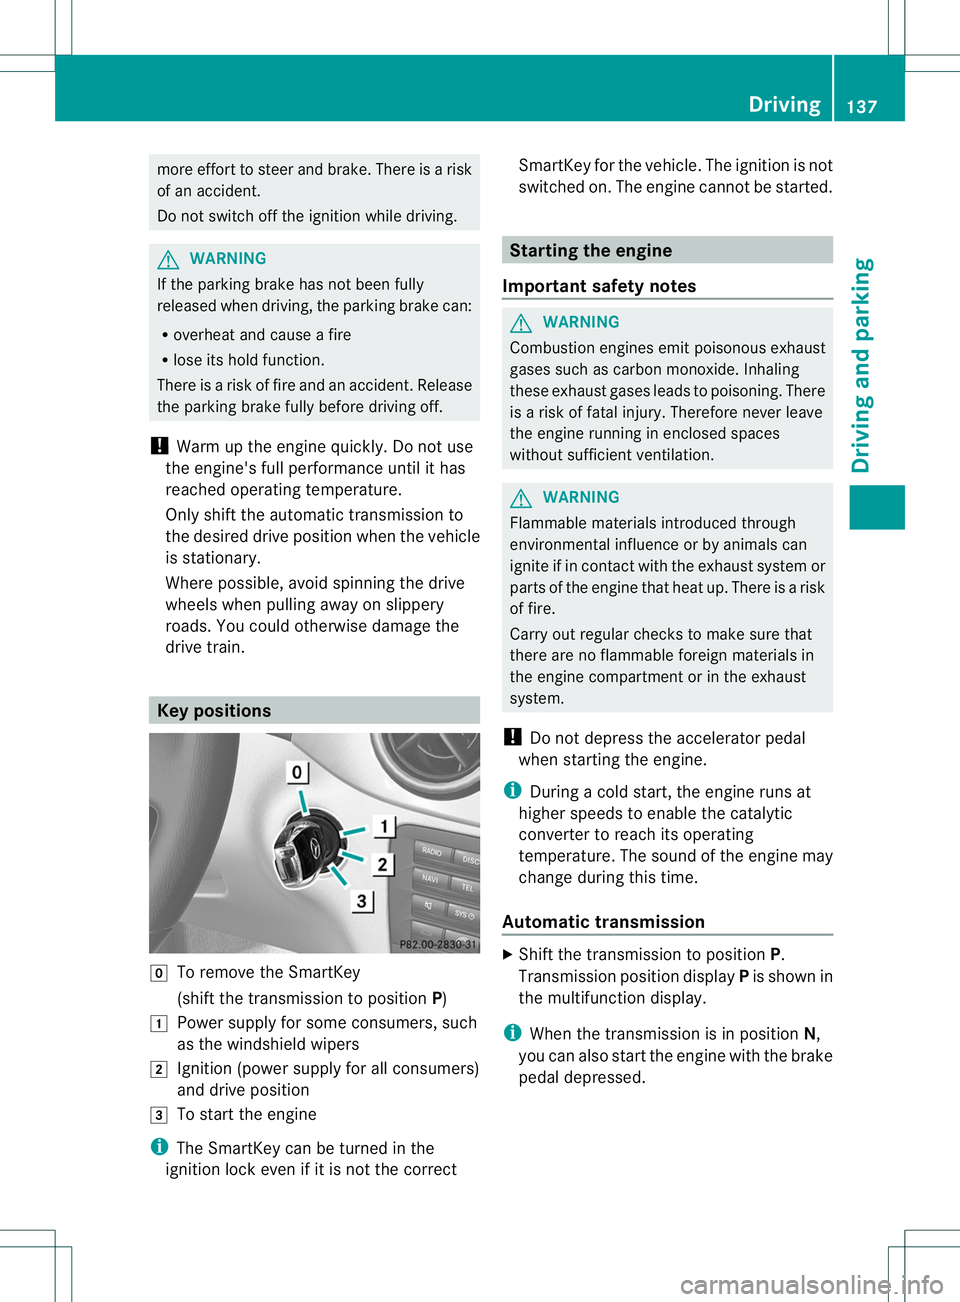
drive train. Key positions
0005
To remove the SmartKey
(shift the transmission to position P)
000C Power supply for some consumers, such
as the windshield wipers
0001 Ignition (power supply for all consumers)
and drive position
0002 To start the engine
i The SmartKey can be turned in the
ignition lock even if it is not the correct SmartKey for the vehicle. The ignition is not
switched on. The engine cannot be started. Starting the engine
Important safety notes G
WARNING
Combustion engines emit poisonous exhaust
gases such as carbon monoxide. Inhaling
these exhaust gases leads to poisoning. There
is ar isk of fatal injury. Therefore never leave
the engine running in enclosed spaces
without sufficient ventilation. G
WARNING
Flammable materials introduced through
environmental influence or by animals can
ignite if in contact with the exhaust system or
parts of the engine that heat up. There is arisk
of fire.
Carry out regular checkstom ake sure that
there are no flammable foreign materials in
the engine compartmentorint he exhaust
system.
! Do not depress the accelerator pedal
when startingt he engine.
i During acold start, the engine runs at
higher speeds to enable the catalytic
converter to reach its operating
temperature. The sound of the engine may
change during this time.
Automatic transmission X
Shift the transmission to position P.
Transmission position display Pis shown in
the multifunction display.
i When the transmission is in position N,
you can also start the engine with the brake
pedal depressed. Driving
137Driving and parking Z
Page 140 of 360
Starting procedure
X
Turn the SmartKey to position 3in the
ignition lock (Y page 137) and release it as
soon as the engine is running. Pulling away
Automatic transmission i
It is only possible to shift the transmission
from position Pto the desired position if
you depress the brake pedal. Only then can
the parking lock be deactivated. If you do
not depress the brake pedal, the DIRECT
SELECT lever can still be moved but the
parking lock remains engaged.
i If the transmission oil temperature is
below 000F4‡(000F20 †),y ou can only shift from
position Pwhen the engin eisrunning.
X Depress the brake pedal and keep it
depressed.
X Shif tthe transmission to position Dor R.
X Release the brake pedal.
X Carefully depress the accelerator pedal.
The electric parking brake (Y page 153) is
automatically released.
The red 000Aindicator lamp in the
instrumentc luster goes out.
i The vehicle lock scentrally onc eyou have
pulled away. The locking knobs in the doors
drop down.
You can open the doors fro mthe inside at
any time.
You can also deactivate the automatic
locking feature (Y page 205).
i Upshifts take place at higher engine
speeds after acold start. This helps the
catalytic converter to reach its operating
temperature more quickly. Hill starta
ssist Hill start assist helps you when pulling away
forwards or in reverse on an uphill gradient.
It holds the vehicle for
ashort time after you
have removed your foot from the brake pedal.
This gives you enough time to move your foot
from the brake pedal to the accelerator pedal
and to depress it before the vehicle begins to
roll. G
WARNING
After ashort time, hill start assist will no
longer brake your vehicle and it could roll
away. There is arisk of an accident and injury.
Therefore, quickly move your foot from the
brake pedal to the accelerator pedal. Never
leave the vehicle when it is held by hill start
assist.
X Remove your foot from the brake pedal.
The vehicle is then held for about asecond.
X Pull away.
Hill start assist is not active if:
R you are pulling away on alevel road or on
ad ownhill gradient.
R the transmission is in position N.
R the electric parking brake is applied.
R ESP ®
is malfunctioning.
Further information on holding the vehicle
stationary on uphill gradients (Y page 146). ECO start/stop function
Introduction The ECO start/stop function switches the
engine off automatically if the vehicle is
stopped under certain conditions.
The engine start
sautomatically when the
driver wants to pull away again. The ECO
start/stop function thereby helps you to
reduce the fuel consumption and emissions
of your vehicle. 138
DrivingDriving and parking