MERCEDES-BENZ C-Class 2015 W205 Comand Manual
Manufacturer: MERCEDES-BENZ, Model Year: 2015, Model line: C-Class, Model: MERCEDES-BENZ C-Class 2015 W205Pages: 214, PDF Size: 5.16 MB
Page 191 of 214
X
To switch on full-screen mode: press the
controller in the basic display.
X To show the video menu: slide 005200C5the
controller in full-screen mode.
The Media Interface menu bar appears.
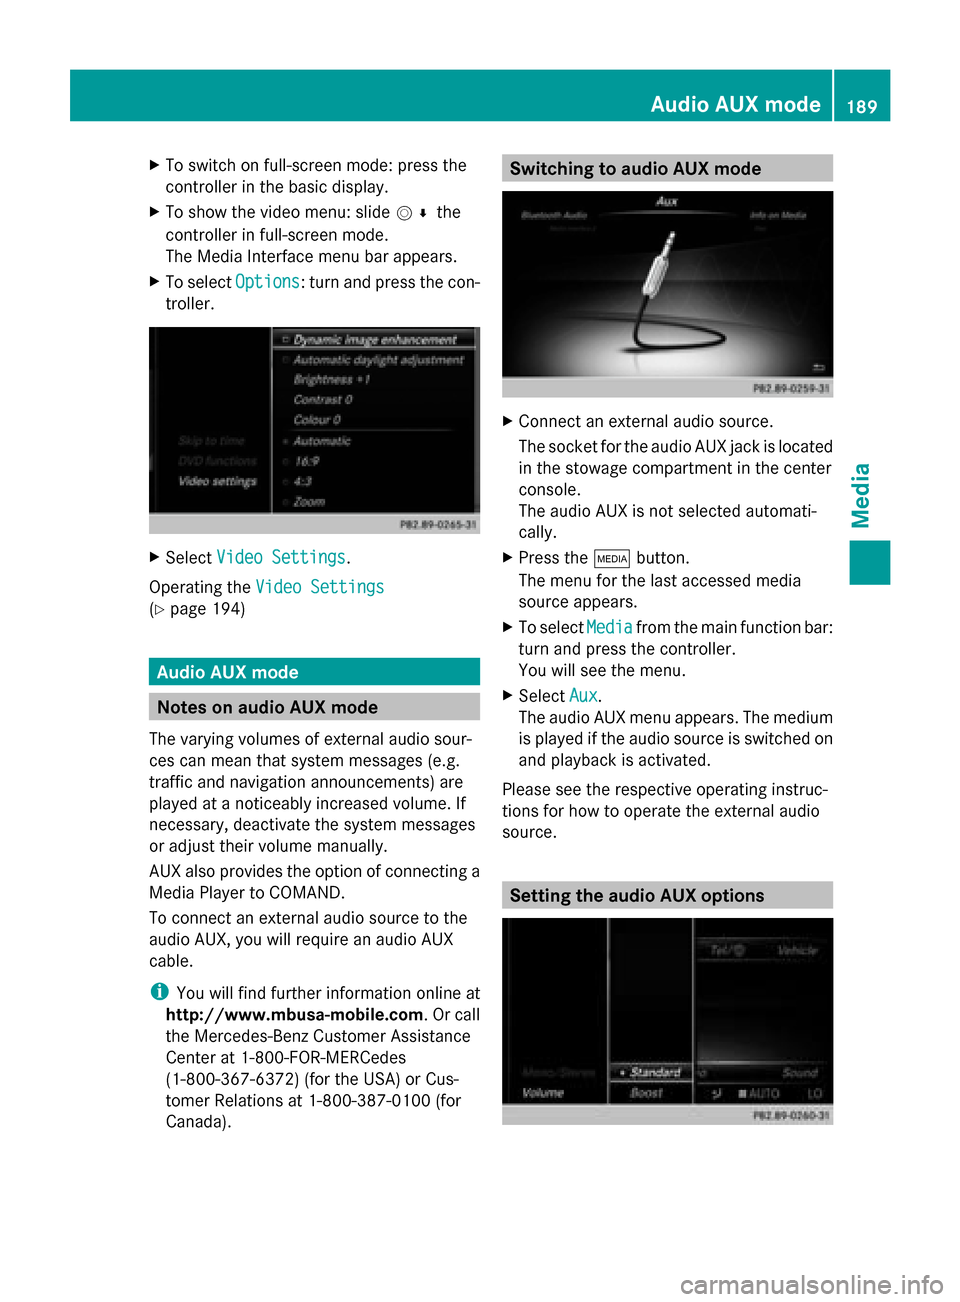
X To select Options
Options: turn and press the con-
troller. X
Select Video Settings
Video Settings.
Operating the Video Settings Video Settings
(Y page 194) Audio AUX mode
Notes on audio AUX mode
The varying volumes of external audio sour-
ces can mean that system messages (e.g.
traffic and navigation announcements) are
played at a noticeably increased volume. If
necessary, deactivate the system messages
or adjust their volume manually.
AUX also provides the option of connecting a
Media Player to COMAND.
To connect an external audio source to the
audio AUX, you will require an audio AUX
cable.
i You will find further information online at
http://www.mbusa-mobile.com. Or call
the Mercedes-Benz Customer Assistance
Center at 1-800-FOR-MERCedes
(1-800-367-6372) (for the USA) or Cus-
tomer Relations at 1-800-387-010 0(for
Canada). Switching to audio AUX mode
X
Connect an external audio source.
The socket for the audio AUX jack is located
in the stowage compartment in the center
console.
The audio AUX is not selected automati-
cally.
X Press the 00FDbutton.
The menu for the last accessed media
source appears.
X To select Media Mediafrom the main function bar:
turn and press the controller.
You will see the menu.
X Select Aux Aux.
The audio AUX menu appears. The medium
is played if the audio source is switched on
and playback is activated.
Please see the respective operating instruc-
tions for how to operate the external audio
source. Setting the audio AUX options Audio AUX mode
189Media Z
Page 192 of 214
X
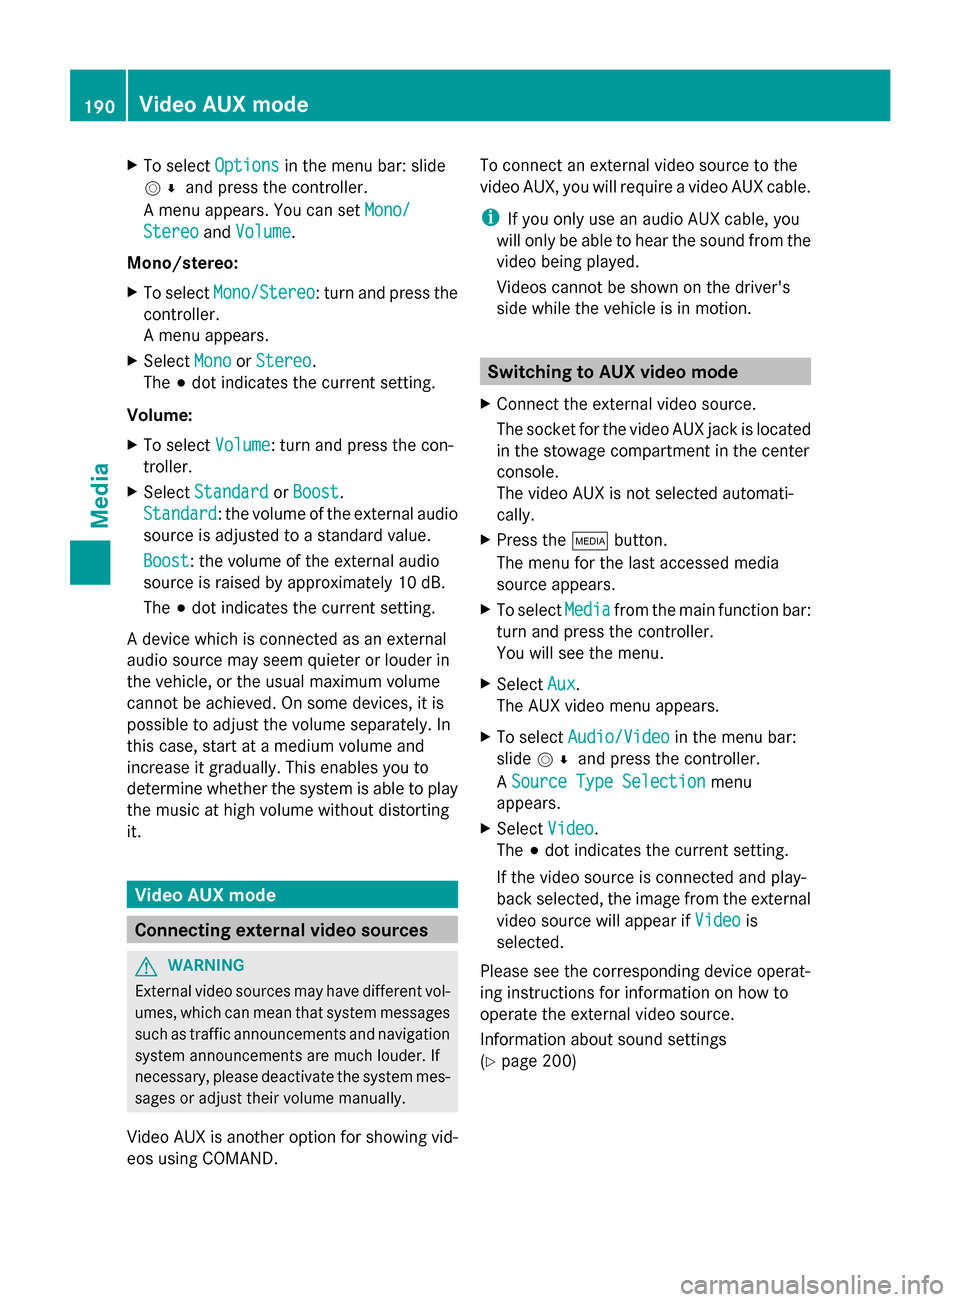
To select Options
Optionsin the menu bar: slide
005200C5 and press the controller.
A menu appears. You can set Mono/
Mono/
Stereo
Stereo andVolume
Volume.
Mono/stereo:
X To select Mono/Stereo
Mono/Stereo: turn and press the
controller.
A menu appears.
X Select Mono
Mono orStereo Stereo.
The 003Bdot indicates the current setting.
Volume:
X To select Volume
Volume: turn and press the con-
troller.
X Select Standard
Standard orBoost Boost.
Standard
Standard: the volume of the external audio
source is adjusted to a standard value.
Boost
Boost: the volume of the external audio
source is raised by approximately 10 dB.
The 003Bdot indicates the current setting.
A device which is connected as an external
audio source may seem quieter or louder in
the vehicle, or the usual maximum volume
cannot be achieved. On some devices, it is
possible to adjust the volume separately. In
this case, start at a medium volume and
increase it gradually. This enables you to
determine whether the system is able to play
the music at high volume without distorting
it. Video AUX mode
Connecting external video sources
G
WARNING
External video sources may have different vol-
umes, which can mean that system messages
such as traffic announcements and navigation
system announcements are much louder. If
necessary, please deactivate the system mes-
sages or adjust their volume manually.
Video AUX is another option for showing vid-
eos using COMAND. To connect an external video source to the
video AUX, you will require a video AUX cable.
i
If you only use an audio AUX cable, you
will only be able to hear the sound from the
video being played.
Videos cannot be shown on the driver's
side while the vehicle is in motion. Switching to AUX video mode
X Connect the external video source.
The socket for the video AUX jack is located
in the stowage compartment in the center
console.
The video AUX is not selected automati-
cally.
X Press the 00FDbutton.
The menu for the last accessed media
source appears.
X To select Media
Media from the main function bar:
turn and press the controller.
You will see the menu.
X Select Aux Aux.
The AUX video menu appears.
X To select Audio/Video Audio/Video in the menu bar:
slide 005200C5 and press the controller.
A Source Type Selection
Source Type Selection menu
appears.
X Select Video Video.
The 003Bdot indicates the current setting.
If the video source is connected and play-
back selected, the image from the external
video source will appear if Video Videois
selected.
Please see the corresponding device operat-
ing instructions for information on how to
operate the external video source.
Information about sound settings
(Y page 200) 190
Video AUX modeMedia
Page 193 of 214
Switching full-screen mode on/off
X
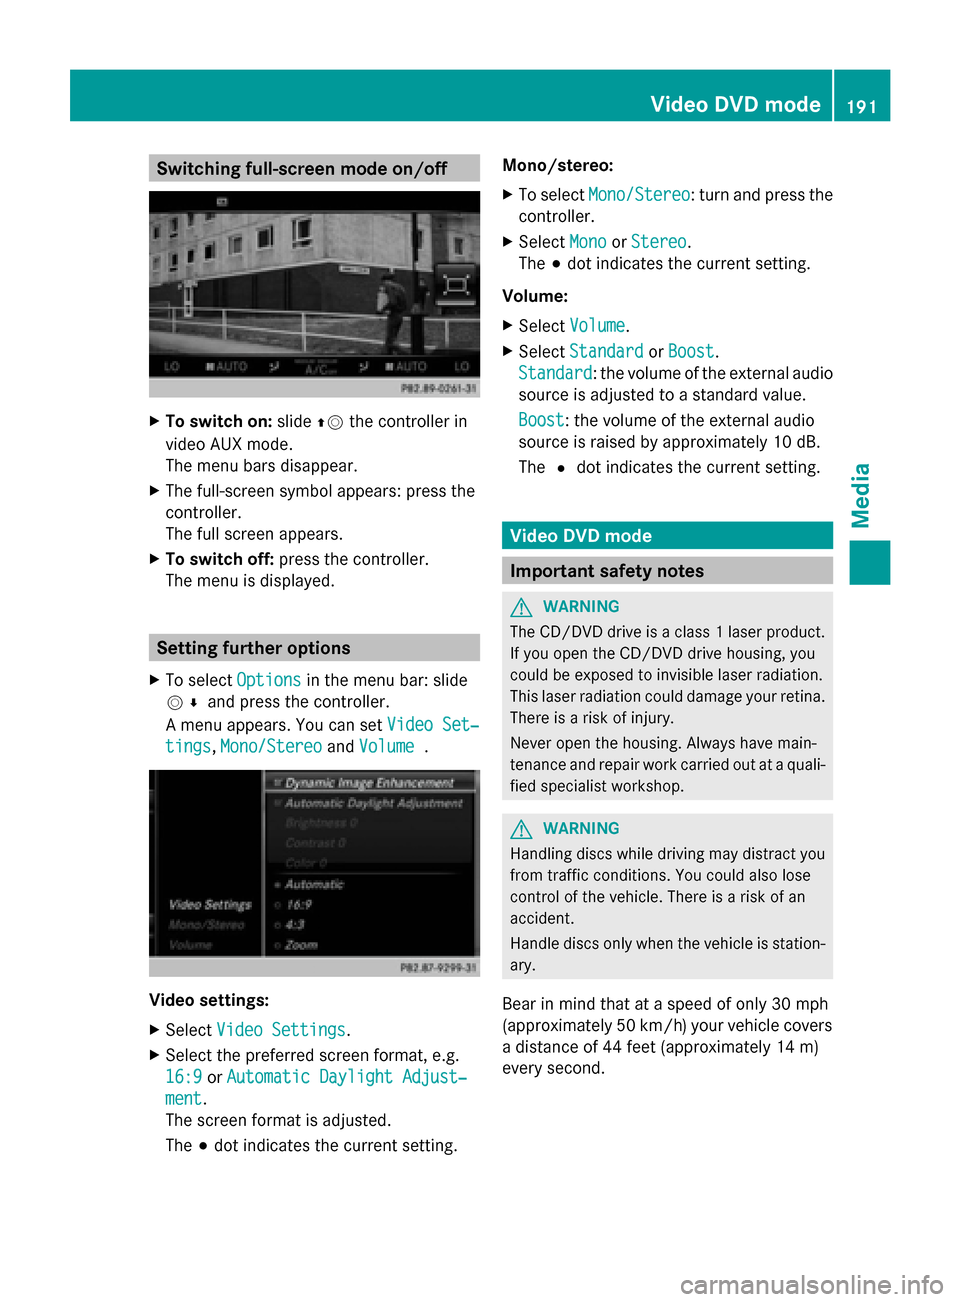
To switch on: slide00970052the controller in
video AUX mode.
The menu bars disappear.
X The full-screen symbol appears: press the
controller.
The full screen appears.
X To switch off: press the controller.
The menu is displayed. Setting further options
X To select Options Optionsin the menu bar: slide
005200C5 and press the controller.
A menu appears. You can set Video Set‐
Video Set‐
tings
tings, Mono/Stereo
Mono/Stereo andVolume
Volume . Video settings:
X
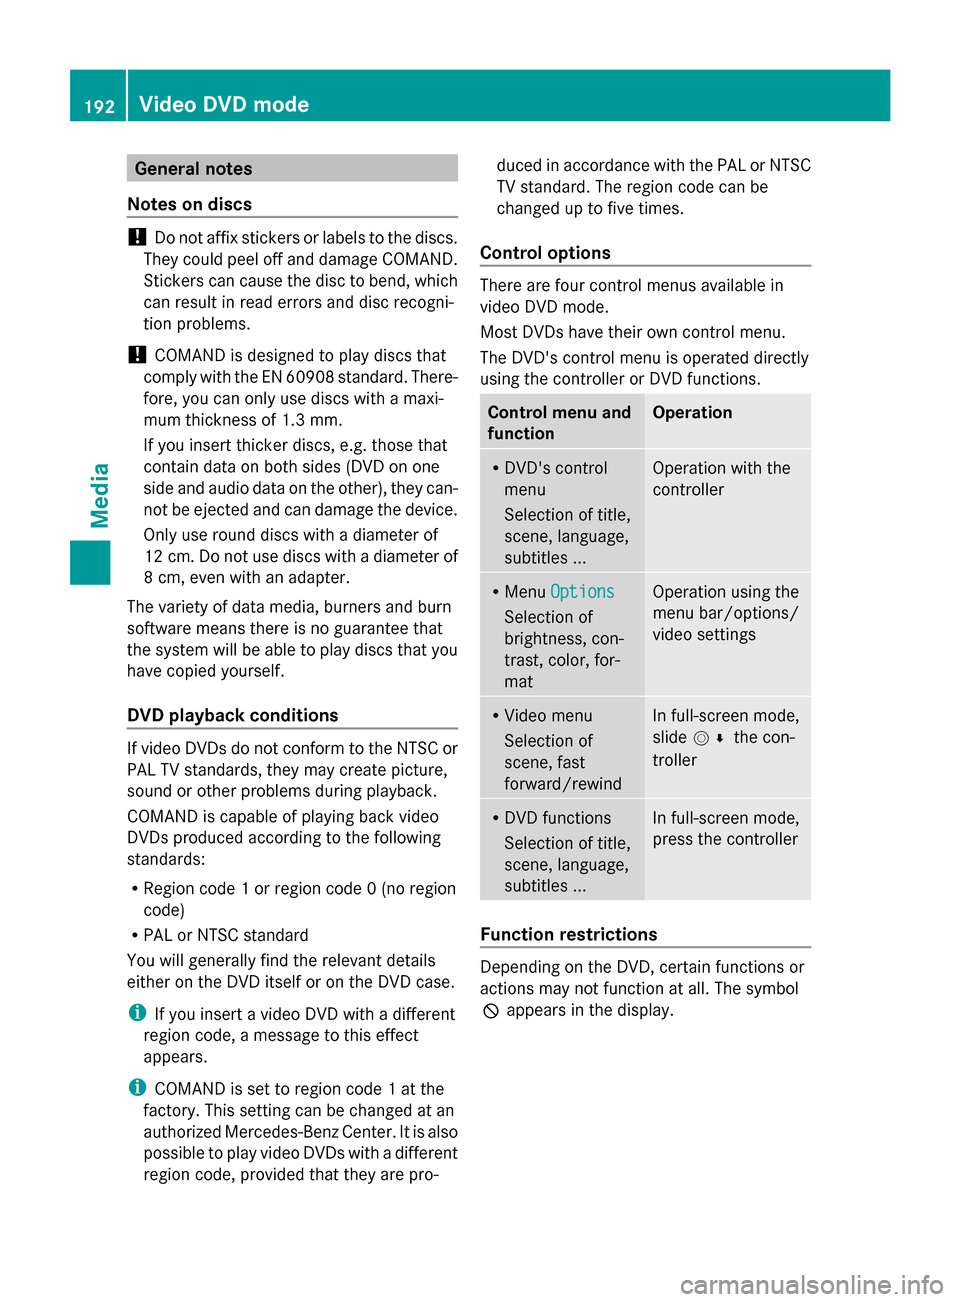
Select Video Settings
Video Settings.
X Select the preferred screen format, e.g.
16:9
16:9 orAutomatic Daylight Adjust‐
Automatic Daylight Adjust‐
ment ment.
The screen format is adjusted.
The 003Bdot indicates the current setting. Mono/stereo:
X
To select Mono/Stereo Mono/Stereo: turn and press the
controller.
X Select Mono
MonoorStereo
Stereo.
The 003Bdot indicates the current setting.
Volume:
X Select Volume Volume.
X Select Standard
Standard orBoost
Boost.
Standard
Standard: the volume of the external audio
source is adjusted to a standard value.
Boost Boost: the volume of the external audio
source is raised by approximately 10 dB.
The 0036dot indicates the current setting. Video DVD mode
Important safety notes
G
WARNING
The CD/DVD drive is a class 1 laser product.
If you open the CD/DVD drive housing, you
could be exposed to invisible laser radiation.
This laser radiation could damage your retina.
There is a risk of injury.
Never open the housing. Always have main-
tenance and repair work carried out at a quali-
fied specialist workshop. G
WARNING
Handling discs while driving may distract you
from traffic conditions. You could also lose
control of the vehicle. There is a risk of an
accident.
Handle discs only when the vehicle is station-
ary.
Bear in mind that at a speed of only 30 mph
(approximately 50 km/h) your vehicle covers
a distance of 44 feet (approximately 14 m)
every second. Video DVD
mode
191Media Z
Page 194 of 214
General notes
Notes on discs !
Do not affix stickers or labels to the discs.
They could peel off and damage COMAND.
Stickers can cause the disc to bend, which
can result in read errors and disc recogni-
tion problems.
! COMAND is designed to play discs that
comply with the EN 60908 standard. There-
fore, you can only use discs with a maxi-
mum thickness of 1.3 mm.
If you insert thicker discs, e.g. those that
contain data on both sides (DVD on one
side and audio data on the other), they can-
not be ejected and can damage the device.
Only use round discs with a diameter of
12 cm. Do not use discs with a diameter of
8 cm, even with an adapter.
The variety of data media, burners and burn
software means there is no guarantee that
the system will be able to play discs that you
have copied yourself.
DVD playback conditions If video DVDs do not conform to the NTSC or
PAL TV standards, they may create picture,
sound or other problems during playback.
COMAND is capable of playing back video
DVDs produced according to the following
standards:
R Region code 1 or region code 0 (no region
code)
R PAL or NTSC standard
You will generally find the relevant details
either on the DVD itself or on the DVD case.
i If you insert a video DVD with a different
region code, a message to this effect
appears.
i COMAND is set to region code 1 at the
factory. This setting can be changed at an
authorized Mercedes-Benz Center. It is also
possible to play video DVDs with a different
region code, provided that they are pro- duced in accordance with the PAL or NTSC
TV standard. The region code can be
changed up to five times.
Control options There are four control menus available in
video DVD mode.
Most DVDs have their own control menu.
The DVD's control menu is operated directly
using the controller or DVD functions.
Control menu and
function Operation
R
DVD's control
menu
Selection of title,
scene, language,
subtitles ... Operation with the
controller
R
Menu Options Options
Selection of
brightness, con-
trast, color, for-
mat Operation using the
menu bar/options/
video settings
R
Video menu
Selection of
scene, fast
forward/rewind In full-screen mode,
slide
005200C5 the con-
troller R
DVD functions
Selection of title,
scene, language,
subtitles ... In full-screen mode,
press the controller
Function restrictions
Depending on the DVD, certain functions or
actions may not function at all. The symbol
0047
appears in the display. 192
Video DVD modeMedia
Page 195 of 214
Switching to video DVD mode
R Insert and eject a disc from the single drive
(Y page 166)
R Insert a disc into the DVD changer
(Y page 166)
R Eject a disc from the DVD changer
(Y page 167)
Further options for switching on:
R Use the number keypad ( Ypage 165)
R Use the main function bar (Y page 165)
R Use the device list (Y page 165)
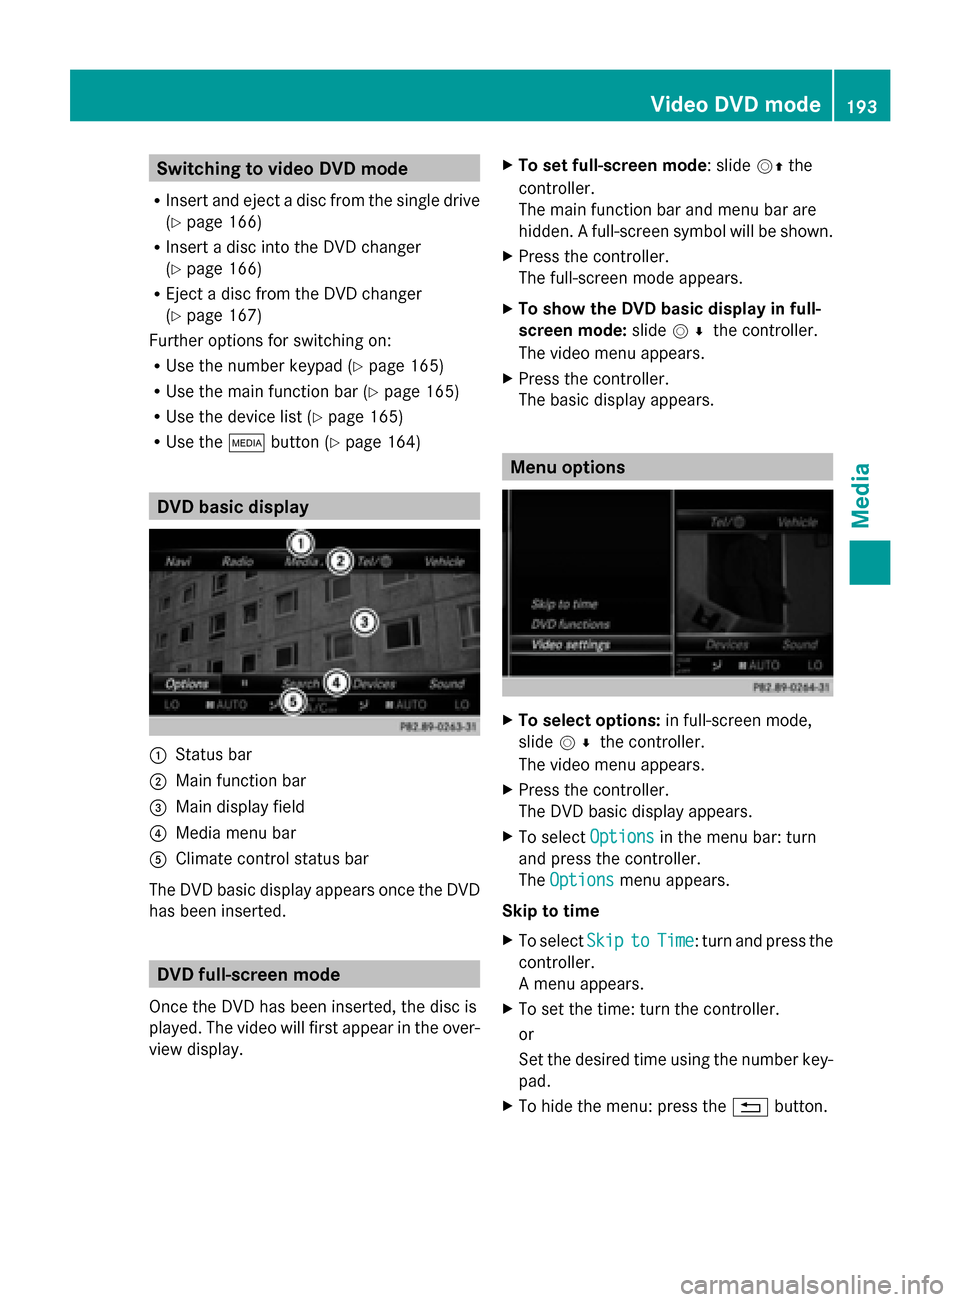
R Use the 00FDbutton (Y page 164) DVD basic display
0043
Status bar
0044 Main function bar
0087 Main display field
0085 Media menu bar
0083 Climate control status bar
The DVD basic display appears once the DVD
has been inserted. DVD full-screen mode
Once the DVD has been inserted, the disc is
played. The video will first appear in the over-
view display. X
To set full-screen mode : slide00520097the
controller.
The main function bar and menu bar are
hidden. A full-screen symbol will be shown.
X Press the controller.
The full-screen mode appears.
X To show the DVD basic display in full-
screen mode: slide005200C5 the controller.
The video menu appears.
X Press the controller.
The basic display appears. Menu options
X
To select options: in full-screen mode,
slide 005200C5 the controller.
The video menu appears.
X Press the controller.
The DVD basic display appears.
X To select Options Optionsin the menu bar: turn
and press the controller.
The Options Options menu appears.
Skip to time
X To select Skip
Skip to toTime
Time : turn and press the
controller.
A menu appears.
X To set the time: turn the controller.
or
Set the desired time using the number key-
pad.
X To hide the menu: press the 0038button. Video DVD mode
193Media Z
Page 196 of 214
DVD functions
X
To select DVD Functions DVD Functions : turn and press
the controller.
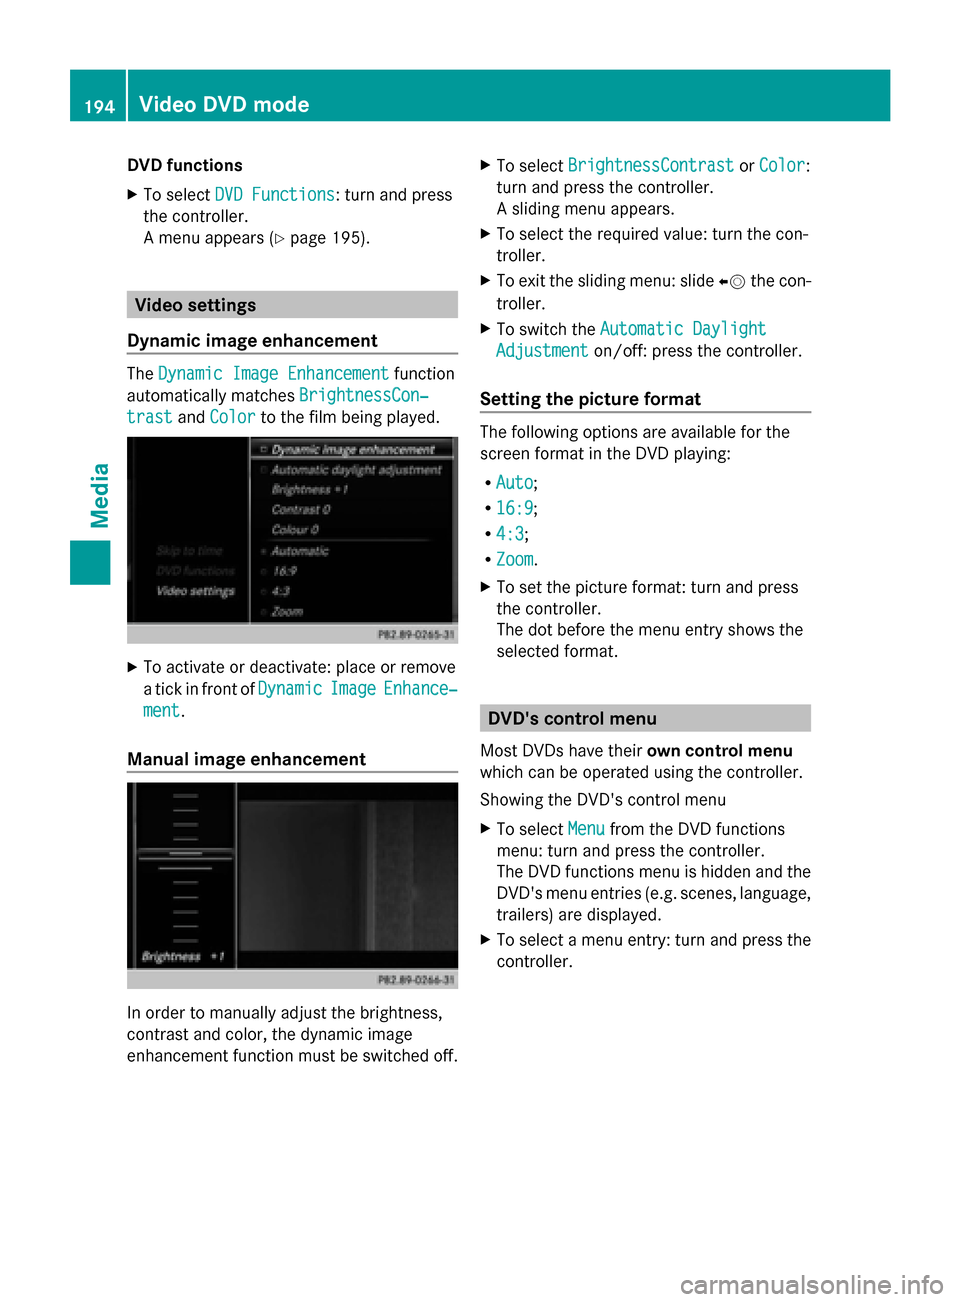
A menu appears ( Ypage 195). Video settings
Dynamic image enhancement The
Dynamic Image Enhancement Dynamic Image Enhancement function
automatically matches BrightnessCon‐
BrightnessCon‐
trast
trast andColor
Color to the film being played. X
To activate or deactivate: place or remove
a tick in front of Dynamic
DynamicImage
ImageEnhance‐
Enhance‐
ment
ment.
Manual image enhancement In order to manually adjust the brightness,
contrast and color, the dynamic image
enhancement function must be switched off. X
To select BrightnessContrast
BrightnessContrast orColor
Color:
turn and press the controller.
A sliding menu appears.
X To select the required value: turn the con-
troller.
X To exit the sliding menu: slide 00950052the con-
troller.
X To switch the Automatic Daylight Automatic Daylight
Adjustment
Adjustment on/off: press the controller.
Setting the picture format The following options are available for the
screen format in the DVD playing:
R Auto Auto;
R 16:9
16:9;
R 4:3
4:3 ;
R Zoom
Zoom.
X To set the picture format: turn and press
the controller.
The dot before the menu entry shows the
selected format. DVD's control menu
Most DVDs have their own control menu
which can be operated using the controller.
Showing the DVD's control menu
X To select Menu Menufrom the DVD functions
menu: turn and press the controller.
The DVD functions menu is hidden and the
DVD's menu entries (e.g. scenes, language,
trailers) are displayed.
X To select a menu entry: turn and press the
controller. 194
Video DVD
modeMedia
Page 197 of 214
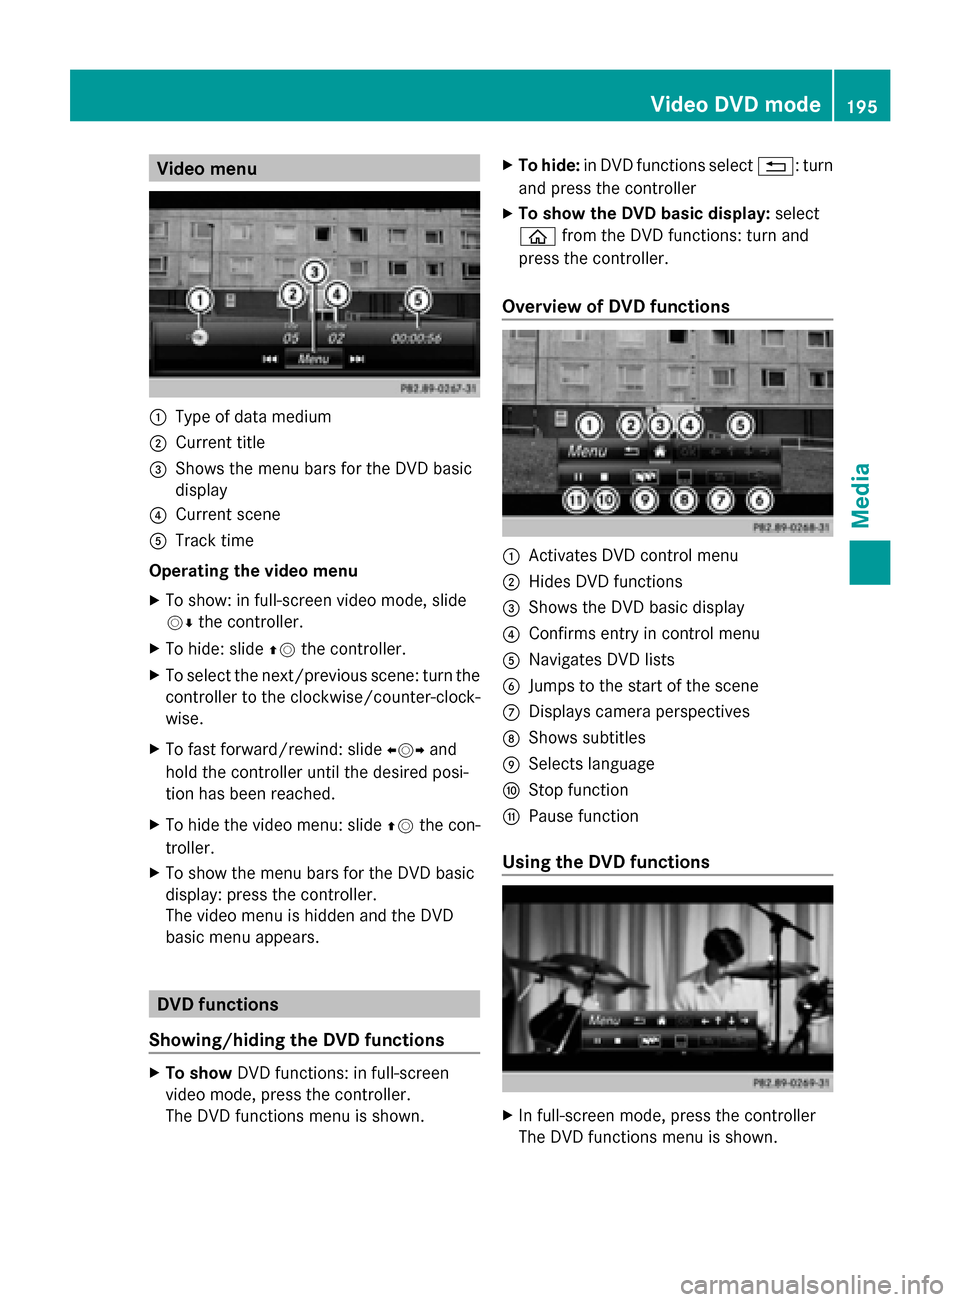
Video menu
0043
Type of data medium
0044 Current title
0087 Shows the menu bars for the DVD basic
display
0085 Current scene
0083 Track time
Operating the video menu
X To show: in full-screen video mode, slide
00520064 the controller.
X To hide: slide 00970052the controller.
X To select the next/previous scene: turn the
controller to the clockwise/counter-clock-
wise.
X To fast forward/rewind: slide 009500520096and
hold the controller until the desired posi-
tion has been reached.
X To hide the video menu: slide 00970052the con-
troller.
X To show the menu bars for the DVD basic
display: press the controller.
The video menu is hidden and the DVD
basic menu appears. DVD functions
Showing/hiding the DVD functions X
To show DVD functions: in full-screen
video mode, press the controller.
The DVD functions menu is shown. X
To hide: in DVD functions select 0038: turn
and press the controller
X To show the DVD basic display: select
00E2 from the DVD functions: turn and
press the controller.
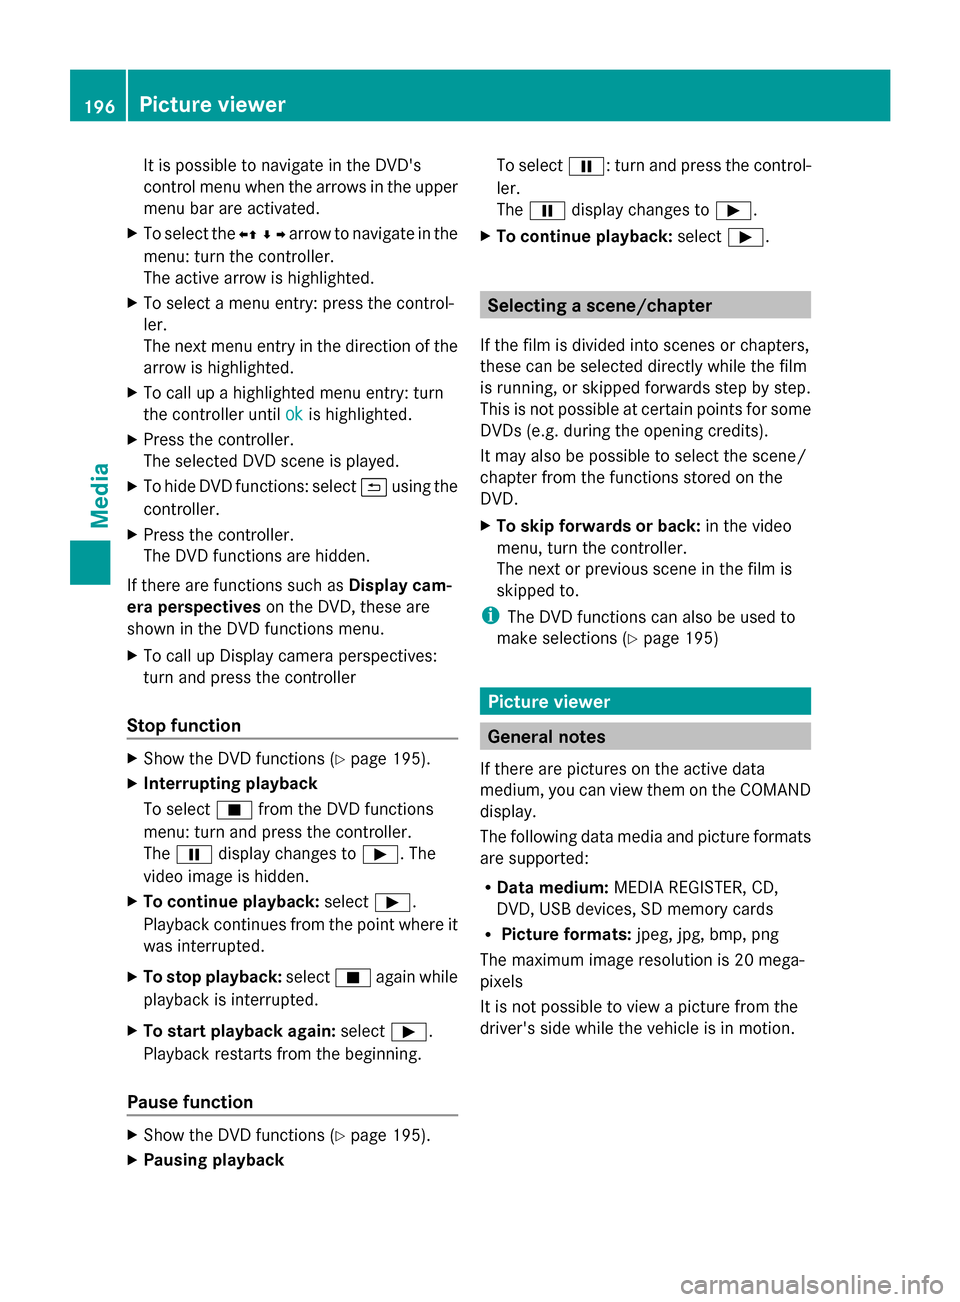
Overview of DVD functions 0043
Activates DVD control menu
0044 Hides DVD functions
0087 Shows the DVD basic display
0085 Confirms entry in control menu
0083 Navigates DVD lists
0084 Jumps to the start of the scene
006B Displays camera perspectives
006C Shows subtitles
006D Selects language
006E Stop function
006F Pause function
Using the DVD functions X
In full-screen mode, press the controller
The DVD functions menu is shown. Video DVD mode
195Media Z
Page 198 of 214
It is possible to navigate in the DVD's
control menu when the arrows in the upper
menu bar are activated.
X To select the 0095009700C50096arrow to navigate in the
menu: turn the controller.
The active arrow is highlighted.
X To select a menu entry: press the control-
ler.
The next menu entry in the direction of the
arrow is highlighted.
X To call up a highlighted menu entry: turn
the controller until ok
ok is highlighted.
X Press the controller.
The selected DVD scene is played.
X To hide DVD functions: select 0039using the
controller.
X Press the controller.
The DVD functions are hidden.
If there are functions such as Display cam-
era perspectives on the DVD, these are
shown in the DVD functions menu.
X To call up Display camera perspectives:
turn and press the controller
Stop function X
Show the DVD functions (Y page 195).
X Interrupting playback
To select 00DBfrom the DVD functions
menu: turn and press the controller.
The 00CF display changes to 00D0. The
video image is hidden.
X To continue playback: select00D0.
Playback continues from the point where it
was interrupted.
X To stop playback: select00DBagain while
playback is interrupted.
X To start playback again: select00D0.
Playback restarts from the beginning.
Pause function X
Show the DVD functions (Y page 195).
X Pausing playback To select
00CF: turn and press the control-
ler.
The 00CF display changes to 00D0.
X To continue playback: select00D0. Selecting a scene/chapter
If the film is divided into scenes or chapters,
these can be selected directly while the film
is running, or skipped forwards step by step.
This is not possible at certain points for some
DVDs (e.g. during the opening credits).
It may also be possible to select the scene/
chapter from the functions stored on the
DVD.
X To skip forwards or back: in the video
menu, turn the controller.
The next or previous scene in the film is
skipped to.
i The DVD functions can also be used to
make selections (Y page 195) Picture viewer
General notes
If there are pictures on the active data
medium, you can view them on the COMAND
display.
The following data media and picture formats
are supported:
R Data medium: MEDIA REGISTER, CD,
DVD, USB devices, SD memory cards
R Picture formats: jpeg, jpg, bmp, png
The maximum image resolution is 20 mega-
pixels
It is not possible to view a picture from the
driver's side while the vehicle is in motion. 196
Picture viewerMedia
Page 199 of 214
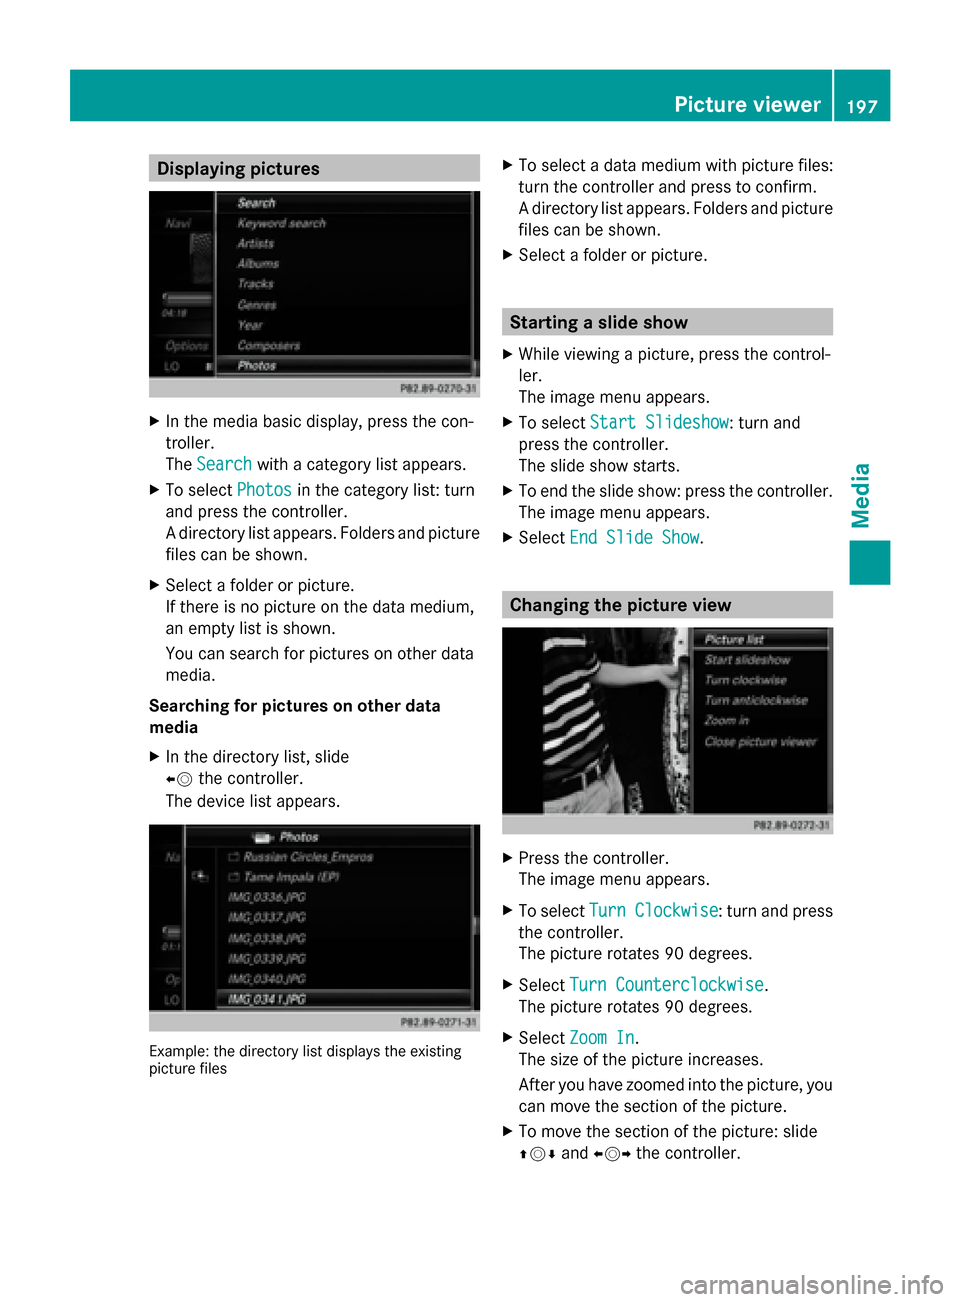
Displaying pictures
X
In the media basic display, press the con-
troller.
The Search
Search with a category list appears.
X To select Photos
Photos in the category list: turn
and press the controller.
A directory list appears. Folders and picture
files can be shown.
X Select a folder or picture.
If there is no picture on the data medium,
an empty list is shown.
You can search for pictures on other data
media.
Searching for pictures on other data
media
X In the directory list, slide
00950052 the controller.
The device list appears. Example: the directory list displays the existing
picture files X
To select a data medium with picture files:
turn the controller and press to confirm.
A directory list appears. Folders and picture
files can be shown.
X Select a folder or picture. Starting a slide show
X While viewing a picture, press the control-
ler.
The image menu appears.
X To select Start Slideshow Start Slideshow : turn and
press the controller.
The slide show starts.
X To end the slide show: press the controller.
The image menu appears.
X Select End Slide Show End Slide Show. Changing the picture view
X
Press the controller.
The image menu appears.
X To select Turn Clockwise Turn Clockwise : turn and press
the controller.
The picture rotates 90 degrees.
X Select Turn Counterclockwise Turn Counterclockwise.
The picture rotates 90 degrees.
X Select Zoom In Zoom In.
The size of the picture increases.
After you have zoomed into the picture, you
can move the section of the picture.
X To move the section of the picture: slide
009700520064 and009500520096 the controller. Picture viewer
197Media Z
Page 200 of 214
X
To revert to the original size: press the con-
troller
or
X Press the 0038button. Closing the picture viewer
X Press the controller.
The menu appears.
X To select Close Picture Viewer Close Picture Viewer: turn
and press the controller.
COMAND returns to the last accessed
media function. 198
Picture viewerMedia