MERCEDES-BENZ C-Class 2015 W205 Comand Manual
Manufacturer: MERCEDES-BENZ, Model Year: 2015, Model line: C-Class, Model: MERCEDES-BENZ C-Class 2015 W205Pages: 214, PDF Size: 5.16 MB
Page 201 of 214
Your COMAND equipment
................200
Sound settings .................................. 200
Burmester ®
surround sound sys-
tem ..................................................... 201 199Sound
Page 202 of 214
Your COMAND equipment
These operating instructions describe all
standard and optional equipment available
for your COMAND system at the time of pur-
chase. Country-specific differences are pos-
sible. Please note that your COMAND system
may not be equipped with all the features
described. This also applies to safety-relevant
systems and functions. Therefore, the equip-
ment on your COMAND system may differ
from that in the descriptions and illustrations.
Should you have any questions concerning
equipment and operation, please consult an
authorized Mercedes-Benz Center. Sound settings
Calling up the sound menu
You can make various sound settings for the
different audio and video sources. It is possi-
ble to set more bass for radio mode than for
audio CD mode, for example. The respective
sound menu can be called up from the menu
of the desired mode.
The example describes where to call up the
sound menu in CD mode. X
Insert an audio CD (Y page 166).
The CD display appears.
X To display the menu bars: slide 00520064the
controller.
X To select Sound
Sound in the menu bar: turn and
press the controller.
The menu appears with the last setting
accessed, e.g. Balance/Fader Balance/Fader. Sound menu overview Function Options
Equalizer Sets: treble, mid-
range and base
Balance/fader Moves the sound
focus: right/left and
front/rear
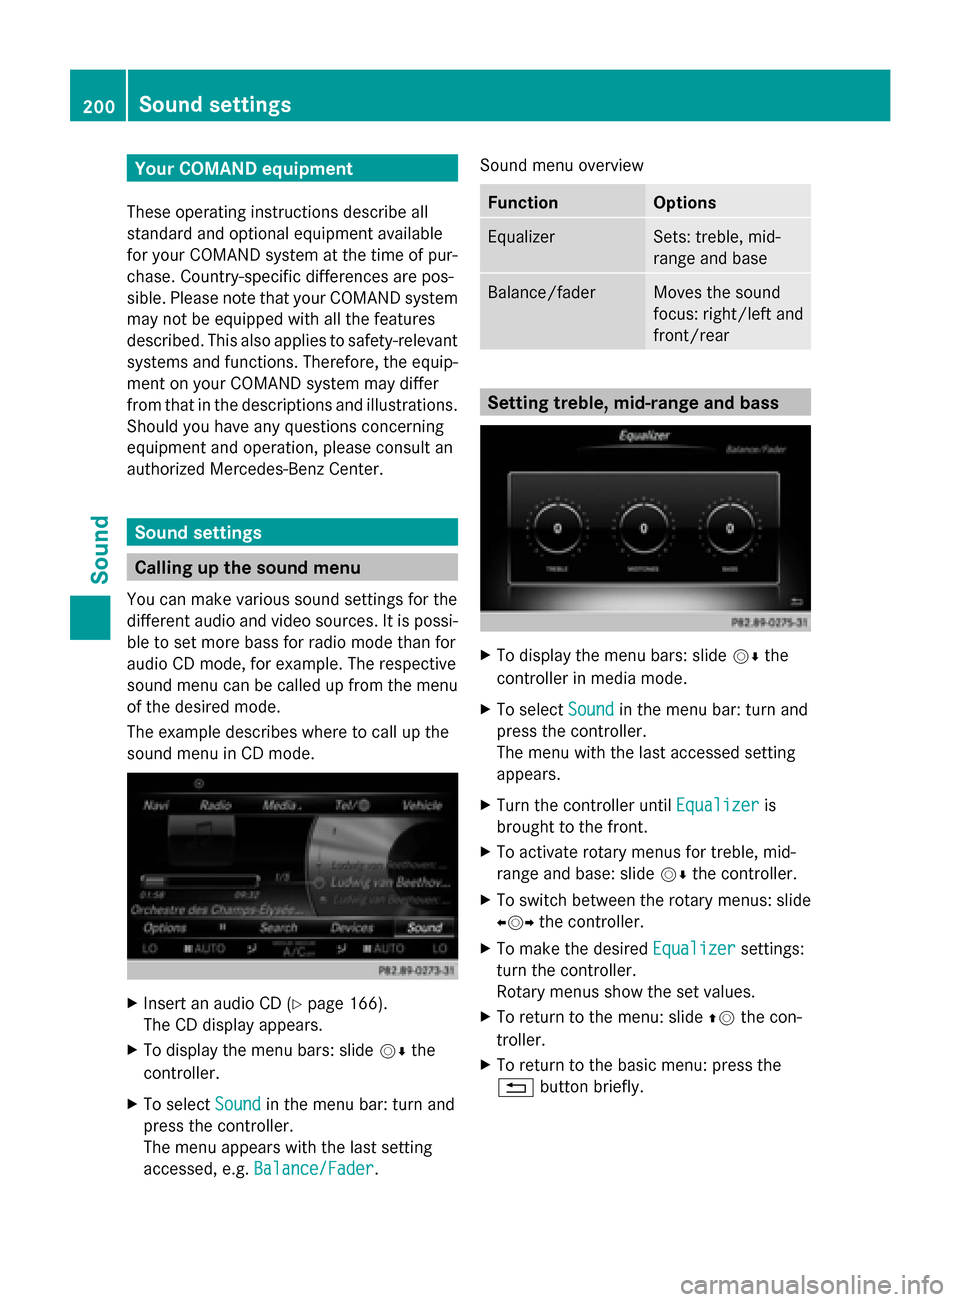
Setting treble, mid-range and bass
X
To display the menu bars: slide 00520064the
controller in media mode.
X To select Sound Soundin the menu bar: turn and
press the controller.
The menu with the last accessed setting
appears.
X Turn the controller until Equalizer Equalizeris
brought to the front.
X To activate rotary menus for treble, mid-
range and base: slide 00520064the controller.
X To switch between the rotary menus: slide
00950052 the controller.
X To make the desired Equalizer
Equalizer settings:
turn the controller.
Rotary menus show the set values.
X To return to the menu: slide 00970052the con-
troller.
X To return to the basic menu: press the
0038 button briefly. 200
Sound set
tingsSound
Page 203 of 214
Adjusting the balance/fader
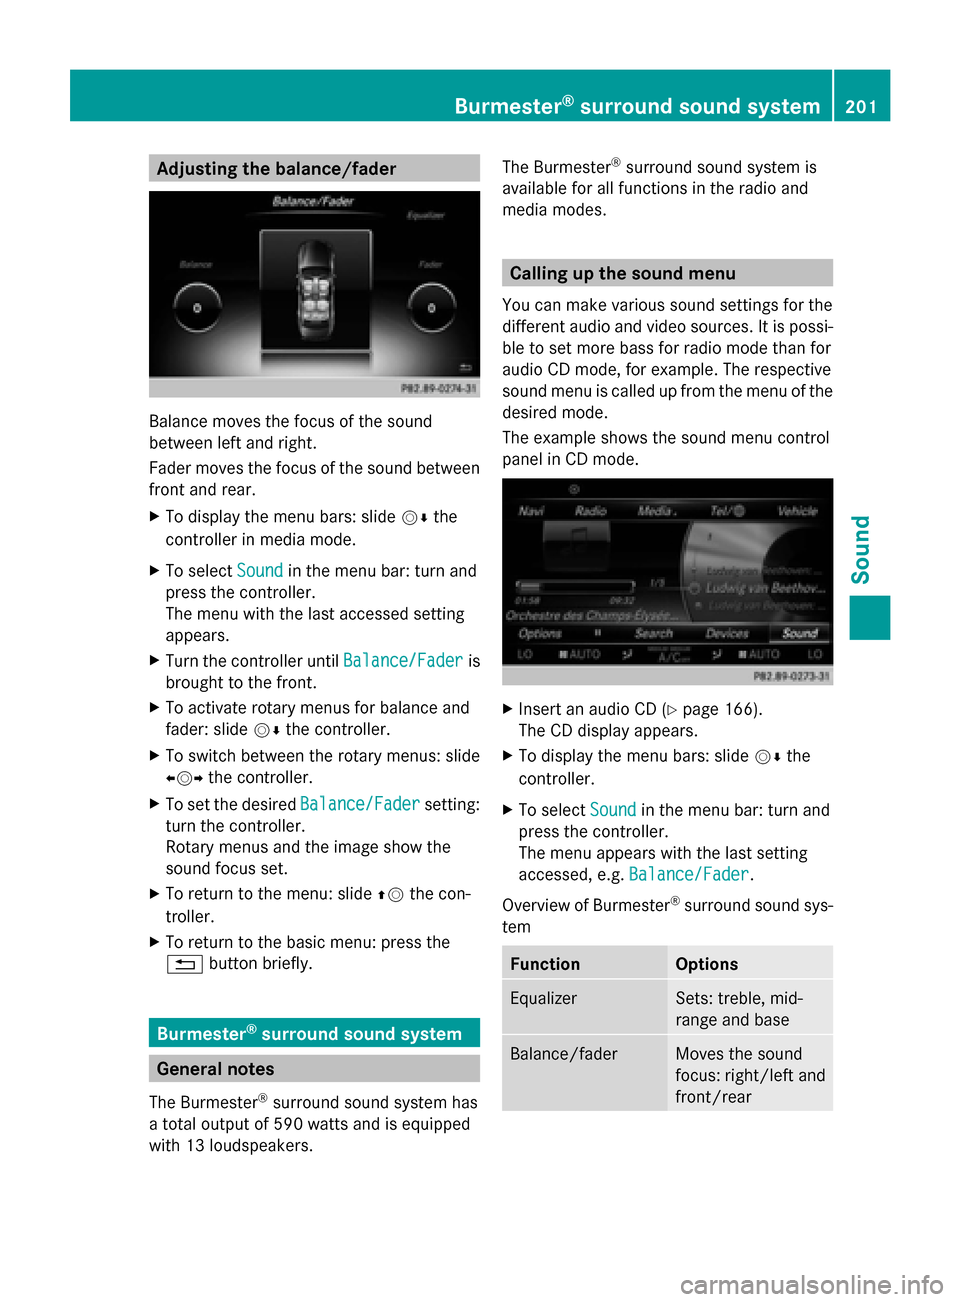
Balance moves the focus of the sound
between left and right.
Fader moves the focus of the sound between
front and rear.
X To display the menu bars: slide 00520064the
controller in media mode.
X To select Sound Soundin the menu bar: turn and
press the controller.
The menu with the last accessed setting
appears.
X Turn the controller until Balance/Fader
Balance/Fader is
brought to the front.
X To activate rotary menus for balance and
fader: slide 00520064the controller.
X To switch between the rotary menus: slide
009500520096 the controller.
X To set the desired Balance/Fader
Balance/Fader setting:
turn the controller.
Rotary menus and the image show the
sound focus set.
X To return to the menu: slide 00970052the con-
troller.
X To return to the basic menu: press the
0038 button briefly. Burmester
®
surround sound system General notes
The Burmester ®
surround sound system has
a total output of 590 watts and is equipped
with 13 loudspeakers. The Burmester
®
surround sound system is
available for all functions in the radio and
media modes. Calling up the sound menu
You can make various sound settings for the
different audio and video sources. It is possi-
ble to set more bass for radio mode than for
audio CD mode, for example. The respective
sound menu is called up from the menu of the
desired mode.
The example shows the sound menu control
panel in CD mode. X
Insert an audio CD (Y page 166).
The CD display appears.
X To display the menu bars: slide 00520064the
controller.
X To select Sound Soundin the menu bar: turn and
press the controller.
The menu appears with the last setting
accessed, e.g. Balance/Fader Balance/Fader.
Overview of Burmester ®
surround sound sys-
tem Function Options
Equalizer Sets: treble, mid-
range and base
Balance/fader Moves the sound
focus: right/left and
front/rearBurmester
®
surround sound system 201Sound
Page 204 of 214
Setting treble, mid-range and bass
X
To display the menu bars: slide 00520064the
controller in media mode.
X To select Sound
Sound in the menu bar: turn and
press the controller.
The menu with the last accessed setting
appears.
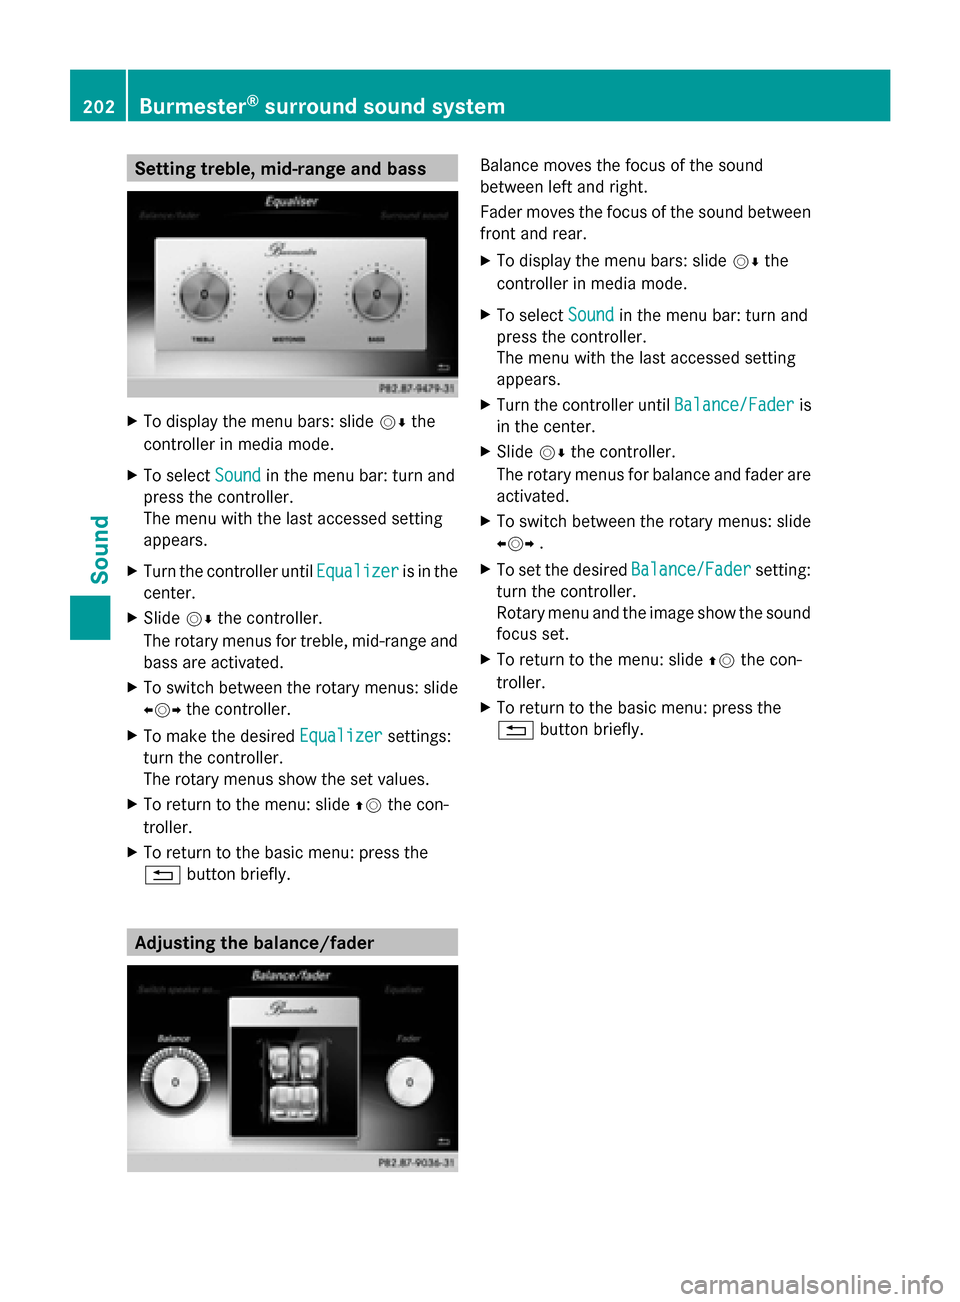
X Turn the controller until Equalizer
Equalizer is in the
center.
X Slide 00520064the controller.
The rotary menus for treble, mid-range and
bass are activated.
X To switch between the rotary menus: slide
009500520096 the controller.
X To make the desired Equalizer Equalizersettings:
turn the controller.
The rotary menus show the set values.
X To return to the menu: slide 00970052the con-
troller.
X To return to the basic menu: press the
0038 button briefly. Adjusting the balance/fader Balance moves the focus of the sound
between left and right.
Fader moves the focus of the sound between
front and rear.
X To display the menu bars: slide 00520064the
controller in media mode.
X To select Sound Soundin the menu bar: turn and
press the controller.
The menu with the last accessed setting
appears.
X Turn the controller until Balance/Fader Balance/Faderis
in the center.
X Slide 00520064the controller.
The rotary menus for balance and fader are
activated.
X To switch between the rotary menus: slide
009500520096 .
X To set the desired Balance/Fader
Balance/Fader setting:
turn the controller.
Rotary menu and the image show the sound
focus set.
X To return to the menu: slide 00970052the con-
troller.
X To return to the basic menu: press the
0038 button briefly. 202
Burmester ®
surround sound systemSound
Page 205 of 214
Your COMAND equipment
................204
Weather forecasts ............................204 203SIRIUS Weather
Page 206 of 214
Your COMAND equipment
These operating instructions describe all the
standard and optional equipment for your
COMAND system, as available at the time of
going to print. Country-specific differences
are possible. Please note that your COMAND
system may not be equipped with all the fea-
tures described. Weather forecasts
Introduction
This function is currently not available for
Canada.
For the reception of weather forecasts via
satellite radio, you will need a SIRIUS XM Sat-
ellite Weather subscription.
If the message Call
Call SIRIUS SIRIUS to
toactivate
activate
system at: SIRIUS_number ESN:
system at: SIRIUS_number ESN:
SIRIUS_ID
SIRIUS_ID appears along with the ID number
of the SIRIUS device, you will need to have
the weather service activated first.
X To select Call
Call orCancel
Cancel : turn and press
the controller.
If a mobile phone is connected to COMAND
(Y page 104), the call will connect to a SIR-
IUS service employee after selecting Call Call.
The ID number of the SIRIUS device will be
transferred to the telephone display.
X This will be followed by instructions from
the service employee.
COMAND can receive weather forecasts via
satellite radio for the entire USA (including
Alaska and Hawaii).
The received weather data can be displayed
as an information chart (daily forecast, five-
day forecast, detailed information) or on the
weather map.
The weather data received from a weather
station is stored in COMAND for one hour. It
can therefore be displayed again immediately
after restarting the engine (for example after
refueling). Depending on which scale has been selected,
the weather map can display the following
weather data with symbols:
R
rain radar
R storm characteristics
R high and low-pressure areas, weather
fronts
R course of tropical cyclones (hurricanes,
typhoons)
R gale warnings
R wind direction and speeds
i The rain radar cannot be displayed for
Alaska, Hawaii and Puerto Rico.
i Hurricane: term used to describe the trop-
ical cyclones that primarily develop in the
Atlantic, North Pacific and South Pacific
oceans. The wind speeds are above
74 mph (118 km/h). Five categories are
used to classify the strength of a hurricane.
Typhoon: term used to describe a tropical
cyclone that develops in the northwestern
Pacific. The wind speeds are in the category
of a hurricane. Switching the SIRIUS Weather display
on/off
Activating 204
Wea
ther forecastsSIRIUS Weather
Page 207 of 214
X
Press the 002Bbutton.
X To select TEL/ 00A7in the main function bar:
slide 5, turn and press the controller.
The menu for selecting telephone and Inter-
net applications appears.
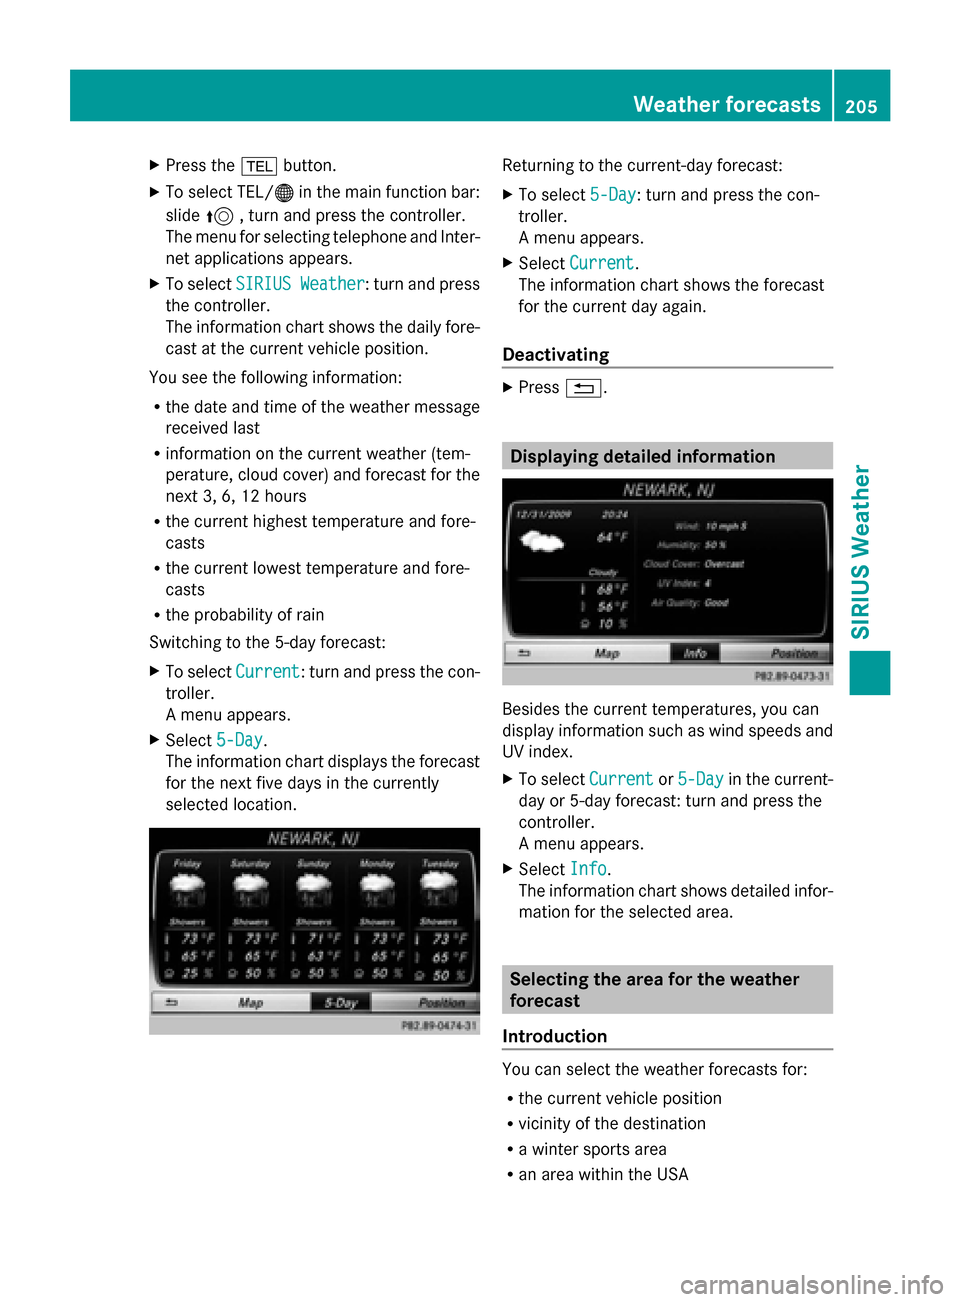
X To select SIRIUS Weather
SIRIUS Weather : turn and press
the controller.
The information chart shows the daily fore-
cast at the current vehicle position.
You see the following information:
R the date and time of the weather message
received last
R information on the current weather (tem-
perature, cloud cover) and forecast for the
next 3, 6, 12 hours
R the current highest temperature and fore-
casts
R the current lowest temperature and fore-
casts
R the probability of rain
Switching to the 5-day forecast:
X To select Current
Current: turn and press the con-
troller.
A menu appears.
X Select 5-Day
5-Day.
The information chart displays the forecast
for the next five days in the currently
selected location. Returning to the current-day forecast:
X
To select 5-Day 5-Day: turn and press the con-
troller.
A menu appears.
X Select Current Current.
The information chart shows the forecast
for the current day again.
Deactivating X
Press 0038. Displaying detailed information
Besides the current temperatures, you can
display information such as wind speeds and
UV index.
X
To select Current Currentor5-Day
5-Day in the current-
day or 5-day forecast: turn and press the
controller.
A menu appears.
X Select Info Info.
The information chart shows detailed infor-
mation for the selected area. Selecting the area for the weather
forecast
Introduction You can select the weather forecasts for:
R
the current vehicle position
R vicinity of the destination
R a winter sports area
R an area within the USA Weather forecasts
205SIRIUS Weather
Page 208 of 214
You can select a location in the information
chart (option 1) or in the map (option 2). You
can store frequently selected locations in the
memory (Y page 207).
i COMAND receives the data for the
weather forecasts from the nearest
weather station to the selected location.
Option 1: selecting the area in the infor-
mation chart X
To select Position Position in the information
chart: turn and press the controller.
X To select the current vehicle position:
select Current Position
Current Position from the menu.
COMAND receives the weather data for the
current vehicle position from the nearest
weather station and displays it automati-
cally.
Requirement for "Selecting the vicinity of the
destination": a route is calculated to a desti-
nation (Y page 69). The menu item is other-
wise grayed out.
X To select the vicinity of the destina-
tion: select Near Destination
Near Destination from the
menu: turn the controller and press to con-
firm. X
To select a winter sports area: selectAt At
Ski
Ski Area
Area from the menu: turn the control-
ler and press to confirm.
X Select a state, e.g. Colorado
Colorado.
X Select a winter sports area from the menu.
The weather data and other information is
displayed for the winter sports area that has been selected. The data is supplied by
the nearest weather station.
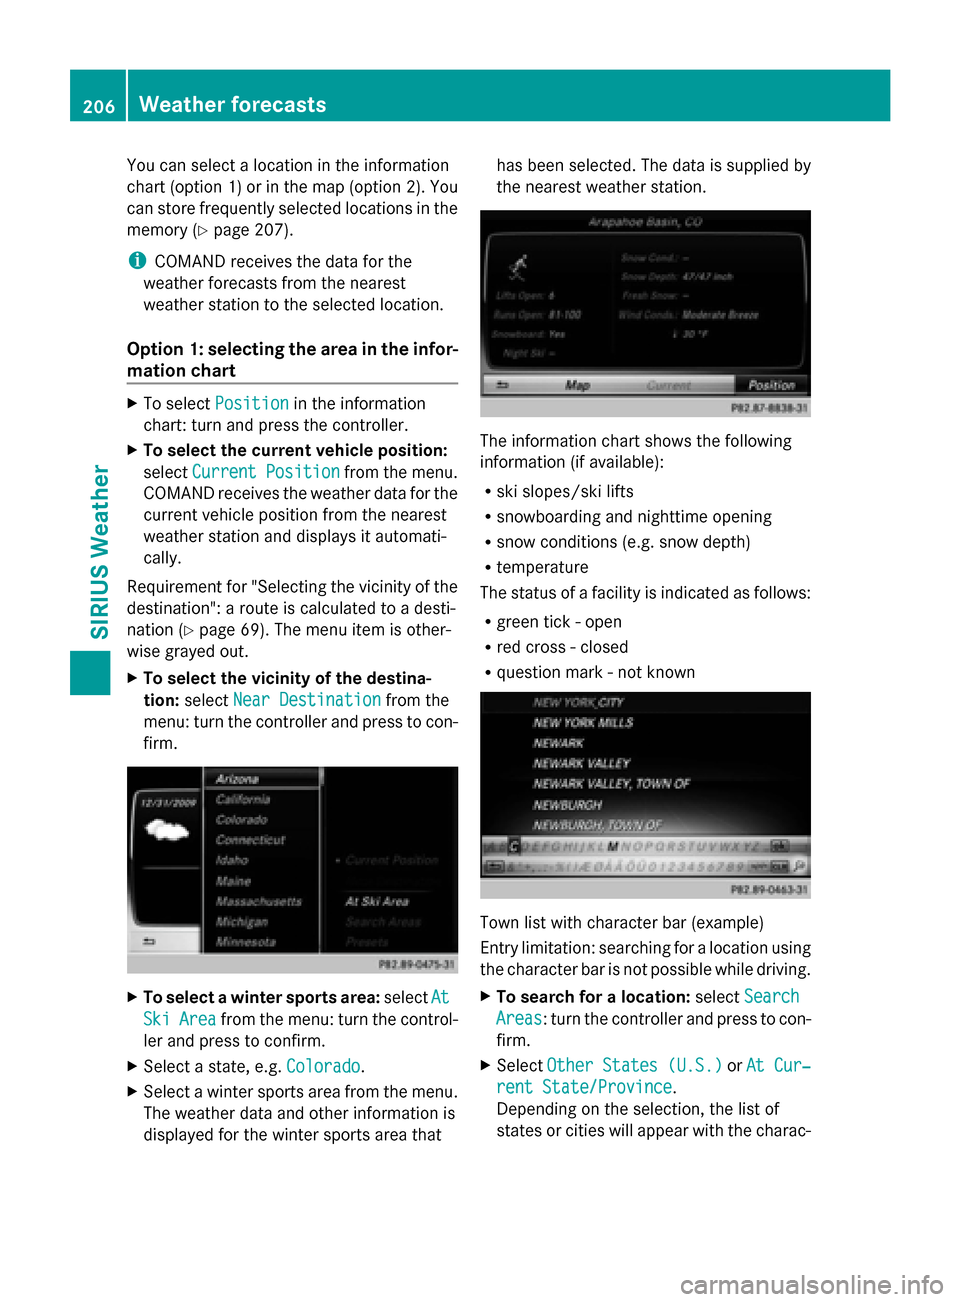
The information chart shows the following
information (if available):
R ski slopes/ski lifts
R snowboarding and nighttime opening
R snow conditions (e.g. snow depth)
R temperature
The status of a facility is indicated as follows:
R green tick - open
R red cross - closed
R question mark - not known Town list with character bar (example)
Entry limitation: searching for a location using
the character bar is not possible while driving.
X
To search for a location: selectSearch Search
Areas
Areas: turn the controller and press to con-
firm.
X Select Other States (U.S.) Other States (U.S.) orAt Cur‐
At Cur‐
rent State/Province
rent State/Province.
Depending on the selection, the list of
states or cities will appear with the charac- 206
Weather forecastsSIRIUS Weather
Page 209 of 214
ter bar. You can limit the search using the
character bar.
X To select the state or town: enter the initial
letter by turning the controller and then
press to confirm.
X To switch to the list without the character
bar: slide 5or select ok ok.
X To delete an entry: select 0084from the
character bar and press the controller.
Pressing briefly deletes the last letter
entered.
Pressing and holding longer deletes the
entire entry.
X To select the state/province or town in the
list: turn the controller and press to con-
firm.
After selecting a state (or province), the list
of towns appears.
After choosing a town, the information
chart displays the weather forecast for the
selected location. The data is supplied by
the nearest weather station.
Option 2: selecting the area in the
weather map X
Call up the weather map (Y page 207).
X Move the weather map so that the cross-
hair is over the desired area (Y page 208).
X Press the controller.
The information chart shows the weather
forecast for the selected area. The data is
supplied by the nearest weather station. Memory functions
Storing the area in the weather memory You can save locations that are called up fre-
quently in ten preset positions (0, 1-9) in the
weather memory. X
In the weather memory: select the area
for the weather forecast (Y page 205).
The selected location appears at the top in
the status bar.
X To select Position
Position in the information
chart: turn and press the controller.
X Select Presets Presets.
X Select a preset using the controller.
X Press and hold the controller until you hear
a tone.
The area is entered on the selected preset.
Selecting an area from the weather
memory X
Directly from the weather memory:
select Position Position from the information
chart: turn and press the controller.
X Select Presets
Presets.
X Select the memory position which contains
the location you require.
The weather data for the selected area is
displayed. Weather map
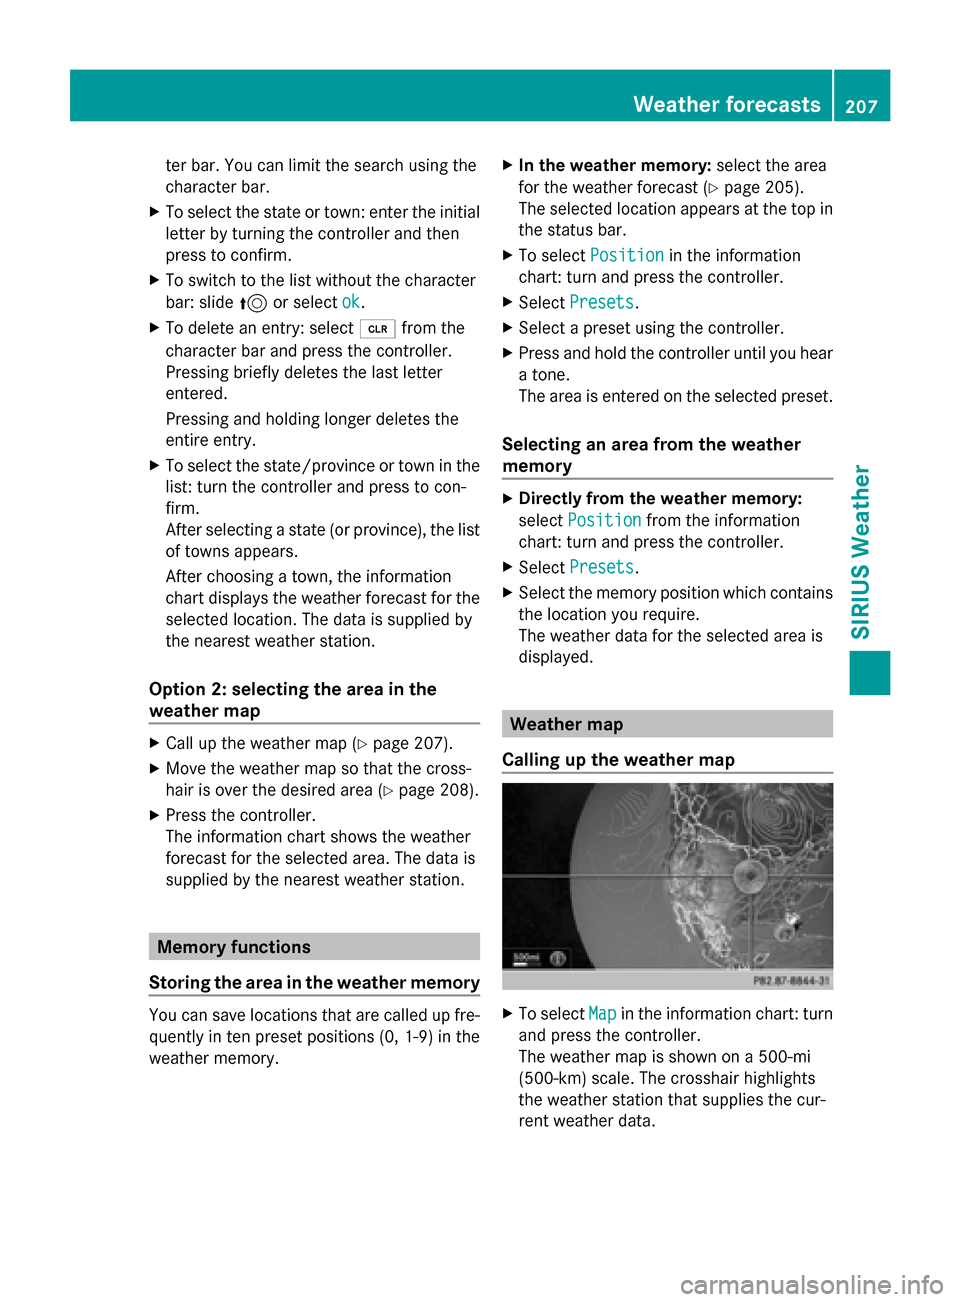
Calling up the weather map X
To select Map Mapin the information chart: turn
and press the controller.
The weather map is shown on a 500-mi
(500-km) scale. The crosshair highlights
the weather station that supplies the cur-
rent weather data. Weather forecasts
207SIRIUS Weather
Page 210 of 214
Moving the weather map
X
Slide 4 or1 the controller.
The weather map moves in the correspond-
ing direction under the crosshair.
Changing the scale X
Turn the controller.
The scale bar appears.
X Turn until the desired scale is set.
Showing/hiding the menu in the
weather map X
To show: press the controller.
X To hide: slide5the controller.
Selecting a weather station in the map X
Move the weather map and crosshair to the
desired position (Y page 208).
X To show the menu: press the controller.
X To select Weather Table
Weather Table: press the con-
troller.
COMAND receives the weather data for the
selected position from the nearest weather
station and displays it automatically as a
daily forecast.
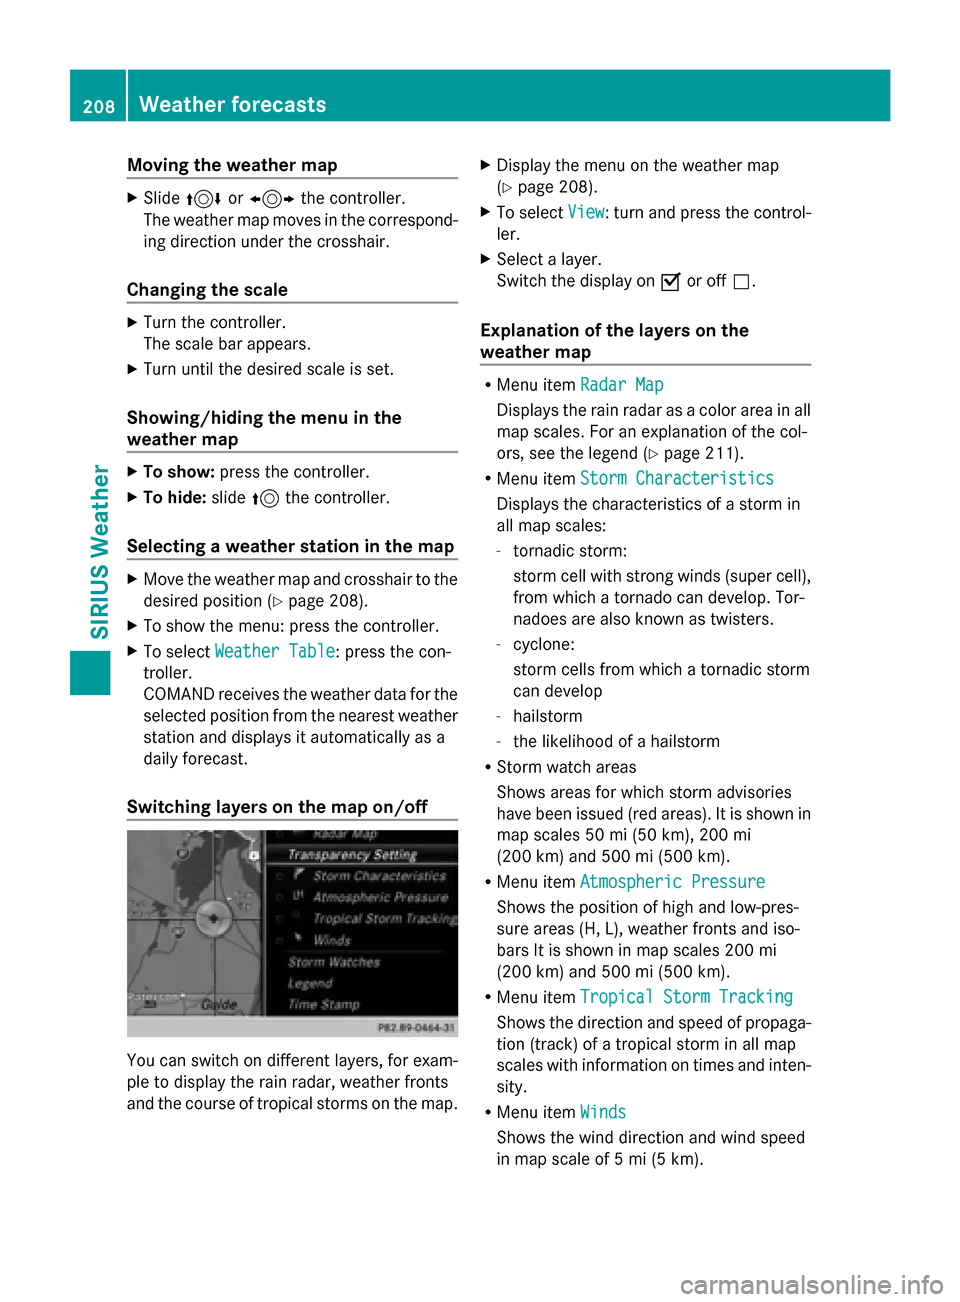
Switching layers on the map on/off You can switch on different layers, for exam-
ple to display the rain radar, weather fronts
and the course of tropical storms on the map. X
Display the menu on the weather map
(Y page 208).
X To select View View: turn and press the control-
ler.
X Select a layer.
Switch the display on 0073or off 0053.
Explanation of the layers on the
weather map R
Menu item Radar Map Radar Map
Displays the rain radar as a color area in all
map scales. For an explanation of the col-
ors, see the legend (Y page 211).
R Menu item Storm Characteristics Storm Characteristics
Displays the characteristics of a storm in
all map scales:
- tornadic storm:
storm cell with strong winds (super cell),
from which a tornado can develop. Tor-
nadoes are also known as twisters.
- cyclone:
storm cells from which a tornadic storm
can develop
- hailstorm
- the likelihood of a hailstorm
R Storm watch areas
Shows areas for which storm advisories
have been issued (red areas). It is shown in
map scales 50 mi (50 km), 200 mi
(200 km) and 500 mi (500 km).
R Menu item Atmospheric Pressure Atmospheric Pressure
Shows the position of high and low-pres-
sure areas (H, L), weather fronts and iso-
bars It is shown in map scales 200 mi
(200 km) and 500 mi (500 km).
R Menu item Tropical Storm Tracking Tropical Storm Tracking
Shows the direction and speed of propaga-
tion (track) of a tropical storm in all map
scales with information on times and inten-
sity.
R Menu item Winds Winds
Shows the wind direction and wind speed
in map scale of 5 mi (5 km). 208
Weather forecastsSIRIUS Weather