lights MERCEDES-BENZ C-Class SEDAN 2013 W204 Repair Manual
[x] Cancel search | Manufacturer: MERCEDES-BENZ, Model Year: 2013, Model line: C-Class SEDAN, Model: MERCEDES-BENZ C-Class SEDAN 2013 W204Pages: 358, PDF Size: 4.85 MB
Page 229 of 358
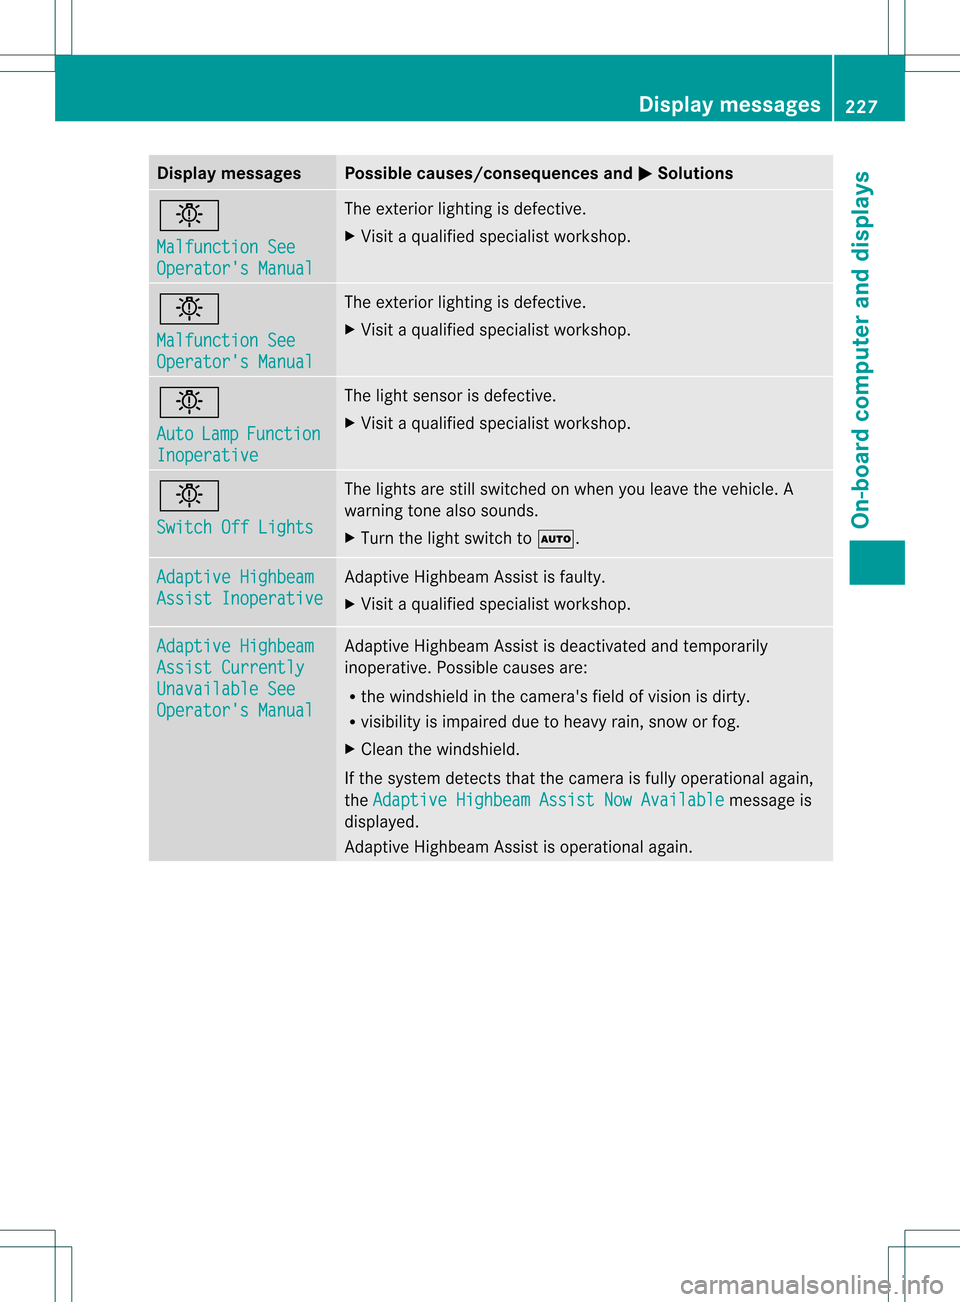
Display messages Possible causes/consequences and
0001 Solutions
0002
Malfunction See
Operator's Manual The exterio
rlighting is defective.
X Visit a qualified specialist workshop. 0002
Malfunction See
Operator's Manual The exterior lighting is defective.
X
Visit a qualified specialist workshop. 0002
Auto
Lamp Function
Inoperative The light sensor is defective.
X
Visit a qualified specialist workshop. 0002
Switch Off Lights The lights are still switched on when you leave the vehicle. A
warning tone also sounds.
X
Turn the light switch to 0004.Adaptive Highbeam
Assist Inoperative Adaptive Highbeam Assist is faulty.
X
Visit a qualified specialist workshop. Adaptive Highbeam
Assist Currently
Unavailable See
Operator's Manual Adaptive Highbeam Assist is deactivated and temporarily
inoperative. Possible causes are:
R
the windshield in the camera's field of vision is dirty.
R visibility is impaired due to heavy rain, snow or fog.
X Clean the windshield.
If the system detects that the camera is fully operational again,
the Adaptive Highbeam Assist Now Available message is
displayed.
Adaptive Highbeam Assist is operational again. Display messages
227On-board computer and displays Z
Page 244 of 358
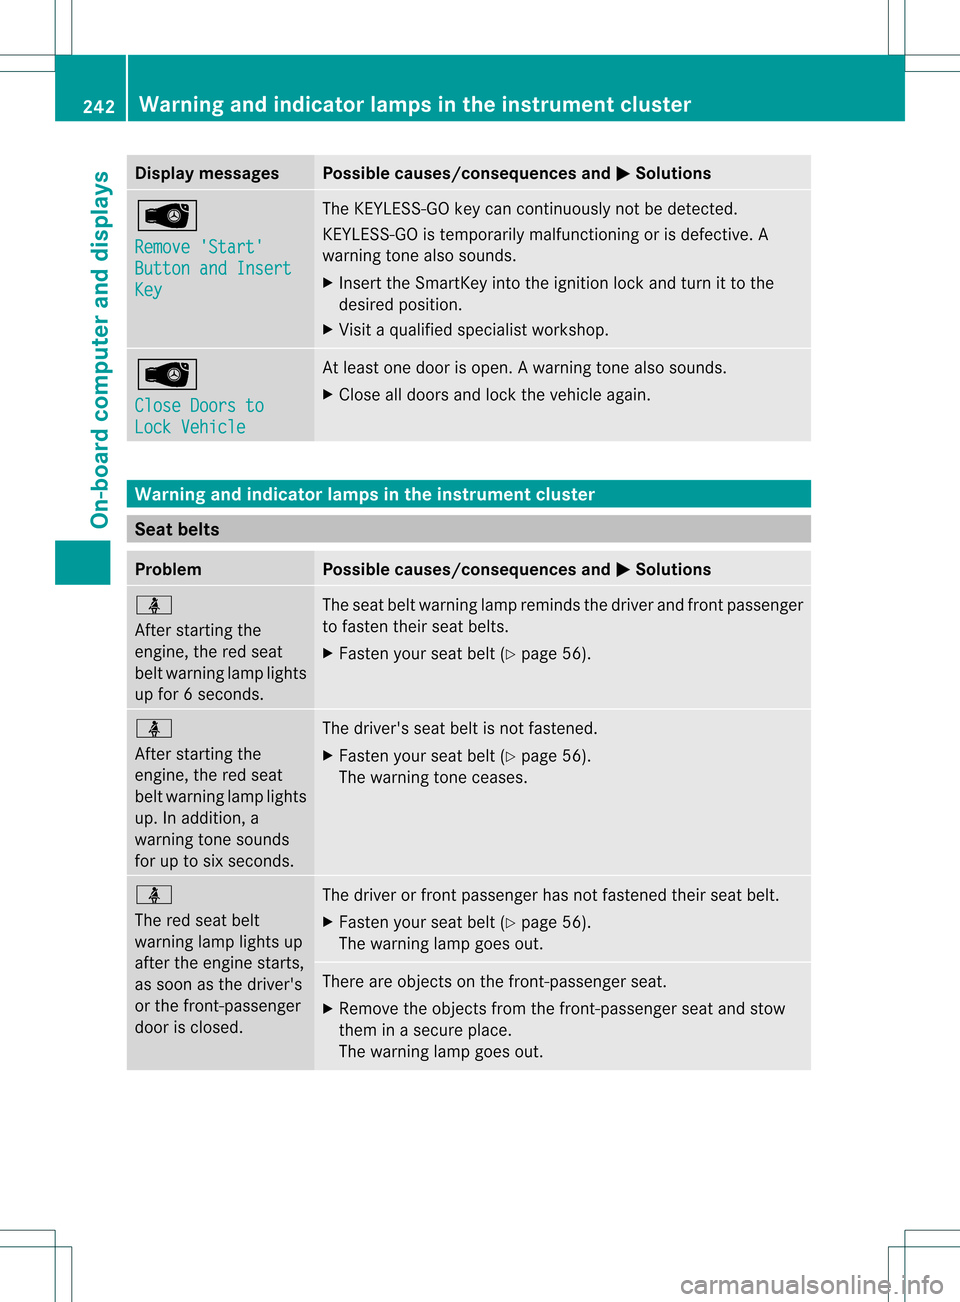
Display messages Possible causes/consequences and
0001 Solutions
0002
Remove 'Start'
Button and Insert
Key The KEYLESS-GO key can continuously not be detected.
KEYLESS-GO is temporarily malfunctioning or is defective. A
warning tone also sounds.
X
Insert the SmartKey into the ignition lock and turn it to the
desired position.
X Visit a qualified specialist workshop. 0002
Close Doors to
Lock Vehicle At leas
tone door is open. Awarning tone also sounds.
X Close all doors and loc kthe vehicle again. Warning and indicator lamps in the instrument cluster
Seat belts
Problem Possible causes/consequences and
0001 Solutions
0012
After starting the
engine, the red seat
belt warning lamp lights
up for
6seconds. The seat belt warning lamp reminds the driver and fron
tpassenger
to fasten their seat belts.
X Faste nyour seat belt (Y page 56). 0012
After starting the
engine, the red seat
belt warning lamp lights
up. In addition, a
warning tone sounds
for up to six seconds.
The driver's seat belt is not fastened.
X
Fasten your seat belt (Y page 56).
The warning tone ceases. 0012
The red seat belt
warning lamp lights up
after the engine starts,
as soon as the driver's
or the front-passenger
door is closed. The driver or front passenger has not fastened their seat belt.
X
Fasten your seat belt (Y page 56).
The warning lamp goes out. There are objects on the front-passenger seat.
X
Remove the objects from the front-passenger seat and stow
them in a secure place.
The warning lamp goes out. 242
Warning and indicator lamps in the instrument clusterOn-board computer and displays
Page 252 of 358
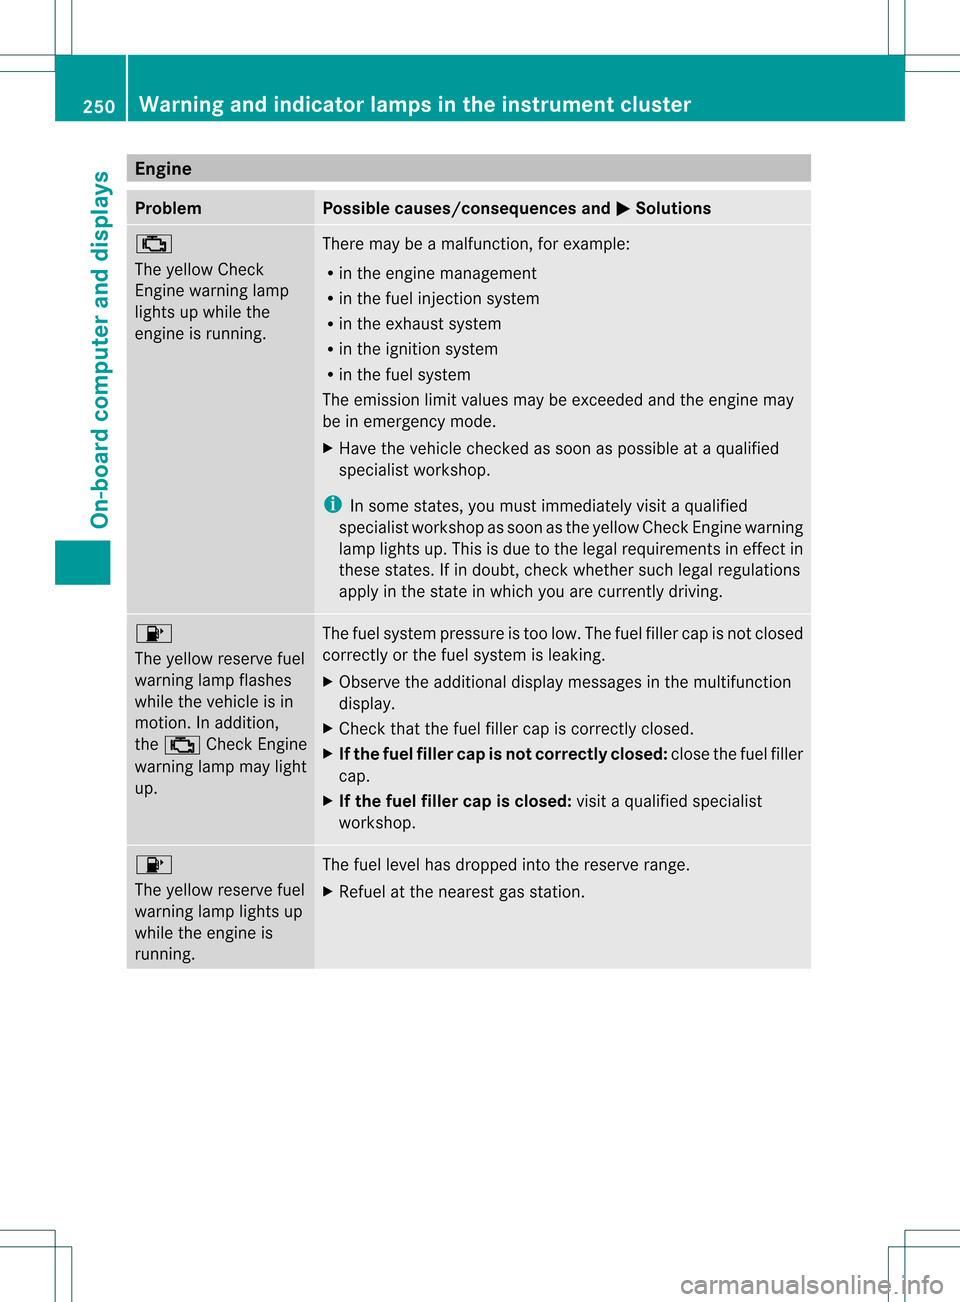
Engine
Problem Possible causes/consequences and
0001 Solutions
000E
The yellow Check
Engine warning lamp
lights up while the
engine is running. There may be a malfunction, for example:
R
in the engine management
R in the fuel injection system
R in the exhaust system
R in the ignition system
R in the fuel system
The emission limit values may be exceeded and the engin emay
be in emergency mode.
X Have the vehicle checked as soon as possible at a qualified
specialist workshop.
i In some states, you must immediately visit a qualified
specialist workshop as soon as the yellow Chec kEngine warning
lamp lights up .This is due to the legal requirements in effect in
these states. If in doubt, check whether such legal regulations
apply in the state in which you are currently driving. 0010
The yellow reserve fuel
warning lamp flashes
while the vehicle is in
motion. In addition,
the 000E Check Engine
warning lamp may light
up. The fuel system pressure is too low. The fuel filler cap is not closed
correctly or the fuel system is leaking.
X
Observe the additional display messages in the multifunction
display.
X Check that the fuel filler cap is correctly closed.
X If the fuel filler cap is not correctly closed: close the fuel filler
cap.
X If the fuel filler cap is closed: visit a qualified specialist
workshop. 0010
The yellow reserve fuel
warning lamp lights up
while the engine is
running. The fuel level has dropped into the reserve range.
X
Refuel at the nearest gas station. 250
Warning and indicator lamps in the instrument clusterOn-board computer and displays
Page 253 of 358
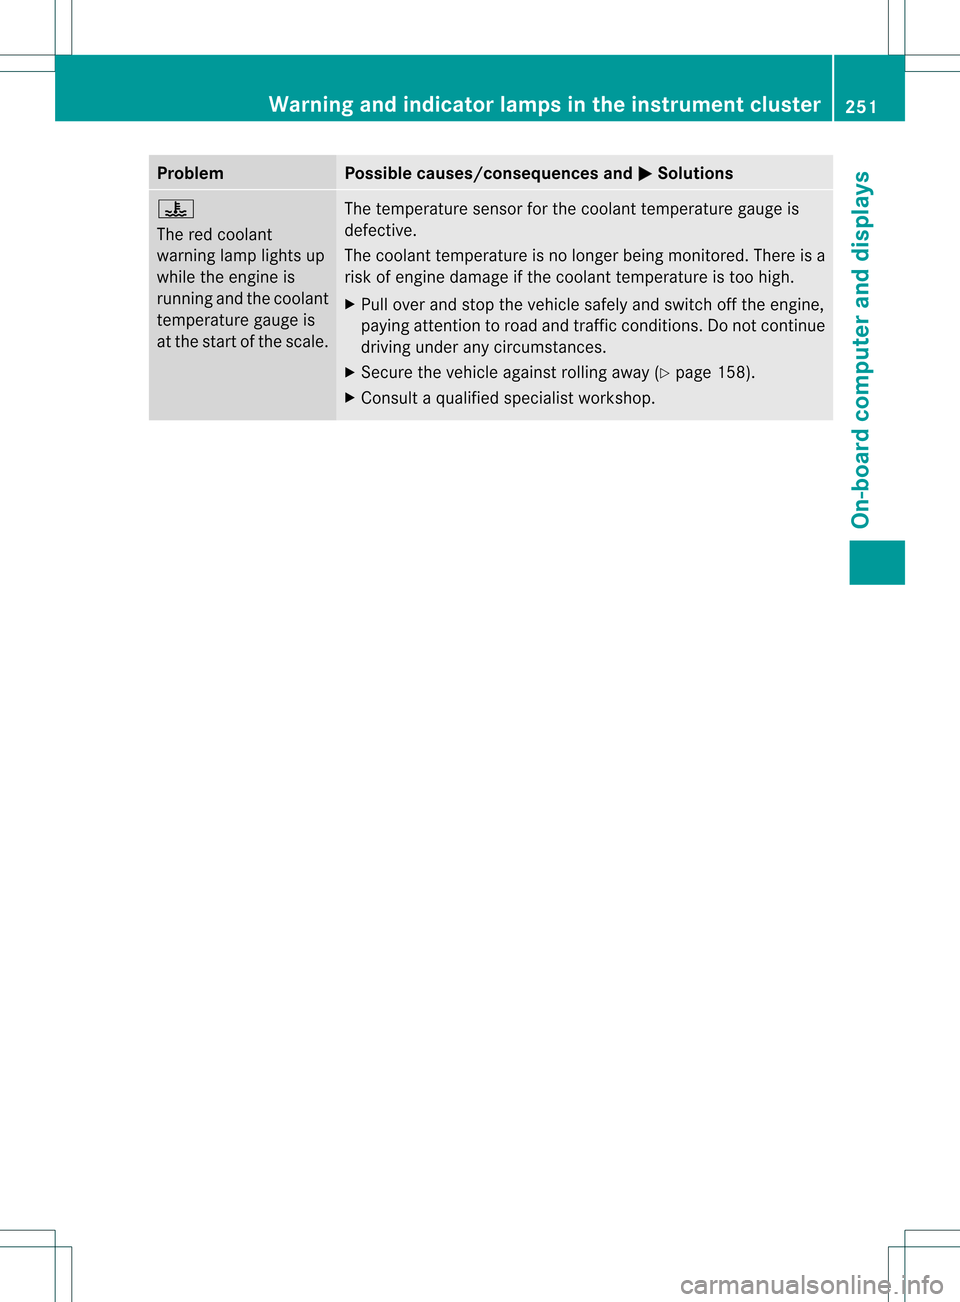
Problem Possible causes/consequences and
0001 Solutions
000C
The red coolant
warning lamp lights up
while the engine is
running and the coolant
temperature gauge is
at the start of the scale.
The temperature sensor for the coolant temperature gauge is
defective.
The coolant temperature is no longer being monitored. There is a
risk of engine damage if the coolant temperature is too high.
X
Pull over and stop the vehicle safely and switch off the engine,
paying attention to road and traffic conditions. Do not continue
driving under any circumstances.
X Secure the vehicle against rolling away (Y page 158).
X Consult a qualified specialist workshop. Warning and indicator lamps in the instrument cluster
251On-board computer and displays Z
Page 255 of 358
Problem Possible causes/consequences and
0001 Solutions
X
Make sure that the air supply to the engine radiator is not
blocked, e.g. by snow, slush or ice.
X Check the coolant level and add coolant (Y page 286). Observe
the warning notes.
X If you need to add coolant more often than usual, have the
engine coolant system checked.
X At coolant temperatures below 248 ‡ (120 †) drive to the
nearest qualified specialist workshop.
X Avoid subjecting the engine to heavy loads, e.g. driving in
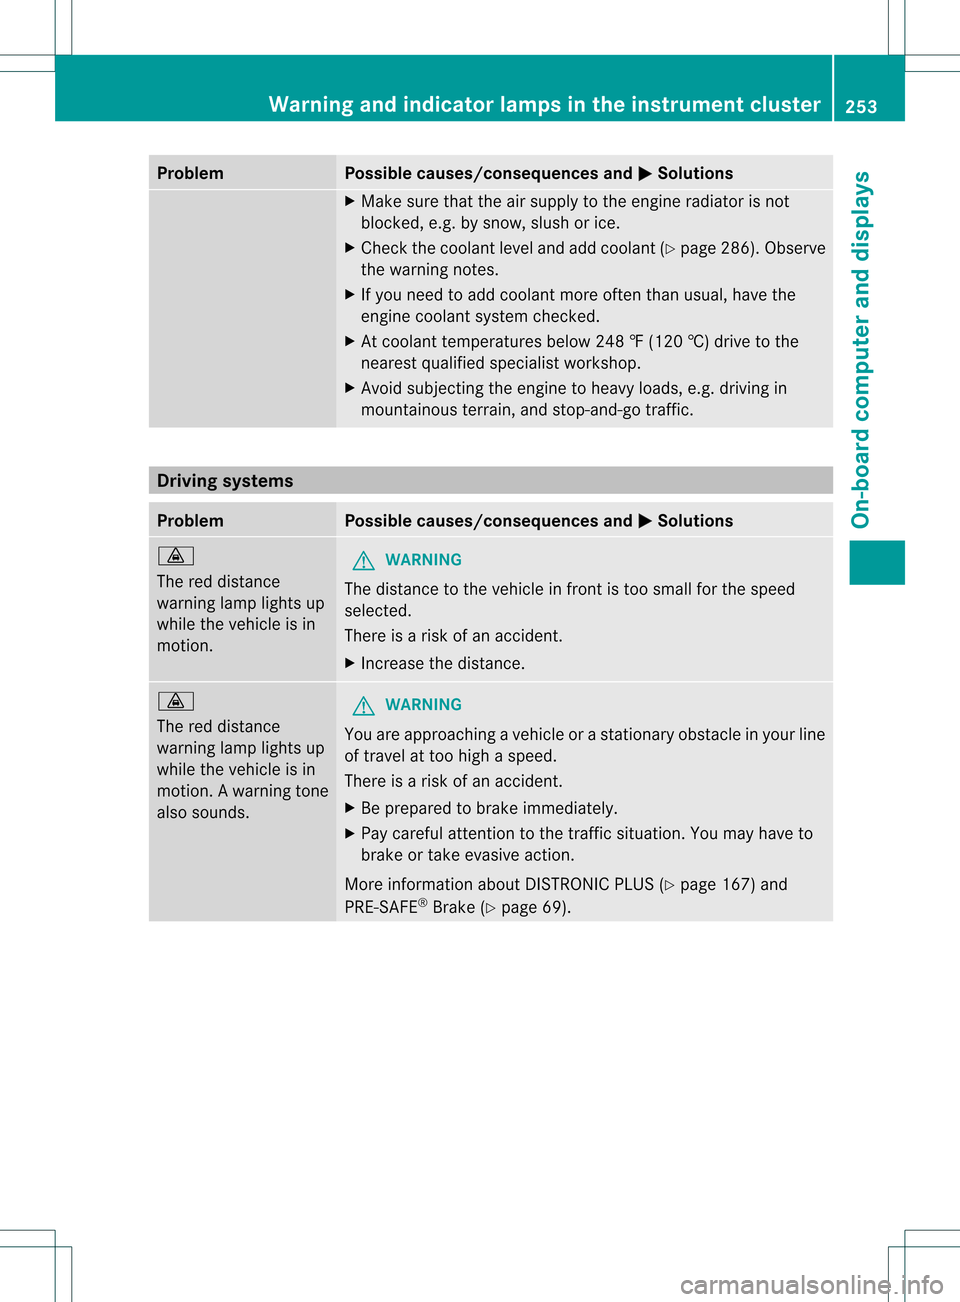
mountainous terrain, and stop-and-go traffic. Driving systems
Problem Possible causes/consequences and
0001 Solutions
000B
The red distance
warning lamp lights up
while the vehicle is in
motion.
G
WARNING
The distance to the vehicle in front is too small for the speed
selected.
There is a risk of an accident.
X Increase the distance. 000B
The red distance
warning lamp lights up
while the vehicle is in
motion. A warning tone
also sounds.
G
WARNING
You are approaching a vehicle or a stationary obstacle in your line
of travel at too high a speed.
There is a risk of an accident.
X Be prepared to brake immediately.
X Pay careful attention to the traffic situation. You may have to
brake or take evasive action.
More information about DISTRONIC PLUS (Y page 167) and
PRE-SAFE ®
Brake (Y page 69). Warning and indicator lamps in the instrument cluster
253On-board computer and displays Z
Page 268 of 358
R
the on-board powe rsupply is within a
permissible voltage range.
R the 12 V sockets in the rear compartment
are operational (Y page 265).
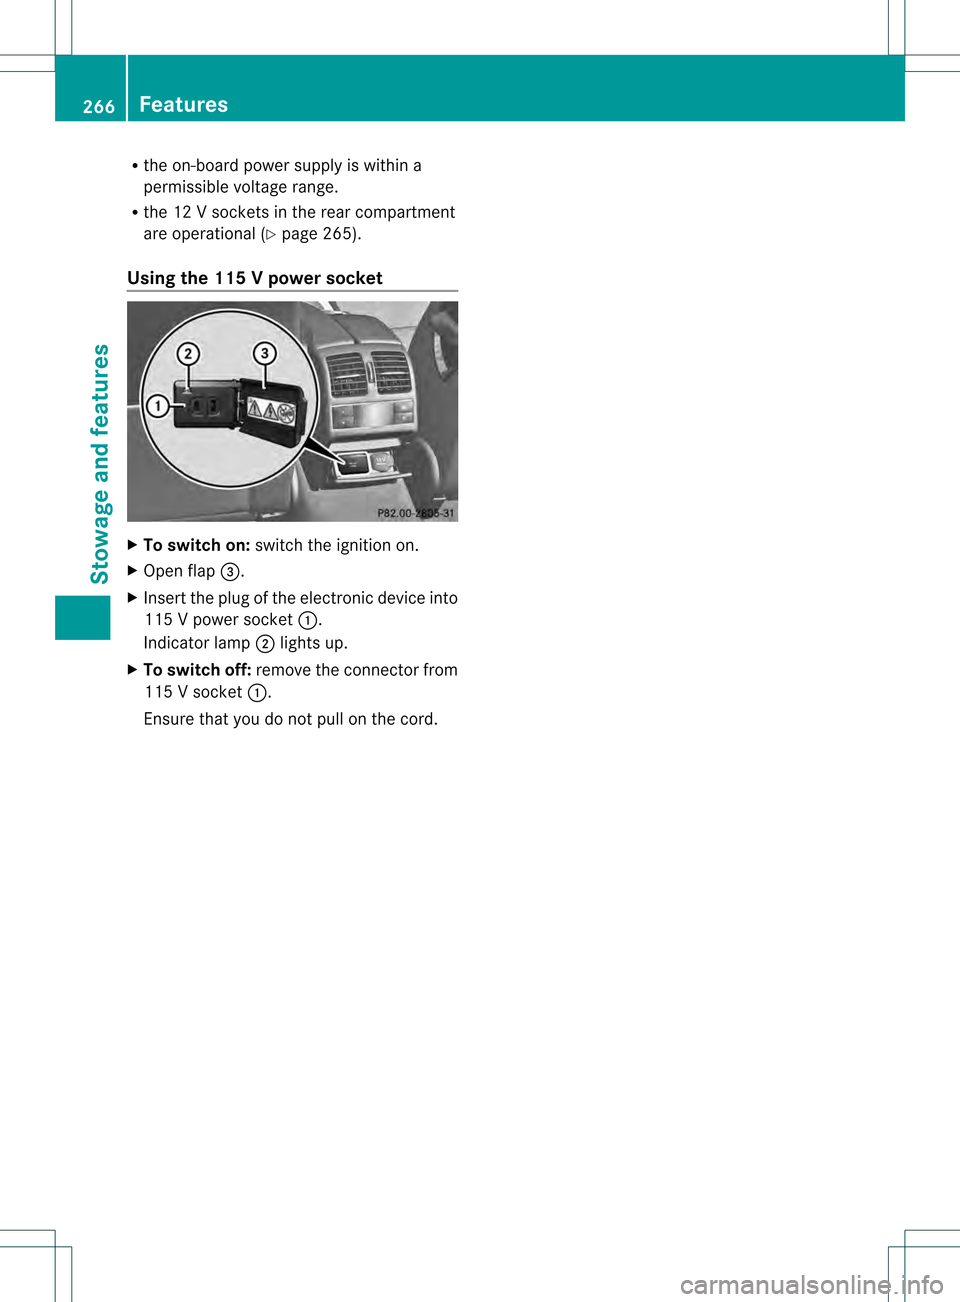
Using the 115 Vpower socket X
To switch on: switch the ignitio non.
X Ope nflap 0022.
X Insert the plug of the electronic device into
115 V power socket 0002.
Indicator lamp 0003lights up.
X To switch off: remove the connector from
115 V socket 0002.
Ensure that you do not pull on the cord. 266
FeaturesStowage and features
Page 278 of 358
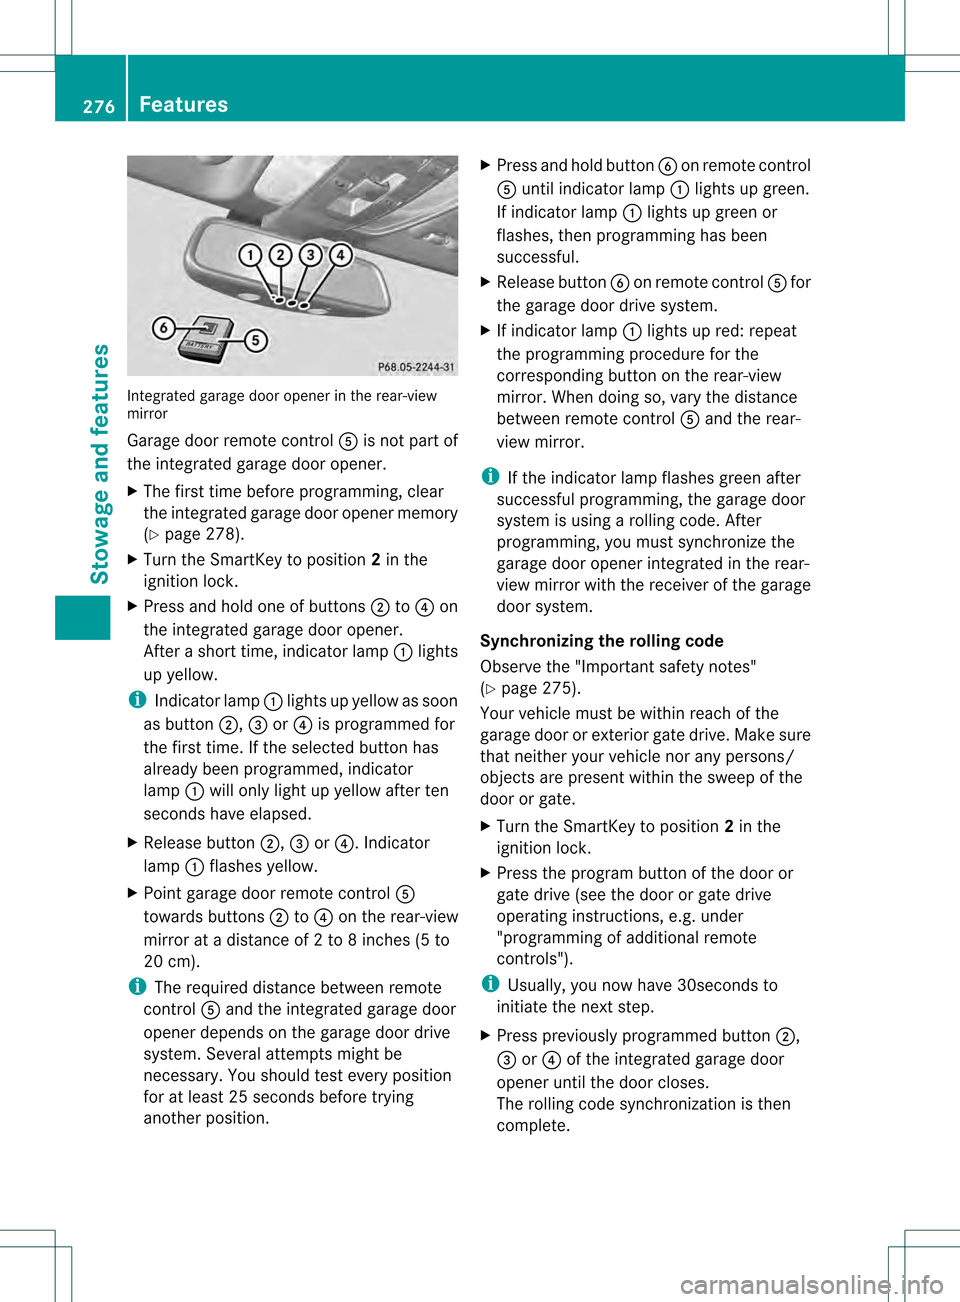
Integrated garage door opener in the rear-view
mirror
Garage door remote control 001Fis not part of
the integrated garage door opener.
X The first time before programming, clear
the integrated garage door opener memory
(Y page 278).
X Turn the SmartKey to position 2in the
ignition lock.
X Press and hold one of buttons 0003to0021 on
the integrated garage door opener.
After a short time, indicator lamp 0002lights
up yellow.
i Indicator lamp 0002lights up yellow as soon
as button 0003,0022or0021 is programmed for
the first time. If the selected button has
already been programmed, indicator
lamp 0002will only lightu p yellow after ten
seconds have elapsed.
X Release button 0003,0022or0021. Indicator
lamp 0002flashes yellow.
X Point garage door remote control 001F
towards buttons 0003to0021 on the rear-view
mirror at a distance of 2 to 8 inches (5 to
20 cm).
i The required distance between remote
control 001Fand the integrated garage door
opener depends on the garage door drive
system. Several attempts might be
necessary. You should test every position
for at least 25 seconds before trying
another position. X
Press and hold button 0020on remot econtrol
001F until indicator lamp 0002lights up green.
If indicator lamp 0002lights up green or
flashes, then programming has been
successful.
X Release button 0020on remote control 001Ffor
the garage door drive system.
X If indicator lamp 0002lights up red: repeat
the programming procedure for the
corresponding button on the rear-view
mirror. When doing so, vary the distance
between remote control 001Fand the rear-
view mirror.
i If the indicator lamp flashes green after
successful programming, the garage door
system is using a rolling code. After
programming, you must synchronize the
garage door opener integrated in the rear-
view mirror with the receiver of the garage
door system.
Synchronizing the rolling code
Observe the "Important safety notes"
(Y page 275).
Your vehicle must be within reach of the
garage door or exterior gate drive. Make sure
that neither your vehicle nor any persons/
objects are present within the sweep of the
door or gate.
X Turn the SmartKey to position 2in the
ignition lock.
X Press the program button of the door or
gate drive (see the door or gate drive
operating instructions, e.g. under
"programming of additional remote
controls").
i Usually, you now have 30seconds to
initiate the next step.
X Press previously programmed button 0003,
0022 or0021 of the integrated garage door
opener until the door closes.
The rolling code synchronization is then
complete. 276
FeaturesStowage and features
Page 279 of 358
Notes on programming the remote
control
Canadia nradio frequency laws require a
"break" (or interruption) of the transmission
signals after broadcasting for a few seconds.
Therefore, these signals may no tlast long
enough for the integrated garage door
opener. The signal is no trecognized during
programming. Comparable with Canadian
law, some U.S.g arage door openers also
feature a "break".
Proceed as follows:
R if you live in Canada
R if you have difficulties programming the
garage door opener (regardless of where
you live) when using the programming
steps
X Press and hold one of buttons 0003to0021 on
the integrated garage door opener.
Afte rashort time, indicator lamp 0002lights
up yellow.
X Release the button.
Indicator lamp 0002flashes yellow.
X Press button 0020of garage door remote
control 001Ffor two seconds, then release it
for two seconds.
X Press button 0020againf or two seconds.
X Repeat this sequence on button 0020of
remote control 001Funtil indicator lamp 0002
lights up green.
If indicator lamp 0002turns red, repeat the
process.
X Continue with the other programming
steps (see above).
Problems when programming
If you are experiencing problems
programming the integrated garage door
opener on the rear-view mirror, take note of
the following instructions:
R Check the transmitter frequency of garage
door drive remote control 001F.This can
usually be found on the back of the remote
control. The integrated garage door opener is
compatible with devices that have units
which operate in the frequency range of
280to 433MHz.
R Replace the batteries in garage door
remote control 001F.This increases the
likelihood that garage door remote control
001F will transmit a stronga nd precise signal
to the integrated garage door opene rinthe
rear-view mirror.
R When programming, hold remote control
001F at varying distances and angles from the
button that you are programming. Try
various angles at a distance between 2and
12 inches (5to 30 cm) or at the same angle
but at varying distances.
R If another remote control for the same
garage door drive is available, repeat the
same programming steps with this remote
control. Before performing these steps,
make sure that new batteries have been
installed in garage door drive remote
control 001F.
R Note that some remote controls only
transmit for a limited amount of time (the
indicator lamp on the remote control goes
out). Press button 0020on remote control
001F again before transmission ends.
R Align the antenna cable of the garage door
opener unit. This can improve signal
reception/transmission.
Opening/closing the garage door After it has been programmed, the integrated
garage door opener performs the function of
the garage door system remote control.
Please also read the operating instructions
for the garage door system.
X
Turn the SmartKey to position 2in the
ignition lock.
X Press button 0003,0022or0021 which you have
programmed to operate the garage door.
Garage door system with a fixed code:
indicator lamp 0002lights up green. Features
277Stowage and features Z
Page 280 of 358
Garage door system with a rolling code:
indicator lamp
0002flashes green.
i The transmitte rwill transmit a signal as
long as the button is pressed. The
transmission is halted after a maximum of
ten seconds and indicator lamp 0002lights
up yellow. Press button 0003,0022or0021 again
if necessary.
Clearing the memory X
Turn the SmartKey to position 2in the
ignition lock.
X Press buttons 0003and 0021.
The indicator lamp lights up yellow.
X Press and hold buttons 0003and 0021until the
indicator lamp turns green.
i Make sure that you clear the memory of
the integrated garage door opener before
selling the vehicle. Compass
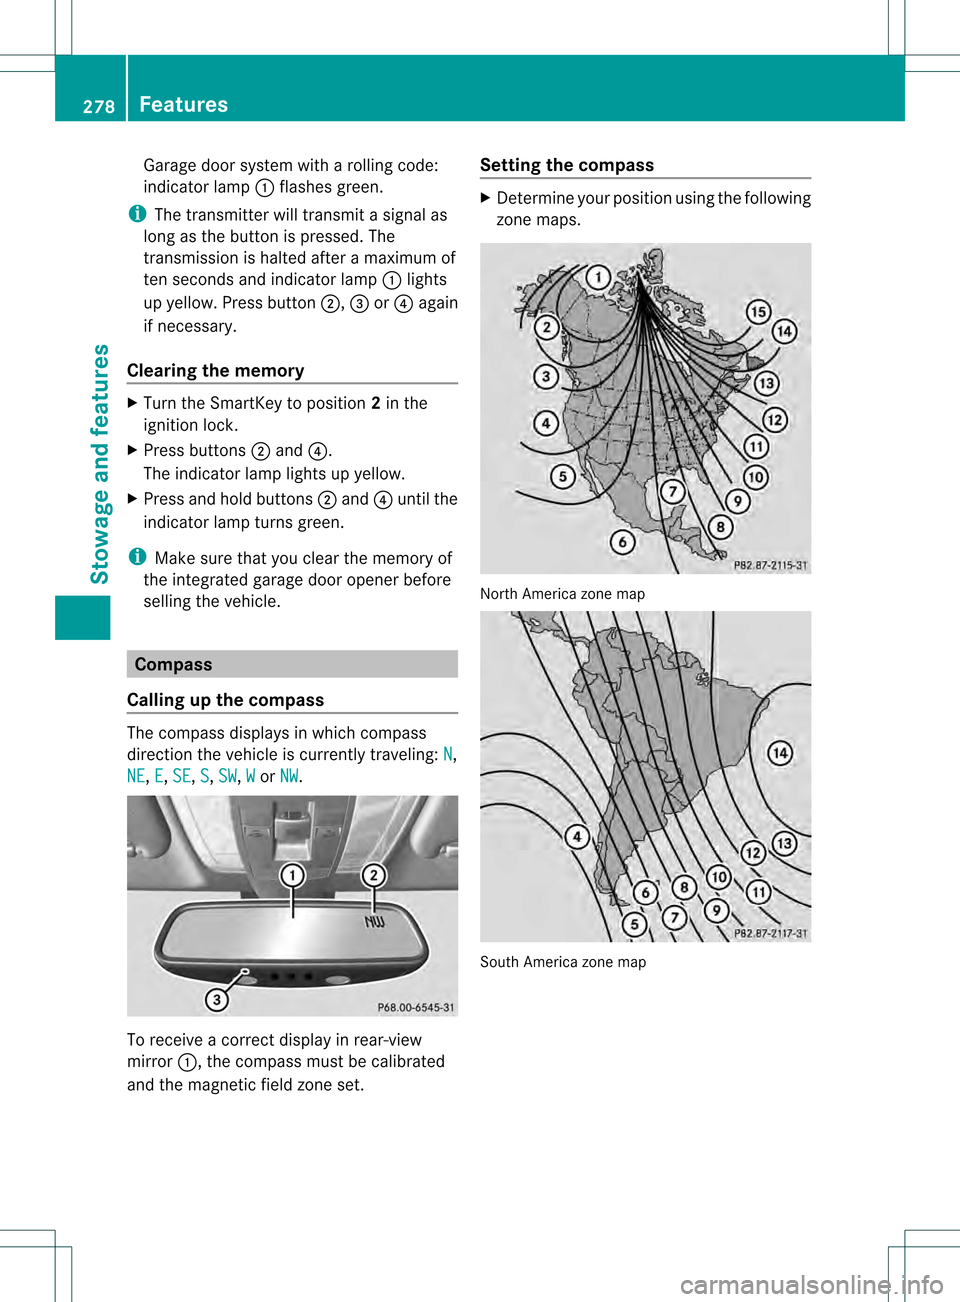
Calling up the compass The compass displays in which compass
direction the vehicle is currently traveling:
N ,
NE ,
E ,
SE ,
S ,
SW ,
W or
NW .
To receive a correc
tdisplay in rear-view
mirror 0002, the compass must be calibrated
and the magnetic field zone set. Setting the compass X
Determine your position using the following
zone maps. North America zone map
South America zone map278
FeaturesStowage and features
Page 290 of 358
!
If DISTRONIC PLUS or the HOLD function
is activated, the vehicle brakes
automatically in certain situations. To
prevent damage to the vehicle, deactivate
DISTRONIC PLUS and the HOLD function in
the following or other similars ituations:
R when towing the vehicle
R in the car wash
! Neve rclean your vehicle in a Touchless
Automatic Car Wash as these use special
cleaning agents. These cleaning agents can
damage the paintwork or plastic parts.
! Make sure that the automatic
transmission is in position Nwhen washing
your vehicle in a tow-through car wash. The
vehicle could be damaged if the
transmission is in another position.
! Make sure that:
R the side windows and the sliding sunroof
are fully closed.
R the ventilation/heating is switched off
(the OFF button has been pressed).
R the windshield wiper switch is in position
0.
Otherwise, the vehicle might be damaged.
You can wash the vehicle in an automatic car
wash from the very start.
If the vehicle is very dirty, pre-wash it before
cleaning it in an automatic car wash.
After using an automatic car wash, wipe off
wax fro mthe windshield and the wiper
blades. This will prevent smears and reduce
wiping noises caused by residue on the
windshield.
Washing by hand In some countries, washing by hand is only
allowed at specially equipped washing bays.
Observe the legal requirements in all
countries concerned.
X Do not use hot water and do not wash the
vehicle in direct sunlight.
X Use a soft sponge to clean. X
Use a mild cleaning agent, such as a car
shampoo approved by Mercedes-Benz.
X Thoroughly hose down the vehicle with a
gentle jet of water.
X Do not point the water jet directly towards
the air inlet.
X Use plenty of water and rinse out the
sponge frequently.
X Rinse the vehicle with clean water and dry
thoroughly with a chamois.
X Do not let the cleaning agent dry on the
paintwork.
When using the vehicle in winter, remove all
traces of road salt deposits carefully and as
soon as possible.
Powerw ashers G
WARNING
The water jet from a circular jet nozzle (dirt
blasters) can cause invisibl eexterior damage
to the tires or chassis components.
Components damaged in this way may fail
unexpectedly .There is a risk of an accident.
Do not use power washers with circular jet
nozzles to clean the vehicle. Have damaged
tires or chassis components replaced
immediately.
! Always maintain a distance of at least
11.8 in (30 cm) between the vehicle and the
power washer nozzle. Information about
the correct distance is available from the
equipment manufacturer.
Move the power washer nozzle around
when cleaning your vehicle.
Do not aim directly at any of the following:
R tires
R door gaps, roof gaps, joints, etc.
R electrical components
R battery
R connectors
R lights
R seals 288
CareMaintenance and care