display MERCEDES-BENZ CLA-Class 2015 C117 Manual PDF
[x] Cancel search | Manufacturer: MERCEDES-BENZ, Model Year: 2015, Model line: CLA-Class, Model: MERCEDES-BENZ CLA-Class 2015 C117Pages: 362, PDF Size: 6.93 MB
Page 205 of 362
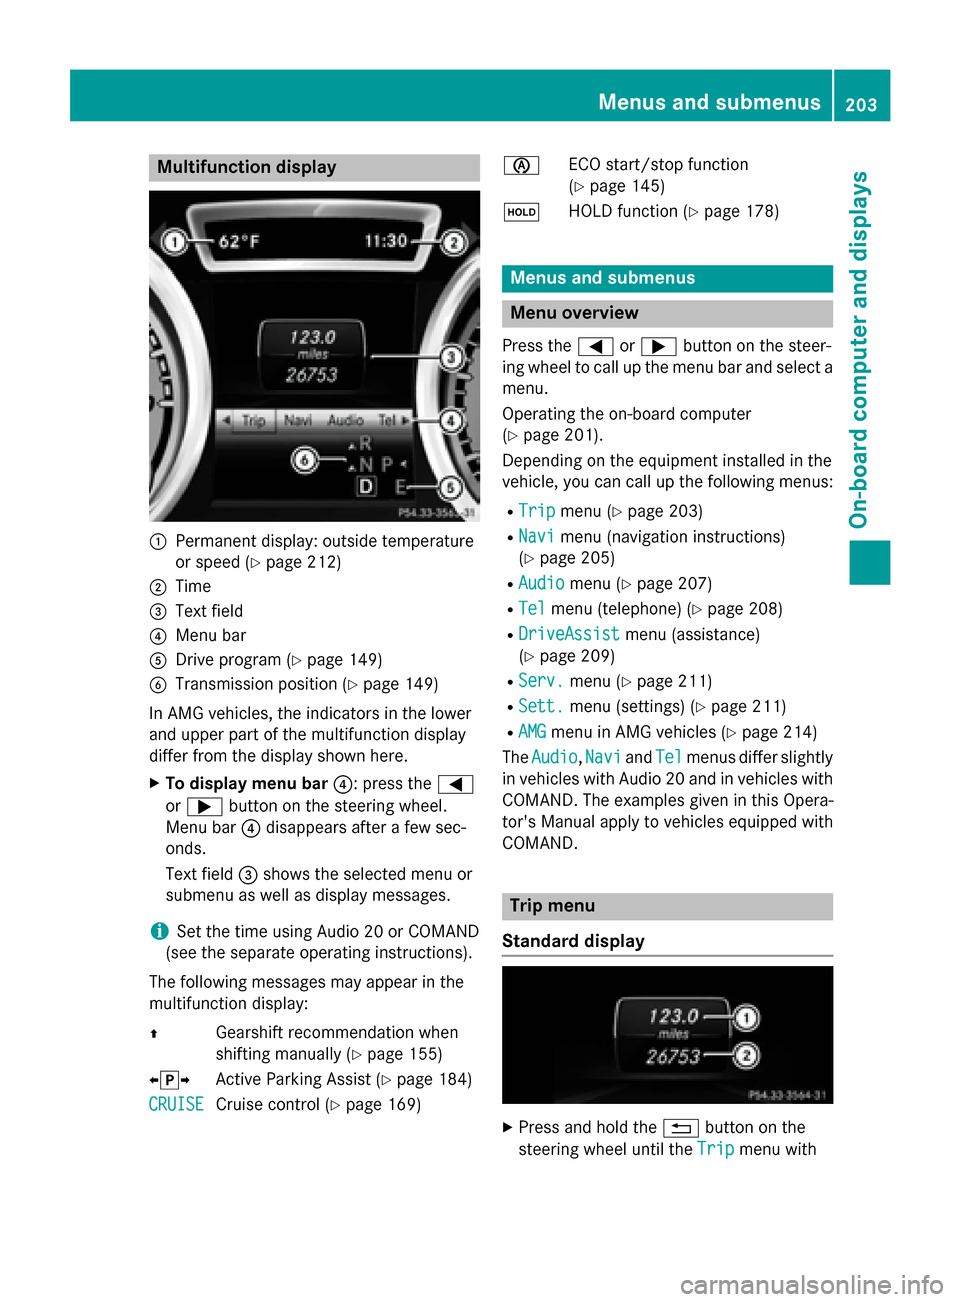
Multifunction display
:
Permanent display: outside temperature
or speed (Y page 212)
; Time
= Text field
? Menu bar
A Drive program (Y page 149)
B Transmission position (Y page 149)
In AMG vehicles, the indicators in the lower
and upper part of the multifunction display
differ from the display shown here.
X To display menu bar ?: press the=
or ; button on the steering wheel.
Menu bar ?disappears after a few sec-
onds.
Text field =shows the selected menu or
submenu as well as display messages.
i Set the time using Audio 20 or COMAND
(see the separate operating instructions).
The following messages may appear in the
multifunction display:
Z Gearshift recommendation when
shifting manually (Y page 155)
XjY Active Parking Assist (Y page 184)
CRUISE
CRUISE Cruise control (Y
page 169) è
ECO start/stop function
(Ypage 145)
ë HOLD function (Y page 178) Menus and submenus
Menu overview
Press the =or; button on the steer-
ing wheel to call up the menu bar and select a
menu.
Operating the on-board computer
(Y page 201).
Depending on the equipment installed in the
vehicle, you can call up the following menus:
R Trip Trip menu (Y page 203)
R Navi Navi menu (navigation instructions)
(Y page 205)
R Audio
Audio menu (Y page 207)
R Tel
Tel menu (telephone) (Y page 208)
R DriveAssist
DriveAssist menu (assistance)
(Y page 209)
R Serv.
Serv. menu (Y page 211)
R Sett.
Sett. menu (settings) (Y page 211)
R AMG
AMG menu in AMG vehicles (Y page 214)
The Audio
Audio, Navi
NaviandTel
Tel menus differ slightly
in vehicles with Audio 20 and in vehicles with COMAND. The examples given in this Opera-
tor's Manual apply to vehicles equipped with
COMAND. Trip menu
Standard display X
Press and hold the %button on the
steering wheel until the Trip Tripmenu with Menus and submenus
203On-board computer and displays Z
Page 206 of 362
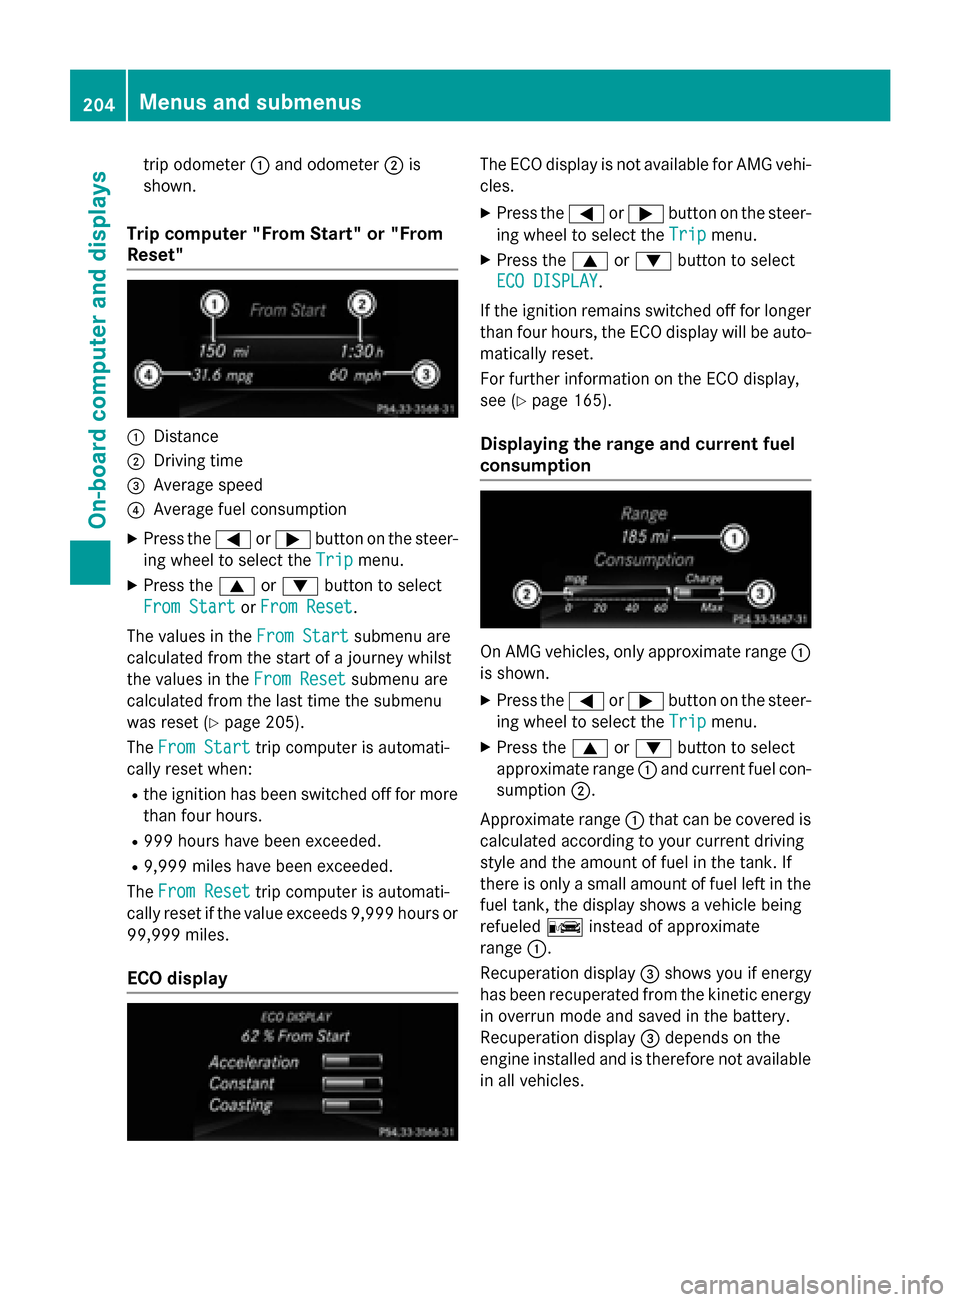
trip odometer
:and odometer ;is
shown.
Trip computer "From Start" or "From
Reset" :
Distance
; Driving time
= Average speed
? Average fuel consumption
X Press the =or; button on the steer-
ing wheel to select the Trip
Tripmenu.
X Press the 9or: button to select
From Start
From Start orFrom Reset
From Reset.
The values in the From Start
From Startsubmenu are
calculated from the start of a journey whilst
the values in the From Reset From Resetsubmenu are
calculated from the last time the submenu
was reset (Y page 205).
The From Start From Start trip computer is automati-
cally reset when:
R the ignition has been switched off for more
than four hours.
R 999 hours have been exceeded.
R 9,999 miles have been exceeded.
The From Reset
From Reset trip computer is automati-
cally reset if the value exceeds 9,999 hours or 99,999 miles.
ECO display The ECO display is not available for AMG vehi-
cles.
X Press the =or; button on the steer-
ing wheel to select the Trip Tripmenu.
X Press the 9or: button to select
ECO DISPLAY
ECO DISPLAY.
If the ignition remains switched off for longer than four hours, the ECO display will be auto-
matically reset.
For further information on the ECO display,
see (Y page 165).
Displaying the range and current fuel
consumption On AMG vehicles, only approximate range
:
is shown.
X Press the =or; button on the steer-
ing wheel to select the Trip Tripmenu.
X Press the 9or: button to select
approximate range :and current fuel con-
sumption ;.
Approximate range :that can be covered is
calculated according to your current driving
style and the amount of fuel in the tank. If
there is only a small amount of fuel left in the
fuel tank, the display shows a vehicle being
refueled Cinstead of approximate
range :.
Recuperation display =shows you if energy
has been recuperated from the kinetic energy
in overrun mode and saved in the battery.
Recuperation display =depends on the
engine installed and is therefore not available
in all vehicles. 204
Menus and submenusOn-board computer and displays
Page 207 of 362
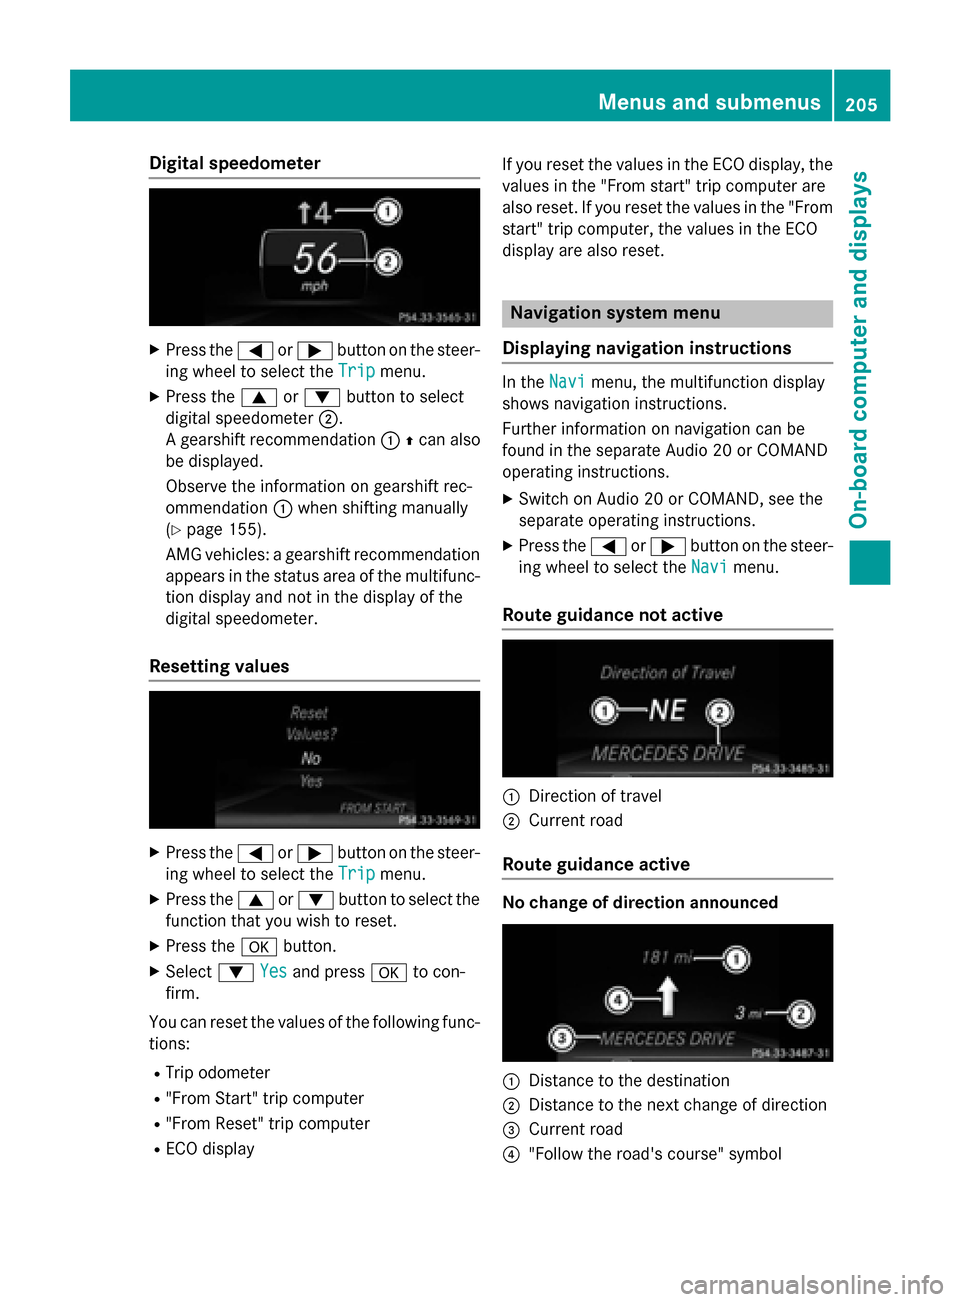
Digital speedometer
X
Press the =or; button on the steer-
ing wheel to select the Trip
Tripmenu.
X Press the 9or: button to select
digital speedometer ;.
A gearshift recommendation :Zcan also
be displayed.
Observe the information on gearshift rec-
ommendation :when shifting manually
(Y page 155).
AMG vehicles: a gearshift recommendation
appears in the status area of the multifunc-
tion display and not in the display of the
digital speedometer.
Resetting values X
Press the =or; button on the steer-
ing wheel to select the Trip
Trip menu.
X Press the 9or: button to select the
function that you wish to reset.
X Press the abutton.
X Select :Yes Yesand press ato con-
firm.
You can reset the values of the following func-
tions:
R Trip odometer
R "From Start" trip computer
R "From Reset" trip computer
R ECO display If you reset the values in the ECO display, the
values in the "From start" trip computer are
also reset. If you reset the values in the "From start" trip computer, the values in the ECO
display are also reset. Navigation system menu
Displaying navigation instructions In the
Navi Navimenu, the multifunction display
shows navigation instructions.
Further information on navigation can be
found in the separate Audio 20 or COMAND
operating instructions.
X Switch on Audio 20 or COMAND, see the
separate operating instructions.
X Press the =or; button on the steer-
ing wheel to select the Navi Navimenu.
Route guidance not active :
Direction of travel
; Current road
Route guidance active No change of direction announced
:
Distance to the destination
; Distance to the next change of direction
= Current road
? "Follow the road's course" symbol Menus and submenus
205On-boardcompu ter and displays Z
Page 208 of 362
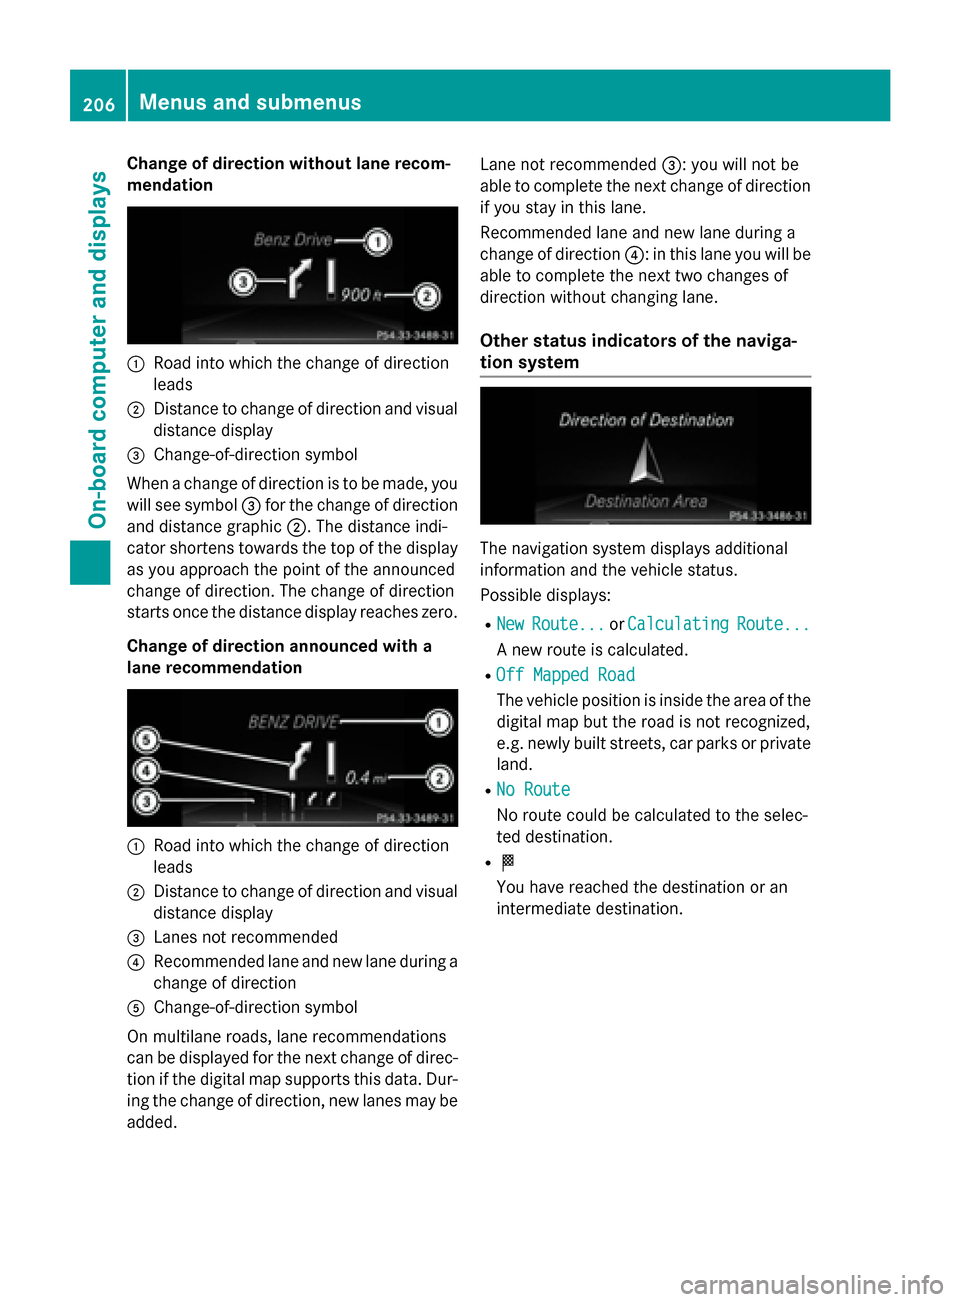
Change of direction without lane recom-
mendation :
Road into which the change of direction
leads
; Distance to change of direction and visual
distance display
= Change-of-direction symbol
When a change of direction is to be made, you will see symbol =for the change of direction
and distance graphic ;. The distance indi-
cator shortens towards the top of the display as you approach the point of the announced
change of direction. The change of direction
starts once the distance display reaches zero.
Change of direction announced with a
lane recommendation :
Road into which the change of direction
leads
; Distance to change of direction and visual
distance display
= Lanes not recommended
? Recommended lane and new lane during a
change of direction
A Change-of-direction symbol
On multilane roads, lane recommendations
can be displayed for the next change of direc- tion if the digital map supports this data. Dur-
ing the change of direction, new lanes may be added. Lane not recommended
=: you will not be
able to complete the next change of direction
if you stay in this lane.
Recommended lane and new lane during a
change of direction ?: in this lane you will be
able to complete the next two changes of
direction without changing lane.
Other status indicators of the naviga-
tion system The navigation system displays additional
information and the vehicle status.
Possible displays:
R New New Route...
Route... orCalculating
Calculating Route...
Route...
A new route is calculated.
R Off Mapped Road
Off Mapped Road
The vehicle position is inside the area of the
digital map but the road is not recognized,
e.g. newly built streets, car parks or private land.
R No Route No Route
No route could be calculated to the selec-
ted destination.
R O
You have reached the destination or an
intermediate destination. 206
Menus and submenusOn-board computer and displays
Page 209 of 362
Audio menu
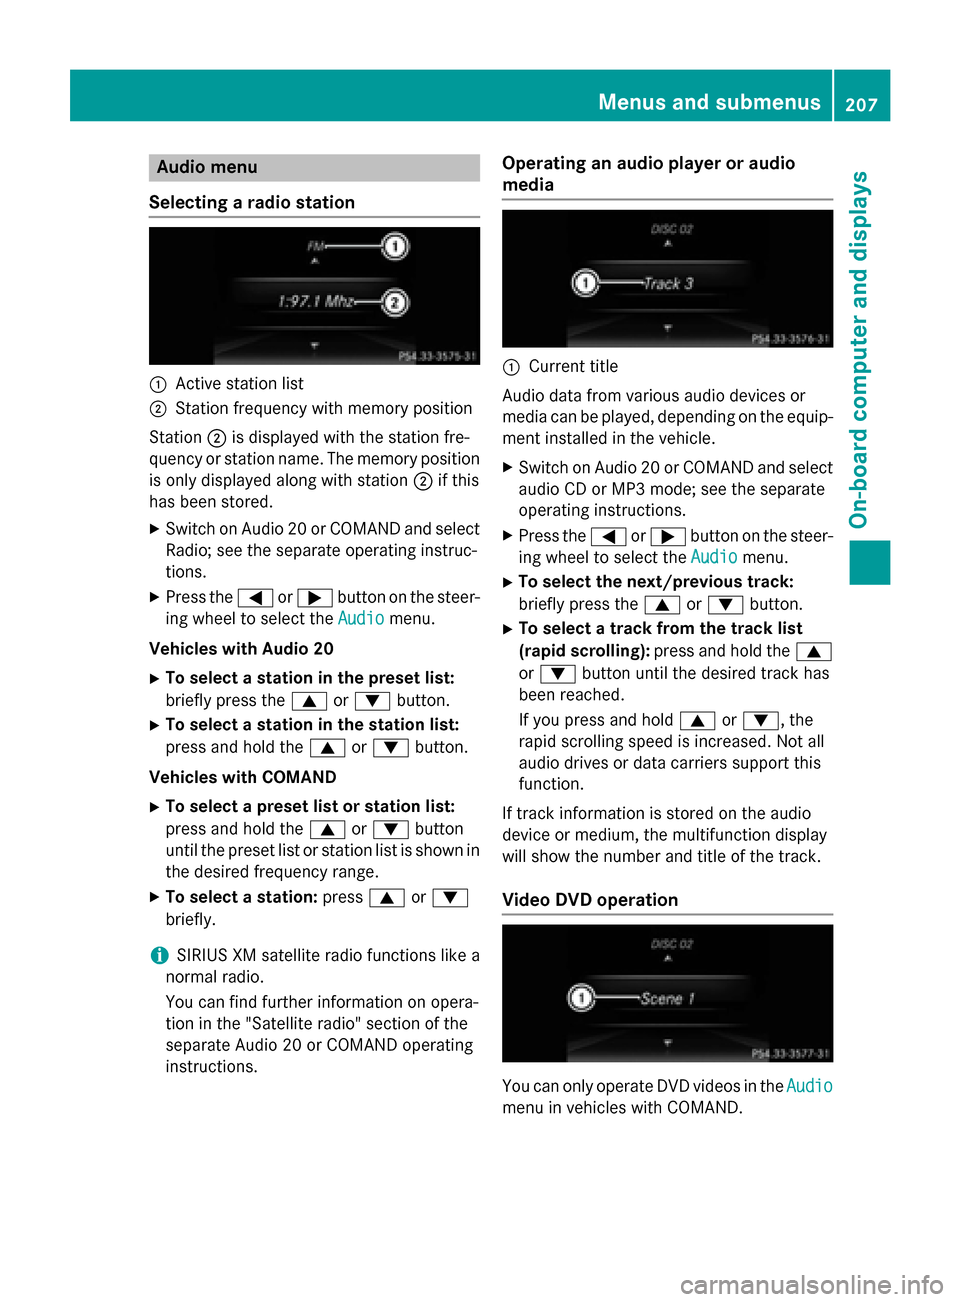
Selecting a radio station :
Active station list
; Station frequency with memory position
Station ;is displayed with the station fre-
quency or station name. The memory position is only displayed along with station ;if this
has been stored.
X Switch on Audio 20 or COMAND and select
Radio; see the separate operating instruc-
tions.
X Press the =or; button on the steer-
ing wheel to select the Audio
Audio menu.
Vehicles with Audio 20 X To select a station in the preset list:
briefly press the 9or: button.
X To select a station in the station list:
press and hold the 9or: button.
Vehicles with COMAND X To select a preset list or station list:
press and hold the 9or: button
until the preset list or station list is shown in
the desired frequency range.
X To select a station: press9or:
briefly.
i SIRIUS XM satellite radio functions like a
normal radio.
You can find further information on opera-
tion in the "Satellite radio" section of the
separate Audio 20 or COMAND operating
instructions. Operating an audio player or audio
media :
Current title
Audio data from various audio devices or
media can be played, depending on the equip- ment installed in the vehicle.
X Switch on Audio 20 or COMAND and select
audio CD or MP3 mode; see the separate
operating instructions.
X Press the =or; button on the steer-
ing wheel to select the Audio
Audio menu.
X To select the next/previous track:
briefly press the 9or: button.
X To select a track from the track list
(rapid scrolling): press and hold the 9
or : button until the desired track has
been reached.
If you press and hold 9or:, the
rapid scrolling speed is increased. Not all
audio drives or data carriers support this
function.
If track information is stored on the audio
device or medium, the multifunction display
will show the number and title of the track.
Video DVD operation You can only operate DVD videos in the
Audio Audio
menu in vehicles with COMAND. Menus and sub
menus
207On-board computer and displays Z
Page 210 of 362
X
Switch on COMAND and select video DVD
(see the separate operating instructions).
X Press the =or; button on the steer-
ing wheel to select the Audio
Audio menu.
X To select the next or previous scene:
briefly press the 9or: button.
X To select a scene from the scene list
(rapid scrolling): press and hold the 9
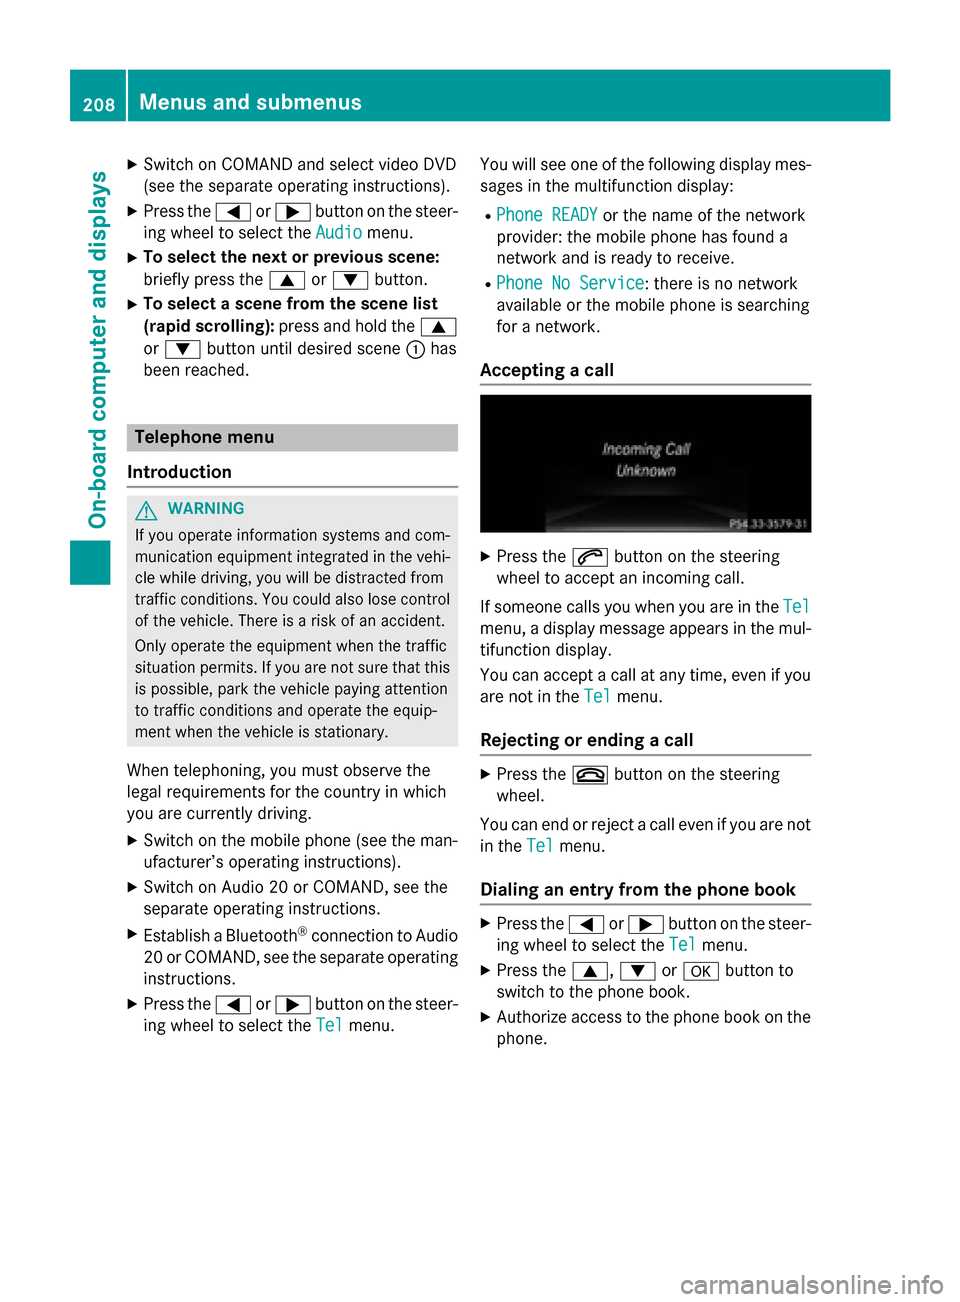
or : button until desired scene :has
been reached. Telephone menu
Introduction G
WARNING
If you operate information systems and com-
munication equipment integrated in the vehi- cle while driving, you will be distracted from
traffic conditions. You could also lose control of the vehicle. There is a risk of an accident.
Only operate the equipment when the traffic
situation permits. If you are not sure that this
is possible, park the vehicle paying attention
to traffic conditions and operate the equip-
ment when the vehicle is stationary.
When telephoning, you must observe the
legal requirements for the country in which
you are currently driving.
X Switch on the mobile phone (see the man-
ufacturer’s operating instructions).
X Switch on Audio 20 or COMAND, see the
separate operating instructions.
X Establish a Bluetooth ®
connection to Audio
20 or COMAND, see the separate operating
instructions.
X Press the =or; button on the steer-
ing wheel to select the Tel
Tel menu. You will see one of the following display mes-
sages in the multifunction display:
R Phone READY Phone READY or the name of the network
provider: the mobile phone has found a
network and is ready to receive.
R Phone No Service Phone No Service: there is no network
available or the mobile phone is searching
for a network.
Accepting a call X
Press the 6button on the steering
wheel to accept an incoming call.
If someone calls you when you are in the Tel Tel
menu, a display message appears in the mul- tifunction display.
You can accept a call at any time, even if you
are not in the Tel
Tel menu.
Rejecting or ending a call X
Press the ~button on the steering
wheel.
You can end or reject a call even if you are not
in the Tel
Tel menu.
Dialing an entry from the phone book X
Press the =or; button on the steer-
ing wheel to select the Tel
Tel menu.
X Press the 9,:ora button to
switch to the phone book.
X Authorize access to the phone book on the
phone. 208
Menus and submenusOn-board computer and displays
Page 211 of 362
X
Press the 9or: button to select the
desired name.
or X To begin rapid scrolling: press and hold
the 9 or: button for longer than
one second.
Rapid scrolling stops when you release the button or reach the end of the list.
X If only one telephone number is stored
for a name: press the6ora button
to start dialing.
or X If there is more than one number for a
particular name: press the6ora
button to display the numbers.
X Press the 9or: button to select the
number you want to dial.
X Press the 6ora button to start dial-
ing.
or
X If you do not want to make the call: press
the ~ or% button.
Redialing The on-board computer saves the last names
or numbers dialed in the redial memory.
X Press the =or; button on the steer-
ing wheel to select the Tel Telmenu.
X Press the 6button to switch to the
redial memory.
X Press the 9or: button to select the
desired name or number.
X Press the 6ora button to start dial-
ing.
or X If you do not want to make the call: press
the ~ or% button. Assistance menu
Introduction Depending on the equipment installed in the
vehicle, you have the following options in the
DriveAssist
DriveAssist menu:
R Displaying the assistance graphic
(Y page 209)
R Activating/deactivating ESP ®
(except AMG
vehicles) (Y page 210)
R Activating/deactivating COLLISION PRE-
VENTION ASSIST PLUS (Y page 210)
R Activating/deactivating ATTENTION
ASSIST (Y page 210)
R Activating/deactivating Blind Spot Assist
(Y page 211)
R Activating/deactivating Lane Keeping
Assist (Y page 211)
Displaying the assistance graphic X
Press the =or; button on the steer-
ing wheel to select the DriveAssist DriveAssistmenu.
X Press 9or: to select Assist.
Assist.
Graphic
Graphic.
X Press the abutton.
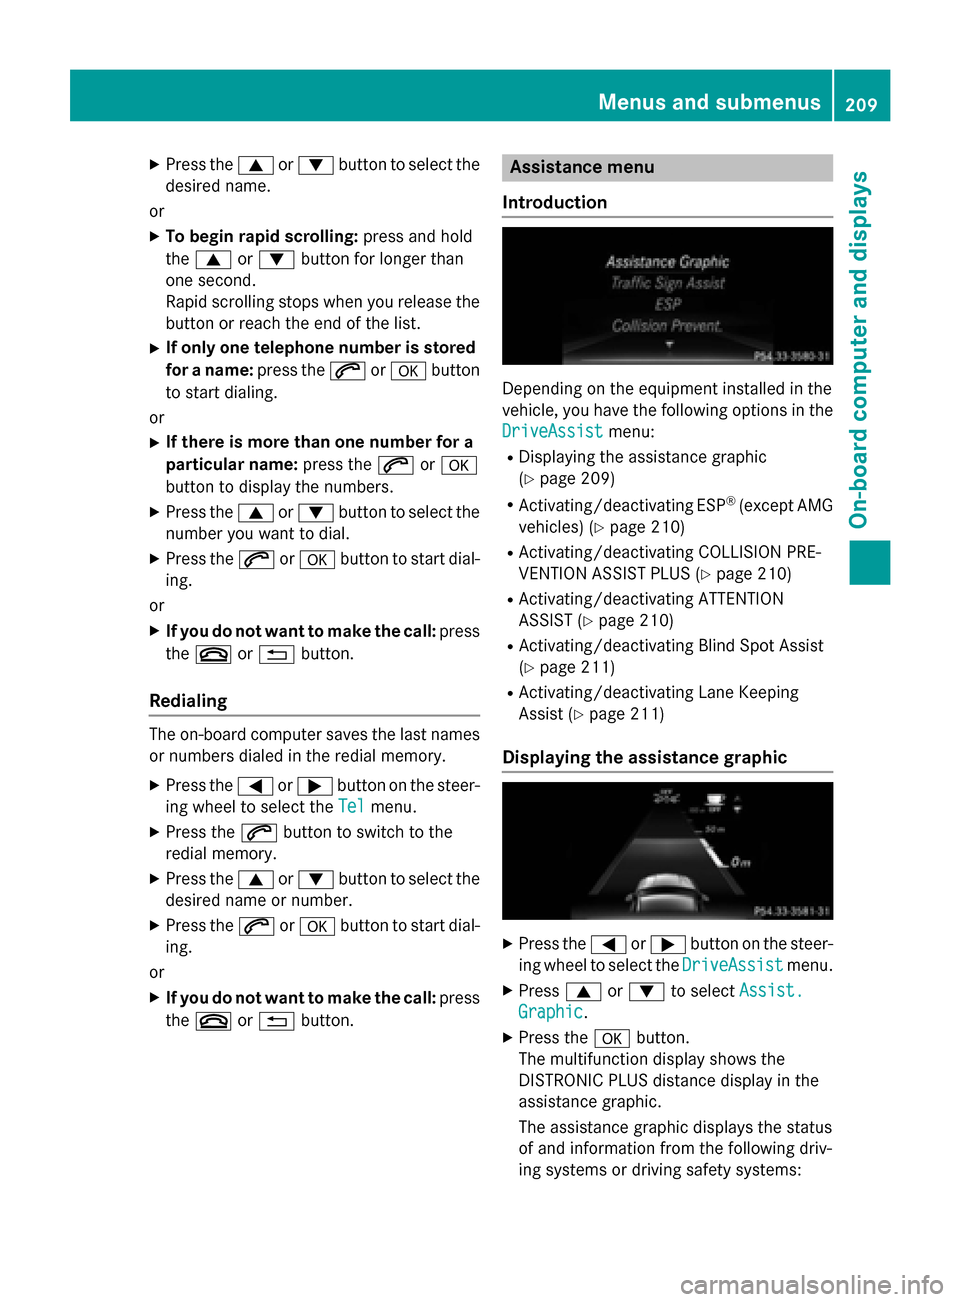
The multifunction display shows the
DISTRONIC PLUS distance display in the
assistance graphic.
The assistance graphic displays the status
of and information from the following driv-
ing systems or driving safety systems: Menus and submenus
209On-board computer and displays Z
Page 212 of 362
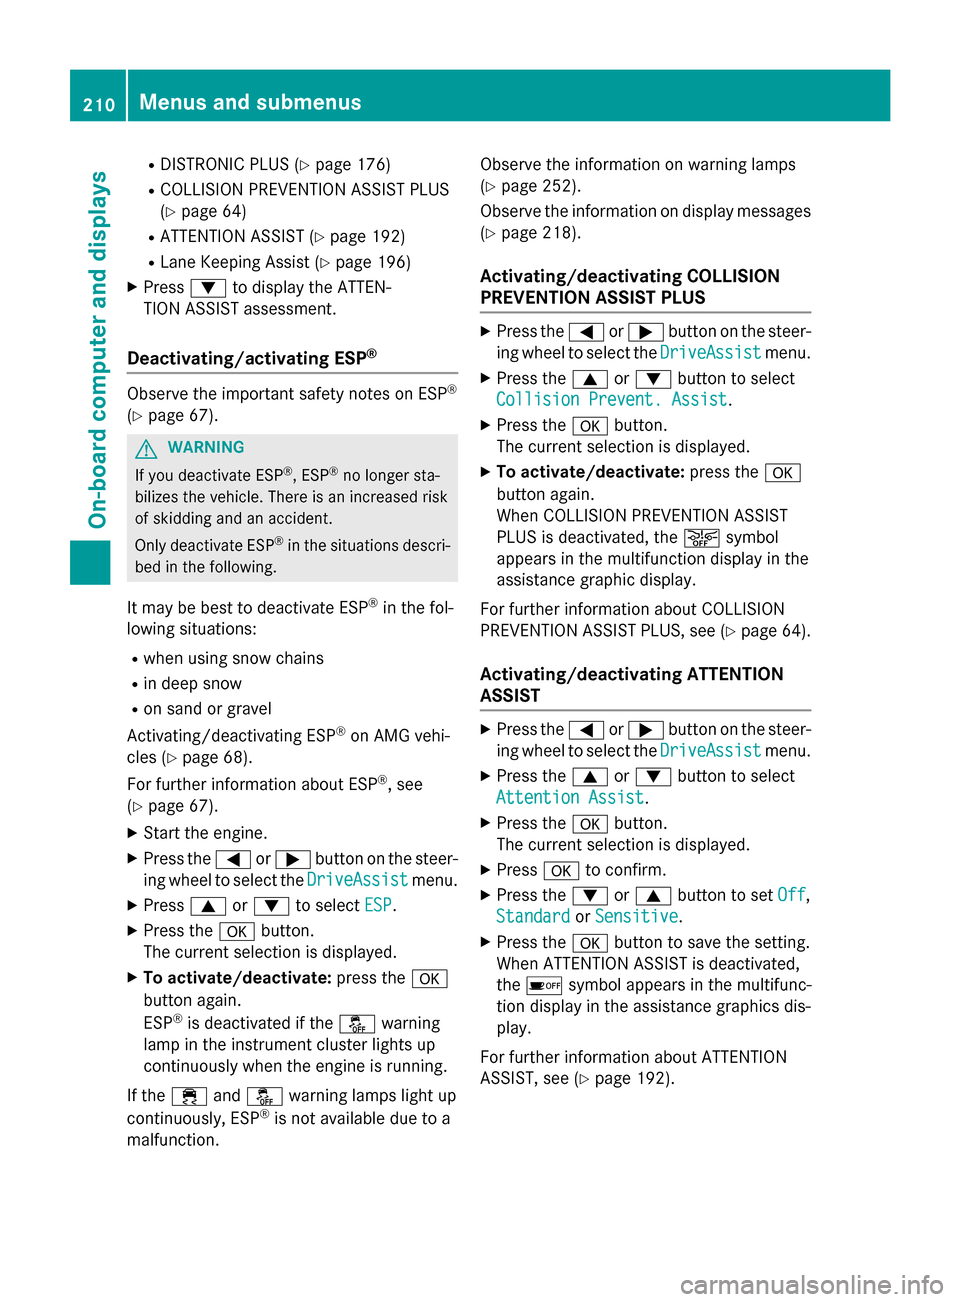
R
DISTRONIC PLUS (Y page 176)
R COLLISION PREVENTION ASSIST PLUS
(Y page 64)
R ATTENTION ASSIST (Y page 192)
R Lane Keeping Assist (Y page 196)
X Press :to display the ATTEN-
TION ASSIST assessment.
Deactivating/activating ESP ®Observe the important safety notes on ESP
®
(Y page 67). G
WARNING
If you deactivate ESP ®
, ESP ®
no longer sta-
bilizes the vehicle. There is an increased risk
of skidding and an accident.
Only deactivate ESP ®
in the situations descri-
bed in the following.
It may be best to deactivate ESP ®
in the fol-
lowing situations:
R when using snow chains
R in deep snow
R on sand or gravel
Activating/deactivating ESP ®
on AMG vehi-
cles (Y page 68).
For further information about ESP ®
, see
(Y page 67).
X Start the engine.
X Press the =or; button on the steer-
ing wheel to select the DriveAssist
DriveAssist menu.
X Press 9or: to select ESP ESP.
X Press the abutton.
The current selection is displayed.
X To activate/deactivate: press thea
button again.
ESP ®
is deactivated if the åwarning
lamp in the instrument cluster lights up
continuously when the engine is running.
If the ÷ andå warning lamps light up
continuously, ESP ®
is not available due to a
malfunction. Observe the information on warning lamps
(Y
page 252).
Observe the information on display messages
(Y page 218).
Activating/deactivating COLLISION
PREVENTION ASSIST PLUS X
Press the =or; button on the steer-
ing wheel to select the DriveAssist DriveAssistmenu.
X Press the 9or: button to select
Collision Prevent. Assist
Collision Prevent. Assist .
X Press the abutton.
The current selection is displayed.
X To activate/deactivate: press thea
button again.
When COLLISION PREVENTION ASSIST
PLUS is deactivated, the æsymbol
appears in the multifunction display in the
assistance graphic display.
For further information about COLLISION
PREVENTION ASSIST PLUS, see (Y page 64).
Activating/deactivating ATTENTION
ASSIST X
Press the =or; button on the steer-
ing wheel to select the DriveAssist DriveAssistmenu.
X Press the 9or: button to select
Attention Assist
Attention Assist .
X Press the abutton.
The current selection is displayed.
X Press ato confirm.
X Press the :or9 button to set Off
Off ,
Standard Standard orSensitive Sensitive .
X Press the abutton to save the setting.
When ATTENTION ASSIST is deactivated,
the é symbol appears in the multifunc-
tion display in the assistance graphics dis-
play.
For further information about ATTENTION
ASSIST, see (Y page 192).210
Menus and submenusOn-board computer and displays
Page 213 of 362
Activating/deactivating Blind Spot
Assist X
Press the =or; button on the steer-
ing wheel to select the DriveAssist
DriveAssist menu.
X Press the 9or: button to select
Blind Spot Assist
Blind Spot Assist .
X Press the abutton.
The current selection is displayed.
X To activate/deactivate: press thea
button again.
For further information about Blind Spot
Assist, see (Y page 194).
Activating/deactivating Lane Keeping
Assist X
Press the =or; button on the steer-
ing wheel to select the DriveAssist DriveAssistmenu.
X Press the 9or: button to select
Lane Keeping Assist
Lane Keeping Assist .
X Press the abutton.
The current selection is displayed.
X Press ato confirm.
X Press the :or9 button to set Off
Off,
Standard
Standard orAdaptive
Adaptive.
X Press the abutton to save the setting.
When Lane Keeping Assist is activated, the
multifunction display shows the lane mark- ings as bright lines in the assistance
graphic.
For further information about Lane Keeping
Assist, see (Y page 196). Service menu
Depending on the equipment installed in the
vehicle, you have the following options in the
Serv. Serv. menu: R
Calling up display messages in message
memory (Y page 217)
R Restarting the tire pressure loss warning
system (Canada only) (Y page 326)
R Checking the tire pressure electronically
(USA only) (Y page 326)
R Calling up the service due date
(Y page 291) Settings menu
Introduction Depending on the equipment installed in the
vehicle, In the
Sett. Sett.menu you have the fol-
lowing options:
R Changing the instrument cluster settings
R Changing the light settings
R Changing the vehicle settings
R Changing the convenience settings
R Restoring the factory settings
Instrument cluster Unit of measurement for distance
The
Display Unit Speed-/Odometer: Display Unit Speed-/Odometer:
function allows you to choose whether cer-
tain displays appear in kilometers or miles in the multifunction display.
X Press the =or; button on the steer-
ing wheel to select the Sett. Sett.menu.
X Press the :or9 button to select the
Instrument Cluster Instrument Cluster submenu.
X Press ato confirm. Menus and sub
menus
211On-board computer and displays Z
Page 214 of 362
X
Press the :or9 button to select the
Display Unit Speed-/Odometer
Display Unit Speed-/Odometer func-
tion.
You will see the selected setting: km
km or
miles
miles.
X Press the abutton to save the setting.
The selected unit of measurement for dis-
tance applies to:
R digital speedometer in the Trip
Trip menu
R odometer and the trip odometer
R trip computer
R current fuel consumption and approximate
range
R navigation instructions in the Navi
Navi menu
R cruise control
R DISTRONIC PLUS
R ASSYST PLUS service interval display
Switching the additional speedometer
on/off
The Speedometer [km/h]
Speedometer [km/h] orSpeedometer Speedometer
[mph]
[mph] function allows you to choose whether
the multifunction display in the status area
shows the speed in km/h
km/hor inmph
mphinstead of
the outside temperature.
X Press the =or; button on the steer-
ing wheel to select the Sett.
Sett. menu.
X Press the :or9 button to select the
Instrument Cluster
Instrument Cluster submenu.
X Press ato confirm.
X Press the :or9 button to select the
Speedometer [km/h]
Speedometer [km/h] orSpeedometer
Speedometer
[mph]
[mph] function.
You will see the selected setting: On
OnorOff
Off.
X Press the abutton to save the setting.
Selecting the permanent display function
You can determine whether the multifunction display permanently shows the outside tem-
perature or your speed in km/h( USA) or mph
(Canada). X
Press the =or; button on the steer-
ing wheel to select the Sett.
Sett. menu.
X Press the :or9 button to select the
Instrument Cluster Instrument Cluster submenu.
X Press ato confirm.
X Press the :or9 button to select the
Permanent Display:
Permanent Display: function.
You will see the selected setting: Outside
Outside
Temperature
Temperature orSpeedometer [km/h]
Speedometer [km/h]/
Speedometer [mph]
Speedometer [mph].
X Press the abutton to save the setting.
i The speed is highlighted in km/h or in
mph conversely to your speedometer.
Lights Switching the daytime running lamps on/
off
This function is not available in Canada.
X Press the =or; button on the steer-
ing wheel to select the Sett. Sett.menu.
X Press the :or9 button to select the
Lights
Lights submenu.
X Press ato confirm.
X Press the :or9 button to select the
Daytime Running Lights
Daytime Running Lights function.
If the Daytime Running Lights
Daytime Running Lights function
has been switched on, the cone of light and the W symbol in the multifunction dis-
play are shown in orange.
X Press the abutton to save the setting.
Further information on daytime running lights
(Y page 110).
Vehicle Activating/deactivating the automatic
door locking mechanism
X Press the =or; button on the steer-
ing wheel to select the Sett. Sett.menu.
X Press the :or9 button to select the
Vehicle
Vehicle submenu.
X Press ato confirm. 212
Menus and submenusOn-board computer and displays