suspension MERCEDES-BENZ CLA COUPE 2019 Owners Manual
[x] Cancel search | Manufacturer: MERCEDES-BENZ, Model Year: 2019, Model line: CLA COUPE, Model: MERCEDES-BENZ CLA COUPE 2019Pages: 645, PDF Size: 10.94 MB
Page 35 of 645
or MP3 pla
yer). If this data is stored in theve hi‐
cle, you can dele teit at any time. This data is
sent tothird parties only at your requ est, partic‐
ularly when you use online services in accord‐
ance with the settings that you ha veselected.
Yo u can store or change con venience settings/
individualisations in theve hicle at any time.
Depending on the equipment, this includes, for
ex ample:
R settings forth e seat and steering wheel posi‐
tions
R suspension and climate control settings
R customisations such as interior lighting
If yo ur vehicle is accordingly equipped, you can
connect your smartphone or ano ther mobile end
device totheve hicle. You can cont rolth is by
means of the control elements integrated in the
ve hicle. Images and audio from the smartphone
can be output via the multimedia sy stem. Cer‐
tai n information is simultaneously trans ferred to
yo ur smartphone. Depending on
the type of integration, this can
include:
R general vehicle data
R position data
This allo wsyouto use selected apps on your
smartphone, such as navigation or music play‐
bac k.There is no fur ther interaction between the
smartphone and theve hicle; in particular, vehi‐
cle data is not directly accessible. Which type of
fur ther data processing occurs is de term ined by
th e pr ovider of the specific app used. Which set‐
tings you can make, if an y,depends on the spe‐
cific app and the operating sy stem of your
smartphone. Online services
Wire
less network connection
If yo ur vehicle has a wireless network connec‐
tion, it enables data tobe exc hanged between
yo ur vehicle and additional sy stems. The wire‐
less network connection is enabled via theve hi‐
cle's transmission and reception unit or via con‐
nected mobile end devices (e.g. sma rtphones). Online functions can be used via
the wireless
network connection. This includes online serv‐
ices and applications/apps pr ovided bythe man‐
ufacturer or other pr oviders.
Manu factu rer's se rvices
Re garding online services of the manufacturer,
th e individual functions are described bythe
manufacturer in a suita ble place (e.g. Owner's
Manual, website of the manufacturer) along with
th ere leva nt da taprotection information. Per‐
sonal data may be used forth e pr ovision of
online services. Data is exchanged via a secure
connection, e.g. the manufacturer's designated
IT sy stems. Personal data is collected, pro‐
cessed and used via the pr ovision of services
exc lusively on the basis of legal permissions or
with prior consent.
The services and functions (sometimes subject
to afe e) can usually be activated or deactivated.
In some cases, this also applies tothe entire
ve hicle's data connection. This excludes, in par‐
ticular, legally prescribed functions and services. 32
General no tes
Page 169 of 645
ve
ry sporty driving style is shown in the cent re
of the display 4. Therange displ ayed does not
indicate a fixe dre duction in consum ption. DY
NA MIC SELECT switch Fu
nction of theDY NA MIC SELECT switch Mercedes-AMG
vehicles: observeth e no tes in
th e Supplement. Otherwise, you may failto rec‐
ognise dangers.
Use theDY NA MIC SELECT switch tochange
between thefo llowing drive programs:
= (Individual) : individual settings
C (Sport): sporty driving style
A (Comfort): comfortable and economical
driving style
; (Eco):particularly economical driving
st yle
% The drive program selected appears in the
multifunction display of the on-board com‐
puter. Depending on
the drive prog ram, thefo llowing
sy stems change their characteristics:
R drive
-
engine and transmission management
- Active Dis tance Assi stDISTRONIC
R ESP ®
R vehicles with adaptive damping adjust‐
ment: suspension
R electric po werst eering Note
s onthero of load display Cer
tain drive programs and ESP ®
settings are
unsuitable for transporting a roof load.
When setting or selecting these drive prog rams,
a crossed-through vehicle with a roof load is
shown as a warning. When this symbol is shown,
th e selected drive program is not suitable for
transpo rting a load on thero of.
The following drive programs are af fected:
R Sport drive program R
Individual drive program wi th the Sport
ESP ®
setting
% The symbol is also shown in thefo llowing sit‐
uations:
R Within theth emes if a cor responding
drive program is sa ved
Fo r more information on themes see
(/ page 307).
R Within there set display if the pr eviously
active drive prog ram is unsui tableforthe
transpo rtof a roof load
Fo r fur ther information on there set dis‐
pla y,see (/ page167). Selec
ting the drive prog ram %
Depending on the equipment, theve hicle is
fi tted wi theither a switch or a button. 16 6
Driving and pa rking
Page 194 of 645
%
Standby mode is automatically deactivated
when the ignition is switched on.
Ac tivating/deactivating standby mode (park‐
ing up theve hicle)
Re quirements:
R The engine is switched off.
Multimedia sy stem:
4 © 5
Settings 5
Fahrzeug (Vehicle) #
Activate or deacti vate Standby mode.
When you activate the function, a prom pt
appears. #
Select Yes.
St andby mode is activated. Driving and driving saf
ety sy stems Driving sy
stems and your responsibility Yo
ur vehicle is equipped with driving sy stems
which assist you in driving, parking and manoeu‐
vring theve hicle. The driving sy stems are aids
and do not relie ve you of your responsibility per‐
ta ining toroad traf fic la w.Pay attention tothe traf
fic conditions at all times and inter vene
when necessa ry. Be aware of the limitations
re ga rding the safe use of these sy stems. Information about
radar senso rs Some driving and driving sa
fety sy stems use
ra dar sensors tomonitor the area in front of,
behind or next totheve hicle (depending on the
ve hicle's equipment).
Depending on theve hicle's equipment, thera dar
sensors are integrated behind the bumpers
and/or behind the Mercedes star. Keep these
parts free of dirt, ice and slush (/ page 458).
The sensors must not be co vered, forex ample
by cycle rack s, overhanging loads, sticke rs,fo il
or foils toprotect against stone chipping. In the
eve nt of dama getothe bumpers or radiator
grille, or following a collision impacting the
bumpers or radiator grille, ha vethe function of
th era dar sensors checked at a qualified special‐
ist workshop. The driving sy stems and driving
saf ety sy stems may no longer function proper ly
in such cases. Overview of driving sy
stems and driving
saf ety sy stems In
this section, you will find information about
th efo llowing driving sy stems and driving saf ety
sy stems:
R 360° Camera (/ page 230)
R ABS (Anti-lock Braking System)
(/ page 192)
R Active Dis tance Assi stDISTRONIC
(/ page 207)
R Adaptive Brake Lights (/ page 203)
R Active Brake Assi st (/ page 197)
R Active Lane Keeping Assist (/ page249)
R ATTENTION ASSIST (/ page240)
R BAS (Brak eAssist System) (/ page192)
R Hill Start Assist (/ page219)
R Suspension wi thadaptive damping adjust‐
ment (/ page 221)
R EBD (Electronic Brakeforc eDistribution)
(/ page 196) Driving and parking
191
Page 224 of 645
R
The vehicle is secured with the electric park‐
ing brake.
In thefo llowing situations, theve hicle is held by
th e transmission position jorby the electric
parking brake:
R The seat belt is unfas tened and the driver's
door is opened.
R The vehicle is switched off.
R There is a malfunction in the sy stem or the
po we r supp lyis insuf ficient. St
art-off assi st Fu
nction of thest art-off assi st
The start-off assist enables optimal vehicle
acceleration from a standstill. Forth is, a suitably
high-grip road sur face is requ ired, the tyres and
ve hicle must also be in good condition.
Do not activate thest art-off assist on public
ro ads.
Be sure toobser vethe saf ety no tes and informa‐
tion on ESP ®
. Ac
tivating the start-off assi st &
WARNING Risk of skidding and having
an accident from wheels spinning
When you use start-off assist, individual
wheels could spin and you could lose cont rol
of theve hicle.
If ESP ®
is deactivated, there is a risk of skid‐
ding and accident! #
Make sure that no persons or obstacles
are in the close vicinity of your vehicle. #
Deactivating ESP ®
(/ page 195). #
Movethesteering wheel tothest ra ight-
ahead position. #
Depress the brake pedal firm ly wi thyour left
fo ot and keep it depressed. #
Enga getheh drive position (/ page172). #
Select the sportiest available drive program
B orC(/ page166). #
Rapidly depress the accelerator pedal full y. #
Take your foot off the brake, but keep the
accelerator pedal depressed.
The vehicle pulls away at maximum accelera‐
tion. #
Swit chon ESP ®
once the acceleration proce‐
dure is comple te. ESP ®
will otherwise not be
able tostabilise theve hicle if theve hicle
st arts toskid or a wheel starts tospin.
Cancelling thest art-off assi st #
Remo veyour foot from the accelerator pedal. #
Reactivate the ESP ®
. Fu
nction of adapt ive damping adjustment Suspension with adaptive damping adjustment
continuously adjusts
thech aracteristics of the
suspension dampers tothe cur rent operating
and driving conditions.
The da mping is tuned individually for each wheel
and is af fected bythefo llowing factors:
R thero ad sur face conditions
R vehicle load
R the drive prog ram selected Driving and parking
221
Page 498 of 645
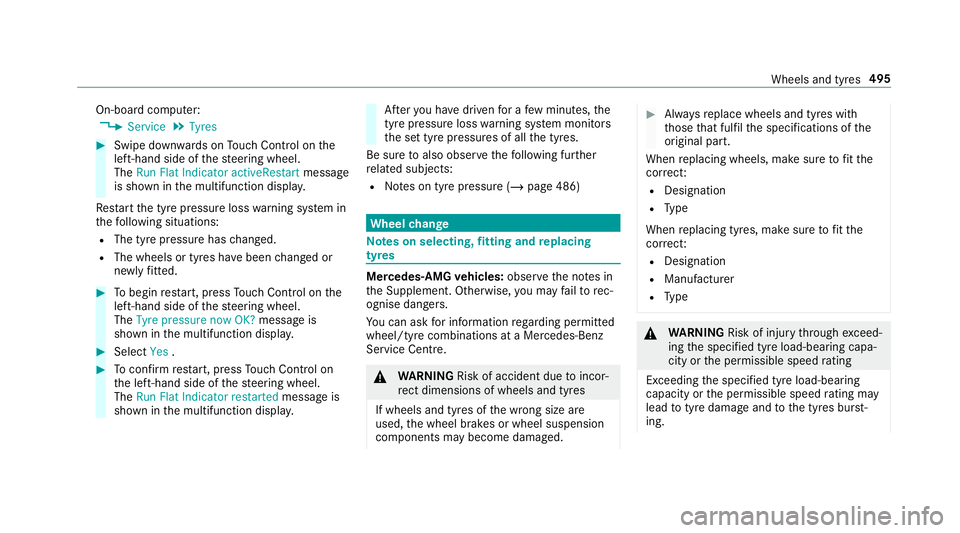
On-board computer:
4 Service 5
Tyres #
Swipe down wards on Touch Control on the
left-hand side of thesteering wheel.
The Run Flat Indicator activeRestart message
is shown in the multifunction displa y.
Re start the tyre pressure loss warning sy stem in
th efo llowing situations:
R The tyre pressure has changed.
R The wheels or tyres ha vebeen changed or
newly fitted. #
Tobegin restart, press Touch Control on the
left-hand side of thesteering wheel.
The Tyre pressure now OK? message is
shown in the multifunction displa y.#
Select Yes. #
Toconfirm restart, press Touch Control on
th e left-hand side of thesteering wheel.
The Run Flat Indicator restarted message is
shown in the multifunction displa y. Af
teryo u ha vedriven for a few minutes, the
tyre pressu reloss warning sy stem monitors
th e set tyre pressures of all the tyres.
Be sure toalso obse rveth efo llowing fur ther
re lated subjects:
R Notes on tyre pressure (/ page 486) Wheel
change Note
s on selecting, fitting and replacing
tyres Mercedes
-AMG vehicles: observeth e no tes in
th e Supplement. Otherwise, you may failto rec‐
ognise dangers.
Yo u can ask for information rega rding permit ted
wheel/tyre combinations at a Mercedes-Benz
Service Cent re. &
WARNING Risk of accident due toincor‐
re ct dimensions of wheels and tyres
If wheels and tyres of the wrong size are
used, the wheel brakes or wheel suspension
components may become damaged. #
Alw aysre place wheels and tyres with
th ose that fulfil the specifications of the
original part.
When replacing wheels, make sure tofit the
cor rect:
R Designation
R Type
When replacing tyres, make sure tofit the
cor rect:
R Designation
R Manufactu rer
R Type &
WARNING Risk of inju rythro ugh exceed‐
ing the specified tyre load-bearing capa‐
city or the permissible speed rating
Exceeding the specified tyre load-bearing
capacity or the permissible speed rating may
lead totyre dama geand tothe tyres bur st‐
ing. Wheels and tyres
495
Page 501 of 645
R
Obser vethe maximum permissible speed for
th e M+S tyres fitted.
If th is is below theve hicle's maximum speed,
th is must be indicated byan appropriate
label in the driver's field of vision.
R Run in new tyres at moderate speeds forthe
fi rs t10 0 km.
R Replace the tyres af ter six years at the latest,
re ga rdless of wear.
R When replacing with tyres that do not
fe ature run-flat characteristics: vehicles
with MOExtended tyres are not equipped
with a TIREFIT kit at thefa ctor y.Equip the
ve hicle with a TIREFIT kit af terre placing with
tyres that do not feature run-flat characteris‐
tics, e.g. winter tyres.
% You can permanently limit the maximum
ve hicle speed for driving with winter tyres
(/ page 207).
Fo r more information on wheels and tyres, con‐
ta ct a qualified specialist workshop. Be sure
toalso obse rveth efo llowing fur ther
re lated subjects:
R Notes on tyre pressure (/ page 486)
R Tyre pressure table (/ page 487)
R Notes on the emer gency spa rewheel
(/ page 504) Note
s on inter changing wheels &
WARNING Risk of inju rythro ugh dif fer‐
ent wheel sizes
Inter changing the front and rear wheels if the
wheels or tyres ha vediffere nt dimensions
may se verely impair the driving characteris‐
tics.
The disk brakes or wheel suspension compo‐
nents may also be damaged. #
Rotate front and rear wheels on lyifthe
wheels and tyres are of the same
dimensions. Inter
changing the front and rear wheels if the
wheels or tyres ha vediffere nt dimensions can
re nder thege neral operating pe rmit in valid.
The wear pat tern s on the front and rear wheels
dif fer:
R Front wheels wear more on the shoulder of
th e tyre
R Rear wheels wear more in the cent reofthe
tyre
On vehicles with the same front and rear wheel
size, you can inter change the wheels every
5,000 to10,000 km, depending on thewe ar.
Ensure the direction of rotation is maintained for
th e wheels.
It is imperative toobser vethe instructions and
saf ety no tes on "Changing a wheel" when doing
so Preparing theve hicle for a wheel
ch ange( /page 500). 498
Wheels and tyres
Page 526 of 645
Fo
rth e cor rect mixing ratio, referto the informa‐
tion on the antif reeze conta iner.
Mix thewa sher fluid with the windscreen washer
fl uid all year round. Ve
hicle data Ve
hicle dimensions The heights speci
fied may vary as a result of the
fo llowing factors:
R tyres
R load
R condition of the suspension
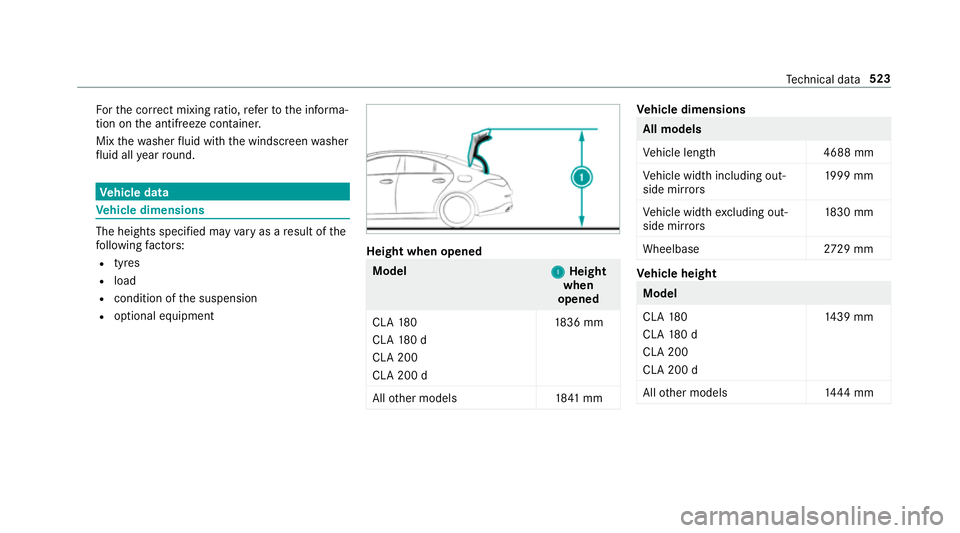
R optional equipment Height when opened
Model
1
1Height
when
opened
CLA 180
CLA 180 d
CLA 200
CLA 200 d 18
36 mm
All other models 1841 mm Ve
hicle dimensions All models
Ve
hicle lengt h4 688 mm
Ve hicle width including out‐
side mir rors 19
99 mm
Ve hicle width excluding out‐
side mir rors 18
30 mm
Wheelbase 2729 mm Ve
hicle height Model
CLA
180
CLA 180 d
CLA 200
CLA 200 d 14
39 mm
All other models 1444 mm Te
ch nical da ta523
Page 613 of 645
dVe
hicle is operational Switch
off the ignition before exiting .............. .572
h Warning tyre defect .....................568
hWheel sensor(s) missing .............. 567
Wi thout changing gear, consult work‐
shop ..................................................... 561
Display on the windscreen
see Head-up display
Distance control see Active Dis tance Assi stDISTRONIC
Di stance recorder
see Trip dis tance
DI STRO NIC
see Active Dis tance Assi stDISTRONIC
Door Additional door lock .............................. 80
Child saf ety lock (rear door) .................. 73
Locking (emergency key) ...................... .84
Opening (from the inside) ......................80
Un locking (emer gency key) .................. .84
Un locking (from the inside) ...................80
Door cont rol panel .................................... .16Dr
aw bar
see Tow- bar sy stem
Drinks holder see Cup holder
Drive Away Assist .................................... 239
Drive Away Assist
see Pr otection against collision
Drive position Enga ging ..............................................1 72
Drive prog ram display ............................. 16 6
Drive prog rams
see DYNA MIC SELECT
Driver's seat see Seat
Driving abroad Symmetrical dipped beam ...................1 28
Driving lights see Automatic driving lights
Driving saf ety sy stem ............................ .191
ABS (Anti-lo ckBraking Sy stem) ........... 19 2
Ac tive Brake Assi st.............................. 197
Ad aptive brake lights .......................... .203
BA S (Brake Assi stSystem) .................. 19 2EBD (Electronic Brake
forc e Distribu‐
tion) ..................................................... 19 6
ESP ®
Crosswind Assi st........................ 19 6
ESP ®
trailer stabilisation .................... .196
Overview .............................................. 191
Ra dar sensors ...................................... 191
Re sponsibility ...................................... 191
ST EER CONTROL ................................. 19 6
Driving sy stem
Suspension with adaptive damping
adjustment .......................................... 221
Driving sy stem
see 360° Camera
see Active Blind Spot Assi st
see Active Dis tance Assi stDISTRONIC
see Active Emergency Stop Assist
see Active Lane Change Assi st
see Active Lane Keeping Assist
see Active Parking Assist
see Active Speed Limit Assi st
see Active Steering Assist
see ATTENTION ASSIST
see Blind Spot Assist
see Cruise control
see Driving saf ety sy stem 61 0
Index
Page 633 of 645
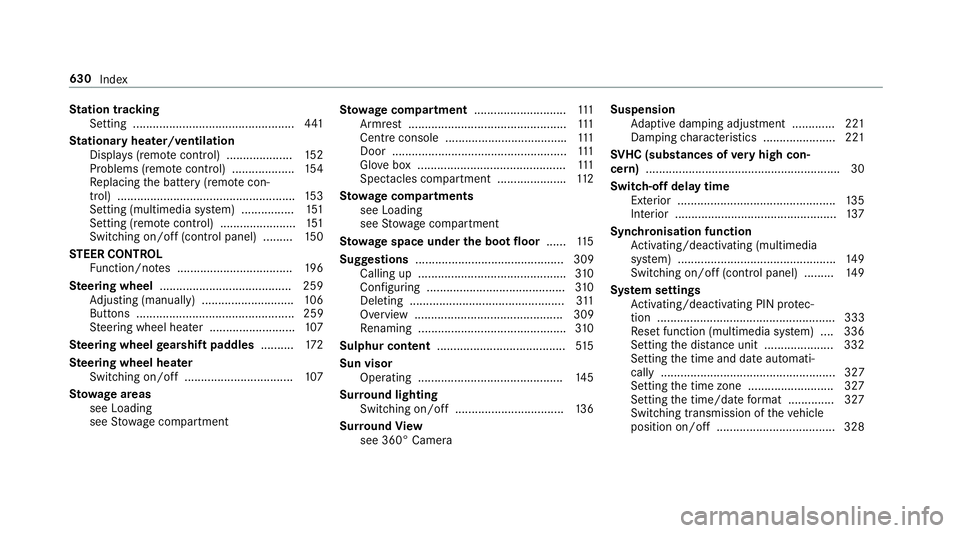
St
ation tracking
Setting ................................................. 441
St ationary heater/ventilation
Displ ays (remo tecontrol) .................... 15 2
Problems (remo tecontrol) ................... 154
Re placing the battery (remo tecon‐
trol) ...................................................... 15 3
Setting (multimedia sy stem) ................1 51
Setting (remo tecontrol) ....................... 151
Switching on/off (control panel) ......... 15 0
ST EER CONT ROL
Fu nction/no tes ................................... 19 6
Ste ering wheel ........................................ 259
Ad justing (manually) ............................ 106
Buttons ................................................ 259
St eering wheel heater .......................... 107
Ste ering wheel gearshift paddles ..........172
Ste ering wheel heater
Swit ching on/off ................................ .107
St ow age areas
see Loading
see Stow age compartment St
ow age comp artment............................ 111
Armrest ................................................ 111
Centre console .................................... .111
Door ..................................................... 111
Glo vebox .............................................1 11
Spectacles compa rtment .................... .112
St ow age comp artments
see Loading
see Stow age compartment
St ow age space under the boot floor ......11 5
Suggestions ............................................. 309
Calling up ............................................. 310
Con figuring .......................................... 310
Del eting .............................................. .311
Overview ............................................. 309
Re naming ............................................. 310
Sulphur content ....................................... 51 5
Sun visor Operating ............................................ 14 5
Sur round lighting
Switching on/off ................................. 13 6
Sur round View
see 360° Camera Suspension
Adaptive damping adjustment ............ .221
Damping characteristics ...................... 221
SV HC (substances of very high con‐
cern ).......................................................... .30
Switch-off delay time Exterior ................................................ 13 5
Interior ................................................. 137
Synchronisation function Activating/deactivating (multimedia
sy stem) ................................................ 14 9
Switching on/off (control panel) ......... 14 9
Sy stem settings
Ac tivating/deactivating PIN pr otec‐
tion ...................................................... 333
Re set function (multimedia sy stem) ....3 36
Setting the dis tance unit ..................... 332
Setting the time and date automati‐
cally ..................................................... 327
Setting the time zone .......................... 327
Setting the time/date form at .............. 327
Swit ching transmission of theve hicle
position on/off .................................... 328 630
Index