MERCEDES-BENZ E-Class 2016 W213 Comand Manual
Manufacturer: MERCEDES-BENZ, Model Year: 2016, Model line: E-Class, Model: MERCEDES-BENZ E-Class 2016 W213Pages: 246, PDF Size: 6.7 MB
Page 31 of 246
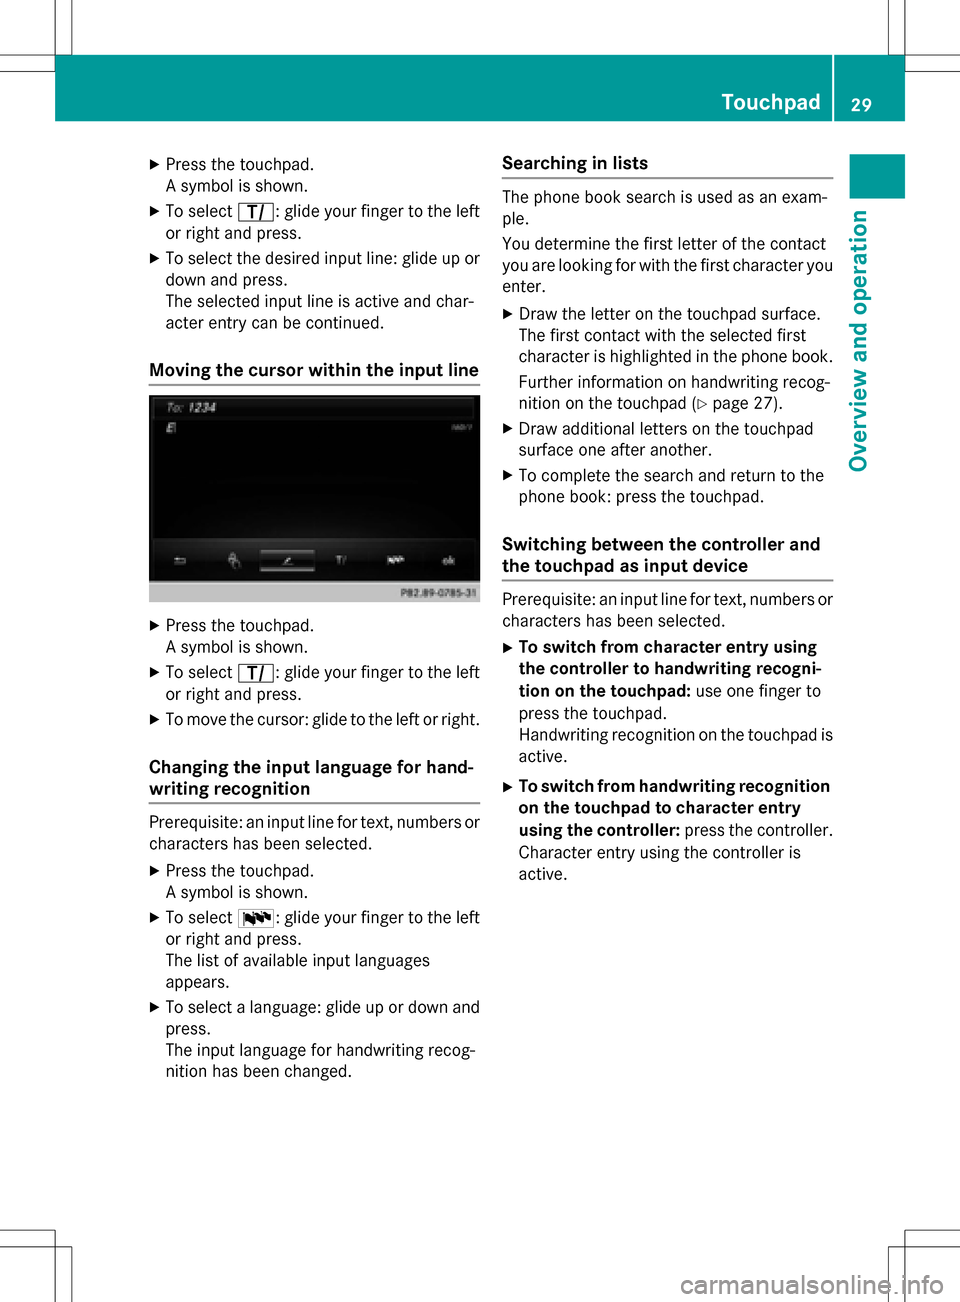
XPress the touchpad.
A symbol is shown.
XTo selectp: glide your finger to the left
or right and press.
XTo select the desired input line: glide up or
down and press.
The selected input line is active and char-
acter entry can be continued.
Moving the cursor within the input line
XPress the touchpad.
A symbol is shown.
XTo select p: glide your finger to the left
or right and press.
XTo move the cursor: glide to the left or right.
Changing the input language for hand-
writing recognition
Prerequisite: an input line for text, numbers or
characters has been selected.
XPress the touchpad.
A symbol is shown.
XTo select B: glide your finger to the left
or right and press.
The list of available input languages
appears.
XTo select a language: glide up or down and
press.
The input language for handwriting recog-
nition has been changed.
Searching in lists
The phone book search is used as an exam-
ple.
You determine the first letter of the contact
you are looking for with the first character you
enter.
XDraw the letter on the touchpad surface.
The first contact with the selected first
character is highlighted in the phone book.
Further information on handwriting recog-
nition on the touchpad (
Ypage 27).
XDraw additional letters on the touchpad
surface one after another.
XTo complete the search and return to the
phone book: press the touchpad.
Switching between the controller and
the touchpad as input device
Prerequisite: an input line for text, numbers or
characters has been selected.
XTo switch from character entry using
the controller to handwriting recogni-
tion on the touchpad: use one finger to
press the touchpad.
Handwriting recognition on the touchpad is
active.
XTo switch from handwriting recognition
on the touchpad to character entry
using the controller: press the controller.
Character entry using the controller is
active.
Touchpad29
Overview and operation
Page 32 of 246
Quick access for audio and telephone
Changing the station or music track
Depending on the audio source that is cur-
rently activated, you can use this function to
select the next station or music track.
XCall up quick access (Ypage 26).
The current audio source is displayed.
XTo select the previous or next station/
music track: glide to the right or left.
The selected station or music track is
played.
Changing the audio source
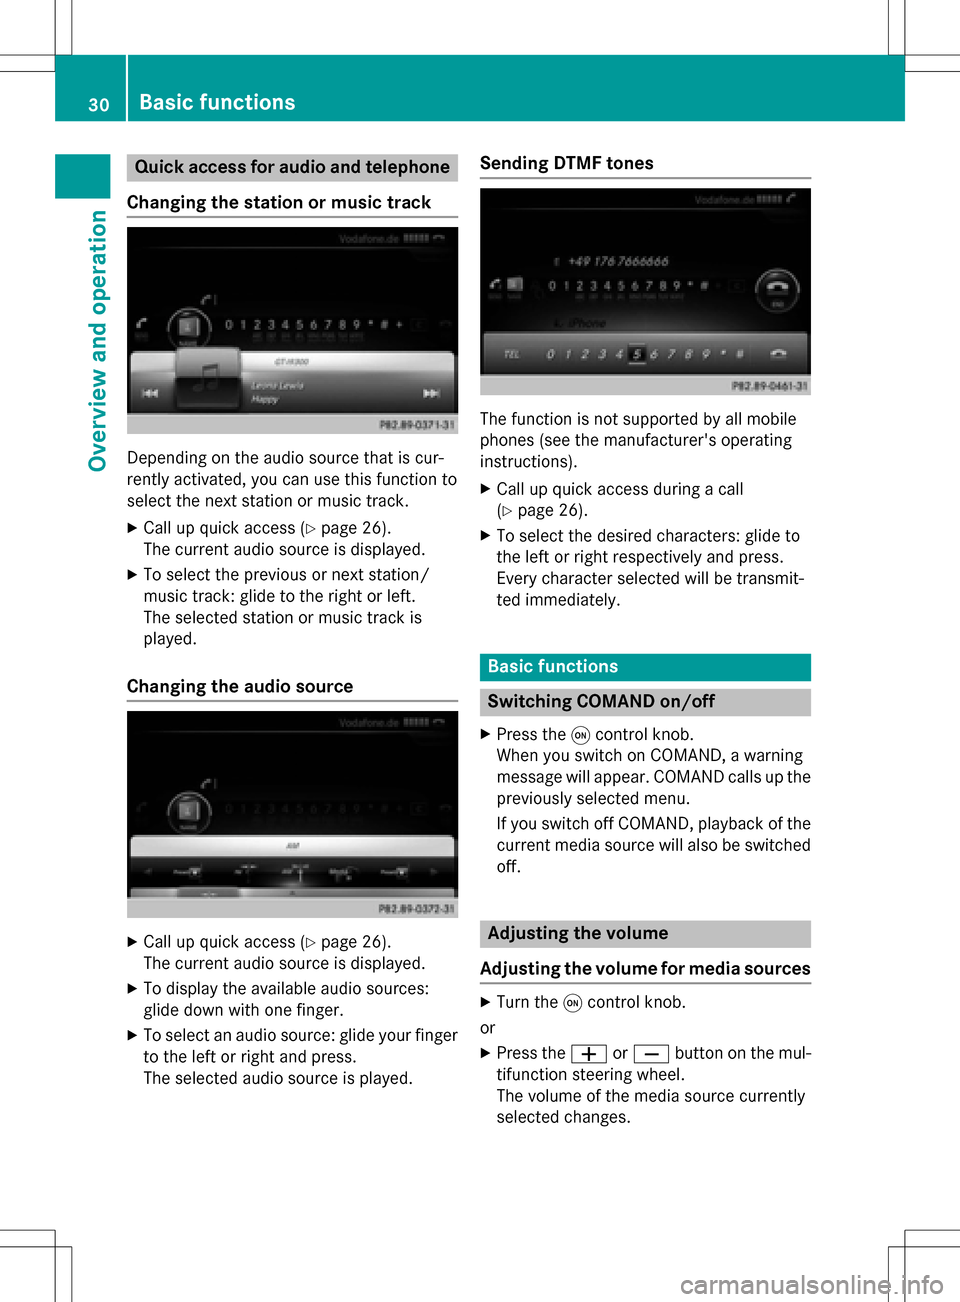
XCall up quick access (Ypage 26).
The current audio source is displayed.
XTo display the available audio sources:
glide down with one finger.
XTo select an audio source: glide your finger
to the left or right and press.
The selected audio source is played.
Sending DTMF tones
The function is not supported by all mobile
phones (see the manufacturer's operating
instructions).
XCall up quick access during a call
(
Ypage 26).
XTo select the desired characters: glide to
the left or right respectively and press.
Every character selected will be transmit-
ted immediately.
Basic functions
Switching COMAND on/off
XPress the qcontrol knob.
When you switch on COMAND, a warning
message will appear. COMAND calls up the
previously selected menu.
If you switch off COMAND, playback of the
current media source will also be switched
off.
Adjusting the volume
Adjusting the volume for media sources
XTurn the qcontrol knob.
or
XPress the WorX button on the mul-
tifunction steering wheel.
The volume of the media source currently
selected changes.
30Basic functions
Overview and operation
Page 33 of 246
Adjusting the volumefor traffic
announcements and navigati on
announcements
During traffic or navigation announcements :
XTurn theq control knob.
or
XPress th eW orX buttonon th emul-
tifunction steering wheel.
iYou can set th evolume for navigation
announcements to be differen tfrom th e
volume of th erespective media source .
Adjusting the volumefor phone calls
You can adjust thevolume for hands-free
mod eduring atelephon ecall .
XTurn th eq control knob.
or
XPress th eW orX buttonon th emul-
tifunction steering wheel.
iSetting th evolume for th eVoic eControl
Syste mvoice output ,see th eseparat e
operating instructions.
Switching the sound on oroff
Media source sound
XPress th e8 buttonon th eCOMAND
controller or th emultifunction steering
wheel.
The soun dis switched off .If th eaudio out -
put is switched off ,th estatus lin ewill sho w
th e8 symbol. If you switch th emedia
source or chang eth evolume, th esoun dis
automatically switched on .
iEven if thesoun dis switched off ,you will
still hear navigation system announce -
ments .
Switching navigati onannouncements
off and onagain
XTo switch navigation announcement s
off: pressthe8 buttonduring an
announcement.
The Spoken
drivin grecommendations
havebee ndeactivated.message
appears.
XTo switch navigation announcement s
back on: switch COMAND off and then on
again (
Ypage 30).
or
XStart ane wrout ecalculation (Ypage 71).
or
XSelec t+: while rout eguidance is active ,
sho wthemen uand pre ssthecontroller
(
Ypage 90) .
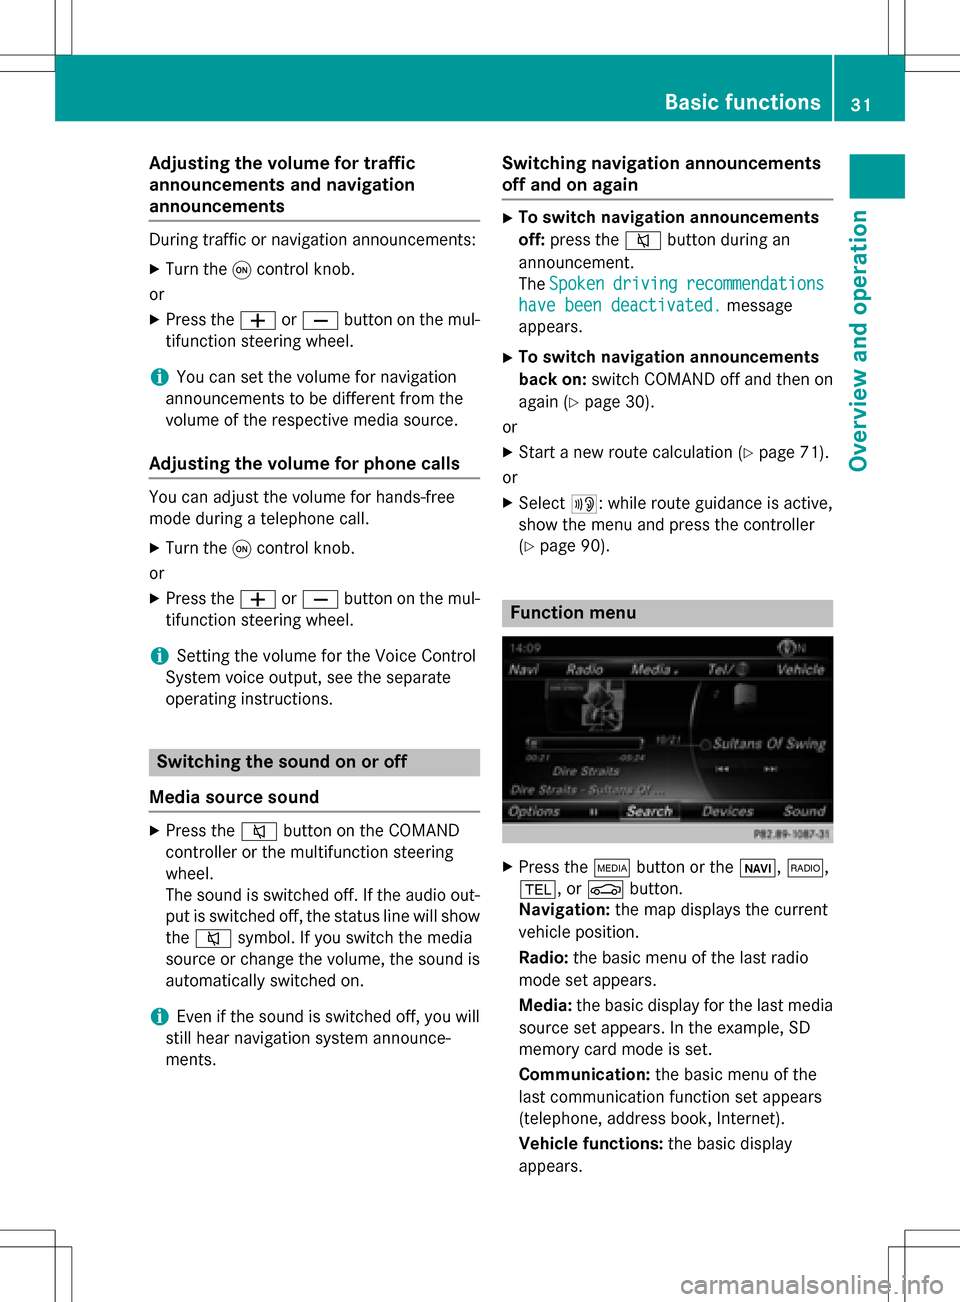
Function menu
XPresstheÕ buttonor th eß, $,
%, orØ button.
Navigation: themap displays th ecurren t
vehicl eposition .
Radio :th ebasic men uof th elast radi o
mod eset appears.
Media: thebasic display for th elast media
source set appears. In th eexample, SD
memory car dmod eis set.
Communication: thebasic men uof th e
last communication function set appear s
(telephone, addr essbook ,Internet).
Vehicle functions: thebasic display
appears.
Basic functions31
Overview and operation
Page 34 of 246
XTo show the menu:slide4 the con-
troller.
The menu for the selected functions
appears. Depending on the operation, the
marking is shown in main function bar (top) or menu bar (bottom).
XTo select a menu item: turn and press the
controller.
If you have selected a menu item from the
main function bar, switch to the last menu
set for the selected function.
The menu bar features options within the
currently set function.
Selecting the operating mode for a
main function
For the main functions, e.g. communication
or media, you can choose from the available
operating modes.
In the communication menu, you can:
Rswitch to telephone mode
Rcall up the address book
Rcall up the Internet
Rcall up the digital operating instructions for
the telephone/®
XPress the %button.
The phone menu appears.
XTo call up the menu: press the%but-
ton again.
or
XTo select Tel/®: slide5and press the
controller.
The communication menu appears. Phone
is at the front.
XTo select Internet, for instance, turn and
press the controller.
Character entry (telephony)
Entering characters using the charac-
ter bar
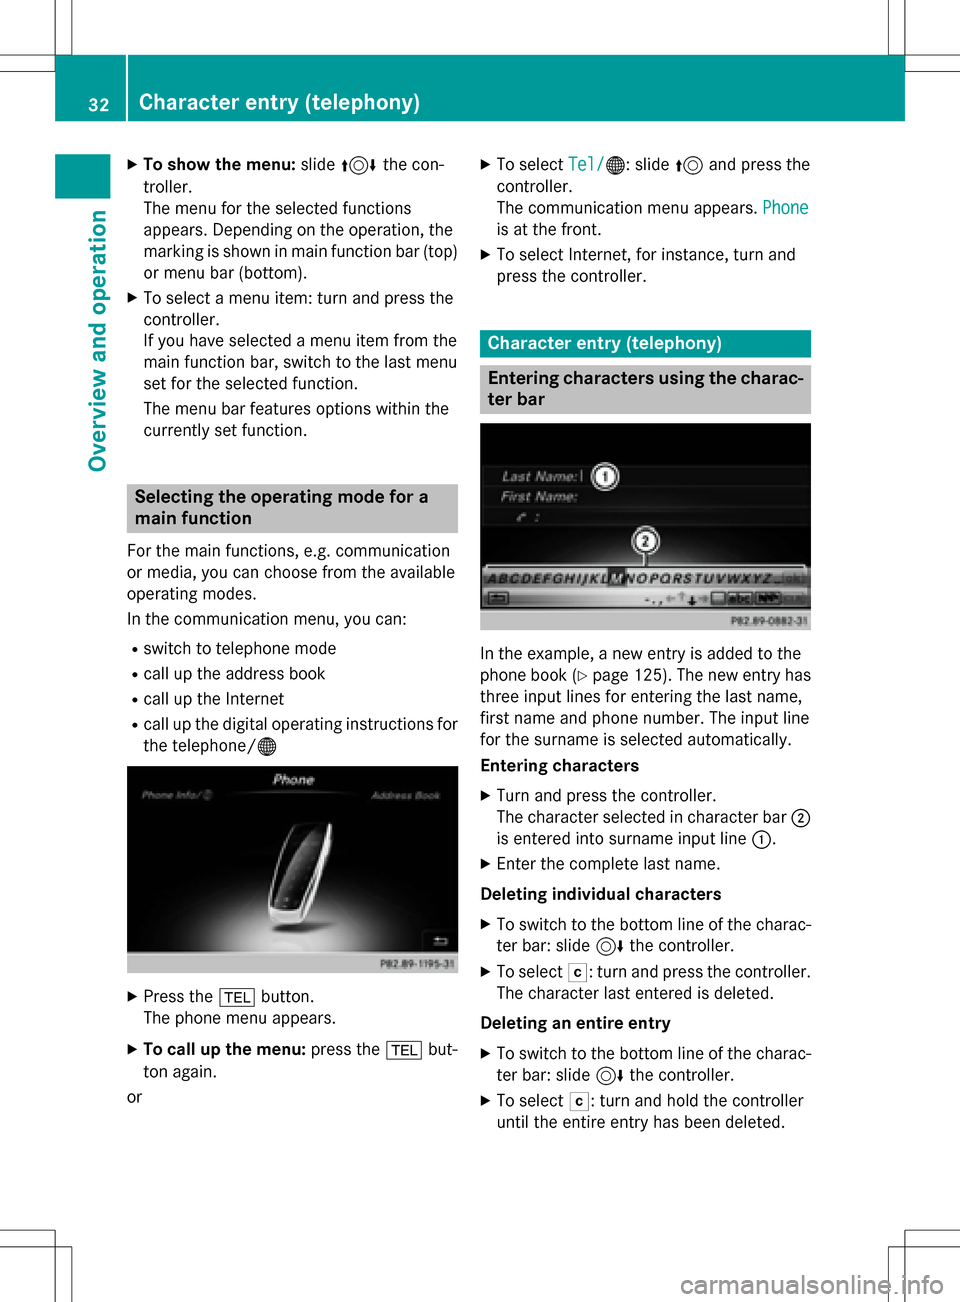
In the example, a new entry is added to the
phone book (
Ypage 125). The new entry has
three input lines for entering the last name,
first name and phone number. The input line
for the surname is selected automatically.
Entering characters
XTurn and press the controller.
The character selected in character bar ;
is entered into surname input line :.
XEnter the complete last name.
Deleting individual characters
XTo switch to the bottom line of the charac-
ter bar: slide 6the controller.
XTo select F: turn and press the controller.
The character last entered is deleted.
Deleting an entire entry
XTo switch to the bottom line of the charac-
ter bar: slide 6the controller.
XTo select F: turn and hold the controller
until the entire entry has been deleted.
32Character entry (telephony)
Overview and operation
Page 35 of 246
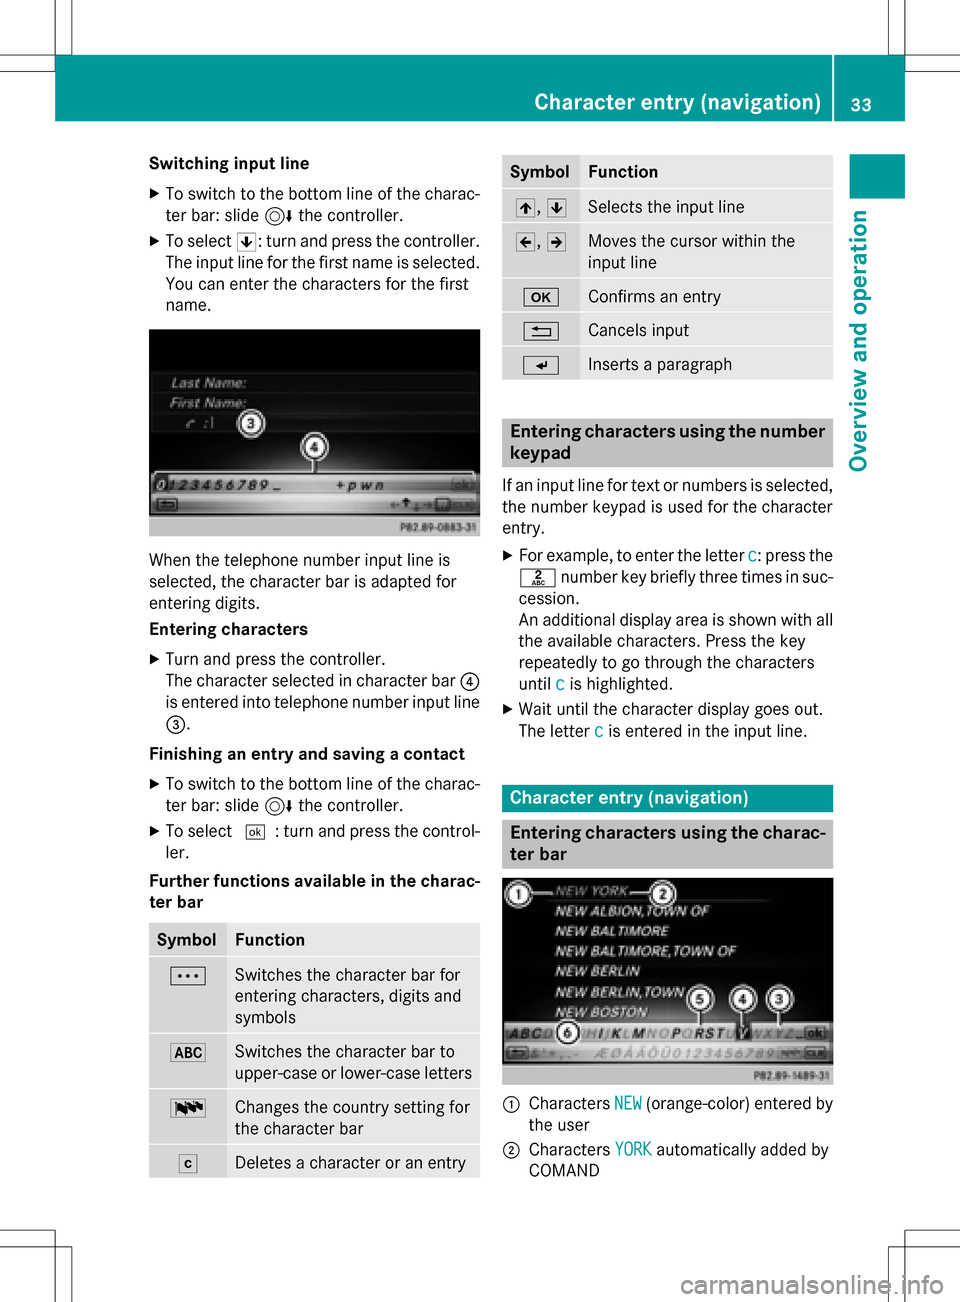
Switching input line
XTo switch to the bottom line of the charac-
ter bar: slide6the controller.
XTo select 5: turn and press the controller.
The input line for the first name is selected.
You can enter the characters for the first
name.
When the telephone number input line is
selected, the character bar is adapted for
entering digits.
Entering characters
XTurn and press the controller.
The character selected in character bar ?
is entered into telephone number input line
=.
Finishing an entry and saving a contact
XTo switch to the bottom line of the charac-
ter bar: slide 6the controller.
XTo select ¬: turn and press the control-
ler.
Further functions available in the charac-
ter bar
SymbolFunction
ÄSwitches the character bar for
entering characters, digits and
symbols
*Switches the character bar to
upper-case or lower-case letters
BChanges the country setting for
the character bar
FDeletes a character or an entry
SymbolFunction
4, 5Selects the input line
2,3Moves the cursor within the
input line
bConfirms an entry
%Cancels input
SInserts a paragraph
Entering characters using the number
keypad
If an input line for text or numbers is selected,
the number keypad is used for the character
entry.
XFor example, to enter the letter c: press the
l number key briefly three times in suc-
cession.
An additional display area is shown with all
the available characters. Press the key
repeatedly to go through the characters
until c
is highlighted.
XWait until the character display goes out.
The letter c
is entered in the input line.
Character entry (navigation)
Entering characters using the charac-
ter bar
:Characters NEW(orange-color) entered by
the user
;Characters YORKautomatically added by
COMAND
Character entry (navigation)33
Overview and operation
Page 36 of 246
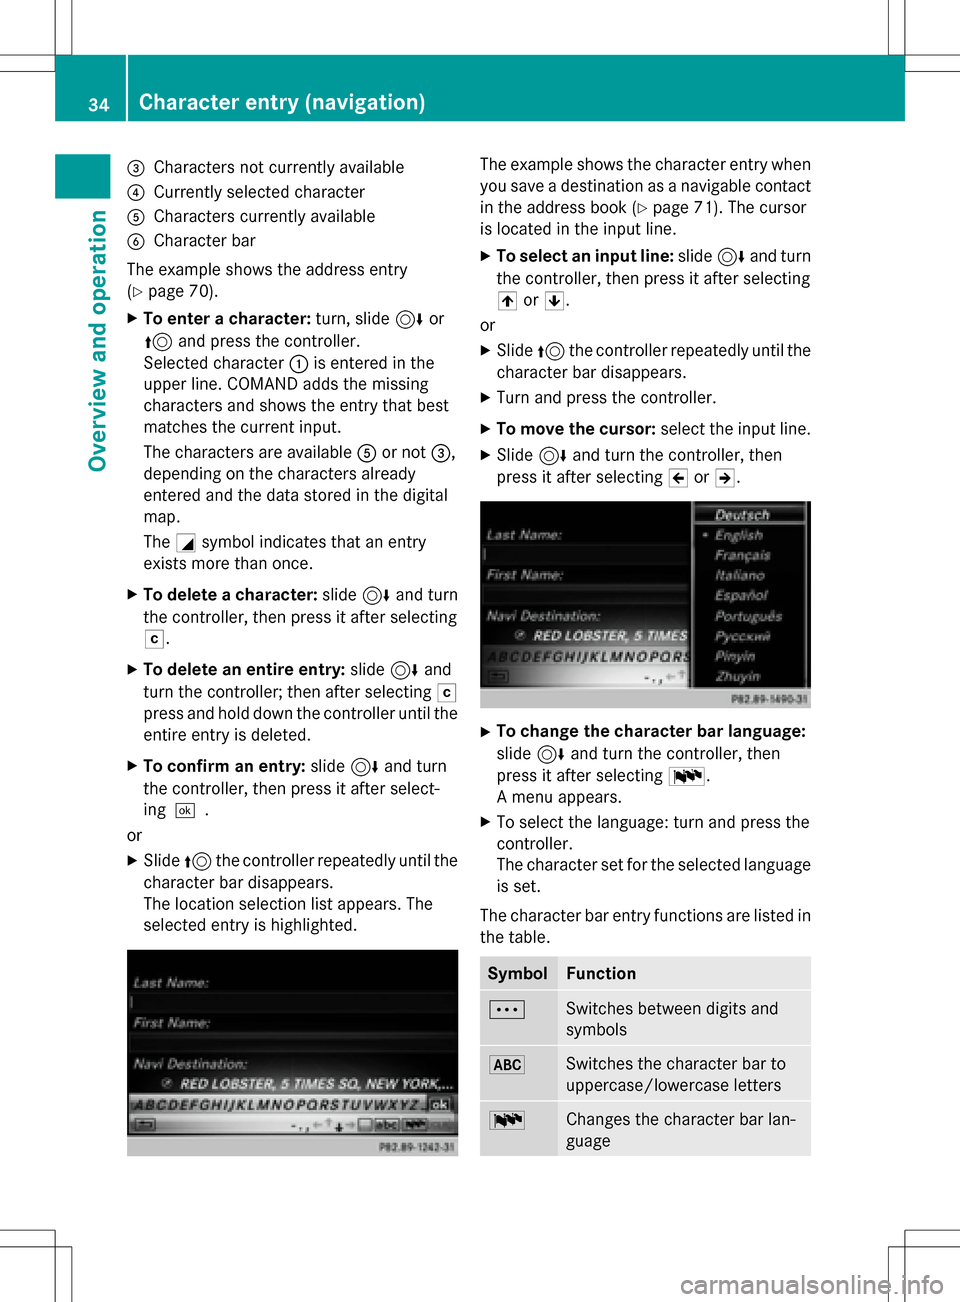
=Characters not currently available
?Currently selected character
ACharacters currently available
BCharacter bar
The example shows the address entry
(
Ypage 70).
XTo enter a cha racter: turn, slide 6or
5 and press the controller.
Se lected character :is entered in the
upper line. COMAND adds the missing
characters and shows the entry that best
matches the current input.
The characters are availab leA or not =,
depe nding on the characters already
entered and the data stored in the digital
map.
The Gsymbol indicates that an entry
exists more than once.
XTo delete a cha racter: slide6and turn
the controller, then press itafter selecting
F.
XTo delete an entire entry :slide 6and
turn the controller; then after selecting F
press and hold downthe controller unt ilthe
entire entry isdeleted.
XTo confi rman entry :slide 6and turn
the controller, then press it after select-
ing ¬.
or
XSlide 5the controller repeatedly until the
character bar disappears.
The location selection list appears. The
selected entry ishighlighted.
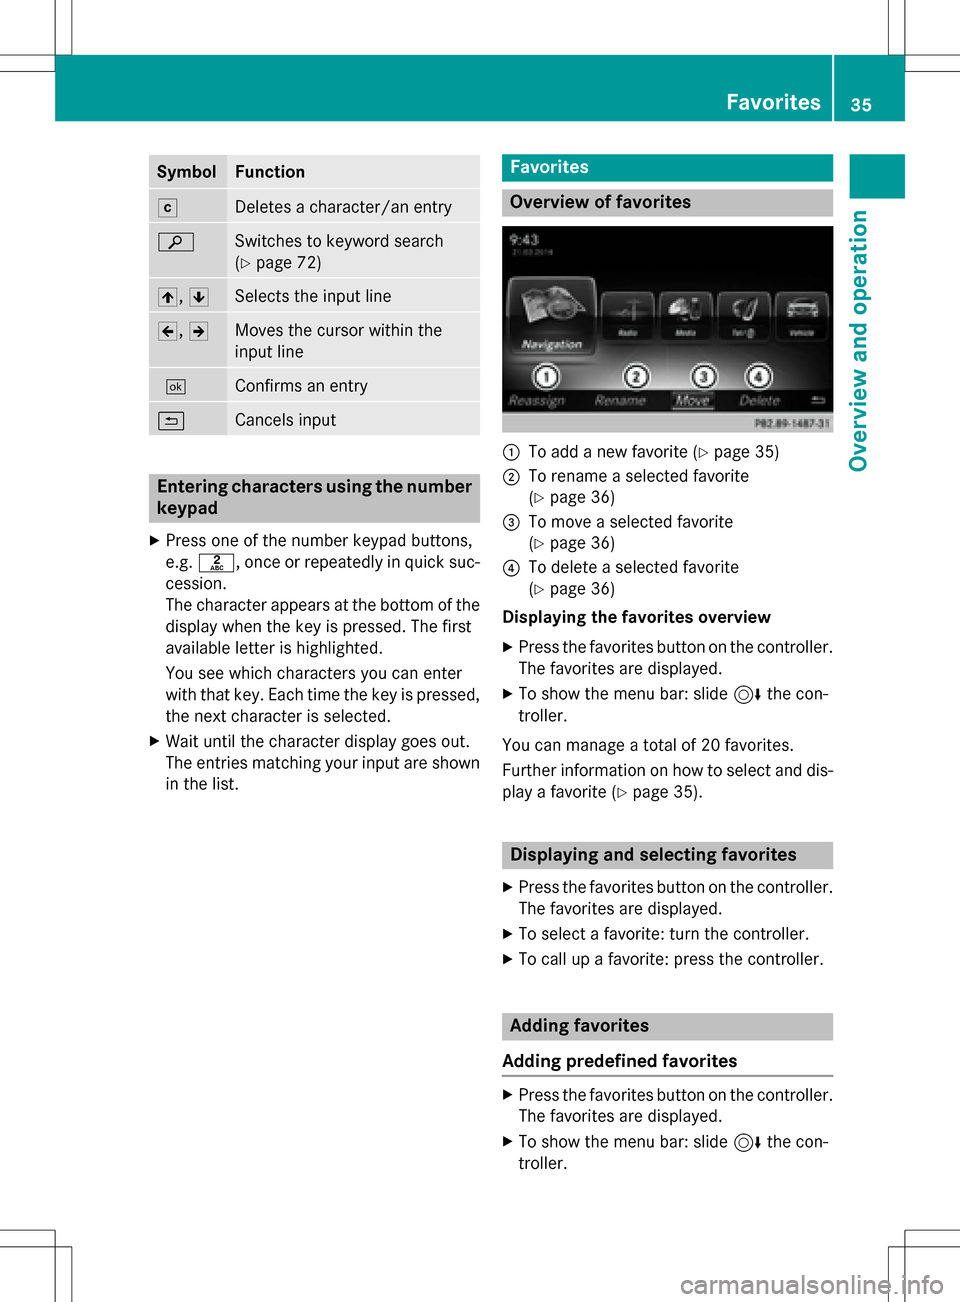
The example shows the character entry when
you save a destination as a nav igablecontact
in the address book (
Ypage 71). The cursor
is located inthe input line.
XTo select an input line: slide6and turn
the controller, then press itafter selecting
4 or5.
or
XSlide 5the controller repeatedly unt ilthe
character bar disappears.
XTurn and press the controller.
XTo move the cursor: select the input line.
XSli de 6 and turn the controller, then
press itafter selecting 2or3.
XTo change the cha racter bar language:
slide 6and turn the controller, then
press itafter selecting B.
A menu appears.
XTo select the language: turn and press the
controller.
The character set for the selected language
is set.
The character bar entry functions are listedin
the table.
SymbolFunction
ÄSwit ches between digits and
symbols
*Swit ches the character bar to
uppercase/lowercase letters
BChanges the character bar lan-
guage
34Character entry (navigation)
Overview and operation
Page 37 of 246
SymbolFunction
FDeletes a character/an entry
èSwitches to keyword search
(
Ypage 72)
4,5Selects the input line
2,3Moves the cursor within the
input line
¬Confirms an entry
&Cancels input
Entering characters using the number
keypad
XPress one of the number keypad buttons,
e.g. l, once or repeatedly in quick suc-
cession.
The character appears at the bottom of the
display when the key is pressed. The first
available letter is highlighted.
You see which characters you can enter
with that key. Each time the key is pressed,
the next character is selected.
XWait until the character display goes out.
The entries matching your input are shown in the list.
Favorites
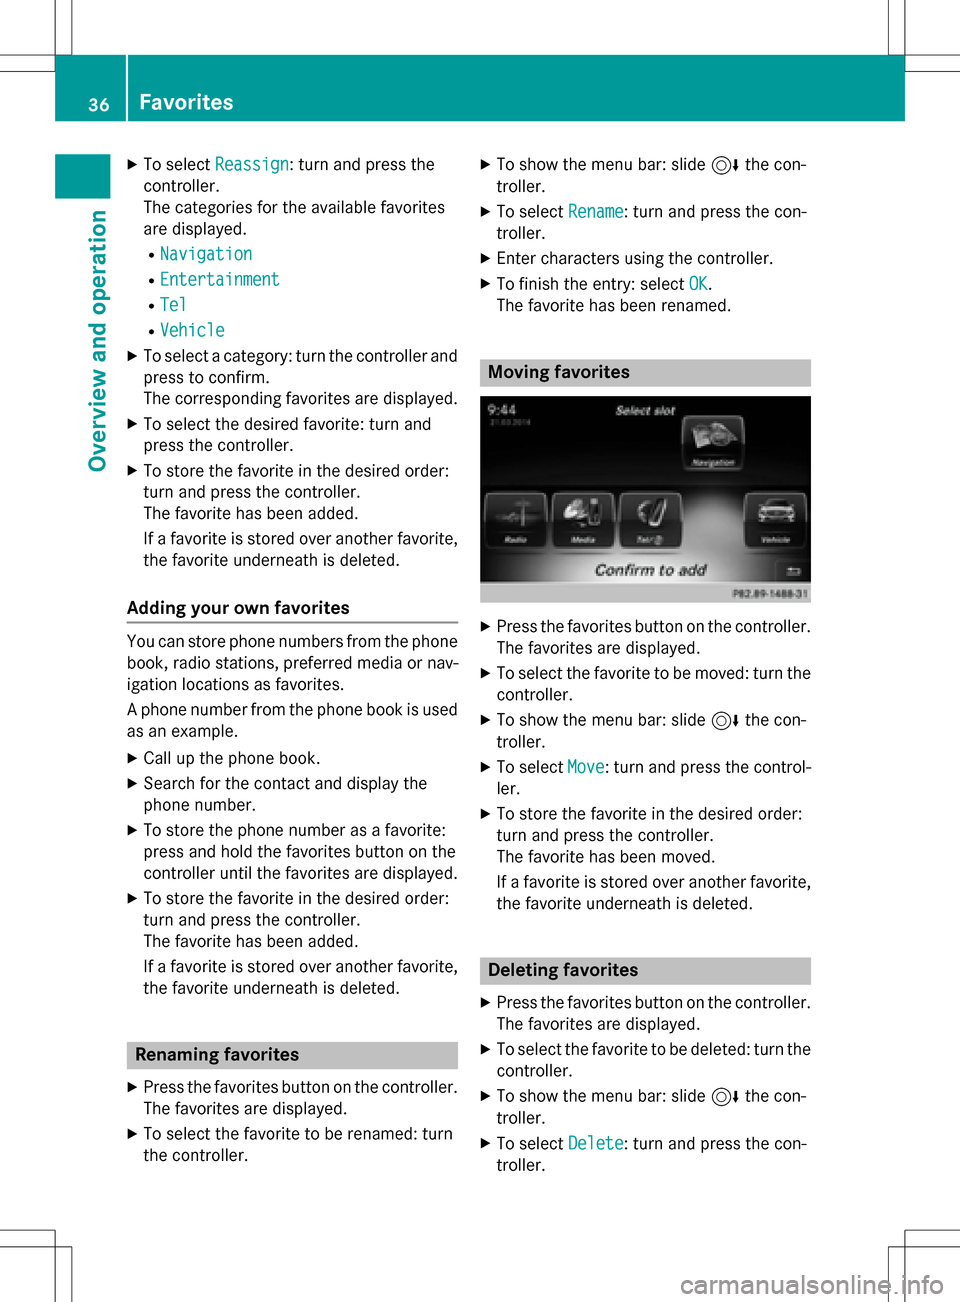
Overview of favorites
:To add a new favorite (Ypage 35)
;To rename a selected favorite
(
Ypage 36)
=To move a selected favorite
(
Ypage 36)
?To delete a selected favorite
(
Ypage 36)
Displaying the favorites overview
XPress the favorites button on the controller.
The favorites are displayed.
XTo show the menu bar: slide 6the con-
troller.
You can manage a total of 20 favorites.
Further information on how to select and dis-
play a favorite (
Ypage 35).
Displaying and selecting favorites
XPress the favorites button on the controller. The favorites are displayed.
XTo select a favorite: turn the controller.
XTo call up a favorite: press the controller.
Adding favorites
Adding predefined favorites
XPress the favorites button on the controller. The favorites are displayed.
XTo show the menu bar: slide 6the con-
troller.
Favorites35
Overview and operation
Page 38 of 246
XTo selectReassign: turn and press the
controller.
The categories for the available favorites
are displayed.
RNavigation
REntertainment
RTel
RVehicle
XTo select a category: turn the controller and
press to confirm.
The corresponding favorites are displayed.
XTo select the desired favorite: turn and
press the controller.
XTo store the favorite in the desired order:
turn and press the controller.
The favorite has been added.
If a favorite is stored over another favorite,
the favorite underneath is deleted.
Adding your own favorites
You can store phone numbers from the phone
book, radio stations, preferred media or nav-
igation locations as favorites.
A phone number from the phone book is used
as an example.
XCall up the phone book.
XSearch for the contact and display the
phone number.
XTo store the phone number as a favorite:
press and hold the favorites button on the
controller until the favorites are displayed.
XTo store the favorite in the desired order:
turn and press the controller.
The favorite has been added.
If a favorite is stored over another favorite,
the favorite underneath is deleted.
Renaming favorites
XPress the favorites button on the controller.
The favorites are displayed.
XTo select the favorite to be renamed: turn
the controller.
XTo show the menu bar: slide 6the con-
troller.
XTo select Rename: turn and press the con-
troller.
XEnter characters using the controller.
XTo finish the entry: select OK.
The favorite has been renamed.
Moving favorites
XPress the favorites button on the controller. The favorites are displayed.
XTo select the favorite to be moved: turn thecontroller.
XTo show the menu bar: slide 6the con-
troller.
XTo select Move: turn and press the control-
ler.
XTo store the favorite in the desired order:
turn and press the controller.
The favorite has been moved.
If a favorite is stored over another favorite,
the favorite underneath is deleted.
Deleting favorites
XPress the favorites button on the controller.
The favorites are displayed.
XTo select the favorite to be deleted: turn the
controller.
XTo show the menu bar: slide 6the con-
troller.
XTo select Delete: turn and press the con-
troller.
36Favorites
Overview and operation
Page 39 of 246
XTo selectYes: turn and press the controller.
The favorite is deleted.
or
XTo select No: turn and press the controller.
The process is canceled.
Favorites37
Overview and operation
Page 40 of 246

38