ECU MERCEDES-BENZ E-CLASS COUPE 2018 Owner's Manual
[x] Cancel search | Manufacturer: MERCEDES-BENZ, Model Year: 2018, Model line: E-CLASS COUPE, Model: MERCEDES-BENZ E-CLASS COUPE 2018Pages: 593, PDF Size: 10.63 MB
Page 64 of 593
When
fitting an i‑Size child restra int sys‐
te m, obser vethefo llowing:
O When using a
rear wa rd-facing child
re stra int sy stem: adjust the front seat so
th at it does not touch thech ild restra int sys‐
te m.
O When using a
forw ard-facing child
re stra int sy stem: the backrest of thech ild
re stra int sy stem must, as far as possible, lie
fl at against the backrest of theve hicle seat.
O Yo
u can ha vethe head restra ints of there ar
seats remo ved and ins talled byaqu alified
specialist workshop. This may be necessary
fo rth e use of cer tain child restra int sys‐
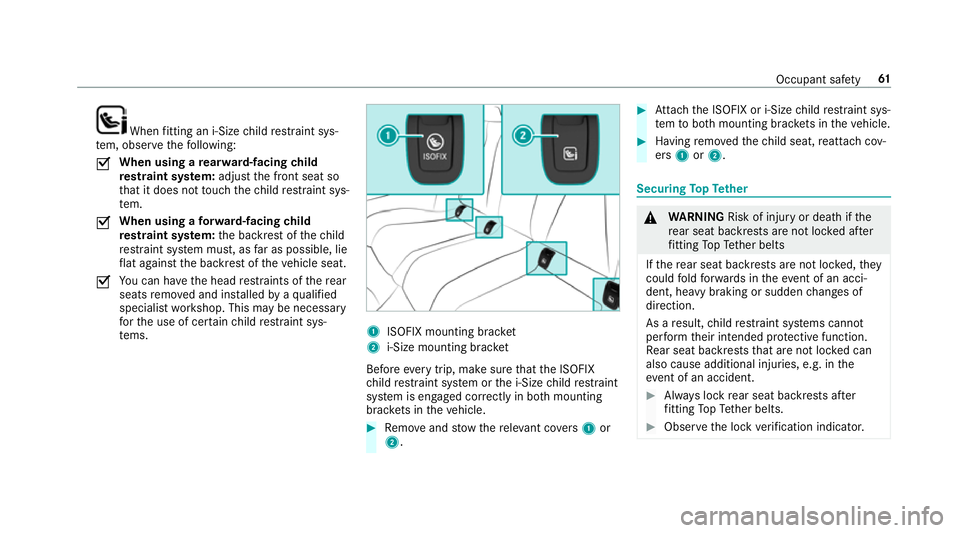
te ms. 1
ISOFIX mounting brac ket
2 i‑Size mounting brac ket
Before every trip, make sure that the ISOFIX
ch ild restra int sy stem or the i‑Size child restra int
sy stem is engaged cor rectly in bo thmounting
brac kets in theve hicle. #
Remo veand stow th ere leva nt co vers 1 or
2. #
Attach the ISOFIX or i‑Size child restra int sys‐
te m to both mounting brac kets in theve hicle. #
Having remo vedth ech ild seat, reattach cov‐
ers 1or2. Securing
TopTe ther &
WARNING Risk of inju ryor death if the
re ar seat backrests are not loc ked af ter
fi tting TopTe ther belts
If th ere ar seat backrests are not loc ked, they
could fold forw ards in theeve nt of an acci‐
dent, heavy braking or sudden changes of
direction.
As a result, child restra int sy stems cann ot
per form their intended pr otective function.
Re ar seat backrests that are not loc ked can
also cause additional injuries, e.g. in the
ev ent of an accident. #
Alw ays lock rear seat backrests af ter
fi tting TopTe ther belts. #
Obser vethe lock verification indicator. Occupant saf
ety61
Page 66 of 593
not inter
fere with the cor rect routing of To p
Te ther belt 4. Securing
thech ild restra int sy stem with the seat belt Note
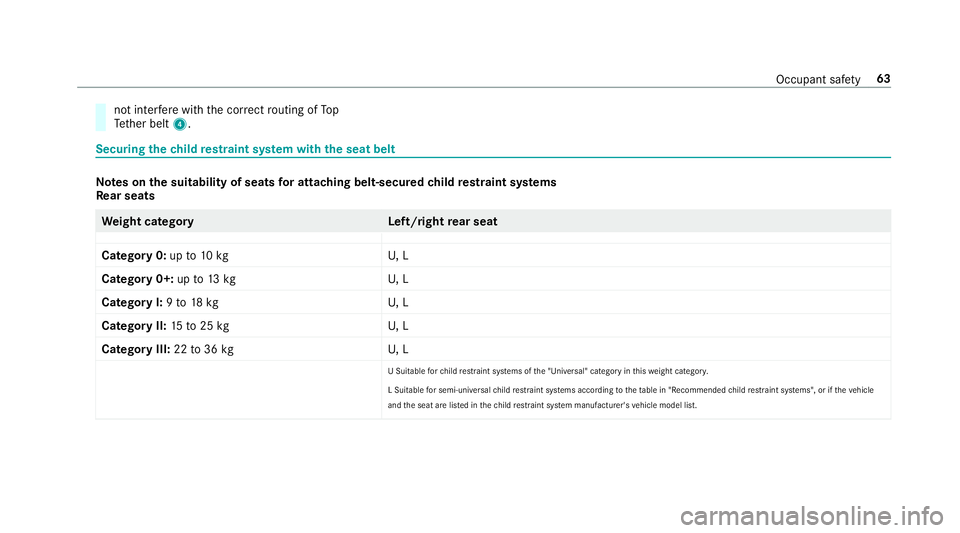
s onthe suitability of seats for attaching belt-secured child restra int sy stems
Re ar seats We
ight categor yL eft/rightrear seat
Catego ry0:up to10 kg U, L
Category 0+: upto13 kg U, L
Category I: 9to 18 kg U, L
Category II: 15to25 kg U, L
Category III: 22to36 kg U, L
U Suitable forch ild restra int sy stems of the "Universal" category in this we ight categor y.
L Suitable for semi-universal child restrai nt sy stems according totheta ble in "Recommended child restra int sy stems", or if theve hicle
and the seat are lis ted in thech ild restra int sy stem manufacturer's vehicle model list. Occupant saf
ety63
Page 68 of 593
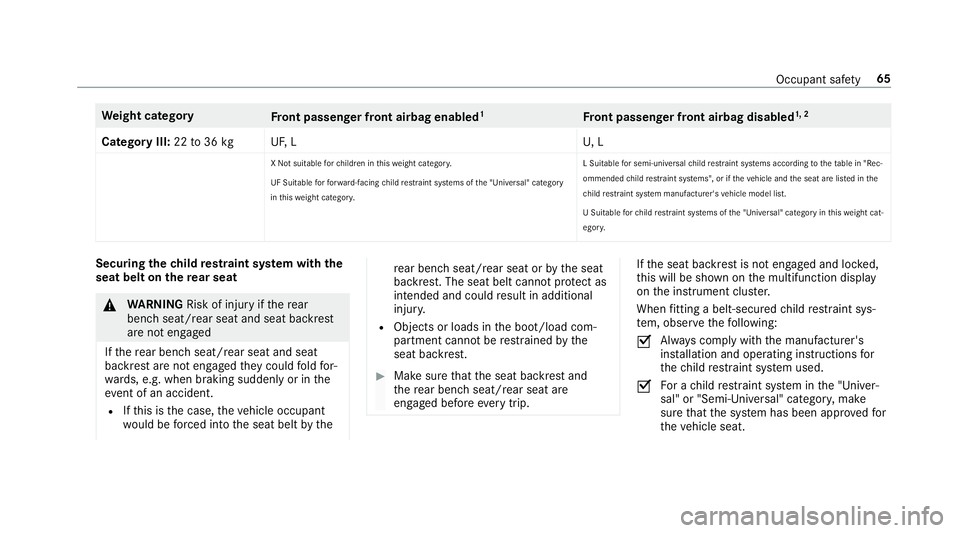
We
ight category
Front passenger front airbag enabled 1
Front passenger front airbag disabled 1, 2
Category III: 22to36 kg UF,LU , L
X Not suitable forch ildren in this we ight categor y.
UF Suitable forfo rw ard-facing child restrai nt sy stems of the "Universal" category
in this we ight categor y. L Suitable
for semi-universal child restrai nt sy stems according totheta ble in "Rec‐
ommended child restra int sy stems", or if theve hicle and the seat are lis ted in the
ch ild restra int sy stem manufacturer's vehicle model list.
U Suitable forch ild restrai nt sy stems of the "Universal" category in this we ight cat‐
egor y. Securing
thech ild restra int sy stem with the
seat belt on there ar seat &
WARNING Risk of inju ryifth ere ar
ben chseat/rear seat and seat backrest
are not engaged
If th ere ar ben chseat/rear seat and seat
backrest are not engaged they could fold for‐
wa rds, e.g. when braking suddenly or in the
ev ent of an accident.
R Ifth is is the case, theve hicle occupant
wo uld be forc ed into the seat belt bythe re
ar ben chseat/rear seat or bythe seat
backrest. The seat belt cann otprotect as
intended and could result in additional
injur y.
R Objects or loads in the boot/load com‐
partment cann otbe restra ined bythe
seat backrest. #
Make sure that the seat backrest and
th ere ar ben chseat/rear seat are
engaged before everytrip. If
th e seat backrest is not engaged and loc ked,
th is will be shown on the multifunction display
on the instrument clus ter.
When fitting a belt-secu redch ild restra int sys‐
te m, obser vethefo llowing:
O Alw
ays comply with the manufacturer's
ins tallation and operating instructions for
th ech ild restra int sy stem used.
O Fo
r a child restra int sy stem in the "Univer‐
sal" or "Semi-Universal" categor y,make
sure that the sy stem has been appr oved for
th eve hicle seat. Occupant saf
ety65
Page 69 of 593
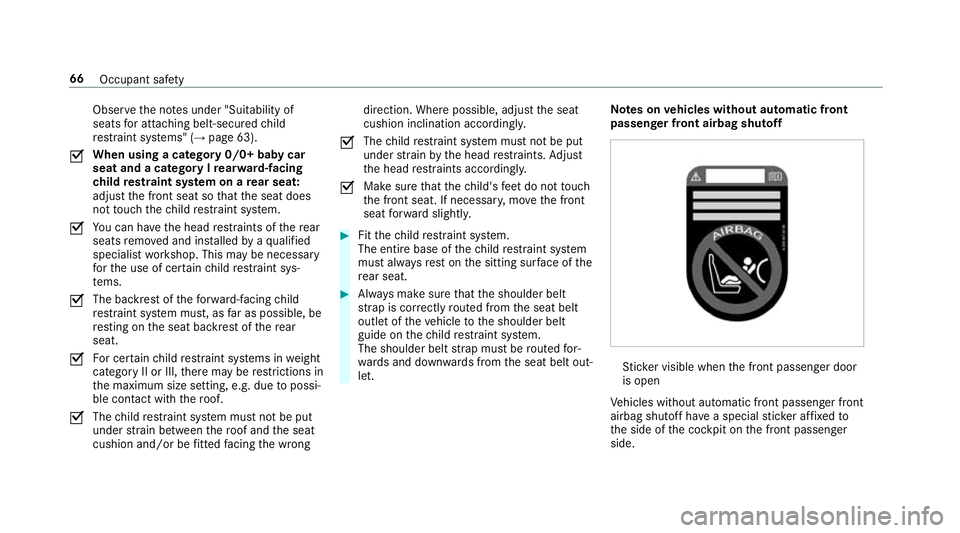
Obser
vethe no tes under "Suitability of
seats for attaching belt-secu redch ild
re stra int sy stems" (→ page 63).
O When using a category 0/0+ baby car
seat and a category I rear wa rd-facing
ch ild restra int sy stem on a rear seat:
adju stthe front seat so that the seat does
not touch thech ild restra int sy stem.
O Yo
u can ha vethe head restra ints of there ar
seats remo ved and ins talled byaqu alified
specialist workshop. This may be necessary
fo rth e use of cer tain child restra int sys‐
te ms.
O The backrest of
thefo rw ard-facing child
re stra int sy stem must, as far as possible, be
re sting on the seat backrest of there ar
seat.
O Fo
r cer tain child restra int sy stems in weight
category II or III, there may be restrictions in
th e maximum size setting, e.g. due topossi‐
ble con tact wi th thero of.
O The
child restra int sy stem must not be put
under stra in between thero of and the seat
cushion and/or be fitted facing the wrong direction. Where possible, adjust
the seat
cushion inclination accordingly.
O The
child restra int sy stem must not be put
under stra in by the head restra ints. Adjust
th e head restra ints accordingly.
O Make sure
that thech ild's feet do not touch
th e front seat. If necessar y,mo vethe front
seat forw ard slightl y. #
Fitthech ild restra int sy stem.
The entire base of thech ild restra int sy stem
must alw aysre st on the sitting sur face of the
re ar seat. #
Alw ays make sure that the shoulder belt
st ra p is cor rectly routed from the seat belt
outlet of theve hicle tothe shoulder belt
guide on thech ild restra int sy stem.
The shoulder belt stra p must be routed for‐
wa rds and down wards from the seat belt out‐
let. Note
s onvehicles without automatic front
passen ger front airbag shu toff St
icke r visible when the front passenger door
is open
Ve hicles without automatic front passenger front
airbag shutoff ha vea special sticke r af fixe dto
th e side of the cockpit on the front passenger
side. 66
Occupant saf ety
Page 70 of 593
Make sure
you obse rveth efo llowing informa‐
tion:
R Neverfit a rear wa rd-facing child restra int
sy stem tothe front passenger seat
R Alw aysfit a rear wa rd-facing child restra int
sy stem toa suitable rear seat
- Suitability of seats for attaching belt-
secured child restra int sy stems
(→ page 63)
- Secure thech ild restra int sy stem with the
seat belt on there ar seat (→ page 65).
R Notes on rear wa rd-facing and forw ard-facing
ch ild restra int sy stems on the front
passenger seat (→ page67 ) Note
s onrear wa rd-facing and forw ard-facing
ch ild restra int sy stems on the front
passenger seat &
WARNING Risk of inju ryor death from
using a rear wa rd-facing child restra int
sy stem when the front passenger front
airbag is enabled
If yo u secure a child in a rear wa rd-facing
ch ild restra int sy stem on the front passenger
seat and thePA SSENGER AIR BAG OFF indi‐
cator lamp is off, the front passenger airbag
can deploy in theeve nt of an accident.
The child could be stru ck bythe airbag.
Alw ays ensure that the front passenger air‐
bag is disabled. The PASSENGER AIR BAG
OFF indicator lamp must be lit.
NEVER use a rear wa rd-facing child restra int
sy stem on a seat pr otected byan ENABLED
FRONT AIRB AGin front of it, DE ATH or SERI‐
OUS INJU RYtotheCH ILD can occur. Obser
vethe specific instructions forth ere ar‐
wa rd-facing and forw ard-facing child restra int
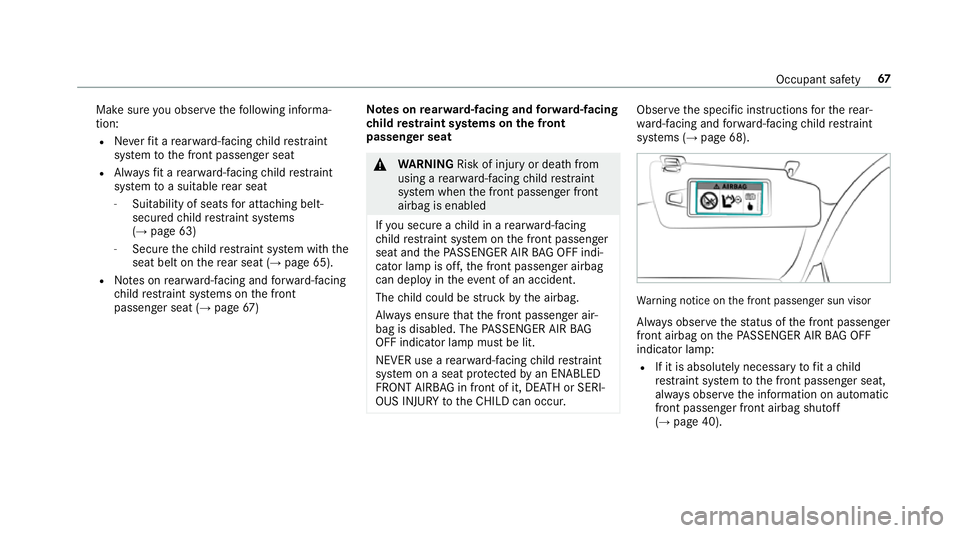
sy stems (→ page 68). Wa
rning notice on the front passenger sun visor
Alw ays obser vethest atus of the front passenger
front airbag on thePA SSENGER AIR BAG OFF
indicator lamp:
R If it is absolutely necessary tofit a child
re stra int sy stem tothe front passenger seat,
alw ays obser vethe information on automatic
front passenger front airbag shutoff
(→ page 40). Occupant saf
ety67
Page 71 of 593
R
When using a rear wa rd-facing child restra int
sy stem on the front passenger seat, the front
passenger front airbag must alw ays be disa‐
bled. This is only the case if thePA SSENGER
AIR BAG OFF indicator lamp is lit continu‐
ously (→ page 42).
R Ifth ePA SSENGER AIR BAG OFF indicator
lamp is off, the front passenger front airbag
is enabled. The front passenger front airbag
may deploy during an accident.
Securing thech ild restra int sy stem with the
seat belt on the front passenger seat
When fitting a belt-secu redch ild restra int sys‐
te m on the front passenger seat, alw ays obser ve
th efo llowing:
O Obser
vethech ild restra int sy stem manufac‐
turer's ins tallation and operating instruc‐
tions.
O Fo
r a child restra int sy stem in the "Univer‐
sal" or "Semi-Universal" categor y,make
sure that the sy stem has been appr ovedfor
th eve hicle seat. Obser
vethe no tes under "Suitability of
seats for attaching belt-secu redch ild
re stra int sy stems" (→ page 63).
O When using a
forw ard-facing child restra int
sy stem in Group I: remo vethe head
re stra int from there spective seat, if possi‐
ble.
When youre mo vethech ild restra int sys‐
te m, ins tallth e head restra int again immedi‐
ately and adjust all the head restra ints cor‐
re ctl y.
O The backrest of
thefo rw ard-facing child
re stra int sy stem must, as far as possible, be
re sting on the seat backrest of the front
passenger seat.
O Fo
r cer tainch ild restra int sy stems in weight
group II or III, there may be restrictions in
th e maximum size setting, e.g. due topossi‐
ble con tact wi th th ero of.
O The
child restra int sy stem must not be put
under stra in between thero of and the seat
cushion and/or be fitted facing the wrong
direction. Adjust the seat backrest inclina‐
tion according ly. O
The
child restra int sy stem must not be put
under stra in by the head restra ints. Adjust
th e head restra ints accordingly.
O Ne
ver place objects under or behind the
ch ild restra int sy stem, e.g. cushions. #
Set the front passenger seat as far back as
possible and mo vethe seat into the highest
position. #
Fully retract the seat cushion length adjust‐
ment. #
Adjust the seat cushion inclination so that
th e front edge of the seat cushion is in the
highest position and there ar edge of the
seat cushion is in the lo west position. #
Set the seat backrest toan almost vertical
position. #
Fitthech ild restra int sy stem.
The entire base of thech ild restra int sy stem
must alw aysre st on the sitting sur face of the
front passenger seat. #
Alw ays make sure that the shoulder belt
st ra p is cor rectly routed from the seat belt 68
Occupant saf ety
Page 73 of 593
#
When leaving theve hicle, alw aysta ke
th eke y with you and lock theve hicle.
This also applies tothe Digital Vehicle
Ke y if the "Digital Vehicle Key" function
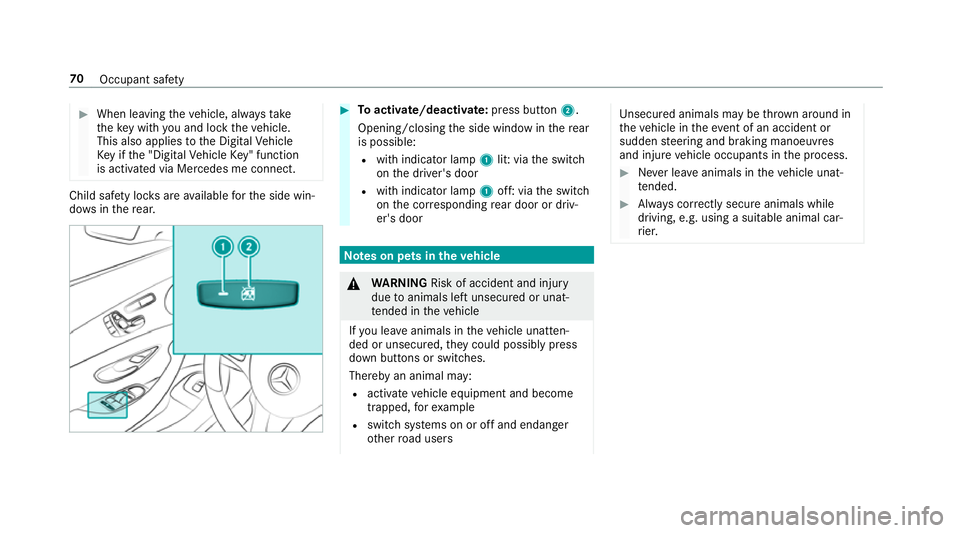
is activated via Mercedes me connect. Child saf
ety loc ksare available forth e side win‐
do ws inthere ar. #
Toactivate/deacti vate:press button 2.
Opening/closing the side window in there ar
is possible:
R with indicator lamp 1lit: via the switch
on the driver's door
R with indicator lamp 1off: via the switch
on the cor responding rear door or driv‐
er's door Note
s on pets in theve hicle &
WARNING Risk of accident and inju ry
due toanimals left unsecured or unat‐
te nded in theve hicle
If yo u lea veanimals in theve hicle unatten‐
ded or unsecured, they could possib lypress
down buttons or switches.
Thereby an animal may:
R activate vehicle equipment and become
trapped, forex ample
R swit chsystems on or off and endanger
ot her road users Uns
ecured animals may be throw n around in
th eve hicle in theeve nt of an accident or
sudden steering and braking manoeuvres
and injure vehicle occupants in the process. #
Never lea veanimals in theve hicle unat‐
te nded. #
Alw ays cor rectly secu reanimals while
driving, e.g. using a suitable animal car‐
ri er. 70
Occupant saf ety
Page 84 of 593
#
Vehicles with HANDS-FREE ACCESS: Use
yo ur foot to kick below the bumper
(→ page 83). #
Vehicles with boot lid conve nience clos‐
ing feature: withthe boot lid stopped in an
intermediate position, pull it upwards and
re lease it as soon as it begins toopen.
Wi th th e boot lid opening limiter activated,
manually pull thestopped boot lid upwards.
Ve hicles with boot lid conve nience closing:if
an object restricts the boot lid during the auto‐
matic opening process, the object recognition
function stops the boot lid. The object recogni‐
tion function is only an aid and is not a substi‐
tute foryo ur attentiveness. Closing
the boot lid &
WARNING Risk of inju ryfrom unsecu red
items in theve hicle
If objects, luggage or loads are not secured
or not secured suf ficientl y,they could slip, tip
ove r or be throw n around and thereby hit
ve hicle occupants.
There is a risk of injur y,particularly in the
ev ent of sudden braking or a sudden change
in direction. #
Alw aysstow objects in such a wayth at
th ey cannot be thro wn around. #
Before the journe y,secure objects, lug‐
ga ge or loads against slipping or tipping
ove r. Comply with
the loading guidelines when loading
th eve hicle. &
WARNING Risk of becoming trapped
du ring au tomatic closing of the boot lid
Pa rts of the body could become trapped dur‐
ing automatic closing of the boot lid. More‐
ove r,people, e.g. children, may be standing
in the closing area or may enter the closing
area during the closing process. #
Make sure that nobody is in the vicinity
of the closing area during the closing
process. #
Use one of thefo llowing options tostop
th e closing process:
R Press thep button on thekey.
R Press or pull there mo teoperating
switch on the driver's door.
R Press the closing or locking button
on the boot lid.
R Press theto p of thest ar on the boot
lid. Ve
hicles with HANDS-FREE ACCESS: it is also
possible tostop the closing process bymaking a
kicking mo vement with your foot below there ar
bumper.
Yo u ha vethefo llowing options toclose the
boot lid: #
Pull the boot lid down using the handle
re cess and push it closed. Opening and closing
81
Page 87 of 593
*
NO
TEDama getotheve hicle caused by
unin tentional lyopening the boot lid: R
when using an automatic car wash
R when using a high pressure cleaner #
Deactivate KEYLESS-GO or make sure
th at theke y located is at least 3 m
aw ay from theve hicle in such situa‐
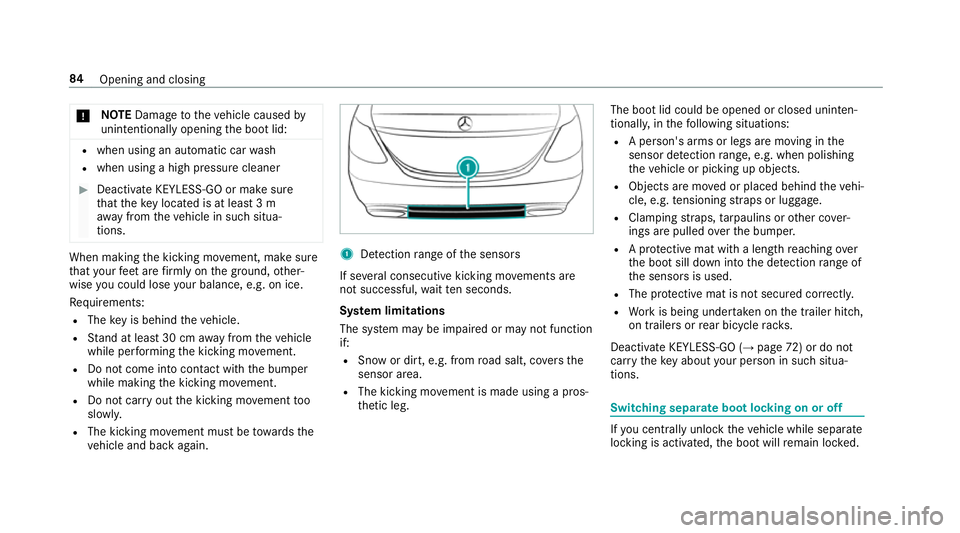
tions. When making
the kicking mo vement, make sure
th at your feet are firm ly on the ground, other‐
wise you could lose your balance, e.g. on ice.
Re quirements:
R The key is behind theve hicle.
R Stand at least 30 cm away from theve hicle
while per form ing the kicking mo vement.
R Do not come into contact with the bumper
while making the kicking mo vement.
R Do not car ryout the kicking mo vement too
slowl y.
R The kicking mo vement must be towa rdsthe
ve hicle and back again. 1
Detection range of the sensors
If se veral consecutive kicking mo vements are
not successful, waitte n seconds.
Sy stem limitations
The sy stem may be impaired or may not function
if:
R Snow or dirt, e.g. from road salt, co vers the
sensor area.
R The kicking mo vement is made using a pros‐
th etic leg. The boot lid could be opened or closed unin
ten‐
tional ly, in thefo llowing situations:
R A person's arms or legs are moving in the
sensor de tection range, e.g. when polishing
th eve hicle or picking up objects.
R Objects are mo ved or placed behind theve hi‐
cle, e.g. tensioning stra ps or luggage.
R Clamping stra ps, tarp aulins or other co ver‐
ings are pulled overth e bumper.
R A pr otective mat with a length reaching over
th e boot sill down into the de tection range of
th e sensors is used.
R The pr otective mat is not secured cor rectl y.
R Workis being under take n on the trailer hitch,
on trailers or rear bicycle rack s.
Deactivate KEYLESS-GO (→ page72) or do not
ca rryth eke y about your person in such situa‐
tions. Swit
ching separate boot locking on or off If
yo u centrally unlo cktheve hicle while separate
locking is activated, the boot will remain loc ked. 84
Opening and closing
Page 117 of 593
&
WARNING Risk of inju ryfrom unsecu red
items in theve hicle
If objects, luggage or loads are not secured
or not secured suf ficientl y,they could slip,
tip ove r or be throw n around and thereby hit
ve hicle occupants.
There is a risk of injur y,particularly in the
ev ent of sudden braking or a sudden change
in direction. #
Alw aysstow objects in such a wayth at
th ey cannot be thro wn around. #
Before the journe y,secure objects, lug‐
ga ge or loads against slipping or tipping
ove r. &
WARNING Risk of inju rydue toobjects
being stowed incor rectly
If yo u inadequately stowobjects in theve hi‐
cle interior, they could slip or be tossed
around and thereby strike vehicle occupants.
In addition, cup holders, open stowage
spaces and mobile phone brac kets cann ot alw
aysre stra in the objects they contain in
th eev ent of an accident.
There is a risk of injur y,particularly in the
ev ent of sudden braking or a sudden change
in direction. #
Alw aysstow objects in such a wayth at
th ey cannot be tossed about in these or
similar situations. #
Alw ays make sure that objects do not
project from stowage spaces, luggage
nets or stowage nets. #
Close the loc kable stow age spaces
before starting a journe y. #
Alw aysstow and secure objects that
are heavy, hard, poin ted, sharp-edged,
fragile or too large in the boot. &
WARNING Risk of bu rning from theta il‐
pipe or tailpipe trim
The tailpipe and tailpipe trim can become
ve ry hot. If you come into contact with these
car parts, you could burn yourself. #
Alw ays be particular lycareful when in
th e vicinity of theta ilpipe and tailpipe
trims and supervise children very
closely when in this area. #
Before any con tact, allow the car parts
to cool down. The driving
characteristics of your vehicle are
dependent on the distribution of the load within
th eve hicle. You should bear thefo llowing in
mind when loading theve hicle:
R neverex ceed the permissible gross mass or
th e permissible axle loads forth eve hicle
(including occupants).
Information can be found on theve hicle iden‐
tification plate (→ page 463).
R the load must not pr otru de abo vethe upper
edge of the seat backrests.
R always place the load behind unoccupied
seats if possible.
R secure the load using the tie-down eyes and
distribute the load evenly. 11 4
Seats and stowing