MERCEDES-BENZ E-CLASS ESTATE 2016 Owners Manual
Manufacturer: MERCEDES-BENZ, Model Year: 2016, Model line: E-CLASS ESTATE, Model: MERCEDES-BENZ E-CLASS ESTATE 2016Pages: 565, PDF Size: 11.34 MB
Page 171 of 565
ECO display
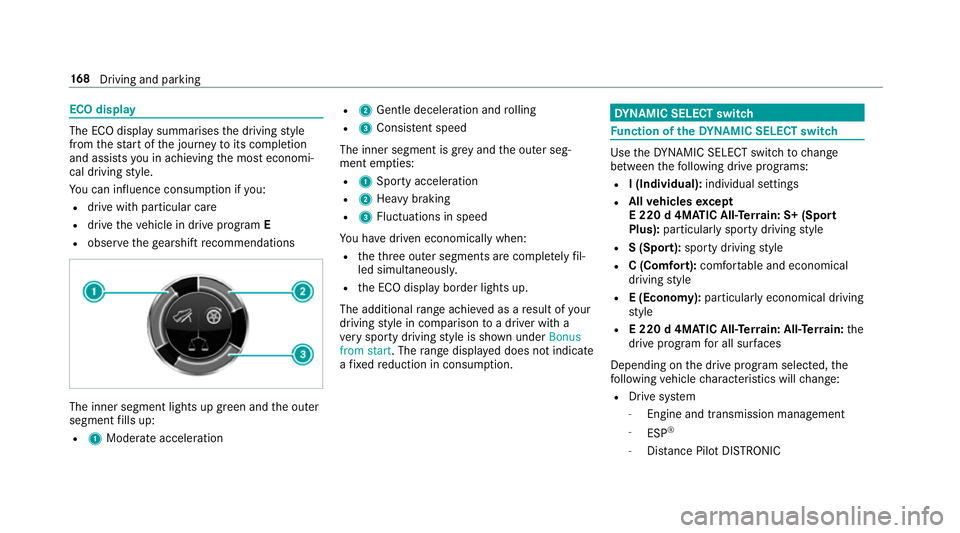
The ECO display summarises
the driving style
from thest art of the journey toits completion
and assists you in achieving the most economi‐
cal driving style.
Yo u can influence consum ption if you:
R drive with particular care
R drive theve hicle in drive program E
R obser vethege arshift recommendations The inner segment lights up green and
the outer
segment fills up:
R 1 Moderate acceleration R
2 Gentle decele ration and rolling
R 3 Consis tent speed
The inner segment is gr eyand the outer seg‐
ment em pties:
R 1 Sporty acceleration
R 2 Heavy braking
R 3 Fluctuations in speed
Yo u ha vedriven economically when:
R theth re e outer segments are comple tely fil‐
led simultaneousl y.
R the ECO display border lights up.
The additional range achi eved as a result of your
driving style in comparison toa driver with a
ve ry sporty driving style is shown under Bonus
from start. The range displ ayed does not indicate
a fixe dre duction in consum ption. DY
NA MIC SELECT switch Fu
nction of theDY NA MIC SELECT switch Use
theDY NA MIC SELECT switch tochange
between thefo llowing drive programs:
R I (Individual): individual settings
R Allvehicles except
E 220 d 4MATIC All‑Ter rain: S+ (Sport
Plus): particularly sporty driving style
R S (Sport): sporty driving style
R C (Comfort): comfortable and economical
driving style
R E (Economy): particularly economical driving
st yle
R E 220 d 4MATIC All‑Ter rain: All‑Ter rain: the
drive prog ram for all sur faces
Depending on the drive program selected, the
fo llowing vehicle characteristics will change:
R Drive sy stem
- Engine and transmission management
- ESP ®
- Distance Pilot DISTRONIC 16 8
Driving and pa rking
Page 172 of 565
R
Suspension
R Steering
R Availability of the ECO start/ stop function
% Time until the next vehicle star t:
R Less than four hours: the last selected
drive program is active.
R More than four hours: drive program Cis
active. Ope
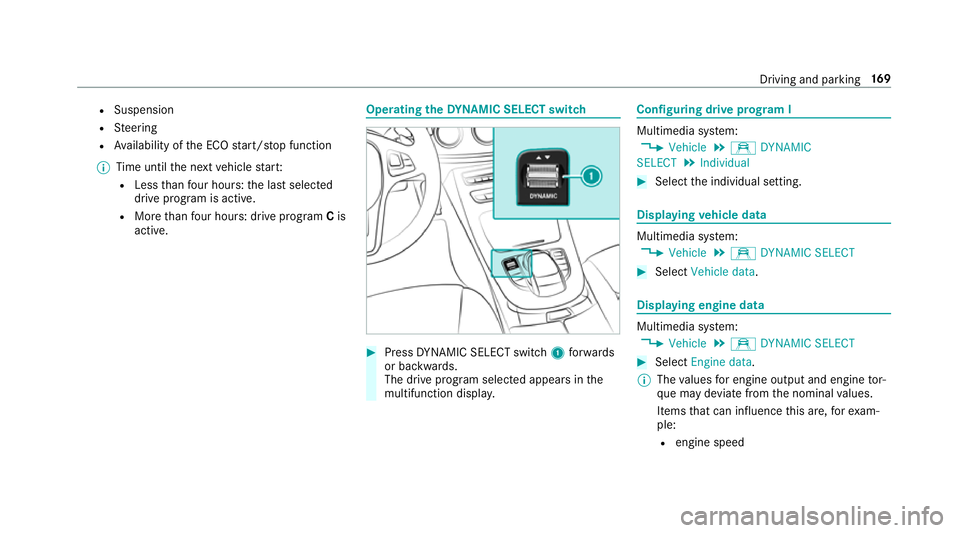
rating the DYNA MIC SELECT switch #
Press DYNA MIC SELECT switch 1forw ards
or backwards.
The drive prog ram selected appears in the
multifunction displa y. Configuring drive prog
ram I Multimedia sy
stem:
, Vehicle .
e DYNAMIC
SELECT .
Individual #
Select the individual setting. Displaying
vehicle data Multimedia sy
stem:
, Vehicle .
e DYNAMIC SELECT #
Select Vehicle data . Displaying engine data
Multimedia sy
stem:
, Vehicle .
e DYNAMIC SELECT #
Select Engine data.
% The values for engine output and engine tor‐
qu e may deviate from the nominal values.
Items that can influence this are, forex am‐
ple:
R engine speed Driving and parking
16 9
Page 173 of 565
R
sea le vel
R fuel grade
R outside temp erature Manual transmission
Operating
thege arshift le ver *
NO
TEDama getothe engine and trans‐
mission byshifting toage ar that is too
low #
When changing between gears 5and
6 push thege arshift le verto theright. #
Do not shift down at high speeds. *
NO
TEDama getothe transmission by
shifting toreve rsege ar k while the
ve hicle is in motion #
Only shift into reve rsege ar k when
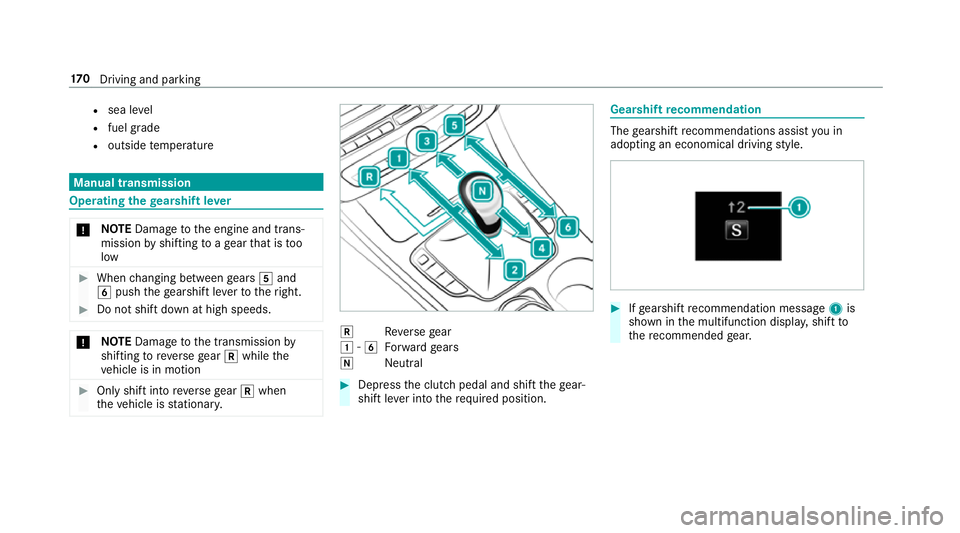
th eve hicle is stationar y. k
Reversege ar
1 -6
Forw ard gears
i Neutral #
Dep ress the clutch pedal and shift thege ar‐
shift le ver into therequ ired position. Gearshift
recommendation The
gearshift recommendations assist you in
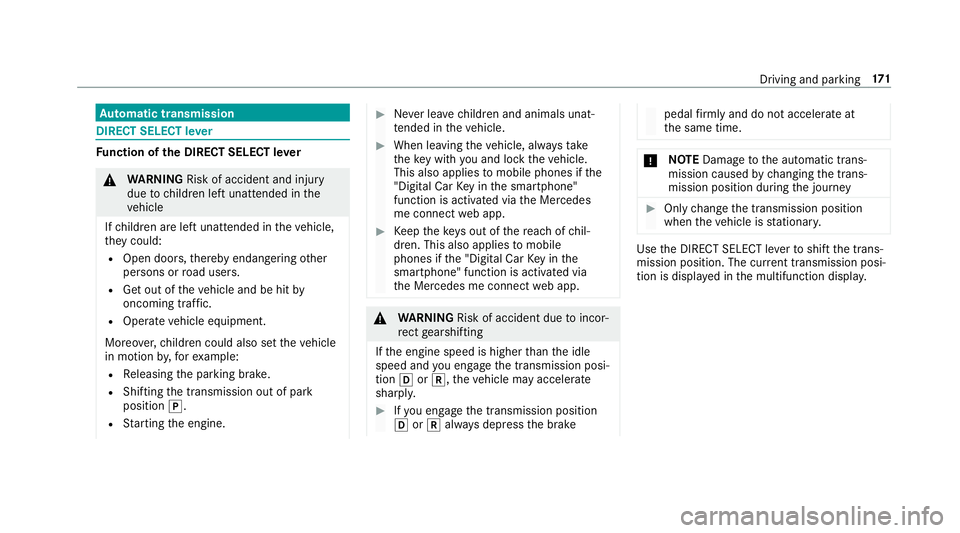
adopting an economical driving style. #
Ifge arshift recommendation message 1is
shown in the multifunction displa y,shift to
th ere commended gear. 17 0
Driving and pa rking
Page 174 of 565
Au
tomatic transmission DIRECT SELECT le
verFu
nction of the DIRECT SELECT le ver&
WARNING Risk of accident and inju ry
due tochildren left unat tended in the
ve hicle
If ch ildren are left unat tended in theve hicle,
th ey could:
R Open doo rs,th ereby endangering other
persons or road users.
R Get out of theve hicle and be hit by
oncoming traf fic.
R Ope rate ve hicle equipment.
Moreo ver,ch ildren could also set theve hicle
in motion by,fo rex ample:
R Releasing the parking brake.
R Shifting the transmission out of park
position j.
R Starting the engine. #
Never lea vechildren and animals unat‐
te nded in theve hicle. #
When leaving theve hicle, alw aysta ke
th eke y with you and lock theve hicle.
This also applies tomobile phones if the
"Digital Car Key in the smartphone"
function is activated via the Mercedes
me connect web app. #
Keep theke ys out of there ach of chil‐
dren. This also applies tomobile
phones if the "Digital Car Key in the
smartphone" function is activated via
th e Mercedes me connect web app. &
WARNING Risk of accident due toincor‐
re ct gearshifting
If th e engine speed is higher than the idle
speed and you en gage the transmission posi‐
tion hork, theve hicle may accelerate
sharply. #
Ifyo u en gage the transmission position
h ork always depress the brake pedal
firm lyand do not accelerate at
th e same time. *
NO
TEDama getothe automatic trans‐
mission caused bychanging the trans‐
mission position during the journey #
Only change the transmission position
when theve hicle is stationar y. Use
the DIRECT SELECT le verto shift the trans‐
mission position. The cur rent transmission posi‐
tion is displ ayed in the multifunction displa y. Driving and pa
rking 171
Page 175 of 565
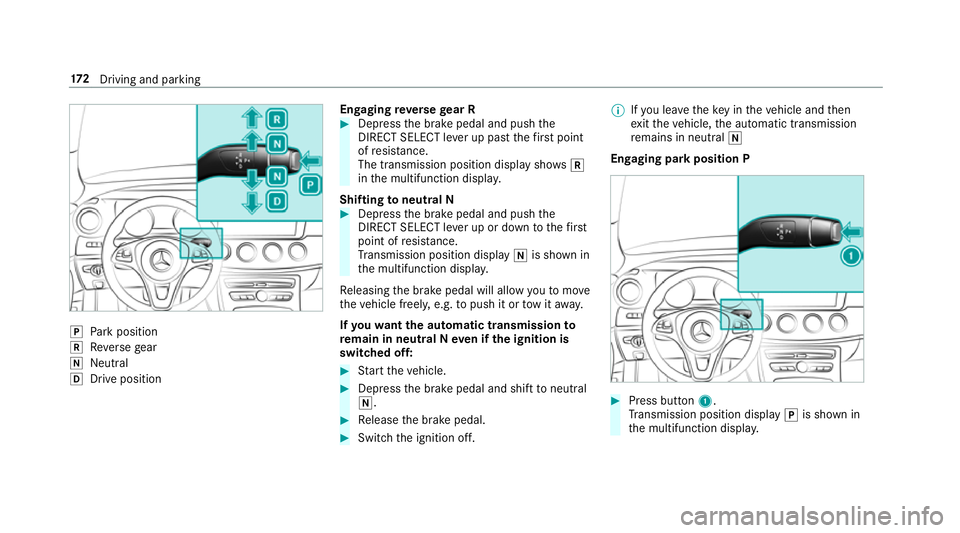
j
Park position
k Reversege ar
i Neut ral
h Drive position En
gaging reve rsege ar R #
Depress the brake pedal and push the
DIRECT SELECT le ver up past thefirs t point
of resis tance.
The transmission position displ aysho wsk
in the multifunction displa y.
Shifting toneutral N #
Depress the brake pedal and push the
DIRECT SELECT le ver up or down tothefirst
point of resis tance.
Tr ansmission position display iis shown in
th e multifunction displa y.
Re leasing the brake pedal will allow youto mo ve
th eve hicle freely, e.g. topush it or tow it away.
If yo uwa ntthe automatic transmission to
re main in neutral N even if the ignition is
switched off: #
Start theve hicle. #
Depress the brake pedal and shift toneutral
i. #
Release the brake pedal. #
Switch the ignition off. %
Ifyo u lea vetheke y in theve hicle and then
ex itth eve hicle, the automatic transmission
re mains in neutral i
Engaging park position P #
Press button 1.
Tr ansmission position display jis shown in
th e multifunction displa y.17 2
Driving and pa rking
Page 176 of 565
Pa
rk position jis engaged automatically if one
of thefo llowing conditions is me t:
R Ifyo u swit chthe engine off with the trans‐
mission in position hork.
R Ifyo u open the driver's door when theve hi‐
cle is stationary or when driving at a very low
speed and the transmission is in position h
or k.
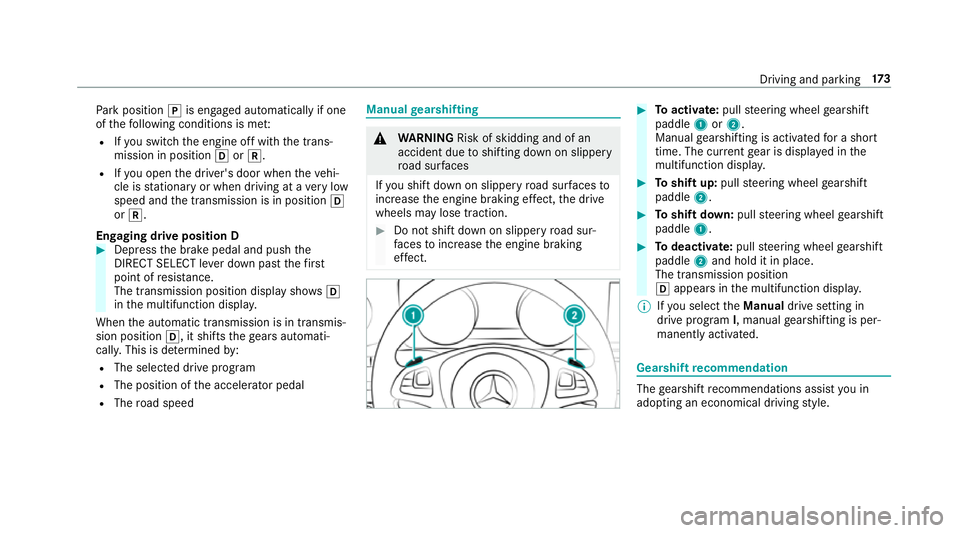
Engaging drive position D #
Depress the brake pedal and push the
DIRECT SELECT le ver down past thefirst
point of resis tance.
The transmission position displ aysho wsh
in the multifunction displa y.
When the automatic transmission is in transmis‐
sion position h, it shiftsthege ars automati‐
call y.This is de term ined by:
R The selected drive program
R The position of the accelerator pedal
R The road speed Manual
gearshifting &
WARNING Risk of skidding and of an
accident due toshifting down on slippery
ro ad sur faces
If yo u shift down on slippery road sur faces to
inc rease the engine braking ef fect, the drive
wheels may lose traction. #
Do not shift down on slippery road sur‐
fa ces toinc rease the engine braking
ef fect. #
Toactivate: pullsteering wheel gearshift
paddle 1or2.
Manual gearshifting is activated for a short
time. The cur rent gear is displa yed in the
multifunction displa y. #
Toshift up: pullsteering wheel gearshift
paddle 2. #
Toshift down: pullsteering wheel gearshift
paddle 1. #
Todeactivate: pullsteering wheel gearshift
paddle 2and hold it in place.
The transmission position
h appears in the multifunction displa y.
% Ifyo u select theManual drive setting in
drive prog ram I, manual gearshifting is per‐
manent lyactivated. Gea
rshift recommendation The
gearshift recommendations assist you in
adopting an economical driving style. Driving and parking
17 3
Page 177 of 565
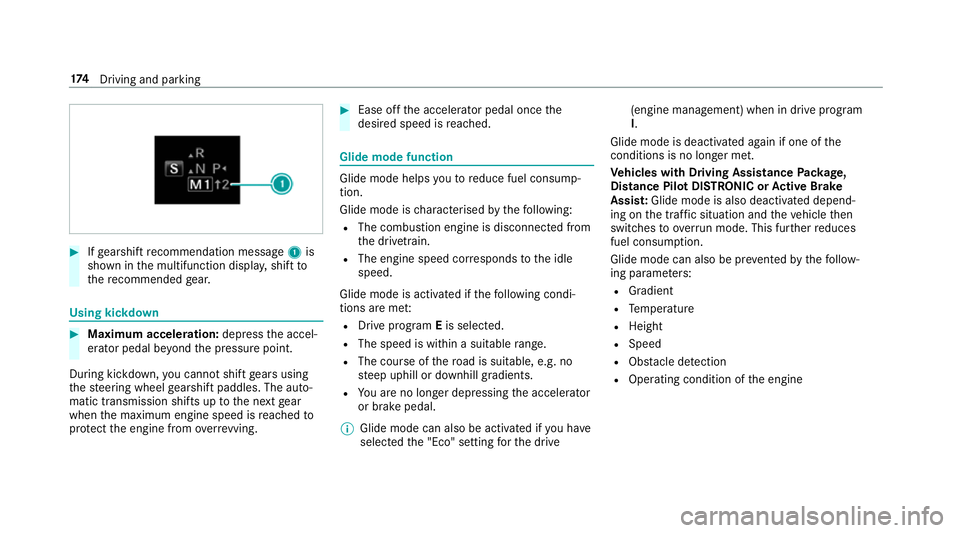
#
Ifge arshift recommendation message 1is
shown in the multifunction displa y,shift to
th ere commended gear. Using kickd
own #
Maximum acceleration: depressthe accel‐
erator pedal be yond the pressure point.
During kickdown, you cannot shift gears using
th esteering wheel gearshift paddles. The auto‐
matic transmission shifts up tothe next gear
when the maximum engine speed is reached to
pr otect the engine from overrev ving. #
Ease off the accelera tor pedal once the
desired speed is reached. Glide mode function
Glide mode helps
youto reduce fuel consump‐
tion.
Glide mode is characterised bythefo llowing:
R The combustion engine is disconnected from
th e driv etra in.
R The engine speed cor responds tothe idle
speed.
Glide mode is activated if thefo llowing condi‐
tions are me t:
R Drive program Eis selected.
R The speed is wi thin a suitable range.
R The cou rse of thero ad is suitable, e.g. no
st eep uphill or downhill gradients.
R You are no lon ger depressing the accelerator
or brake pedal.
% Glide mode can also be activated if you ha ve
selected the "Eco" setting forth e drive (engine management) when in drive program
I.
Glide mode is deactivated again if one of the
conditions is no longer met.
Ve hicles with Driving Assistance Package,
Dist ance Pil otDISTRONIC or Active Brake
Assi st:Glide mode is also deacti vated depend‐
ing on the traf fic situation and theve hicle then
switches toove rrun mode. This fur ther reduces
fuel consum ption.
Glide mode can also be pr evented bythefo llow‐
ing parame ters:
R Gradient
R Temp erature
R Height
R Speed
R Obs tacle de tection
R Ope rating condition of the engine 174
Driving and pa rking
Page 178 of 565
Re
fuelling Re
fuelling theve hicle &
WARNING ‑ Risk of fire or explosion
caused byfuel
Fu els are highly inflammable. #
You must avoidfire , naked flames, cre‐
ating spar ksand smoking. #
Before refuelling, switch off the engine
and auxiliary heating if your vehicle is
equipped with auxiliary heating.&
WARNING Risk of inju ryfrom fuel
Fu els are poisonous and harmful to your
health #
Do not swallow fuel or let it come into
contact with skin, eyes or clo thing. #
Do not inhale fuel vapour. #
Keep children away from fuel.
If yo u or other people come into contact with
fuel, obser vethefo llowing: #
Immediately rinse fuel off your skin with
soap and water. #
If fuel comes into contact with your
ey es, immediately rinse them thor‐
oughly with clean water.Seek medical
attention immediately. #
Ifyo u swallow fuel, seek medical atten‐
tion immediatel y.Do not induce vomit‐
ing. #
Change immediately out of clo thing that
has come into con tact wi thfuel. &
WARNING Risk offire and explosion due
to electros tatic charge
Electros tatic charge can cause spa rks and
th ereby ignite fuel vapours. #
Touch the me talvehicle body before
opening the fuel filler cap or touching
th e pump nozzle.
This dischar ges any electros tatic charge that
may ha vebuilt up. &
WARNING Risk offire from fuel mixture
Ve hicles with a diesel engine:
If yo u mix diesel fuel with petrol, theflash
point of the fuel mixture is lo werth an that of
pure diesel fuel.
While the engine is running, component
pa rts in theex haust sy stem may overheat
without warning. #
Neverre fuel using petrol. #
Never mix petrol with diesel fuel. *
NO
TEDama gecaused bythe wrong fuel Fu
elthat does not con form totherequ ired
qu ality can lead toinc reased wear as well as
damage tothe engine and exhaust sy stem. #
Only use the fuel recommended. *
NO
TEDama gecaused bythe wrong fuel Ve
hicles with a petrol engine: Driving and parking
175
Page 179 of 565
Even small amounts of
the wrong fuel could
re sult in damage tothe fuel sy stem, the
engine and the emission control sy stem. #
Only refuel using premium-grade unlea‐
ded fuel that con form sto EN 228, or an
equi valent specification.
Fu el of this specification may con tain up to
10 %ethanol. Your vehicle is suitable for use
with E10 fuel.
Do not refuel using:
R Diesel
R E85, E100
R Petrol containing me thanol (M15, M30,
M85, M100)
R Petrol wi thadditives con taining me tal
If yo u accidentally refuel with the wrong fuel: #
Do not switch the ignition on. #
Consult a qualified specialist workshop. *
NO
TEDama gecaused bythe wrong fuel Ve
hicles with a diesel engine:
Even small amounts of the wrong fuel could
re sult in damage tothe fuel sy stem, the
engine and the emission control sy stem. #
Only refuel using diesel fuel that con‐
fo rm sto European standard EN 590, or
an equivalent specification. #
Vehicles with diesel particulate fil‐
ters: in countries outside the EU, only
use lo w-sulphur Euro diesel with a sul‐
phur content of under 50 ppm.
Do not use thefo llowing:
R Petrol
R Marine diesel
R Heating oil
R Bio-diesel
R Vegetable oil
R Paraffin
R Kerosene *
NO
TEDo not use diesel torefuel vehi‐
cles with a petrol engine. #
Do not switch on the ignition if you
acciden tally refuel with the wrong fuel.
Otherwise, fuel can enter the fuel sys‐
te m. Even small amounts of the wrong
fuel could result in damage tothe fuel
sy stem and the engine. Notify a quali‐
fi ed specialist workshop and ha vethe
fuel tank and fuel lines drained com‐
pl et ely. *
NO
TEDo not use petrol torefuel vehi‐
cles with a diesel engine. #
Do not switch on the ignition if you
acciden tally refuel with the wrong fuel.
Otherwise, fuel can enter the fuel sys‐
te m. Even small amounts of the wrong
fuel could result in damage tothe fuel
sy stem and the engine. The repair costs
are high. Notifyaqu alified specialist
wo rkshop and ha vethe fuel tank and
fuel lines drained compl etely. 176
Driving and pa rking
Page 180 of 565
*
NO
TEDo not overfill the fuel tank, other‐
wise the fuel sy stem may be damaged. #
Only fill th e fuel tank until the pump
nozzle switches off. *
NO
TEDo not overfill the fuel tank, other‐
wise fuel may spay out when youre mo ve
th e pump nozzle. #
Only fill th e fuel tank until the pump
nozzle switches off. Re
quirement:
The vehicle must be unloc ked.
% Do not get into theve hicle again during the
re fuelling process. Otherwise, electros tatic
ch arge could build up again.
Obser vethe no tes on operating fluids
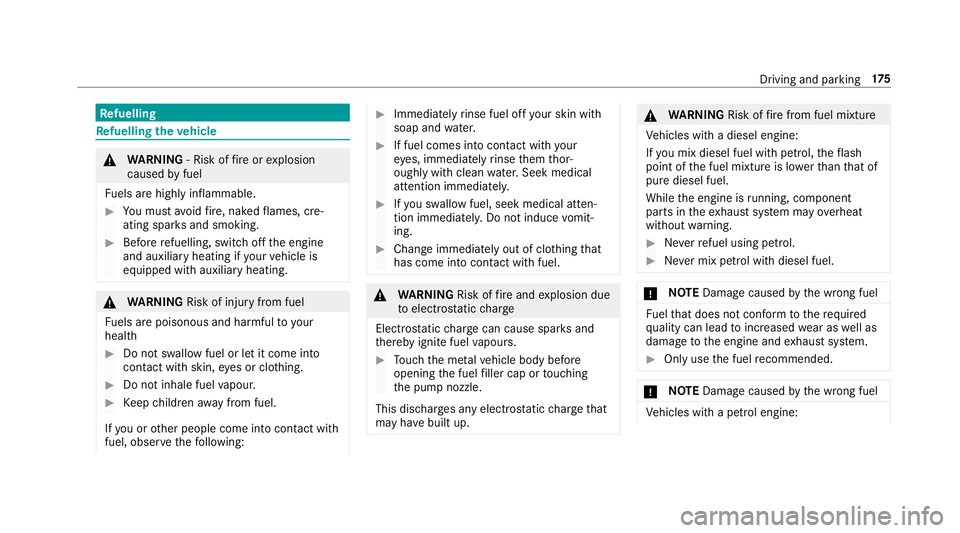
(→ page 433). Re
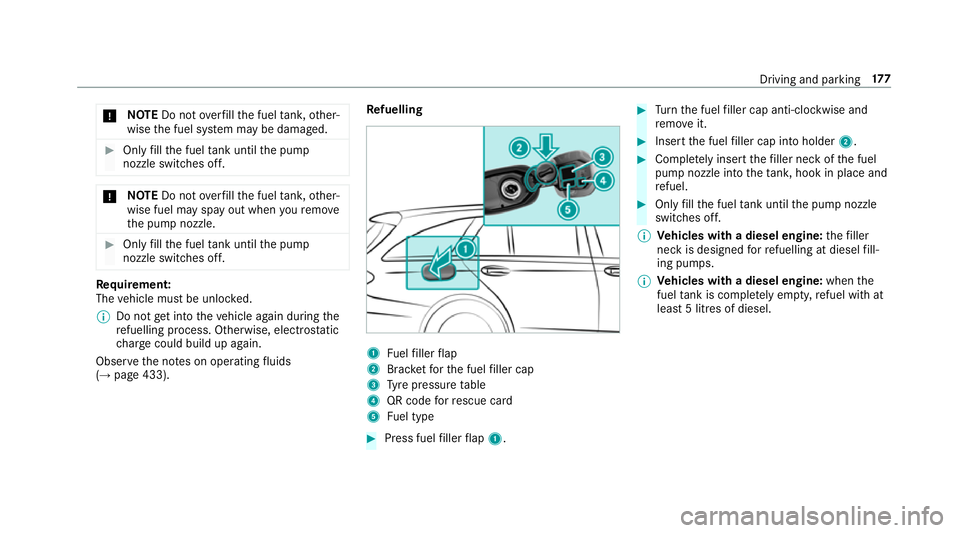
fuelling 1
Fuelfiller flap
2 Brac ketfo rth e fuel filler cap
3 Tyre pressure table
4 QR code forre scue card
5 Fuel type #
Press fuel filler flap 1. #
Turn the fuel filler cap anti-clockwise and
re mo veit. #
Insert the fuel filler cap into holder 2. #
Comple tely inse rtthefiller neck of the fuel
pump nozzle into theta nk, hook in place and
re fuel. #
Only fill th e fuel tank until the pump nozzle
switches off.
% Vehicles with a diesel engine: thefiller
neck is designed forre fuelling at diesel fill‐
ing pumps.
% Vehicles with a diesel engine: whenthe
fuel tank is compl etely em pty, refuel with at
lea st5 litres of diesel. Driving and parking
17 7