ad blue MERCEDES-BENZ E-CLASS SALOON 2017 Owners Manual
[x] Cancel search | Manufacturer: MERCEDES-BENZ, Model Year: 2017, Model line: E-CLASS SALOON, Model: MERCEDES-BENZ E-CLASS SALOON 2017Pages: 497, PDF Size: 10.38 MB
Page 157 of 497
#
After heating or ventilating theve hicle
twice, drive for a longer period of time. Re
quirements:
R The fuel tank is filled toat least reser vefuel
le ve l. #
Set the desired temp erature using thew
button. #
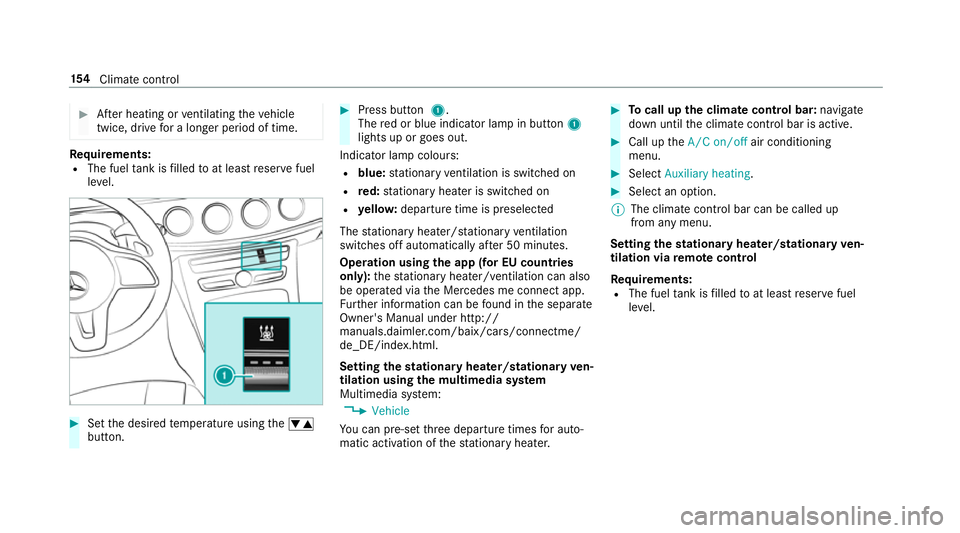
Press button 1.
The red or blue indicator lamp in button 1
lights up or goes out.
Indicator lamp colours: R blue: stationary ventilation is switched on
R red: stationary heater is swit ched on
R yello w: departure time is preselected
The stationary heater/ stationary ventilation
switches off au tomatically af ter 50 minutes.
Operation using the app (for EU count ries
only): thest ationary heater/ ventilation can also
be operated via the Mercedes me connect app.
Fu rther information can be found in the separate
Owner's Manual under http://
manuals.daimler.com/baix/cars/connectme/
de_DE/index.html.
Setting thest ationary heater/stationary ven‐
tilation using the multimedia sy stem
Multimedia sy stem:
, Vehicle
Yo u can pre-set thre e departure times for auto‐
matic activation of thest ationary heater. #
Tocall up the clima tecont rol bar: navigate
down until the climate control bar is active. #
Call up theA/C on/off air conditioning
menu. #
Select Auxiliary heating . #
Select an option.
% The climate control bar can be called up
from any menu.
Setting thest ationary heater/stationary ven‐
tilation via remo tecont rol
Re quirements:
R The fuel tank is filled toat least reser vefuel
le ve l. 15 4
Climate cont rol
Page 182 of 497
Ad
Blue ®
(diesel engine vehicles only) Note
s onAdBlue ®
* NOTEWhen you open theAd Blue ®
tank,
small amounts of ammonia vapour may
escape. #
Only fill th eAd Blue ®
tank in well-venti‐
lated areas. #
Do not let AdBlue ®
come into contact
wi th skin, eyes or clo thes. #
Keep AdBlue ®
aw ay from children. *
NOTEDo not ingest AdBlue ®
. If
Ad Blue ®
is swallo wed: #
Immediately rinse out your mouth thor‐
oughl y. #
Drink plenty of water. #
Seek medical attention immediately. Please also obser
vethe no tes on service prod‐
ucts and fuels (→ page 368). Ad
Blue ®
is a fluid urea solution forex haust gas
af te rtre atment of diesel engines. In order forthe
ex haust gas af tertre atment tofunction properly,
only use AdBlue ®
in accordance wi thISO 222 41 .
Ad Blue ®
is ch aracterised bythefo llowing:
R non-t oxic
R colourless and odourless
R non-flammable
Ad Blue ®
av ailability:
R AdBlue ®
may be topped up byfast service at
a qu alified specialist workshop, e.g. a
Mercedes-Benz Service Centre.
R AdBlue ®
is available at many filling stations
from AdBlue ®
filling pumps.
R Alternativel y,Ad Blue ®
is available at qualified
specialist workshops, e.g. Mercedes-Benz
Service Centres, and at many filling stations
in Ad Blue ®
re fill canis ters or AdBlue ®
re fill
bottles. %
Ensure the connection between there fill
con tainer and vehicle filler neck does not
drip.
To pping up AdBlue ®
* NOTEEngine dama gedue toAd Blue ®
in
th e fuel #
AdBlue ®
must not be used tofill the
fuel tank. #
Only use AdBlue ®
to fill th eAd Blue ®
ta nk. #
Do not overfill theAd Blue ®
tank. *
NO
TEContamination of theve hicle inte‐
ri or due toAd Blue ®
lea kage #
Afterto pping up, carefully close the
Ad Blue ®
re fill con tainer. #
Avoid car rying AdBlue ®
re fill con tainers
permanently in theve hicle. Re
quirements:
R unlock theve hicle. Driving and parking
17 9
Page 183 of 497
The
following announcements appear in order in
th e multifunction display when theAd Blue ®
tank
requ iresrefilling:
R Refill AdBlue See Owner's Manual . The
Ad Blue ®
re ser voir is down tothere ser ve
le ve l.
R Refill AdBlue No start in XXX km .Yo u can
on lydrive theve hicle overth e dis tance
shown. Top up AdBlue ®
as soon as possible.
R Refill AdBlue Start not possible. The vehicle
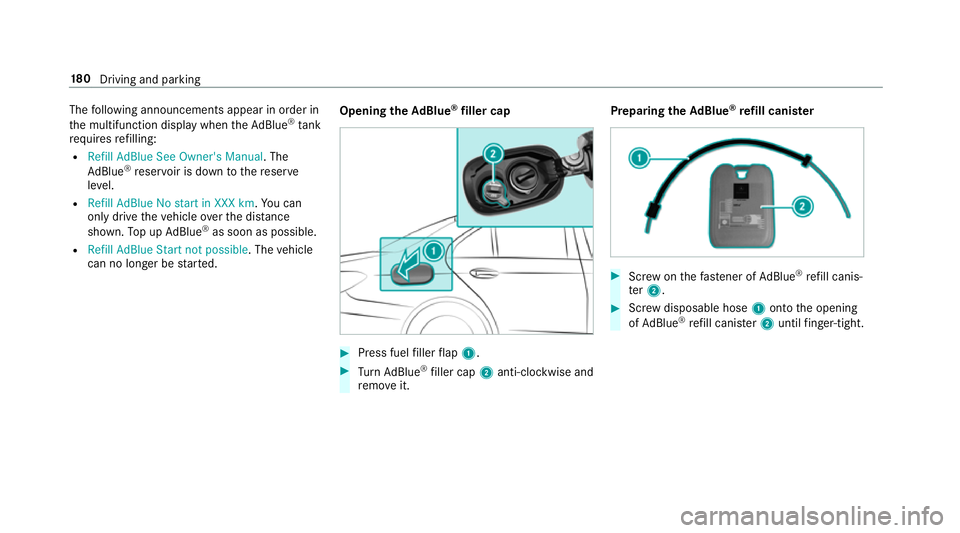
can no longer be star ted. Opening
theAd Blue ®
filler cap #
Press fuel filler flap 1. #
Turn AdBlue ®
filler cap 2anti-clockwise and
re mo veit. Preparing
theAd Blue ®
re fill canis ter #
Screw onthefast ener of AdBlue ®
re fill canis‐
te r2. #
Screw disposable hose 1onto the opening
of Ad Blue ®
re fill canis ter2 until finger-tight. 18 0
Driving and pa rking
Page 184 of 497
To
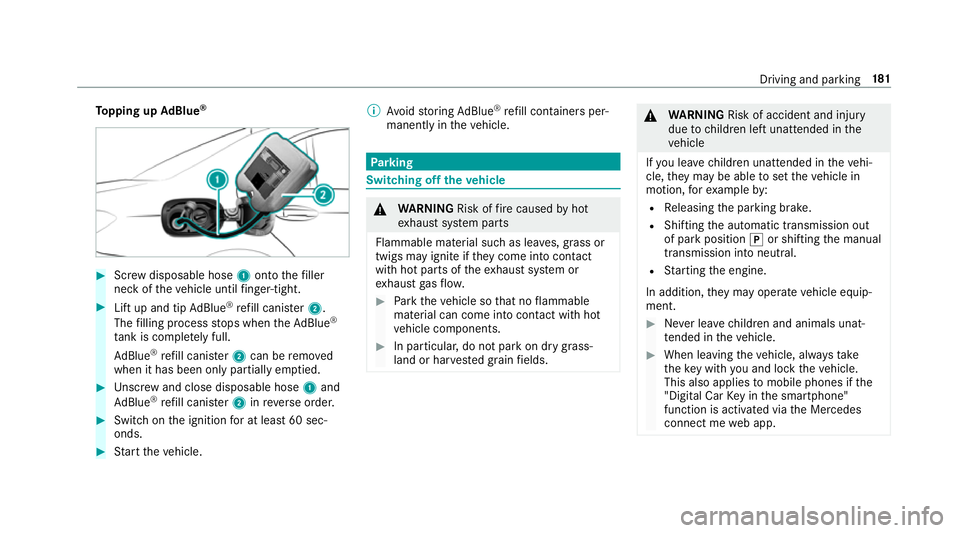
pping up AdBlue ® #
Screw disposable hose 1onto thefiller
neck of theve hicle until finger-tight. #
Lift up and tip AdBlue ®
re fill canis ter2.
The filling process stops when theAd Blue ®
ta nk is compl etely full.
Ad Blue ®
re fill canis ter2 can be remo ved
when it has been only partially em ptied. #
Unscr ew and close disposable hose 1and
Ad Blue ®
re fill canis ter2 inreve rse order. #
Switch on the ignition for at least 60 sec‐
onds. #
Start theve hicle. %
Avoid storing AdBlue ®
re fill con tainers per‐
manently in theve hicle. Pa
rking Switching off
theve hicle &
WARNING Risk offire caused byhot
ex haust sy stem parts
Flammable material such as lea ves, grass or
twigs may ignite if they come into contact
wi th hot parts of theex haust sy stem or
ex haust gasflow. #
Park theve hicle so that no flammable
material can come into con tact wi thhot
ve hicle components. #
In particular, do not park on dry grass‐
land or har vested grain fields. &
WARNING Risk of accident and inju ry
due tochildren left unat tended in the
ve hicle
If yo u lea vechildren unat tended in theve hi‐
cle, they may be able toset theve hicle in
motion, forex ample by:
R Releasing the parking brake.
R Shifting the automatic transmission out
of park position jor shifting the manual
transmission into neutral.
R Starting the engine.
In addition, they may operate vehicle equip‐
ment. #
Never lea vechildren and animals unat‐
te nded in theve hicle. #
When leaving theve hicle, alw aysta ke
th eke y with you and lock theve hicle.
This also applies tomobile phones if the
"Digital Car Key in the smartphone"
function is activated via the Mercedes
connect me web app. Driving and parking
181
Page 259 of 497
Menus and submenus
Fu
nctions on the Service menu of the on-
board compu terOn-board computer:
, Service #
Toselect the function: swipe upwards or
down wards on the left-hand touch cont rol. #
Press the left-hand touch cont rol.
Fu nctions on theService menu:
R Message memory (→ page 381)
R AdBlue: Adblue ®
ra nge
R Tyres:
- Restarting the tyre pressure loss warning
sy stem (→ page 352)
- Checking tyre pressure with the tyre
pressure monitoring sy stem
(→ page 348)
- Restarting the tyre pressure monitoring
sy stem(→ page 348)
R ASSYST PLUS: Calling up the service due
date (→ page 306) R
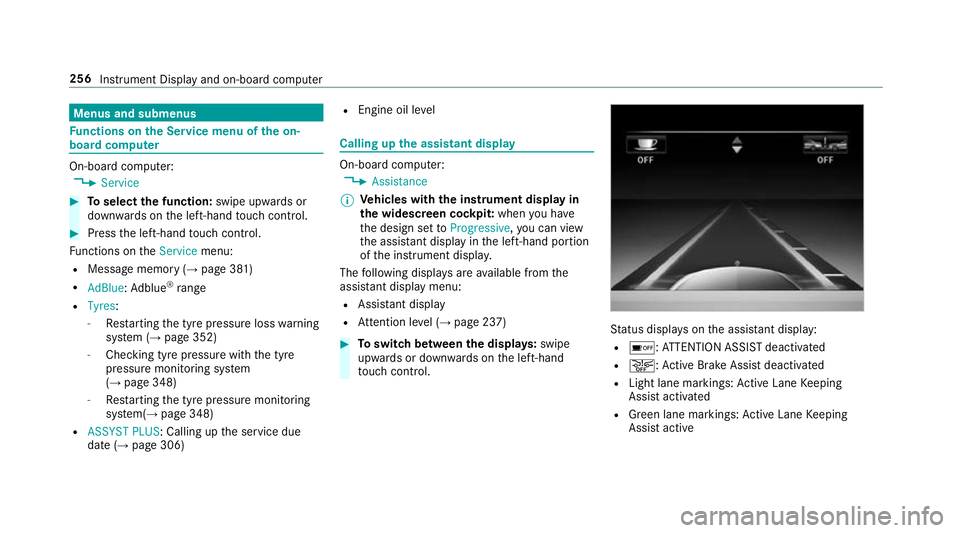
Engine oil le vel Calling up
the assistant display On-board computer:
, Assistance
% Ve
hicles with the instrument display in
th e widescreen cockpit: whenyou ha ve
th e design set toProgressive ,yo u can view
th e assis tant displ ayinthe left-hand portion
of the instrument displa y.
The following displa ysare available from the
assis tant displ aymenu:
R Assis tant displ ay
R Attention le vel (→ page 237) #
Toswitch between the displa ys:swipe
upwards or down wards on the left-hand
to uch cont rol. St
atus displa yson the assis tant displ ay:
R é :AT TENTION ASSIST deactivated
R æ: Active Brake Assi stdeactivated
R Light lane markings: Active Lane Keeping
Assist activated
R Green lane markings: Active Lane Keeping
Assist active 256
Instrument Display and on-board computer
Page 264 of 497
#
Only operate this equipment when the
traf fic situation permits. #
Ifyo u cannot be sure of this, stop the
ve hicle whilst paying attention toroad
and traf fic conditions and ope rate the
equipment with theve hicle stationar y. When
telephoning, you must obse rveth e legal
re qu irements forth e count ryin which you are
cur rently driving.
Ve hicles with theAu dio 20 multimedia sys‐
te m: the most recently dialled telephone num‐
bers are displa yed on theTelephone menu. #
Select an entr y:swipe upwards or down‐
wa rds on the left-hand touch cont rol. #
Press the left-hand touch cont rol.
If th ere is only one telephone number
sa ve dto an entr y:thete lephone number is
selec ted. #
Ifth ere are multiple telephone numbers
sa ve dto an entr y:swipe upwards or down‐
wa rds on the left-hand touch cont rolto
select the desired telephone number. #
Press the left-hand touch cont rol.
The telephone number is dialled.
The following displa ysmay appear ins tead of the
te lephone numbers dialled:
R Please wait... :th e application is starting.
When a Blue tooth®
connection tothe mobile
phone is not es tablished, the menu for
authorising and connecting a mobile phone is
displa yed in the multimedia sy stem
(→ page 279).
R Updating data. ..:the call list is being upda‐
te d.
R Importing contacts... :th e conta cts from the
mobile phone or from a storage medium are
being impor ted.
Ac cepting/rejecting a call
When youre cei vea call, theIncoming call mes‐
sage appears on the head-up displa y. #
Swipe up wards or down wards on the left-
hand touch cont rol and select 6(Accept)
or ~ (Reject). #
Press the left-hand touch cont rol. The call may be accep
ted/rejec ted using the
6 or~ buttons on thesteering wheel. Ad
justing the head-up display settings via
the on-board co mputer On-board computer:
, HUD
The following head-up display settings can be
adjus ted:
R Position
R Brightness
R Display content #
Toselect a setting: swipe upwards or down‐
wa rds on the left-hand touch cont rol. #
Press the left-hand touch cont rol. #
Toadjust a value: swipe upwards or down‐
wa rds on the left-hand touch cont rol. #
Press the left-hand touch cont rol. Instrument Display and on-board computer
261
Page 272 of 497
#
Toselect a menu item: swipe left orright
on theto uchpad and then press it.
or #
Slide the controller tothe left or right and
press it.
Main function line (top) is selected: ano ther
main function is called up.
Menu bar (bottom) is selected: a menu
appears.
Calling up an operating mode for a main
function #
Call up a main function (→ page 268). #
Select the main function in the main function
line again. #
Swipe left or right on theto uchpad and press
it.
or #
Slide the controller tothe left or right and
press it.
Depending on the main function, a range of
operating modes are available. Fo
r media selection, thefo llowing media
sources can be selec ted, forex ample:
R Memory card
R Media Interface 1
R Media Interface 2
R Bluetooth audio
R Information on media #
Alternatively for media selection: select Devi-
ces inthe lo wer menu bar. #
Swipe up or down on theto uchpad and press
it.
or #
Slide the controller up or down and press it.
The media source is selected. Playback
st arts. Favo
urites Overview of
favo urites
Fa vourites of feryo uqu ick access tofrequently
used applications. It is possible tocrea te20
fa vo urites in tota l. The
following functions are available:
R add pre-defined favo urites fromthefo llow‐
ing categories:
- Navigation
- Entertainment
- Tel/ ®
- Vehicle
- Climate control
R add your ow nfa vo urites
R rename a favo urite
R moveafa vo urite
R dele teafa vo urite
Calling up favo urites #
Press theò button.
The favo urites are displ ayed. #
Swipe left or right on theto uchpad and press
it.
or #
Turn and press the controller. Multimedia sy
stem 269
Page 277 of 497
Multimedia sy
stem:
, Vehicle .
Time
Ve hicles with GPS #
Select Summer Time .#
Select On,OfforAutomatic.
R Automatic: the automatic changeo verto
summer time is not available for all time
zones.
R Off: standard time is set.
Ve hicles without GPS #
Switch Current time: Summer Time onO or
off ª. #
Summer time changeo ver:select Summer
Time setting. #
Select Automatic, Summer Time orStandard
time.
The cur rent setting is ma rked with #.
The local time is set one hour forw ard or
bac k.
R Automatic :th e automatic changeo verto
summer time is not available for all time
zones. Setting
the time and da teform at
Multimedia sy stem:
, Vehicle .
Time .
Format #
Set the date and time form at#.
Setting the time and da temanually
Multimedia sy stem:
, Vehicle .
Time
Ve hicles with GPS
It may be useful toset the time manually in the
fo llowing situations:
R a country is not con tained in the list of time
zones
R a time dif fering from the local time is set #
Select Set time manually. #
Set the hours. #
Navigate totheright toset the minutes. #
Set the minutes.
The Automatic time settings function is deac‐
tivated ª.
% The time can be set back by12 hours and
fo rw ard by14 hours. Ve
hicles without GPS #
Select Set time orSet date . #
Set the time or date.
The various time and date settings must be set
cor rectly toenable a reliable In tern et connection
to be es tablished. Blue
tooth ® Information about Blu
etoo th®
Bl ue tooth ®
tech nology is a standard for short-
ra nge wi reless data transfer up toappr oximately
10 m.You can use Blue tooth®
to connect your
mobile phone tothe multimedia sy stem and use
th efo llowing functions, forex ample:
R hands-free sy stem with access tothefo llow‐
ing options:
- phone book (→ page 283)
- call lists (→ page 285)
- messages (→ page 286)
R Internet connection 274
Multimedia sy stem
Page 278 of 497
R
listening tomusic via Blue tooth ®
audio
(→ page 299)
R trans ferring business cards (vCards) into the
ve hicle
Blue tooth ®
is a regis tere d trademark of Blue‐
toot h Special Interest Group (SIG) Inc.
% Internet connection via Blue tooth®
is not
av ailable in all countries.
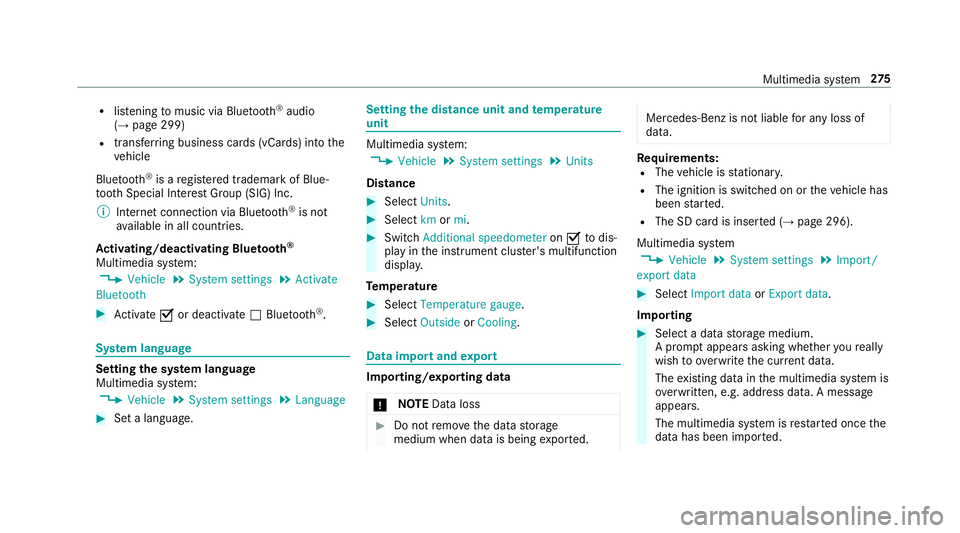
Ac tivating/deactivating Blue tooth ®
Multimedia sy stem:
, Vehicle .
System settings .
Activate
Bluetooth #
Activate Oor deacti vate ª Bluetoo th®
. Sy
stem language Setting
the sy stem language
Multimedia sy stem:
, Vehicle .
System settings .
Language #
Set a language. Setting
the distance unit and temperature
unit Multimedia sy
stem:
, Vehicle .
System settings .
Units
Distance #
Select Units. #
Select kmormi. #
Switch Additional speedometer onO todis‐
play in the instrument clus ter's multifunction
displa y.
Te mp erature #
Select Temperature gauge . #
Select Outside orCooling . Data import and
export Importing/exporting data
* NO
TEData loss #
Do not remo vethe data storage
medium when data is being expor ted. Mercedes-Benz is not liable
for any loss of
data. Re
quirements:
R The vehicle is stationar y.
R The ignition is switched on or theve hicle has
been star ted.
R The SD card is inser ted (→ page 296).
Multimedia sy stem
, Vehicle .
System settings .
Import/
export data #
Select Import data orExport data.
Importing #
Select a data storage medium.
A prom ptappears asking whe ther youre ally
wish to overwrite the cur rent da ta.
The existing data in the multimedia sy stem is
ove rwritten, e.g. address da ta. A messa ge
appears.
The multimedia sy stem is restar ted once the
data has been impor ted. Multimedia sy
stem 275
Page 281 of 497
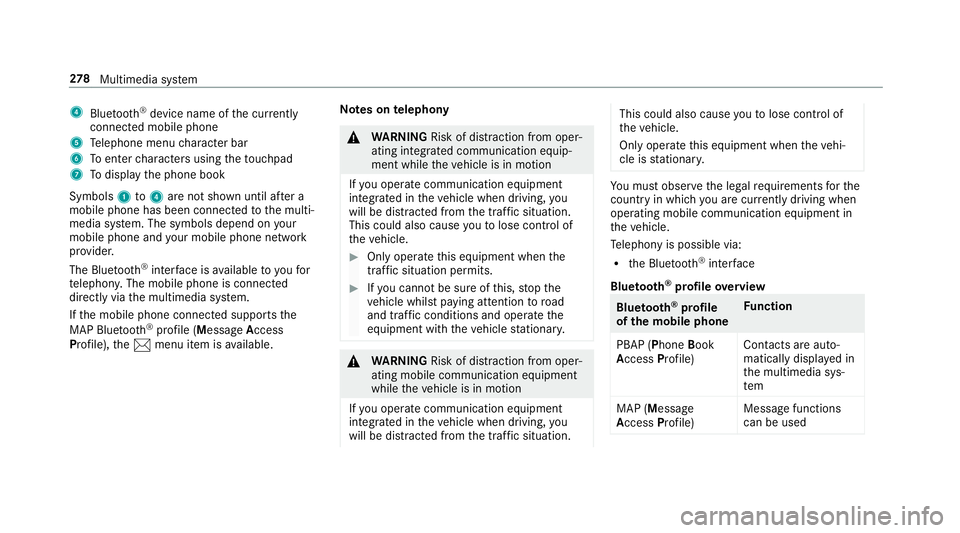
4
Bluetoo th®
device name of the cur rently
connected mobile phone
5 Telephone menu character bar
6 Toenter characters using theto uchpad
7 Todisplay the phone book
Symbols 1to4 are not shown until af ter a
mobile phone has been connected tothe multi‐
media sy stem. The symbols depend on your
mobile phone and your mobile phone network
pr ov ider.
The Blue tooth®
inter face is available toyoufor
te lephon y.The mobile phone is connected
directly via the multimedia sy stem.
If th e mobile phone connected supports the
MAP Blue tooth®
profile (Message Access
Pro file), the1 menu item is available. Note
s ontelephony &
WARNING Risk of di stra ction from oper‐
ating integrated communication equip‐
ment while theve hicle is in motion
If yo u operate communication equipment
integrated in theve hicle when driving, you
will be distracted from the traf fic situation.
This could also cause youto lose control of
th eve hicle. #
Only operate this equipment when the
traf fic situation permits. #
Ifyo u cannot be sure of this, stop the
ve hicle whilst paying attention toroad
and traf fic conditions and ope rate the
equipment with theve hicle stationar y. &
WARNING Risk of di stra ction from oper‐
ating mobile communication equipment
while theve hicle is in motion
If yo u operate communication equipment
integrated in theve hicle when driving, you
will be distracted from the tra ffic situation. This could also cause
youto lose control of
th eve hicle.
Only operate this equipment when theve hi‐
cle is stationar y. Yo
u must obse rveth e legal requ irements forthe
country in whi chyou are cur rently driving when
operating mobile communication equipment in
th eve hicle.
Te lephony is possible via:
R the Blue tooth®
inter face
Blue tooth ®
profile overview Blue
tooth ®
profile
of the mobile phone Fu
nction
PBAP (Phone Book
Access Profile) Contacts are auto‐
matically displa
yed in
th e multimedia sys‐
tem
MAP (Message
Access Profile) Message functions
can be used 278
Multimedia sy stem