display MERCEDES-BENZ G-Class 2014 W463 Comand Manual
[x] Cancel search | Manufacturer: MERCEDES-BENZ, Model Year: 2014, Model line: G-Class, Model: MERCEDES-BENZ G-Class 2014 W463Pages: 274, PDF Size: 5.76 MB
Page 53 of 274
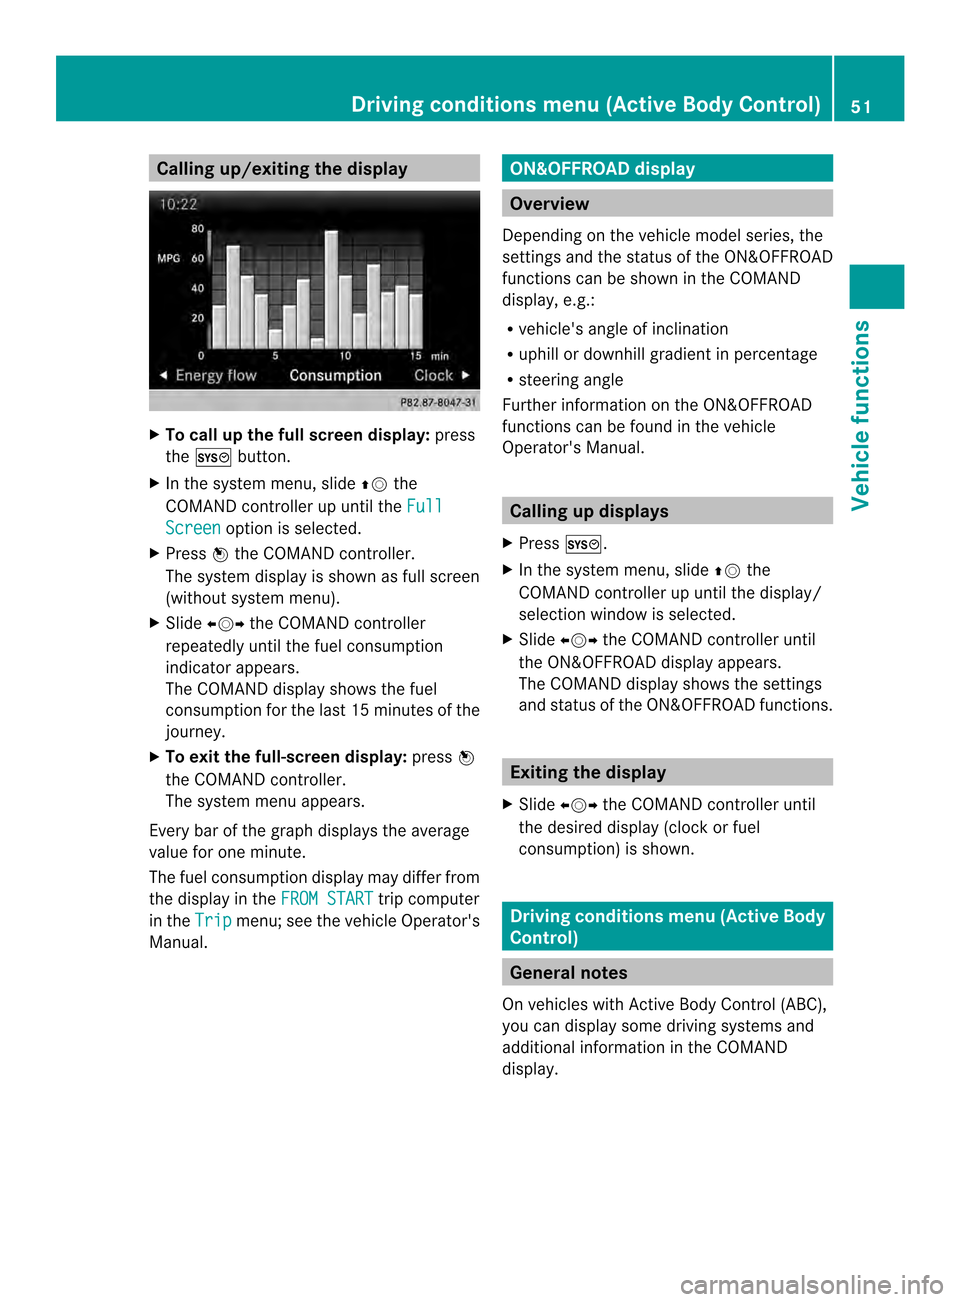
Calling up/exiting the display
X
To call up the full screen display: press
the 000B button.
X In the system menu, slide 00360012the
COMAND controller up until the FullScreen option is selected.
X Press 0037the COMAND controller.
The system display is shown as full screen
(without system menu).
X Slide 003400120035 the COMAND controller
repeatedly until the fuel consumption
indicator appears.
The COMAND display shows the fuel
consumption for the last 15 minutes of the
journey.
X To exit the full-screen display: press0037
the COMAND controller.
The system menu appears.
Every bar of the grap hdisplays the average
value for one minute.
The fuel consumption display may differ from
the display in the FROM START trip computer
in the Trip menu; see the vehicle Operator's
Manual. ON&OFFROAD display
Overview
Depending on the vehicle model series, the
settings and the status of the ON&OFFROAD
functions can be shown in the COMAND
display, e.g.:
R vehicle's angle of inclination
R uphill or downhill gradien tinpercentage
R steering angle
Further information on the ON&OFFROAD
functions can be found in the vehicle
Operator's Manual. Calling up displays
X Press 000B.
X In the system menu, slide 00360012the
COMAND controller up until the display/
selection window is selected.
X Slide 003400120035 the COMAND controller until
the ON&OFFROAD display appears.
The COMAND display shows the settings
and status of the ON&OFFROAD functions. Exiting the display
X Slide 003400120035 the COMAND controller until
the desired display (clock or fuel
consumption) is shown. Driving conditions menu (Active Body
Control)
General notes
On vehicles with Active Body Control (ABC),
you can display some driving systems and
additional information in the COMAND
display. Driving conditions menu (Active Body Control)
51Vehicle functions
Page 54 of 274
Calling up drive status regulator (ABC)
X Press 000B.
X In the system menu, slide 00360012the
COMAND controller up until the display/
selectio nwindow is selected.
X Slide 003400120035 the COMAND controller
repeatedly until the drivin gconditions
menu (ABC) appears.
The corresponding displays appear in the
COMAND display.
Details on the displays:
R for all vehicles except AMG vehicles, see
the separate vehicle Operator's Manual
R for AMG vehicles, see the separate vehicle
Operator's Manual. Exiting the display
X Slide 003400120035 the COMAND controller until
the desired display (clock or fuel
consumption) is shown. Seat functions
Overview
Using the 0011button next to the COMAND
controller or the Seat menu item in the
system menu, you can call up different setting
functions. The following settings depend on
the type of seat and the vehicle model series:
R seat cushion length
R backrest side bolsters
R lumbar
R balance
R seat cushion side bolsters
R dynamics
R massage
i You can also store and recall the current
seat function settings using the memory
button and the corresponding memory
position switch; see the separate vehicle
Operator's Manual. The massage function cannot be started or
stopped using the memory button. Selecting the seat
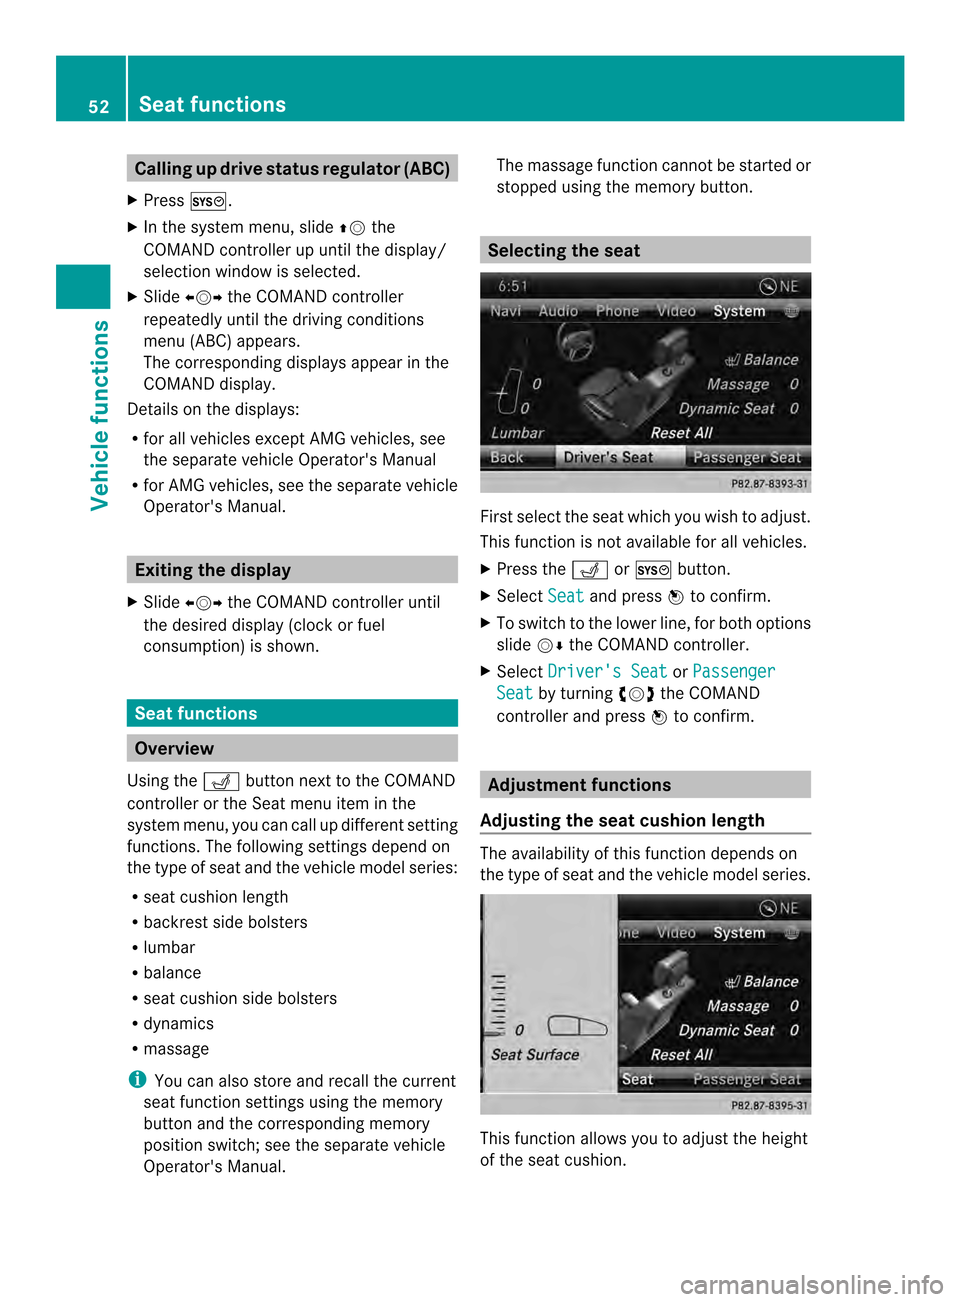
First select the seat which you wish to adjust.
This function is not available for all vehicles.
X
Press the 0011or000B button.
X Select Seat and press
0037to confirm.
X To switch to the lower line, for both options
slide 00120008the COMAND controller.
X Select Driver's Seat or
Passenger Seat by turning
003C0012003Dthe COMAND
controller and press 0037to confirm. Adjustment functions
Adjusting the seat cushion length The availability of this function depends on
the type of seat and the vehicle model series.
This function allows you to adjust the height
of the seat cushion.52
Seat functionsVehicle functions
Page 56 of 274
This function allows you to adjust the air
cushions in the seat side bolsters.
X
Select the seat (Y page 52).
X Select Seat Sides by turning
003C0012003Dthe
COMAND controller and press 0037to
confirm.
As cale appears.
X Turn 003C0012003D or slide 003600120008the COMAND
controlle rand press 0037to confirm.
X To exit the menu: press the000Aback
button.
Balance The availability of this functio
ndepends on
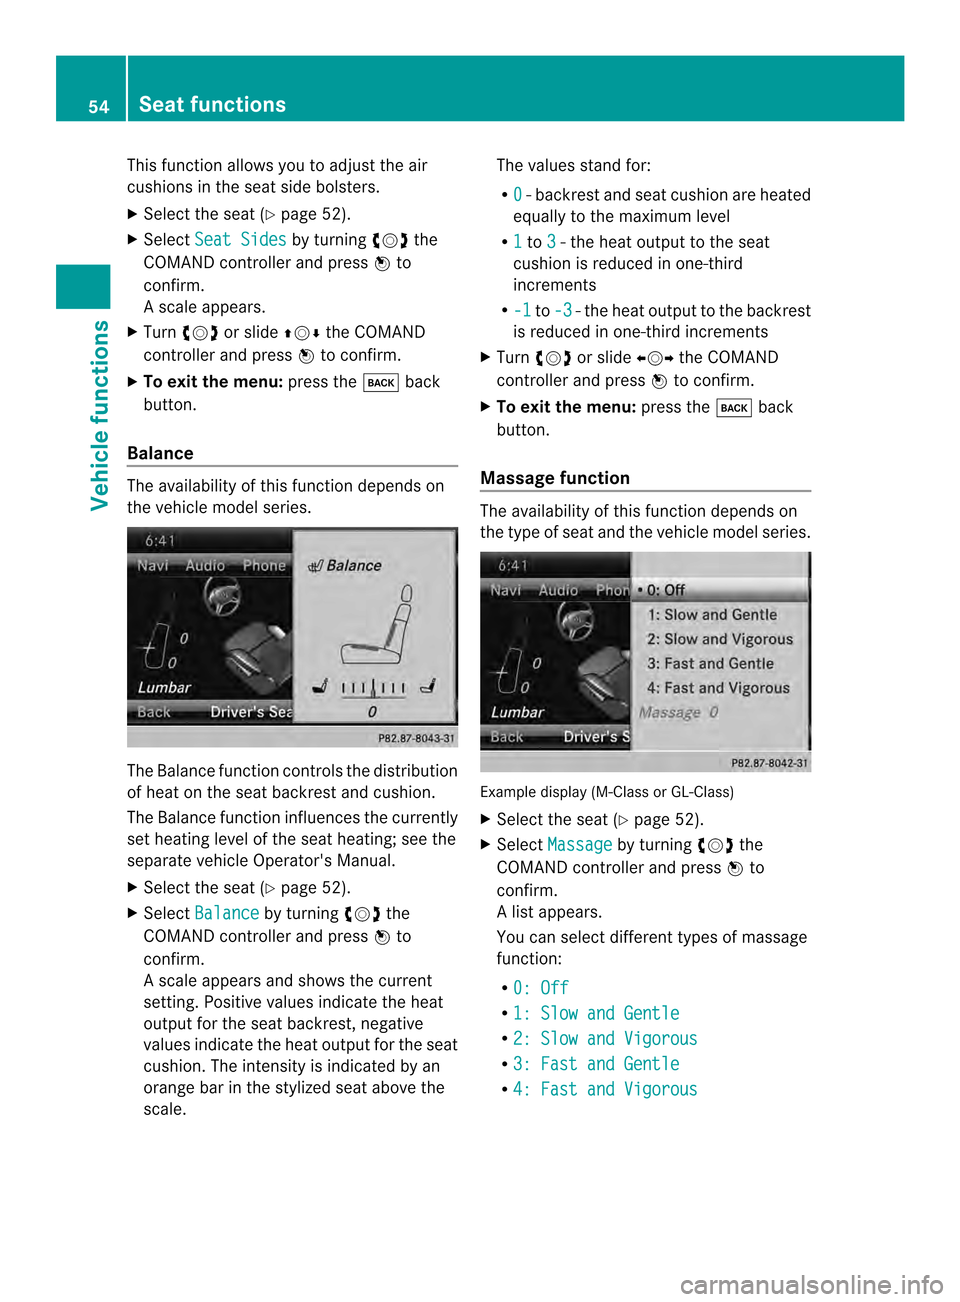
the vehicle model series. The Balance function controls the distribution
of heat on the seat backrest and cushion.
The Balance function influences the currently
set heating level of the seat heating; see the
separate vehicle Operator's Manual.
X
Select the seat (Y page 52).
X Select Balance by turning
003C0012003Dthe
COMAND controller and press 0037to
confirm.
As cale appears and shows the current
setting. Positive values indicate the heat
outpu tfor the seat backrest, negative
values indicate the heat output for the seat
cushion. The intensity is indicated by an
orange bar in the stylized seat above the
scale. The values stand for:
R
0 -b
ackres tand sea tcushio nare heated
equally to the maximu mlevel
R 1 to
3 -t
he heat output to the seat
cushion is reduced in one-third
increments
R -1 to
-3 -t
he heat output to the backrest
is reduced in one-third increments
X Turn 003C0012003D or slide 003400120035the COMAND
controller and press 0037to confirm.
X To exit the menu: press the000Aback
button.
Massage function The availability of this function depends on
the type of seat and the vehicle model series.
Example display (M-Class or GL-Class)
X
Select the seat (Y page 52).
X Select Massage by turning
003C0012003Dthe
COMAND controller and press 0037to
confirm.
Al ist appears.
You can selec tdifferen ttypes of massage
function:
R 0: Off R
1: Slow and Gentle R
2: Slow and Vigorous R
3: Fast and Gentle R
4: Fast and Vigorous 54
Sea
tfunctionsVehicle functions
Page 57 of 274
X
Turn 003C0012003D or slide 003600120008the COMAND
controller and press 0037to confirm.
The massage function runs for
approximately 15 to 25 minutes,
depending on the setting.
X To exit the menu: press the000Aback
button.
Adjusting the driving dynamics This function is available on vehicle model
series with a dynamic multicontour seat. X
Select the seat (Y page 52).
X Select Dynamic Seat by turning
003C0012003Dthe
COMAND controller and press 0037to
confirm.
As cale appears.
You can select:
R 0 : Off
R 1 :l
evel 1(mediu msetting)
R 2 :l
evel 2(high setting)
X Turn 003C0012003D or slide 003600120008the COMAND
controller and press 0037to confirm.
X To exit the menu: press the000Aback
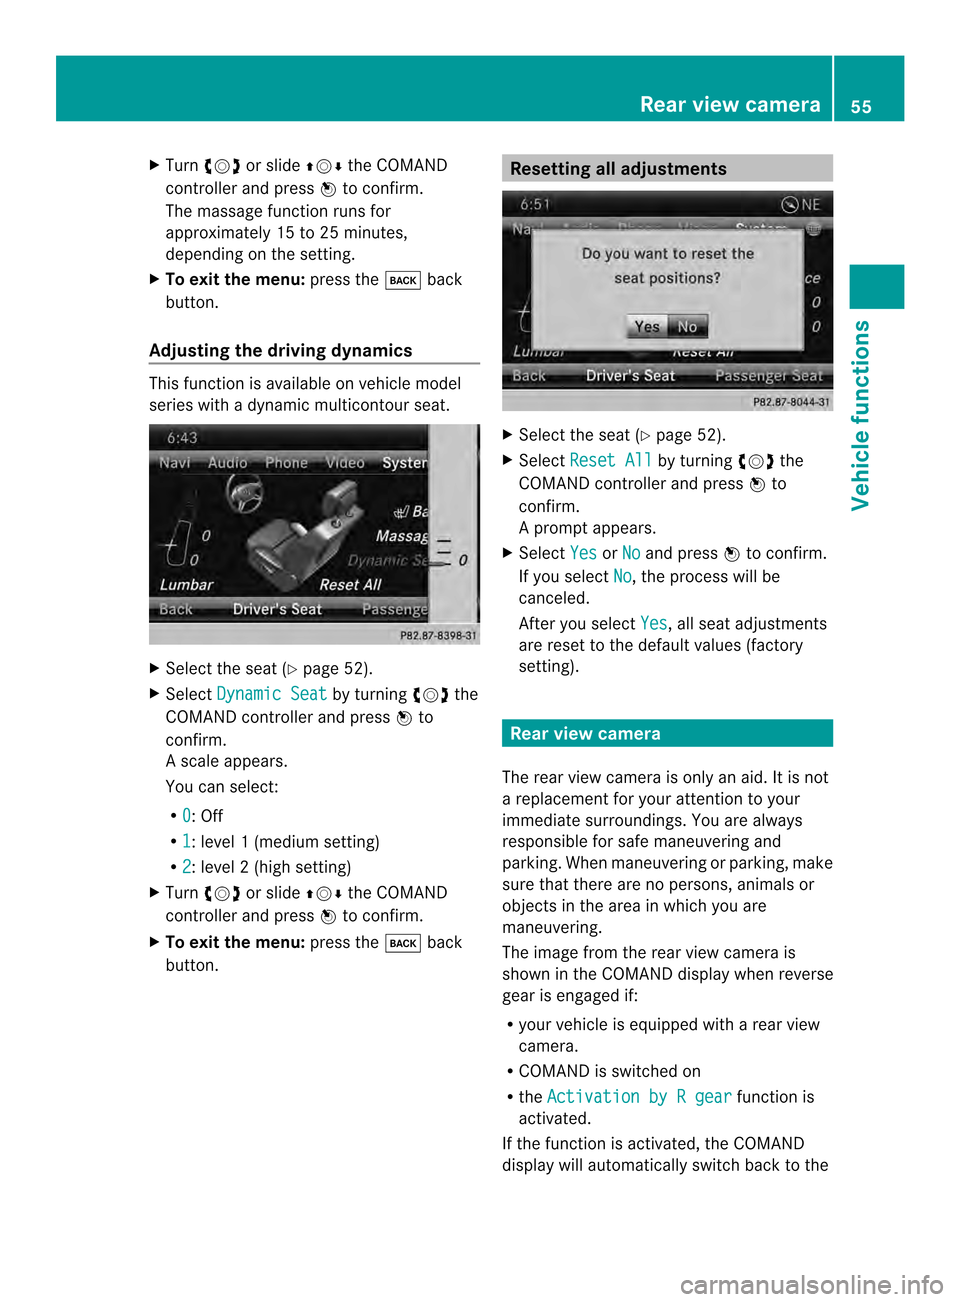
button. Resetting all adjustments
X
Select the seat (Y page 52).
X Select Reset All by turning
003C0012003Dthe
COMAND controller and press 0037to
confirm.
Ap rompt appears.
X Select Yes or
No and press
0037to confirm.
If you select No , the process will be
canceled.
After you select Yes , all seat adjustments
are reset to the default values (factory
setting). Rear view camera
The rear view camera is only an aid.Iti s not
a replacement for your attention to your
immediate surroundings. You are always
responsible for safe maneuvering and
parking. When maneuvering or parking, make
sure that there are no persons, animals or
objects in the area in which you are
maneuvering.
The image from the rear view camera is
shown in the COMAND displayw hen reverse
gear is engaged if:
R your vehicle is equipped with a rear view
camera.
R COMAND is switched on
R the Activation by R gear function is
activated.
If the function is activated, the COMAND
display will automatically switch back to the Rear view camera
55Vehicle functions
Page 58 of 274
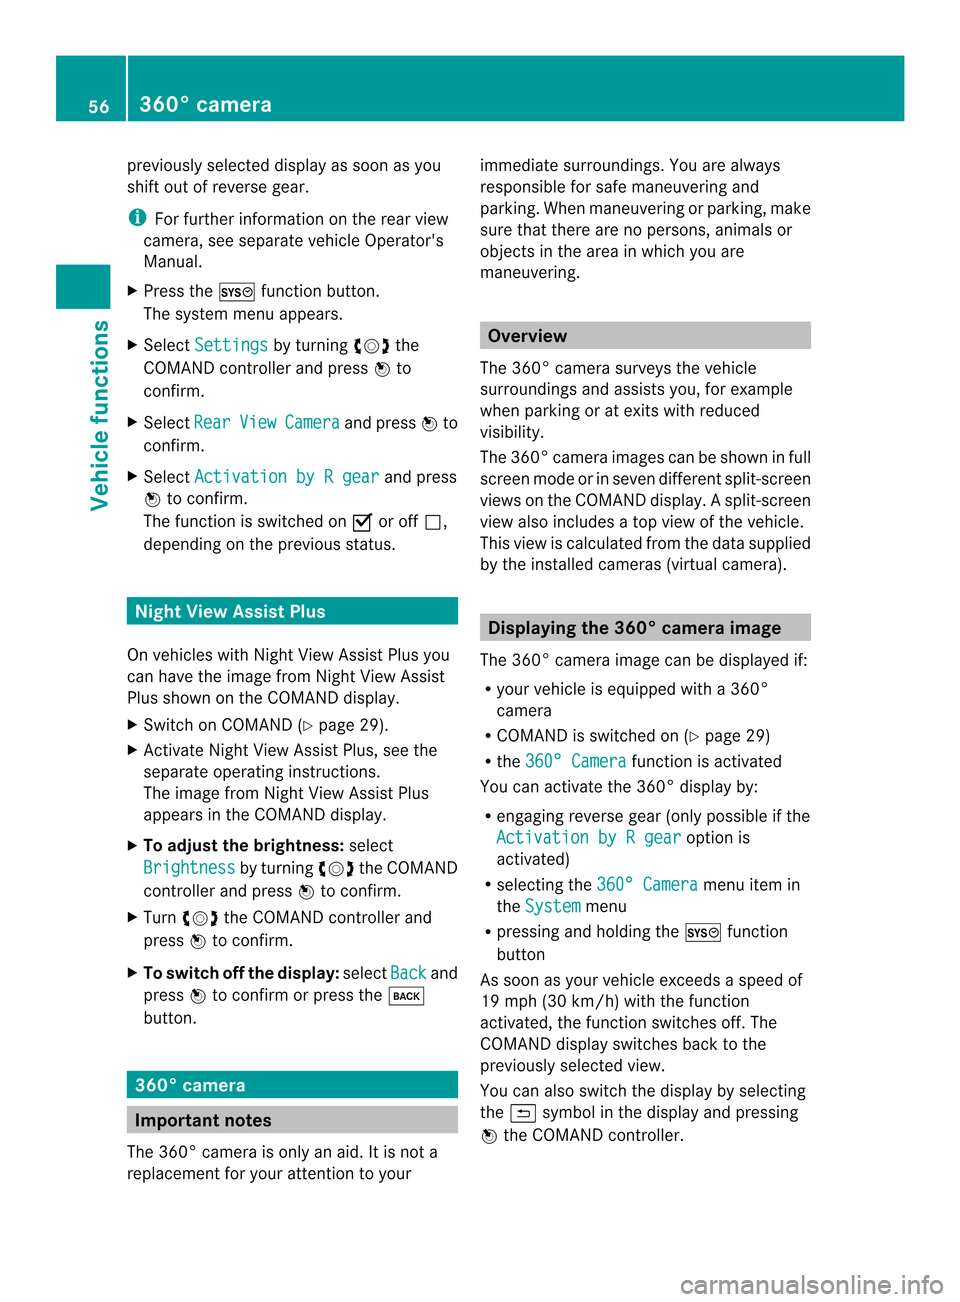
previously selected display as soon as you
shift out of reverse gear.
i
For further information on the rear view
camera, see separate vehicle Operator's
Manual.
X Press the 000Bfunction button.
The system menu appears.
X Select Settings by turning
003C0012003Dthe
COMAND controller and press 0037to
confirm.
X Select Rear View Camera and press
0037to
confirm.
X Select Activation by R gear and press
0037 to confirm.
The function is switched on 0010or off 0003,
depending on the previous status. Night View Assist Plus
On vehicles with Night View Assist Plus you
can have the image from Night View Assist
Plus shown on the COMAND display.
X Switch on COMAND (Y page 29).
X Activate Night View Assist Plus, see the
separate operating instructions.
The image from Night View Assist Plus
appears in the COMAND display.
X To adjust the brightness: select
Brightness by turning
003C0012003Dthe COMAND
controller and press 0037to confirm.
X Turn 003C0012003D the COMAND controller and
press 0037to confirm.
X To switch off the display: selectBack and
press 0037to confirm or press the 000A
button. 360° camera
Important notes
The 360° camera is only an aid. It is not a
replacement for your attention to your immediate surroundings. You are always
responsible for safe maneuvering and
parking. When maneuvering or parking, make
sure that there are no persons, animals or
objects in the area in which you are
maneuvering.
Overview
The 360 °camera surveys the vehicle
surroundings and assists you, for example
when parking or at exits with reduced
visibility.
The 360° camera images can be shown in full
scree nmode or in seven different split-screen
views on the COMAND display .Asplit-screen
view also includes a top view of the vehicle.
This view is calculated from the data supplied
by the installed cameras (virtual camera). Displaying the 360° camera image
The 360 °camera image can be displayed if:
R your vehicle is equipped with a 360°
camera
R COMAND is switched on (Y page 29)
R the 360° Camera function is activated
You can activate the 360° display by:
R engaging reverse gear (only possible if the
Activation by R gear option is
activated)
R selecting the 360° Camera menu item in
the System menu
R pressing and holding the 000Bfunction
button
As soon as your vehicle exceeds a speed of
19 mph (30 km/h) with the function
activated, the function switches off .The
COMAND display switches back to the
previously selected view.
You can also switch the display by selecting
the 0024 symbol in the display and pressing
0037 the COMAND controller. 56
360° cameraVehicle functions
Page 59 of 274
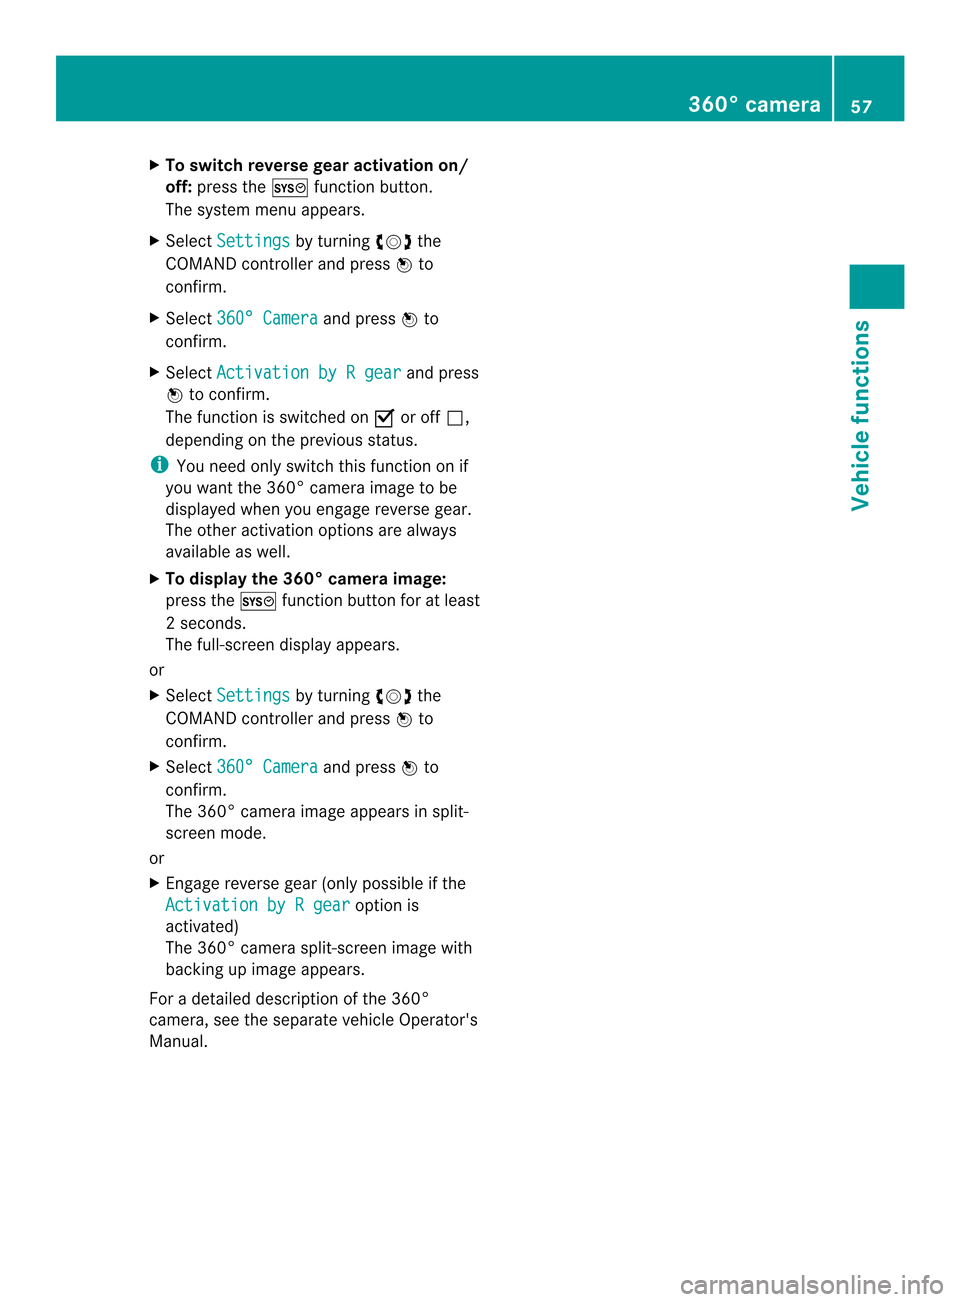
X
To switc hreverse gear activation on/
off: press the 000Bfunction button.
The system menu appears.
X Select Settings by turning
003C0012003Dthe
COMAND controller and press 0037to
confirm.
X Select 360° Camera and press
0037to
confirm.
X Select Activation by R gear and press
0037 to confirm.
The function is switched on 0010or off 0003,
depending on the previous status.
i You need only switch this function on if
you want the 360° camera image to be
displayed when you engage reverse gear.
The other activation option sare always
available as well.
X To display the 360° camera image:
press the 000Bfunction button for at least
2s econds.
The full-screen display appears.
or
X Select Settings by turning
003C0012003Dthe
COMAND controller and press 0037to
confirm.
X Select 360° Camera and press
0037to
confirm.
The 360°c amera image appears in split-
scree nmode.
or
X Engage reverse gear (only possible if the
Activation by R gear option is
activated)
The 360° camera split-screen image with
backing up image appears.
For a detailed description of the 360°
camera, see the separate vehicle Operator's
Manual. 360° camera
57Vehicle functions
Page 62 of 274
Your COMAND equipment
These operating instructions describe all the
standard and optional equipmen tfor your
COMAND system, as available at the time of
going to print. Country-specific differences
are possible. Please note that your COMAND
system may not be equipped with all the
features described. Introduction
Important safety notes
G
WARNING
If you operate information systems and
communication equipment integrated in the
vehicle while driving, you will be distracted
from traffic conditions. You could also lose
control of the vehicle. There is a risk of an
accident.
Only operate the equipment when the traffic
situation permits. If you are not sure that this
is possible, park the vehicle paying attention
to traffic conditions and operate the
equipment when the vehicle is stationary.
You must observe the legal requirements for
the country in which you are currently driving
when operating COMAND.
COMAND calculates the route to the
destination without taking account of the
following, for example:
R traffic lights
R stop and give way signs
R merging lanes
R parking or stopping in a no parking/no
stopping zone
R other road and traffic rules and regulations
R narrow bridges
COMAND can give incorrect navigation
commands if the actual street/traffic
situation does not correspond with the digital
map's data. Digital maps do not cover all
areas nor all routes in an area. For example, a route may have been diverted or the
direction of a one-way street may have
changed.
For this reason, you must always observe
road and traffic rules and regulations during
your journey. Road and traffic rules and
regulations always have priority over the
system's driving recommendations.
Navigation announcements are intended to
direct you while driving without diverting your
attention from the road and driving.
Please always use this feature instead of
consulting the map display for directions.
Looking at the icons or map display can
distract you from traffic conditions and
driving, and increase the risk of an accident.
General notes
Operational readiness of the navigation
system The navigation system must determine the
position of the vehicle before first use or
whenever operational status is restored.
Therefore, you may have to drive for a while
before precise route guidance is possible.
GPS reception
Among other things, correct functioning of
the navigation system depends on GPS
reception .Incertain situations, GPS
reception may be impaired, there may be
interference or there may be no reception at
all, e.g. in tunnels or parking garages.
i Using roof carriers may impair the correct
functioning of a roof antenna (phone,
satellite radio, GPS).
Entry restriction On vehicles for certain countries, there is a
restriction on entering data.
The restriction is active from a vehicle speed
of above approximately 3 mph (5 km/h). As
soon as the speed falls below approximately 60
IntroductionNavigation
Page 63 of 274
2 mph (3 km/h), the restriction becomes
inactive.
When the restrictio nis active, certain entries
cannot be made. This will be indicated by the
fact that certain menu items are grayed out
and cannot be selected.
The following entries are not possible, for
example:
R entering the destination city and street
R entering a destination via the map
R entering POIs in the vicinity of a city or via
a name search
R editing entries
R using the number keypad for direct entry
Other entries are possible, such as entering
points of interest in the vicinity of the
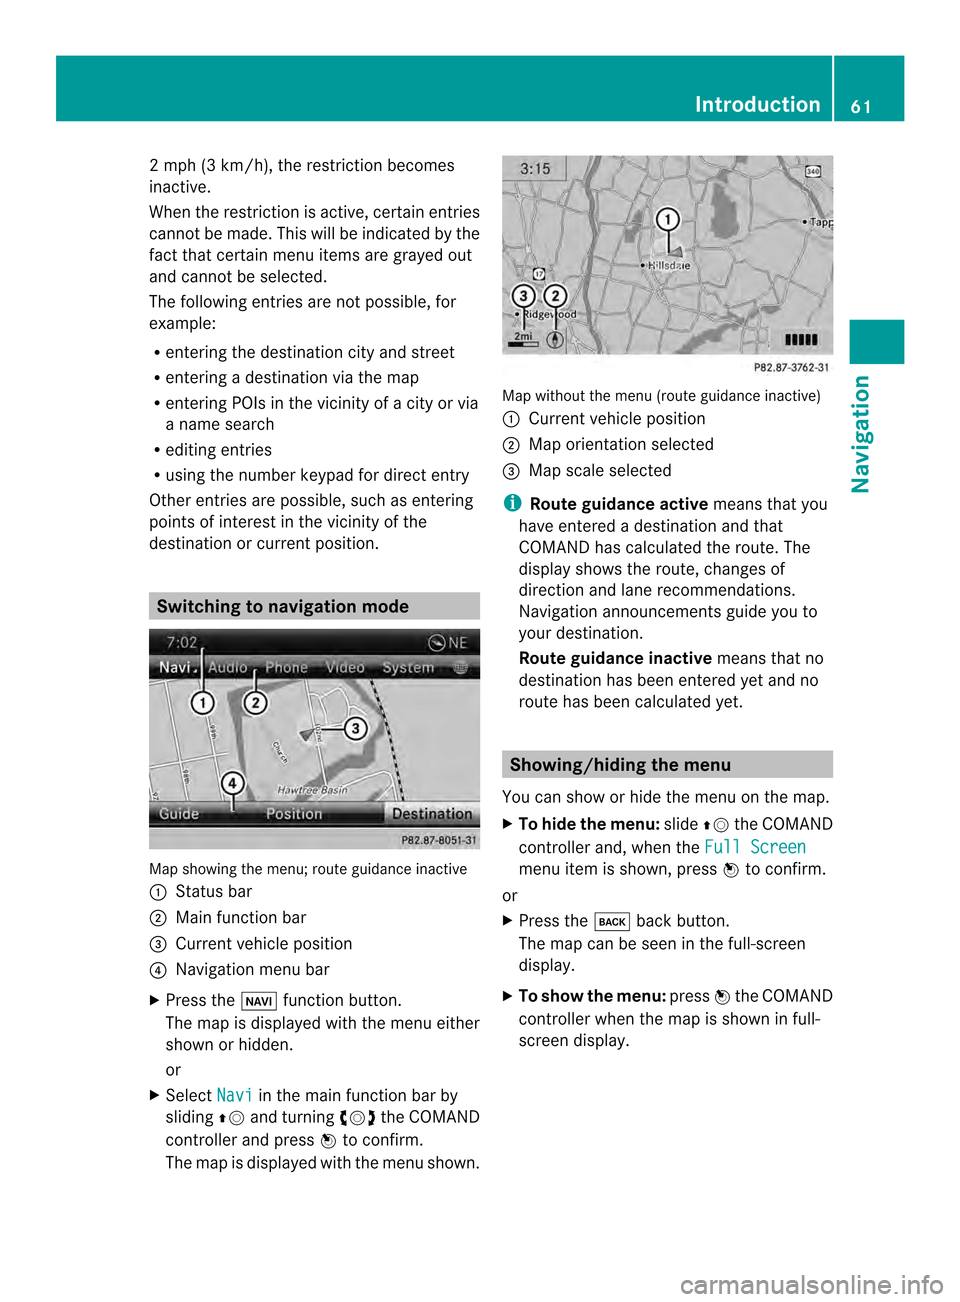
destination or current position. Switching to navigation mode
Map showing the menu; route guidance inactive
0001 Status bar
0002 Main function bar
0014 Current vehicle position
0013 Navigation menu bar
X Press the 0012function button.
The map is displayed with the menu either
shown or hidden.
or
X Select Navi in the main function bar by
sliding 00360012and turning 003C0012003Dthe COMAND
controller and press 0037to confirm.
The map is displayed with the menu shown. Map without the menu (route guidance inactive)
0001
Current vehicle position
0002 Map orientation selected
0014 Map scale selected
i Route guidance active means that you
have entered a destination and that
COMAND has calculated the route. The
display shows the route, changes of
direction and lane recommendations.
Navigation announcements guide you to
your destination.
Route guidance inactive means that no
destination has been entered yet and no
route has been calculated yet. Showing/hiding the menu
You can show or hide the menu on the map.
X To hide the menu: slide00360012the COMAND
controller and, when the Full Screen menu item is shown, press
0037to confirm.
or
X Press the 000Aback button.
The map can be seen in the full-screen
display.
X To show the menu: press0037the COMAND
controller when the map is shown in full-
screen display. Introduction
61Navigation Z
Page 66 of 274
R
entering the state/province, city/ZIP code,
street and house number
R entering the state/province, city/ZIP code,
street and intersection
R entering the state/province, street, city
and house number
R entering the state/province, street and
house number
R entering the state/province, street and
intersection
i You can only enter those cities, streets,
ZIP codes etc.t hat are stored on the digital
map. This means that for some countries,
you cannot enter ZIP codes, for example.
The step-by-step instructions for entering an
address use the following example data:
New York (state)
New York (city)
40 Broadway
Of course, you can freely enter information
such as state/province, city, street and
house number, for example to enter your
home address.
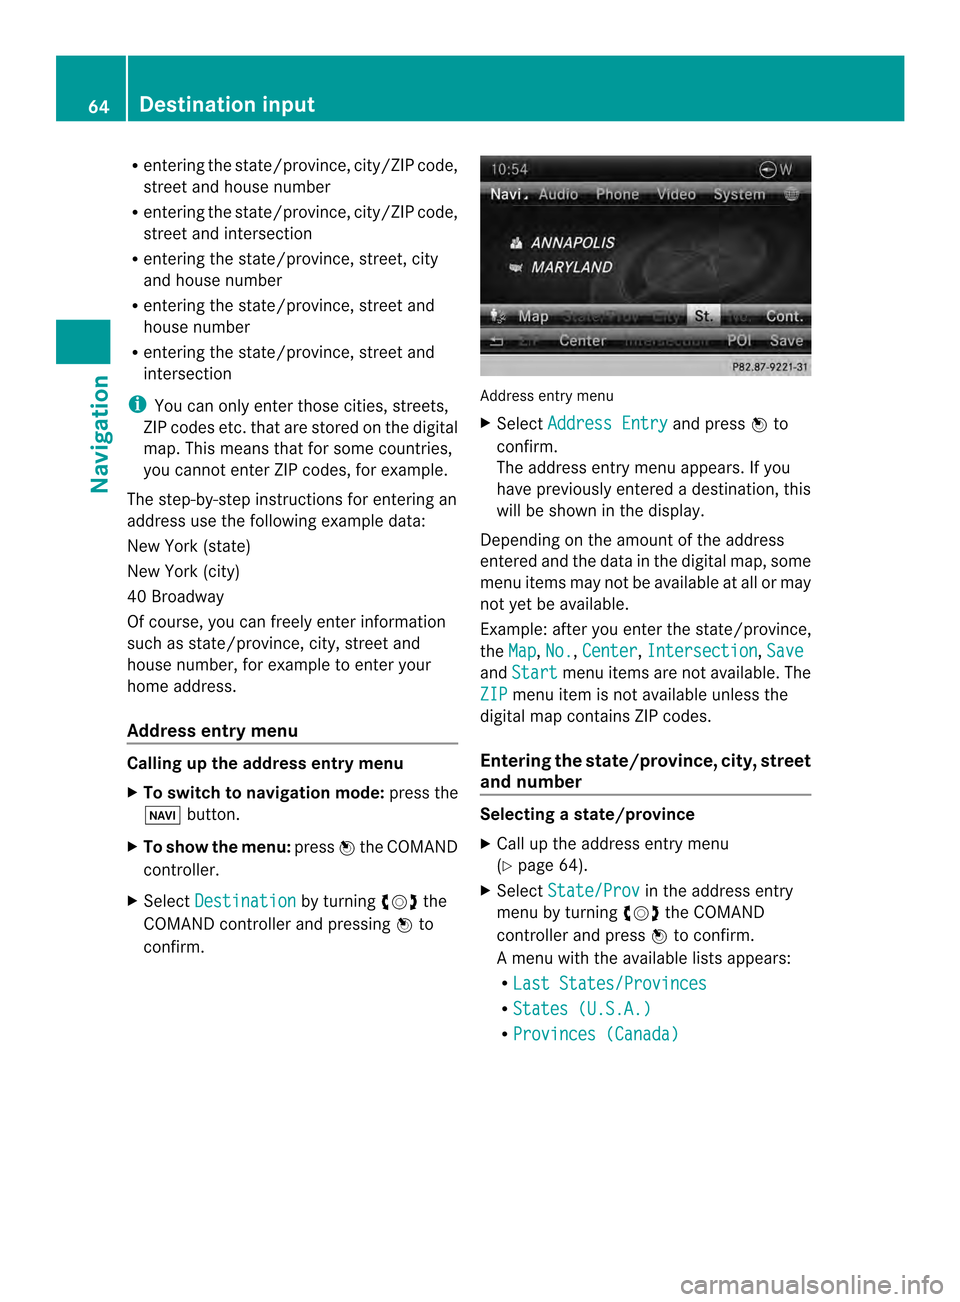
Address entry menu Calling up the address entry menu
X
To switch to navigation mode: press the
0012 button.
X To show the menu: press0037the COMAND
controller.
X Select Destination by turning
003C0012003Dthe
COMAND controller and pressing 0037to
confirm. Address entry menu
X
Select Address Entry and press
0037to
confirm.
The address entry menu appears. If you
have previously entered a destination, this
will be shown in the display.
Depending on the amount of the address
entered and the data in the digital map, some
menu items may not be available at all or may
not yet be available.
Example: after you enter the state/province,
the Map ,
No. ,
Center ,
Intersection ,
Save and
Start menu items are not available. The
ZIP menu item is not available unless the
digital map contains ZIP codes.
Entering the state/province, city, street
and number Selecting
astate/province
X Call up the address entry menu
(Y page 64).
X Select State/Prov in the address entry
menu by turning 003C0012003Dthe COMAND
controller and press 0037to confirm.
Am enu with the available lists appears:
R Last States/Provinces R
States (U.S.A.) R
Provinces (Canada) 64
Destination inputNavigation
Page 71 of 274
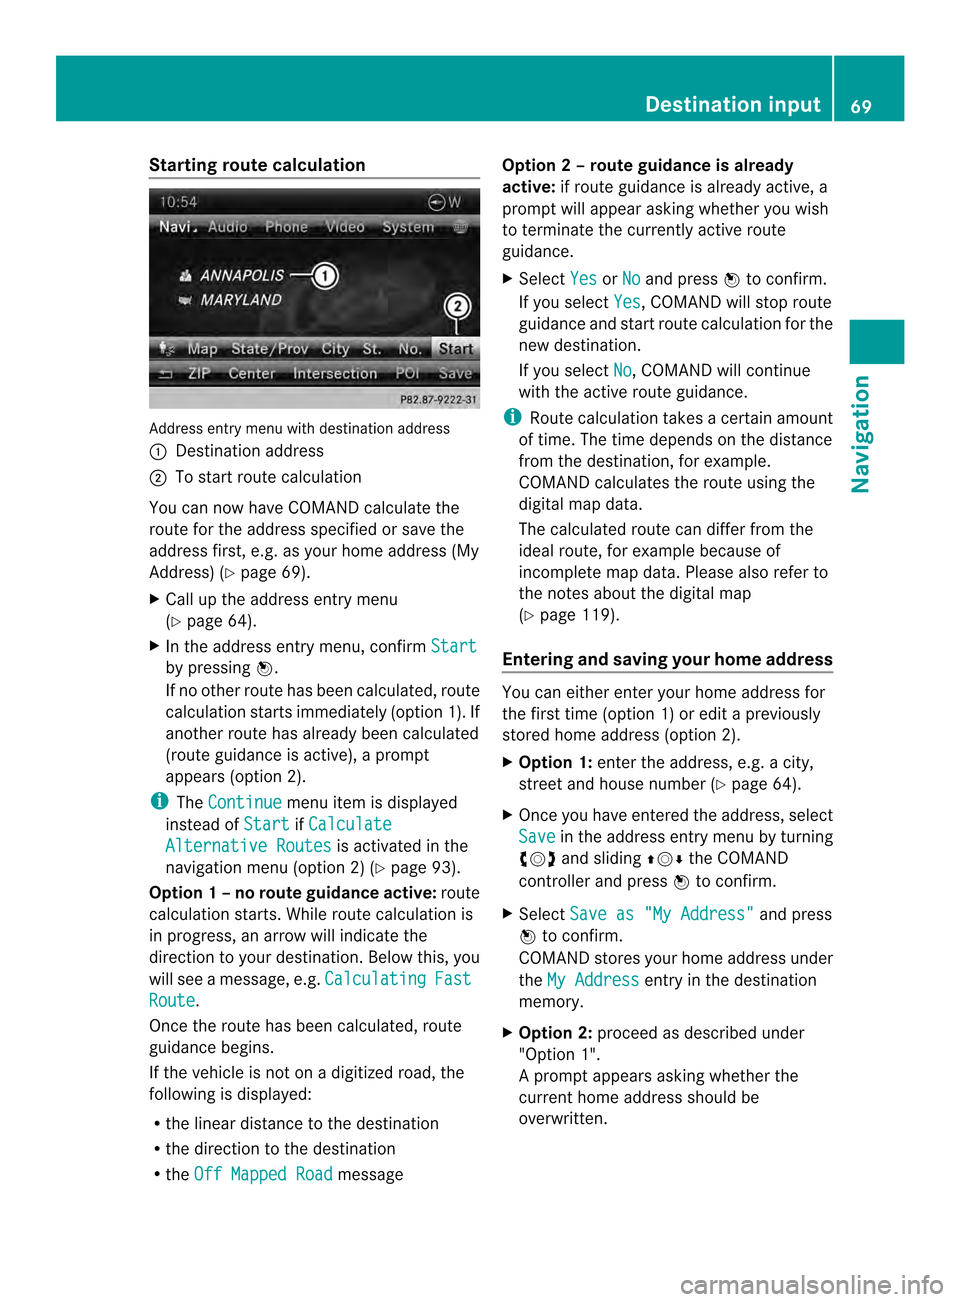
Starting route calculation
Address entry menu with destination address
0001
Destination address
0002 To start route calculation
You can now have COMAND calculate the
route for the address specified or save the
address first, e.g. as your home address (My
Address) (Y page 69).
X Call up the address entry menu
(Y page 64).
X In the address entry menu, confirm Startby pressing
0037.
If no other route has been calculated, route
calculation starts immediately (option 1). If
another route has already been calculated
(route guidance is active), a prompt
appears (option 2).
i The Continue menu item is displayed
instead of Start if
Calculate Alternative Routes is activated in the
navigation menu (option 2) (Y page 93).
Option 1 –no route guidance active: route
calculatio nstarts. While route calculatio nis
in progress, an arrow will indicate the
direction to your destination. Below this, you
will see a message, e.g. Calculating Fast
Route .
Once the route has been calculated, route
guidance begins.
If the vehicle is not on a digitized road, the
following is displayed:
R the linear distance to the destination
R the direction to the destination
R the Off Mapped Road messageOption 2 – route guidance is already
active:
if route guidance is already active, a
prompt will appear asking whether you wish
to terminate the currently active route
guidance.
X Select Yes or
No and press
0037to confirm.
If you select Yes , COMAND will stop route
guidance and start route calculation for the
new destination.
If you select No , COMAND will continue
with the active route guidance.
i Route calculation takes a certain amount
of time. The time depends on the distance
fro mt he destination, for example.
COMAND calculates the route using the
digital map data.
The calculated route can differ from the
ideal route, for example because of
incomplete map data. Please also refer to
the notes about the digital map
(Y page 119).
Entering and saving your home address You can either enter your home address for
the first time (option 1) or edit a previously
stored home address (option 2).
X
Option 1: enter the address, e.g. a city,
street and house number (Y page 64).
X Once you have entered the address, select
Save in the address entry menu by turning
003C0012003D and sliding 003600120008the COMAND
controller and press 0037to confirm.
X Select Save as "My Address" and press
0037 to confirm.
COMAND stores your home address under
the My Address entry in the destination
memory.
X Option 2: proceed as described under
"Option 1".
Ap rompt appears asking whethe rthe
current home address should be
overwritten. Destination input
69Navigation Z