display MERCEDES-BENZ G-Class 2014 W463 Comand Manual
[x] Cancel search | Manufacturer: MERCEDES-BENZ, Model Year: 2014, Model line: G-Class, Model: MERCEDES-BENZ G-Class 2014 W463Pages: 274, PDF Size: 5.76 MB
Page 98 of 274
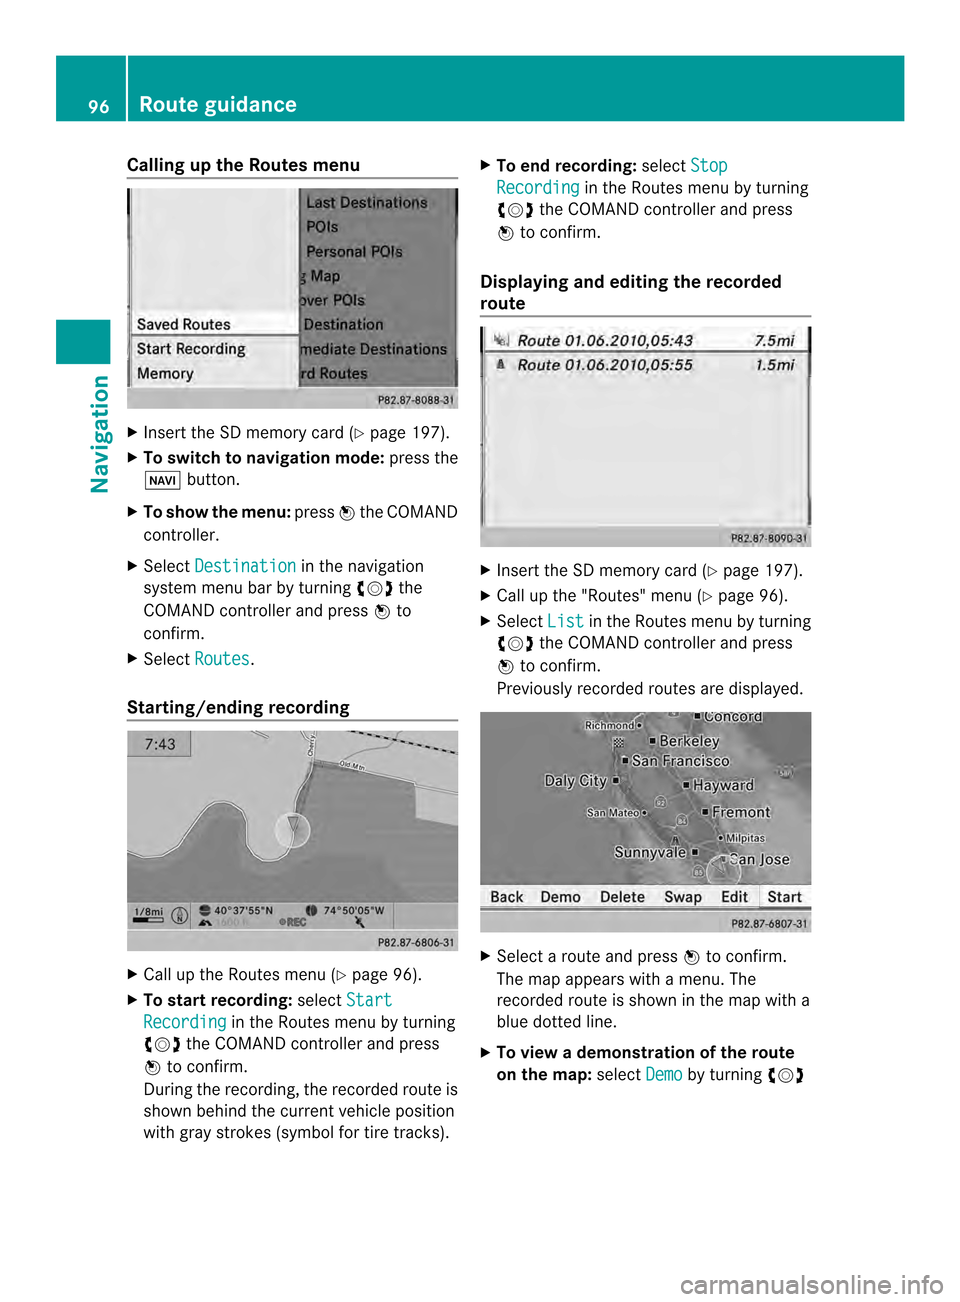
Calling up the Routes menu
X
Insert the SD memory car d(Ypage 197).
X To switch to navigation mode: press the
0012 button.
X To show the menu: press0037the COMAND
controller.
X Select Destination in the navigation
system menu bar by turning 003C0012003Dthe
COMAND controller and press 0037to
confirm.
X Select Routes .
Starting/ending recording X
Call up the Routes menu (Y page 96).
X To start recording: selectStart Recording in the Routes menu by turning
003C0012003D the COMAND controller and press
0037 to confirm.
During the recording, the recorded route is
shown behind the curren tvehicle position
with gray strokes (symbol for tire tracks). X
To end recording: selectStop Recording in the Routes menu by turning
003C0012003D the COMAND controller and press
0037 to confirm.
Displaying and editing the recorded
route X
Insert the SD memory card (Y page 197).
X Call up the "Routes" menu (Y page 96).
X Select List in the Routes menu by turning
003C0012003D the COMAND controller and press
0037 to confirm.
Previously recorded routes are displayed. X
Select a route and press 0037to confirm.
The map appears with a menu. The
recorded route is shown in the map with a
blue dotted line.
X To view a demonstration of the route
on the map: selectDemo by turning
003C0012003D 96
Route guidanceNavigation
Page 99 of 274
the COMAND controlle
rand press 0037to
confirm.
The map with the crosshair appears.
X Proceed as described in the "Route
demonstration" section (Y page 95).
X To begin route calculation: selectStart in the menu by turning
003C0012003Dthe COMAND
controller and press 0037to confirm.
COMAND attempts to alig nthe recorded
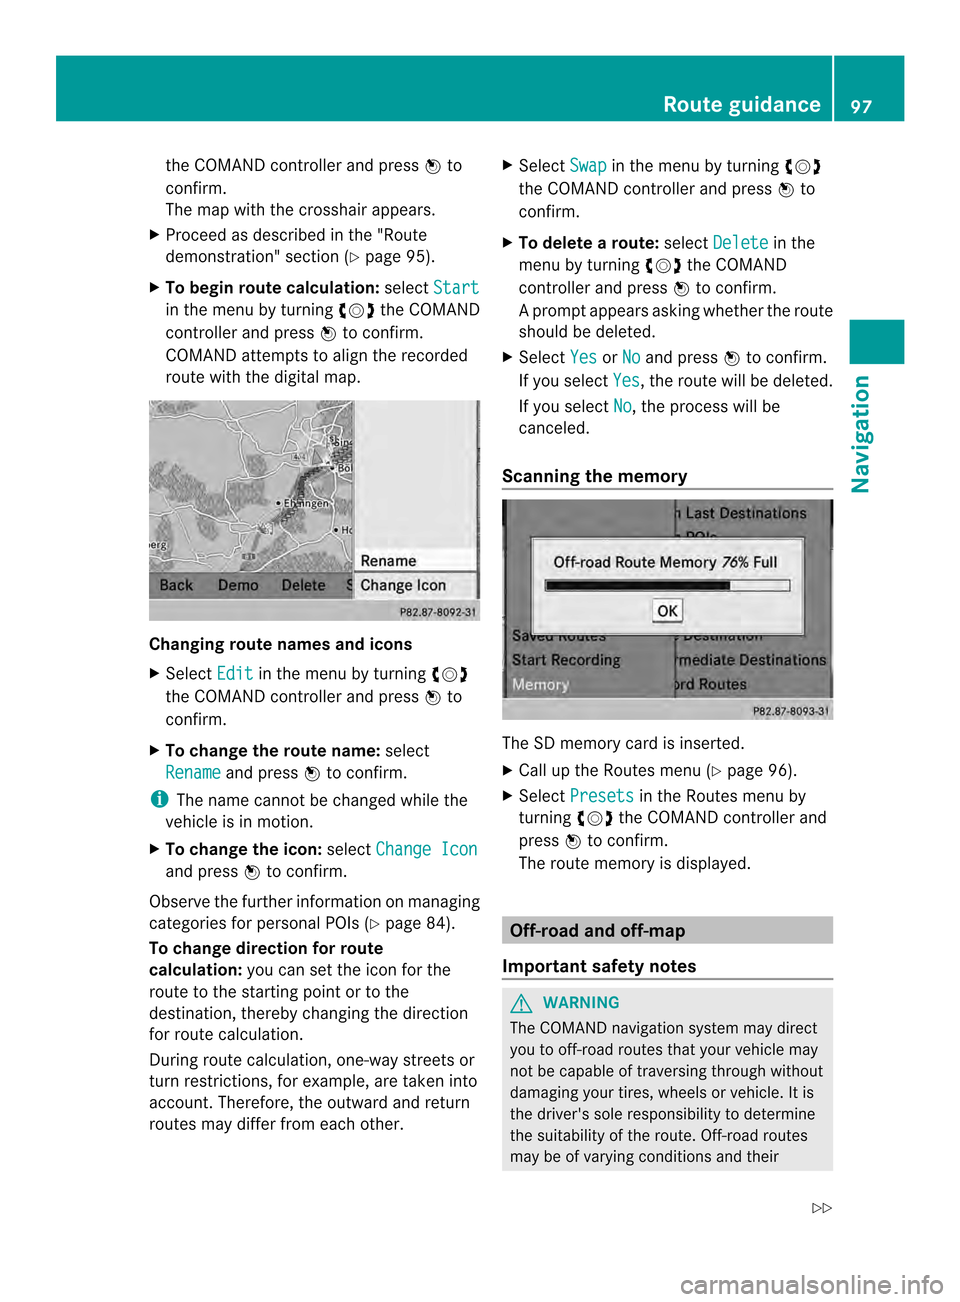
route with the digital map. Changing route names and icons
X
Select Edit in the menu by turning
003C0012003D
the COMAND controller and press 0037to
confirm.
X To change the route name: select
Rename and press
0037to confirm.
i The name cannot be changed while the
vehicle is in motion.
X To change the icon: selectChange Icon and press
0037to confirm.
Observe the further information on managing
categories for personal POIs (Y page 84).
To change direction for route
calculation: you can set the icon for the
route to the starting point or to the
destination, thereby changing the direction
for route calculation.
During route calculation, one-way streets or
turn restrictions, for example, are taken into
account. Therefore, the outward and return
routes may differ from each other. X
Select Swap in the menu by turning
003C0012003D
the COMAND controller and press 0037to
confirm.
X To delete a route: selectDelete in the
menu by turning 003C0012003Dthe COMAND
controller and press 0037to confirm.
Ap rompt appears asking whethe rthe route
should be deleted.
X Select Yes or
No and press
0037to confirm.
If you select Yes , the route will be deleted.
If you select No , the process will be
canceled.
Scanning the memory The SD memory card is inserted.
X
Call up the Routes menu (Y page 96).
X Select Presets in the Routes menu by
turning 003C0012003Dthe COMAND controller and
press 0037to confirm.
The route memory is displayed. Off-road and off-map
Important safety notes G
WARNING
The COMAND navigation system may direct
you to off-road routes that your vehicle may
not be capable of traversing through without
damaging your tires, wheels or vehicle. It is
the driver's sole responsibility to determine
the suitability of the route. Off-road routes
may be of varying conditions and their Route guidance
97Navigation
Z
Page 100 of 274

appropriateness for use may be affected by
various factors such as time of day, time of
year and immediate weather conditions that
canno tbe judged or taken into consideration
by the COMAND system.
Route guidance to a destination that is
not on a digitized road Example: route guidance to an off-road destination
0001 Off-road destination
0002 Off-road route section (blue dashes)
0014 Current vehicle position (the tip of the
triangle indicates the vehicle’s direction
of travel)
0013 Off-road (if available)
COMAND can guide you to destinations
which are within the area of the digital map,
but which are not themselves recorded on the
map.
These destinations are known as off-road
destinations, which you can enter using the
map, for example. In these cases, COMAND
guides you for as long as possible with
navigation announcements and displays on
roads known to the system.
If the vehicle reaches an area which is not part
of the digital map, the display appears as a
split-screen view. On the right, an arrow
appears that points to off-road
destination 0001.You will hear the
announcement:" Please follow the arrow on
the display" .As the vehicle approaches the
destination, the Area of destination reached message appears. Route guidance from an off-road
location to
adestination If the vehicle position is within the area
covered by the digital map, but the map does
not contain any information about that
location, the vehicle is in an off-road location.
COMAND is also able to guide you to a
destination even from an off-road location.
At the start of route guidance, you will see the
Off Mapped Road
message, an arrow and
the distance to the destination .The arrow
shows the compass heading to the actual
destination.
The route is highlighted blue, starting from
the last recognized street the vehicle was on
before it left the map.
As soon as the vehicle is back on a road
known to the system, route guidance
continues in the usual way.
Route guidance from an off-map
location to adestination If the vehicle position is outside the area
covered by the digital map, then the vehicle
is in an off-map location .COMAND is also
able to guide you to a destination even from
an off-map location.
At the start of route guidance, you will see the
Off Mapped Road message, an arrow and
the distance to the destination. The direction
arrow shows the compass heading to the
destination.
The route is highlighted in blue from the
nearest road known to the system.
As soon as the vehicle is back on a road
known to the system, route guidance
continues in the usual way.
Off-road during route guidance Due to roadworks, for example, there may be
differences between the data on the digital
map and the actual course of the road.
In such cases, the system will temporarily be
unable to locate the vehicle position on the98
Route guidanceNavigation
Page 101 of 274

digital map. The vehicle is therefore in an off-
road position.
In the display, you will see the Off MappedRoad message, an arrow and the distance to
the destination. The direction arrow shows
the compass heading to the destination.
As soon as the system can assign the vehicle
position to the map again, route guidance
continues in the usual way. Traffic reports
Prerequisites
i This function is currently not available for
Canada.
To receive real-time traffic reports via
satellite radio, you require:
R optional satellite radio equipment
R a subscription to SIRIUS XM Satellite Radio
Traffic Message Service
Further information on satellite radio
(Y page 188).
COMAND can receive traffic reports via
satellite radio and take accoun tofthese for
route guidance in the navigation system.
Received traffic reports are displayed on the
map either as text or as symbols. Real-time traffic reports on the map
0001
Delimits the section of the route affected
0002 Indicates an incident on the route (traffic
flow) 0014
Destination
0013 Map scale
COMAND can show certain traffic incidents
on the map. Traffic reports are shown on the
map at scales of 0.05 mi to 20 mi.
X To hide the menu: slide00360012the COMAND
controller and, when the Full Screen menu item is shown, press
0037to confirm.
The map can be seen in the full-screen
display.
X Turn 003C0012003D the COMAND controller until the
desired map scale is set. Traffic reports
99Navigation Z
Page 102 of 274

Symbols used in real-time traffic reports
Unimpeded traffic flow
Green line with arrows
The arrows can be seen on a map scale of 200 m (0.25 mi) and smaller.
Heavy/slow-moving traffic
Together with a yellow line
The symbol marks average speeds of 25 – 45 mph(40 – 72 km/h).
Caution, traffic incident
Traffic jam
Together with a red line and arrows
The symbol marks average speeds of 5 - 20 mph(8 - 32 km/h).
The arrows can be seen on a map scale of 200 m (0.25 mi) and smaller. Warning message
Together with a red/white striped line and arrows
The arrows can be seen on a map scale of 200 m (0.25 mi) and smaller.
Blocked route section
Possibly in combination with XXXX
Displaying real-time traffic reports
Starting a search for traffic reports X
To switch to navigation mode: press the
0012 button.
X To show the menu: press0037the COMAND
controller.
X Select Traffic by turning
003C0012003Dthe
COMAND controller and press 0037to
confirm.
Am enu appears.
If No Traffic Messages appears, this
means either:
R no traffic reports have been received yet,
or
R no traffic reports are available.
X To end the search: selectCancel and
press 0037to confirm.
X To close the repor twindow: selectOK and press
0037to confirm. Traffic symbol information
Example display
0001
Affected roads with indication of direction
0002 Symbol for report type, e.g. traffic flow
message
X To switch to navigation mode: press the
0012 button.
X To show the menu: press0037the COMAND
controller. 100
Traffic reportsNavigation
Page 103 of 274

X
Select Traffic in the navigation system
menu bar by turning 003C0012003Dthe COMAND
controlle rand press 0037to confirm.
X Select Traffic Symbol Information by
turning 003C0012003Dthe COMAND controller and
press 0037to confirm.
X Select Next or
Previous by turning
003C0012003D
the COMAND controller and press 0037to
confirm in order to continue highlighting
traffic symbols.
X To change the map scale: selectMap by
sliding 00360012the COMAND controller and
press 0037to confirm.
You can now zoom in or out of the map. Example: details on traffi
csymbol information
X To show the detaile dview: select
Details and press
0037to confirm.
X To close the detailed view: slide003400120035 the
COMAND controller. Displaying reports on the route 0001
State/province for the calculated route,
road designation, direction and reports
for the affected road (2/3)
0002 Section of the road to which the traffic
repor tapplies
0014 Traffic report
0013 Type of traffic report (slow-moving traffic)
X To switch to navigation mode: press the
0012 button.
X To show the menu: press0037the COMAND
controller.
X Select Traffic in the navigation system
menu bar by turning 003C0012003Dthe COMAND
controller and press 0037to confirm.
X Select Messages On Route and press
0037
to confirm.
The traffic report window appears. If there
is more than one traffic report for a section
of the route, this is indicated by 2/3, for
example.
X To scroll within arepor tort o access
the next report: turn003C0012003D the COMAND
controller.
X To retur ntothe report list: slide003400120035 the
COMAND controller. Traffic reports
101Navigation Z
Page 104 of 274
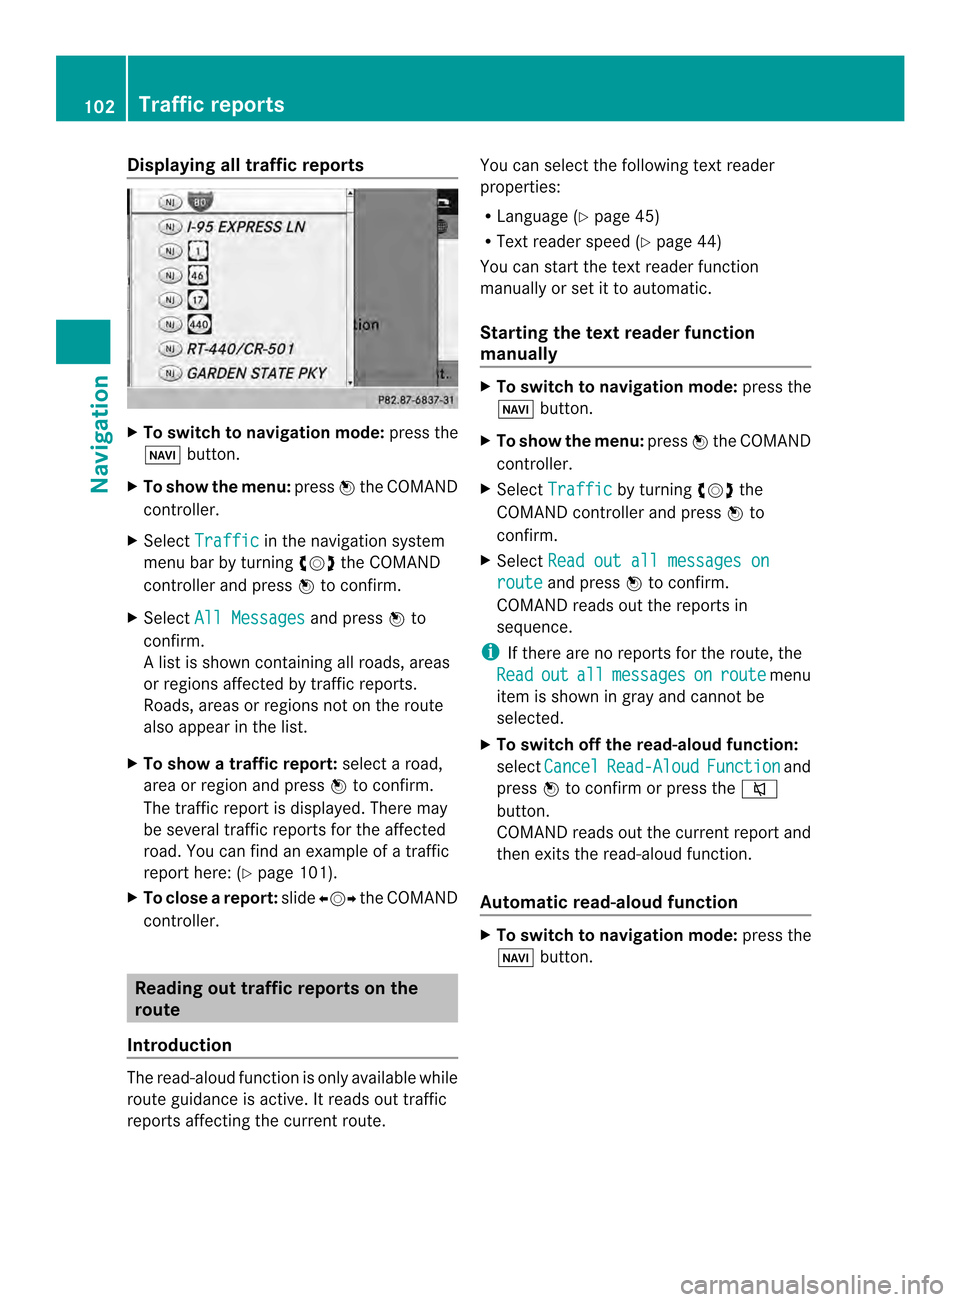
Displaying all traffic reports
X
To switch to navigation mode: press the
0012 button.
X To show the menu: press0037the COMAND
controller.
X Select Traffic in the navigation system
menu bar by turning 003C0012003Dthe COMAND
controller and press 0037to confirm.
X Select All Messages and press
0037to
confirm.
Al ist is shown containing all roads, areas
or regions affected by traffic reports.
Roads, areas or regions not on the route
also appear in the list.
X To show a traffic report: selectaroad,
area or regio nand press 0037to confirm.
The traffic report is displayed .There may
be several traffic reports for the affected
road. You can find an example of a traffic
report here: (Y page 101).
X To close areport: slide003400120035 the COMAND
controller. Reading out traffic reports on the
route
Introduction The read-aloud function is only available while
route guidance is active. It reads out traffic
reports affecting the current route. You can selec
tthe following text reader
properties:
R Language (Y page 45)
R Text reader speed (Y page 44)
You can start the text reader function
manually or set it to automatic.
Starting the text reader function
manually X
To switch to navigation mode: press the
0012 button.
X To show the menu: press0037the COMAND
controller.
X Select Traffic by turning
003C0012003Dthe
COMAND controller and press 0037to
confirm.
X Select Read out all messages on route and press
0037to confirm.
COMAND reads out the reports in
sequence.
i If there are no reports for the route, the
Read out all messages on route menu
item is shown in gray and cannot be
selected.
X To switch off the read-aloud function:
select Cancel Read-Aloud Function and
press 0037to confirm or press the 001C
button.
COMAND reads out the current report and
then exits the read-aloud function.
Automatic read-aloud function X
To switch to navigation mode: press the
0012 button. 102
Traffic reportsNavigation
Page 106 of 274

X
Slide 00120036the COMAND controller
repeatedly until the destination memory
list appears as a selection list.
Option 2: destination memory list as
selection list The
My Address entry is listed as the first
entry in the destination memory.
X Select My Address by turning
003C0012003Dthe
COMAND controlle rand press 0037to
confirm.
i If you have not yet entered any
characters, My Address is automatically
highlighted in the selection list.
If no home address has been stored yet, you
can now assign an address book entry. If a
home address already exists, it is displayed
and you can alter it.
i If you select New Entry , you are also
offered the optio nofentering the home
address for the first time. You can then
save the home address withou thaving to
start route guidance. X
To enter th ehome address for th efirst
time: select Assign to Address Book Entry and press
0037to confirm.
X Select Home ,
Work or
Not Classified and
press 0037to confirm.
X To change the home address: select
Change and press
0037to confirm.
X Select Assign to Address Book Entry and press
0037to confirm.
i If you select New Entry , you are also
offered the optio nofchanging the home
address by entering an address. You can
then save the home address without having
to start route guidance.
X Select Home ,
Work or
Not Classified and
press 0037to confirm.
In both cases, you will see the address book
either with the character bar or as a
selection list.
X Select an address book entry
(Y page 150).
X To confirm the selection: press0037the
COMAND controller.
If there is no existing home address,
COMAND saves the entry. You will see a
message and then the address menu with
the selected address. Start is highlighted
automatically.
If a home address has already been stored,
you will see a prompt asking you whether
the My Address entry should be
overwritten.
X Select Yes or
No and press
0037to confirm.
If you select Yes , COMAND overwrites the
destination. You will see a message and
then the address menu with the selected
address. Start is highlighted
automatically.
If you select No , the list will appeara
gain.104
Destination memoryNavigation
Page 110 of 274
Deleting one of the previous
destinations
X To switch on navigation mode: press the
0012 function button.
X To show the menu: press0037the COMAND
controller.
X Select Destination in the navigation
system menu bar by turning 003C0012003Dthe
COMAN Dcontroller and press 0037to
confirm.
X Select From Last Destinations and
press 0037to confirm.
The list of last destinations appears.
X Select the desired destination and press
0037 to confirm.
The destination address appears.
X Select Delete and press
0037to confirm.
Ap rompt appears asking whethe rthe entry
should be deleted.
X Select Yes or
No and press
0037to confirm.
If you select Yes , the entry is deleted.
If you select No , the process will be
canceled. Map operation and map settings
General notes
Company logos displayed on the map are
trademarks of the respective companies and
used solely for the purpose of indicating the
locations of these companies. The use of such
logos on the map does not indicate approval
of, support of or advertising by these
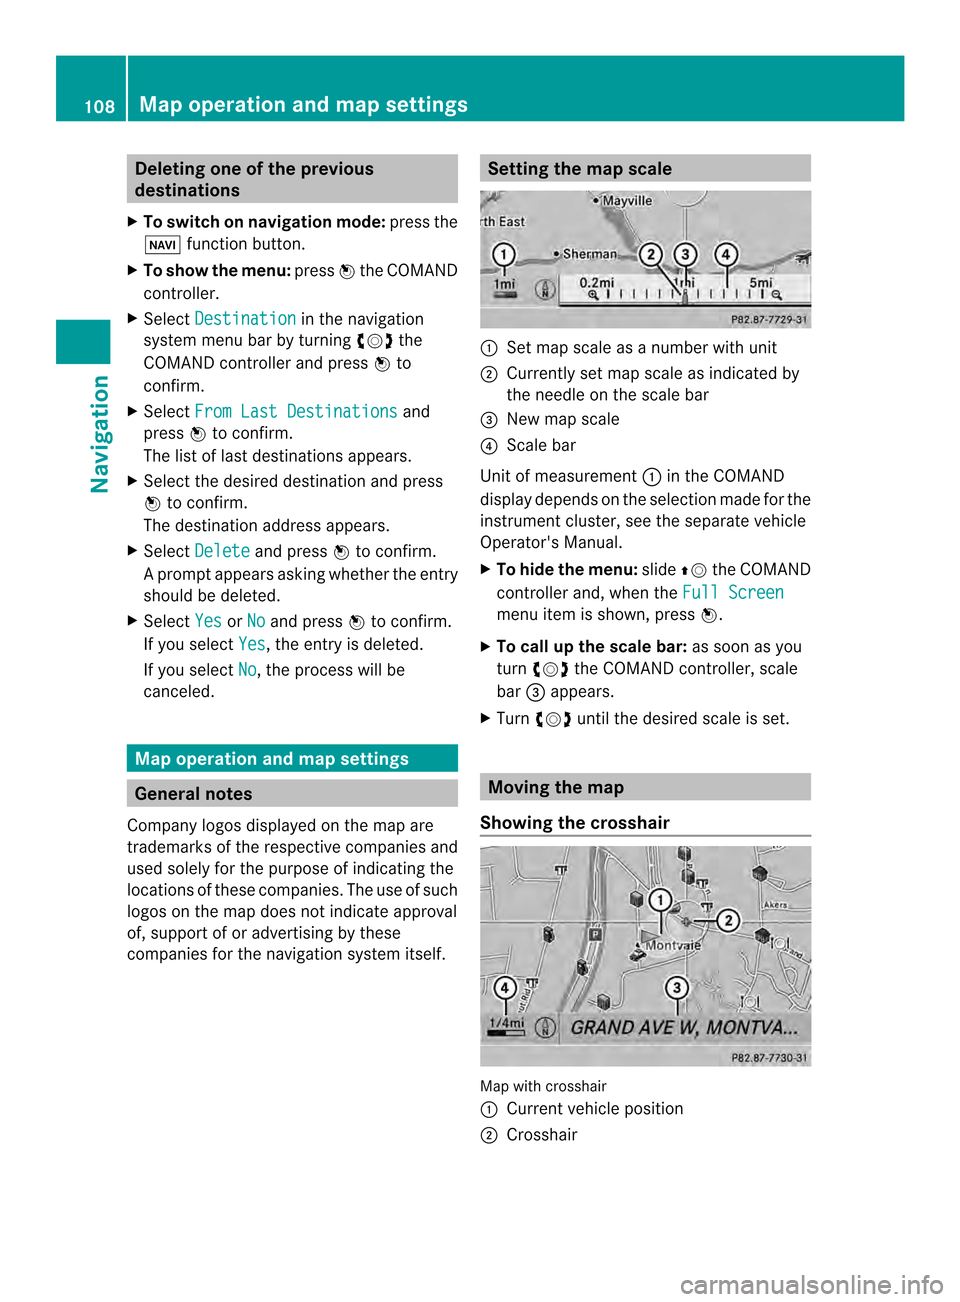
companies for the navigation system itself. Setting the map scale
0001
Set map scale as a number with unit
0002 Currently set map scale as indicated by
the needle on the scale bar
0014 New map scale
0013 Scale bar
Unit of measurement 0001in the COMAND
display depends on the selection made for the
instrumentc luster, see the separate vehicle
Operator's Manual.
X To hid ethe menu: slide00360012the COMAND
controlle rand, when the Full Screen menu ite
mis shown, press 0037.
X To call up the scale bar: as soon as you
turn 003C0012003D the COMAND controller, scale
bar 0014appears.
X Turn 003C0012003D until the desired scale is set. Moving the map
Showing the crosshair Map with crosshair
0001
Current vehicle position
0002 Crosshair 108
Map operation and map settingsNavigation
Page 111 of 274
0014
Details of the crosshair position
0013 Map scale selected
X To hid ethe menu: slide00360012the COMAND
controlle rand, when the Full Screen menu ite
mis shown, press 0037.
X To scroll the weather map: slide003400120035,
003600120008 or00320012003B the COMAND controller.
Ac rosshair appears on the map. If you slide
it again, the map under the crosshair moves
in the corresponding direction.
Display 0014may be the name of a street, for
example, provided the digital map contains
the necessary data .Itshows the geo-
coordinate position of the crosshair if the
Geo-coordinates display is switched on
(Y page 111).
Hiding the crosshair and centering the
map on the vehicle position or
destination X
Press the 001Eback button twice.
The crosshair disappears and the map is
set to the vehicle position.
Centering the map on the vehicle's
position X
To show the menu: press0037the COMAND
controller.
X Select Position in the navigation system
menu bar by sliding 00120008and turning 003C0012003D
the COMAND controller and press 0037to
confirm.
X Select Vehicle Position Map and press
0037 to confirm or, if the crosshair is shown,
press the 001Eback button.
This hides the crosshair.
Centering the map on the destination
position This function requires a calculated route to a
destination. If the route includes waypoints and an intermediate stop, the map can also
be set to these positions.
X
To show the menu: press0037the COMAND
controller.
X Select Position in the navigation system
menu bar by sliding 00120008and turning 003C0012003D
the COMAND controller and press 0037to
confirm.
X Select Destination Map and press
0037to
confirm.
The crosshair position is set to the relevant
destination. Map settings
Calling up the map settings menu X
To show the menu: press0037the COMAND
controller.
X Select Navi in the main function bar by
sliding 00360012and turning 003C0012003Dthe COMAND
controller and press 0037to confirm.
X Select Map Settings and press
0037to
confirm.
The map settings menu appears.
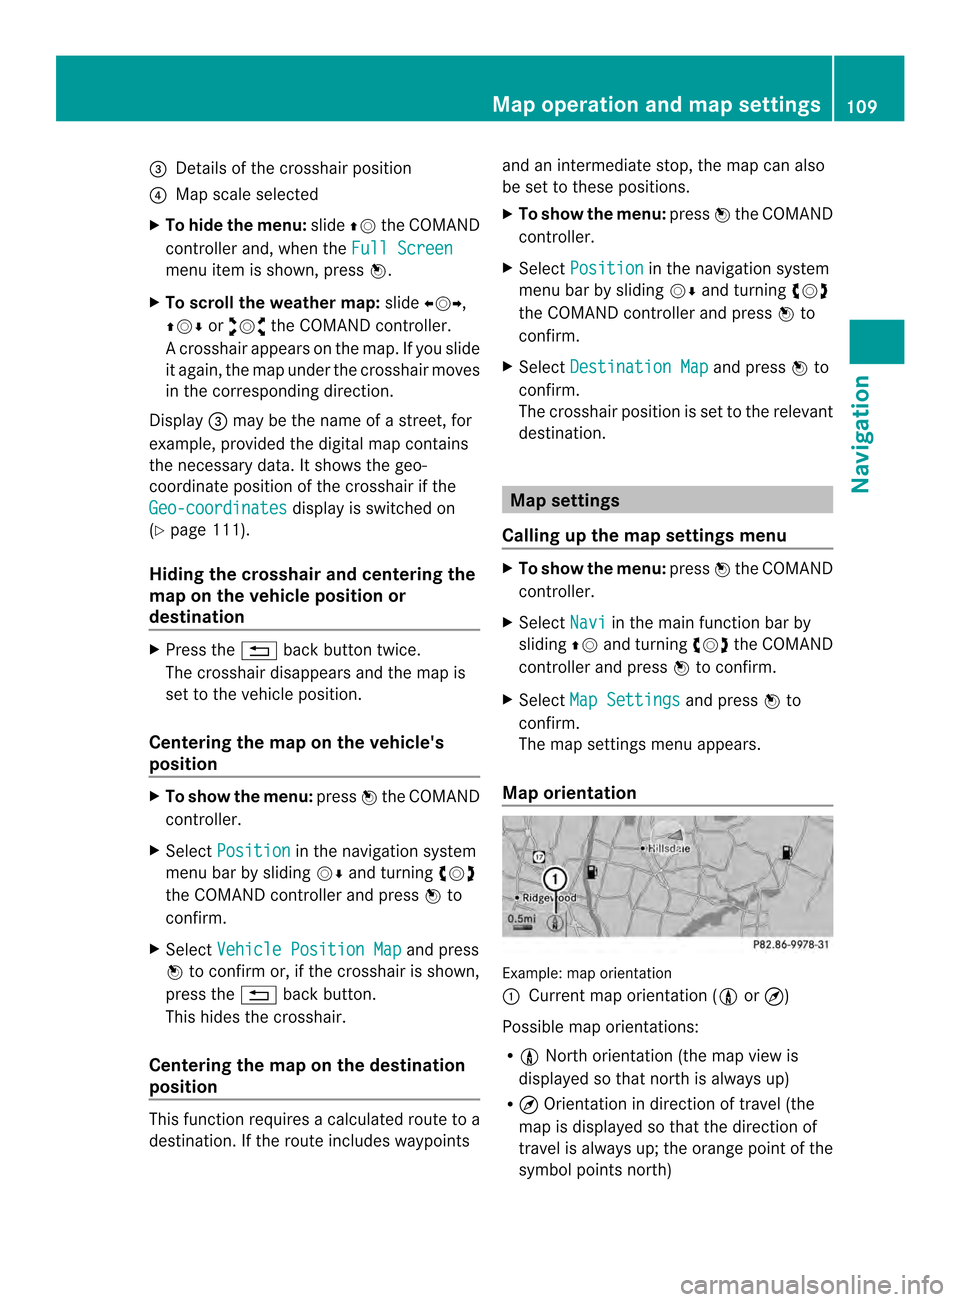
Map orientation Example: map orientation
0001
Current map orientation (001A or¤)
Possible map orientations:
R 001A North orientation (the map view is
displayed so that north is always up)
R ¤ Orientation in direction of travel (the
map is displayed so that the direction of
travel is always up; the orange point of the
symbol points north) Map operation and map settings
109Navigation Z