display MERCEDES-BENZ G-Class 2014 W463 Comand Manual
[x] Cancel search | Manufacturer: MERCEDES-BENZ, Model Year: 2014, Model line: G-Class, Model: MERCEDES-BENZ G-Class 2014 W463Pages: 274, PDF Size: 5.76 MB
Page 73 of 274
X
Select My Address by turning
003C0012003Dthe
COMAND controller.
X Irrespective of the option, press 0037to
confirm your selection.
The address entry menu appears again.
"My Address" has been entered.
X To start route calculation: selectStart and press
0037to confirm. Entering
adestination from the list of
last destinations
X To switch to navigation mode: press the
0012 button.
X To show the menu: press0037the COMAND
controller.
X Select Destination in the navigation
system menu bar by turning 003C0012003Dthe
COMAND controller and pressing 0037to
confirm. X
Select From Last Destinations and
press 0037to confirm.
X Select the desired destination by turning
003C0012003D the COMAND controller and press
0037 to confirm.
The address entry menu appears again .The
destination address selected has been
entered.
X To start route calculation: selectStart and press
0037to confirm.
Once the route has been calculated, route
guidance begins (Y page 69). i
“Last destinations” memory
(Y page 107). Entering
adestination usin gthe map
Calling up the map X
To switch to navigation mode: press the
0012 button.
X To show the menu: press0037the COMAND
controller.
X Select Destination in the navigation
system menu bar by turning 003C0012003Dthe
COMAND controlle rand pressing 0037to
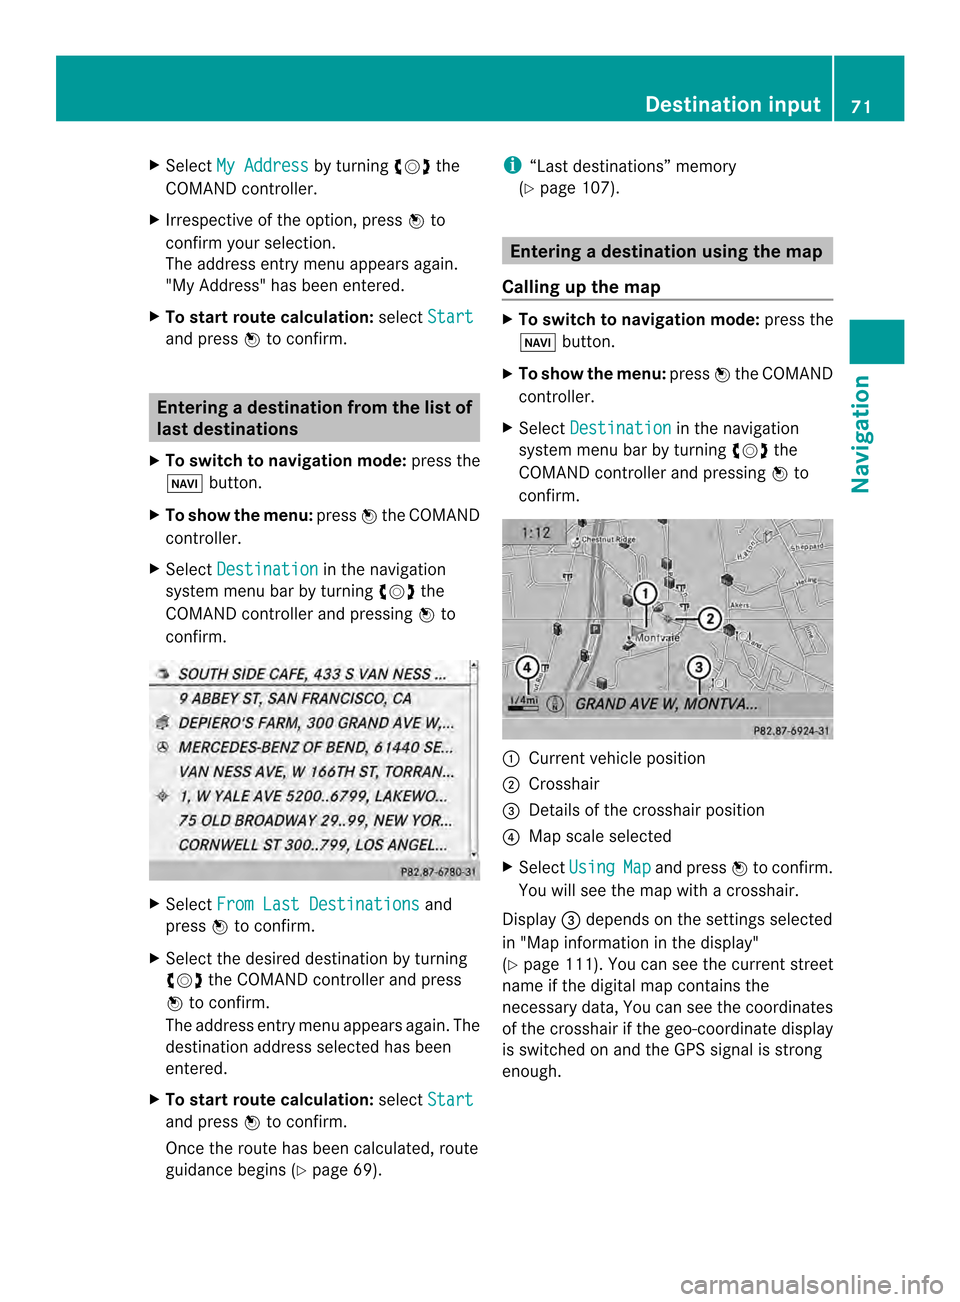
confirm. 0001
Current vehicle position
0002 Crosshair
0014 Details of the crosshair position
0013 Map scale selected
X Select Using Map and press
0037to confirm.
You will see the map with acrosshair.
Display 0014depends on the settings selected
in "Map information in the display"
(Y page1 11). You can see the current street
name if the digital map contains the
necessary data, You can see the coordinates
of the crosshair if the geo-coordinate display
is switched on and the GPS signal is strong
enough. Destination input
71Navigation Z
Page 75 of 274
is in a body of water. Please
select another destination.
Entering
adestination using
Mercedes-Benz Apps
X To switch to navigation mode: press the
0012 button.
X To show the menu: press0037the COMAND
controller.
X Select Destination in the navigation
system menu bar by turning 003C0012003Dthe
COMAND controller and pressing 0037to
confirm.
X Select Mercedes-Benz Apps and press
0037 to confirm.
If an Internet connectio nis established, you
will see the message Do you want to accept the navigation data sent
via Mercedes-Benz Apps?
Street View
X
To switch to navigation mode: press the
0012 button.
X To show the menu: press0037the COMAND
controller.
X Select Destination in the lower menu bar
by turning 003C0012003Dthe COMAND controller
and press 0037to confirm.
X Select Address Entry and press
0037to
confirm. X
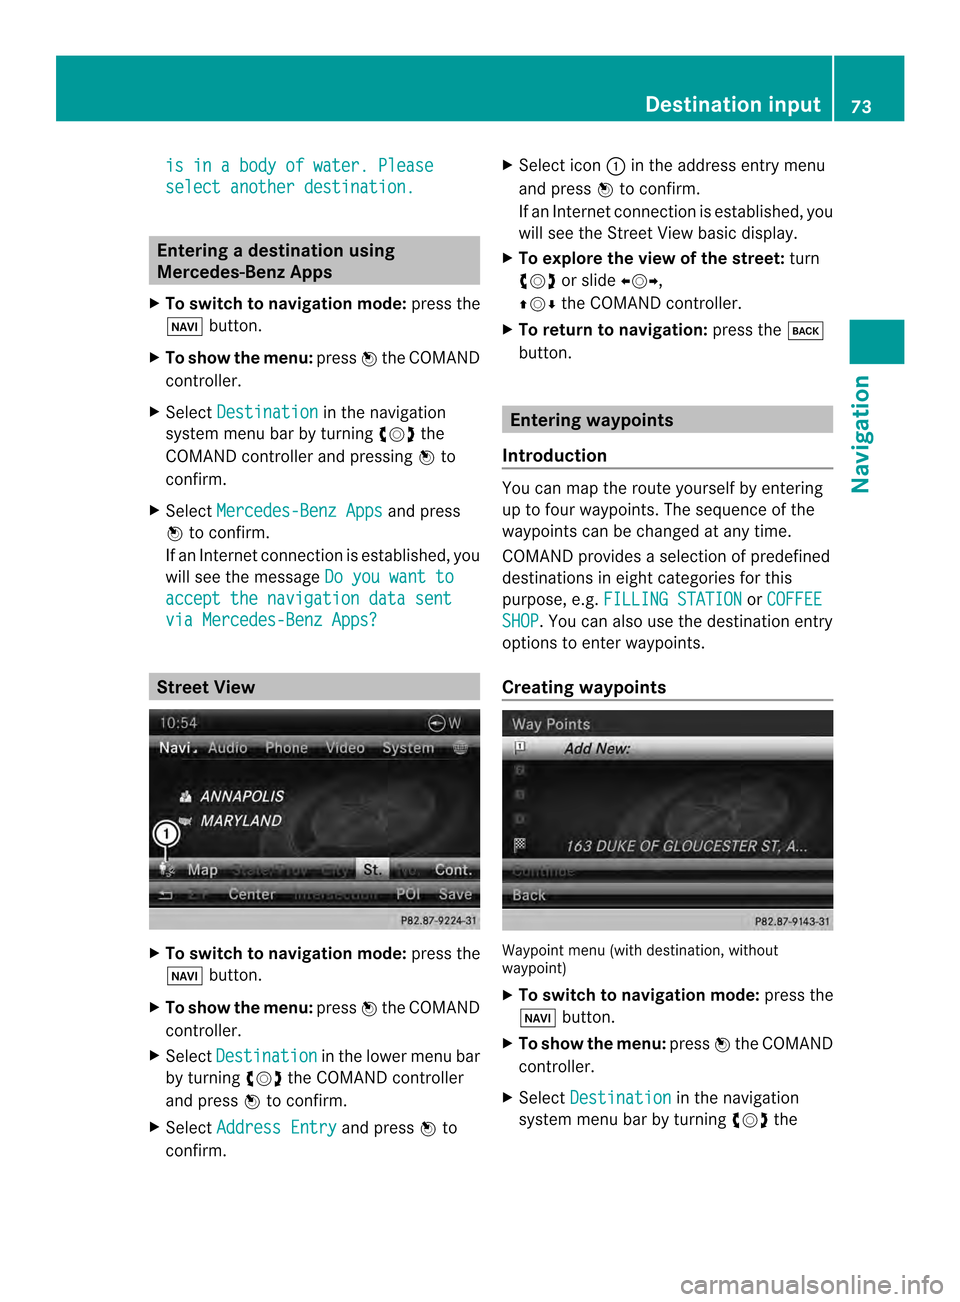
Select icon 0001in the address entry menu
and press 0037to confirm.
If an Internet connection is established, you
will see the Street View basic display.
X To explore the view of the street: turn
003C0012003D or slide 003400120035,
003600120008 the COMAND controller.
X To return to navigation: press the000A
button. Entering waypoints
Introduction You can map the route yourselfb
y entering
up to four waypoints. The sequence of the
waypoints can be changed at any time.
COMAND provides a selection of predefined
destinations in eigh tcategories for this
purpose, e.g. FILLING STATION or
COFFEE SHOP .Y
ou can also use the destination entry
options to enter waypoints.
Creating waypoints Waypoint menu (with destination, without
waypoint)
X
To switch to navigation mode: press the
0012 button.
X To show the menu: press0037the COMAND
controller.
X Select Destination in the navigation
system menu bar by turning 003C0012003Dthe Destination input
73Navigation Z
Page 76 of 274
COMAND controller and pressing
0037to
confirm.
X Select Waypoints and press
0037to confirm.
The destination is entered into the
waypoints menu. The waypoints are no tyet
entered.
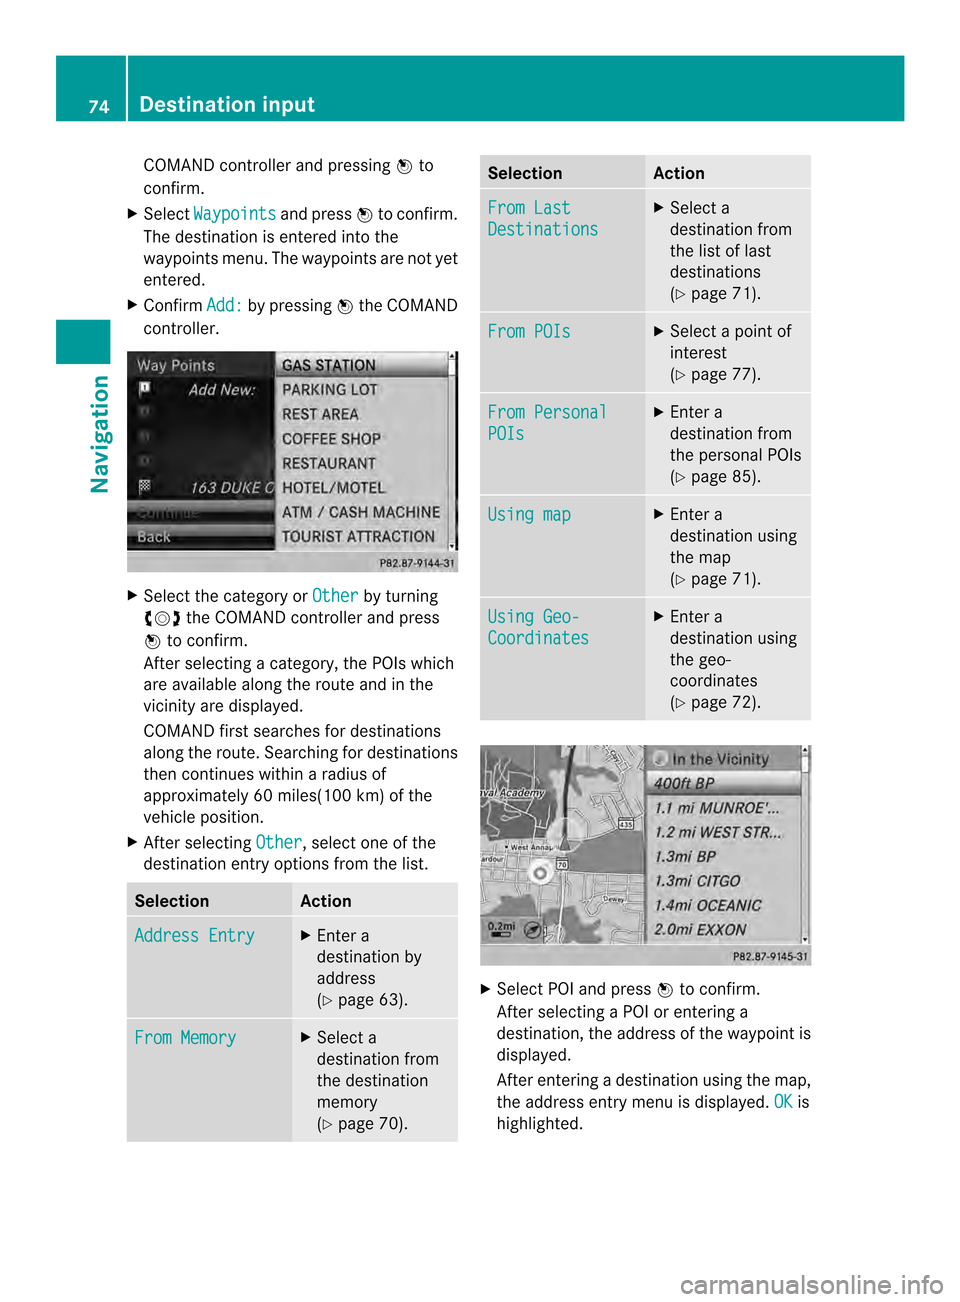
X Confirm Add: by pressing
0037the COMAND
controller. X
Select the category or Other by turning
003C0012003D the COMAND controller and press
0037 to confirm.
After selecting a category, the POIs which
are available along the route and in the
vicinity are displayed.
COMAND first searches for destinations
along the route. Searching for destinations
then continues within a radius of
approximately 60 miles(100 km) of the
vehicle position.
X After selecting Other , select one of the
destination entry options from the list. Selection Action
Address Entry X
Enter a
destination by
address
(Y page 63). From Memory X
Select a
destination from
the destination
memory
(Y page 70). Selection Action
From Last
Destinations X
Select a
destination from
the list of last
destinations
(Y page 71). From POIs X
Select a point of
interest
(Y page 77). From Personal
POIs X
Enter a
destination from
the personal POIs
(Y page 85). Using map X
Enter a
destination using
the map
(Y page 71). Using Geo-
Coordinates X
Enter a
destination using
the geo-
coordinates
(Y page 72). X
Select POI and press 0037to confirm.
After selecting a POI or entering a
destination, the address of the waypoint is
displayed.
After entering a destination using the map,
the address entry menu is displayed. OK is
highlighted. 74
Destination inputNavigation
Page 77 of 274
X
To accept the waypoint: confirmOK by
pressing 0037.
Once you have accepted the waypoint, it is
entered in the waypoint menu.
X To display the details: selectDetails by
turning 003C0012003Dthe COMAND controller and
press 0037to confirm.
X To make a call: selectCall with the
COMAND controller and press 0037to
confirm. COMAND switches to telephone
mode (Y page 134).
i This menu ite mis available if the waypoint
has a telephone number and if a mobile
phone is connected to COMAND
(Y page 128).
X To call up the map: selectMap with the
COMAND controller and press 0037to
confirm.
X You can move the map and select the
destination.
X To store the waypoint in the destination
memory: selectPresets with the
COMAND controller and press 0037to
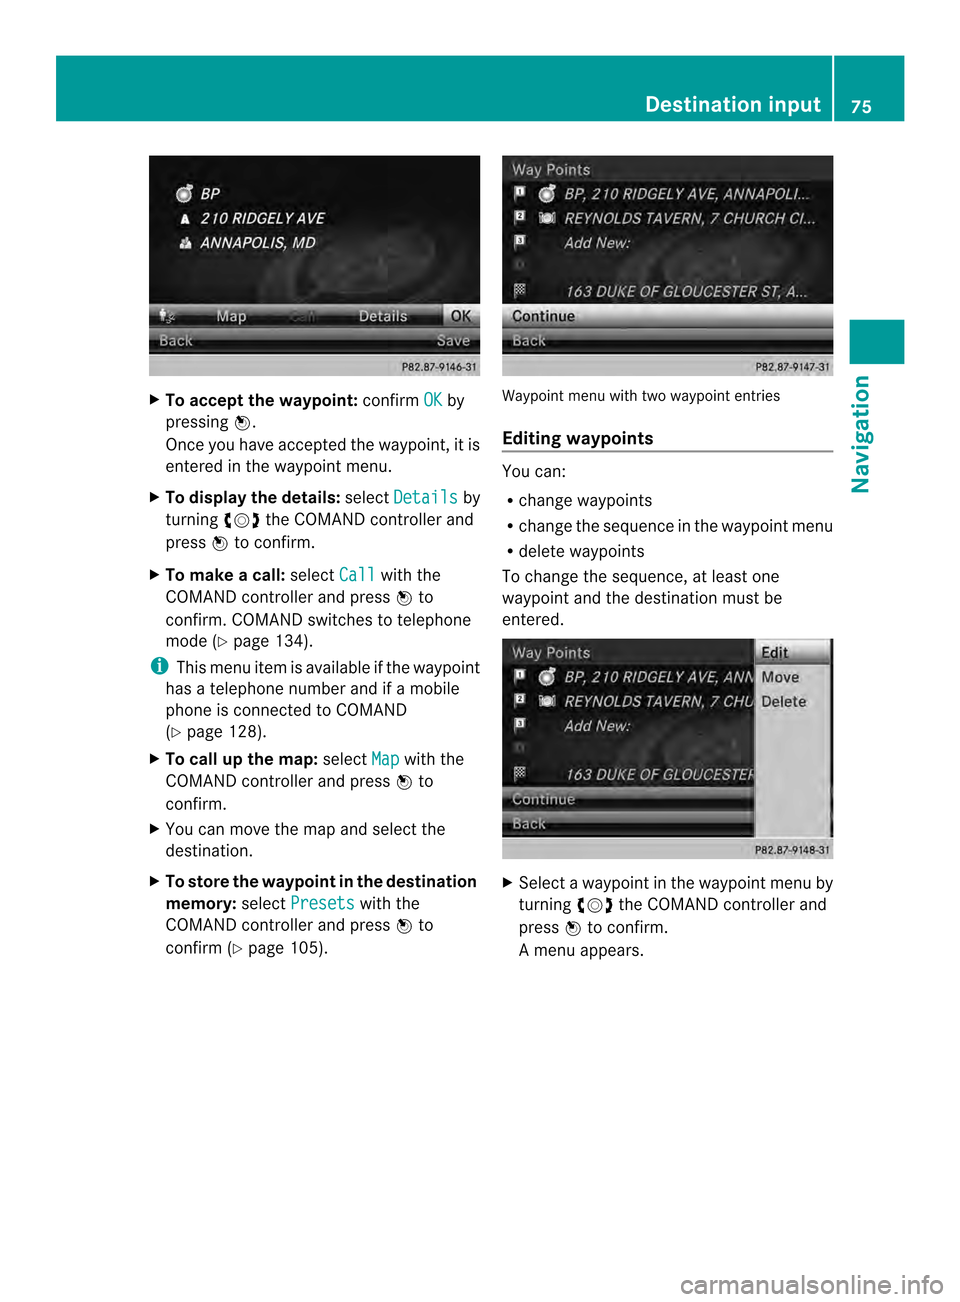
confirm (Y page 105). Waypoint menu with two waypoint entries
Editing waypoints
You can:
R
change waypoints
R change the sequence in the waypoint menu
R delete waypoints
To change the sequence, at least one
waypoint and the destination must be
entered. X
Select a waypoint in the waypoint menu by
turning 003C0012003Dthe COMAND controller and
press 0037to confirm.
Am enu appears. Destination input
75Navigation Z
Page 78 of 274
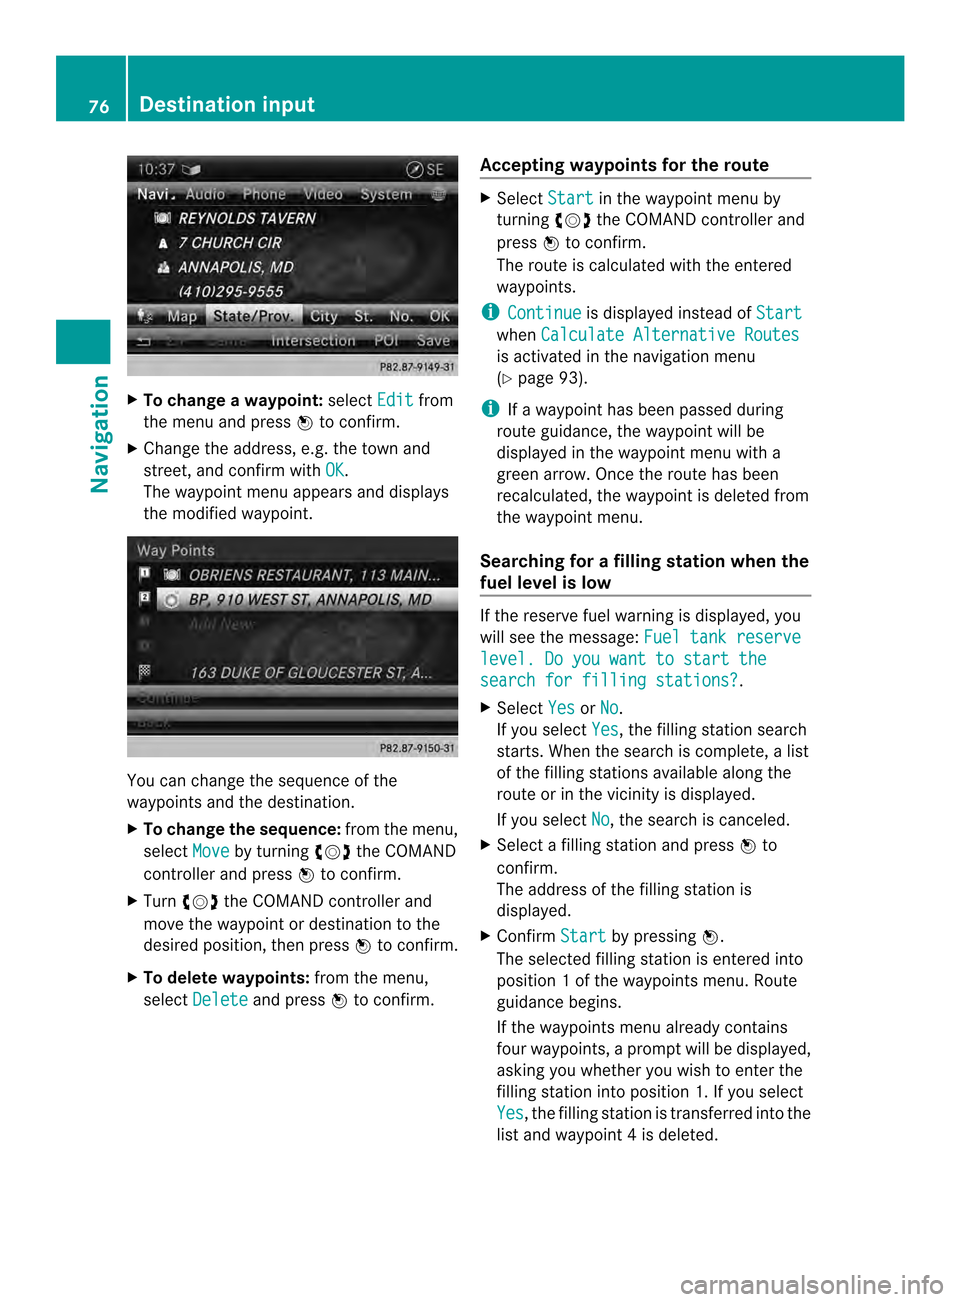
X
To change a waypoint: selectEdit from
the menu and press 0037to confirm.
X Change the address, e.g .the town and
street, and confirm with OK .
The waypoint menu appears and displays
the modified waypoint. You can change the sequence of the
waypoints and the destination.
X
To change the sequence: from the menu,
select Move by turning
003C0012003Dthe COMAND
controller and press 0037to confirm.
X Turn 003C0012003D the COMAND controller and
move the waypoint or destination to the
desired position, then press 0037to confirm.
X To delete waypoints: from the menu,
select Delete and press
0037to confirm. Accepting waypoints for the route X
Select Start in the waypoint menu by
turning 003C0012003Dthe COMAND controller and
press 0037to confirm.
The route is calculated with the entered
waypoints.
i Continue is displayed instead of
Start when
Calculate Alternative Routes is activated in the navigation menu
(Y
page 93).
i If a waypoint has been passed during
route guidance, the waypoint will be
displayed in the waypoint menu with a
green arrow. Once the route has been
recalculated, the waypoint is deleted from
the waypoint menu.
Searching for afilling station when the
fuel level is low If the reserve fuel warning is displayed, you
will see the message:
Fuel tank reserve level. Do you want to start the
search for filling stations? .
X Select Yes or
No .
If you select Yes , the filling station search
starts. When the search is complete, a list
of the filling stations available along the
route or in the vicinity is displayed.
If you select No , the search is canceled.
X Selec tafilling station and press 0037to
confirm.
The address of the filling station is
displayed.
X Confirm Start by pressing
0037.
The selected filling station is entered into
position 1ofthe waypoints menu. Route
guidance begins.
If the waypoints menu already contains
four waypoints, a prompt will be displayed,
asking you whether you wish to enter the
filling station into position 1. If you select
Yes , the filling station is transferred into the
list and waypoint 4is deleted. 76
Destination inputNavigation
Page 81 of 274
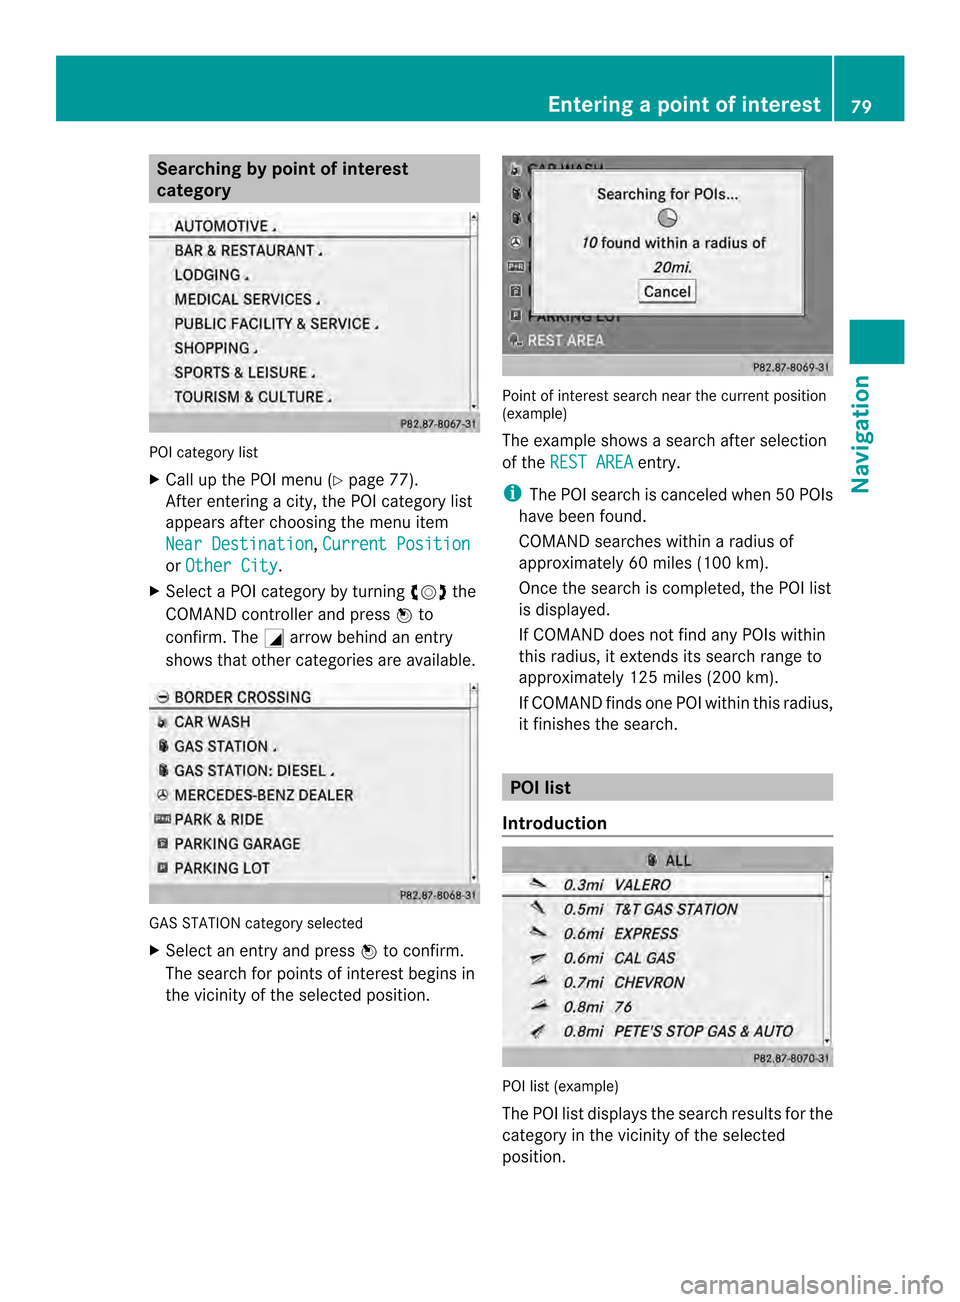
Searching by point of interest
category
POI category list
X
Call up the POI menu (Y page 77).
After entering a city, the POI category list
appears after choosing the menu item
Near Destination ,
Current Position or
Other City .
X Select a POI category by turning 003C0012003Dthe
COMAND controller and press 0037to
confirm. The 0002arrow behind an entry
shows that other categories are available. GAS STATION category selected
X
Select an entry and press 0037to confirm.
The search for points of interest begins in
the vicinity of the selected position. Point of interest search near the current position
(example)
The example shows a search after selection
of the
REST AREA entry.
i The POI search is canceled when 50 POIs
have been found.
COMAND searches within a radius of
approximately 60 miles (100 km).
Once the search is completed, the POI list
is displayed.
If COMAND does not find any POIs within
this radius, it extends its search range to
approximately 125 miles (200 km).
If COMAND finds one POI within this radius,
it finishes the search. POI list
Introduction POI list (example)
The POI list displays the search results for the
category in the vicinity of the selected
position. Entering
apoint of interest
79Navigation Z
Page 82 of 274
The search results display the following
information:
R
an arrow that shows the linear direction to
the point of interest
R the linear distance to the point of interest
R the name of the point of interest
i The arrow and linear distance to the
destination are not visible if you have
entered a POI after entering another city.
The arrow is also not shown when
searching for a POI in the vicinity of the
destination.
Depending on the POI selected, COMAND
uses different reference points in
determining the linear distance to the
destination:
R vicinity of current position: the linear
distance is the distance of the point of
interest from the current vehicle
position.
R vicinity of destination: the linear distance
is the distance from the destination
entered to the point of interest.
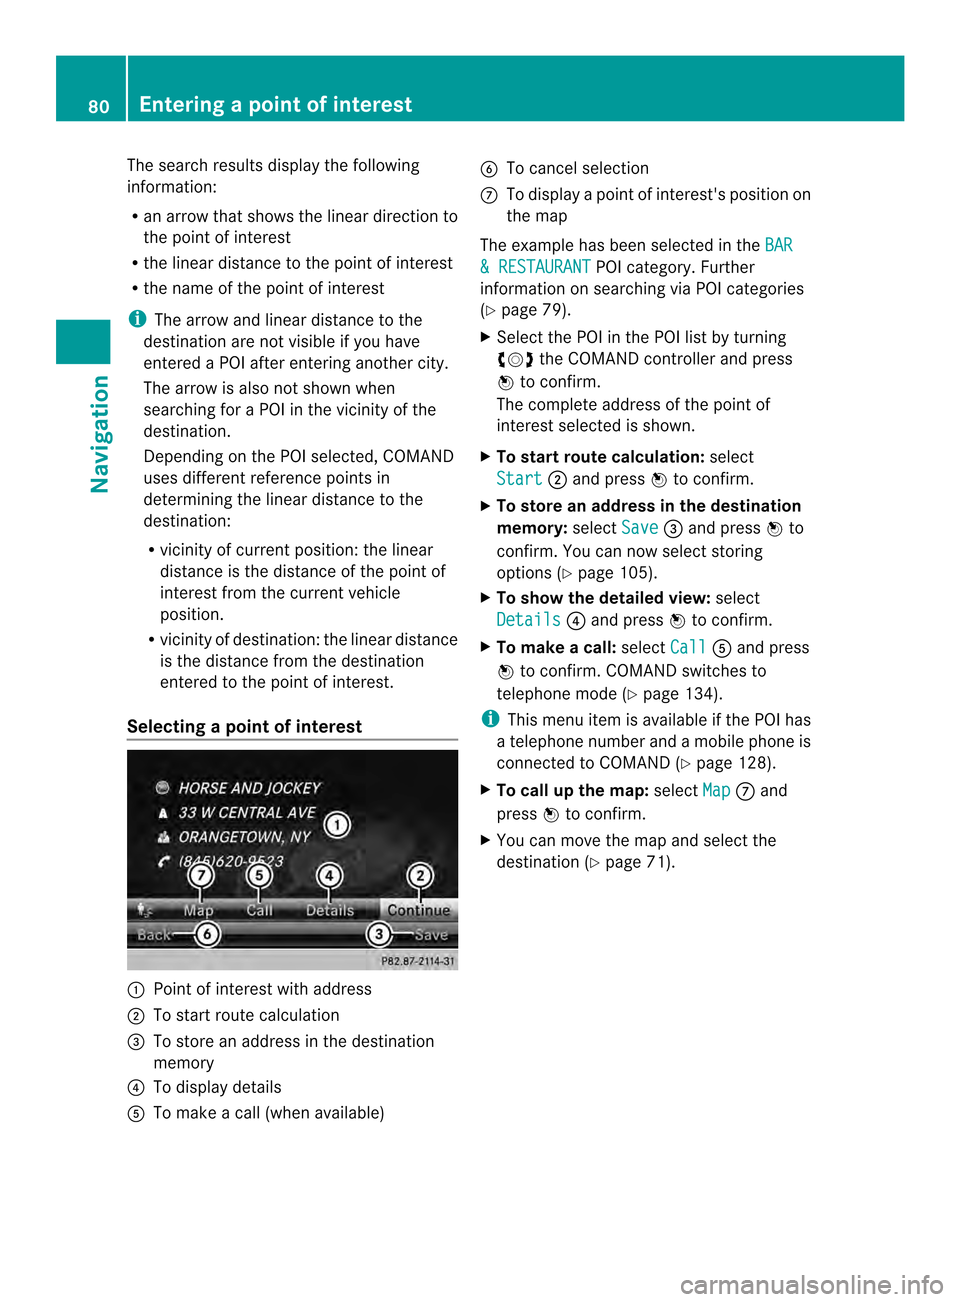
Selecting apoint of interest 0001
Poin tofi nterest with address
0002 To start route calculation
0014 To store an address in the destination
memory
0013 To display details
0011 To make a call (when available) 0012
To cancel selection
0005 To display a point of interest's positio non
the map
The example has been selected in the BAR & RESTAURANT POI category. Further
information on searching via PO Icategories
(Y page 79).
X Select the POI in the POI list by turning
003C0012003D the COMAND controller and press
0037 to confirm.
The complete address of the poin tof
interest selected is shown.
X To start route calculation: select
Start 0002
and press 0037to confirm.
X To store an address in the destination
memory: selectSave 0014
and press 0037to
confirm. You can now select storing
options (Y page 105).
X To show the detailed view: select
Details 0013
and press 0037to confirm.
X To make a call: selectCall 0011
and press
0037 to confirm. COMAND switches to
telephone mode (Y page 134).
i This menu item is available if the POI has
a telephone number and a mobile phone is
connected to COMAND (Y page 128).
X To call up the map: selectMap 0005
and
press 0037to confirm.
X You can move the map and selec tthe
destination (Y page 71).80
Entering
apoint of interestNavigation
Page 83 of 274
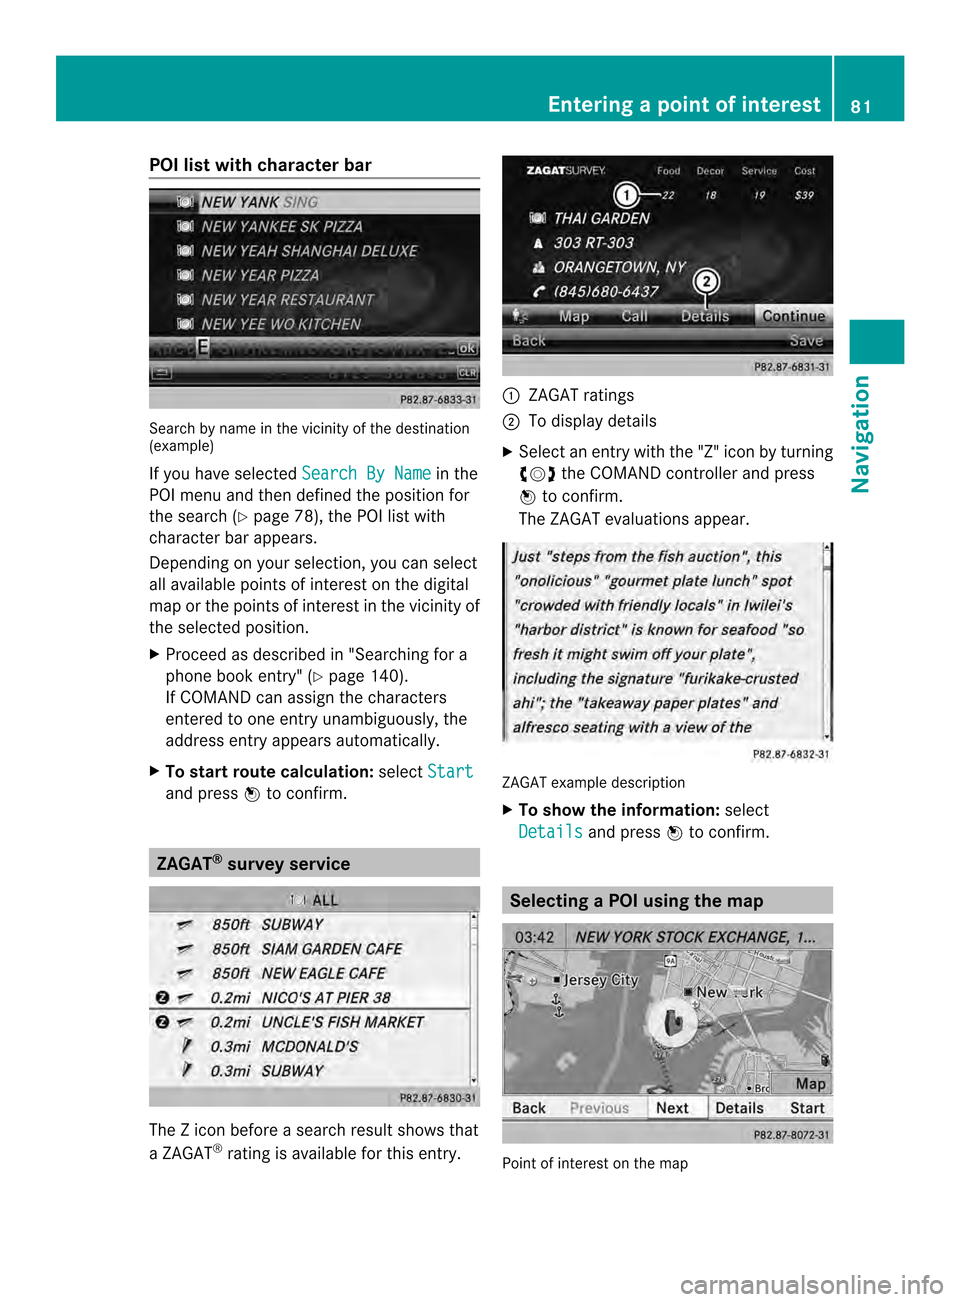
POI list with character bar
Search by name in the vicinity of the destination
(example)
If you have selected
Search By Name in the
POI menu and then defined the position for
the search (Y page 78), the POI list with
character bar appears.
Depending on your selection, you can select
all available points of interest on the digital
map or the points of interest in the vicinity of
the selected position.
X Proceed as described in "Searching for a
phone book entry" (Y page 140).
If COMAND can assign the characters
entered to one entry unambiguously, the
address entry appears automatically.
X To start route calculation: selectStart and press
0037to confirm. ZAGAT
®
survey service The Z icon before a search result shows that
a ZAGAT ®
rating is available for this entry. 0001
ZAGAT ratings
0002 To display details
X Select an entry with the "Z" icon by turning
003C0012003D the COMAND controller and press
0037 to confirm.
The ZAGAT evaluations appear. ZAGAT example description
X
To show the information: select
Details and press
0037to confirm. Selecting
aPOI using the map Point of interest on the map Entering
apoint of interest
81Navigation Z
Page 84 of 274
You can select points of interest that are
available in the selected (visible) section of
the map. The POI is highlighted on the map,
you will see further information on the upper
edge of the display.
X To switch on navigation mode: press the
0012 function button.
X To show the menu: press0037the COMAND
controller.
X Select Guide in the navigation system
menu bar by turning 003C0012003Dthe COMAND
controller and press 0037to confirm.
If points of interest are available:
Depending on the map scale selected,
point of interest icons appear on the map.
The scale at which the icons are displayed
on the map varies according to the icon.
You can selec tthe icons that you want
COMAND to display.
If no points of interest are available, you will
see a message to this effect.
i You also see this message if you have
selected the No Symbols menu item under
"Map display" (Y page 110).
X To confirm the message: press0037the
COMAND controller.
X To selectaP OI:select Next or
Previous and press
0037to confirm.
X To show details for the selection: select
Details and press
0037to confirm.
X To change to the map: slide00360012the
COMAND controller.
You can move the map and select the map
section.
X To start route calculation: selectStart and press
0037to confirm.
Ap rompt appears asking whethe rthe point
of interest should be used as the
destination.
X Select Yes or
No and press
0037to confirm.
i Cont. is displayed instead of
Start when
Calculate Alternative Routes isactivated in the navigation menu
(Y
page 93). Personal points of interest
General notes
i The use of personal POIs for displaying
traffic surveillance equipment is not
permitted in every country. Please observe
the country-specific regulations and adapt
your speed accordingly when driving. Settings
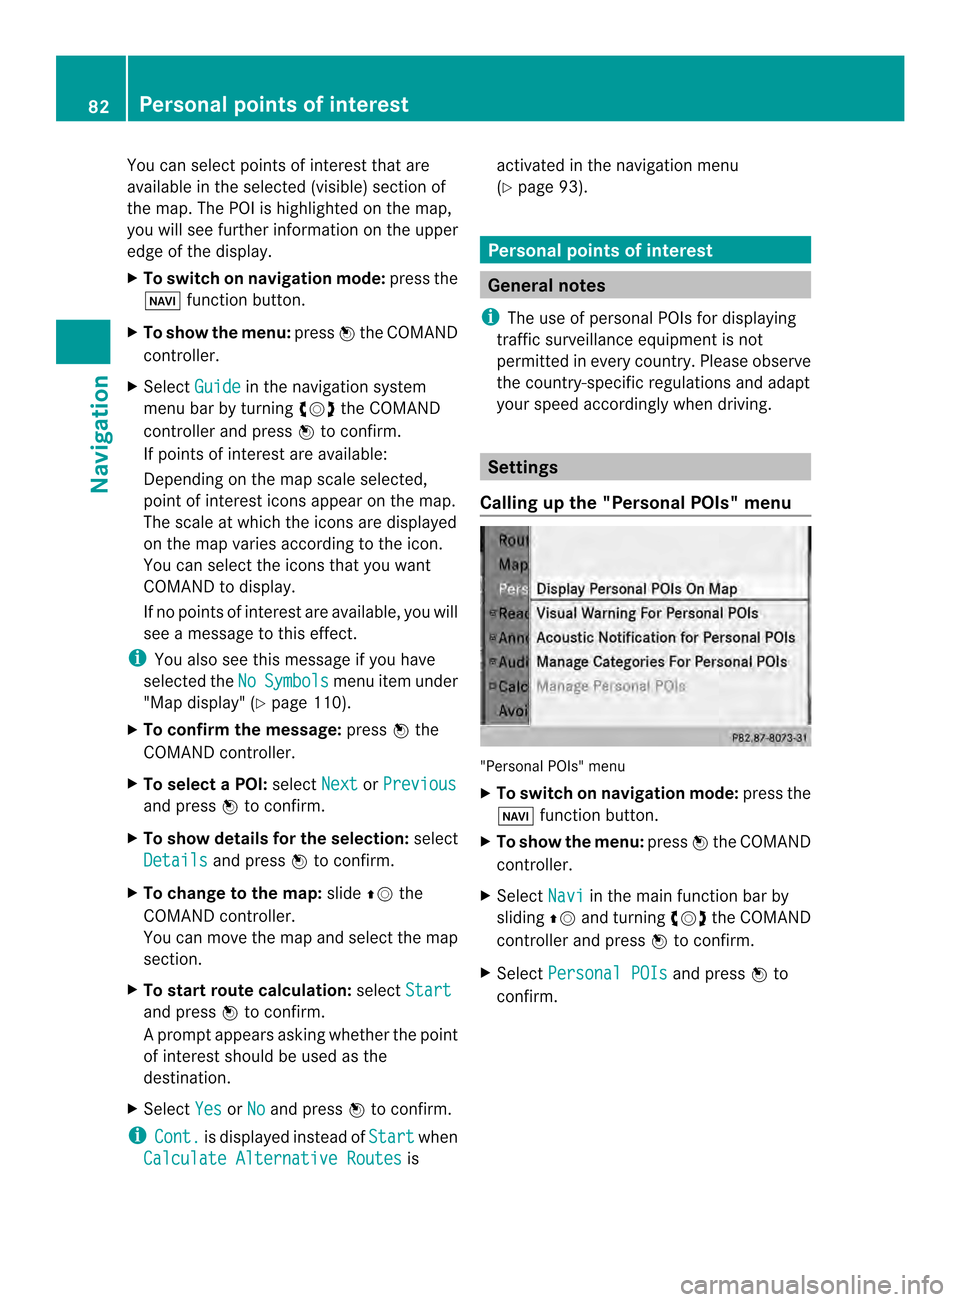
Calling up the "Personal POIs" menu "Personal POIs" menu
X
To switch on navigation mode: press the
0012 function button.
X To show the menu: press0037the COMAND
controller.
X Select Navi in the main function bar by
sliding 00360012and turning 003C0012003Dthe COMAND
controller and press 0037to confirm.
X Select Personal POIs and press
0037to
confirm. 82
Personal points of interestNavigation
Page 85 of 274
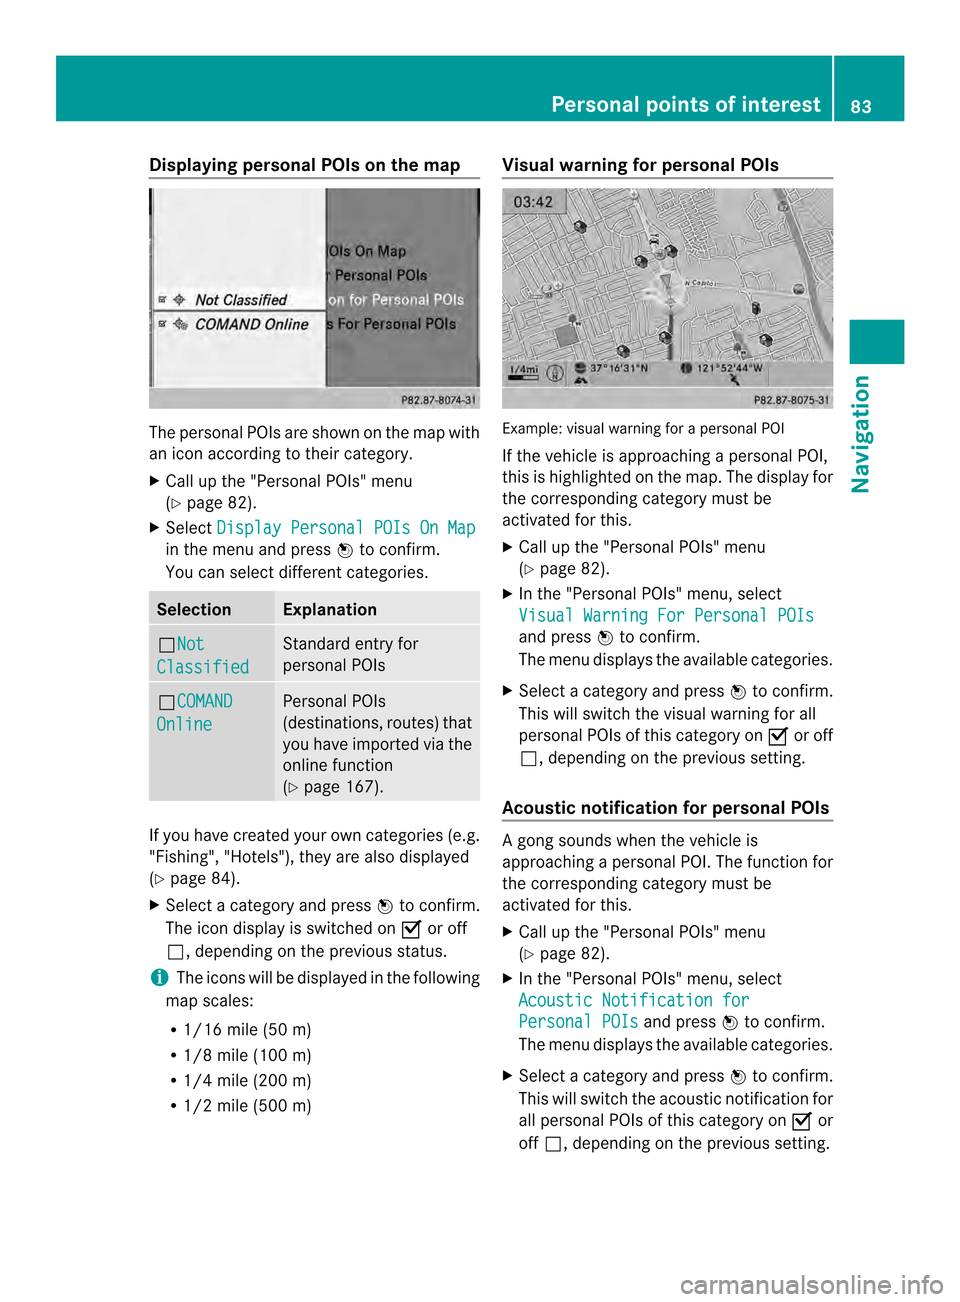
Displaying personal POIs on the map
The personal POIs are shown on the map with
an icon according to their category.
X
Call up the "Personal POIs" menu
(Y page 82).
X Select Display Personal POIs On Map in the menu and press
0037to confirm.
You can selec tdifferen tcategories. Selection Explanation
0003Not
Classified Standard entry for
personal POIs
0003COMAND
Online Personal POIs
(destinations, routes) that
you have imported via the
online function
(Y
page 167). If you have created your own categories (e.g.
"Fishing", "Hotels"), they are also displayed
(Y page 84).
X Select a category and press 0037to confirm.
The ico ndisplay is switched on 0010or off
0003, depending on the previous status.
i The icons will be displayed in the following
map scales:
R 1/16 mile (50 m)
R 1/8 mile (100 m)
R 1/4 mile (200 m)
R 1/2 mile (500 m) Visual warning for personal POIs
Example: visual warning for a personal POI
If the vehicle is approaching a personal POI,
this is highlighted on the map. The display for
the corresponding category must be
activated for this.
X
Call up the "Personal POIs" menu
(Y page 82).
X In the "Personal POIs" menu, select
Visual Warning For Personal POIs and press
0037to confirm.
The menu displays the available categories.
X Selec tacategory and press 0037to confirm.
This will switch the visual warning for all
personal POIs of this category on 0010or off
0003, depending on the previous setting.
Acoustic notification for personal POIs Ag
ong sounds when the vehicle is
approaching a personal POI. The function for
the corresponding category must be
activated for this.
X Call up the "Personal POIs" menu
(Y page 82).
X In the "Personal POIs" menu, select
Acoustic Notification for Personal POIs and press
0037to confirm.
The menu displays the available categories.
X Select a category and press 0037to confirm.
This will switch the acoustic notification for
all personal POIs of this category on 0010or
off 0003, depending on the previous setting. Personal points of interest
83Navigation Z