MERCEDES-BENZ G-Class 2016 W463 Owner's Manual
Manufacturer: MERCEDES-BENZ, Model Year: 2016, Model line: G-Class, Model: MERCEDES-BENZ G-Class 2016 W463Pages: 302, PDF Size: 7.04 MB
Page 261 of 302
In the event of damage to the front axle
Haveth epropelle rshaf tbetween th erear axl e
and th etransfer cas eremoved.
Hav eth evehicl etowed wit hth efron taxl e
raised.
In the event of damage to the rear axle
Hav eth epropelle rshaf tbetween th efron taxl e
and th etransfer cas eremoved.
Hav eth evehicl etowed wit hth erear axl eraised
and wit hwhee lroller sunder th efron taxle.
Tow-starting (emergency engine
starting)
!
Vehicles wit hautomatic transmission must
no tbe tow-started. You could otherwise dam-
age th eautomatic transmission .
You can fin dinformation on "Jump-starting "
under (
Ypage 254).
Fuses
Important safety notes
GWARNIN G
If you manipulat eor bridge afault yfus eor if
you replace it wit h afusewit h a higher amper-
age, th eelectric cables could be overloaded.
This could result in afire. Ther eis aris kof an
acciden tand injury.
Always replace fault yfuses wit hth especifie d
ne wfuses having th ecorrec tamperage .
!Only use fuses that hav ebeen approve dfor
Mercedes-Ben zvehicles and whic hhave th e
correc tfus erating for th esystem concerned.
Otherwise, component sor systems could be
damaged.
The fuses in your vehicl eserve to close down
fault ycircuits. If afus eblows ,all th ecompo -
nent son th ecircuit and their function sstop
operating .
Blown fuses must be replace dwit hfuses of th e
sam erating ,whic hyou can recognize by th e
color and value .The fus erating sare listed in th e
fus eallocation chart .
iIfafus ehas blown ,contact abreakdown
servic eor an authorize dMercedes-Ben zCen -
ter.
If anewly inserted fus ealso blows ,hav eth e
caus etrace dand rectifie dat aqualified special-
ist workshop, e.g. an authorize dMercedes-Ben z
Center.
Before changing a fuse
XPark th evehicl eand apply th eparking brake.
XSwitc hoff all electrical consumers.
XRemove th eSmartKey from th eignition lock.
All indicator lamp sin th einstrumen tcluste r
must be off .
The fuses are locate din various fus eboxes:
RMain fus ebox on th edriver' sside of th edash -
boar d
RFusebox in th efront-passenger footwell
RFus ebox in th etransmission tunne l
RFusebox in th ebattery cas e
RFusebox in th ecargo compartmen t
The fus eallocation chart and th espar efuses are
in th emain fus ebox on th edashboar d
(
Ypage 259).
You will fin dth efus eremoval device in th evehi-
cle tool kit (
Ypage 248).
Dashboard fuse box
!
Do no tuse apointe dobjec tsuc has ascrew-
driver to open th ecover in th edashboard. You
could damag eth edashboar dor th ecover .
!Makesur ethat no moisture can ente rth e
fus ebox when th ecover is open .
!When closingth ecover ,mak esur ethat it is
lyin gcorrectl yon th efus ebox .Moistur eseep -
ing in or dirt could otherwise impair th eoper -
ation of th efuses.
Fuses259
Breakdown assistance
Z
Page 262 of 302
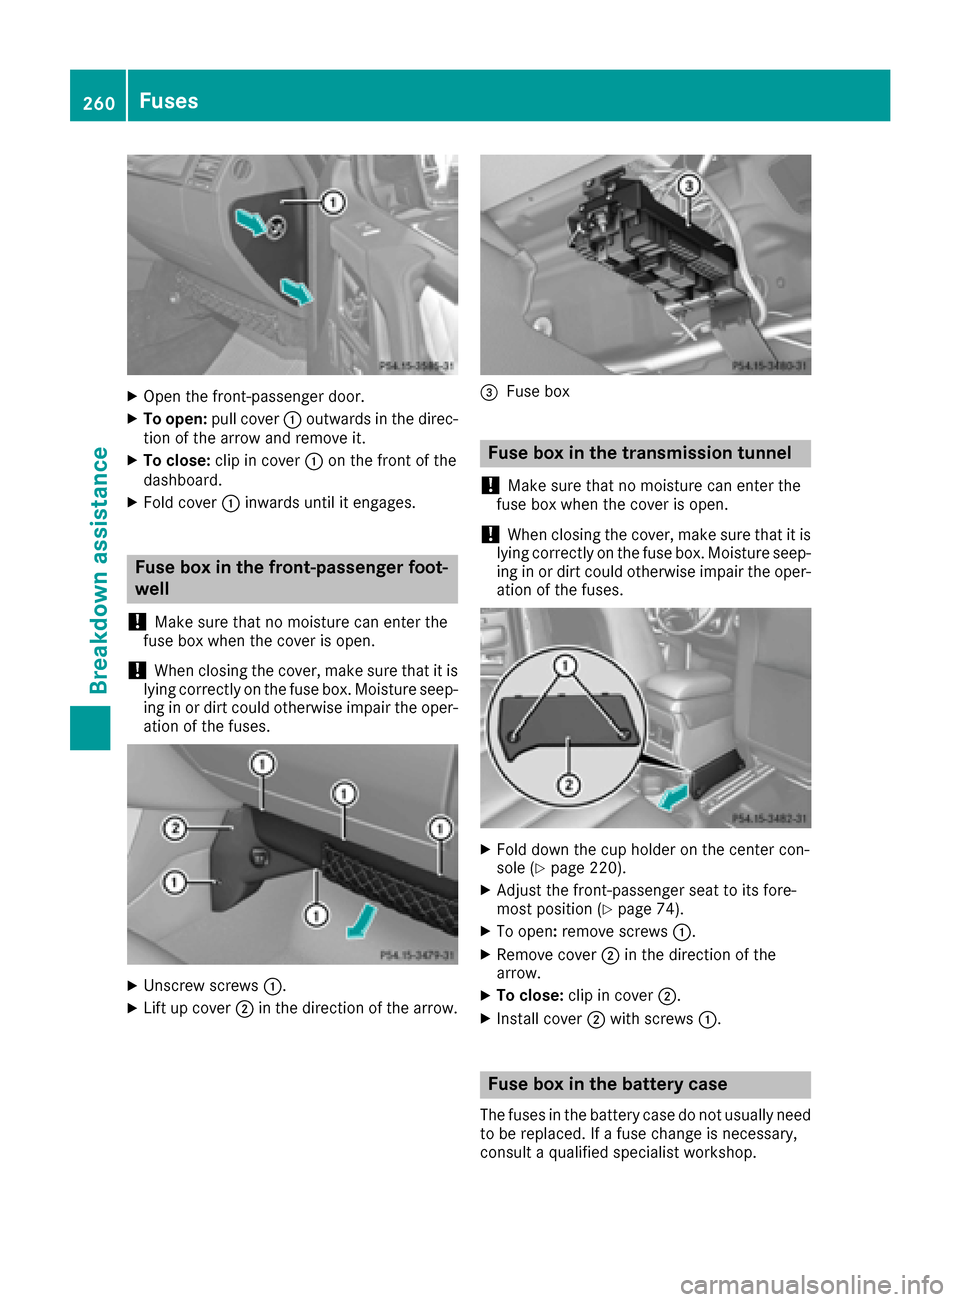
XOpen the front-passenger door.
XTo open:pull cover :outwards in the direc-
tion of the arrow and remove it.
XTo close: clip in cover :on the front of the
dashboard.
XFold cover :inwards until it engages.
Fuse box in the front-passenger foot-
well
!
Make sure that no moisture can enter the
fuse box when the cover is open.
!When closing the cover, make sure that it is
lying correctly on the fuse box. Moisture seep-
ing in or dirt could otherwise impair the oper-
ation of the fuses.
XUnscrew screws :.
XLift up cover;in the direction of the arrow.
=Fuse box
Fuse box in the transmission tunnel
!
Make sure that no moisture can enter the
fuse box when the cover is open.
!When closing the cover, make sure that it is
lying correctly on the fuse box. Moisture seep-
ing in or dirt could otherwise impair the oper-
ation of the fuses.
XFold down the cup holder on the center con-
sole (Ypage 220).
XAdjust the front-passenger seat to its fore-
most position (Ypage 74).
XTo open: remove screws :.
XRemove cover;in the direction of the
arrow.
XTo close: clip in cover ;.
XInstall cover ;with screws :.
Fuse box in the battery case
The fuses in the battery case do not usually need
to be replaced. If a fuse change is necessary,
consult a qualified specialist workshop.
260Fuses
Breakdown assistance
Page 263 of 302
Fuse box in the cargo compartment
!
Mak esure that no moisture can ente rth e
fus ebox when th ecover is open .
!When closingth ecover ,mak esure that it is
lyin gcorrectly on th efus ebox .Moistur eseep -
ing in or dirt could otherwise impair th eoper -
ation of th efuses.
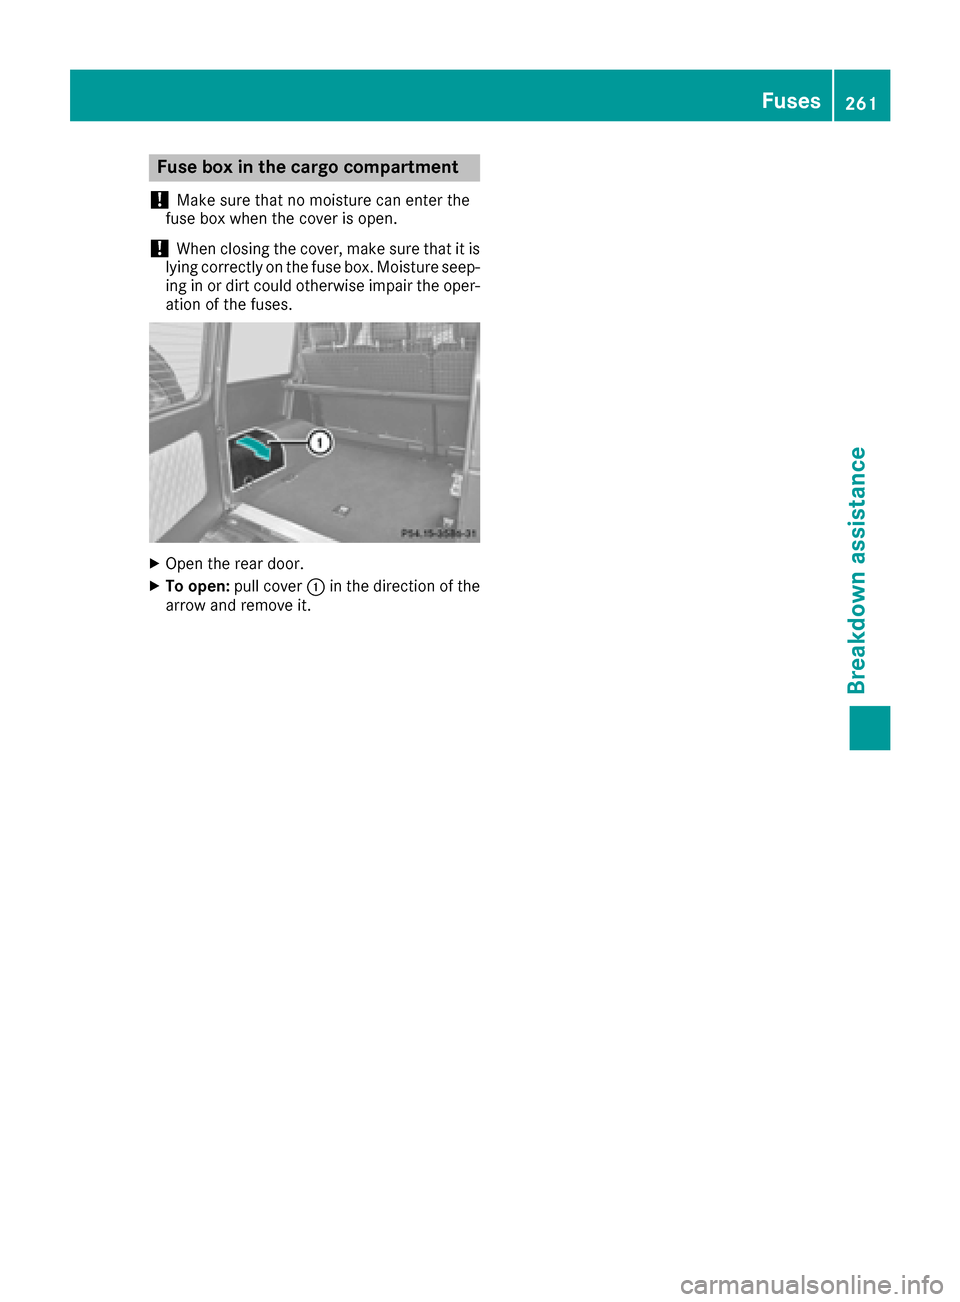
XOpen th erear door .
XTo open:pull cover :in th edirection of th e
arrow and remove it .
Fuses261
Breakdown assistance
Z
Page 264 of 302
Useful information
i
This Operator's Manual describes all models
and all standard and optional equipment of
your vehicle available at the time of publica-
tion of the Operator's Manual. Country-spe-
cific differences are possible. Please note
that your vehicle may not be equipped with all
features described. This also applies to
safety-related systems and functions.
iRead the information on qualified specialist
workshops: (Ypage 23).
Important safety notes
GWARNING
If wheels and tires of the wrong size are used, the wheel brakes or suspension components
may be damaged. There is a risk of an acci-
dent.
Always replace wheels and tires with those
that fulfill the specifications of the original
part.
When replacing wheels, make sure to use the
correct:
Rdesignation
Rmodel
When replacing tires, make sure to use the
correct:
Rdesignation
Rmanufacturer
Rmodel
GWarning
A flat tire severely impairs the driving, steer-
ing and braking characteristics of the vehicle.
There is a risk of an accident.
do not drive with a flat tire. Immediately
replace the flat tire with your spare wheel, or
consult a qualified specialist workshop.
Contact an authorized Mercedes-Benz Center if
you require information on tested and recom-
mended wheels and tires for summer and winter
driving. Advice on purchasing and caring for
tires is also available there. Accessories that are not approved for your vehi-
cle by Mercedes-Benz or are not being used cor-
rectly can impair the operating safety.
Before purchasing and using non-approved
accessories, visit a qualified specialist work-
shop and ask about:
Rsuitability
Rlegal stipulations
Rfactory recommendations
Information on the dimensions and types of
wheels and tires for your vehicle can be found in
the "Wheel/tire combinations" section
(
Ypage 284).
Information on air pressure for the tires on your
vehicle can be found:
Ron the tire pressure label on the fuel filler flap
Rin the "Tire pressure" section
iFurther information on wheels and tires can
be obtained at any qualified specialist work-
shop.
Operation
Notes on driving
If the vehicle is heavily loaded, check the tire
pressures and correct them if necessary.
When parking your vehicle, make sure that the
tires do not get deformed by the curb or other
obstacles. If it is necessary to drive over curbs,
speed humps or similar elevations, try to do so
slowly and at an obtuse angle. Otherwise, the
tires, particularly the sidewalls, may be dam-
aged.
Regular checking of wheels and tires
GWARNING
Damaged tires can cause tire inflation pres-
sure loss. As a result, you could lose control of
your vehicle. There is a risk of accident.
Check the tires regularly for signs of damage
and replace any damaged tires immediately.
RRegularly check the wheels and tires of your
vehicle for damage at least once a month, as
well as after driving off-road or on rough
roads. Damage includes bulges and deforma-
tion on tires, cuts, punctures, cracks or
262Operation
Wheels and tires
Page 265 of 302
severe corrosion on wheels, for example.
Damaged wheels can cause a loss of tire pres-
sure.
RRegularly check the tire tread depth and the
condition of the tread across the whole width
of the tire (
Ypage 263). In order to inspect
the inner side of the tire surface, turn the
steering wheel to full lock.
RAll wheels must have a valve cap to protect
the valve against dirt and moisture. Do not
install anything onto the valve other than the
standard valve cap or a valve cap approved by Mercedes-Benz for your vehicle.
Do not install anything onto the valve, such as
tire pressure monitoring systems.
RYou should regularly check the pressure of all
your tires including the spare wheel, particu-
larly prior to long trips. Adjust the tire pres-
sure as necessary (
Ypage 270).
The service life of tires depends, among other
things, on the following factors:
RDriving style
RTire pressure
RDistance covered
Tire tread
GWARNING
Insufficient tire tread will reduce tire traction.
The tire is no longer able to dissipate water.
This means that on wet road surfaces, the risk
of hydroplaning increases, in particular where speed is not adapted to suit the driving con-
ditions. There is a risk of accident.
If the tire pressure is too high or too low, tires
may exhibit different levels of wear at differ-
ent locations on the tire tread. Thus, you
should regularly check the tread depth and
the condition of the tread across the entire
width of all tires.
Minimum tire tread depth for:
RSummer tires: âin (3 mm)
RM+S tires: ãin (4 mm)
For safety reasons, replace the tires before
the legally prescribed limit for the minimum
tire tread depth is reached.
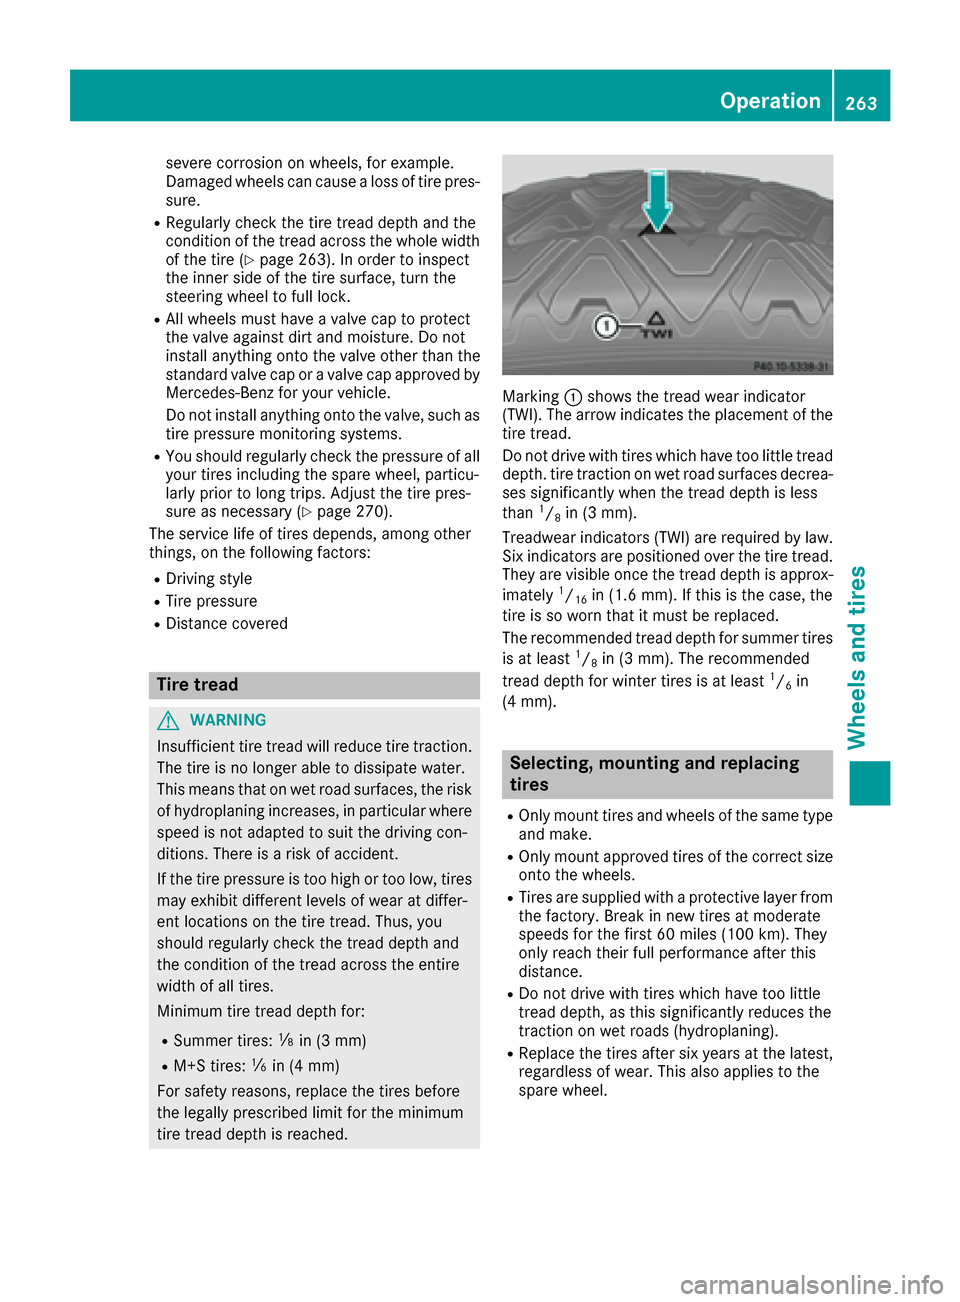
Marking :shows the tread wear indicator
(TWI). The arrow indicates the placement of the
tire tread.
Do not drive with tires which have too little tread
depth. tire traction on wet road surfaces decrea-
ses significantly when the tread depth is less
than
1/8in (3 mm).
Treadwear indicators (TWI) are required by law.
Six indicators are positioned over the tire tread.
They are visible once the tread depth is approx-
imately
1/16in (1.6 mm). If this is the case, the
tire is so worn that it must be replaced.
The recommended tread depth for summer tires
is at least
1/8in (3 mm). The recommended
tread depth for winter tires is at least1/6in
(4 mm).
Selecting, mounting and replacing
tires
ROnly mount tires and wheels of the same type
and make.
ROnly mount approved tires of the correct size
onto the wheels.
RTires are supplied with a protective layer from
the factory. Break in new tires at moderate
speeds for the first 60 miles (100 km). They
only reach their full performance after this
distance.
RDo not drive with tires which have too little
tread depth, as this significantly reduces the
traction on wet roads (hydroplaning).
RReplace the tires after six years at the latest,
regardless of wear. This also applies to the
spare wheel.
Operation263
Wheels and tires
Z
Page 266 of 302
Winter operation
General notes
Have your vehicle winterproofed at a qualified
specialist workshop at the onset of winter.
Observe the notes in the "Changing a wheel"
section (
Ypage 281).
Driving with summer tires
At temperatures below 45 ‡ (+7 †), summer
tires lose elasticity and therefore traction and
braking power. Change the tires on your vehicle
to M+S tires. Using summer tires at very cold
temperatures could cause cracks to form,
thereby damaging the tires permanently.
Mercedes-Benz cannot accept responsibility for
this type of damage.
M+S tires
GWARNING
M+S tires with a tire tread depth of less than
ã in (4 mm) are not suitable for use in winter
and do not provide sufficient traction. There is
a risk of an accident.
M+S tires with a tread depth of less than ãin
(4 mm) must be replaced immediately.
GWARNING
Wheel and tire dimensions as well as the type of tire can vary between the spare wheel and
the wheel to be replaced. When the spare
wheel is mounted, driving characteristics may be severely affected. There is a risk of an acci-
dent.
In order to reduce risks:
Ryou should therefore adapt your driving
style and drive carefully.
Rnever mount more than one spare wheel
that differs from the wheel to be replaced.
Ronly use a spare wheel that differs from the
wheel to be replaced for a short time.
Rdo not deactivate ESP®.
Rhave a spare wheel that differs from the
wheel that has been changed replaced at
the nearest qualified specialist workshop.
You must observe the correct wheel and
tire dimensions as well as the wheel type.
Do not exceed a maximum speed of 50 mph
(80 km/h) if a spare wheel of a different size is
installed.
At temperatures below 45 ‡ (+7 †), use all-
season tires or winter tires. Both types of tire are
identified by the M+S marking.
Not all tires with the M+S marking provide the
driving characteristics of winter tires. In addition
to the M+S marking, winter tires also have the
i snowflake symbol on the tire wall. Tires
with this marking fulfill the requirements of the
Rubber Manufacturers Association (RMA) and
the Rubber Association of Canada (RAC) regard-
ing snow traction, and were specially developed
for driving on snow. Only these tires will allow
driving safety systems such as ABS and ESP
®to
function optimally in winter, since these tires
have been designed specifically for driving on
snow.
Use M+S tires of the same make and tread on all
wheels to maintain safe handling characteris-
tics.
Always observe the maximum permissible
speed specified for the M+S tires you have
mounted.
When you have mounted the M+S tires:
XCheck the tire pressures (Ypage 265).
XRestart the tire pressure monitor
(Ypage 270).
iYou can obtain information about winter
tires that have been approved by Mercedes-
Benz especially for your vehicle at any
Mercedes-Benz Service center.
iFor further information about tires, see
(Ypage 286).
Snow chains
GWARNING
If you drive too fast with snow chains moun-
ted, they may snap. As a result, you could
injure others and damage the vehicle. There is
a risk of an accident.
264Winter operation
Wheels and tires
Page 267 of 302
Observe the maximum permissible speed for
operation with snow chains.
!Information about the use of snow chain
compatible AMG winter tires is applicable for
AMG tires. Use of snow chains is only per-
missible with these tires.
!On some tire sizes there is not enough space
for snow chains. To avoid damage to the vehi- cle or tires, observe the "Wheel and tire com-
binations" section under "Tires and wheels".
!Check the snow chains for damage before
mounting them. Damaged or worn snow
chains may snap and damage the following
components:
Rwheel
Rwheel housing
Rwheel suspension
For this reason, you must use only snow
chains that are free of defects. Observe the
manufacturer's mounting instructions.
For safety reasons, Mercedes-Benz recom-
mends that you only use snow chains that have
been specially approved for your vehicle by
Mercedes-Benz, or are of a corresponding
standard of quality.
ROnly use snow chains when driving on roads
completely covered by snow. Remove the
snow chains as soon as possible when you
come to a road that is not snow-covered.
RLocal regulations may restrict the use of snow
chains. Observe the appropriate regulations if
you wish to mount snow chains.
RDo not exceed the maximum permissible
speed of 30 mph (50 km/h).
If you intend to mount snow chains, please bear
the following points in mind:
RSnow chains cannot be mounted on all
wheel/tire combinations (Ypage 284).
RMount snow chains only in pairs and only on
the rear wheels. Observe the manufacturer's
mounting instructions.
iYou may wish to deactivate ESP®when pull-
ing away with snow chains installed
(
Ypage 57). You can thereby allow the wheels
to spin in a controlled manner, achieving an
increased driving force (cutting action).
For more information, contact a qualified spe-
cialist workshop.
Tire pressure
Tire pressure specifications
Important safety notes
GWARNING
Underinflated or overinflated tires pose the
following risks:
Rthe tires may burst, especially as the load
and vehicle speed increase.
Rthe tires may wear excessively and/or
unevenly, which may greatly impair tire
traction.
Rthe driving characteristics, as well as steer-
ing and braking, may be greatly impaired.
There is a risk of an accident.
Follow recommended tire inflation pressures
and check the pressure of all the tires includ-
ing the spare wheel:
Rmonthly, at least
Rif the load changes
Rbefore beginning a long journey
Runder different operating conditions, e.g.
off-road driving
If necessary, correct the tire pressure.
iThe specifications on the sample Tire and
Loading Information placard and tire pressure
tables are examples. Tire pressure specifica-
tions are vehicle-specific and may deviate
from the data shown here. The tire pressure
specifications that are valid for your vehicle
can be found on the Tire and Loading Infor-
mation placard and tire pressure table on the
vehicle.
General notes
The recommended tire pressures for the tires
mounted at the factory can be found on the
labels described here.
Operation with a trailer: the applicable value
for the rear tires is the maximum tire pressure
value stated in the table inside the fuel filler flap.
Further information on tire pressures can be
obtained at a qualified specialist workshop.
Tire pressure265
Wheels and tires
Z
Page 268 of 302
Tire and Loading Information placard
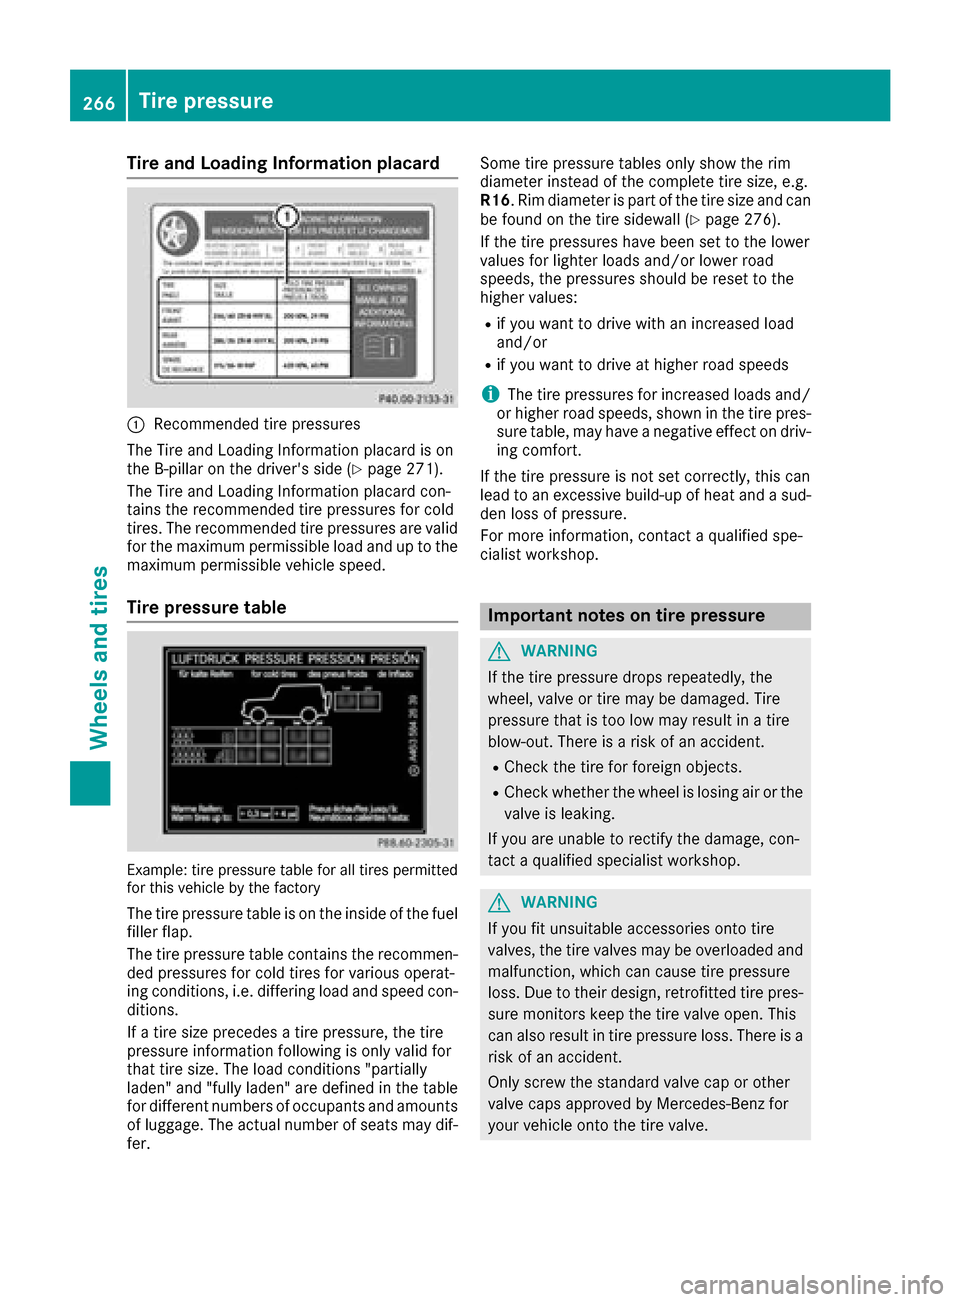
:Recommended tire pressures
The Tire and Loading Information placard is on
the B-pillar on the driver's side (
Ypage 271).
The Tire and Loading Information placard con-
tains the recommended tire pressures for cold
tires. The recommended tire pressures are valid
for the maximum permissible load and up to the
maximum permissible vehicle speed.
Tire pressure table
Example: tire pressure table for all tires permitted
for this vehicle by the factory
The tire pressure table is on the inside of the fuel
filler flap.
The tire pressure table contains the recommen- ded pressures for cold tires for various operat-
ing conditions, i.e. differing load and speed con-
ditions.
If a tire size precedes a tire pressure, the tire
pressure information following is only valid for
that tire size. The load conditions "partially
laden" and "fully laden" are defined in the table
for different numbers of occupants and amounts
of luggage. The actual number of seats may dif-fer. Some tire pressure tables only show the rim
diameter instead of the complete tire size, e.g.
R16
. Rim diameter is part of the tire size and can
be found on the tire sidewall (
Ypage 276).
If the tire pressures have been set to the lower
values for lighter loads and/or lower road
speeds, the pressures should be reset to the
higher values:
Rif you want to drive with an increased load
and/or
Rif you want to drive at higher road speeds
iThe tire pressures for increased loads and/
or higher road speeds, shown in the tire pres-
sure table, may have a ne
gative effect on driv-
ing comfort.
If the tire pressure is not set correctly, this can
lead to an excessive build-up of heat and a sud-
den loss of pressure.
For more information, contact a qualified spe-
cialist workshop.
Important notes on tire pressure
GWARNING
If the tire pressure drops repeatedly, the
wheel, valve or tire may be damaged. Tire
pressure that is too low may result in a tire
blow-out. There is a risk of an accident.
RCheck the tire for foreign objects.
RCheck whether the wheel is losing air or the valve is leaking.
If you are unable to rectify the damage, con-
tact a qualified specialist workshop.
GWARNING
If you fit unsuitable accessories onto tire
valves, the tire valves may be overloaded and
malfunction, which can cause tire pressure
loss. Due to their design, retrofitted tire pres- sure monitors keep the tire valve open. This
can also result in tire pressure loss. There is a
risk of an accident.
Only screw the standard valve cap or other
valve caps approved by Mercedes-Benz for
your vehicle onto the tire valve.
266Tire pressure
Wheels and tires
Page 269 of 302
Use a suitable pressure gauge to check the tire
pressure. The outer appearance of a tire does
not permit any reliable conclusion about the tire
pressure. On vehicles equipped with the elec-
tronic tire pressure monitoring system, the tire
pressure can be checked using the on-board
computer.
The tire temperature and pressure increase
when the vehicle is in motion. This is dependenton the driving speed and the load.
Therefore, you should only correct tire pres-
sures when the tires are cold.
The tires are cold:
Rif the vehicle has been parked without direct
sunlight on the tires for at least three hours
and
Rif the vehicle has been driven for less than
1 mile (1.6 km).
The tire temperature changes depending on the outside temperature, the vehicle speed and the
tire load. If the tire temperature changes by
18 ‡ (10 †), the tire pressure changes by
approximately 10 kPa (0.1 bar/1.5 psi). Take
this into account when checking the pressure of
warm tires. Only correct the tire pressure if it is
too low for the current operating conditions. If
you check the tire pressure when the tires are
warm, the resulting value will be higher than if
the tires were cold. This is normal. Do not
reduce the tire pressure to the value specified
for cold tires. The tire pressure would otherwise
be too low.
Observe the recommended tire pressures for
cold tires:
Ron the Tire and Loading Information placard
on the B-pillar on the driver's side
Rin the tire pressure table on the inside of the
fuel filler flap
Observe the following for the tire pressure on
the spare wheel:
Rthe tire and loading information table on the
B-pillar on the driver's side.
Rthe tire pressure sticker on the inside of the
fuel filler flap.
Underinflated or overinflated tires
Underinflation
GWARNING
Tires with pressure that is too low can over-
heat and burst as a consequence. In addition, they also suffer from excessive and/or irreg-
ular wear, which can severely impair the brak-
ing properties and the driving characteristics.
There is a risk of an accident.
Avoid tire pressures that are too low in all the
tires, including the spare wheel.
Underinflated tires may:
Roverheat, leading to tire defects
Rhave an adverse effect on handling charac-
teristics
Rwear quickly and unevenly
Rhave an adverse effect on fuel consumption
Overinflation
GWARNING
Tires with excessively high pressure can burst
because they are damaged more easily by
road debris, potholes etc. In addition, they
also suffer from irregular wear, which can
severely impair the braking properties and the driving characteristics. There is a risk of an
accident.
Avoid tire pressures that are too high in all the
tires, including the spare wheel.
Overinflated tires may:
Rincrease the braking distance
Rhave an adverse effect on handling charac-
teristics
Rwear quickly and unevenly
Rhave an adverse effect on ride comfort
Rbe more susceptible to damage
Tire pressure267
Wheels and tires
Z
Page 270 of 302
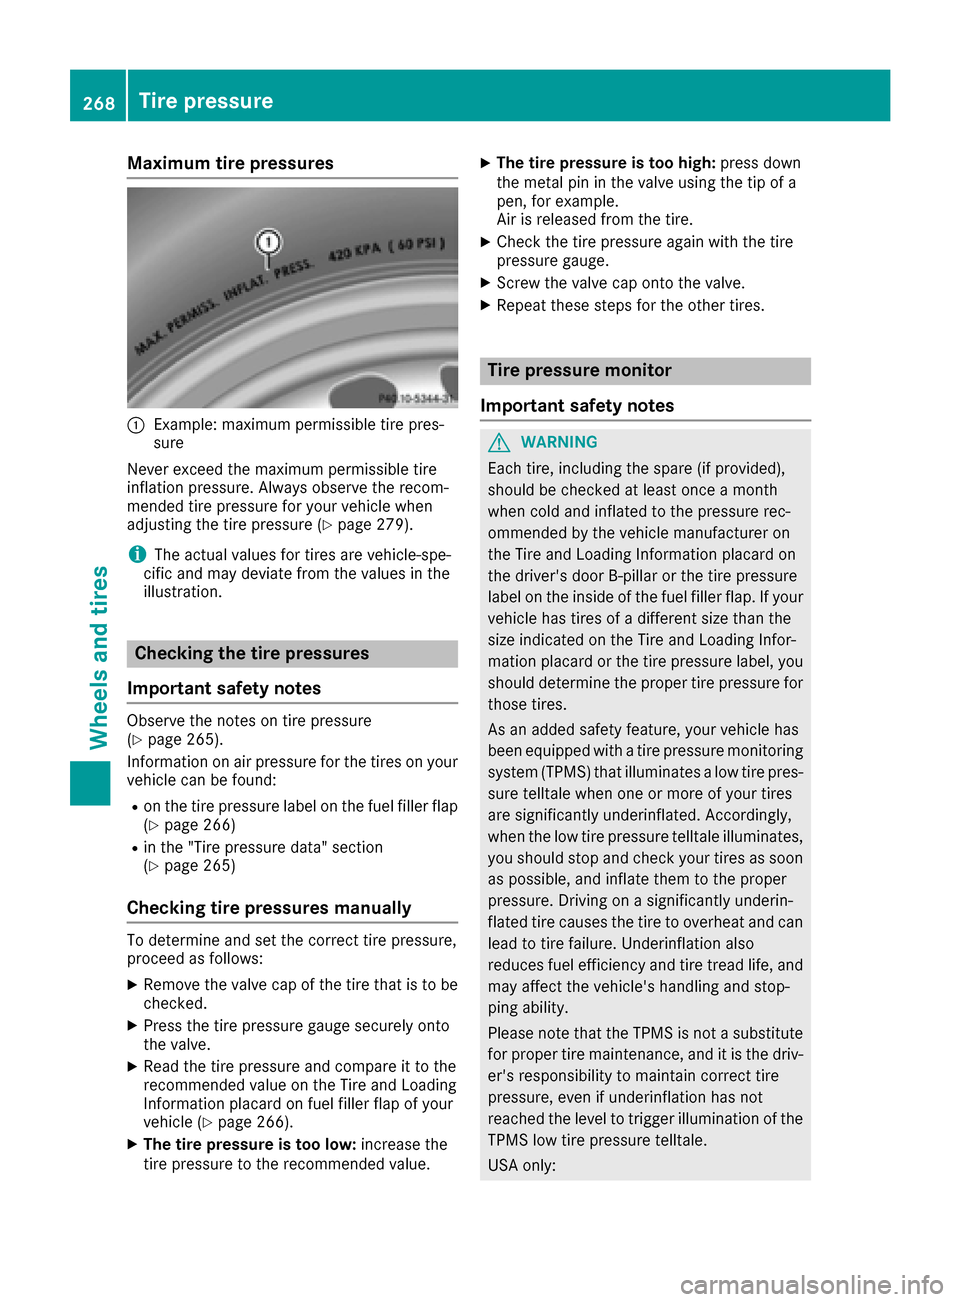
Maximum tire pressures
:Example: maximum permissible tire pres-
sure
Never exceed the maximum permissible tire
inflation pressure. Always observe the recom-
mended tire pressure for your vehicle when
adjusting the tire pressure (
Ypage 279).
iThe actual values for tires are vehicle-spe-
cific and may deviate from the values in the
illustration.
Checking the tire pressures
Important safety notes
Observe the notes on tire pressure
(Ypage 265).
Information on air pressure for the tires on your
vehicle can be found:
Ron the tire pressure label on the fuel filler flap
(Ypage 266)
Rin the "Tire pressure data" section
(Ypage 265)
Checking tire pressures manually
To determine and set the correct tire pressure,
proceed as follows:
XRemove the valve cap of the tire that is to be
checked.
XPress the tire pressure gauge securely onto
the valve.
XRead the tire pressure and compare it to the
recommended value on the Tire and Loading
Information placard on fuel filler flap of your
vehicle (
Ypage 266).
XThe tire pressure is too low: increase the
tire pressure to the recommended value.
XThe tire pressure is too high: press down
the metal pin in the valve using the tip of a
pen, for example.
Air is released from the tire.
XCheck the tire pressure again with the tire
pressure gauge.
XScrew the valve cap onto the valve.
XRepeat these steps for the other tires.
Tire pressure monitor
Important safety notes
GWARNING
Each tire, including the spare (if provided),
should be checked at least once a month
when cold and inflated to the pressure rec-
ommended by the vehicle manufacturer on
the Tire and Loading Information placard on
the driver's door B-pillar or the tire pressure
label on the inside of the fuel filler flap. If your
vehicle has tires of a different size than the
size indicated on the Tire and Loading Infor-
mation placard or the tire pressure label, you
should determine the proper tire pressure for
those tires.
As an added safety feature, your vehicle has
been equipped with a tire pressure monitoring
system (TPMS) that illuminates a low tire pres-
sure telltale when one or more of your tires
are significantly underinflated. Accordingly,
when the low tire pressure telltale illuminates,
you should stop and check your tires as soon
as possible, and inflate them to the proper
pressure. Driving on a significantly underin-
flated tire causes the tire to overheat and can lead to tire failure. Underinflation also
reduces fuel efficiency and tire tread life, and
may affect the vehicle's handling and stop-
ping ability.
Please note that the TPMS is not a substitute
for proper tire maintenance, and it is the driv-
er's responsibility to maintain correct tire
pressure, even if underinflation has not
reached the level to trigger illumination of the
TPMS low tire pressure telltale.
USA only:
268Tire pressure
Wheels and tires