wheelbase MERCEDES-BENZ G-CLASS SUV 2008 User Guide
[x] Cancel search | Manufacturer: MERCEDES-BENZ, Model Year: 2008, Model line: G-CLASS SUV, Model: MERCEDES-BENZ G-CLASS SUV 2008Pages: 293, PDF Size: 4.49 MB
Page 121 of 293
Driving sys
tems 118 Ultrasonic reversing aid* (Station
wagon) G
Risk of accident
The ultrasonic reversing aid is only an aid
and may not detect all obstacles. It is not a
substitute for attentive driving.
You are always responsible for safety and
must continue to pay attention to your
immediate surroundings when parking and
manoeuvring. You could otherwise endan-
ger yourself and others. G
Risk of injury
Make sure that no persons or animals are
in the manoeuvring range. Otherwise, they
could be injured.
The ultrasonic reversing aid is an electronic
parking aid. It indicates visually and audibly
the distance between the rear area of your
vehicle and an object.
The ultrasonic reversing aid is activated auto-
matically when you switch on the ignition and
engage the reverse gear.
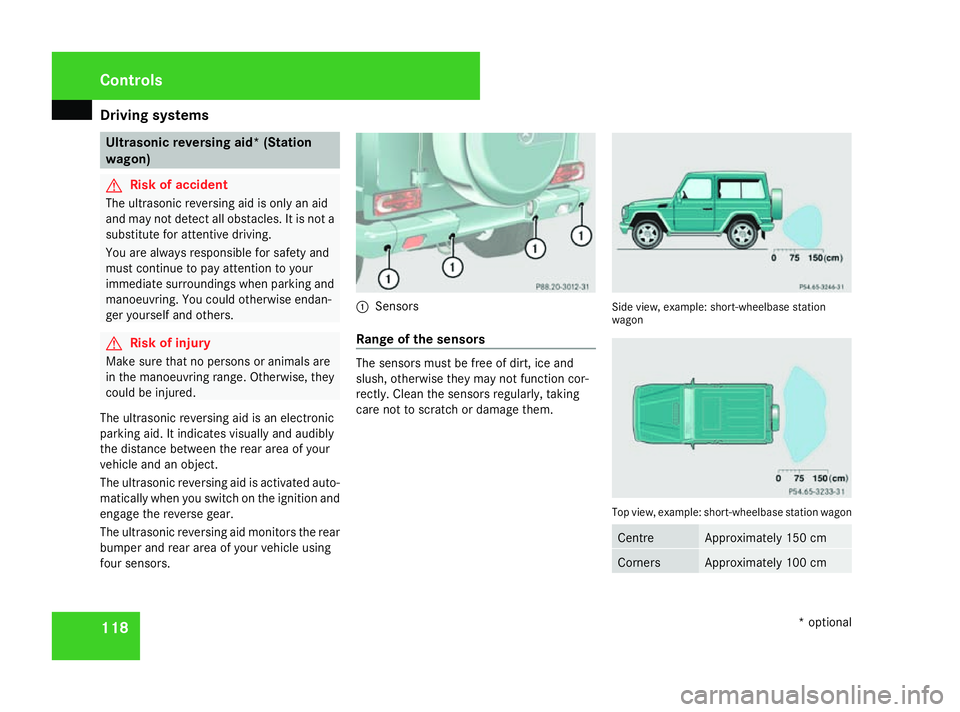
The ultrasonic reversing aid monitors the rear
bumper and rear area of your vehicle using
four sensors. 1
Sensors
Range of the sensors The sensors must be free of dirt, ice and
slush, otherwise they may not function cor-
rectly. Clean the sensors regularly, taking
care not to scratch or damage them. Side view, example: short-wheelbase station
wagon
Top view, example: short-wheelbase station wagon
Centre Approximately 150 cm
Corners Approximately 100 cmControls
* optional
463_AKB; 1; 8, en-GB
wobuchh
,V ersion: 2.10.6
2008-07-17T15:19:41+02:00 - Seite 118 Dateiname: 6515_4091_02_buchblock.pdf; preflight
Page 123 of 293
Driving sys
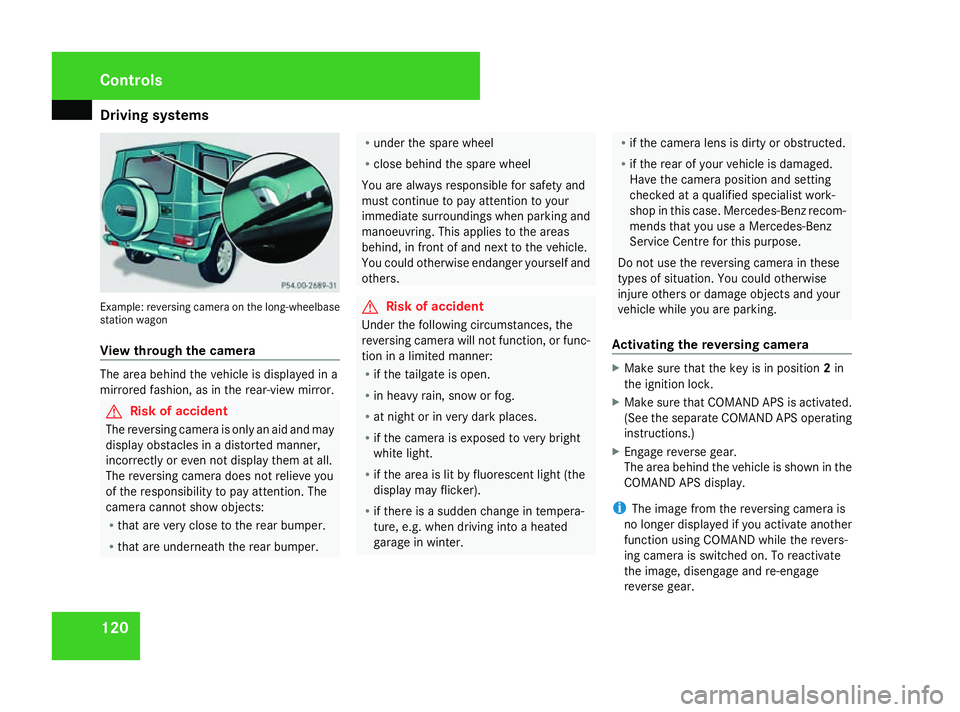
tems 120Example: reversing camera on the long-wheelbase
station wagon
View through the camera The area behind the vehicle is displayed in a
mirrored fashion, as in the rear-view mirror. G
Risk of accident
The reversing camera is only an aid and may
display obstacles in a distorted manner,
incorrectly or even not display them at all.
The reversing camera does not relieve you
of the responsibility to pay attention. The
camera cannot show objects:
R that are very close to the rear bumper.
R that are underneath the rear bumper. R
under the spare wheel
R close behind the spare wheel
You are always responsible for safety and
must continue to pay attention to your
immediate surroundings when parking and
manoeuvring. This applies to the areas
behind, in front of and next to the vehicle.
You could otherwise endanger yourself and
others. G
Risk of accident
Under the following circumstances, the
reversing camera will not function, or func-
tion in a limited manner:
R if the tailgate is open.
R in heavy rain, snow or fog.
R at night or in very dark places.
R if the camera is exposed to very bright
white light.
R if the area is lit by fluorescent light (the
display may flicker).
R if there is a sudden change in tempera-
ture, e.g. when driving into a heated
garage in winter. R
if the camera lens is dirty or obstructed.
R if the rear of your vehicle is damaged.
Have the camera position and setting
checked at a qualified specialist work-
shop in this case. Mercedes-Benz recom-
mends that you use a Mercedes-Benz
Service Centre for this purpose.
Do not use the reversing camera in these
types of situation. You could otherwise
injure others or damage objects and your
vehicle while you are parking.
Activating the reversing camera X
Make sure that the key is in position 2in
the ignition lock.
X Make sure that COMAND APS is activated.
(See the separate COMAND APS operating
instructions.)
X Engage reverse gear.
The area behind the vehicle is shown in the
COMAND APS display.
i The image from the reversing camera is
no longer displayed if you activate another
function using COMAND while the revers-
ing camera is switched on. To reactivate
the image, disengage and re-engage
reverse gear. Controls
463_AKB; 1; 8, en-GB
wobuchh
,V ersion: 2.10.6
2008-07-17T15:19:41+02:00 - Seite 120 Dateiname: 6515_4091_02_buchblock.pdf; preflight
Page 143 of 293
Loading and stowing
140
R
Always place the load behind unoccupied
seats if possible.
R If possible, always transport the load in the
luggage compartment with the seat backr-
ests folded up and engaged. R
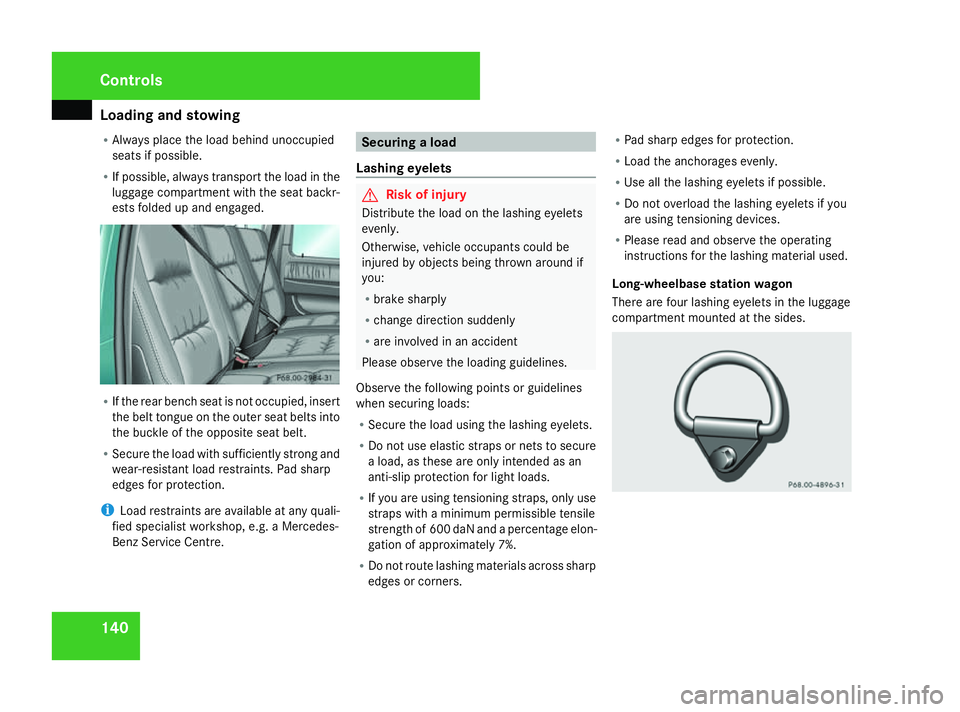
If the rear bench seat is not occupied, insert
the belt tongue on the outer seat belts into
the buckle of the opposite seat belt.
R Secure the load with sufficiently strong and
wear-resistant load restraints. Pad sharp
edges for protection.
i Load restraints are available at any quali-
fied specialist workshop, e.g. a Mercedes-
Benz Service Centre. Securing a load
Lashing eyelets G
Risk of injury
Distribute the load on the lashing eyelets
evenly.
Otherwise, vehicle occupants could be
injured by objects being thrown around if
you:
R brake sharply
R change direction suddenly
R are involved in an accident
Please observe the loading guidelines.
Observe the following points or guidelines
when securing loads:
R Secure the load using the lashing eyelets.
R Do not use elastic straps or nets to secure
a load, as these are only intended as an
anti-slip protection for light loads.
R If you are using tensioning straps, only use
straps with a minimum permissible tensile
strength of 600 daN and a percentage elon-
gation of approximately 7%.
R Do not route lashing materials across sharp
edges or corners. R
Pad sharp edges for protection.
R Load the anchorages evenly.
R Use all the lashing eyelets if possible.
R Do not overload the lashing eyelets if you
are using tensioning devices.
R Please read and observe the operating
instructions for the lashing material used.
Long-wheelbase station wagon
There are four lashing eyelets in the luggage
compartment mounted at the sides. Controls
463_AKB; 1; 8, en-GB
wobuchh,
Version: 2.10.6 2008-07-17T15:19:41+02:00 - Seite 140Dateiname: 6515_4091_02_buchblock.pdf; preflight
Page 144 of 293
Loading and stowing
141
Short-wheelbase station wagon and cab-
riolet
There are two further lashing eyelets moun-
ted at the sides in the luggage compartment
and under the rear bench seat. Guide the load restraints in a cross pattern
over the load, as shown in the illustration. Enlarging the luggage compartment
Short-wheelbase station wagon and cabrio-
let: the rear bench seat is split 50/50.
Long-wheelbase station wagon: the rear
bench seat is split 50/50.
The left-hand and right-hand rear seats can
be folded down to increase the luggage com-
partment capacity. You can:
R fold the seat backrests forward
R fold the rear bench seat back fully. G
Risk of injury
Do not carry heavy or hard objects inside
the vehicle or in the luggage compartment
unless they are secured.
Otherwise, you and other vehicle occu-
pants could be injured by objects being
thrown around the vehicle in the event of
sharp braking, a sudden change in direction
or an accident.
When using the luggage compartment
enlargement, you should always clip in the
safety net*, if at hand. G
Risk of poisoning
Keep the boot lid/tailgate closed when the
engine is running. Otherwise, you could be poisoned by exhaust fumes entering the
vehicle.
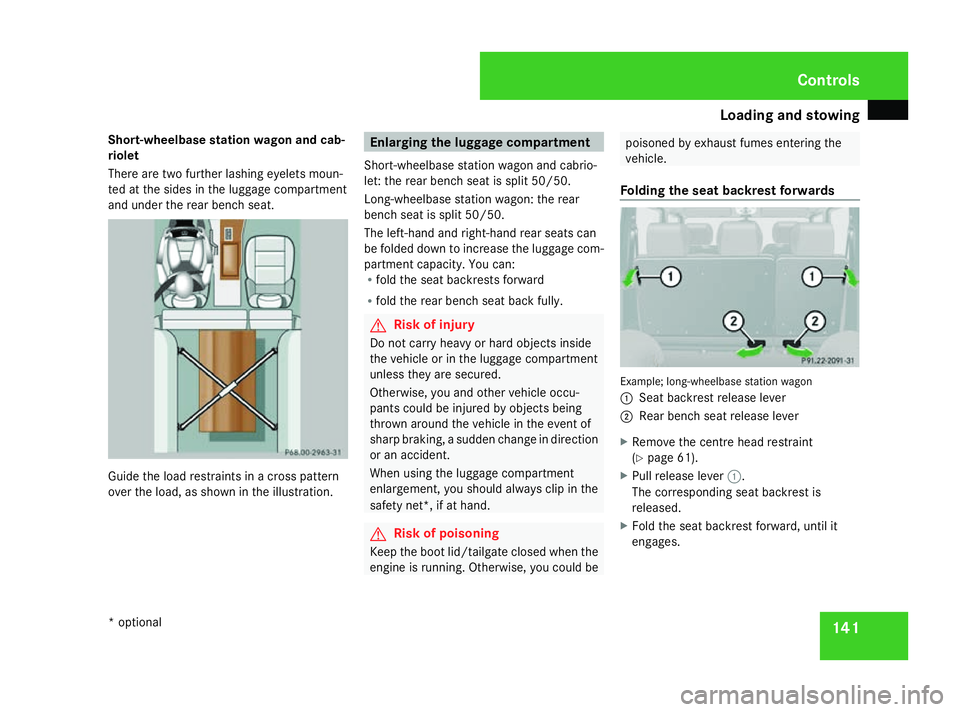
Folding the seat backrest forwards Example; long-wheelbase station wagon
1
Seat backrest release lever
2 Rear bench seat release lever
X Remove the centre head restraint
(Y page 61).
X Pull release lever 1.
The corresponding seat backrest is
released.
X Fold the seat backrest forward, until it
engages. Controls
* optional
463_AKB; 1; 8, en-GB
wobuchh, Version: 2.10.6 2008-07-17T15:19:41+02:00 - Seite 141 ZDateiname: 6515_4091_02_buchblock.pdf; preflight
Page 145 of 293
Loading and stowing
142
Folding back the seat backrest i
Long-wheelbase station wagon: open the
rear doors. This allows you better access to
release lever 1.
X Pull release lever 1and fold the seat back-
rest up.
! Make sure that the seat belt does not
become trapped.
X Fold the seat backrest back until it engages
audibly in the seat catch.
X Fit the head restraints.
Folding the rear bench seat forwards X
Fold the seat backrest forward.
X Pull release lever 2.
The corresponding rear bench seat is
released.
X Fold the rear bench seat forward until it
engages. Folding rear bench seat into an upright
position X
Fold back the rear bench seat backrest
until it engages audibly in the seat catch.
X Fold back the seat backrest.
X Fit the head restraints. G
Risk of injury
Make sure that the rear bench seat and
front seat backrest are correctly engaged
in position.
If the front seat backrests or rear bench
seat backrest are not fully engaged and the
following occurs:
R sharp braking
R a sudden change of direction
R an accident
the seat backrests or rear bench seat may
fold forwards and instead of being
restrained by the seats as intended you
could be injured by them. Occupants could
then also be injured in the event of an acci-
dent, e.g. by objects being thrown forwards
from the luggage compartment. Luggage compartment cover*
G
Risk of accident and injury
The luggage compartment cover is not a
restraint system. Secure the load under the
luggage compartment cover by suitable
means. Make sure that the luggage com-
partment cover is engaged securely. If lug-
gage is not sufficiently secured, it can be
thrown over the backrest into the
passenger compartment during, for
instance, heavy braking, sudden changes of
direction or in the event of an accident. You
could cause an accident or cause injury to
yourself and others.
! When loading the vehicle, make sure that
you do not stack the load in the luggage
compartment higher than the lower edge of
the side windows. Do not place heavy
objects on top of the luggage compartment
cover.
Long-wheelbase station wagon G
Risk of injury
If the luggage compartment cover is fitted,
the side-facing bench seat* must not be
occupied. Controls
* optional
463_AKB; 1; 8, en-GB
wobuchh,
Version: 2.10.6 2008-07-17T15:19:41+02:00 - Seite 142Dateiname: 6515_4091_02_buchblock.pdf; preflight
Page 146 of 293
Loading and stowing
143
i
The luggage compartment cover consists
of two roller blinds. You can cover the
entire luggage compartment even if the
rear seat backrest is folded down.
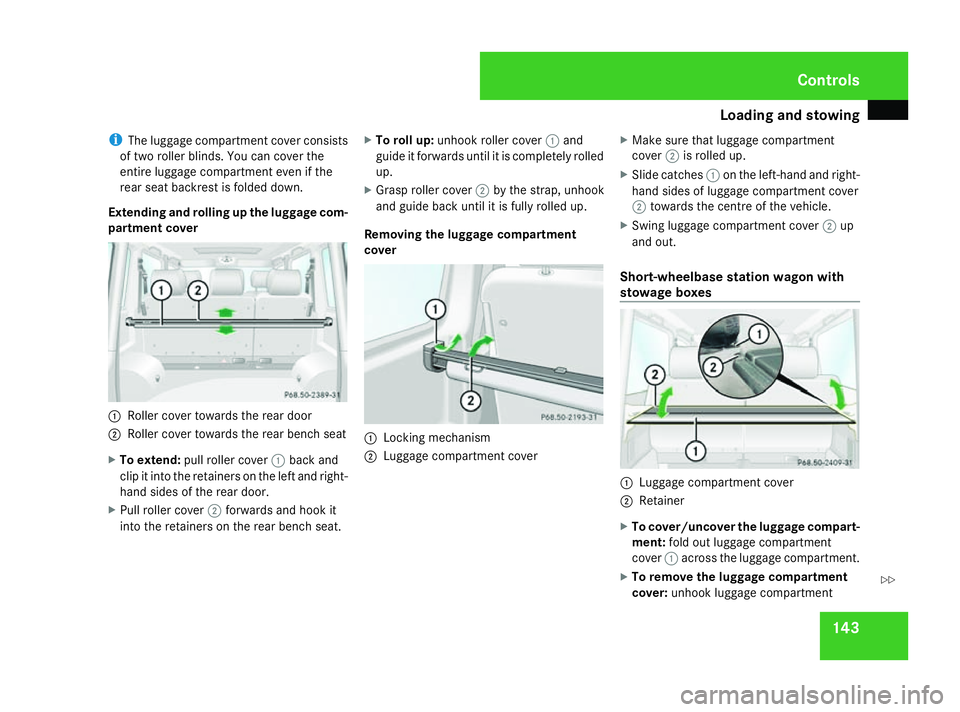
Extending and rolling up the luggage com-
partment cover 1
Roller cover towards the rear door
2 Roller cover towards the rear bench seat
X To extend: pull roller cover 1back and
clip it into the retainers on the left and right-
hand sides of the rear door.
X Pull roller cover 2forwards and hook it
into the retainers on the rear bench seat. X
To roll up: unhook roller cover 1and
guide it forwards until it is completely rolled
up.
X Grasp roller cover 2by the strap, unhook
and guide back until it is fully rolled up.
Removing the luggage compartment
cover 1
Locking mechanism
2 Luggage compartment cover X
Make sure that luggage compartment
cover 2is rolled up.
X Slide catches 1on the left-hand and right-
hand sides of luggage compartment cover
2 towards the centre of the vehicle.
X Swing luggage compartment cover 2up
and out.
Short-wheelbase station wagon with
stowage boxes 1
Luggage compartment cover
2 Retainer
X To cover/uncover the luggage compart-
ment: fold out luggage compartment
cover 1across the luggage compartment.
X To remove the luggage compartment
cover: unhook luggage compartment Controls
463_AKB; 1; 8, en-GB
wobuchh,
Version: 2.10.6 2008-07-17T15:19:41+02:00 - Seite 143 ZDateiname: 6515_4091_02_buchblock.pdf; preflight
Page 147 of 293
Loading and stowing
144cover
1from the left-hand and right-hand
retainers 2.
X Remove luggage compartment cover 1.Safety net*
G
Risk of injury
You must make sure that the safety net is
correctly secured at the top and bottom.
Do not use a damaged safety net.
The safety net cannot restrain heavy loads.
For this reason, you should always secure
the load.
Otherwise, objects that have not been
secured sufficiently might be thrown
around if you brake suddenly, change direc-
tion suddenly or are involved in an accident,
and could cause you an injury.
If the safety net is fitted the row of seats
behind it must not be occupied. Safety net without luggage compart-
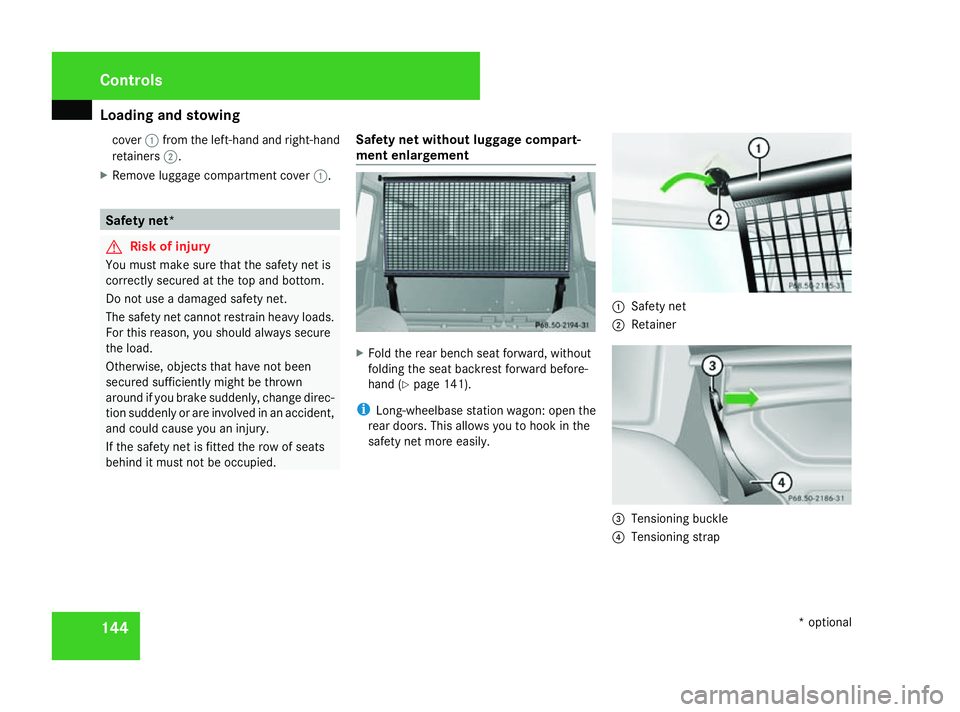
ment enlargement X
Fold the rear bench seat forward, without
folding the seat backrest forward before-
hand (Y page 141).
i Long-wheelbase station wagon: open the
rear doors. This allows you to hook in the
safety net more easily. 1
Safety net
2 Retainer 3
Tensioning buckle
4 Tensioning strap Controls
* optional
463_AKB; 1; 8, en-GB
wobuchh,
Version: 2.10.6 2008-07-17T15:19:41+02:00 - Seite 144Dateiname: 6515_4091_02_buchblock.pdf; preflight
Page 149 of 293
Loading and stowing
146
X
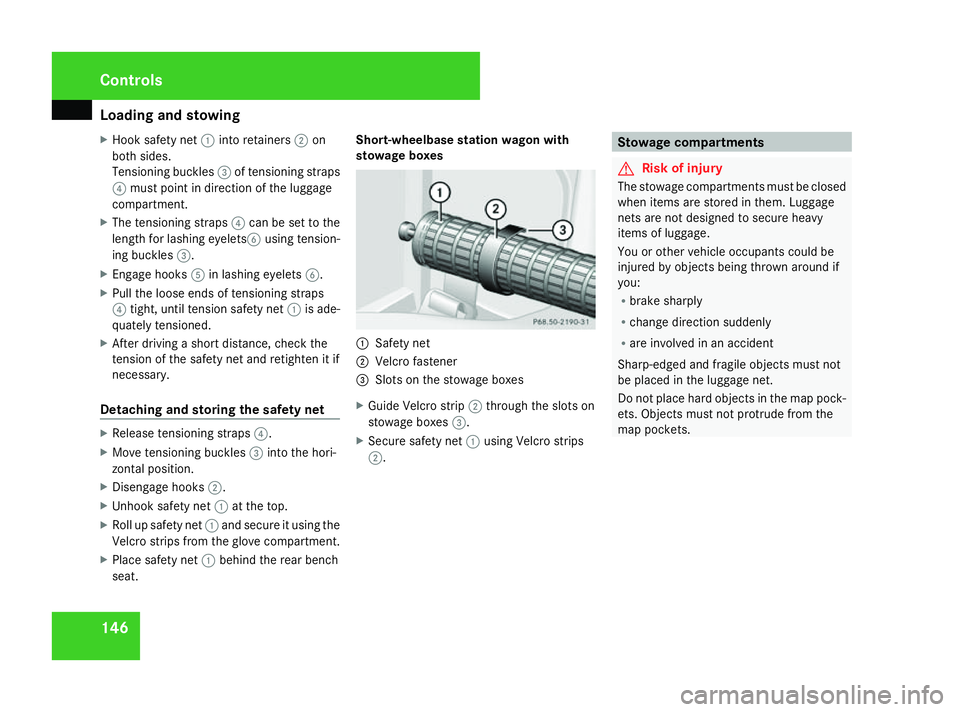
Hook safety net 1into retainers 2on
both sides.
Tensioning buckles 3of tensioning straps
4 must point in direction of the luggage
compartment.
X The tensioning straps 4can be set to the
length for lashing eyelets 6using tension-
ing buckles 3.
X Engage hooks 5in lashing eyelets 6.
X Pull the loose ends of tensioning straps
4 tight, until tension safety net 1is ade-
quately tensioned.
X After driving a short distance, check the
tension of the safety net and retighten it if
necessary.
Detaching and storing the safety net X
Release tensioning straps 4.
X Move tensioning buckles 3into the hori-
zontal position.
X Disengage hooks 2.
X Unhook safety net 1at the top.
X Roll up safety net 1and secure it using the
Velcro strips from the glove compartment.
X Place safety net 1behind the rear bench
seat. Short-wheelbase station wagon with
stowage boxes
1
Safety net
2 Velcro fastener
3 Slots on the stowage boxes
X Guide Velcro strip 2through the slots on
stowage boxes 3.
X Secure safety net 1using Velcro strips
2. Stowage compartments
G
Risk of injury
The stowage compartments must be closed
when items are stored in them. Luggage
nets are not designed to secure heavy
items of luggage.
You or other vehicle occupants could be
injured by objects being thrown around if
you:
R brake sharply
R change direction suddenly
R are involved in an accident
Sharp-edged and fragile objects must not
be placed in the luggage net.
Do not place hard objects in the map pock-
ets. Objects must not protrude from the
map pockets. Controls
463_AKB; 1; 8, en-GB
wobuchh,
Version: 2.10.6 2008-07-17T15:19:41+02:00 - Seite 146Dateiname: 6515_4091_02_buchblock.pdf; preflight
Page 153 of 293
Features
150 12 V sockets
The sockets can be used for accessories with
a maximum power consumption of 180 W.
! If the engine is switched off and consum-
ers are used for long periods, the battery
may become discharged.
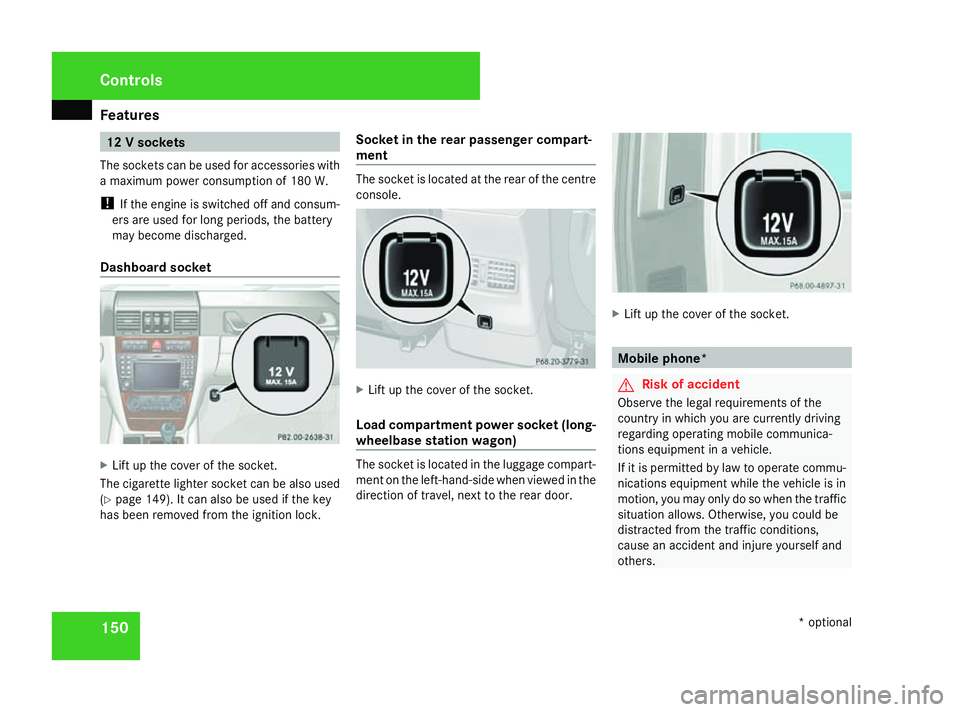
Dashboard socket X
Lift up the cover of the socket.
The cigarette lighter socket can be also used
(Y page 149). It can also be used if the key
has been removed from the ignition lock. Socket in the rear passenger compart-
ment The socket is located at the rear of the centre
console.
X
Lift up the cover of the socket.
Load compartment power socket (long-
wheelbase station wagon) The socket is located in the luggage compart-
ment on the left-hand-side when viewed in the
direction of travel, next to the rear door. X
Lift up the cover of the socket. Mobile phone*
G
Risk of accident
Observe the legal requirements of the
country in which you are currently driving
regarding operating mobile communica-
tions equipment in a vehicle.
If it is permitted by law to operate commu-
nications equipment while the vehicle is in
motion, you may only do so when the traffic
situation allows. Otherwise, you could be
distracted from the traffic conditions,
cause an accident and injure yourself and
others. Cont
rols
* optional
463_AKB; 1; 8, en-GB
wobuchh,
Version: 2.10.6 2008-07-17T15:19:41+02:00 - Seite 150Dateiname: 6515_4091_02_buchblock.pdf; preflight
Page 178 of 293
Off-road driving
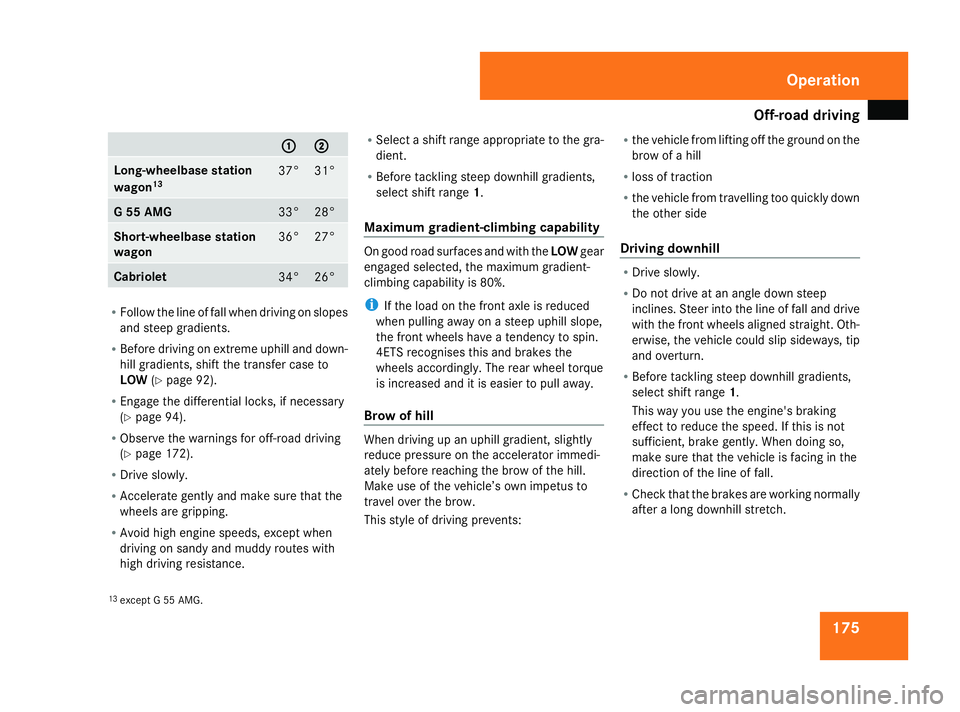
1751
1 2
2 Long-wheelbase station
wagon
13 37° 31°
G 55 AMG
33° 28°
Short-wheelbase station
wagon
36° 27°
Cabriolet
34° 26°
R
Follow the line of fall when driving on slopes
and steep gradients.
R Before driving on extreme uphill and down-
hill gradients, shift the transfer case to
LOW (Ypage 92).
R Engage the differential locks, if necessary
(Y page 94).
R Observe the warnings for off-road driving
(Y page 172).
R Drive slowly.
R Accelerate gently and make sure that the
wheels are gripping.
R Avoid high engine speeds, except when
driving on sandy and muddy routes with
high driving resistance. R
Select a shift range appropriate to the gra-
dient.
R Before tackling steep downhill gradients,
select shift range 1.
Maximum gradient-climbing capability On good road surfaces and with the
LOWgear
engaged selected, the maximum gradient-
climbing capability is 80%.
i If the load on the front axle is reduced
when pulling away on a steep uphill slope,
the front wheels have a tendency to spin.
4ETS recognises this and brakes the
wheels accordingly. The rear wheel torque
is increased and it is easier to pull away.
Brow of hill When driving up an uphill gradient, slightly
reduce pressure on the accelerator immedi-
ately before reaching the brow of the hill.
Make use of the vehicle’s own impetus to
travel over the brow.
This style of driving prevents:R
the vehicle from lifting off the ground on the
brow of a hill
R loss of traction
R the vehicle from travelling too quickly down
the other side
Driving downhill R
Drive slowly.
R Do not drive at an angle down steep
inclines. Steer into the line of fall and drive
with the front wheels aligned straight. Oth-
erwise, the vehicle could slip sideways, tip
and overturn.
R Before tackling steep downhill gradients,
select shift range 1.
This way you use the engine's braking
effect to reduce the speed. If this is not
sufficient, brake gently. When doing so,
make sure that the vehicle is facing in the
direction of the line of fall.
R Check that the brakes are working normally
after a long downhill stretch.
13 except G 55 AMG. Operation
463_AKB; 1; 8, en-GB
wobuchh,
Version: 2.10.6 2008-07-17T15:19:41+02:00 - Seite 175 ZDateiname: 6515_4091_02_buchblock.pdf; preflight