check engine light MERCEDES-BENZ G-CLASS SUV 2012 Owners Manual
[x] Cancel search | Manufacturer: MERCEDES-BENZ, Model Year: 2012, Model line: G-CLASS SUV, Model: MERCEDES-BENZ G-CLASS SUV 2012Pages: 357, PDF Size: 8.86 MB
Page 10 of 357
Switching the ZONE function on/
off
.................................................. 131
THERMATIC automatic climate
control (2-zone) ............................. 125
Cockpit
Overview .......................................... 26
see Instrument cluster
COMAND
see Separate operating instructions
Combination switch ..........................108
Constant headlamp mode see Daytime driving lights
Consumption statistics (on-board
computer) .......................................... 215
Convenience opening feature see Side windows
Coolan t(engine)
Checkin gthe level ......................... 293
Display message ............................ 237
Notes ............................................. 347
Temperature (on-board computer) .225
Temperature gauge ........................ 212
Warning lamp ................................. 260
Cooling
see Climate control
Cornering light function
Function/notes ............................. 110
Courtesy lights .................................. 114
Cruise control Cruise control leve r....................... 174
Display message ............................ 245
Driving system ............................... 173
Selecting ........................................ 175
Cup holder
Centre console .............................. 275
Important safety notes ..................275
Rea rcompartmen t......................... 275 D
Data see Technical data
Daytime driving lights
Display message ............................ 236
Switching on/off (on-board com-
puter) ............................................. 222
Switching on/off (switch) ..............105Delaye
dswitch-off
Exterio rlighting (on-board com-
puter )............................................. 222
Interior lighting .............................. 222
Diagnostics connection ......................22
Diesel ................................................. .343
Diesel particle filter ..........................164
Differential locks ............................... 204
Digital speedometer .........................216
Dipped-beam headlamp Switching on/off ........................... 105
Dipped-beam headlamps
Display message ............................ 234
Setting for driving abroad (sym-
metrical) ........................................ 104
Display (cleaning instructions) ........300
Display message ASSYST service interval display .....294
General information .......................228
Hiding (on-board computer) ...........228
Display messages
Calling up (on-board computer) .....228
Driving systems ............................. 241
Engine ............................................ 237
Key ................................................ 251
Lights ............................................ .234
Safety systems .............................. 229
Tyres .............................................. 245
Vehicle .......................................... .248
Distance display (on-board com-
puter) ................................................. .220
Distance warning signal (warning
lamp) .................................................. 262
DISTRONIC PLUS Activating ....................................... 184
Activatio ncondition s..................... 184
Cruise control leve r....................... 183
Deactivating ................................... 188
Display message ............................ 243
Displays in the multifunctio ndis-
play ................................................ 187
Drivin gtips .................................... 189
Function/notes ............................. 182
Important safety notes ..................182
Selecting ........................................ 183
Setting the specified minimum
distance ......................................... 188
Warning lamp ................................. 262 Index
7
Page 12 of 357
ECO start/stop function
Deactivating/activatin g................. 146
General information .......................145
Electronic Stability Program
see ESP ®
(Electroni cStability Program)
Electronic Traction System
see 4ETS (Electronic Traction System)
Emergenc yclosing
Sof ttop ............................................ 82
Emergency key element
Function/notes ................................ 70
General notes .................................. 70
Removing ......................................... 70
Emergency locking
Vehicle ............................................. 75
Emergency unlocking
Vehicle ............................................. 74
Engine
Display message ............................ 237
ECO start/stop function ................145
Engine number ............................... 341
Jump-starting ................................. 313
Running irregularl y......................... 148
Starting problems ..........................148
Starting the engine with the key ....144
Stopping ........................................ 163
Warning lamp (engine diagnostics) 259
Engine electronics
Notes ............................................. 339
Problem (fault) ............................... 148
Engine oil
Additives ........................................ 346
Checking the oil level ..................... 291
Display message ............................ 239
Filling capacity ............................... 346
Notes about oil grades ................... 345
Temperature (on-board computer) .225
Topping up ..................................... 293
Viscosity ........................................ 346
Environmental protection
Note ................................................ .20
Returning an end-of-life vehicle .......20
ESP ®
(Electronic Stability Pro-
gram) AMG menu (on-board computer) ...226
Deactivating/activating ...................63
Display message ............................ 229Function/notes ................................ 62
Important safety guidelines
.............62
Trailer stabilisatio n.......................... 63
Warning lamp ................................. 256
Exhaus ttail pipe (cleaning instruc-
tions) .................................................. 299
Exterior lighting see Lights
Exterior mirrors
Adjusting ......................................... 99
Anti-dazzle mode (automatic) ........100
Folding in/ou t(automatically) .......100
Folding in/ou t(electrically) .............99
Folding in whe nlocking (on-board
computer) ...................................... 225
Out of position (troubleshooting) ...100
Parking position ............................. 101
Resetting ....................................... 100
Storing settings (memory function) 102 F
Faul tmessage
see Display messages
Filler cap
see Fuel filler flap
Fire extinguisher ............................... 305
First-aid kit ......................................... 305
Fitting awheel
Removing awheel .......................... 332
Fitting wheels
Fitting awheel ............................... 332
Raising the vehicle .........................330
Securing the vehicle against roll-
ing away ........................................ 330
Flat tyre
Preparing the vehicle .....................309
Floormat ............................................ .286
Foglamps Switching on/off ........................... 106
Folding the seat backrest (rear)
forwards/back .................................. 269
Frequencies Garage door opene r....................... 283
Mobile phone ................................. 339
Two-way radio ................................ 339
Fron tfoglam p(display message) ....236 Index
9
Page 14 of 357
I
Immobiliser .......................................... 64
Indicator and warning lamps Coolan t.......................................... 260
DISTRONI CPLUS ........................... 262
Engine diagnostics .........................259
Indicator lamps
Display message ............................ 235
Instrument cluster
Overview ........................................ 211
Warning and indicator lamps .........251
Instrument cluster lighting ..............212
Interior lighting ................................. 110
Automatic control system ..............111
Delayed switch-off (on-board
computer) ...................................... 222
Luggage compartment lighting ......112
Manual control ............................... 112
Overview ........................................ 110
Reading lamp ................................. 112
Rea rinterior lighting ...................... 113
Interior motion sensor ........................65
ISOFIX child seat securing system ....51 J
Jack Pump lever ..................................... 331
Storage location ............................ 306
Using ............................................. 330
Jump starting (engine) ......................313 K
Key Changing the battery .......................71
Checking the battery .......................71
Convenience opening feature ..........78
Display message ............................ 251
Door central locking/unlocking .......68
Emergency key element ................... 70
Important safety notes ....................68
Loss ................................................. 72
Malfunction ...................................... 72
Modifying the programming .............69
Overview .......................................... 68Problem (malfunction)
.....................72
Starting the engine ........................144
Keyp ositions
Key ................................................ 143
Kickdown
Manual drive program ....................155 L
Lap time (RACETIMER) ......................226
Lashing eyelets ................................. 271
Licence plate lamp (display mes-
sage) ................................................... 235
Lights Activating/deactivating the inte-
rior lighting delayed switch-off .......222
Automatic headlamp mode ............105
Cornering light function .................110
Courtesy lights ............................... 114
Dipped-bea mheadlamps ............... 105
Driving abroad ............................... 104
Foglamps ....................................... 106
Hazard warning lamps ...................109
Headlamp flasher ........................... 109
Ligh tswitc h................................... 104
Main-beam headlamps ................... 109
Parking lamps ................................ 108
Rea rfoglamp ................................. 107
Side lamps ..................................... 107
Switching the daytime driving
lights on/off (on-board computer) .222
Switching the daytime driving
lights on/off (switch) .....................105
Switching the exterio rlighting
delayed switch-off on/off (on-
board computer )............................ 222
Switching the surround lighting
on/off (on-board computer) ..........222
Turn signals ................................... 108
see Changing bulbs
see Interior lighting
Light sensor (display message) .......236
LIM indicator lamp Cruise control ................................ 174
DISTRONI CPLUS ........................... 183
Variabl eSPEEDTRONIC .................179
Limiting the speed
see SPEEDTRONIC Index
11
Page 42 of 357
SRS (Supplemental Restraint System)
Introduction SRS reduces the risk of occupants coming
into contact with the vehicle's interior in the
event of an accident. It can also reduce the
forces to which occupants are subjected dur-
ing an accident.
SRS consists of:
R the 6 SRS warning lamp
R airbags
R airbag control unit (with crash sensors)
R belt tensioners
R belt force limiters
SRS warning lamp G
WARNING
If SRS is malfunctioning, individual systems
may be triggered unintentionally or might not
be triggered in the event of an accident with
a high rate of vehicle deceleration.
A malfunction has occurred if:
R the 6 SRS warning lamp does not light
up when the ignition is switched on.
R the engine is running and the 6SRS
warning lamp does not go out after a few
seconds.
R the engine is running and the 6SRS
warning lamp lights up again.
In this case, have SRS checked immediately
at a qualified specialist workshop.
SRS functions are checked regularly when
you switch on the ignition and when the
engine is running. Therefore, malfunctions
can be detected in good time.
The 6 SRS warning lamp in the instrument
cluster lights up when the ignition is switched
on. It goes out no later than a few seconds
after the engine is started. Triggering of belt tensioners, belt force
limiters and airbags During the first stage of a collision, the airbag
control unit evaluates important physical
data relating to vehicle deceleration or accel-
eration, such as:
R
duration
R direction
R magnitude
Based on the evaluation of this data, the air-
bag control unit pre-emptively triggers the
belt tensioners in the first stage.
i The belt tensioners can only be triggered
if the seat belt tongues are correctly
engaged in the seat belt buckles.
If there is an even higher rate of vehicle decel-
eration or acceleration in a longitudinal direc-
tion, the front airbags are also deployed.
Your vehicle is equipped with adual-stage
driver's airbag and a single-stage front-
passenger fron tairbag. The airbag control
unit evaluates vehicle deceleration or accel-
eration in the event of a collision. In the first
deploymen tstage, the driver's airbag is filled
with enough propellant gas to reduce the risk
of injuries .The front airbag is fully deployed
if a second deployment threshold is exceeded
within a few milliseconds. The front-
passenger front airbag is filled with the max-
imum amount of propellant gas in one stage
at the moment of impact.
The belt tensioner and airbag triggering
thresholds are variable and are adapted to the
rate of deceleration or acceleration of the
vehicle. This process is pre-emptive in nature.
The triggering process must take place in
good time at the start of the collision.
i Airbags are not deployed in all types of
accidents. Also, not all airbags are
deployed together in an accident. The dif-
ferent airbag systems work independently
of each other. Occupant safety
39Safety Z
Page 50 of 357
Belt warning for the driver and front
passenger
The
7 seatbelt warning lamp in the instru-
ment cluster is a reminder for all occupants
to fasten their seat belts. It may light up con-
tinuously or flash. In addition, there may be a
warning tone.
The 7 seat belt warning lamp goes out and
the warning tone ceases when the driver and
the fron tpassenger have fastened their seat
belt.
For certain countries only: regardless of
whether the driver and th efront passenger
have fastened their seat belts, the 7seat
beltw arning lamp lights up for six seconds
after the engine is started. It then goes out if
the driver and the fron tpassenger have fas-
tened their seat belts.
i Further information about the 7seat
belt warning lamp (Y page 252).
Rear seat belt status indicator The rear-compartmen
tseat belt status indi-
cator tells you if the rear passengers have
their seat belts fastened.
The rear-compartment seat belt status indi-
cator indicates the rear seat on which the belt
is fastened. The üsymbol in the multi-
function display indicates afastened seat
belt .Ifaseat belt is not fastened or if a seat
is not occupied, the ýsymbol is displayed.
The rear-compartments eat belt status indi-
cator appears in the multifunction display for
around 30 seconds if:
R you drive off and reach a speed of approx-
imately 10 km/h.
R the rear passengers fasten or unfasten
their seat belts while the vehicle is in
motion.
R someone gets in or out of the vehicle and
the vehicle drives off again.
You can also cancel the rear seat belt status
indicator immediately (Y page 228).i
The status indicator for the rear-compart-
ment seat belts is only available for certain
countries.
Belt tensioners, belt force limiters G
WARNING
The belt tensioners in the rear only function if
the belt buckles can be pulled down unob-
structed. They must not be restricted in any
way. Therefore, do not grab the belt buckles
and do not place any objects under the belt
buckles. Otherwise, the tensioning of the belt
by the buckle is restricted or will not function,
and will not provide any additional protection. G
WARNING
If the seat belt tensioners have been trig-
gered, they provide no additional protection
in the event of another accident. Therefore,
have belt tensioners which have been trig-
gered replaced at a qualified specialist work-
shop.
Comply with safety regulations when dispos-
ing of belt tensioners. Any Mercedes-Benz
Service Centre can provide details of these
regulations.
! If the front-passenger seat is not occu-
pied, do not engage the seat belt tongue in
the buckle on the front-passenger seat.
Otherwise, the belt tensioner could be trig-
gered in the event of an accident.
X In order to ensure that the pyrotechnic seat
belt tensioners have not been triggered,
always have the seat belts checked after an
accident.
If the belt tensioners have been triggered,
they must be replaced.
The fron tseat belts and the outer seat belts
in the rear are equipped with belt tensioners
and belt force limiters.
The belt tensioners tighten the seat belts in
an accident, pulling them close against the
body. Occupant safety
47Safety Z
Page 64 of 357
G
WARNING
If ABS is faulty, the wheels could lock when
braking. The steerability and braking charac-
teristics may be severely impaired .Addition-
ally, further driving safety systems are deac-
tivated. There is an increased danger of skid-
ding and accidents.
Drive on carefully. Have ABS checked imme-
diately at a qualified specialist workshop.
If ABS is malfunctioning, other systems,
including driving safety systems, will also
become inoperative. Observe the information
on the ABS warning lamp (Y page 254) and
any display messages that may appear in the
instrument cluster (Y page 229).
ABSr egulates brake pressure in such a way
that the wheels do not lock when you brake.
This allows you to continue steering the vehi-
cle when braking.
ABS works from a speed of about 8 km/h
upwards, regardless of road-surface condi-
tions. ABSw orks on slippery surfaces, even
when you only brake gently.
The yellow !ABS warning lamp in the
instrument cluster lights up when the ignition
is switched on. It goes out when the engine is
running.
Brakes If ABS intervenes when braking, you will feel
a pulsing in the brake pedal.
X If ABS intervenes: continue to depress the
brake pedal with force until the braking sit-
uation is over.
X To make a full brake application:
depress the brake pedal with full force.
The pulsating brake pedal can be an indica-
tion of hazardous road conditions, and func-
tions as a reminder to take extra care while
driving. Off-road ABS If the
LOW RANGE shift range is selected by
the transfer case, (Y page 202), an ABS sys-
tem specifically suited to off-road terrain is
automatically activated.
At speeds below 60 km/h, the front wheels
lock cyclically during braking. The digging-in
effect achieved in the process reduces the
stopping distance when driving off-road. This
limits steering capability. BAS (Brake Assist System)
i Observe the "Important safety notes" sec-
tion (Y page 60). G
WARNING
If BAS is malfunctioning, the braking distance
in an emergency braking situation is
increased. There is a risk of accident.
In an emergency braking situation, depress
the brake pedal with full force. ABS prevents
the wheels from locking.
BAS operates in emergency braking situa-
tions. If you depress the brake pedal quickly,
BAS automatically boosts the braking force,
thus shortening the stopping distance.
X Keep the brake pedal depressed firmly until
the emergency braking situation is over.
ABS prevents the wheels from locking.
The brakes will function as usual once you
release the brake pedal. BAS is deactivated. Adaptive brake lamps
If you brake sharply from a speed of more
than 50 km/ho rifbraking is assisted by BAS,
the brake lamps flash rapidly.Int his way,
traffic travelling behind you is warned in an
even more noticeable manner.
If you brake sharply from a speed of more
than 70 km/h to a standstill, the hazard warn-
ing lamps are activated automatically .Ifthe
brakes are applied again, the brake lamps Driving safety systems
61Safety Z
Page 65 of 357
light up continuously. The hazard warning
lamps switch off automatically if you travel
faster than 10 km/h
.You can also switch off
the hazard warning lamps using the hazard
warning switch button (Y page 109).ESP
®
(Electronic Stability Program)
Important safety notes i
Observe the "Important safety notes" sec-
tion (Y page 60). G
WARNING
If ESP ®
is malfunctioning, ESP ®
is unable to
stabilise the vehicle. In addition, other driving
safety systems are switched off. This increa-
ses the risk of skidding and an accident.
Drive on carefully. Have ESP ®
checked at a
qualified specialist workshop.
! Only operate the vehicle for a maximum
of ten seconds on a brake dynamometer.
Switch off the ignition.
Application of the brakes by ESP ®
may oth-
erwise destroy the brake system.
! A function or performance test should
only be carried out on atwin-axle dyna-
mometer. Before you operate the vehicle
on such a dynamometer, please consult a
qualified workshop .You could otherwise
damage the drive train or the brake system.
ESP ®
monitors driving stability and traction.
Traction is the transmission of power from the
tyres to the road surface.
ESP ®
is deactivated if the åwarning lamp
in the instrument cluster lights up continu-
ously when the engine is running.
If the ÷ warning lamp and the åwarn-
ing lamp are lit continuously, ESP ®
is not
available due to a malfunction.
Observe the information on warning lamps
(Y page 256) and any display messages that
appear in the instrument cluster
(Y page 229). If ESP
®
detects that the vehicle is deviating
from the direction desired by the driver, one
or more wheels are braked to stabilise the
vehicle. If necessary, the engine output is also
modified to keep the vehicle on the desired
course within physical limits. ESP ®
assists
the driver when pulling away on wet or slip-
pery roads. ESP ®
can also stabilise the vehi-
cle during braking.
If ESP ®
intervenes, the ÷warning lamp
flashes in the instrument cluster.
If ESP ®
intervenes:
X Do not deactivate ESP ®
under any circum-
stances.
X When pulling away, only depress the accel-
erator pedal as far as is necessary.
X Adapt your driving style to suit the prevail-
ing road and weather conditions.
i Only use wheels with the recommended
tyre sizes. Only then will ESP ®
function
properly.
i If differential locks are switched on, ABS,
BAS and ESP ®
switch off automatically.
4ETS (Electronic Traction System) Traction control remains active if you deacti-
vate ESP
®
.
X If appropriate for the driving conditions,
engage the LOW RANGE off-road gear
(Y page 202).
Traction control is part of ESP ®
.
Traction control brakes the drive wheels indi-
vidually if they spin. This enables you to pull
away and accelerate on slippery surfaces, for
example if the road surface is slippery on one
side. In addition, more drive torque is trans-
ferred to the wheel or wheels with traction.
Traction control remains active if you deacti-
vate ESP ®
.
Traction control is no longer active above a
speed of about 60 km/h. 62
Driving safety systemsSafety
Page 75 of 357
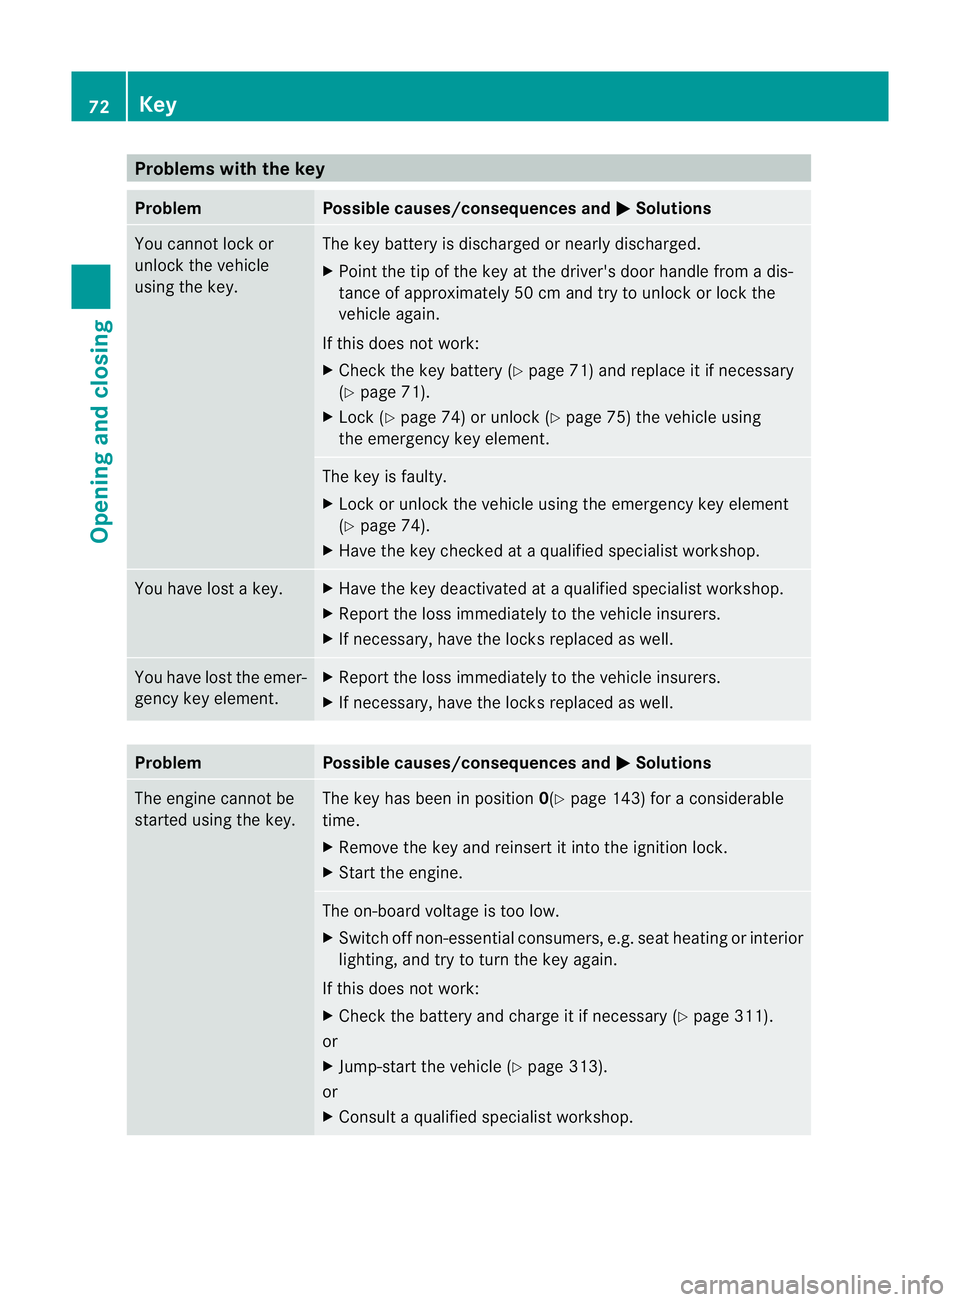
Problems with the key
Problem Possible causes/consequences and
M Solutions
You cannot lock or
unlock the vehicle
using the key. The key battery is discharged or nearly discharged.
X
Point the tip of the key at the driver's door handle from a dis-
tance of approximately 50 cm and try to unlock or lock the
vehicle again.
If this does not work:
X Check the key battery (Y page 71) and replace it if necessary
(Y page 71).
X Lock (Y page 74) or unlock (Y page 75) the vehicle using
the emergency key element. The key is faulty.
X
Lock or unlock the vehicle using the emergency key element
(Y page 74).
X Have the key checked at a qualified specialist workshop. You have lost a key. X
Have the key deactivated at a qualified specialist workshop.
X Report the loss immediately to the vehicle insurers.
X If necessary, have the locks replaced as well. You have lost the emer-
gency key element. X
Report the loss immediately to the vehicle insurers.
X If necessary, have the locks replaced as well. Problem Possible causes/consequences and
M Solutions
The engine cannot be
started using the key. The key has been in position
0(Ypage 143) for a considerable
time.
X Remove the key and reinsert it into the ignition lock.
X Start the engine. The on-board voltage is too low.
X
Switch off non-essential consumers, e.g. seat heating or interior
lighting, and try to turn the key again.
If this does not work:
X Check the battery and charge it if necessary (Y page 311).
or
X Jump-start the vehicle (Y page 313).
or
X Consult a qualified specialist workshop. 72
KeyOpening and closing
Page 117 of 357
Courtesy lighting in the front doors
The courtesy light is switched on to help you
see bette rwhen it is dark.
X To switch on: activate the interior lighting
automatic control.
X Open the door.
X To switch off: close the door. Replacing bulbs
Important safety notes
Xenon bulbs G
DANGER
Xenon bulbs carry a high voltage. You could
get an electric shock and be seriously or even
fatally injured if you touch the electric con-
tacts on xenon bulbs. Therefore, never
remove the cover from xenon bulbs.
Do not change the xenon bulbs yourself, but
have them replaced at a qualified workshop.
If your vehicle is equipped with xenon bulbs,
you can recognise this by the following: the
cone of light from the xenon bulbs moves
from the top to the bottom and back again
when you start the engine. For this to be
observed, the lights must be switched on
before starting the engine.
Bulbs and lamps are an important aspect of
vehicle safety. You must therefore make sure
that these function correctly at all times.
Have the headlamp setting checked regularly.
LED lamps You can neither replace xenon bulbs nor LED
bulbs. Have LED bulbs changed at a qualified
specialist workshop.
Bulbs and lamps are an important aspect of
vehicle safety. You must therefore make sure
that these function correctly at all times.
Have the headlamp setting checked regularly. Other bulbs G
WARNING
Bulbs and lamps can be very hot. You should
therefore allow them to cool down before you
change them. Otherwise, you could be burned
if you touch them.
Keep bulbs out of the reach of children. Oth-
erwise, they could damage the bulbs, for
example, and injure themselves.
Never use a bulb which has been dropped.
Such a bulb may break or even explode and
injure you.
Halogen bulbs are pressurised and can
explode when you change them, particularly
if they are very hot. You should therefore wear
eye protection and gloves when you are
changing them.
There are bulbs other than the xenon bulbs
that you cannot replace. Replace only the
bulbs listed (Y page 115). Have the bulbs that
you cannot replace yourself changed at a
qualified specialist workshop.
If you require assistance replacing bulbs, con-
sult a qualified specialist workshop.
Do not touch the glass tube of new bulbs with
your bare hands. Even minor contamination
can burn into the glass surface and reduce
the service life of the bulbs. Always use a lint-
free cloth or only touch the base of the bulb
when fitting.
Only use bulbs of the correct type.
If the new bulb still does not light up, consult
a qualified specialist workshop.
Bulbs and lamps are an important aspect of
vehicle safety. You must therefore make sure
that these function correctly at all times.
Have the headlamp setting checked regularly. 114
Replacing bulbsLights and windscreen wipers
Page 173 of 357
R
Chec kthat items of luggage and loads are
stowed safely and are well secured
(Y page 271).
R To avoid damaging the vehicle, make sure
there is always sufficient ground clearance.
R Always keep the engine running and in gear
when driving on a downhill gradient.
R Always keep the engine running and in gear
when driving on a slope.
R Drive slowly and evenly, if necessary at
walking pace.
R Ensure that the wheels are in contact with
the ground at all times.
R Drive with extreme care on unknown off-
road routes where visibility is poor. For
safety reasons, get out of the vehicle first
and survey the off-road route.
R Check the depth of water before fording
rivers and streams.
R When fording, do not stop and do not
switch off the engine.
R Look out for obstacles such as rocks, holes,
tree stumps and furrows.
R Always keep the doors, the rear door or
tailgate (G-Class Cabriolet), the side win-
dows and the sliding sunroof closed while
the vehicle is in motion.
R Switch off cruise control and variable
SPEEDTRONIC.
R Do not stray from marked routes or paths.
R Adapt your speed to the terrain. The
rougher, steeper or more ruts on the ter-
rain, the slower your speed should be.
R Drive slowly and at a constant speed
through the water. Ensure that a bow wave
does not form as you drive.
R On sand, drive quickly to overcome the roll-
ing resistance. Otherwise, the vehicle could
dig itself into the sand.
R Do not jump with the vehicle as this will
interrupt the vehicle's propulsion. R
Avoid high engine speeds. Drive at appro-
priate engine speeds.
R Always check the vehicle for damage after
off-road driving.
i Information about retrofitting special all-
terrain tyres is available from any qualified
specialist workshop.
i Do not use the HOLD function when driv-
ing off-road, on steep uphill or downhill gra-
dients or on slippery or loose surfaces. The
HOLD function cannot hold the vehicle on
such surfaces.
Checklist before driving off-road !
If the engine oil warning lamp lights up
during the journey, stop the vehicle in a
safe place as soon as is possible. Check the
engine oil level. The warning given by the
engine oil warning light must not be
ignored. Continuing your journey when the
symbol is shown may result in engine dam-
age.
X Engine oil level: check the engine oil and
top it up if necessary.
Only then does the engine receive enough
oil when the vehicle is standing on a steep
incline.
X G3 50 BlueTEC: have the AdBlue ®
level
checked at a qualified specialist workshop
(Y page 160).
X Tyre-change tool kit: check that the jack
is working and make sure you have the
wheelbrace, a robust tow cable and a fold-
ing spade in the vehicle.
X Wheels and tyres: check the tyre tread
depth and tyre pressure.
X Check for damage and remove any foreign
objects, e.g. small stones, from the
wheels/tyres.
X Replace any missing valve caps.
X Replace dented or damaged wheels.
X Carry a sound spare wheel. 170
Driving tipsDriving and parking