tyre pressure MERCEDES-BENZ G-CLASS SUV 2016 Owners Manual
[x] Cancel search | Manufacturer: MERCEDES-BENZ, Model Year: 2016, Model line: G-CLASS SUV, Model: MERCEDES-BENZ G-CLASS SUV 2016Pages: 261, PDF Size: 6.01 MB
Page 6 of 261
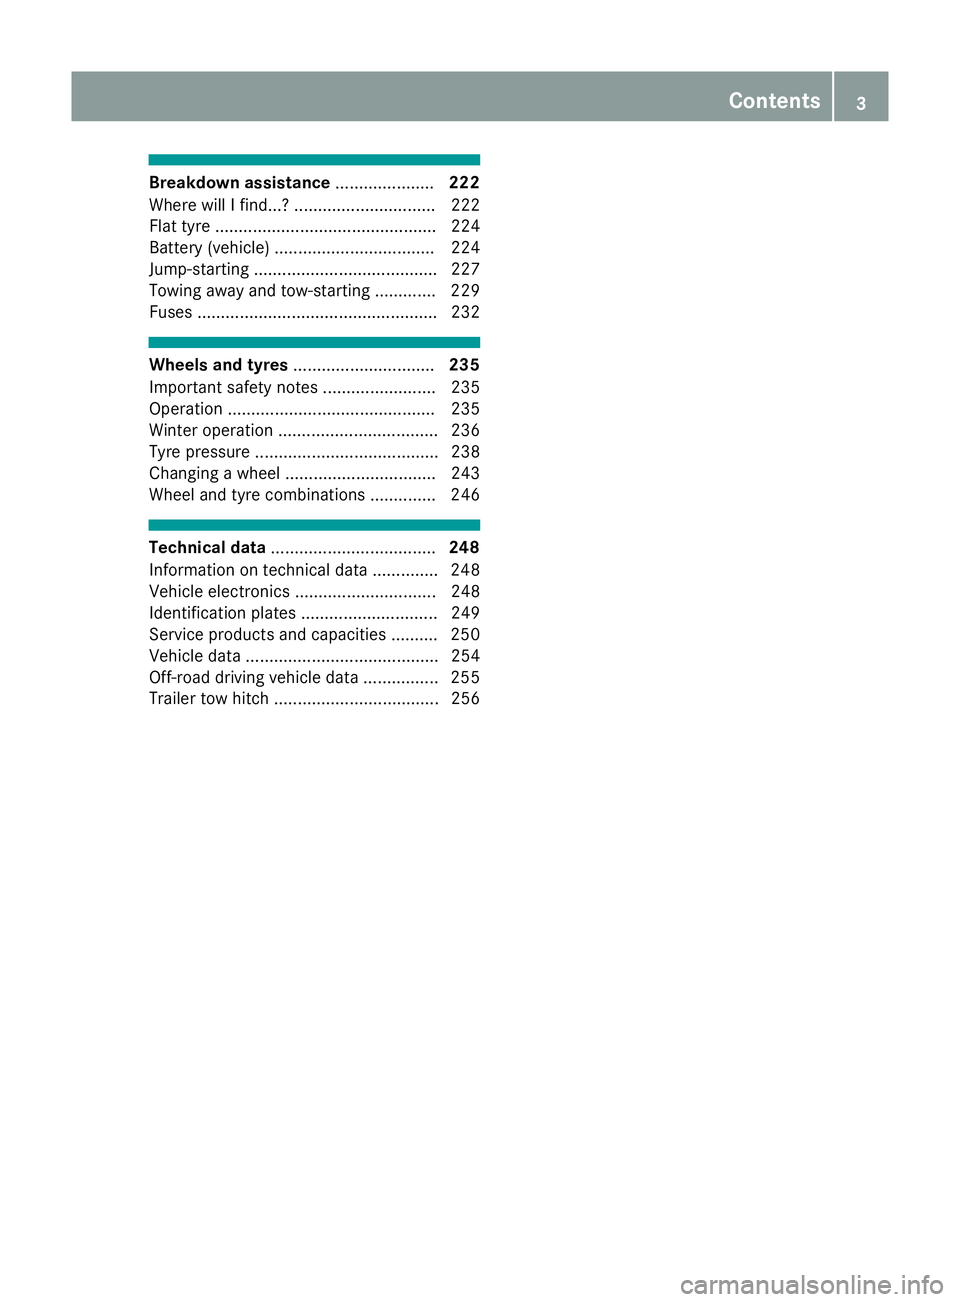
Breakdow
nassistance ..................... 222
Where will Ifind...? .............................. 222
Fla ttyre ............................................... 224
Battery (vehicle ).................................. 224
Jump-starting ....................................... 227
Towing away and tow-starting ............. 229
Fuses ................................................... 232 Wheel
sand tyres .............................. 235
Important safety notes ........................ 235
Operation ............................................ 235
Winter operation .................................. 236
Tyre pressure ....................................... 238
Changing awheel ................................ 243
Whee land tyre combinations .............. 246 Technical data
................................... 248
Informatio nontechnica ldata. ............. 248
Vehicl eelectronics .............................. 248
Identification plate s............................. 249
Service products and capacitie s.......... 250
Vehicl edata. ........................................ 254
Off-roa ddriving vehicl edata. ............... 255
Trailer tow hitch ................................... 256 Contents
3
Page 9 of 261
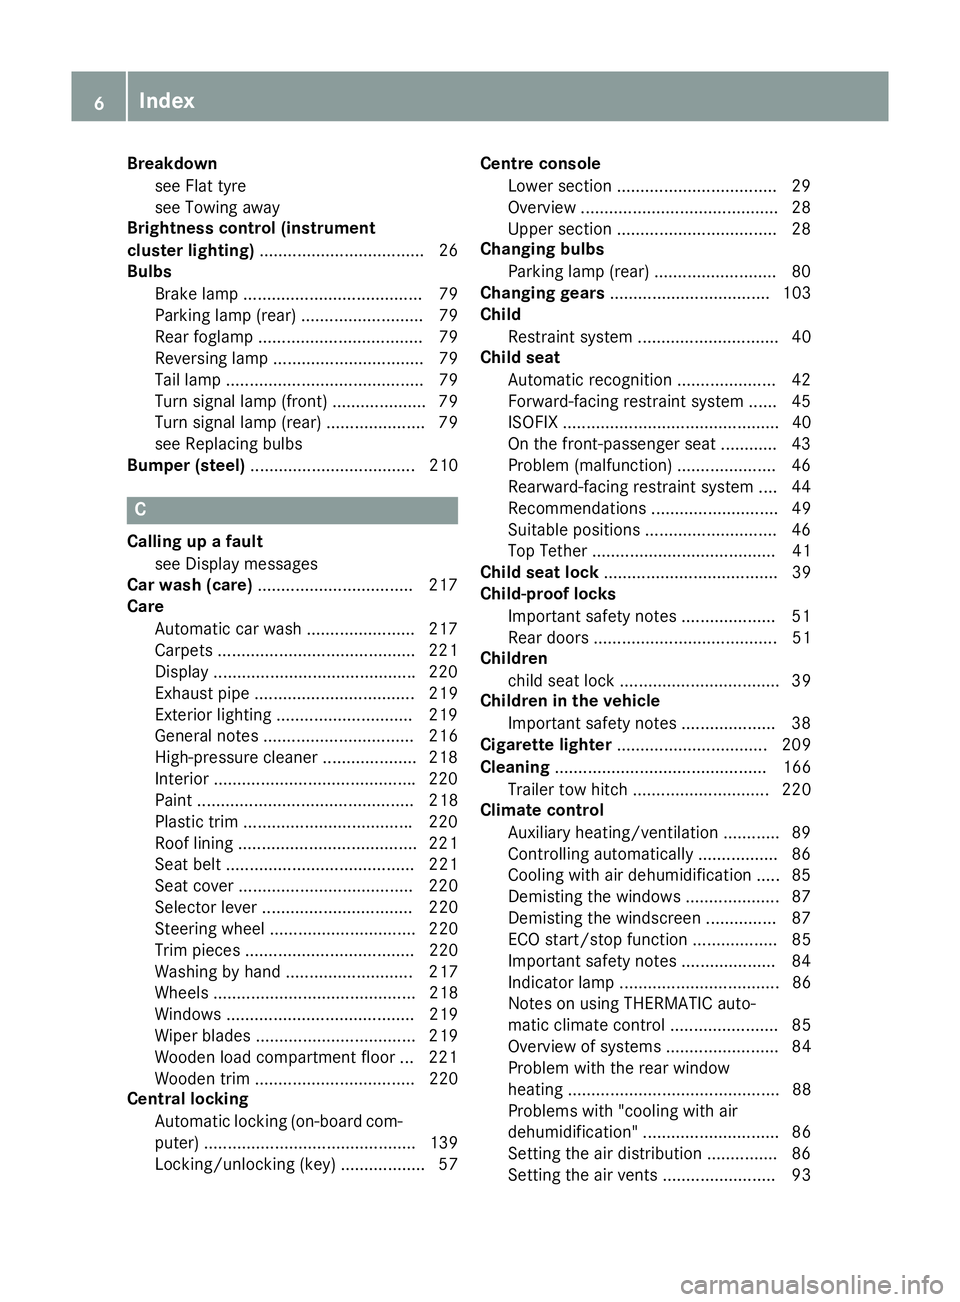
Breakdown
see Fla ttyre
see Towing away
Brightness contro l(instrument
cluste rlighting) ................................... 26
Bulbs
Brake lamp ...................................... 79
Parking lamp (rear) .......................... 79
Rear foglamp ................................... 79
Reversing lamp ................................ 79
Tail lamp .......................................... 79
Turn signa llam p(front) .................... 79
Turn signa llam p(rear) ..................... 79
see Replacing bulbs
Bumper (steel) ................................... 210 C
Calling up afault
see Display messages
Car wash (care) ................................ .217
Care
Automatic car wash ....................... 217
Carpets .......................................... 221
Display .......................................... .220
Exhaus tpipe. ................................. 219
Exterior lighting ............................ .219
General notes ................................ 216
High-pressure cleaner .................... 218
Interior .......................................... .220
Paint .............................................. 218
Plastic trim ................................... .220
Roo flining ...................................... 221
Seat bel t........................................ 221
Seat cover ..................................... 220
Selector leve r................................ 220
Steering whee l............................... 220
Tri mp iece s.................................... 220
Washing by hand ........................... 217
Wheel s........................................... 218
Window s........................................ 219
Wipe rblade s.................................. 219
Woode nloa dc ompartment floor ... 221
Woode ntrim .................................. 220
Central locking
Automati cloc king (on-board com-
puter) ............................................. 139
Locking/unlocking (key) .................. 57 Centr
econsole
Lowe rsectio n................................. .29
Overview .......................................... 28
Upper sectio n................................. .28
Changing bulbs
Parking lamp (rear ).......................... 80
Changin ggears .................................. 103
Child
Restraint system .............................. 40
Child seat
Automati crecognition ..................... 42
Forward-facing restraint system ...... 45
ISOFIX .............................................. 40
On the front-passenger sea t............ 43
Problem (malfunction) ..................... 46
Rearward-facing restraint system .... 44
Recommendations ........................... 49
Suitable positions ............................ 46
Top Tether ....................................... 41
Child seat lock ..................................... 39
Child-proof locks
Important safety notes .................... 51
Rear doors ....................................... 51
Children
child sea tloc k. ................................. 39
Childre ninthe vehicle
Important safety notes .................... 38
Cigarette lighter ................................ 209
Cleaning ............................................. 166
Trailer tow hitch ............................. 220
Climate control
Auxiliary heating/ventilation ............ 89
Controlling automaticall y................. 86
Cooling with ai rdehumidifica tion ..... 85
Demisting the window s.................... 87
Demisting the windscree n............... 87
ECO start/stop function .................. 85
Important safety notes .................... 84
Indicato rlam p.................................. 86
Note sonu sing THERMATI Cauto-
mati cclimate control ....................... 85
Overview of systems ........................ 84
Problem with the rea rwindow
heating ............................................. 88
Problems with "cooling with air
dehumidification" ............................. 86
Setting the ai rdistribution ............... 86
Setting the ai rvents ........................ 93 6
Index
Page 20 of 261
Towin
geye
Front .............................................. 230
Rear .............................................. .230
Traffic reports
Overview lis t.................................. 188
Showing on the map ...................... 188
Switching on/of f........................... 196
Trailer
7-pi nconnecto r............................. 130
Power supply ................................. 129
Trailer coupling
see Towing atrailer
Trailer loads
Technica ldata. .............................. 256
Trailer towing
Cleaning the traile rtow hitch ......... 220
Coupling up atraile r...................... 129
Decoupling atraile r....................... 129
Driving tip s.................................... 128
ESP ®
................................................ 55
Important safety notes .................. 127
Lights display message .................. 145
Shift rang e..................................... 104
Trailer load s................................... 256
Transfer case
Genera lnotes ................................ 124
Shift rang e..................................... 124
Shifting .......................................... 124
Shifting (general notes ).................. 124
Shifting (important safety notes )... 124
Shifting to neutral .......................... 125
Switching off the off-road gear
rati o............................................... 124
Switching on the off-road gear
rati o............................................... 124
Transmission
see Automati ctransmission
Transmissio npositions .................... 103
Transport (vehicle) ............................ 231
Travellin guphill
Brow of hill ..................................... 122
Trim piece s(clea ning instruc-
tions) .................................................. 220
Trip computer (on-board com-
puter) .................................................. 134
Trip meter
Calling up ....................................... 133 Reset
ting(on-boar dcom puter) ...... 134
Turn signal lamp
Replacin gbulbs (rear) ...................... 80
Turn signals
Replacin gbulbs (front) .................... .80
Switching on/of f.............................. 76
Two-wa yradio
Frequencie s................................... 248
Installation ..................................... 248
Transmission outpu t(maximum) .... 248
Type identificatio nplate
see Vehicl eide ntification plate
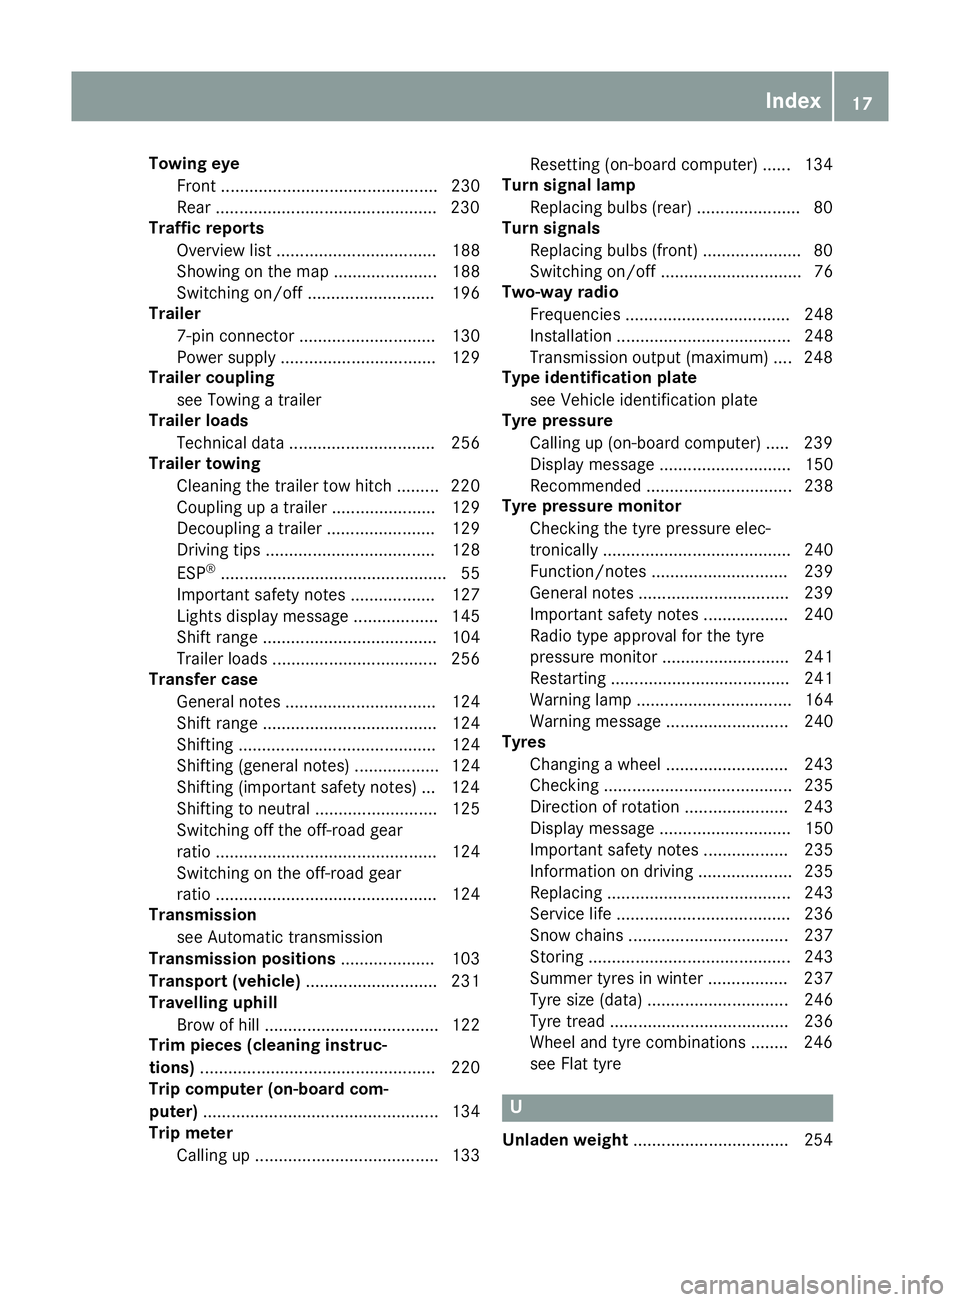
Tyre pressure
Calling up (on-board computer) ..... 239
Displa ymessage ............................ 150
Recommended ............................... 238
Tyre pressure monitor
Checking the tyre pressure elec-
tronically ........................................ 240
Function/note s............................. 239
Genera lnotes ................................ 239
Important safety notes .................. 240
Radi otypea pproval for the tyre
pressure monitor ........................... 241
Restarting ...................................... 241
Warning lamp ................................. 164
Warning message .......................... 240
Tyres
Changing awheel .......................... 243
Checking ........................................ 235
Directio nofrotation ...................... 243
Displa ymessage ............................ 150
Important safety notes .................. 235
Information on driving .................... 235
Replacing ....................................... 243
Service life ..................................... 236
Snow chains .................................. 237
Storing ........................................... 243
Summer tyre sinwinter ................. 237
Tyre size (data ).............................. 246
Tyre trea d...................................... 236
Wheel and tyre combinations ........ 246
see Fla ttyre U
Unlade nweight .................................2 54 Index
17
Page 29 of 261
Instrumen
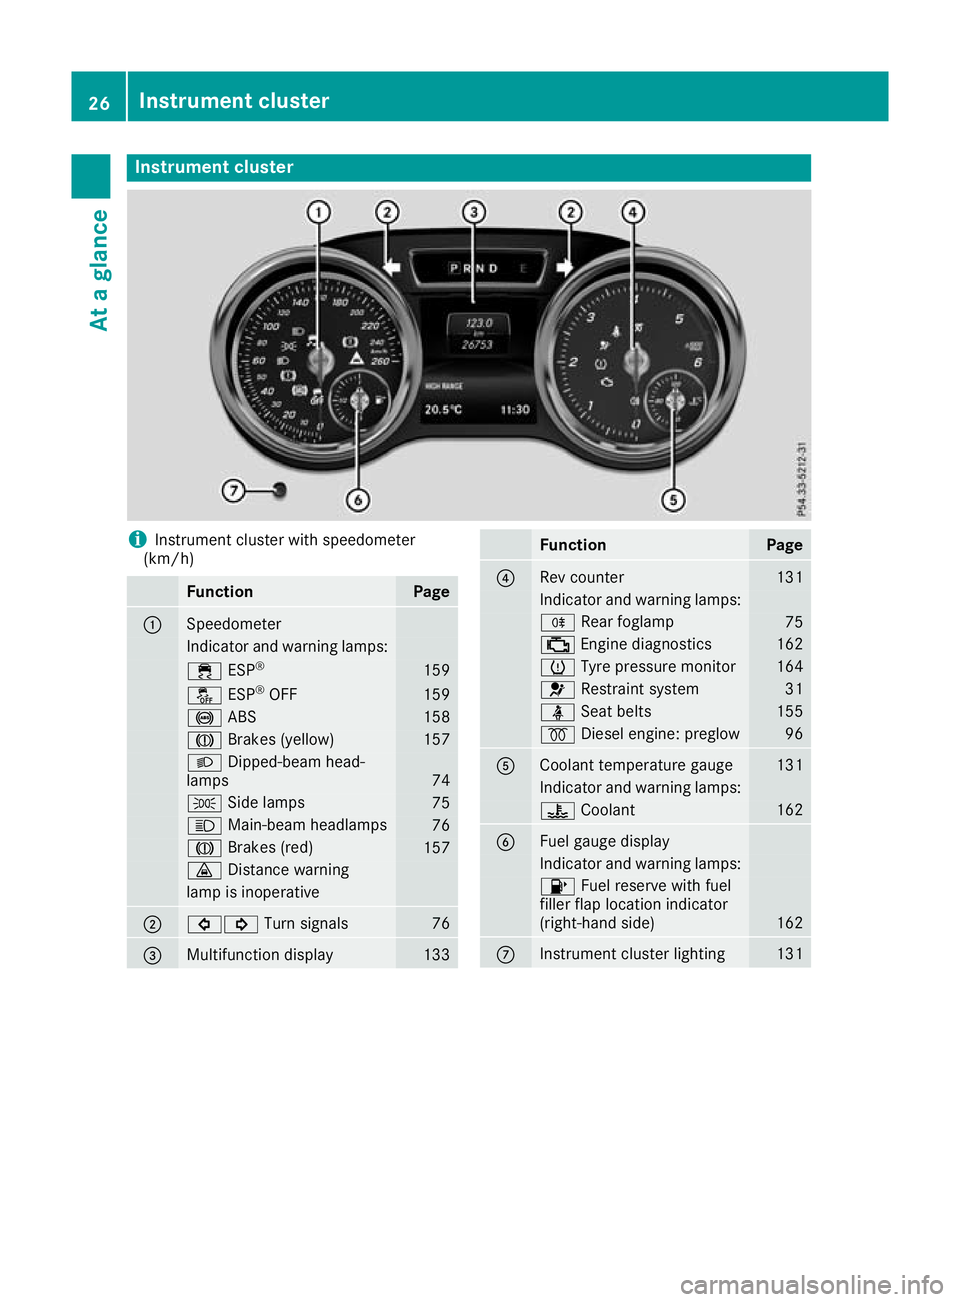
tcluster i
Instrument cluste
rwith speedometer
(km/h) Function Page
:
Speedometer
Indicator and warning lamps:
÷
ESP® 159
å
ESP®
OFF 159
!
ABS 158
J
Brakes (yellow) 157
L
Dipped-bea mhead-
lamps 74
T
Sidelam ps 75
K
Main-beam headlamps 76
J
Brakes(red) 157
·
Distance warning lamp is inoperative
;
#!
Turn signals 76
=
Multifunctio
ndisplay 133 Function Page
?
Rev counter 131
Indicato
rand warning lamps: R
Rear foglamp 75
;
Engine diagnost ics 162
h
Tyre pressure monitor 164
6
Restraint system 31
ü
Seat belts 155
%
Diesel engine: preglow 96
A
Coolant temperature gauge 131
Indicator and warning lamps:
?
Coolant 162
B
Fuel gaug
edisplay Indicator and warnin
glamps: 8
Fuel reserve with fuel
filler flap location indicator
(right-hand side) 162
C
Instrument cluster lighting 13126
Instrument clusterAt
ag lance
Page 55 of 261
Pets in the vehicle
G
WARNING
If you leave animals unsupervised or unse-
cured in the vehicle, they may push abutton
or as witch, for example.
They could:
R activate vehicl eequipment and become
trapped, for example
R switch vehicl esystems on or off, thus
endangering other road users
In the event of an accident, sudden braking or
abrupt changes of direction, unsecured ani-
mals coul dbeflung around the vehicle, injur-
ing the vehicl eoccupants. There is arisk of an
accident and injury.
Never leave animals unattended in the vehi-
cle. Always secure animals correctly during a
journey ,e.g. in an anima ltransport box. Driving safe
tysystems Drivin
gsafet ys ystems overview
In this section ,you will fin dinformati on about
th ef ollowin gdrivin gsafet ysystems:
R AB S(Anti-lock Braking System)
(Y page 52)
R BA S(Brake Assist System) (Y page 53)
R Adaptive brake lights (Y page 53)
R ESP ®
(Electronic Stability Program)
(Y page 53)
R EB D( electronic brak eforce distributi on)
(Y page 55)
R ADAPTIV EBRAKE (Y page 56) Important safety notes
If you fail to adapt your driving style or if you are
inattentive, th edriving safet ysystems can nei-
ther reduce th eriskofana ccidentnor override
th el aws of physics .Drivin gs afet ysystems are
merely aids designed to assist driving .You are
responsible for maintainin gthe distanc etothe
vehicl einfront,for vehicl espeed, for braking in
goo dtime, and for staying in lane. Always adapt
your driving style to suit th eprevailing road and weather conditions and maintain
asafe distance
fro mt hevehicle in front .Drive carefully.
The driving safet ysystems described work as
effectively as possible only when there is ade-
quate contac tbetween th etyres and th eroad
surface. Pay particular attention to th einforma-
tio nr egarding tyres, recommended minimum
tyr etread depths etc .inthe"Wheels and tyres"
sectio n(Ypage 235).
In wintry driving conditions ,always use winter
tyres (M+S tyres) and, if necessary, snow
chains. Only in this way will th edriving safety
systems described in this sectio nwork as effec-
tively as possible. ABS (Anti-lock Braking System)
Genera linformation AB
Sregulate sbrake pressure in such awaythat
the wheels do not lock when yo ubrake. This
allows yo utocontinue steering the vehicl ewhen
braking.
The yellow !ABS warning lamp in the instru-
ment cluster lights up when the ignition is
switched on. It goe soutwhen the engine is run-
ning.
ABS works from aspeed of abou t8km/h,
regardless of road-surface conditions. ABS
works on slippery surfaces ,evenw heny ou
brake onl ygently.
Important safety notes i
Observ
ethe "Important safety notes" sec-
tion (Y page 52). G
WARNING
If ABS is faulty, the wheels could lock when
braking. The steerability and braking charac-
teristics may be severely impaired.A ddition-
ally, further driving safety systems are deac-
tivated. There is an increased dange rofskid-
ding and accidents.
Drive on carefully.H ave ABS checked imme-
diately at aqualified specialist workshop.
If ABS is malfunctioning, other systems ,includ-
ing driving safety systems ,willa lsob ecome
inoperative. Observe the information on the ABS warning lamp (Y page158) and display mes- 52
Driving safety systemsSafety
Page 112 of 261
nozzle. Thi
sdischarge sany electrostatic
charge tha tmayhave buil tup.
Do not get back into the vehicl eduring the refu-
elling process ;otherwise, electrostatic charge
could buil dupagain. G
WARNING
If yo umix diesel fuel with petrol, the flash
point of this fuel mixture is lower than that of pure diesel fuel .When the engine is running,
components in the exhaust system may over-
heatu nnoticed. There is arisk of fire.
Never refue lwith petrol. Never add petrol to
diesel fuel.
! Do not use petrol to refue
lvehicles with a
diesel engine. Do not switch on the ignitio nif
you accidentally refue lwith the wrong fuel.
Otherwise, fuel can enter the fuel system.
Even smal lamounts of the wrong fuel could
result in damage to the fuel system and the
engine. The repair costs are high .Notify a
qualified specialist worksho pand have the
fuel tank and fuel lines drained completely.
! Overfilling the fuel tank coul
ddamage the
fuel system.
! Take care not to spil
lany fuel on painted
surfaces. You coul dotherwise damage the
paintwork.
! Use
afilter when adding fuel from afuel can.
The fuel lines and/or the fuel injection system coul dotherwise be blocked by particles from
the fuel can.
If you overfil lthe fuel tank, some fuel may spray
out when you remove the fuel pump nozzle.
Further information on fuel and fuel quality
(Y page2 50). Refuelling
General information Observe the important safety notes
(Y
page 108).
If you unlock/lock the vehicle from the outside, the fuel filler flap also unlocks/locks.
The positio nofthe8 fuel filler cap is dis-
played on the instrument cluster. The arrow next to the filling pump indicates the side of the vehi-
cle.
Opening the fuel filler flap :
To open the fuel filler flap
; Tyre pressure table
= Instruction label on the fuel type to be refu-
elled
? To insert the fuel filler cap
X Turn the fuel filler cap anti-clockwise and
remove it.
X Insert the fuel filler cap into the holder
bracket on the inside of filler flap ?.
i AdBlue ®
vehicles do not have abracket on
the inside of the filler flap.
X Completely insert the filler neck of the fuel
pump nozzle into the tank and refuel.
X Fill the tank only until the pump nozzle
switches off.
Do not add any more fuel after the pump stops
filling for the first time. Otherwise, fuel may leak out.
The filler neck is designed for refuelling at diesel
filling pumps.
Closing the fuel filler flap X
Replace the cap on the filler neck and turn
clockwise until it engages audibly.
X Clos ethe fuel filler flap.
Close th efuel filler flap before lockin gthe vehi-
cle. Refuelling
109Driving and parking Z
Page 118 of 261
X
To apply: pull parking brake lever ;up
firmly.
Whe nthe ignition is switched on, the red J
indicator lamp in the instrument cluster lights up.
X To release: pull parking brake lever ;
slightly.
X Press release button :and guid eparking
brake ;down to the stop.
The J indicator lamp in the instrument
cluster goe sout.
The vehicl ecan also be braked during an emer-
genc ybyu sing the parking brake.
X To brake in an emergency: press and hold
release button :and carefull ypullp arking
brake lever ;upwards.
If yo udrive on we troads or dirt-covered surfa-
ces, roa dsalta nd/or dirt could get into the
parking brake.
In order to prevent corrosion and areduction in
the braking powe rofthe parking brake, observe
the following:
R pull the parking brake upwards with release
button :depresse dfrom time to time before
beginning ajourney
R drive for approximatel y100 ma tamaximum
speed of 20 km/h Parkin
gupthe vehicle
If you leave the vehicle parked up for longer than
four weeks, the battery may be damaged by
exhaustive discharging.
If you leave the vehicle parked up for longer than
six weeks, it may suffer from lack of use.
X Contact aqualified specialist workshop and
seek advice.
i You can obtain information on trickle charg-
ers from aqualified specialist workshop. Driving tips
General drivin
gtips
Important safety notes G
WARNING
If you switch off the ignition while driving,
safety-relevant functions are only available wit
hlimitations, or not at all. This could affect,
for example, th epower steerin gand th ebrake
boosting effect .You will requir econsiderably
mor eeffort to steer and brake. Ther eisarisk
of an accident.
Do not switch off th eignitio nwhile driving.
Drive sensibly –savef uel Observe the following tips to save fuel:
X The tyre sshould always be inflated to the rec-
ommended tyre pressure.
X Remove unnecessary loads.
X Remove roof carriers when they are not nee-
ded.
X Warm up the engine at low engine speeds.
X Avoid frequent acceleration or braking.
X Have all service and maintenance work car-
ried out at the specified intervals.
Fuel consumption also increases when driving in
cold weather, in stop-start traffic, on short jour- neys and in hilly terrain. Short journeys
! Vehicles with
adiesel particle filter: if the
vehicle is mostly driven for short distances, it
is possible that malfunction smay occur dur-
ing the automatic cleaning of the diesel par-
ticle filter. This may lead to fuel collecting in
the engine oil and cause engine failure. There- fore, if you frequently drive short distances,
you should take a20minute trip on amotor-
way or rural road at least every 500km. Brakes
Imp ortant safety notes G
WARNING
If you shift dow nonaslippery road surface in
an attempt to increas ethe engine's braking
effect, the drive wheels coul dlose their grip.
This increases the risk of skidding and having
an accident.
Do not shift downf or additionalengine brak-
ing on aslippery road surface. Drivingt
ips
115Driving an dparking Z
Page 123 of 261
Observe the following notes:
R stop the vehicle before you drive off-road and,
if necessary, shift the transfer case to the
LOW RANGE off-road driving position
(Y page 124)
R engage the differential locks if necessary
(Y page 126)
i ABS,4
ETS, ESP ®
and BAS are deactivated
while the differential locks are engaged. This
allowst he front wheels to lock briefly, so that
they can dig into aloose surface. However,
please note that locked wheels skid and can
no longer steer.
R Make sure that items of luggage and loads are
stowed safely and are well secured
(Y page 203).
R To avoid damaging the vehicle, make sure
there is always sufficient ground clearance.
R Alwaysk eep the engine running and in gear
when driving on adownhill gradient.
R Alwaysk eep the engine running and in gear
when driving on aslope.
R Drive slowly and evenly, if necessary at walk-
ing pace.
R Ensure that the wheels are in contact with the
ground at all times.
R Drive with extreme care on unknown off-road
routes where visibility is poor. For safety rea- sons, get out of the vehicle first and survey
the off-road route.
R Check the depth of water before fording rivers
and streams.
R Watch out for obstacles.
R Alwaysk eep the doors, the rear door, the side
windows and the sliding sunroof closed while
the vehicle is in motion.
R Do not deviate from marked routes.
R Match your speed to the terrain. The rougher,
steeper or more ruts on the terrain, the slower your speed should be.
R Do not jump with the vehicle. This will inter-
rupt the vehicle's propulsion.
R Avoid high engine speeds. Drive at appropri-
ate engine speeds.
R Alwaysc heck the vehicle for damage after off-
road driving.
Do not use the HOLD function when driving off- road, on steep uphillord ownhill gradients or on
slippery or loose surfaces. The HOLD function
cannot hold the vehicle on such surfaces. You can obtain further information aboutr
etro-
fittin gspecial all-terrain tyres from aqualified
specialis tworkshop.
Checklist before off-roa ddriving X
Engine oil level: check the engine oil and top
it up if necessary.
When driving on steep gradients, the oil level must be sufficiently high to ensure acorrect
oil supply in th evehicle.
X Hav ethe AdBlue ®
level checked at aqualified
specialist workshop (Y page 111).
X Tyre-change tool kit: check that thejackis
working and mak esure that th ewheel
wrench, arobus ttow cable and afolding
spade are in th evehicle.
X Wheels and tyres: check thetyret read
dept hand tyr epressure.
X Chec kfor damage and remove any foreign
objects, e.g .small stones, fro mthewheels/
tyres.
X Replace any missing valv ecaps.
X Replace dented or damage dwheels .Also
check th espare wheel.
X Wheels: dented or ben twheels can lead to a
loss of tyr epressure and damage to th etyre
bead. Before driving off-road, check the
wheels and replac ethemifn ecessary.
Checklist after off-roa ddriving !
If you detect damage to the vehicl
eafter
driving off-road, have the vehicle checked
immediately at aqualified specialist work-
shop.
Driving over rough terrain places greater
demands on your vehicle than driving on normal
roads. After driving off-road, check the vehicle.
This allowsy ou to detect damage promptly and
reduce the risk of an accident to yourselfa nd
other road users.
X Shift the transfer case to the on-road position
HIGH RANGE (Ypage 124).
X Disengage the differential locks
(Y page 127).
X Cleant he headlamps and rear lights and
check for damage.
X Cleant he front and rear licence plates.
X Cleant he wheels and tyres with awater jet
and remove any foreign objects. 120
Drivingt
ipsDriving and parking
Page 126 of 261
Important safety notes
G
WARNING
When leavin gthe vehicle, it can still roll away
despite being braked by the HOLD function if:
R there is amalfunction in the system or in
the voltag esupply
R the HOLD function is deactivated by the
accelerator peda lbeing depressed, e.g. by
av ehicl eoccupant
R the electrica lsystem in the engine com-
partment, the battery or the fuses are tam-
pered with
R the battery is disconnected
There is arisk of an accident.
Before leaving the vehicle, alwaysd eactivate
the HOLD function and secure the vehicle
from rolling away.
Deactivating the HOLD function (Y page123).
Activation conditions You can activate the HOLD fun
ction if:
R the vehicle is stationary
R the engin eisrunning or if it has been auto-
matically switched off by the ECO start/stop
function
R the driver's door is close dorifyour seat belt
is fastened
R the parking brak eisreleased
R the transmission is in position D,Ror N
Activating th eHOLD function X
Make sure that the activation condition sare
met.
X Depress the brake pedal.
X Quickly depress the brake pedal further until
ë appears in the multifunction display.
The HOLD function is activated. You can
release the brake pedal.
If depressing the brake pedal the first time does not activate the HOLD function, wait briefly and
then try again. Deactivating the HOLD function The HOLD function is deactivated automatically
if:
R you depress the accelerator and the trans-
mission is in position Dor R.
R the transmission is in position j.
R you depress the brake pedal again with acer-
tain amount of pressure until ëdisap-
pears from the multifunction display.
On steep uphill or downhill inclines or if there is
am alfunction, the transmission may also be
automatically shifted into position P. Permanent all-wheel drive
! Never tow the vehicle with one axle raised.
This may damage the transfer case. Damage
of this sort is not covered by the Mercedes-
Benz implied warranty. All wheels must
remain either on the ground or be fully raised.
Observe the instructions for towing the vehi-
cle with all wheels in full contact with the
ground.
! When testin
gthe parking brake, operate the
vehicle only briefly (for amaximum of ten sec-
onds) on abrake test dynamometer. When
doing this, turn the key to position 0or 1in
the ignition. Failure to do this can cause dam- age to the drive train or the brake system.
! Af
unction or performanc etest should only
be carried out on atwin-axle dynamometer.
Before you operate the vehicle on such a
dynamometer, please consult aqualified
workshop. You could otherwise damage the
drive train or the brake system.
The all-wheel drive system ensures that all four
wheels are permanently driven. The all-wheel
drive system improves vehicle traction together with ESP ®
and 4ETS if adrive wheel spins due to
insufficient grip.
Only when you use winter tyres (M+S tyres) in
wintry driving condition sand, if necessary, snow
chains (Y page 237). Only in this way can the
maximum effect of all-wheel drive be achieved.
Information about driving off-road (Y page 119). Driving systems
123Driving and parking Z
Page 131 of 261
To avoid hazardous situations:
R make sure to check the noseweight before
each journey
R the noseweight should be as close as possible
to the maximum noseweight
R do not exceed the maximum permissible
noseweight
R the noseweight must not be lower than the
minimum permissible noseweight
Make sure that the following values are not
exceeded:
R the permissible noseweight
R the permissible trailer load
R the permissible rear axle load of the towing
vehicle
R the maximum permissible gross vehicle
weight of both the towing vehicle and the
trailer
When reversin gthe towing vehicle, make sure
there is nobody between the trailer and the vehi- cle.
The applicable permissible values, which must
not be exceeded, can be found:
R in your vehicle documents
R on the type plates for the trailer
R on the vehicle identification plate
If the values differ, the lowest value applies.
You will find the values approved by the manu-
facturer on the identification plates and for the
towing vehicle under "Technical data"
(Y page 256).
When reversin gthe towing vehicle, make sure
there is nobody between the trailer and the vehi- cle.
Couple and uncouple the trailer carefully. If youdo not couple the trailer to the towing vehicle
correctly, the trailer could become detached.
When towing atrailer, your vehicle's handling
characteristics will be different from when driv-
ing without atrailer.
The vehicle/trailer combination:
R is heavier
R is restricted in its acceleration and gradient-
climbing capability
R has an increased braking distance
R is affected more by stron gcrosswinds
R demands more sensitiv esteering
R has alarger turnin gcircle This can impair the vehicle's handling charac-
teristics. Adapt your driving style accordingly.
Maintain asafe distance. Drive carefully.
When towing atrailer, alway sadjust your speed
to the current road and weather conditions. Do
not exceed the maximum permissible speed for
your vehicle/trailer combination. Notes on to
wingatrailer
General notes When towing
atrailer, set the tyre pressure on
the rear axle of the towing vehicle for amaxi-
mum load. Further information on the tyre pres-
sure table in the fuel filler flap (Y page 109).
The height of the ball coupling changes with the load of the vehicle. If necessary, use atrailer
with aheight-adjustable drawbar.
You will find permissible trailer loads under
"Technical data" (Y page 256).
Driving tips X
Observe the information on ESP ®
trailer sta-
bilisation (Y page 55).
X On long and steep downhill gradients, select
shift range 1,2or 3(Y page 105) in good time.
X If necessary, shift the transfer case to LOW
RANGE (Ypage 124).
This will use the braking effect of the engine, so less braking will be required to maintain
the vehicle speed. This relieves the load on
the brake system and prevents the brakes
from overheating and wearing too quickly. If
you need additional braking, depress the
brake pedal repeatedly rather than continu-
ously.
The maximum permissible speed for vehicle/
trailer combinations depends on the type of
trailer. Before beginnin gthe journey, check the
trailer's documents to see what the maximum
permitted speed is. Observe the maximum per-
missible speed in the relevant country.
For certain Mercedes-Benz vehicles, the maxi-
mum permissibler ear axle load is increased
when towing atrailer. See the "Technical data"
section to find out whether this applies to your
vehicle (Y page 256). In the event of increased
rear axle load, the car/trailer combination may
not exceed amaximum speed of 100 km/h for
reasons concerning the operating permit. This 128
Towing
atrailerDriving and parking