SD Card MERCEDES-BENZ GL-Class 2016 X166 Comand Manual
[x] Cancel search | Manufacturer: MERCEDES-BENZ, Model Year: 2016, Model line: GL-Class, Model: MERCEDES-BENZ GL-Class 2016 X166Pages: 246, PDF Size: 6.72 MB
Page 50 of 246
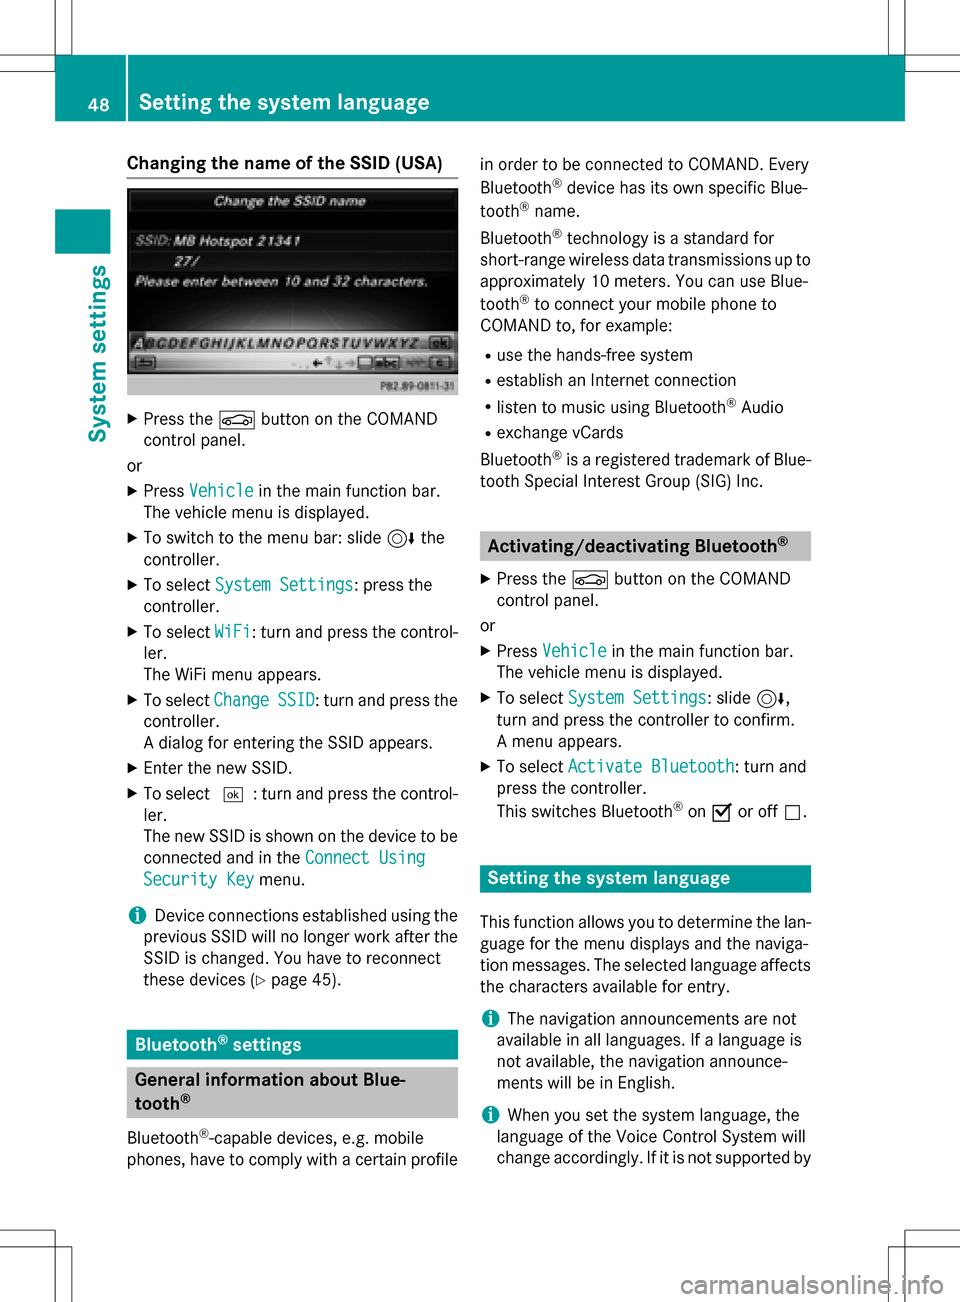
Changing the name of the SSID (USA)
XPress theØbutton on the COMAND
control panel.
or
XPress Vehiclein the main function bar.
The vehicle menu is displayed.
XTo switch to the menu bar: slide 6the
controller.
XTo select System Settings: press the
controller.
XTo select WiFi: turn and press the control-
ler.
The WiFi menu appears.
XTo select ChangeSSID: turn and press the
controller.
A dialog for entering the SSID appears.
XEnter the new SSID.
XTo select ¬: turn and press the control-
ler.
The new SSID is shown on the device to be
connected and in the Connect Using
Security Keymenu.
iDevice connections established using the
previous SSID will no longer work after the
SSID is changed. You have to reconnect
these devices (
Ypage 45).
Bluetooth®settings
General information about Blue-
tooth®
Bluetooth®-capable devices, e.g. mobile
phones, have to comply with a certain profile in order to be connected to COMAND. Every
Bluetooth
®device has its own specific Blue-
tooth®name.
Bluetooth
®technology is a standard for
short-range wireless data transmissions up to
approximately 10 meters. You can use Blue-
tooth
®to connect your mobile phone to
COMAND to, for example:
Ruse the hands-free system
Restablish an Internet connection
Rlisten to music using Bluetooth®Audio
Rexchange vCards
Bluetooth
®is a registered trademark of Blue-
tooth Special Interest Group (SIG) Inc.
Activating/deactivating Bluetooth®
X
Press the Øbutton on the COMAND
control panel.
or
XPress Vehiclein the main function bar.
The vehicle menu is displayed.
XTo select System Settings: slide6,
turn and press the controller to confirm.
A menu appears.
XTo select Activate Bluetooth: turn and
press the controller.
This switches Bluetooth
®on O or off ª.
Setting the system language
This function allows you to determine the lan-
guage for the menu displays and the naviga-
tion messages. The selected language affects
the characters available for entry.
iThe navigation announcements are not
available in all languages. If a language is
not available, the navigation announce-
ments will be in English.
iWhen you set the system language, the
language of the Voice Control System will
change accordingly. If it is not supported by
48Setting the system language
System settings
Page 51 of 246
the Voice Control System, English will be
selected.
XPress theØbutton on the COMAND
control panel.
or
XPress Vehiclein the main function bar.
The vehicle menu is displayed.
XTo select System Settings: slide6,
turn and press the controller.
A menu appears.
XTo select Language: turn and press the
controller.
The list of languages appears. The #dot
indicates the current setting.
XSelect the desired language.
COMAND loads the selected language and
sets it.
Calling up the favorite functions
The favorites function can be called up as fol-
lows:
Rvia the System Settingsmenu
Rvia the Favorites button on the controller
(
Ypage 24)
Rvia the Favorites button on the touchpad
(
Ypage 25)
Calling up the Favorites function via the
system menu:
XPress the Øbutton on the COMAND
control panel.
or
XPress Vehiclein the main function bar.
The vehicle menu is displayed.
XTo select SystemSettings: slide6and
press the controller.
A menu appears.
XTo select Favorite Functions: press the
controller.
The favorites are displayed.
XTo select the desired function, e.g. Phone‐
book: turn and press the controller.
A menu appears. Calling up the Favorites function using
the controller:
XPress the favorites button on the controller.
The favorites are displayed.
XTo select the desired function, e.g. Phone‐
book: turn and press the controller.
Calling up the Favorites function via the
touchpad:
XPress the favorites button on the touchpad.
The favorites are displayed.
XTo select the desired function, e.g. Phone‐
book: turn and press the controller.
The Favorites function can be exited at any
time. To exit the Favorites function:
XPress the Favorites button again
or
XPress %on the controller.
or
XPress the %button on the touchpad.
or
XTo select %in the display: turn and
press the controller.
Further information on the Favorites function
(
Ypage 35).
Importing/exporting data
General notes
!
Never remove the stick or card when writ-
ing data to the USB stick or the memory
card. You may otherwise lose data.
Using this function you can:
Rtransfer your personal COMAND data from
one system/vehicle to another.
Rmake a backup copy of your personal data
(export data) and load it again (import
data).
Rprotect your data from unwanted export by
activating a PIN prompt (presetting: deac-
tivated ª).
Importing/exporting data49
System settings
Z
Page 52 of 246
You can either use an SD memory card or a
USB storage device (e.g. a USB stick) as tem-
porary storage.
Please remember that the NFTS file system is
not supported. The FAT32 file system is rec-
ommended.
Activating/deactivating PIN protec-
tion
XPress theØbutton on the COMAND
control panel.
or
XPress Vehiclein the main function bar.
The vehicle menu is displayed.
XTo select System Settings: slide6,
turn and press the controller.
A menu appears.
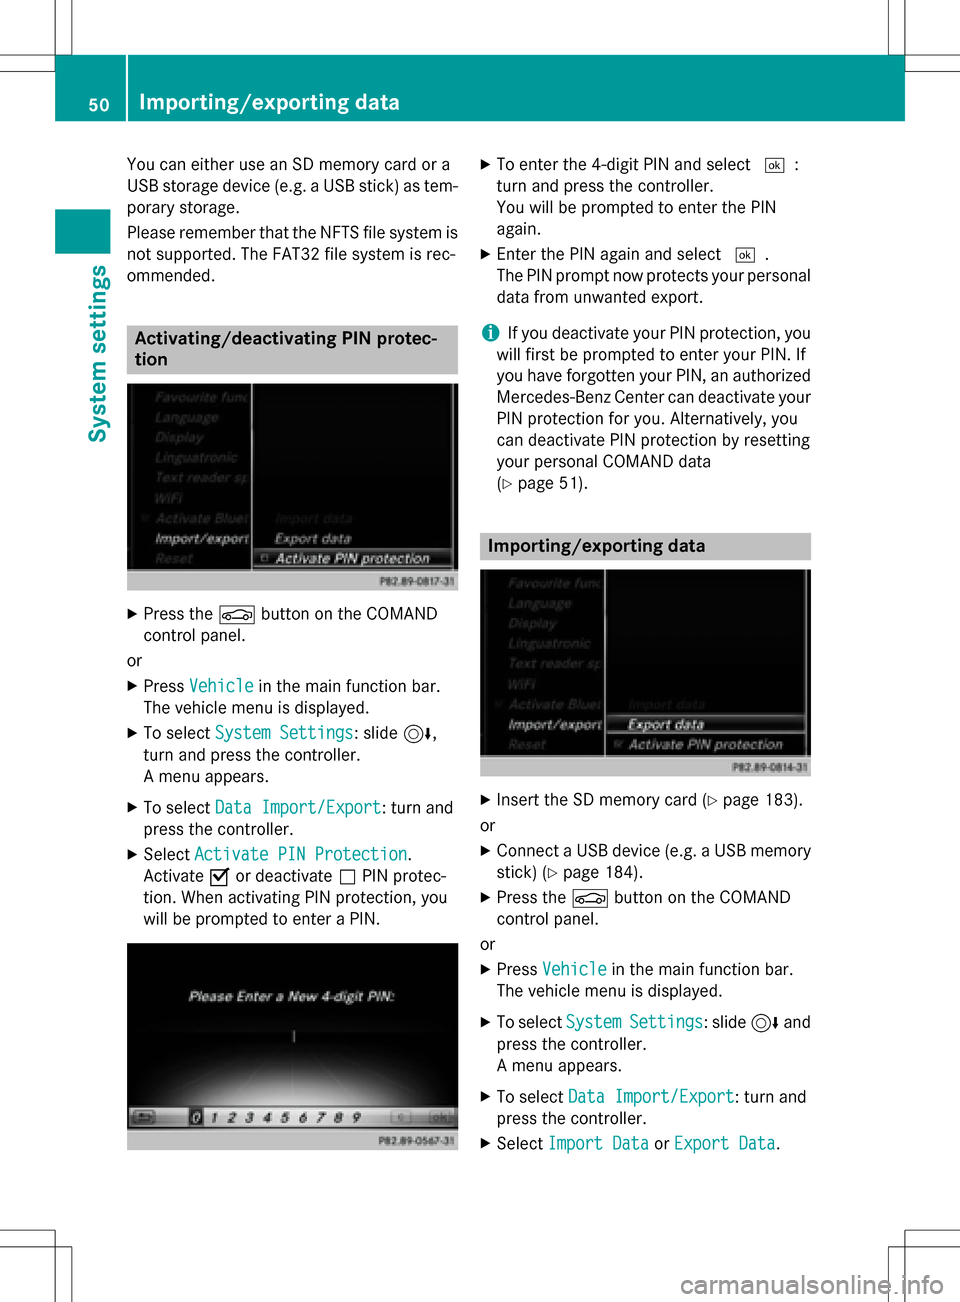
XTo select Data Import/Export: turn and
press the controller.
XSelect Activate PIN Protection.
Activate Oor deactivate ªPIN protec-
tion. When activating PIN protection, you
will be prompted to enter a PIN.
XTo enter the 4-digit PIN and select ¬:
turn and press the controller.
You will be prompted to enter the PIN
again.
XEnter the PIN again and select ¬.
The PIN prompt now protects your personal
data from unwanted export.
iIf you deactivate your PIN protection, you
will first be prompted to enter your PIN. If
you have forgotten your PIN, an authorized
Mercedes-Benz Center can deactivate your
PIN protection for you. Alternatively, you
can deactivate PIN protection by resetting
your personal COMAND data
(
Ypage 51).
Importing/exporting data
XInsert the SD memory card (Ypage 183).
or
XConnect a USB device (e.g. a USB memory
stick) (
Ypage 184).
XPress the Øbutton on the COMAND
control panel.
or
XPress Vehiclein the main function bar.
The vehicle menu is displayed.
XTo select SystemSettings: slide6and
press the controller.
A menu appears.
XTo select Data Import/Export: turn and
press the controller.
XSelect Import DataorExport Data.
50Importing/exporting data
System settings
Page 53 of 246
iIf you import data, such as address data,
the existing data on COMAND is overwrit-
ten. You will see a message to this effect.
COMAND is restarted after the data import.
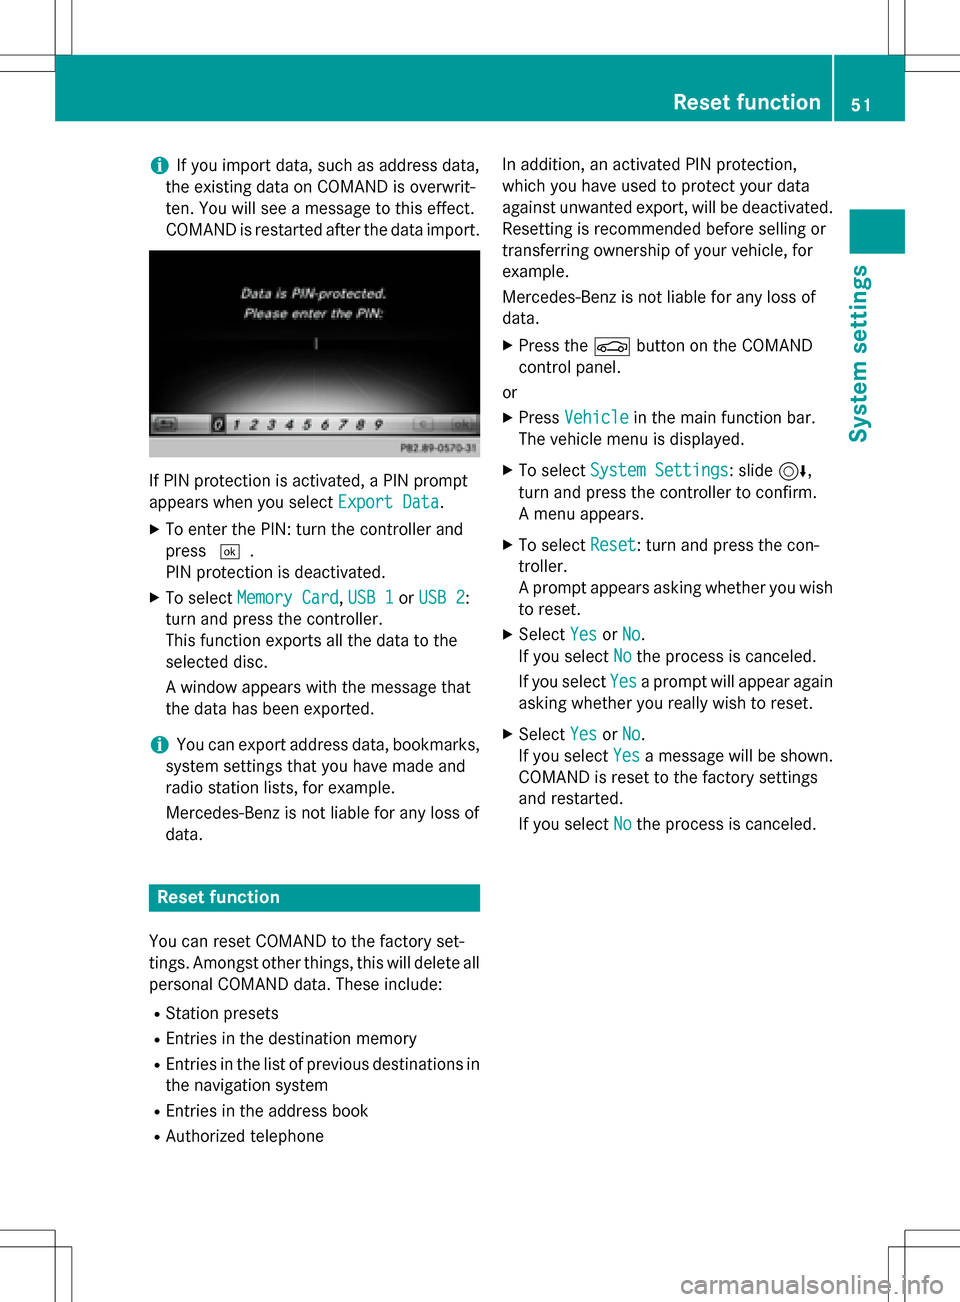
If PIN protection is activated, a PIN prompt
appears when you select Export Data
.
XTo enter the PIN: turn the controller and
press¬.
PIN protection is deactivated.
XTo select Memory Card,USB 1or USB 2:
turn and press the controller.
This function exports all the data to the
selected disc.
A window appears with the message that
the data has been exported.
iYou can export address data, bookmarks,
system settings that you have made and
radio station lists, for example.
Mercedes-Benz is not liable for any loss of
data.
Reset function
You can reset COMAND to the factory set-
tings. Amongst other things, this will delete all
personal COMAND data. These include:
RStation presets
REntries in the destination memory
REntries in the list of previous destinations in
the navigation system
REntries in the address book
RAuthorized telephone In addition, an activated PIN protection,
which you have used to protect your data
against unwanted export, will be deactivated.
Resetting is recommended before selling or
transferring ownership of your vehicle, for
example.
Mercedes-Benz is not liable for any loss of
data.
XPress the
Øbutton on the COMAND
control panel.
or
XPress Vehiclein the main function bar.
The vehicle menu is displayed.
XTo select System Settings: slide6,
turn and press the controller to confirm.
A menu appears.
XTo select Reset: turn and press the con-
troller.
A prompt appears asking whether you wish
to reset.
XSelect YesorNo.
If you select No
the process is canceled.
If you select Yes
a prompt will appear again
asking whether you really wish to reset.
XSelect YesorNo.
If you select Yes
a message will be shown.
COMAND is reset to the factory settings
and restarted.
If you select No
the process is canceled.
Reset function51
System settings
Z
Page 73 of 246
RCenter
Entering a center will delete a previously
entered street.
RIntersection
Entering an intersection will delete a previ-
ously entered house number.
XSe lect the address entry menu (Ypage 69).
XTo select State/Province,ZIP Code,
Ctr.
or Intersection: turn, slide 6and
press the controller.
XSe lect an entry (Ypage 70).
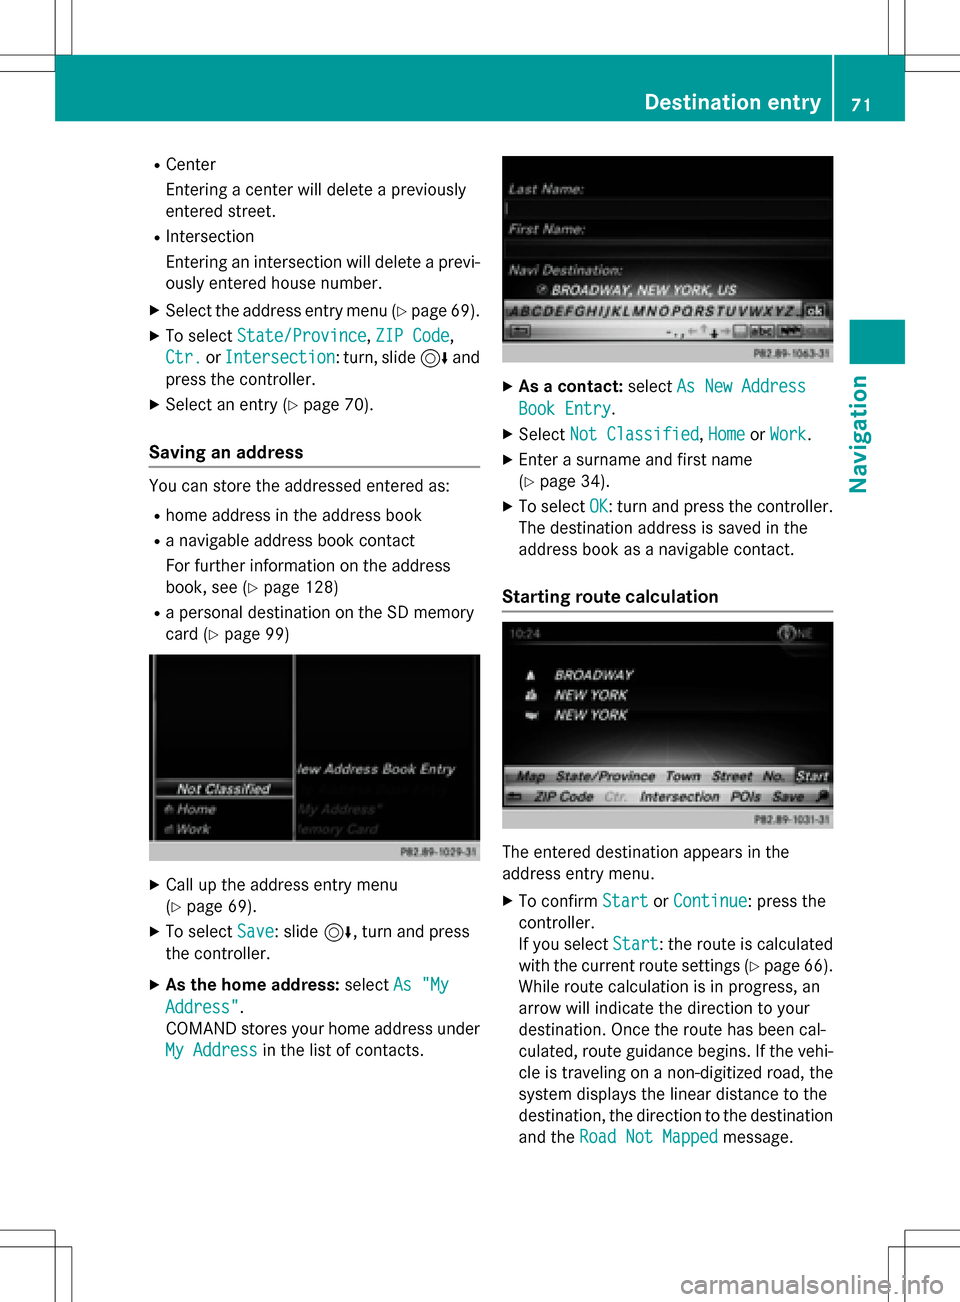
Saving an address
You can store the addressed entered as:
Rhome address in the address book
Ra nav igable address book contact
For further information on the address
book, see (
Ypage 128)
Ra personal destination on the SDmemory
card (
Ypage 99)
XCall up the address entry menu
(
Ypage 69).
XTo select Save: slide6, turn and press
the controller.
XAs the home address: selectAs "My
Address".
COMAND stores your home address under
My Address
in the list of contacts.
XAs a contact: selectAs New Address
Book Entry.
XSelect Not Classified,Homeor Work.
XEnter a surname and first name
(
Ypage 34).
XTo select OK: turn and press the controller.
The destination address issaved inthe
address book as a nav igablecontact.
Starting route calculation
The entered destination appears inthe
address entry menu.
XTo confirm StartorContinue: press the
controller.
If you select Start
: the route iscalculated
wit h the current route settings (
Ypage 66).
While route calculation is inprogress, an
arrow willindicate the direction to your
destination. Once the route has been cal-
culated, route guidance begins. Ifthe veh i-
cle istraveling on a non-digitized road, the
system displays the linear distance to the
destination, the direction to the destination
and the Road Not Mapped
message.
Destination entry71
Navigation
Z
Page 82 of 246

SelectionStep
Address
Entry
XEnter a destination by
address (
Ypage 70).
Keyword
Search
XSelect a destination by
means of a keyword
search (
Ypage 72).
From Last
Destinations
XSelect a destination
from the list of last des-
tinations (
Ypage 74).
From Con‐
tacts
XSelect a contact from
the address book as
the destination
(
Ypage 74).
From POIsXSelect a point of inter-
est (
Ypage 75).
Using MapXEnter a destination
using the map
(
Ypage 78).
From Memory
Card
XSelect a personal POI
(
Ypage 85).
From
Mercedes-
Benz Apps
XEnter a destination
from Mercedes-Benz
Apps (
Ypage 82).
Using Geo-
Coordinates
XEnter a destination
using the geo-coordi-
nates (
Ypage 82).
XTo select a POI: turn the controller and
press to confirm.
After selecting a POI or entering a destina-
tion, the address of the intermediate des-
tination is displayed.
After entering a destination using the map,
the address entry menu is displayed.Start
is highlighted.
XTo call up a map:selectMapby turning and
pressing the controller.
You can move the map and select the des-
tination.
XTo make a call: selectCall.
If the intermediate destination has a tele-
phone number and a mobile phone is con-
nected to COMAND (
Ypage 114), the call
is connected.
XTo load data from the Internet: select
www
.
If an Internet address is available, data is
loaded from the Internet.
XTo store an intermediate destination in
the destination memory: selectSave
(Ypage 98).
XTo accept an intermediate destination:
selectOK
by pressing the controller.
The destination is entered in the intermedi-
ate destinations menu.
80Destination entry
Navigation
Page 83 of 246

Editing intermediate destinations
You can perform the following functions:
Rchange intermediate destinations
Rswitch the sequence of the intermediate
destinations in the intermediate destina-
tions menu
Rdelete intermediate destinations
XTo select an intermediate destination in the
intermediate destinations menu: turn and
press the controller.
A menu appears.
XTo change an intermediate destination:
selectEdit
in the menu.
XChange the address, e.g. the city and
street.
XTo select OK: turn and press the controller.
The intermediate destinations menu
appears and displays the changed inter-
mediate destination.
You can change the sequence of the inter-
mediate destinations entered and the desti-
nation. To change the sequence, at least one
intermediate destination and the destination
must have been entered.
XTo change the order: in the menu, select
Move
.
XTurn the controller and move the intermedi-
ate destination or destination to the
desired position.
XPress the controller.
XTo delete an intermediate destination:
select Delete
in the menu.
Accepting intermediate destinations
for the route
XTo select Startin the intermediate desti-
nations menu: press the controller.
The route is calculated with the entered
intermediate destinations.
If Calculate Alternative Routes
is
enabled in the basic settings, the menu
item Continue
is displayed instead of
Start
(Ypage 66).
If an intermediate destination was passed
during route guidance, a green tick mark
will be entered in the intermediate destina-
tions menu. Once the route has been recal-
culated, the intermediate destination is
deleted from the intermediate destinations menu.
Saving as a personal route
XInsert the SD memory card (Ypage 183).
XTo select SaveAsPersonalRoutein the
intermediate destinations menu: turn and
press the controller.
The route is saved on the SD memory card
under Personal Routes
.
Searching for a gas station when the
fuel level is low
Requirement: the setting Gas on Reserve
must be enabled (Ypage 68).
If the fuel tank reserve level is displayed, you
will see the Gas
onReserveDoyouwant
to start a search for surrounding
gas stations?message.
XTo selectYesorNo: turn and press the con-
troller.
If you select Yes
: the gas station search
starts. When the search is complete, a list
of the gas stations available along the route
or in the vicinity is displayed.
Destination entry81
Navigation
Z
Page 84 of 246

If you selectNo: the search is canceled.
XSelect the gas station.
The address of the gas station is displayed.
XTo selectStart: press the controller.
The gas station selected is set in the inter-
mediate destinations menu as the next
intermediate destination not yet reached.
Route guidance begins.
Entering a destination from
Mercedes-Benz Apps
Requirement (USA): mbrace is activated for
the Mercedes-Benz Apps (
Ypage 148).
Requirement (Canada): a mobile phone is
connected via Bluetooth
®(Ypage 114) or
USB (
Ypage 196) with COMAND.
XTo switch to navigation mode: press the
Ø button.
XTo show the menu: slide6the control-
ler.
XTo select Destination: turn and press the
controller.
XSelect From Mercedes-Benz Apps.
The list of Mercedes-Benz Apps appears.
Using geo-coordinates
XTo switch to navigation mode: press the
ß button.
XTo show the menu: slide6the control-
ler.
XTo select Destination: turn and press the
controller.
XSelect Using Geo-Coordinates.
Geo-coordinates are entered in degrees,
minutes and seconds.
XTo enter the latitude and longitude coor-
dinates: turn the controller to change the
value.
XTo move the selection within the line: slide
1 the controller.
XTo move the selection between lines: slide
4the controller.
XTo confirm the value: press the controller.
XTo save a destination: select Saveby
turning and pressing the controller.
The destination can be stored as:
Rhome address in the address book
Ra navigable address book contact
For further information on the address
book, see (
Ypage 128)
Ra personal destination on the SD memory
card (
Ypage 99)
Starting route calculation
XTo select Start Route Guidance: turn
and press the controller.
Personal POIs and routes
General notes
The use of personal POIs for displaying traffic surveillance equipment is not permitted in
every country. Please observe the country-
specific regulations and always drive at a suit-
able speed.
Personal POIs are filed in categories:
RNot Classified
Standard entry for personal POIs
RMercedes-Benz Apps
Personal POIs (destinations, routes) that
you have imported via the online functions
RCategories which you have created your-
self, e.g. on your PC
Personal routes are not categorized.
82Personal POIs and routes
Navigation
Page 85 of 246

Settings for personal POIs
Displaying on the map
Requirement: an SD memory card with per-
sonal POIs is inserted (
Ypage 183).
All personal POIs of the selected category are
displayed on the map with a corresponding
symbol.
If the "Alert when approaching" (
Ypage 83)
function is activated, the symbols are dis-
played up to a map scale of 2 km.
XTo switch to navigation mode: press the
ß button.
XTo show the menu: slide6the control-
ler.
XTo select Options: turn and press the con-
troller.
XSelect Personal POIs.
XSelectDisplay on the Map.
The menu displays the categories available
on the SD memory card.
XTo select a category: turn the controller and
press to confirm.
All personal POIs in the selected category
are displayed Oor not displayed ª,
depending on the previous status.
Alert when approaching
Requirement: an SD memory card with per-
sonal POIs is inserted (
Ypage 183).
If the vehicle is approaching a personal POI
and the functions are enabled, the personal
POI is highlighted on the map and an audible
signal sounds.
For this purpose, both the corresponding
function Alert When Approaching
and the
category containing the personal POI must be
activated.
XTo switch to navigation mode: press the
ß button.
XTo show the menu: slide6the control-
ler.
XTo select Options: turn and press the con-
troller.
XSelect Personal POIs.
XSelectAlert When Approaching.
The menu displays the categories available
on the SD memory card.
XSelect AudibleorOptical.
The function is switched on Oor off ª,
depending on the previous status.
XTo select a category: turn the controller and
press to confirm.
The function is switched on Oor off ª, for
all personal POIs of this category, depend-
ing on the previous setting.
Personal POIs and routes83
Navigation
Z
Page 86 of 246

Saving personal POIs and routes
General notes
Personal POIs and routes are geodata which
are saved in the open GPX (GPS Exchange)
format on the SD memory card.
Personal POI from current vehicle posi-
tion or crosshair position
XInsert the SD memory card (Ypage 183).
XTo switch to navigation mode: press the
ß button.
XWhen the map is displayed, press the con-
troller until a message appears.
The current vehicle position is saved to the
Not
Classifiedcategory on the SD mem-
ory card and also stored in the "Last desti-
nations" memory (
Ypage 99).
If the "Move map" function is selected
(
Ypage 66), the crosshair position is saved.
iIf no SD memory card is inserted, the per-
sonal POI will only be stored in the "Last
destinations" memory.
Personal POI from destination address
XInsert the SD memory card (Ypage 183).
XTo switch to navigation mode: press the
ß button.
XCall up the address entry menu and enter
the destination address (
Ypage 69).
XTo select Save: slide6the controller.
XTurn and press the controller.
XTo select ToMemoryCard: turn and press
the controller.
XEnter the name.
XSelect a category.
The current address is saved as a personal
point of interest on the SD memory card.
iYou can select a destination from the
From Last Destinations
or From Con‐
tactsmemories and save it on the SD
memory card.
RFrom Last Destinations
(Ypage 74)
RFrom Contacts(Ypage 74)
Personal route from a tour including
intermediate destinations
XInsert the SD memory card (Ypage 183).
XTo switch to navigation mode: press the
ß button.
XEnter a destination, e.g. by address
(
Ypage 69).
XStart route calculation (Ypage 71).
XCreate intermediate destinations
(
Ypage 79).
XTo select SaveAsPersonalRoutein the
intermediate destinations menu: turn and
press the controller.
The route is saved in the Personal
Routes
folder on the SD memory card.
Importing personal POIs and routes
via Mercedes-Benz Apps
You can use Mercedes-Benz Apps (e.g. Down-
load POI, Local Search) to import destinations
to the navigation system. These have their
own symbol and are filed in the Mercedes-
Benz Appscategory.
You can save the imported destinations and
routes as personal POIs and routes
(
Ypage 84).
When importing routes, please note:
RThe Mercedes-Benz Apps may generate a
route based on a different map from the
one used by COMAND. Points on the route
may therefore be situated off the digital
roads. For this reason an imported route
commenced in COMAND may deviate from the original route from the Mercedes-Benz
Apps.
RThe Mercedes-Benz Apps minimize the
number of route points offered. For this
reason an imported route commenced in
84Personal POIs and routes
Navigation