stop start MERCEDES-BENZ GL SUV 2012 Workshop Manual
[x] Cancel search | Manufacturer: MERCEDES-BENZ, Model Year: 2012, Model line: GL SUV, Model: MERCEDES-BENZ GL SUV 2012Pages: 441, PDF Size: 10.66 MB
Page 365 of 441
X
Lower th ebonnet and let it fal lfrom a
heig ht of approx imately 20 cm.
X Check that the bonnet has engaged prop-
erly.
If the bonnet can be raised slightly, it is not
properly engaged. Open it again and close
it with alittle more force. Radiator
Vehicles with adiesel engine: do not cover
the radiator .Donot use therma lmats, insect
protection covers or anything similar. Doing
so can cause the Onboard Diagnostics Sys-
tem to display inaccurat evalues. Some of
these values are legally required and must
always be correct. Engin
eoil
Genera lnotes Dependin
gonyour drivin gstyle, the vehicle
consumes up to 0.8 lofoil per 1,00 0km. The
oi lc onsumption ma ybehigher than this when
the vehicle is new or if you frequently drive at
high engine speeds.
Dependin gonthe engine, the oil dipstick may
be installed at adifferent location.
When checking the oil level:
R park the vehicle on alevel surface.
R the engine should be switched off for
approximately fiv eminutes if the engine is
at normal operating tempera ture.
R if the engine is not at normal operating
tempera ture,e.g. if the engine was only
started briefly, wait about 30 minutes
before carrying out the measurement. Checkin
gthe oi llevel using the oil dip-
stick Example: vehicles with
apetrol engine Example: vehicles with
adiesel engine
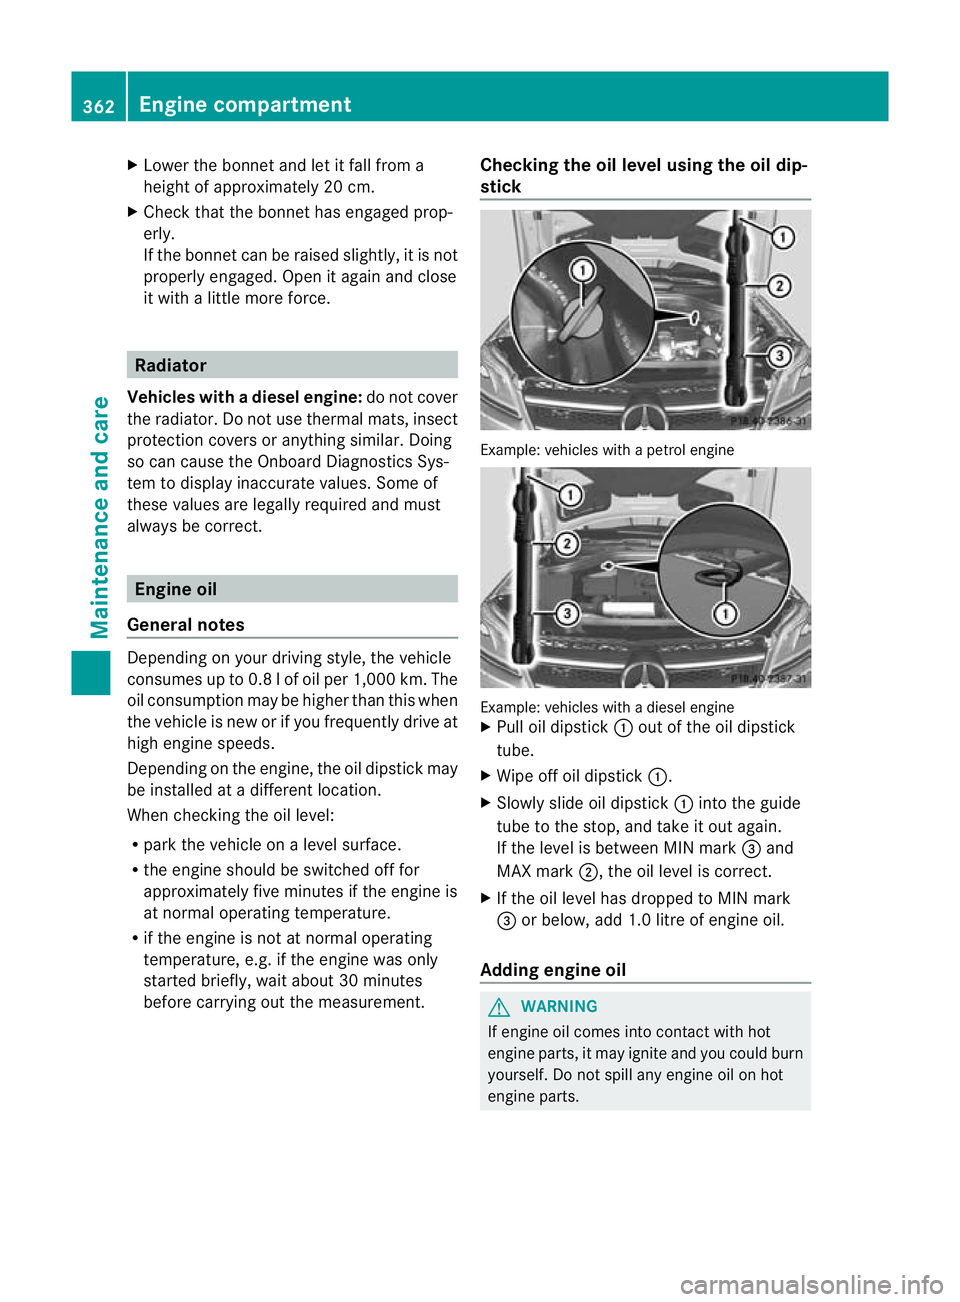
X Pull oil dipstick :out of the oil dipstick
tube.
X Wipe off oil dipstick :.
X Slowly slide oil dipstick :into the guide
tube to the stop, and take it out again.
If the level is between MIN mark =and
MAX mark ;,the oil level is correct.
X If the oil level has dropped to MIN mark
= or below, add 1. 0litre of engine oil.
Adding engine oil G
WARNING
If engine oil comes into contact with hot
engine parts, it may ignite and you could burn
yourself .Donot spill any engin eoil on hot
engine parts. 362
Engine compartmentMaintenance and care
Page 366 of 441
H
Environmenta
lnote
When toppin guptheoil, tak ecaren ot to spill
any .Ifo il enters th esoil or waterways, it is
harmful to th eenvironment.
! Only use engine oil sand oil filters that
have bee napproved for vehicles with a
servic esystem. You can obtain alist of the
engine oils and oil filters tested and
approved in accordance with the
Mercedes-Ben zSpecification sfor Service
Product satany Mercedes-Ben zService
Centre.
Damage to th eengine or exhaust sys temis
caused by the following:
R using engine oil sand oil filters that have
not bee nspecifically approved for the
servic esystem
R changing the engine oil and oil filter after
missing the change interval required by
the servic esystem
R using engine oil additives
! Do not add too muc hoil. Toppin gupwith
to om uche ngine oil can resul tindamage
to the engine or to the catalytic converter.
Hav eexcess engine oil siphoned off. Example: engine oil filler cap
X
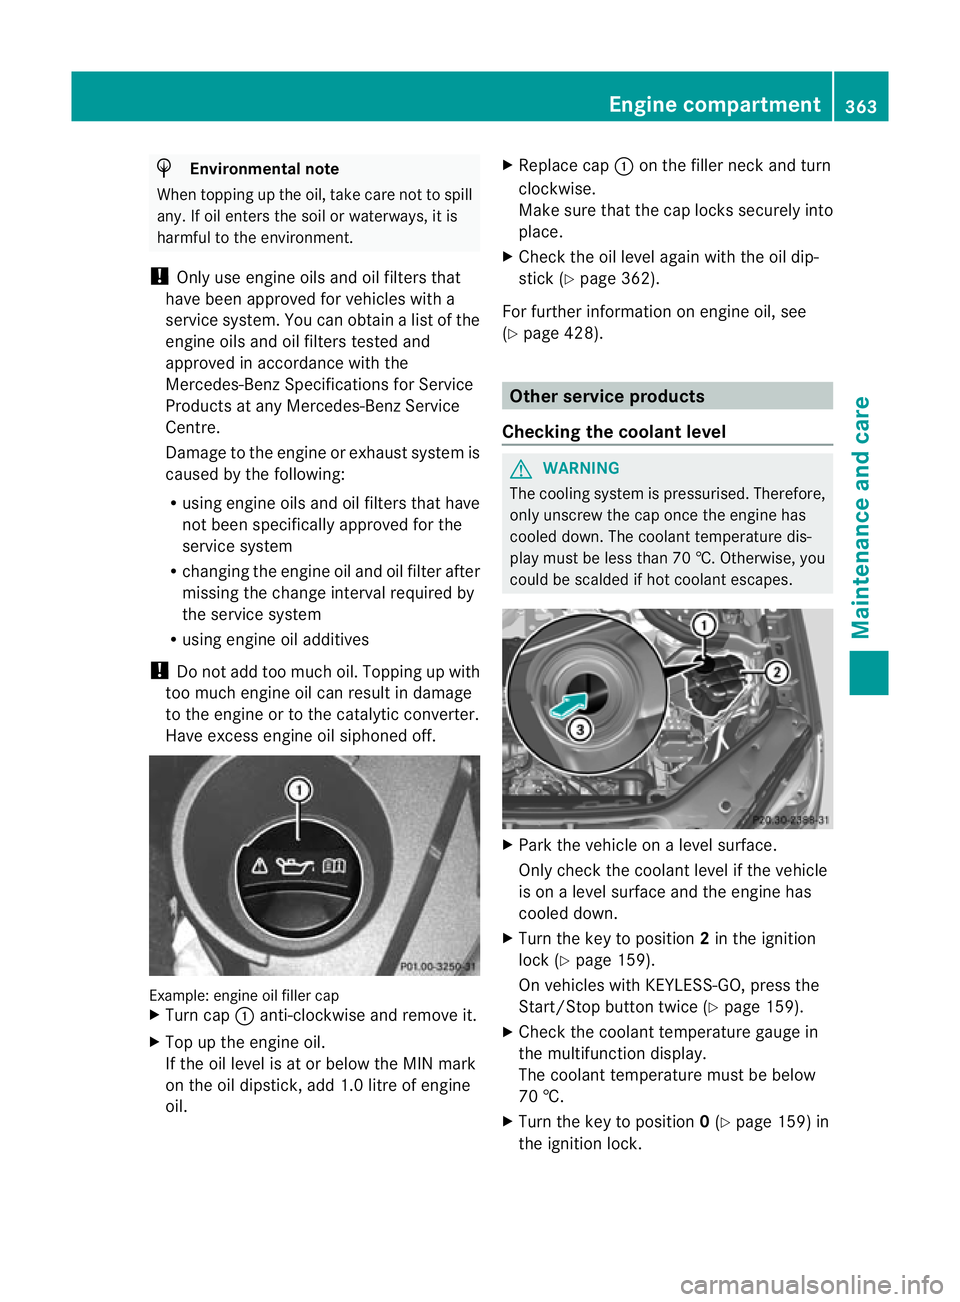
Turn cap :anti-clockwis eand remove it.
X Top up the engine oil.
If the oil level is at or below the MIN mark
on the oil dipstick ,add 1. 0litreo fengine
oil. X
Replace cap :on the filler nec kand turn
clockwise.
Make sure that the cap locks securely into
place.
X Check the oil level agai nwith the oil dip-
stic k(Ypage 36 2).
For furthe rinformation on engine oil ,see
(Y page 42 8). Other service products
Checking th ecoolant level G
WARNING
The coolin gsystem is pressurised. Therefore,
only unscrew the cap onc ethe engine has
coole ddown. The coolan ttemperatur edis-
play must be less than 70 †. Otherwise, you
could be scalded if hot coolant escapes. X
Park the vehicle on alevel surface.
Only chec kthe coolant level if the vehicle
is on alevel surface and the engine has
cooled down.
X Turn the key to position 2in the ignition
lock (Y page 159).
On vehicles with KEYLESS-GO, press the
Start/Stop button twic e(Ypage 159).
X Check the coolant temperatur egauge in
the multifunction displ ay.
Th ec oolant temperatur emust be below
70 †.
X Turn the key to position 0(Y page 159 )in
the ignition lock. Eng
inecompartment
363Maintenance and care Z
Page 372 of 441
i
The vehicle should preferably be washed
by hand using asoft sponge, car shampoo
and plent yofwater.
i Use only insect remover and car shampoo
from the range of recommended and
approved Mercedes -Benz care products. Cleaning vehicle parts
Cleaning the wheels !
Do not use acidic wheel cleaning products
to remove brake dust. Thi scould damage
wheel bolts and brake components.
! Do not par kupthe vehicle for an extended
period straight after cleanin git, particularly
after having cleaned the wheels with wheel
cleaner. Wheel cleaners could cause
increased corrosion of the brake discs and
brake pads/linings .For this reason, you
should drive for afew minutes after clean-
ing. Brakin gheats the brak ediscs and the
brake pads/linings, thus drying them. The
vehicle can then be parked up.
Cleaning the windows G
WARNING
Switc hoff the windscree nwipers and remove
the key from the ignition lock before cleaning
the windscreen or the wiper blades. On vehi-
cles with KEYL ESS-GO, pres sthe Start/S top
button repeatedly until all indicator lamps in
the instrumen tcluster have gone off. The
windscreen wipers could otherwise move and
injur eyou.
! Do not use dry cloths, abrasive products,
solven tsor cleanin gagents con taining sol-
vent stoc lean the inside of the windows.
Do not touch the insides of the windows
with hard objects, e.g. an ice scraper or
ring. There is otherwise arisk of damaging
the windows.
! Clean the water drainage channels of the
windscreen and the rear window at regular intervals. Deposits such as leaves, petals
and pollen may under certain circumstan-
ces prevent water from drainin
gaway. This
can lead to corrosion damage and damage
to electronic components.
X Clean the inside and outside of the win-
dows with adamp cloth and acleaning
agent that is recommended and approved
by Mercedes-Benz.
Cleanin gthe wiper blades G
WARNING
Switch off the windscree nwipers and remove
the key from the ignition lock before cleaning
the windscreen or the wiper blades. On vehi-
cles with KEYLESS-GO, press the Star t/Stop
butto nrepeatedly unti lall indicator lamps in
the instrumen tcluster have gone off. The
windscreen wipers could otherwise move and
injur eyou.
! Do not pull on the wiper blade. Otherwise,
the wiper blade could be damaged.
! Do not clean wiper blades too often and
do not rub them too hard. Otherwise, the
graphit ecoatin gcould be damaged. This
coul dcause wiper noise.
! Hold the wiper arm securely when folding
back. The windscreen could be damaged if
the wiper arm hits against it suddenly.
X Fold the wiper arms away from the wind-
screen.
X Clea nthe wiper blades carefully usin ga
damp cloth.
X Fold the windscreen wipers back again
befor eswitching on the ignition.
Cleanin gthe exterio rlighting !
Only use cleaning agents or cleaning
cloths that are suitable for plastic lenses.
Unsuitable cleaning agents or cleaning
cloths could scratc hordamage the plastic
lenses of the exterior lighting. Care
369Maintenance and care Z
Page 381 of 441
C
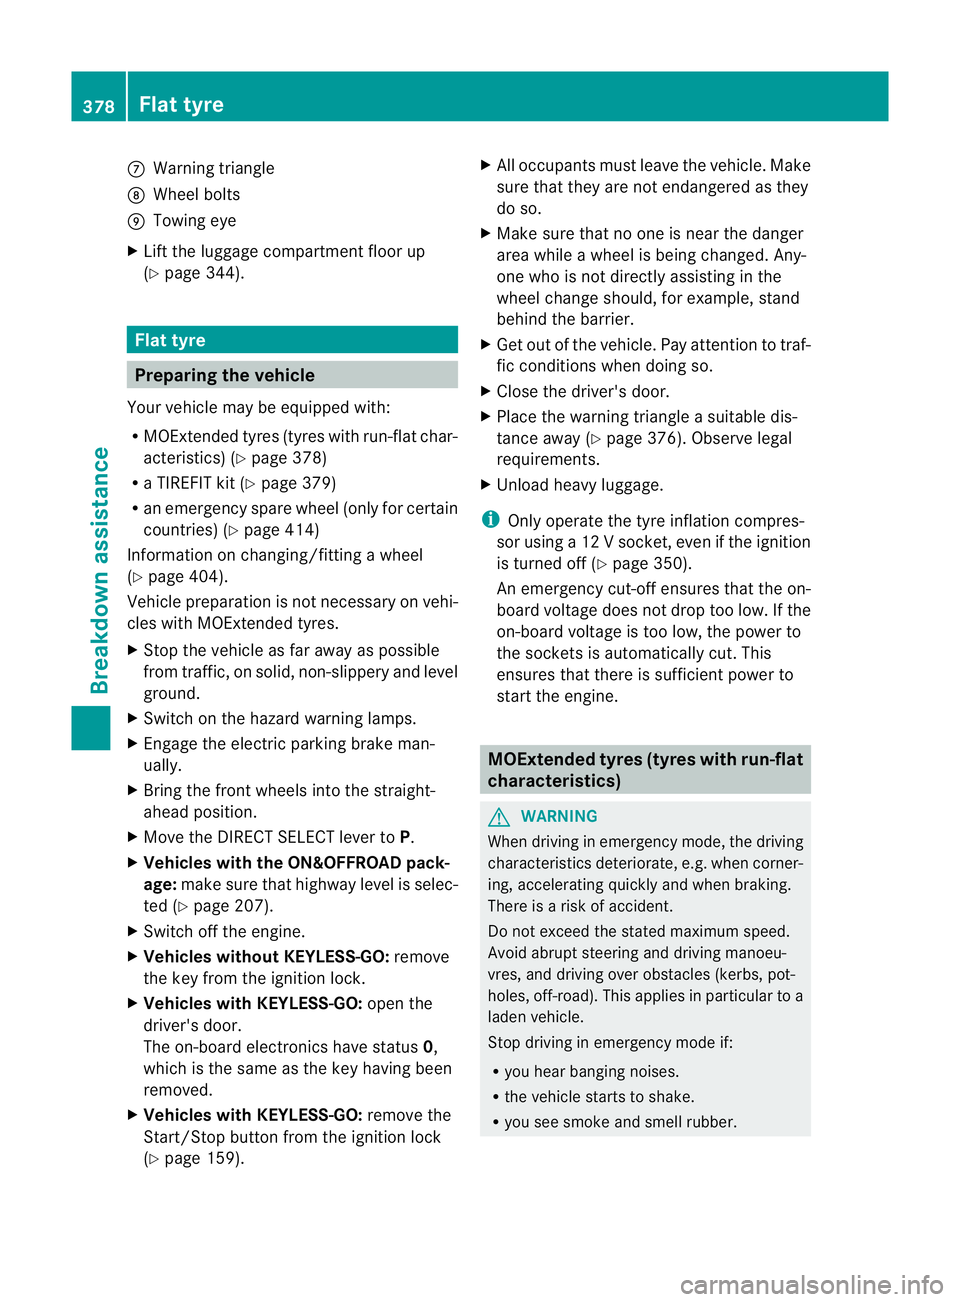
Warning triangle
D Wheel bolts
E Towing eye
X Lif tthe luggage compar tment floor up
(Y page 344). Flat ty
re Prep
aring the vehicle
Your vehicle may be equipped with:
R MOExtended tyres (tyres with run -flat char-
acteristics) (Y page 378)
R aT IREFIT kit (Y page 379)
R an emergency spare whee l(only for cer tain
countries) (Y page 414)
Information on changing/fitting awheel
(Y page 404).
Vehicle preparation is not necessar yonvehi-
cles with MOExtended tyres.
X Stop the vehicle as far away as possible
from traffic, on solid, non-slipper yand level
ground.
X Switch on the hazard warning lamps.
X Engag ethe electric parkin gbrake man-
ually.
X Bring th efront wheels into the straight-
ahead position.
X Move the DIRECT SELECT leve rtoP.
X Vehicle swith the ON&OFFROAD pack-
age: makesure that highway level is selec-
ted (Y page 207).
X Switch off the engine.
X Vehicles without KEYLESS-GO: remove
the key from the ignition lock.
X Vehicles with KEYLESS-GO: open the
driver' sdoor.
The on-boar delectronic shave status 0,
which is the same as the key having been
removed.
X Vehicles with KEYLESS-GO: remove the
Start/Stop button from the ignition lock
(Y page 159). X
All occupants must leave the vehicle. Make
sure that they are not endangered as they
do so.
X Make sure that no one is near the danger
area while awheel is being changed. Any-
one who is not directly assisting in the
wheel change should, for example, stand
behind the barrier.
X Get out of the vehicle. Pay attention to traf-
fic condition swhen doing so.
X Close the driver's door.
X Plac ethe warnin gtriangl easuitable dis-
tance away (Y page 376). Observe legal
requirements.
X Unload heavy luggage.
i Only operate the tyre inflation compres-
sor using a12Vs ocket,even if the ignition
is turned off (Y page 350).
An emergenc ycut-off ensures that the on-
board voltage does not drop too low. If the
on-board voltage is too low, the power to
the sockets is automatically cut. This
ensures that there is sufficient power to
start the engine. MOExtended tyres (tyres with run-flat
characteristics)
G
WARNING
When driving in emergenc ymode, the driving
characteristic sdeteriorate, e.g. when cor ner-
ing, accelerating quickly and when braking.
There is arisk of accident.
Do not exceed the stated maximum speed.
Avoid abrupt steering and drivin gmanoeu-
vres, and driving over obstacles (kerbs, pot-
holes ,off-road) .This applies in particular to a
laden vehicle.
Sto pdriving in emergency mod eif:
R you hear banging noises.
R the vehicl estart stos hake.
R you see smok eand smell rubber. 378
Flat tyreBreakdown assistance
Page 392 of 441
!
Observe the following points when towing
wit hat ow rope:
R secur ethe tow rope on the sam eside on
both vehicles.
R the tow rope must not be longer than is
legally permitted. It should be marked in
the middle, e.g. with awhite cloth
(30 x30c m) so that other roa dusers are
aware that avehicle is being towed.
R the tow rope may only be attached to the
towing eyes.
R observ ethe brake lamps of the towing
vehicle while driving. Always maintain a
distanc esothat the tow rope does not
sag.
R do not use steel cables or chains to tow
your vehicle. The vehicle could be dam-
aged.
! Do not use the towing eye for recovery,
this could damage the vehicle. If in doubt,
recover the vehicle with acrane.
! When towing, pu llaway slowly and
smoothly .Ifthe tractive power is too high,
the vehicles could be damaged.
! To tow vehicles with KEYL ESS-GO,use
the key instead of the Star t/Stop button.
Th ea utomatic transmission may otherwise
switch to position Pwhen you open the
driver' sorfront-passenger door which
could damag ethe transmission.
! Vehicles with differential locks: make
sur ethe differential lock sare in automatic
mode. When towing, th edifferential locks
must not be switched on. The transmission
may otherwise be damaged.
! You may tow the vehicle for amaximum
of 50km .Atowing speed of 50 km/h must
not be exceeded.
For towin gdistances over 50 km, the entire
vehicle must be lifted up and transported.
! If you tow or tow-start another vehicle, its
weight must not exceed the maximum per- missible gross vehicle weight of your vehi-
cle.
Information on your vehicle' sgros svehicle
weight rating can be foun donthe vehicle
identification plat e(Ypage 422).
Observe the legal requirement sfor the rele-
vant countries when towing.
It is bette rtoh ave the vehicle transported
than to have it towed.
If the vehicle has suffered transmission dam-
age, have it transported on atransporter or
trailer.
Th ea utomatic transmission must be in posi-
tion Nwhen the vehicle is being towed.
The battery must be connected and charged.
Otherwise, you:
R cannot turn the key in the ignition lock to
position 2
R cannot release the electric parking brake
R cannot shift the automatic transmission to
position N
i Deactivate the automatic locking feature
(Y page 283). You could otherwis ebe
locked out when pushing or towing the
vehicle.
Deactivate tow-away protection
(Y page 71) before the vehicle is towed. Towing and tow-starting
389Breakdown assistance Z
Page 393 of 441
Fitting/removing th
etowing eye
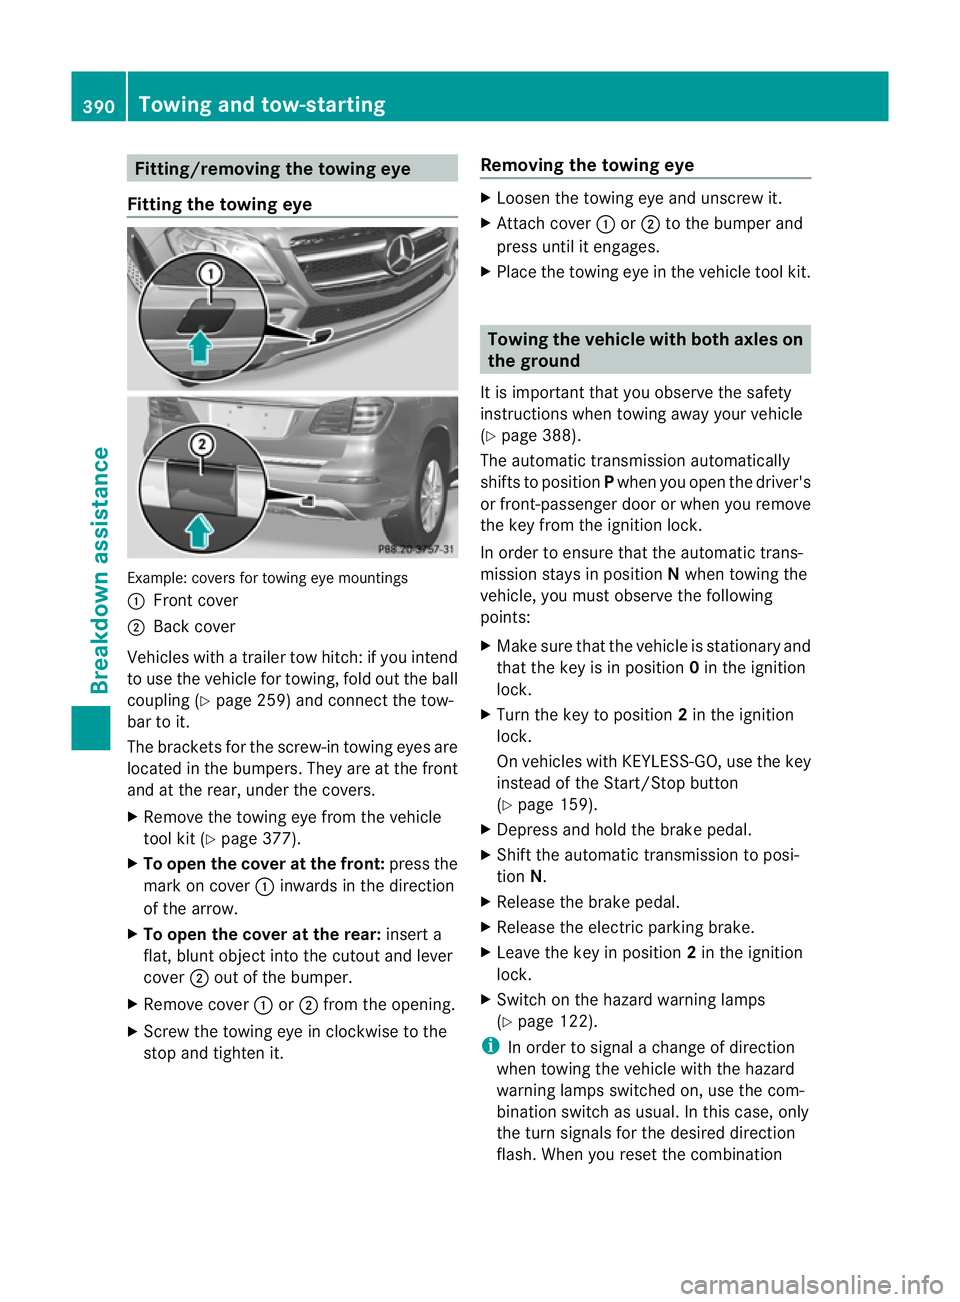
Fitting th etowing eye Example: cover
sfor towin geye mountings
: Front cover
; Bac kcover
Vehicles with atrailer to whitch :ify ou intend
to use the vehicle for towing, fold out the ball
coupling (Y page 259) and con nect the tow-
bar to it.
Th eb rackets for th escrew-i ntowing eyes are
located in the bumpers. They ar eatthe front
and at the rear, under the covers.
X Remove the towing eye from the vehicle
tool kit (Y page 377).
X To ope nthe cover at the front: press the
mark on cover :inwards in th edirection
of the arrow.
X To open the cover at the rear: insert a
flat, blunt object into the cutout and lever
cover ;out of the bumper.
X Remove cover :or; from the opening.
X Screw the towing eye in clockwise to the
stop and tighten it. Removing the towing eye X
Loosen the towing eye and unscrew it.
X Attach cover :or; to the bumper and
press until it engages.
X Place the towing eye in the vehicle tool kit. Towing the vehicle with both axles on
the ground
It is important that you observe the safety
instructions when towing away your vehicle
(Y page 388).
The automatic transmission automatically
shifts to position Pwhen you open the driver's
or front-passenger door or when you remove
the key from the ignition lock.
In order to ensure that the automatic trans-
mission stays in position Nwhen towing the
vehicle, you must observe the following
points:
X Make sure that the vehicle is stationary and
that the key is in position 0in the ignition
lock.
X Turn the key to position 2in the ignition
lock.
On vehicles with KEYL ESS-GO, use the key
instead of the Start/Stop button
(Y pag e159).
X Depres sand hol dthe brake pedal.
X Shif tthe automatic transmission to posi-
tion N.
X Release the brake pedal.
X Release the electric parkin gbrake.
X Leave th ekey in position 2in the ignition
lock.
X Switch on the hazar dwarning lamps
(Y page 122).
i In order to signal achange of direction
when towing the vehicle with the hazard
warnin glamps switched on, use the com-
bination switch as usual .Inthis case ,only
the turn signals for the desired direction
flash .When you reset the combination 390
Towing and tow-startingBreakdown assistance
Page 408 of 441
Storing wheels
Stor ewheels that ar enot being used in acool,
dry and preferably dar kplace. Protect the
tyres against oil, grease, petrol and diesel. Cleaning the wheels
G
WARNING
The water jet of circular-jet nozzles (dirt grind-
ers) can cause damage not visible from the
outside to tyres or chassis components. Com-
ponent sdamaged in this way can unexpect-
edly fail. There is arisk of an accident.
Do not use high-pressure cleaners with circu-
lar-jet nozzles to clean the vehicle. Have dam-
aged tyres or chassis components replaced
immediately. Fitting
awheel
Preparing the vehicle X
Vehi cles with an emergency spare
wheel: whenfitting the emergenc yspare
wheel in the even tofaflat tyre, observe the
addi tional note sonvehicl epreparation
under "Flat tyre" (Y page 378).
X Pa rk th evehicle on firm, non-slippery and
level ground.
X Unload heavy luggage.
X Engage the electric parking brak eman-
ually.
X Bring the front wheels into the straight-
ahead position.
X Shift the transmission to position P.
X Switch off the engine.
X Vehicles without KEYLESS-GO: remove
the key from the ignition lock.
X Vehicles with KEYLESS-GO: open the
driver' sdoor.
The on-boar delectronic shave status 0,
which is the same as the key having been
removed. X
Vehicles with KEYLESS-GO: remove the
Start/Stop button from the ignition lock
(Y page 159).
X If included in the vehicle equipment, take
the tyre-change tool kit out of the vehicle.
X Secure the vehicle to prevent it from rolling
away.
i Apart from some country-specific var-
iants, vehicles are not equipped with tyre-
changing tools .For mor einformation on
which tool sare require dtop erform awheel
change on your vehicle, consult a
Mercedes-Ben zService Centre.
Required tyre-cha nging tools could be, for
example:
R jack
R wheel chock
R wheel wrench
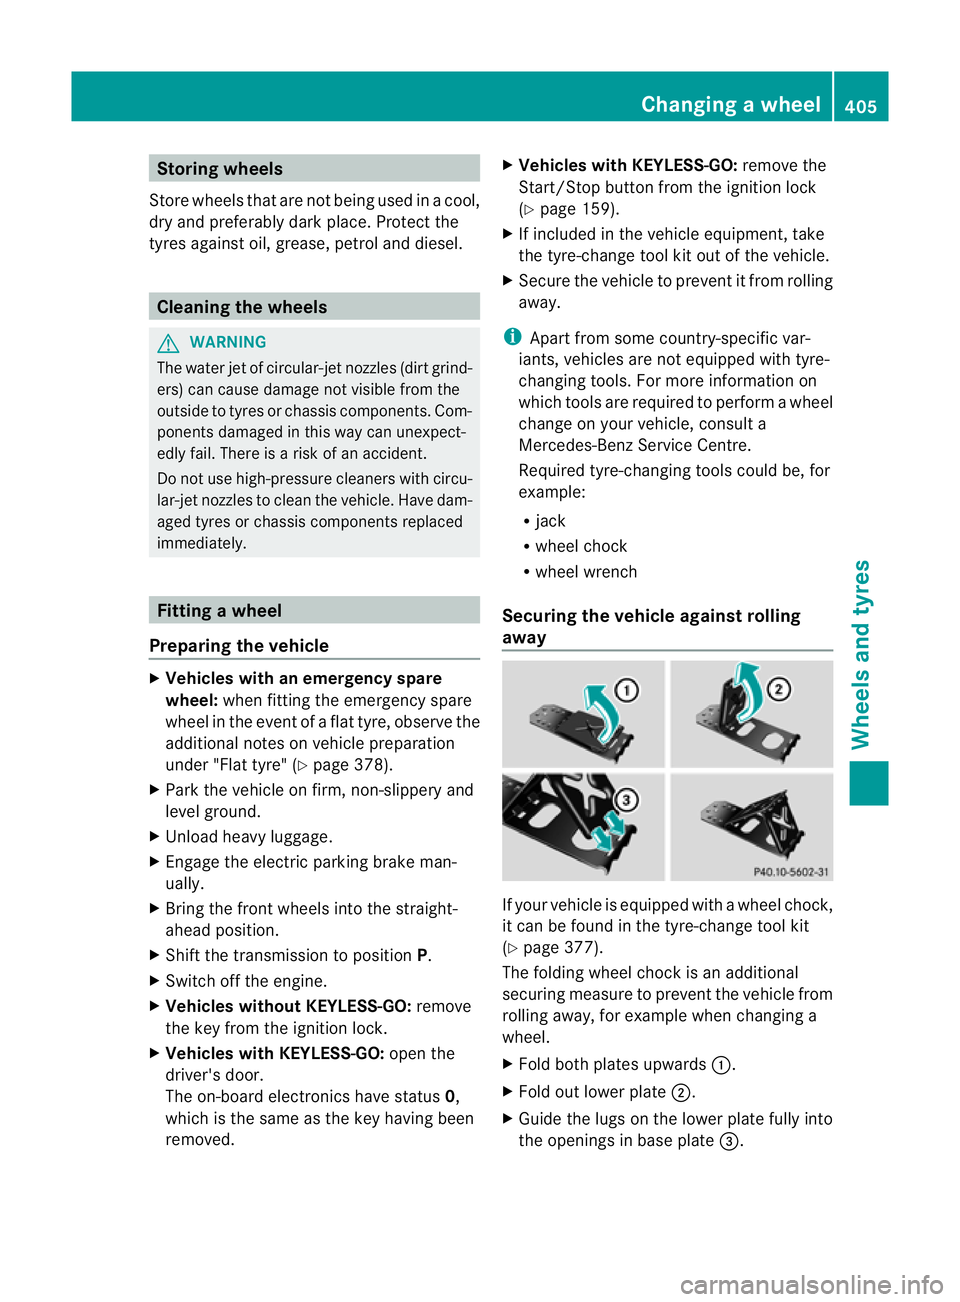
Securing the vehicle against rolling
away If your vehicle is equipped with
awheel choc k,
it can be found in the tyre-change tool kit
(Y page 377).
The folding wheel chock is an additional
securing measure to prevent the vehicle from
rolling away, for example when changing a
wheel.
X Fold both plates upwards :.
X Fold out lower plate ;.
X Guide the lugs on the lower plate fully into
the openings in base plate =. Changing
awheel
405Wheels and tyres Z