radio MERCEDES-BENZ GLK SUV 2008 Owners Manual
[x] Cancel search | Manufacturer: MERCEDES-BENZ, Model Year: 2008, Model line: GLK SUV, Model: MERCEDES-BENZ GLK SUV 2008Pages: 261, PDF Size: 8.67 MB
Page 15 of 261
Parking lamps
Display message ............................. 194
Parking lock
Releasing manually (automatic
transmission) .................................. 215
Parking position
Exterior mirror on the front-
passenger side.................................. 69
Parktronic ........................................... 113
Activating/deactivating ..................115
Malfunction..................................... 209
Range of the sensors. .....................113
Trailer towing. ................................. 115
Warning displa y.............................. 114
PARKTRONIC
Cleaning the sensors. .....................171
PASSENGER AIRBAG OFF warning
lamp.............................................. 43, 200
Performance....................................... 249
Permanent display On-board computer (luxury multi-
function steering wheel) .................101
Permanent four-wheel drive
see 4MATIC
Permanent Speedtronic .....................112
Petrol Minimum grade .............................. 145
see Fuel
Plastic trim
Cleaning. ........................................ 170
Power supply (trailer)........................ 166
Power window switch see Side windows
Pre-emptive occupant safety system
see PRE-SAFE ®
PRE-SAFE ®
system............................... 40
Display message ............................. 181
Program selector button
Automatic transmission ....................87
Pulling away......................................... .83 R
Radio Selecting a station (on-board
computer, luxury multi-function
steering wheel). ................................ 98
see separate operating instructions
Rain closing feature
Panorama sliding sunroo f............... 128
Range
Calling up (on-board computer,
luxury multi-function steering
wheel). .............................................. 96
Calling up (on-board computer,
multi-function steering wheel) ..........93
Rear-compartment seat belt sta-
tus indicator ......................................... 72
Rear foglamp Display message ............................. 193
Rear seat backrest
Folding forwards/back. ..................132
Rear-view mirror
Adjusting .......................................... 67
Anti-dazzle (manual). ........................67
Anti-dazzle mode (automatic). ..........68
Rear window
Cleaning. ........................................ 169
Rear window heating......................... 125
Rear window wiper.............................. 80
Replacing the wiper blade.............. .221
Refuelling............................................ 144
Replacing the wiper blades............... 220
Reserve Warning lamp.................................. 204
Reserve fuel........................................ 245
Display message ............................. 198
Fuel tank......................................... 245
Warning lamp.................................. 204
Restraint system
see SRS
Restraint systems
For children. ..................................... 41
Rev counter........................................... 90
Reverse gear
Engaging (automatic transmission) ...86
Reversing camera.............................. 115
Cleaning. ........................................ 17212 Index
X204_AKB; 1; 5, en-GB
wobuchh,
Version: 2.11.4 2008-10-15T13:20:56+02:00 - Seite 12Dateiname: 6515_0671_02_buchblock.pdf; preflight
Page 17 of 261
Standard display
On-board computer (luxury multi-
function steering wheel). ..................95
On-board computer (multi-func-
tion steering wheel). .........................92
Station
see Radio
Steering wheel
Adjusting .......................................... 66
Buttons (on-board computer,
luxury multi-function steering
wheel). .............................................. 93
Buttons (on-board computer,
multi-function steering wheel) ..........91
Storing settings ................................ 69
Steering wheel boss
Cleaning. ........................................ 170
Steering wheel gearshift paddles....... 88
Stowage compartment ......................129
Armrest (under) .............................. 130
Glove compartment. .......................130
Rear seat armrest. ..........................131
Stowage compartments
Under driver's seat/front-
passenger seat. .............................. 130
Submenu (luxury multi-function
steering wheel)
Convenience ................................... 104
Factory settings .............................. 104
Instrument cluster .......................... 101
Lights ............................................ .102
Standard display. .............................. 95
Time/date. ..................................... 102
Vehicle............................................ 104
Summer opening
see Convenience opening
Sun visor............................................. 137
Supplemental Restraint System see SRS
Surround lighting
On-board computer (luxury multi-
function steering wheel) .................103
Switching off the alarm
ATA. .................................................. 55 T
Tailgate Display message ............................. 183
Emergency unlocking...................... 214
Limiting the opening angle................ 61
Tail lamp
Display message ............................. 191
Tail lamps
changing. ........................................ 220
Display message ............................. 191
Tail pipes
Cleaning. ........................................ 171
Tank
see Fuel tank
Tank capacity ..................................... 245
Technical data GLK 280 4MATIC ............................ 249
GLK 320 CDI 4MATIC .....................250
GLK 350 4MATIC ............................ 249
Trailer loads .................................... 254
Tyres. .............................................. 252
Wheels. ........................................... 252
Telephone
see Mobile phone
Telephone compartment ...................130
Temperature Coolant. ............................................ 90
Outside temperature......................... 90
Thermatic
Malfunction indicator lamp. ............199
Thermotronic
Malfunction indicator lamp. ............199
Tightening torque............................... 231
Time Setting (on-board computer,
luxury multi-function steering
wheel). ............................................ 102
Setting (on-board computer,
multi-function steering wheel)
......................................................... 93
TIREFIT kit
Using. ............................................. 222
TopTether .............................................. 49
Total distance recorder................. 92, 95
Tow-away protection........................... 55
Towing................................................. 23814 Index
X204_AKB; 1; 5, en-GB
wobuchh,
Version: 2.11.4 2008-10-15T13:20:56+02:00 - Seite 14Dateiname: 6515_0671_02_buchblock.pdf; preflight
Page 18 of 261
Towing eye
Fitting ............................................. 237
Removing....................................... .238
Trailer
7-pin connector .............................. 166
Display message (luxury multi-
function steering wheel) .................188
Display messages (multi-function
steering wheel). .............................. 188
Power supply. ................................. 166
Trailer coupling
see Trailer tow hitch
Trailer loads
Technical data. ............................... 254
Trailer tow hitch
Cleaning. ........................................ 172
Trailer towing
Driving tips ..................................... 164
ESP ®
................................................. 53
Mounting dimensions. ....................253
Parktronic. ...................................... 115
Transmission output (maximum)
Telephone/two-way radio ...............243
Transport (vehicle)............................. 238
Travelling uphill.................................. 159
Trim strips Cleaning. ........................................ 171
Trip computer
On-board computer (luxury multi-
function steering wheel) ...................95
On-board computer (multi-func-
tion steering wheel). .........................92
Trip meter ....................................... 92, 95
Resetting (on-board computer,
luxury multi-function steering
wheel). .............................................. 96
Resetting (on-board computer,
multi-function steering wheel) ..........92
Turn signal
Display message..................... 188, 190
Two-way radio
Installation. ..................................... 243
Tyre grip .............................................. 157
Tyre pressure ..................................... 152
Display message ............................. 181
Tyre pressure loss warning system
............................................................. 153Tyres
Direction of rotatio n....................... 152
General notes. ................................ 150
Technical data. ............................... 252
Tyre tread ............................................ 152 U
Unladen weight.................................. 249
Unlocking Emergency unlocking...................... 213
From the inside (central unlocking
button) .............................................. 59 V
Variable Speedtronic .........................111
Vehicle Emergency unlocking .............213, 214
Individual settings. ..........................101
Leaving parked up. .........................213
Towing. ........................................... 238
Transporting ................................... 238
Vehicle battery................................... 232
Vehicle dimensions .................... 242, 249
Vehicle electronics ............................243
Vehicle identification number
(VIN) ................................................... 244
Vehicle identification plates............. 244
Vehicle tool kit................................... 175
Vehicle weights.................................. 249
Video DVD Operating (on-board computer,
luxury multi-function steering
wheel). .............................................. 99 W
Warning and indicator lamp ABS (yellow).................................... 201
LIM (cruise control)......................... 108
LIM (variable Speedtronic). .............111
Warning and indicator lamps
ESP ®
......................................... 52, 201
Malfunction indicator lamp. ............199
Warning tone...................................... 205
Warning triangle................................. 174
Washer fluid Display message ............................. 198 Index
15 X204_AKB; 1; 5, en-GB
wobuchh,
Version: 2.11.4
2008-10-15T13:20:56+02:00 - Seite 15 Dateiname: 6515_0671_02_buchblock.pdf; preflight
Page 101 of 261
:
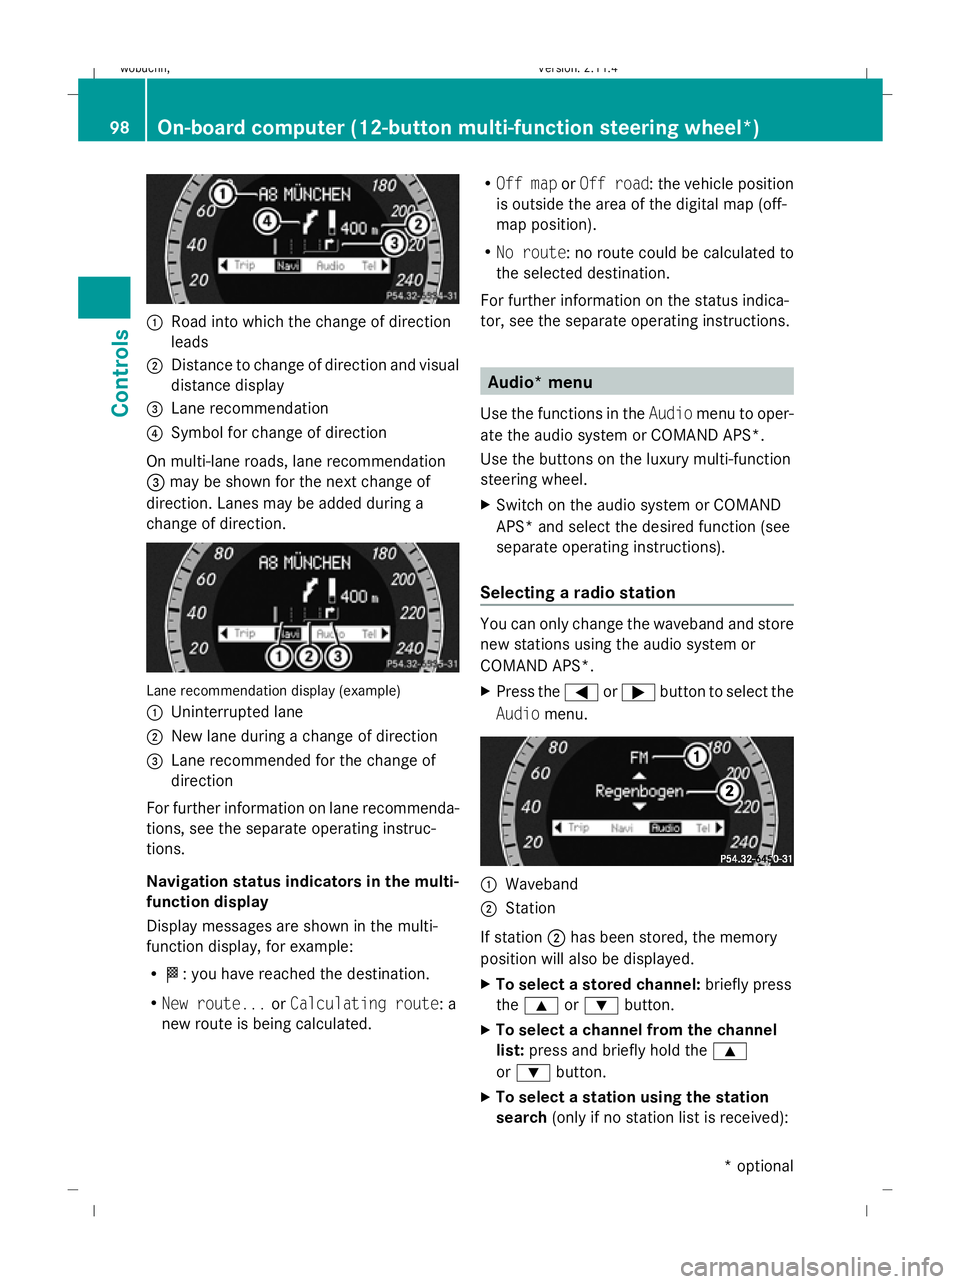
Road into which the change of direction
leads
; Distance to change of direction and visual
distance display
= Lane recommendation
? Symbol for change of direction
On multi-lane roads, lane recommendation
= may be shown for the next change of
direction. Lanes may be added during a
change of direction.Lane recommendation display (example)
: Uninterrupted lane
; New lane during a change of direction
= Lane recommended for the change of
direction
For further information on lane recommenda-
tions, see the separate operating instruc-
tions.
Navigation status indicators in the multi-
function display
Display messages are shown in the multi-
function display, for example:
R O: you have reached the destination.
R New route... orCalculating route: a
new route is being calculated. R
Off map orOff road : the vehicle position
is outside the area of the digital map (off-
map position).
R No route : no route could be calculated to
the selected destination.
For further information on the status indica-
tor, see the separate operating instructions.
Audio* menu
Use the functions in the Audiomenu to oper-
ate the audio system or COMAND APS*.
Use the buttons on the luxury multi-function
steering wheel.
X Switch on the audio system or COMAND
APS* and select the desired function (see
separate operating instructions).
Selecting a radio station
You can only change the waveband and store
new stations using the audio system or
COMAND APS*.
X Press the =or; button to select the
Audio menu.
:
Waveband
; Station
If station ;has been stored, the memory
position will also be displayed.
X To select a stored channel: briefly press
the 9 or: button.
X To select a channel from the channel
list: press and briefly hold the 9
or : button.
X To select a station using the station
search (only if no station list is received):
98On-board computer (12-button multi-function steering wheel*)
Controls
* optional
X204_AKB; 1; 5, en-GB
wobuchh,
Version: 2.11.4
2008-10-15T13:20:56+02:00 - Seite 98 Dateiname: 6515_0671_02_buchblock.pdf; preflight
Page 102 of 261
press and briefly hold the
9or:
button.
i DAB* radio mode 23
( Digital Audio Broad-
casting) (see the separate operating
instructions for the audio system* or
COMAND APS*).
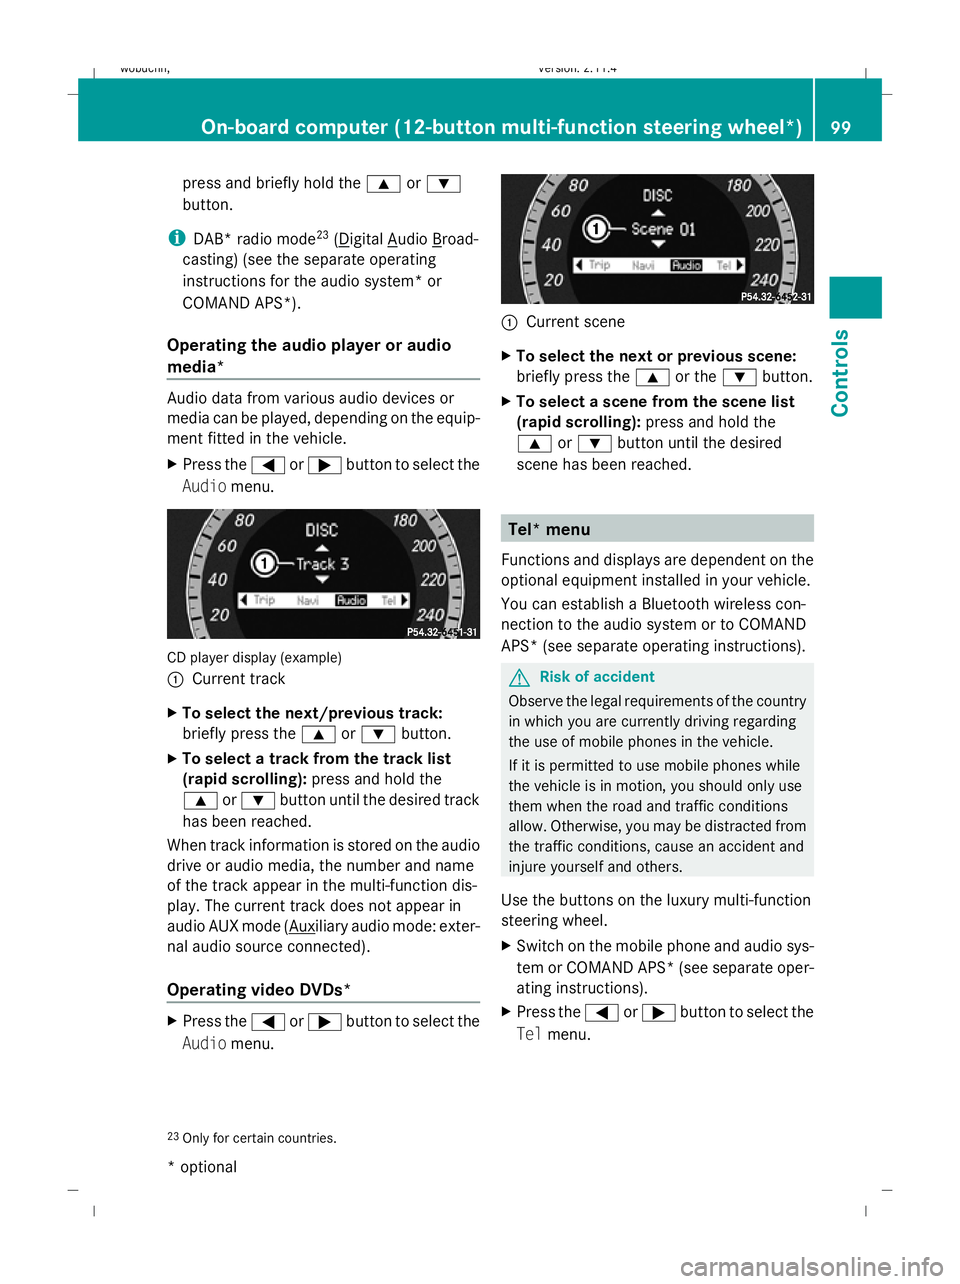
Operating the audio player or audio
media* Audio data from various audio devices or
media can be played, depending on the equip-
ment fitted in the vehicle.
X Press the =or; button to select the
Audio menu. CD player display (example)
:
Current track
X To select the next/previous track:
briefly press the 9or: button.
X To select a track from the track list
(rapid scrolling): press and hold the
9 or: button until the desired track
has been reached.
When track information is stored on the audio
drive or audio media, the number and name
of the track appear in the multi-function dis-
play. The current track does not appear in
audio AUX mode ( Auxiliary audio mode: exter-
nal audio source connected).
Operating video DVDs* X
Press the =or; button to select the
Audio menu. :
Current scene
X To select the next or previous scene:
briefly press the 9or the :button.
X To select a scene from the scene list
(rapid scrolling): press and hold the
9 or: button until the desired
scene has been reached. Tel* menu
Functions and displays are dependent on the
optional equipment installed in your vehicle.
You can establish a Bluetooth wireless con-
nection to the audio system or to COMAND
APS* (see separate operating instructions). G
Risk of accident
Observe the legal requirements of the country
in which you are currently driving regarding
the use of mobile phones in the vehicle.
If it is permitted to use mobile phones while
the vehicle is in motion, you should only use
them when the road and traffic conditions
allow. Otherwise, you may be distracted from
the traffic conditions, cause an accident and
injure yourself and others.
Use the buttons on the luxury multi-function
steering wheel.
X Switch on the mobile phone and audio sys-
tem or COMAND APS *(see separate oper-
ating instructions).
X Press the =or; button to select the
Tel menu.
23 Only for certain countries. On-board computer (12-button multi-function steering wheel*)
99Controls
* optional
X204_AKB; 1; 5, en-GB
wobuchh,
Version: 2.11.4
2008-10-15T13:20:56+02:00 - Seite 99 ZDateiname: 6515_0671_02_buchblock.pdf; preflight
Page 143 of 261
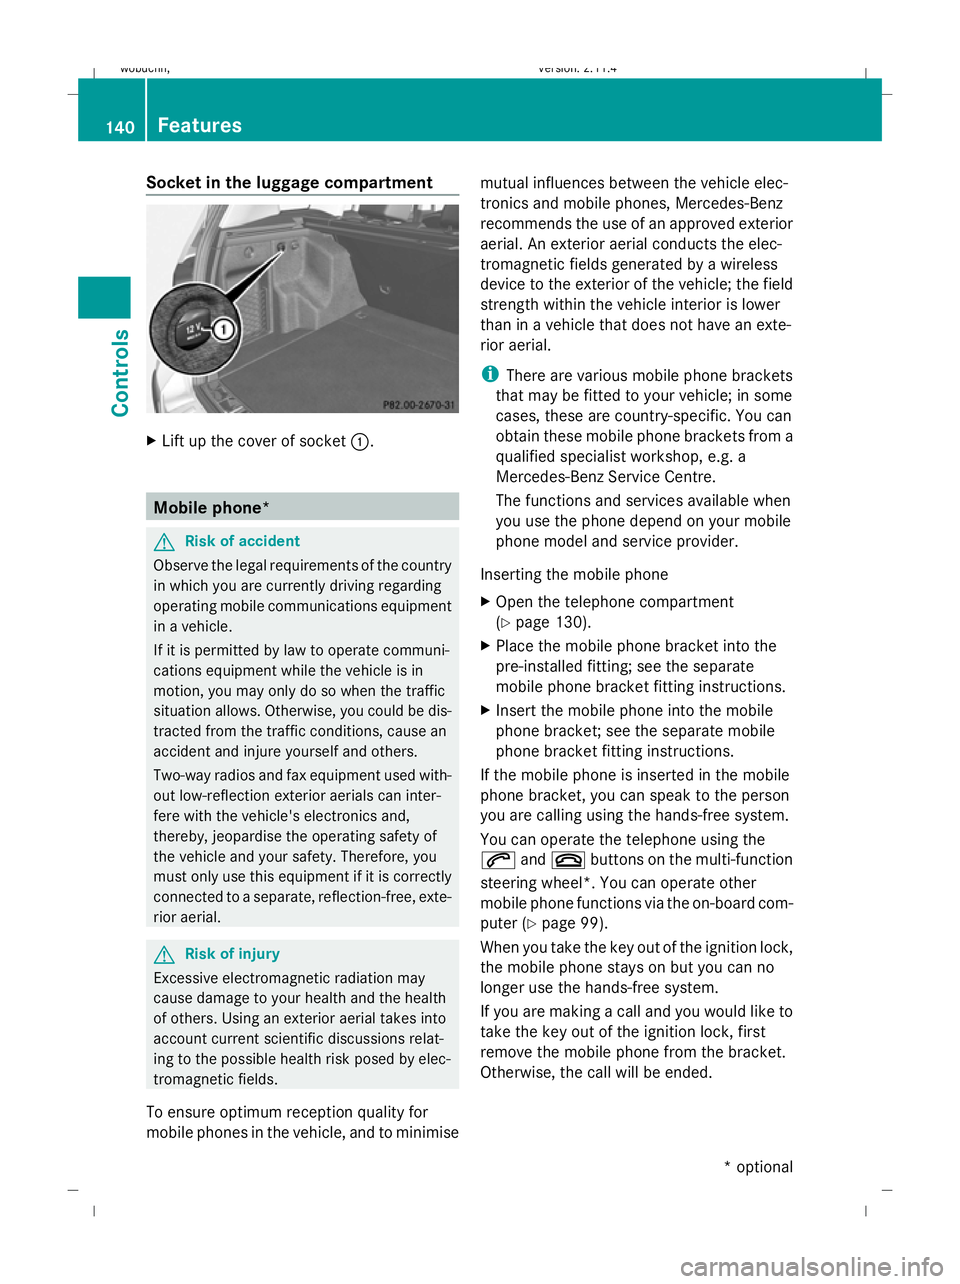
Socket in the luggage compartment
X
Lift up the cover of socket :.Mobile phone*
G
Risk of accident
Observe the legal requirements of the country
in which you are currently driving regarding
operating mobile communications equipment
in a vehicle.
If it is permitted by law to operate communi-
cations equipment while the vehicle is in
motion, you may only do so when the traffic
situation allows. Otherwise, you could be dis-
tracted from the traffic conditions, cause an
accident and injure yourself and others.
Two-way radios and fax equipment used with-
out low-reflection exterior aerials can inter-
fere with the vehicle's electronics and,
thereby, jeopardise the operating safety of
the vehicle and your safety. Therefore, you
must only use this equipment if it is correctly
connected to a separate, reflection-free, exte-
rior aerial. G
Risk of injury
Excessive electromagnetic radiation may
cause damage to your health and the health
of others. Using an exterior aerial takes into
account current scientific discussions relat-
ing to the possible health risk posed by elec-
tromagnetic fields.
To ensure optimum reception quality for
mobile phones in the vehicle, and to minimise mutual influences between the vehicle elec-
tronics and mobile phones, Mercedes-Benz
recommends the use of an approved exterior
aerial. An exterior aerial conducts the elec-
tromagnetic fields generated by a wireless
device to the exterior of the vehicle; the field
strength within the vehicle interior is lower
than in a vehicle that does not have an exte-
rior aerial.
i
There are various mobile phone brackets
that may be fitted to your vehicle; in some
cases, these are country-specific. You can
obtain these mobile phone brackets from a
qualified specialist workshop, e.g. a
Mercedes-Benz Service Centre.
The functions and services available when
you use the phone depend on your mobile
phone model and service provider.
Inserting the mobile phone
X Open the telephone compartment
(Y page 130).
X Place the mobile phone bracket into the
pre-installed fitting; see the separate
mobile phone bracket fitting instructions.
X Insert the mobile phone into the mobile
phone bracket; see the separate mobile
phone bracket fitting instructions.
If the mobile phone is inserted in the mobile
phone bracket, you can speak to the person
you are calling using the hands-free system.
You can operate the telephone using the
6 and~ buttons on the multi-function
steering wheel*. You can operate other
mobile phone functions via the on-board com-
puter (Y page 99).
When you take the key out of the ignition lock,
the mobile phone stays on but you can no
longer use the hands-free system.
If you are making a call and you would like to
take the key out of the ignition lock, first
remove the mobile phone from the bracket.
Otherwise, the call will be ended. 140 FeaturesControls
* optional
X204_AKB; 1; 5, en-GB
wobuchh,
Version: 2.11.4 2008-10-15T13:20:56+02:00 - Seite 140Dateiname: 6515_0671_02_buchblock.pdf; preflight
Page 172 of 261
Do not aim directly at any of the following:
R
tyres
R door joint
R electrical components
R battery
R connectors
R lights
R seals
R trim elements
Damaged seals or electrical components
can lead to failures or leaks.
Cleaning the wiper blades and the out-
side of the windscreen G
Risk of injury
Before cleaning the windscreen or wiper
blades, turn the key in the ignition to 0. Oth-
erwise, the windscreen wipers may move and
injure you.
! Do not clean the wiper blades too often
as this will result in damage to the graphite
coating. This could cause wiper noise.
X Turn the key to position 1(Y page 61)in the
ignition lock.
X Set the windscreen wipers to position °
(Y page 79) on the combination switch.
X Turn the key to position 0(Y page 61) or
remove it when the wiper arms are vertical.
! Only fold the windscreen wipers away
from the windscreen when vertical. Other-
wise, you will damage the bonnet.
X Fold the wiper arms away from the wind-
screen.
X Clean the windscreen.
i To clean the windscreen, it is recommen-
ded that Mercedes-Benz cleaning products
are used. X
Carefully wipe down the wiper blades using
a clean, damp cloth.
X Fold the wiper arms back to the windscreen
before switching on the ignition.
Cleaning the windscreen/windows !
When cleaning the inside of the wind-
screen, rear and side windows, do not use:
R dry cloths
R abrasive cleaning agents
R solvents
R cleaning agents containing solvent
Clean the inside of the windscreen, rear
and side windows using a damp cloth and
commercially-available glass cleaner.
Avoid touching the inside of the rear win-
dow and the side windows with hard
objects, e.g. ice scrapers or rings. Other-
wise, you could cause damage to the rear
window heating or the aerial in the rear
window and the side windows.
i Anti-glare film retrofitted to the inside of
the rear or side windows could interfere
with radio or mobile phone reception, espe-
cially if it is conductive or metal-coated
film. Information about anti-glare film can
be obtained from any Mercedes-Benz
Service Centre.
Cleaning the headlamps X
Clean the plastic lenses of the headlamps
with a damp sponge.
! Only use washer fluid which is suitable
for plastic lenses. Unsuitable washer fluid
could damage the plastic lenses of the
headlamps.
Do not use the following:
R dry cloths
R abrasive cleaning agents
R solvents
R cleaning agents containing solvent Care
169Operation
X204_AKB; 1; 5, en-GB
wobuchh,V ersion: 2.11.4
2008-10-15T13:20:56+02:00 - Seite 169 ZDateiname: 6515_0671_02_buchblock.pdf; preflight
Page 213 of 261
Problem
Possible causes/consequences and
X XSolutions Only the red segments
in the Parktronic warn-
ing display are lit. Park-
tronic is deactivated
after approximately 20
seconds. The problem may be caused by an external source of radio or
ultrasound waves.
X
See if Parktronic functions in a different location. Headlamps
Problem
Possible causes/consequences and
X XSolutions The headlamps are mis-
ted up on the inside. Air humidity is very high.
X
Drive with the headlamps switched on.
The headlamps are demisted after a short distance. The headlamp housing is not sealed and moisture has been able
to enter.
X
Have the headlamps checked at a qualified specialist workshop. Windscreen wipers
Problem
Possible causes/consequences and
X XSolutions The windscreen wipers
are jammed. Leaves or snow, for example, may be obstructing the windscreen
wiper movement. The wiper motor has been deactivated.
X
For safety reasons, you should remove the key from the ignition
lock.
X Remove the cause of the obstruction.
X Switch the windscreen wipers back on. The windscreen wipers
fail completely.
G
Risk of accident
The windscreen wiper drive is malfunctioning.
X Select another wiper speed on the combination switch.
X Have the windscreen wipers checked at a qualified specialist
workshop. The windscreen washer
fluid from the spray
nozzles no longer hits
the centre of the wind-
screen. The spray nozzles are misaligned.
X
Have the spray nozzles adjusted at a qualified specialist work-
shop. 210 TroubleshootingPractical advice
X204_AKB; 1; 5, en-GB
wobuchh,
Version: 2.11.4 2008-10-15T13:20:56+02:00 - Seite 210Dateiname: 6515_0671_02_buchblock.pdf; preflight
Page 236 of 261
from the battery. Otherwise, you may
destroy electronic components, such as
the alternator.
i Mercedes-Benz recommends that you
have all work involving the battery, e.g.
removal, charging and replacement, car-
ried out at a qualified specialist workshop,
e.g. a Mercedes-Benz Service Centre.
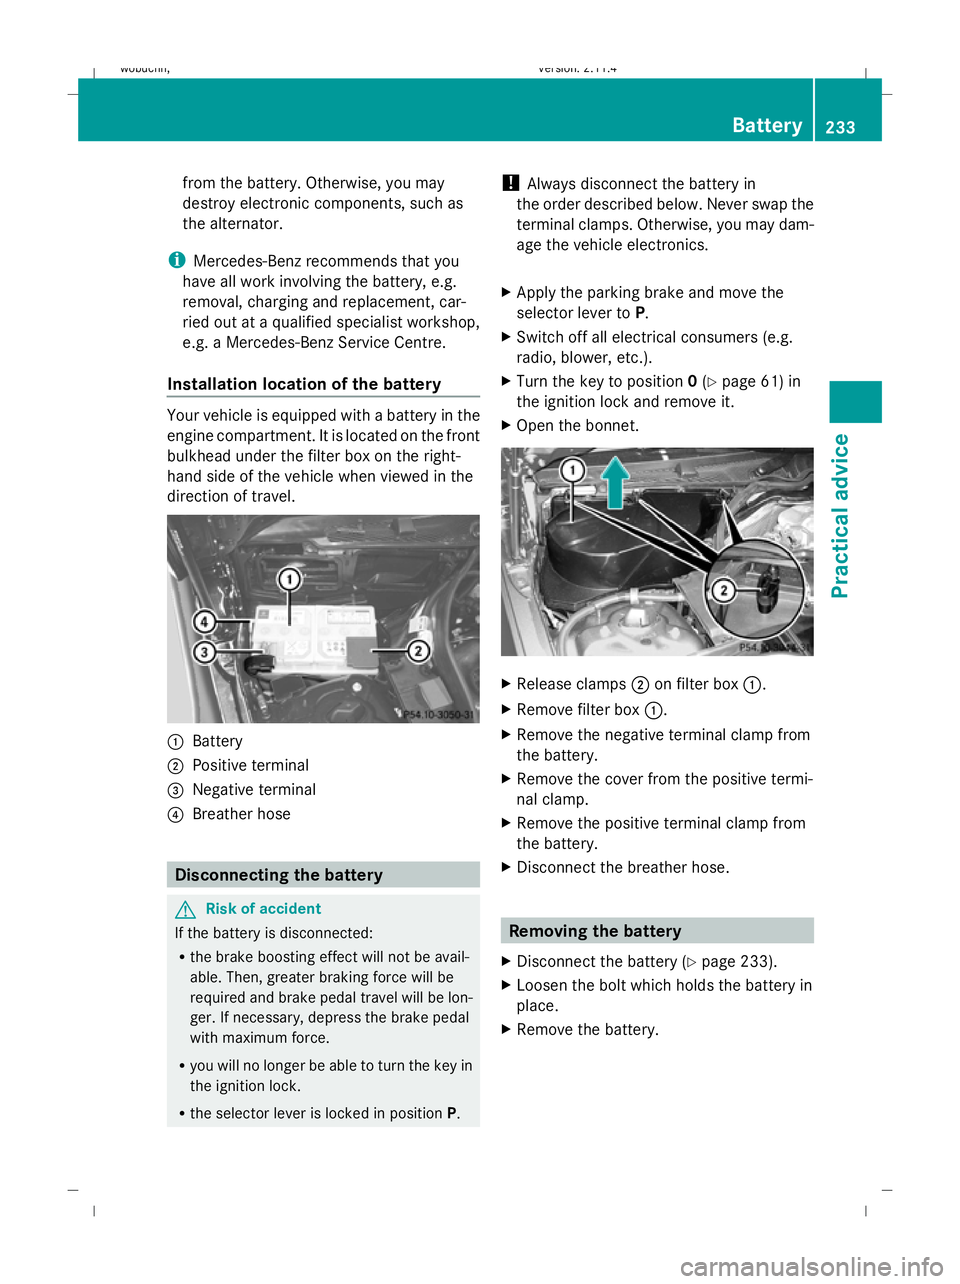
Installation location of the battery Your vehicle is equipped with a battery in the
engine compartment. It is located on the front
bulkhead under the filter box on the right-
hand side of the vehicle when viewed in the
direction of travel.
:
Battery
; Positive terminal
= Negative terminal
? Breather hose Disconnecting the battery
G
Risk of accident
If the battery is disconnected:
R the brake boosting effect will not be avail-
able. Then, greater braking force will be
required and brake pedal travel will be lon-
ger. If necessary, depress the brake pedal
with maximum force.
R you will no longer be able to turn the key in
the ignition lock.
R the selector lever is locked in position P.!
Always disconnect the battery in
the order described below. Never swap the
terminal clamps. Otherwise, you may dam-
age the vehicle electronics.
X Apply the parking brake and move the
selector lever to P.
X Switch off all electrical consumers (e.g.
radio, blower, etc.).
X Turn the key to position 0(Y page 61) in
the ignition lock and remove it.
X Open the bonnet. X
Release clamps ;on filter box :.
X Remove filter box :.
X Remove the negative terminal clamp from
the battery.
X Remove the cover from the positive termi-
nal clamp.
X Remove the positive terminal clamp from
the battery.
X Disconnect the breather hose. Removing the battery
X Disconnect the battery ( Ypage 233).
X Loosen the bolt which holds the battery in
place.
X Remove the battery. Battery
233Practical advice
X204_AKB; 1; 5, en-GB
wobuchh, Version: 2.11.4 2008-10-15T13:20:56+02:00 - Seite 233 ZDateiname: 6515_0671_02_buchblock.pdf; preflight
Page 237 of 261
Charging and fitting the battery
G
Risk of injury
Only charge the battery in a well-ventilated
area. As the battery is being charged, gases
can escape and generate minor explosions.
This may injure you and other persons or
cause damage to the paintwork or acid cor-
rosion on the vehicle.
You can obtain information about battery
chargers which allow the battery to be
charged when still installed from a qualified
specialist workshop, e.g. a Mercedes-Benz
Service Centre. G
Risk of injury
There is a risk of acid burns during the charg-
ing process due to the gases which escape
from the battery. Do not lean over the battery
during the charging process. G
Risk of injury
Battery acid is caustic. Avoid contact with the
skin, eyes or clothing.
! Only charge the installed battery with a
battery charger which has been tested and
approved by Mercedes-Benz. These battery
chargers allow the battery to be charged
while it is still installed. However, the bat-
tery must always be disconnected first.
! Only use battery chargers with a maxi-
mum charging voltage of 14.8 V.
X Charge the battery. Observe the notes in
the operating instructions for your battery
charger.
X Refit the charged battery.
To do this, follow the steps described in
"Removing the battery" (Y page 233) in
reverse order. Reconnecting the battery
! Always reconnect the battery in the
sequence described below. Never swap the
terminal clamps. You may otherwise dam-
age the vehicle electronics.
X Switch off all electrical consumers (e.g.
radio, blower, etc.).
X Connect the positive terminal clamp and
secure the cover.
X Connect the negative terminal clamp.
X Connect the breather hose. Make sure that
a cell cap is fitted on the side of the battery.
X Close the bonnet.
i If the battery power supply has been inter-
rupted (e.g. if it has been reconnected), you
must carry out the following tasks:
R set the time (Y page 102).
R reset the panorama sliding sun-
roof* (Y page 127)
R reset the function for folding the exterior
mirrors in/out automatically* by folding
the mirrors out once (Y page 68). Jump-starting
If your vehicle's battery is discharged, the
engine can be jump-started from another
vehicle or from an external battery using jump
leads.
Observe the following points:
R jump-starting may only be performed when
the engine and catalytic converter are cold.
R do not start the engine if the battery is fro-
zen. Let the battery thaw first.
R jump-starting may only be performed from
batteries with a nominal voltage of 12 V.
R only use jump leads which have a sufficient
cross-section and insulated terminal
clamps. 234 Jump-startingPractical advice
* optional
X204_AKB; 1; 5, en-GB
wobuchh,
Version: 2.11.4 2008-10-15T13:20:56+02:00 - Seite 234Dateiname: 6515_0671_02_buchblock.pdf; preflight