USB MERCEDES-BENZ GLS SUV 2019 Owners Manual
[x] Cancel search | Manufacturer: MERCEDES-BENZ, Model Year: 2019, Model line: GLS SUV, Model: MERCEDES-BENZ GLS SUV 2019Pages: 729, PDF Size: 12.03 MB
Page 36 of 729
te
ch nical information about theve hicle's operat‐
ing state, component loads, main tenance
re qu irements and tech nical events or faults.
In general, this information documents thest ate
of a component part, a module, a sy stem or the
sur roundings such as:
R operating status of sy stem components (e.g.
fi ll le vels, battery status, tyre pressure)
R status messages concerning theve hicle or
its individual components (e.g. number of
wheel revo lutions/speed, longitudinal accel‐
eration, lateral acceleration, display of fas‐
te ned seat belts)
R malfunctions or faults in impor tant sy stem
components (e.g. lights, brakes)
R information on events leading tovehicle
damage
R system reactions in special driving situations
(e.g. airbag deployment, inter vention of sta‐
bility control sy stems)
R ambient conditions (e.g. temp erature, rain
sensor) In addition
toprov iding the actual control unit
function, this data assists the manufacturer in
de tecting and rectifying faults and optimising
ve hicle functions. The majority of this data is
te mp orary and is only processed in theve hicle
itself. Only a small portion of the data is stored
in theeve nt or fault memor y.
When your vehicle is serviced, tech nical da ta
from theve hicle can be read out byservice net‐
wo rkemplo yees (e.g. workshops, manufactur‐
ers) or third parties (e.g. breakdown services).
Services include repair services, maintenance
processes, warranty claims and quality assur‐
ance measures, forex ample. The read out is per‐
fo rm ed via the legally prescribed port forthe
diagnostics connection in theve hicle. The
re spective service network locations or third
parties collect, process and use the data. They
document tech nical statuses of theve hicle,
assist in finding faults and impr oving quality and
are transmitted tothe manufacturer, if neces‐
sar y.Fu rthermore, the manufacturer is subject
to product liability. Forth is, the manufacturer
requ irestech nical da tafrom vehicles. Fa
ult memories in theve hicle can be reset by a
service outlet as part of repair or maintenance
wo rk.
Depending on the selected equipment, you can
import data into theve hicle's comfort and info‐
ta inment functions yourself.
This includes, forex ample:
R multimedia data such as music, films or pho‐
to sfo r playback in an integrated multimedia
sy stem
R address book data for use in connection with
an integrated hands-free sy stem or an inte‐
grated navigation sy stem
R entered navigation destinations
R data about the use of Internet services
This data can be sa ved locally in theve hicle or it
is located on a device which you ha veconnected
to theve hicle (e.g. smartphone, USB flash drive
or MP3 pla yer). If this data is stored in theve hi‐
cle, you can dele teit at any time. This data is
sent tothird parties only at your requ est, partic‐
ular lywhen you use online services in accord‐
ance with the settings that you ha veselected. General no
tes33
Page 137 of 729
#
Alw ays be particular lycareful when in
th e vicinity of theta ilpipe and tailpipe
trims and supervise children very
closely when in this area. #
Before any con tact, allow the car parts
to cool down. The driving
characteristics of your vehicle are
dependent on the distribution of the load within
th eve hicle. You should bear thefo llowing in
mind when loading theve hicle:
R neverex ceed the permissible gross mass or
th e permissible axle loads forth eve hicle
(including occupants).
Information can be found on theve hicle iden‐
tification plate (/ page 595).
R the load must not pr otru de abo vethe upper
edge of the seat backrests.
R always use the partition net when transport‐
ing objects in the load compartment.
R always place the load behind unoccupied
seats if possible. R
secure the load using the tie-down eyes and
distribute the load evenl y. St
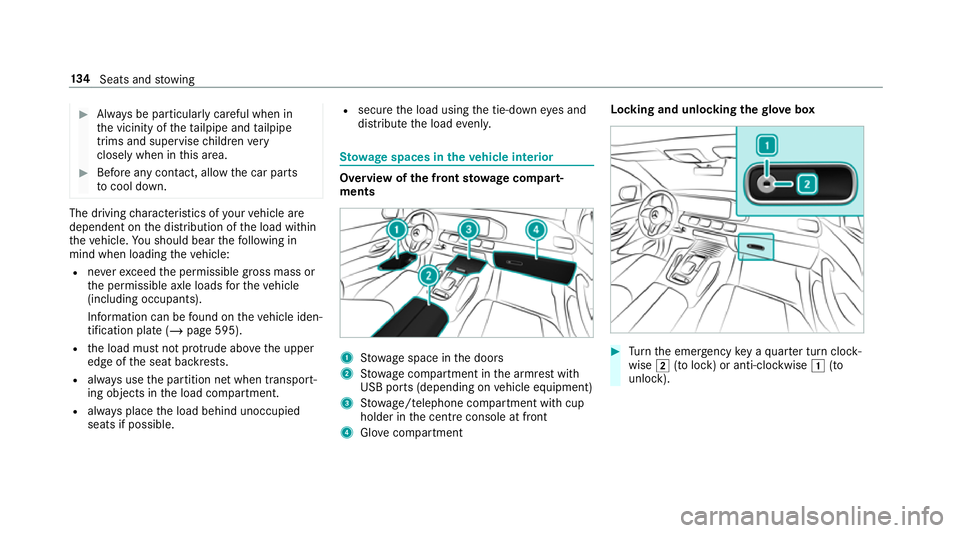
ow age spaces in theve hicle interior Overview of
the front stowage compa rt‐
ments 1
Stow age space in the doors
2 Stow age compartment in the armrest with
USB ports (depending on vehicle equipment)
3 Stow age/telephone compartment with cup
holder in the cent reconsole at front
4 Glove compa rtment Locking and unlo
cking thegl ove box #
Turn the emer gency key a quarter turn clock‐
wise 2(to lock) or anti-clockwise 1(to
unlock). 134
Seats and stowing
Page 156 of 729
Using
the12 V so cket inthe load compa rt‐
ment Re
quirements:
R Only devices with up toa maximum of
24 0wa tts (20 A) are pe rmissible. #
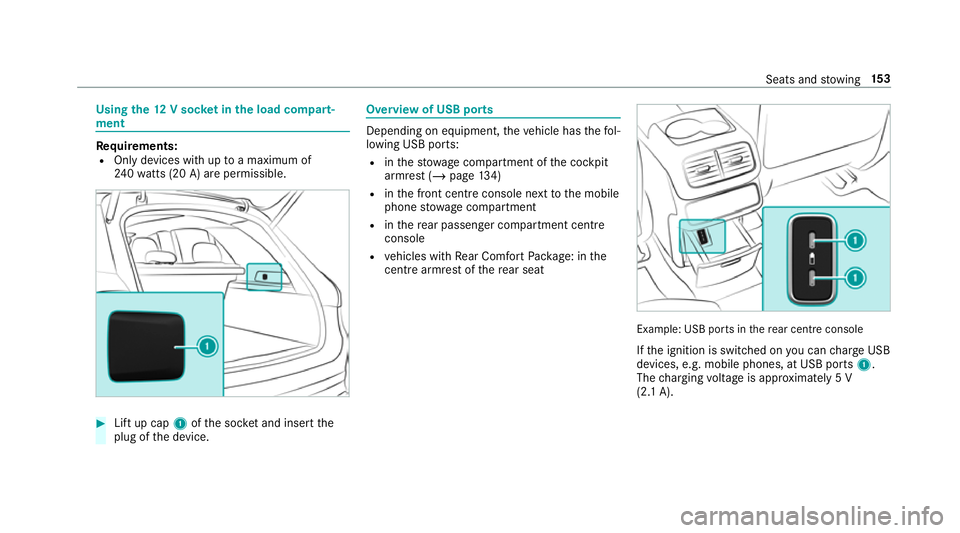
Lift up cap 1ofthe soc ket and insert the
plug of the device. Overview of USB ports
Depending on equipment,
theve hicle has thefo l‐
lowing USB ports:
R inthestow age compartment of the cockpit
armrest (/ page134)
R inthe front cent reconsole next tothe mobile
phone stowage compartment
R inthere ar passenger compartment centre
console
R vehicles with Rear Comfort Package: in the
centre armrest of there ar seat Example: USB ports in
there ar centre console
If th e ignition is switched on you can charge USB
devices, e.g. mobile phones, at USB ports 1.
The charging voltage is appr oximately 5 V
(2.1 A). Seats and
stowing 15 3
Page 372 of 729
R
Favoured drive program
These settings are sa ved under the name you
wish when setting up a theme (/ page 369). On
th e next mo torw ay jou rney you can select this
th eme and thereby restore your settings.
Content of a theme
Depending on vehicle equipment thefo llowing
settings can be sa ved in a theme:
R Setting of the Instrument Display
(/ page 322)
R Setting of the Head-up Display (/ page 331)
R Setting of the ambient lighting (/ page164)
R Active audio sou rce, e.g. radio or USB
R Starting sc reen forth e media display
R Visual style (/ page 388)
R DYNA MIC SELECT drive program
(/ page 204)
R Eco start/ stop setting (/ page 200)
R Navigation sy stem settings
% Atheme conta insthe cur rently acti veset‐
tings in theve hicle. Calling up
themes
Multimedia sy stem:
4 © #
When the home screen is shown, swipe up
until THEMES appears. #
Select a theme.
Creating new themes
Re quirements:
R The settings which are tobe sa ved in the
th eme are active.
The overview sho wsthe settings which can
be sa ved in a theme (/ page 368).
Multimedia sy stem:
4 © 5
THEMES #
Select WSet theme .
The settings which are sa ved in theth eme
are shown. #
Select Continue r. #
Select additional settings which are tobe
sa ve d in theth eme. R
Select Audio, tosave the active audio set‐
tings in theth eme.
R Select Navigation (Navigation), tosave
th e active navigation settings in the
th eme. #
Select Continue r. #
Select an entry screen. #
Select Continue r. #
Select an image. #
Enter the names into the entry field and con‐
fi rm with a. #
Tosave ath eme: select Save.
When the maximum number that can be
sa ve d is reached: #
Select afromthe prom pt. #
Select a theme that should be overwritten.
The settings which are sa ved in theth eme
are shown. #
Select Continue r. #
Select additional settings which are tobe
sa ve d in theth eme. MBUX multimedia sy
stem 369
Page 400 of 729
Software update
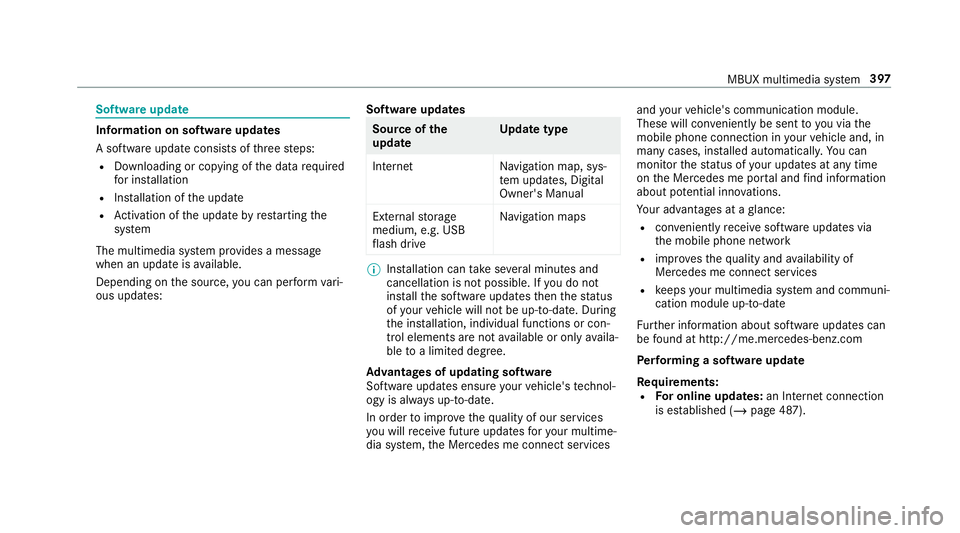
Information on software upda
tes
A software upda teconsi sts of thre esteps:
R Downloading or copying of the data requ ired
fo r ins tallation
R Installation of the update
R Activation of the update byrestarting the
sy stem
The multimedia sy stem pr ovides a message
when an update is available.
Depending on the source, you can per form vari‐
ous updates: Software updates Source of
the
update Up
date type
Interne tN avigation map, sys‐
te m updates, Digital
Owner's Manual
External storage
medium, e.g. USB
fl ash drive Na
vigation maps %
Installation can take several minutes and
cancellation is not possible. If you do not
ins tallth e software updates then thest atus
of your vehicle will not be up-to-date. During
th e ins tallation, individual functions or con‐
trol elements are not available or on lyavaila‐
ble toa limited deg ree.
Ad vantages of updating software
Software updates ensure your vehicle's tech nol‐
ogy is al ways up-to-date.
In order toimpr oveth equ ality of our services
yo u will recei vefuture updates foryo ur multime‐
dia sy stem, the Mercedes me connect services and
your vehicle's communication module.
These will con veniently be sent to you via the
mobile phone connection in your vehicle and, in
many cases, ins talled automaticall y.Yo u can
monitor thest atus of your updates at any time
on the Mercedes me por tal and find information
about po tential inno vations.
Yo ur advantages at a glance:
R con veniently recei vesoftware update s via
th e mobile phone network
R impr ovesth equ ality and availability of
Mercedes me connect services
R keeps your multimedia sy stem and communi‐
cation module up-to-date
Fu rther information about software updates can
be found at http://me.mercedes-benz.com
Pe rforming a software upda te
Requ irements:
R For online updates: an Internet connection
is es tablished (/ page 487). MBUX multimedia sy
stem 397
Page 413 of 729
Using online sear
ch
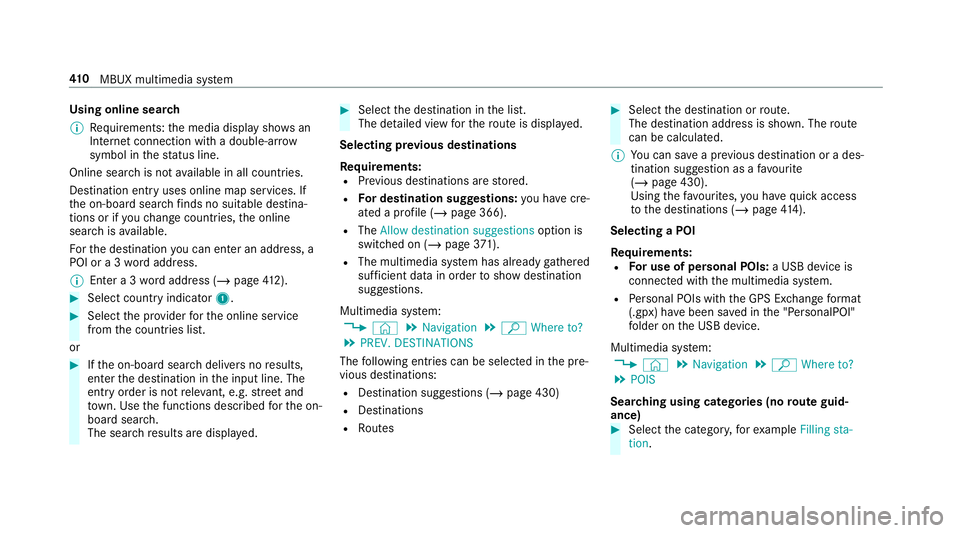
% Requirements: the media display sho wsan
In te rn et connection wi tha double-ar row
symbol in thest atus line.
Online sear chis not available in all countries.
De stination ent ryuses online map services. If
th e on-board sear chfinds no suitable de stina‐
tions or if youch ange countries, the online
sear chisavailable.
Fo rth e destination you can en ter an addre ss, a
POI or a 3 wordaddress.
% Enter a 3 wordaddress (/ page412). #
Select country indica tor1. #
Select the pr ovider forth e online service
from the count ries list.
or #
Ifth e on-board sear chdelivers no results,
enter the destination in the input line. The
entry order is not releva nt, e.g. stre et and
to wn. Use the functions described forth e on-
board sear ch.
The sear chresults are displa yed. #
Select the destination in the list.
The de tailed view forth ero ute is displ ayed.
Selecting pr evious destinations
Re quirements:
R Prev ious destinations are stored.
R For destination sug gestions: you ha vecre‐
ated a profile (/ page 366).
R The Allow destination suggestions option is
switched on (/ page371).
R The multimedia sy stem has already gathered
suf ficient da tain order toshow destination
suggestions.
Multimedia sy stem:
4 © 5
Navigation 5
ª Where to?
5 PREV. DESTINATIONS
The following ent ries can be selected in the pre‐
vious destinations:
R Destination suggestions (/ page 430)
R Destinations
R Routes #
Select the destination or route.
The destination address is shown. The route
can be calculated.
% You can sa vea pr evious destination or a des‐
tination suggestion as a favo urite
(/ page 430).
Using thefa vo urites, you ha vequick access
to the destinations (/ page414).
Selec ting a POI
Requ irements:
R For use of personal POIs: a USB device is
connected wi th the multimedia sy stem.
R Personal POIs with the GPS Ex change form at
(.gpx) ha vebeen sa ved in the "PersonalPOI"
fo lder on the USB device.
Multimedia sy stem:
4 © 5
Navigation 5
ª Where to?
5 POIS
Sear ching using categories (no route guid‐
ance) #
Select the categor y,forex ample Filling sta-
tion. 41 0
MBUX multimedia sy stem
Page 421 of 729
The selected
route options cannot alw ays be
ta ke n into account. The refore , a route may
include a ferry, for ins tance, eventh ough the
Avoid ferries avoid option is enabled. A mes‐
sage then appears and you will hear a co rre‐
sponding message.
Av oiding or using tollro ads #
Select Avoid options. #
Select Toll roads. #
Switch Avoid all on or off.
To avoid: the display button is activated. The
ro ute avoids all tollro ads.
To use: the display button is off. The route
ta ke s into account all roads that requ irethe
payment of a usage fee (toll).
or #
Toavoid a type of payment: selectAvoid.
The route avoids all tollro ads with the selec‐
te d me thod of payment. #
Touse a type of payment: selectUse.
The route take s into account all tollro ads
with the selected me thod of payment. These
route options are not available in every
countr y.
Av oiding or using roads requ iring a special
to llst icker #
Select Avoid options . #
Select Vignette roads . #
Switch Allon or off.
or #
Activate or deacti vate the count ries.
To avoid: the display button is activated. The
ro ute avoids roads requ iring a special toll
st icke r in the selected count ries.
To use: the display button is off. The route
ta ke s into account roads in the selected
count rywhich requireyouto pay a time-
based fee (vignette). A vignette allo wsforthe
use of a route network for a limi ted time
period.
% These route options are not available in
eve rycountr y. Selecting notifications
for the route
Re quirements:
R For an audible indication when approach‐
ing a personal POI: the USB device conta ins
personal POIs.
R The USB device is connec ted with the multi‐
media sy stem.
R The category in which the personal POI
belongs is activated.
Multimedia sy stem:
4 © 5
Navigation 5
Z
5 Advanced 5
Announcements #
Switch Muteon or off.
No navi gation announcements are issued
when the display button is switched on. #
Toselect a navigation announcement:
select an option #under theDRIVING REC-
OMMENDATIONS category.
The following options are available:
R Acoustic signal only
In place of the spoken navigation
announcement you hear a gong. The 41 8
MBUX multimedia sy stem
Page 425 of 729
Switching
the automatic filling station
sear chon/off
Multimedia sy stem:
4 © 5
Settings 5
Vehicle #
Switch Filling station search on or off.
When the fuel reser veleve l is reached, and
th e display button is switched on, a message
appears tostart sear ching forfilling stations.
St arting an automatic filling station sear ch
Re quirements:
R The automatic filling station sear chis activa‐
te d (/ page 422) .
Driving situation
The fuel le vel in the fuel tank reaches the
re ser vefuel le vel.
The following notification is shown in the media
display Reserve fuel Tap here to search for fill-
ing stations. #
Confirm the notification.
The automatic filling station sear chbegins.
The available filling stations along thero ute or in
the vicinity of theve hicle's cur rent posi‐
tion are displ ayed. #
Select a filling station.
The address of thefilling station is displa yed. #
Calculate thero ute (/ page415).
The filling station is set as the destination or
th e next intermediate destination. #
Ifth ere are already four intermediate des‐
tinations: selectYesinthe prom pt.
The filling station is entered in thero ute
ove rview. Intermediate destination 4 is
dele ted. Ro ute guidance begins.
St arting the automatic service station
sear ch
Re quirements:
R ATTENTION ASSIST and theSuggest rest
area function are activated (/ page 301).
R There are service stations along thero ute
section ahead.
Driving situation
The following notification is shown in the media
display ATTENTION ASSIST Tap here to search
for rest areas. #
Confirm the notification.
The service station sear ch starts. The availa‐
ble service stations along thero ute or in the
vicinity of theve hicle's cur rent position are
displ ayed. #
Select a service station.
The service station address is displa yed. #
Calculate thero ute (/ page415).
The service station is set as the destination
or the next intermediate destination. #
Ifth ere are already four intermediate des‐
tinations: selectYesinthe prom pt.
The service station is entered in thero ute
ove rview. Intermediate destination 4 is
dele ted. Ro ute guidance begins.
Showing a stored route on the map
Re quirements:
R A USB device with stored routes is connec‐
te d with the multimedia sy stem
(/ page 500).
R The route is stored in the "Routes" folder
with the GPS Ex change form at (.gpx). 422
MBUX multimedia sy stem
Page 426 of 729
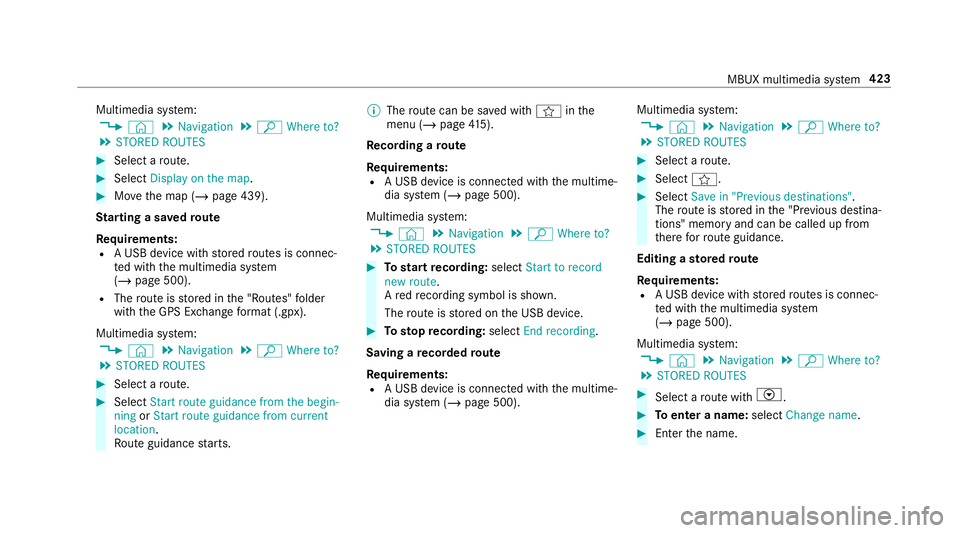
Multimedia sy
stem:
4 © 5
Navigation 5
ª Where to?
5 STORED ROUTES #
Select a route. #
Select Display on the map .#
Movethe map (/ page 439).
St arting a sa vedro ute
Re quirements:
R A USB device with stored routes is connec‐
te d with the multimedia sy stem
(/ page 500).
R The route is stored in the "Routes" folder
with the GPS Ex change form at (.gpx).
Multimedia sy stem:
4 © 5
Navigation 5
ª Where to?
5 STORED ROUTES #
Select a route. #
Select Start route guidance from the begin-
ning orStart route guidance from current
location.
Ro ute guidance starts. %
The route can be sa ved with finthe
menu (/ page415).
Re cording a route
Re quirements:
R A USB device is connec ted with the multime‐
dia sy stem (/ page 500).
Multimedia sy stem:
4 © 5
Navigation 5
ª Where to?
5 STORED ROUTES #
Tostart recording: selectStart to record
new route.
A redre cording symbol is shown.
The route is stored on the USB device. #
Tosto pre cording: selectEnd recording.
Saving a recorded route
Re quirements:
R A USB device is connec ted with the multime‐
dia sy stem (/ page 500). Multimedia sy
stem:
4 © 5
Navigation 5
ª Where to?
5 STORED ROUTES #
Select a route. #
Select f. #
Select Save in "Previous destinations" .
The route is stored in the "Pr evious destina‐
tions" memo ryand can be called up from
th ere forro ute guidance.
Editing a storedro ute
Re quirements:
R A USB device with stored routes is connec‐
te d with the multimedia sy stem
(/ page 500).
Multimedia sy stem:
4 © 5
Navigation 5
ª Where to?
5 STORED ROUTES #
Select a route with V. #
Toenter a name: selectChange name . #
Enterth e name. MBUX multimedia sy
stem 423
Page 443 of 729
#
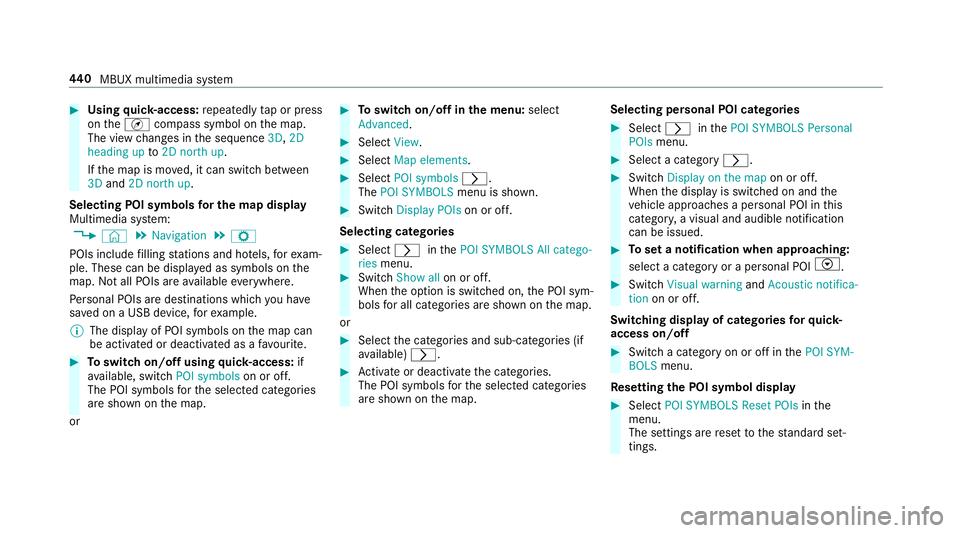
Using quick- access: repeatedly tap or press
on theÄ compass symbol on the map.
The view changes in the sequence 3D,2D
heading up to2D north up .
If th e map is mo ved, it can switch between
3D and 2D north up .
Selecting POI symbols for the map display
Multimedia sy stem:
4 © 5
Navigation 5
Z
POIs include filling stations and ho tels, forex am‐
ple. These can be displa yed as symbols on the
map. Not all POIs are available everywhere.
Pe rsonal POIs are destinations which you ha ve
sa ve d on a USB device, forex ample.
% The display of POI symbols on the map can
be activated or deactivated as a favo urite. #
Toswitch on/off using quick- access: if
av ailable, swit chPOI symbols on or off.
The POI symbols forth e selected categories
are shown on the map.
or #
Toswitch on/off in the menu: select
Advanced. #
Select View. #
Select Map elements. #
Select POI symbols r.
The POI SYMBOLS menu is shown. #
Swit chDisplay POIs on or off.
Selecting ca tegories #
Select rinthePOI SYMBOLS All catego-
ries menu. #
Switch Show all on or off.
When the option is switched on, the POI sym‐
bols for all categories are shown on the map.
or #
Select the categories and sub-categories (if
av ailable) r. #
Activate or deacti vate the categories.
The POI symbols forth e selected categories
are shown on the map. Selecting personal POI categories #
Select rinthePOI SYMBOLS Personal
POIs menu. #
Select a category r. #
Switch Display on the map on or off.
When the display is switched on and the
ve hicle approaches a personal POI in this
categor y,a visual and audible notification
can be issued. #
Toset a notification when appro aching:
select a category or a personal POI V. #
Switch Visual warning andAcoustic notifica-
tion on or off.
Switching display of catego ries forqu ick-
access on/off #
Switch a category on or off in thePOI SYM-
BOLS menu.
Re setting the POI symbol display #
Select POI SYMBOLS Reset POIs inthe
menu.
The settings are reset tothest andard set‐
tings. 440
MBUX multimedia sy stem